

Page 1
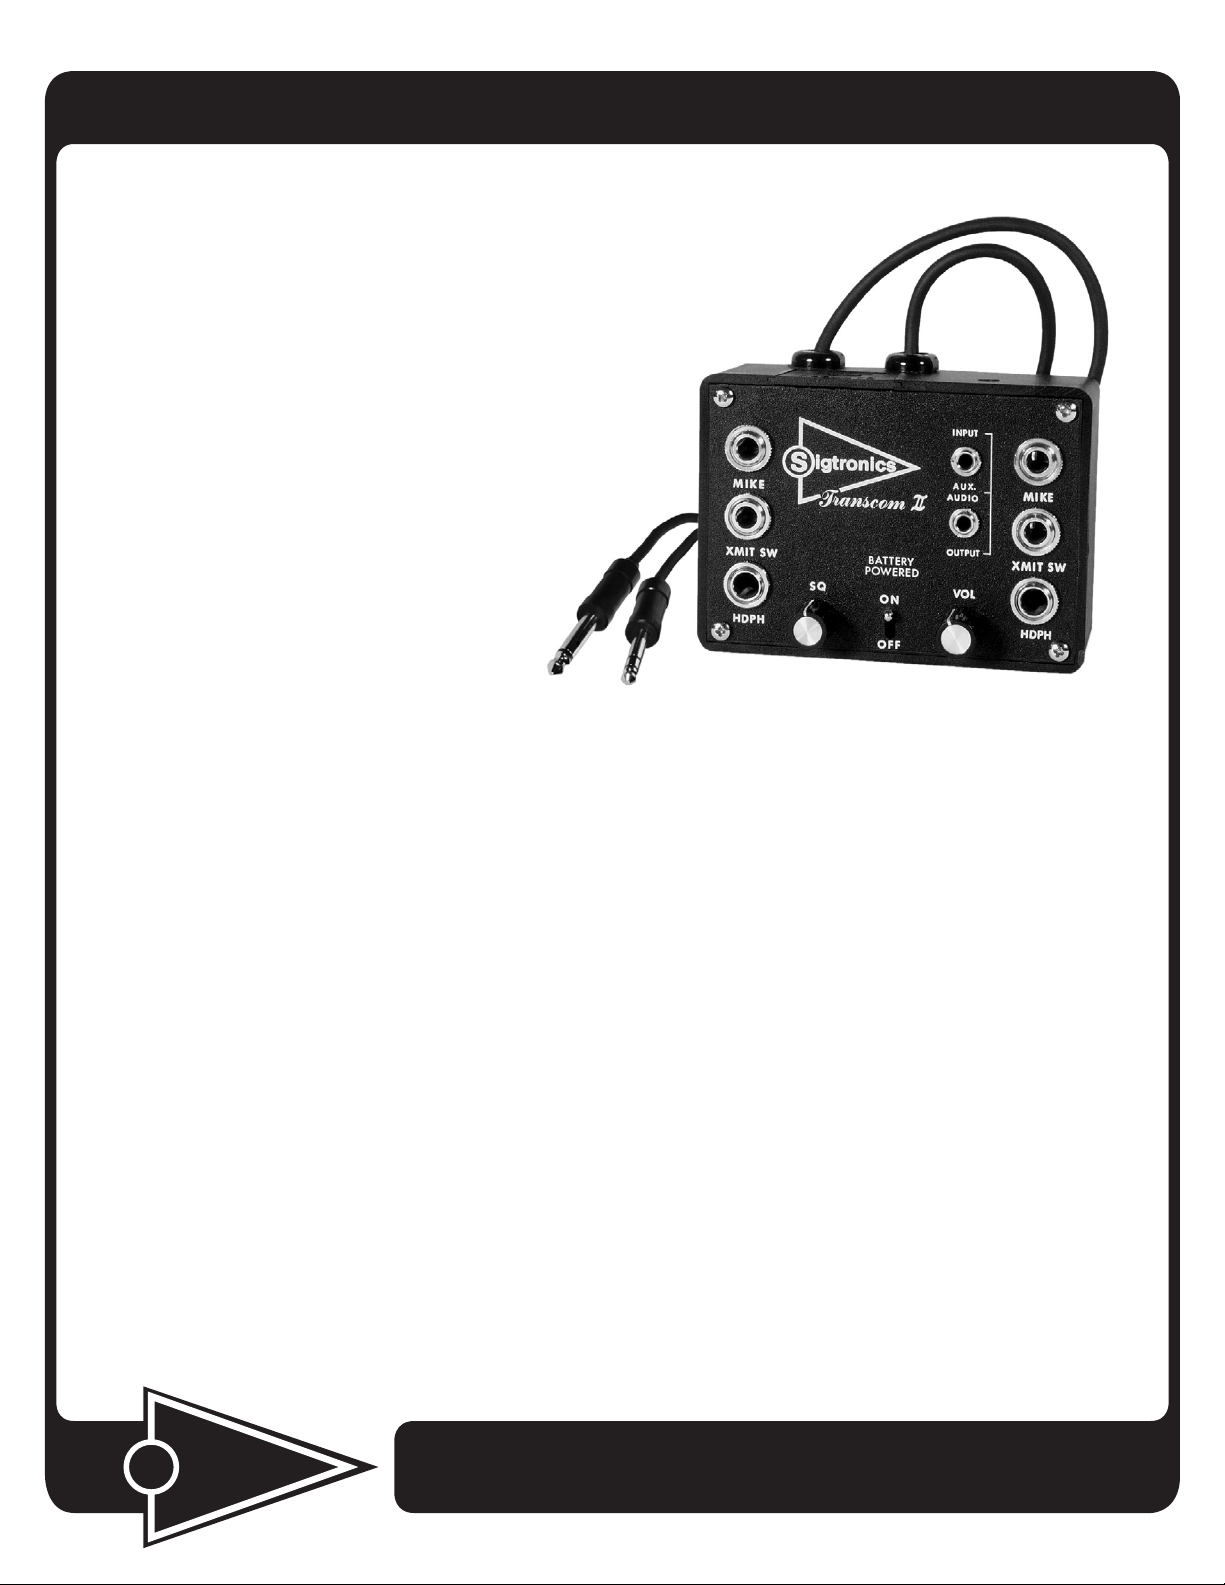
Sigtronics Transcom II
. . . A Portable Battery Powered Intercom!
Voice Activated
Communication
… Any Pilot
… Any Plane!
Discover the dramatic improvement in flight
cabin conversation with Sigtronics’ Transcom
II. Pilot-to- Passenger hands-free conversation,
radio transmit capability, battery power or
auxiliary power, and input-output source
all rolled up into one! All standard aircraft
headsets and portable push-to-talk switches are
compatible with the Transcom II.
BATTERY OR AIRCRAFT POWER: The Transcom II is powered
by an internal 9V battery enabling approximately 40 hours of
operation in airplanes lacking a cigarette lighter socket. An
auxiliary 4 foot power cord with LED Power Indicator is supplied
for use in airplanes which have a socket. The LED indicator will be
on if power is available, it will be off if no power or reversed socket
wiring. Note: The LED shows power available, not intercom On
or Off. When using the power cord the battery is bypassed,
thus preserving the life of the battery. It is not necessary for
the battery to be operative in order to use the auxiliary power
cord. The battery powered feature is especially convenient for
students and instructors who move from plane to plane.
VOICE ACTIVATED: The voice activation feature allows “handsfree” communication between pilot and co-pilot. Start speaking
and the intercom instantly turns on (no clipping) to relay your
message clearly to the other headsets; stop talking and it turns
off to reduce background noise.
TRANSMIT: Use your portable push-to-talk switch for transmitting
to air traffic control. Transmitting can be accomplished from
two positions (pilot and co-pilot). The intercom function is
automatically disabled during transmitting, so that only the
voice of the person transmitting goes over the air. However, the
transmitting person’s voice is heard at all headset positions via
the side-tone output. This feature is especially valuable to the
instructor and the student who wish to monitor each other’s
transmissions.
FAIL SAFE RADIO COMMUNICATIONS: Even with the intercom
“OFF”, the pilot can hear all radio communications and can
transmit through the aircraft radio using the headset boom
mic. The headset mic is routed directly to the radio via the “ONOFF” switch. The “fail safe” feature also works should the battery
go dead in mid-flight, thus providing the most fail-safe unit on
the market.
AUXILIARY AUDIO OUTPUT: Record ATC clearances or flight
instructor’s lessons on your cassette player.
AUXILIARY AUDIO INPUT: Plug in your portable music source
and enjoy music or instructional recordings!
WARRANTY: The Transcom II is constructed of high quality
components, carries a five year parts and labor warranty, and is
manufactured in the U.S.A.
SPECIFICATIONS:
Weight: 14 oz. with battery and auxiliary power cord.
(SPO-22)
Size: 4” x 2.9” x 2” (SPO-22)
Power: 11-34 VDC
Maximum Current Drain: 0.05 amps.
Environmental: TSO-C50b
MODELS OF TRANSCOM II: Transcom II models available are a
2-way (SPO-22 & -22N), 4-way (SPO-42 & -42N), 6-way (SPO-62 &
-62N), 8-way (SPO-82), and a 10-way model (SPO-102).
igtronics
S
Originators of aircraft Voice Activated Intercoms
®
Specialists in “SOUND” Management
178 East Arrow Highway, San Dimas, CA 91773 ( 909 ) 305-9399
Made in the U.S.A. w w w . s i g t r o n i c s . c o m
Page 2
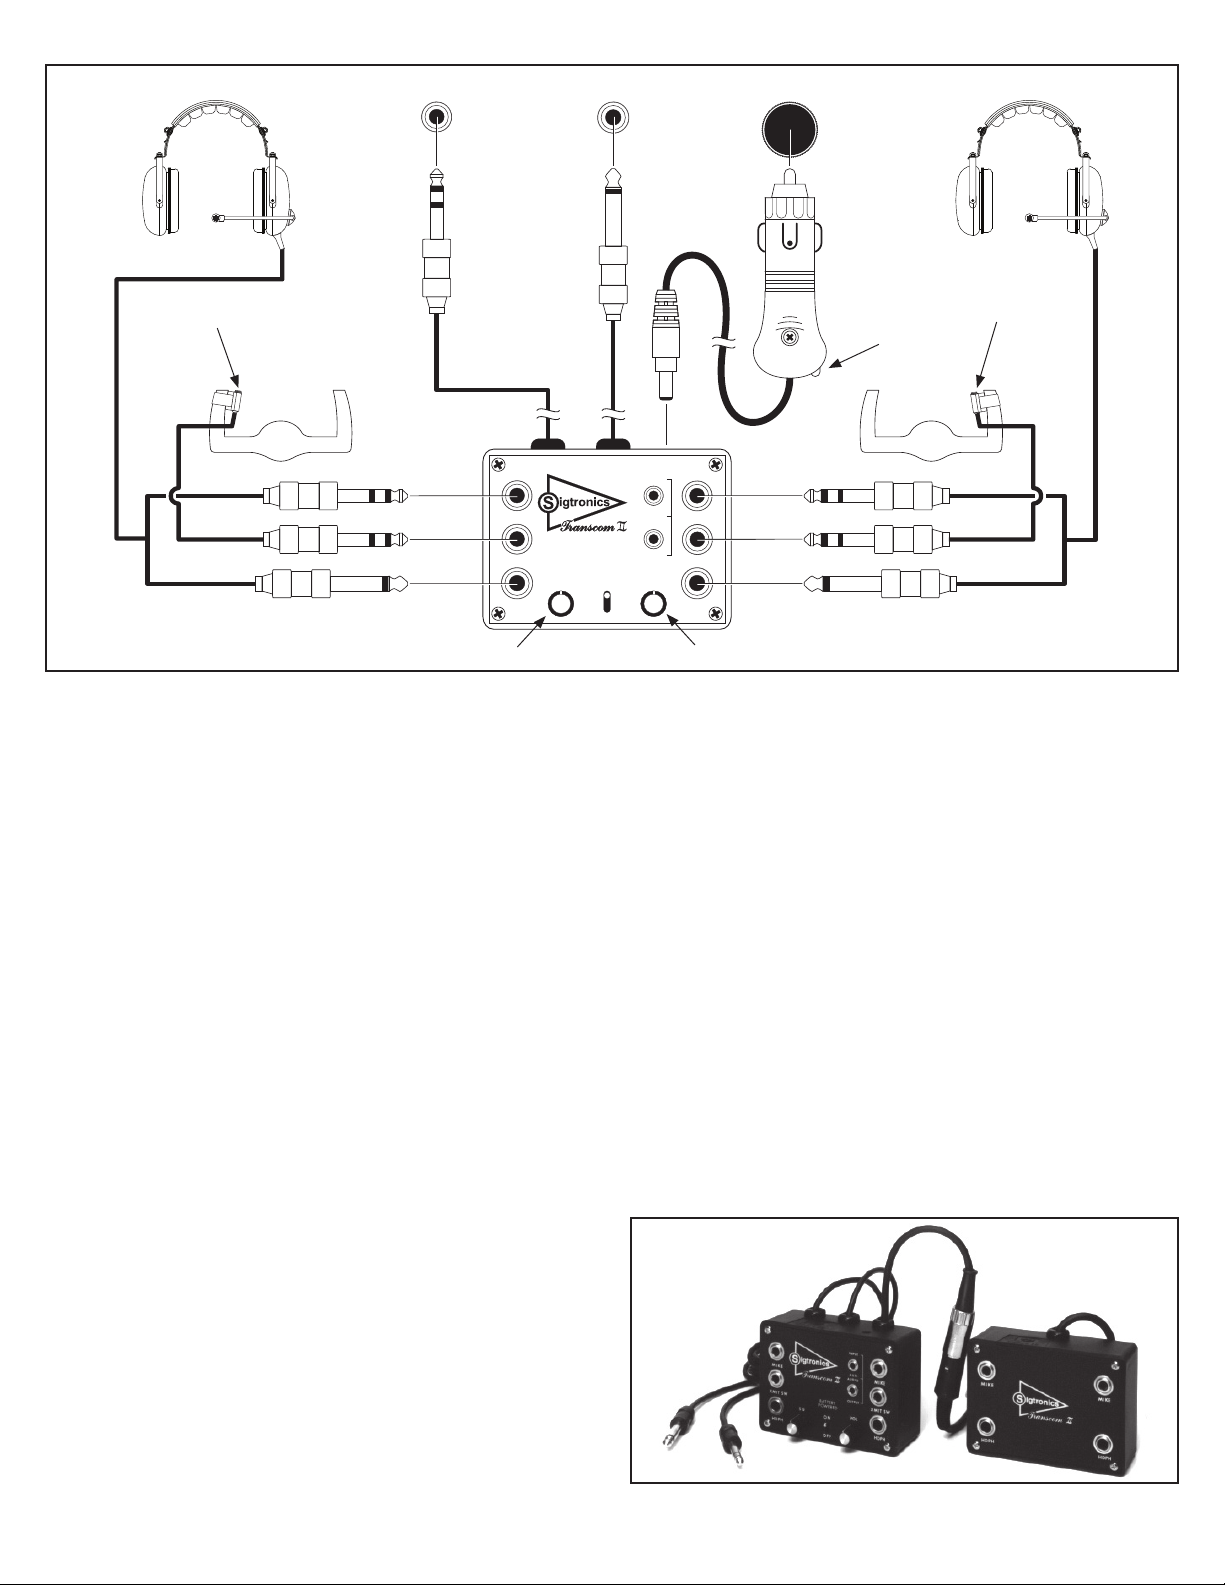
Sigtronics Transcom II Connection Schematic Aircraft Handmic
Jack
Aircraft Headphone
Jack
Aircraft Auxiliary
Power Jack
Microphone
Output Cable
PTT-ICS*
Portable
Transmit
Switch
Pilot’s Jacks
Squelch
Control
MIKE
XMIT SW
SQ
HDPH
On–Off Power
Microphone Plug
Transmit Switch Plug
Headphone Plug
Note: Transmit with the unit ‘OFF’ is
only from the pilot’s position.
CONTROLS:
Power Switch: On-Off
Volume Control: Controls intercom volume.
Squelch Control: This control is normally used to adjust for variations
in background noise found in different aircraft.
Auxiliary Audio Input Jack: Plug in your portable music source and
enjoy music or instructional recordings. Accepts 1/8” mini monaural
headphone plugs. Stereo and monaural adapters are available from
Sigtronics for your interface needs.
Auxiliary Audio Output Jack: Record intercom or radio work. Terrific
for instructional purposes.
STEP 1 – How To Use The Transcom II:
A. Connect the Sigtronics Transcom as illustrated in the Connection
Schematic. Be certain that the transmit switch and corresponding
headset mic plugs are connected on the same side as shown in the
schematic, since the mic input on the opposite side is disabled when
a transmit switch is activated.
B. Put on headset(s) and position the boom mic close to the mouth, as
you would with a hand-held mic. Voice clarity is best when the mic is
at one side of the mouth and 1/4” from the lips.
C. Set audio panel to “Headphone” position, if applicable.
D. Turn power ‘ON’ and set the volume control to a low level. (1/4th to 1/
3rd open for best signal to noise ratio). Maintain minimum acceptable
volume for hearing protection.
E. Adjust squelch control clockwise until background noise becomes
audible. Then rotate counter-clockwise small, incremental amounts
until background noise disappears, (This procedure is necessary
because the squelch is a ‘fast on, slow off’ circuit.) Small adjustments
may be necessary if aircraft background noise changes significantly,
such as from idle to full power.
STEP 2 – Transmit Mode:
To transmit, depress the transmit switch and your voice is automatically
transmitted via the aircraft radio. When transmitting, your voice or sidetone is heard in all headsets connected to the Trancsom II. The Transcom II
automatically provides simulated transmit side-tone. You may also transmit
from the pilot’s position with the unit ‘OFF’. (Fail Safe feature).
2
Audio (Headphone)
Input Cable
Power Input
Cable
PTT-ICS*
Portable
Transmit
Switch
* If your Push-To-Talk switch has a
female jack do not connect it.
BATTER Y
POWER ED
ON
OFF
Control
INPUT
AUX.
AUDIO
OUTPU T
VOL
MIKE
Microphone Plug
XMIT SW
Transmit Switch Plug
HDPH
Headphone Plug
Volume
Control
LED Power
Indicator
A small, square, trimmer potentiometer is provided inside the unit for
adjusting the mic input level to the radio. In the event of over-modulation
or reports of weak transmissions, an appropriate adjustment can be made.
Clockwise rotation of the screwdriver adjustment increases the mic output
level.
STEP 3 – Radio Monitoring:
When the unit is connected as in Step 1, radio monitoring is automatic.
The radio monitor circuit is always active, even with the intercom power
switch in the ‘off’ position or in the event of a Transom failure. No switching
is necessary. A ‘fail-safe’ feature.
BATTERY REPLACEMENT INSTRUCTIONS:
1. Turn unit “OFF”
2. Remove battery door by pressing on the center as you slide it out.
3. Remove the battery and disconnect the battery connector.
4. Connect a new battery and insert it into the unit the same way as the
original.
5. Slide the battery door back in and resume normal operation.
Battery Replacement Instructions for SPO-42, -62, -82 and -102:
The only indication of a low battery will be the lack of power, and neither
the front unit nor rear unit(s) will function. There will never be an indication
of low rear unit batteries, since the front unit battery will carry all units, if
needed. Therefore, make it a practice to change all batteries at the same
time.
Model SPO-42
1-9-2012 trcm2.pdf
 Loading...