

Signode 4A1-114, 4A1-114KR, 4A1-2 Operation, Parts And Safety Manual
4A1-114/114KR & 4A1-2
MANUAL TENSIONERS

READ THESE INSTRUCTIONS CAREFULLY. FAILURE TO FOLLOW THESE INSTRUCTIONS CAN
RESULT IN SEVERE PERSONAL INJURY.
GENERAL SAFETY CONSIDERATIONS
1. TOOL MANUAL
Before using this tool read and understand the operation manual.
2. STRAP BREAKAGE HAZARD
Never position yourself in-line with the strap during tensioning and sealing. Properly position
yourself when tensioning and sealing as shown in the operating instructions.
Improper operation of the tool, sharp corners on the load, improper strap placement around
the load or an unstable or shifted load could result in strap release or breakage, during
tensioning. This could result in the following:
!! A sudden loss of balance causing you to fall.
!! Both tool and strap flying violently towards your face.
3. TRAINING
This tool must not be used by persons not properly trained in its use. Be certain that you
receive proper training from your employer. If you have any questions contact your Signode
Representative.
4. EYE INJURY HAZARD
Failure to wear safety glasses with side shields can result in severe eye injury or
blindness. Always wear safety glasses with side shields which conform to ANSI
Standard Z87.1 or EN 166.
5. FALL HAZARD
Maintaining improper footing and/or balance when operating the tool can cause you to fall.
Do not use the tool when you are in an awkward position.
6. CUT HAZARD
Handling strap or sharp parts could result in cut hands or fingers. Wear
protective gloves.
7. TOOL CARE
Take good care of the tool. Inspect and clean it daily, lubricate it weekly and adjust when
necessary. Replace any worn or broken parts.
8. WORK AREA
Keep work areas uncluttered and well lighted.
2
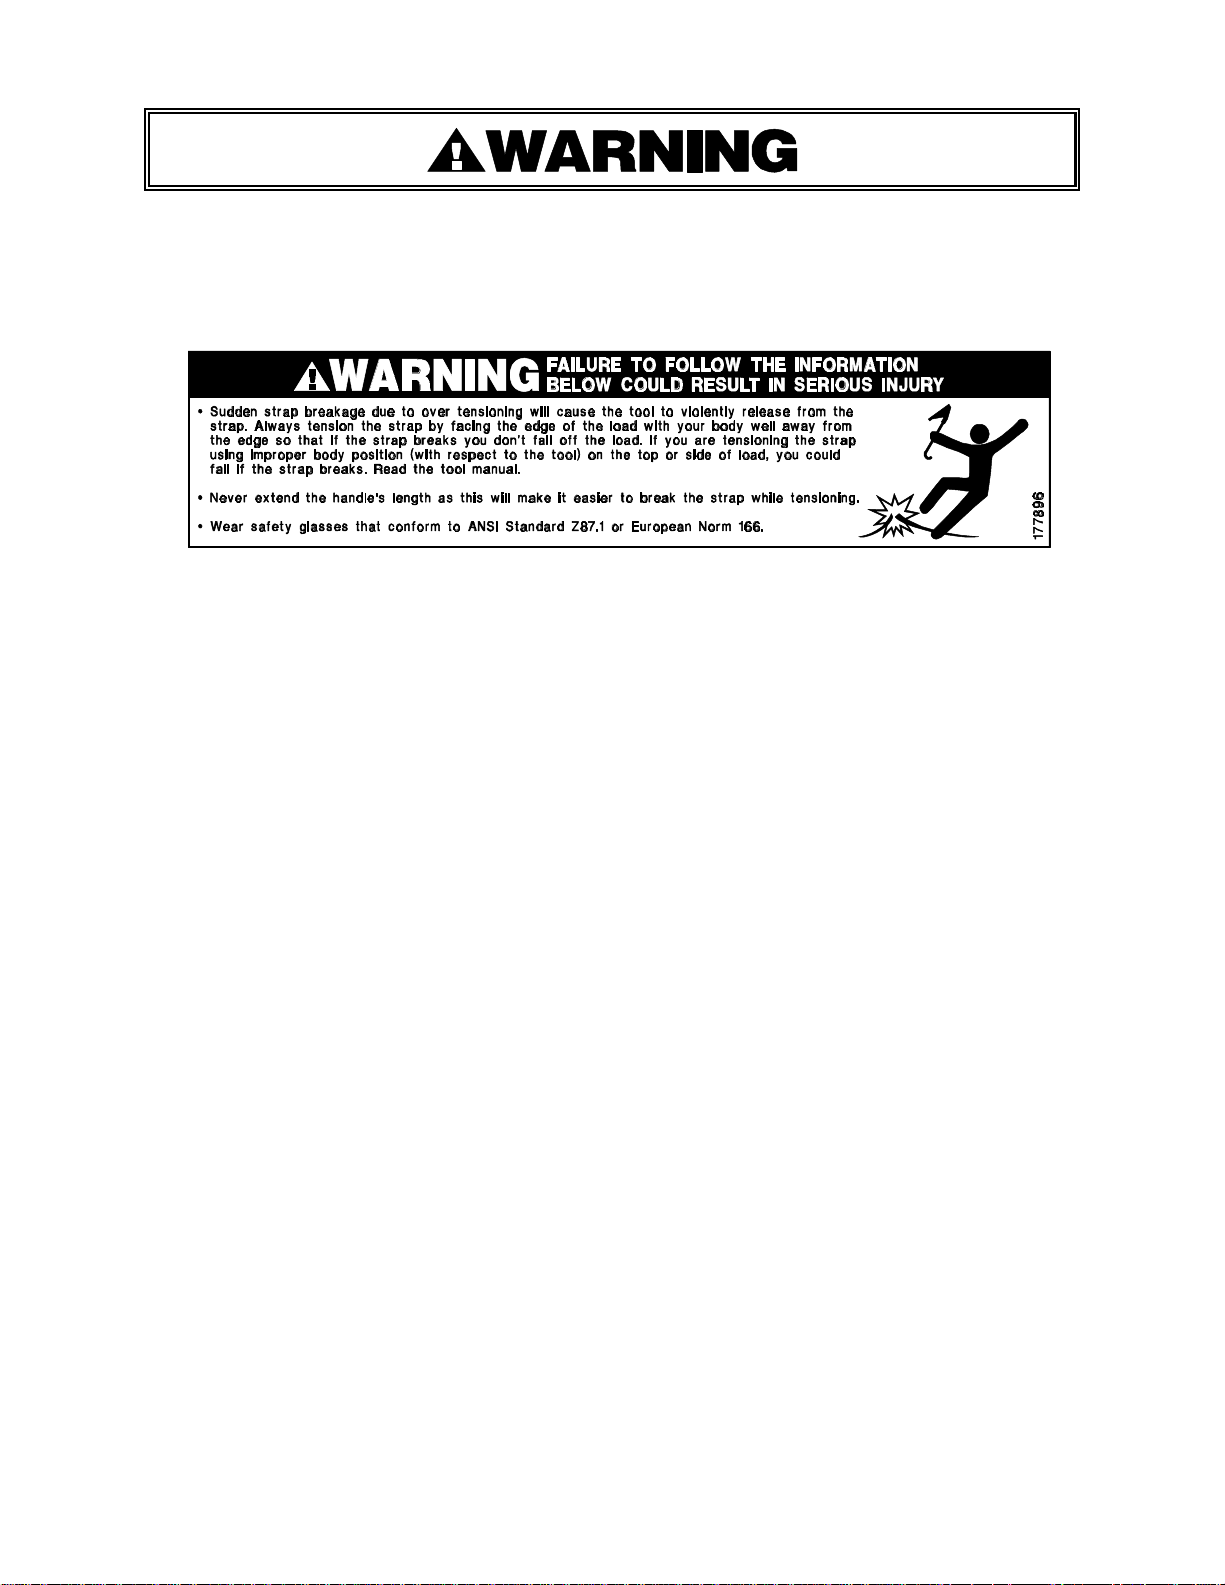
9. WARNING LABEL 177896
The warning label shown below is on the tool handle. If this label becomes damaged, replace
it immediately. Ensure that a plastic shrink tube sleeve us applied over the label. Contact
your Signode Sales Representative if you have any questions.
10. CUTTING TENSIONED STRAP
A. Keep all bystanders at a safe distance, away from the danger zone (shaded area) and
possible flying strap ends.
B. Stand to one side of the strap being cut - outside of the danger zone (shaded area).
C. Cut the strap.
3
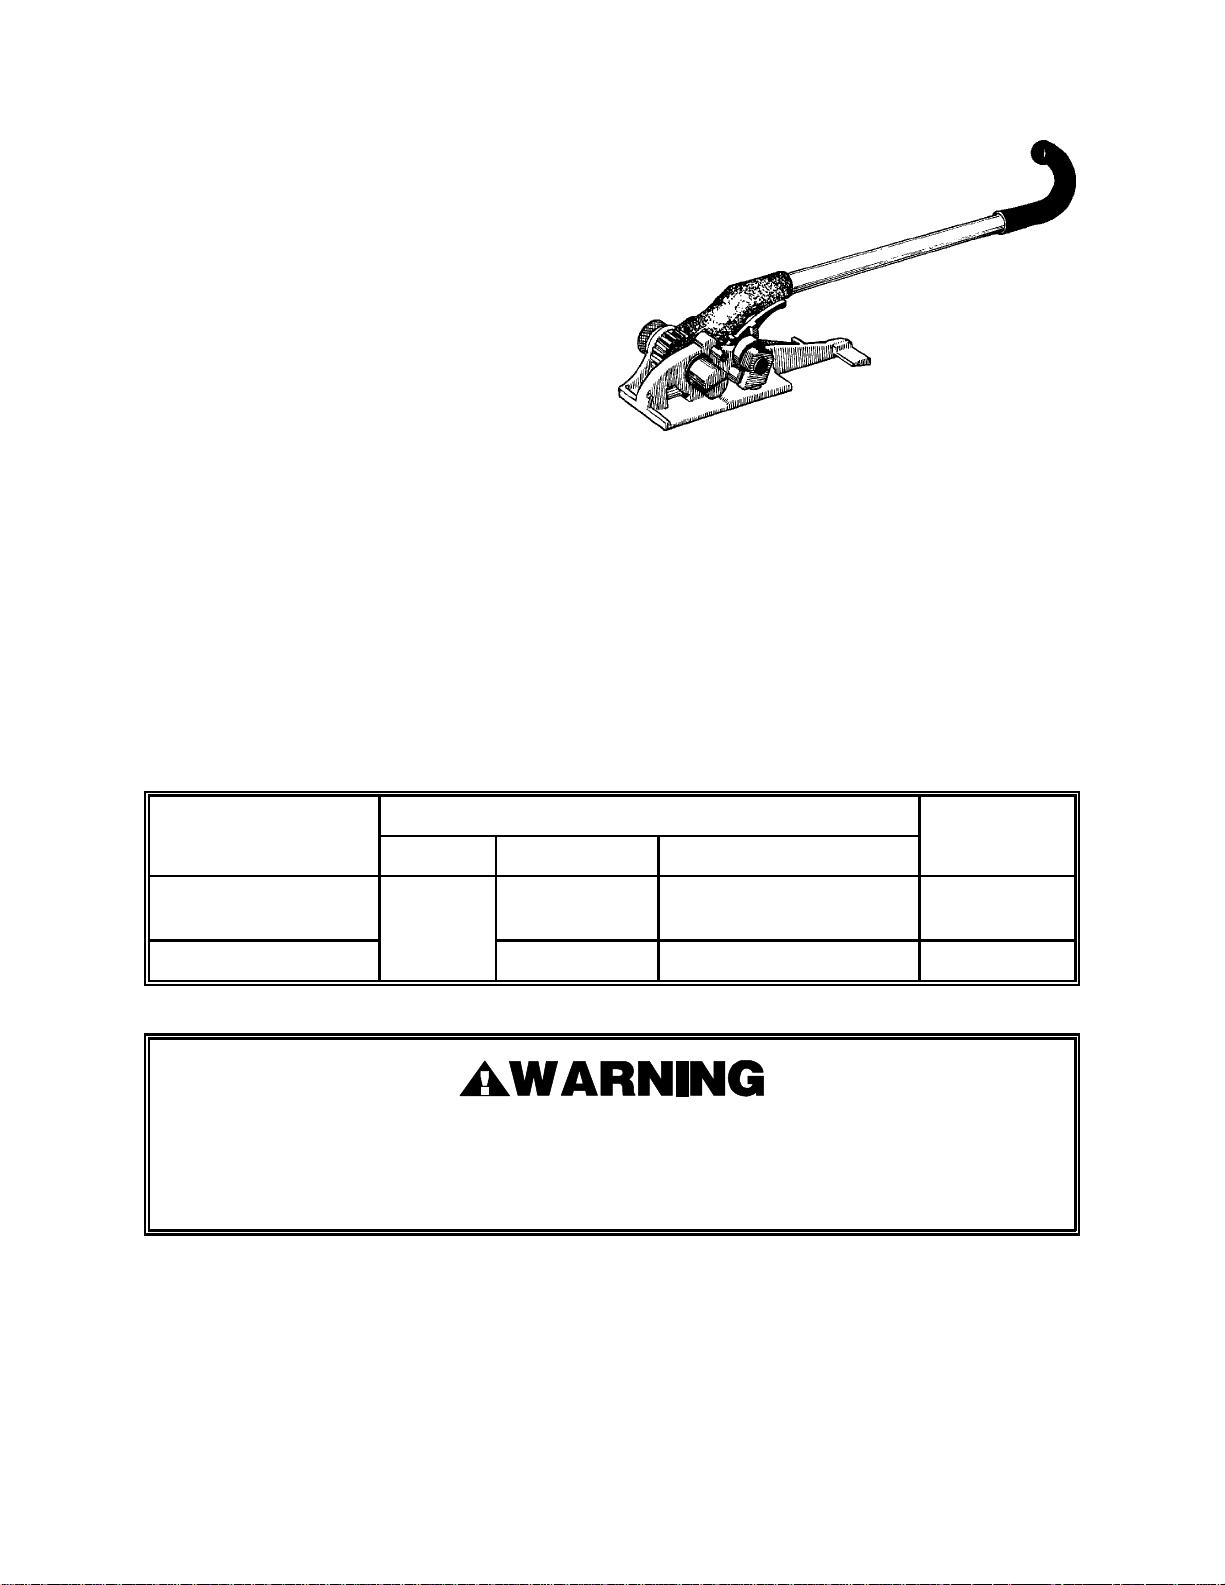
TABLE OF CONTENTS Page
General Safety Instructions 2
Specifications 4
Operating Instructions Overview 5
Placement Around Load 6
Inserting Strap Into Tool 7
Top of Load 8
Side of Load 9
Wall Anchored Load 10
Part Removal & Replacement 12
Troubleshooting 16
Parts List 20
4A1-114, Part No. 184125
4A1-114KR, Part No. 1844135
4A1-2, Part No. 184140
SPECIFICATIONS
STRAP
TOOL MODEL TYPE WIDTH THICKNESS SEALS
4A1-114
4A1-114KR Magnus
4A1-2 2" Min. .044" Min. to .050"
1-1/4" Min. .031" Min. to .050"
With the 4A1-114 and 4A1-114KR tools, use only 1-1/4" wide (minimum) x .031" thick
(minimum) hi tensile strap. With the 4A1-2 tool, use only 2" wide (minimum) x .044" thick
(minimum) hi tensile strap. Failure to use the proper tool or strap can result in serious
injury. Contact your Signode Sales Representative for the correct strap for your application.
4
OPERATING INSTRUCTIONS
When tensioning or sealing, position yourself according to the operation instructions for
the type of load being strapped. Keep all bystanders away.
It is recommended that safety belts be worn by operators working on at elevated positions.
Never increase the length of the tensioning handle by any means such as extending the
handle length.
Apply tensions that are proper for the size and type of strap being used and is compatible
with the loads being strapped and its corner characteristics. Contact your Signode Sales
Representative if you have any questions.
Tuck the strap end back into the dispenser when you are not using it.
Operating instructions are broken down into the following sequences:
1. Placing strapping around a load.
2. Inserting strapping into tool.
3. Tensioning strap when on top of a load.
4. Tensioning vertical strap for sides of a load.
5. Tensioning strap for wall anchored load and horizontal strap.
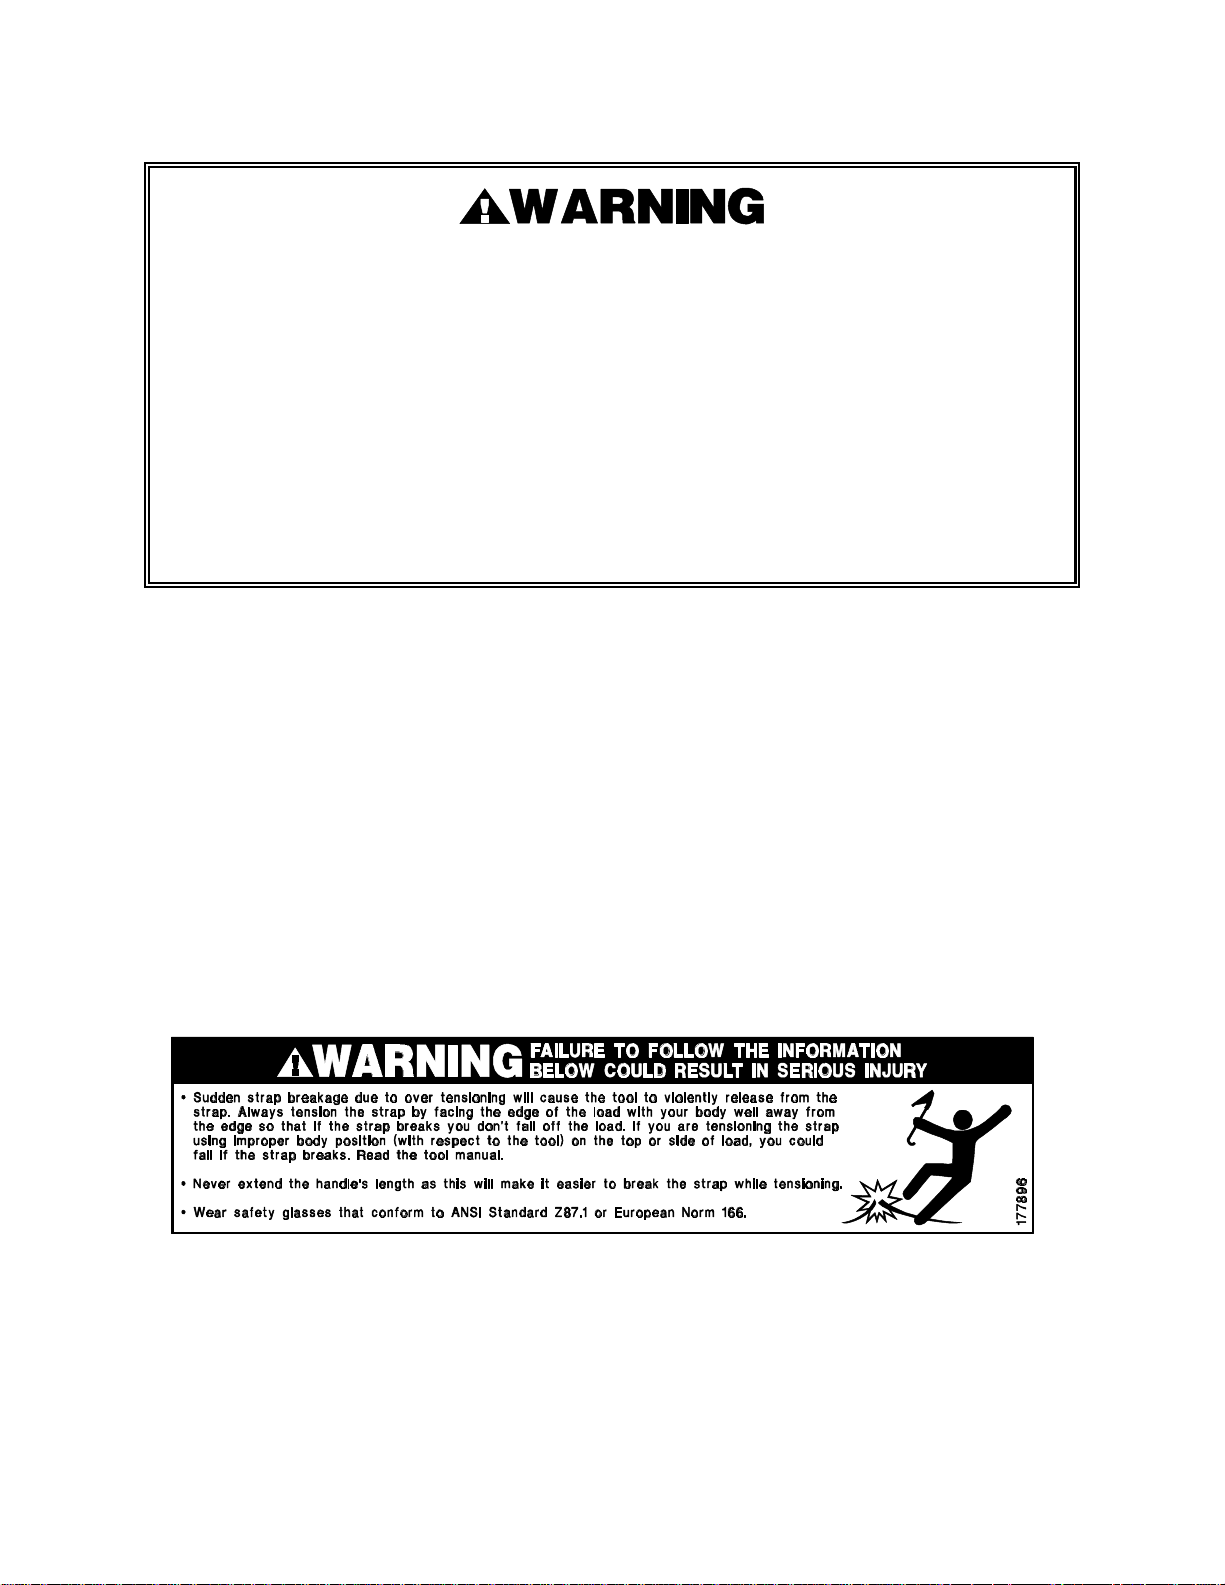
The warning label shown below (177896) is installed on every tool handle. If this label becomes
damaged, replace it immediately. Ensure that a plastic shrink tube sleeve us applied over the
label. Contact your Signode Sales Representative if you have any questions.
5

STRAP PLACEMENT AROUND LOAD
1. Place strap around load as shown in the illustrations.
HORIZONTAL STRAP SIDE LOAD
VERTICAL STRAP SIDE LOAD
TOP STRAP LOAD
Failure to place the strap properly around the load or an unstable or shifted load could
result in a sudden loss of strap tension during tensioning. This could result in a sudden
loss of balance casing you to fall.
If the load corners are sharp use edge protectors.
Failure to follow the above could result in serious injury or death.
2. Thread the proper number of heavy duty seals on both straps, Contact your Signode Sales
Representative for recommendations. Bend the lower/inner strap backwards to hold seals in
place. Bend the upper/outer strap away from the load to permit insertion into the windlass of
tensioner.
6

INSERTING STRAP INTO THE TOOL
1. Rotate the tensioning handle all the way down to lock the gripper in the open position.
Adjust the windlass so that the slot is in line with angle of strap.
TYPICAL ORIENTATION FOR TOP LOADS
TYPICAL ORIENTATION FOR SIDE LOADS
2. Insert lower/inner strap in opening between gripper and base of tensioner until the strap is
fully in contact with the inner wall of the base (strap guide). Make sure that the lower/inner
strap is inserted over the base foot. Insert top/outer strap fully into windlass slot.
Approximately 2 to 4 inches should extend beyond windlass; cut off any excessive length
before tensioning.
TYPICAL ORIENTATION FOR TOP LOADS
TYPICAL ORIENTATION
FOR SIDE LOADS
7
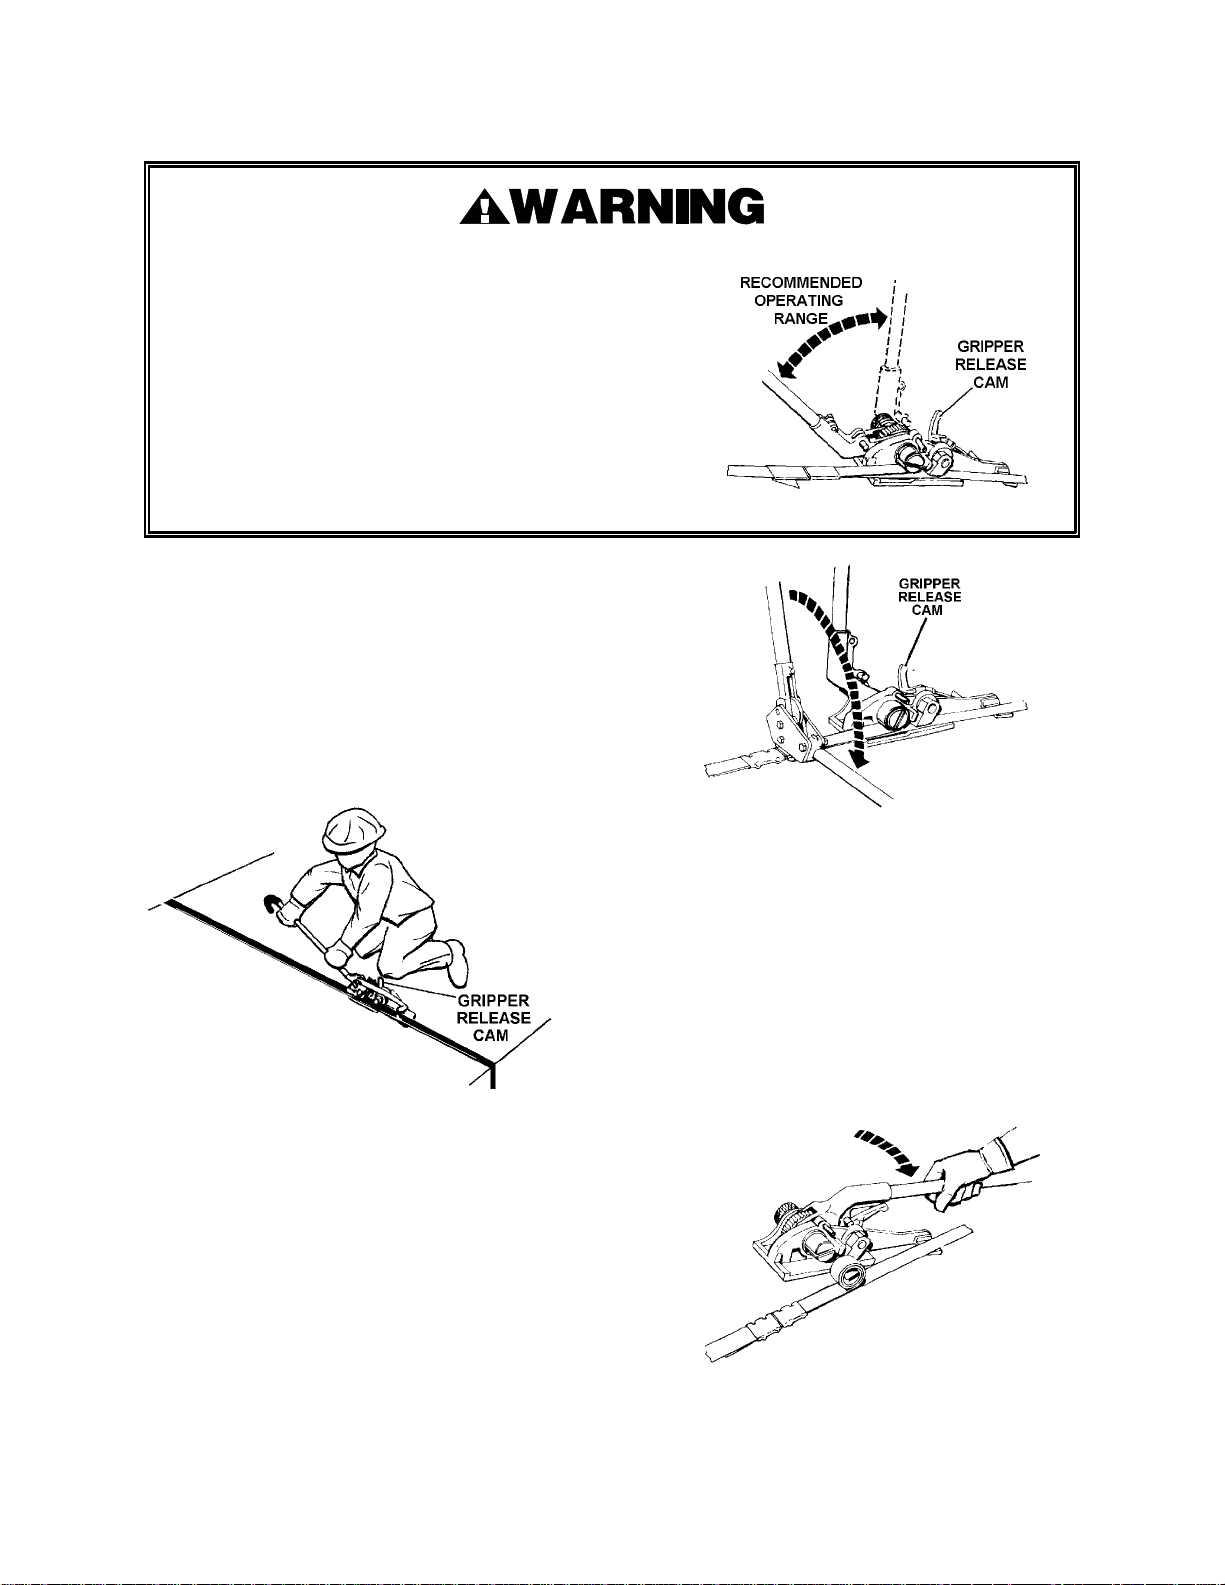
OPERATING INSTRUCTIONS FOR ON TOP OF LOAD
While tensioning strap, do not rotate the tensioning
handle to the point where it will contact the gripper
release cam. This will result in a sudden loss of strap
tension. Be careful when applying final tension, as
excessive tension could cause strap breakage.
Position yourself in such a manner that strap
breakage or hands slipping off the handle will not
cause a loss of balance. Never increase the length of
the tensioning handle by any means, such as, slipping
a pipe over the handle to extend its length. If you have
any questions contact your Signode Sales
Representative.
1. Bring tensioning handle upward,
allowing the gripper to contact the lower
strap. Rotate tensioning handle back
and forth to take up slack in strap. When
strap is snug, the operator should kneel
perpendicular to the strap and apply the
final tension using short tensioning
strokes.
2. Open sealer fully and center sealer jaws
of sealer over each seal. Crimp or notch
each seal the proper number of times by
bringing the top handle downward as far
as it will go.
Consult your sealer manual for the
proper number of crimps or notches
needed for your application.
3. Release tensioner from strap by bringing
handle down until gripper release cam
locks in tensioning handle pin. Remove
tensioner by twisting windlass slot out
of strap curl and sliding tool away from
strap.
8
 Loading...