

Page 1
www.gardcolighting.com
443561201270 Rev. C
Page 1 of 3
Signify Classified - Internal
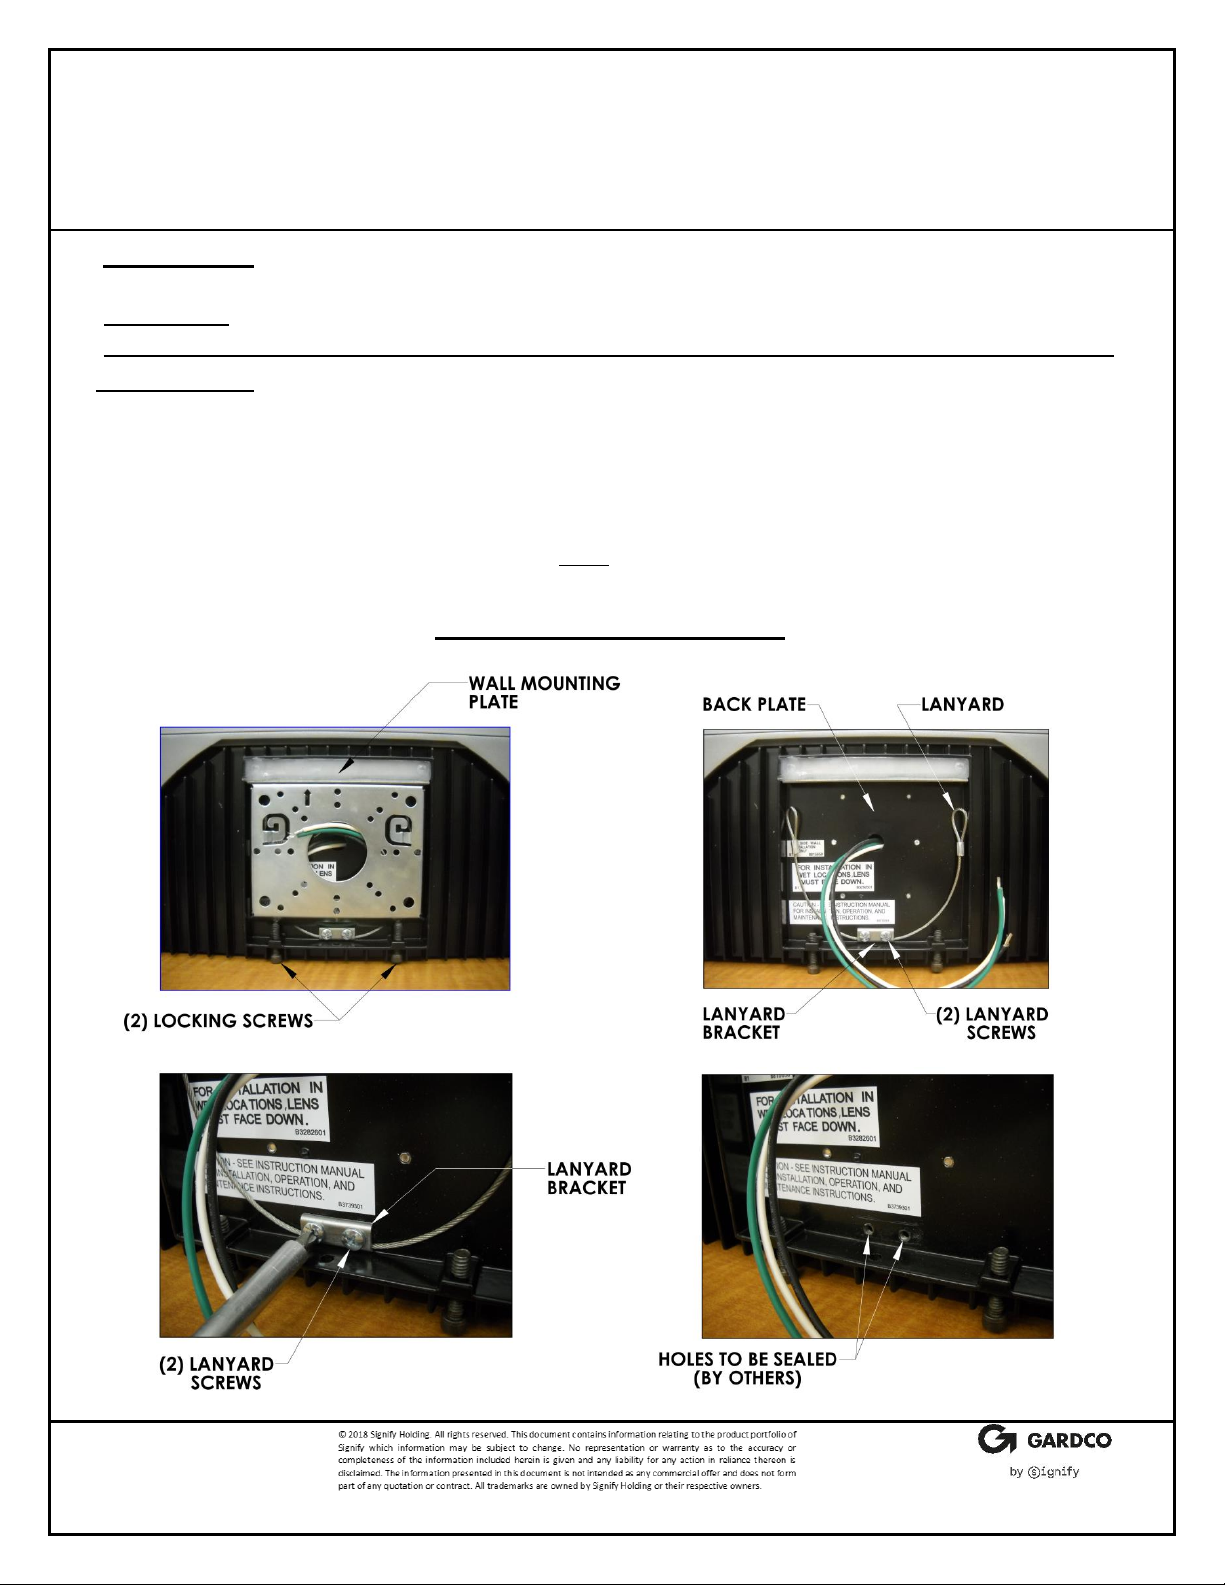
IMPORTANT !!!
MUST remove LANYARD ASSEMBLY to correctly install luminaire to SURFACE MOUNT CONDUIT BOX:
1. Loosen (2) locking screws and remove WALL MOUNTING PLATE from back of luminaire.
Discard WALL MOUNTING PLATE.
2. Remove (2) LANYARD SCREWS holding BRACKET and LANYARD in place. Discard screws,
BRACKET, LANYARD.
3. HOLES for LANYARD BRACKET SCREWS must be sealed with sealant (by others).
INSTALLATION INSTRUCTIONS
FOR WS (WALLMOUNT, SURFACE CONDUIT) OPTION,
161 SCONCE
IMPORTANT: READ ALL INSTRUCTIONS BEFORE PERFORMING ANY WORK. BE SURE
ALL POWER IS OFF PRIOR TO INSTALLING LUMINAIRES.
WARNING: LUMINAIRE MUST BE GROUNDED IN ACCORDANCE WITH APPROPRIATE
CODES. FAILURE TO DO SO MAY RESULT IN SERIOUS INJURY.
BACK OF LUMINAIRE
Page 2
Signify Classified - Internal
443561201270 Rev. C
Page 2 of 3
INSTALLATION INSTRUCTIONS
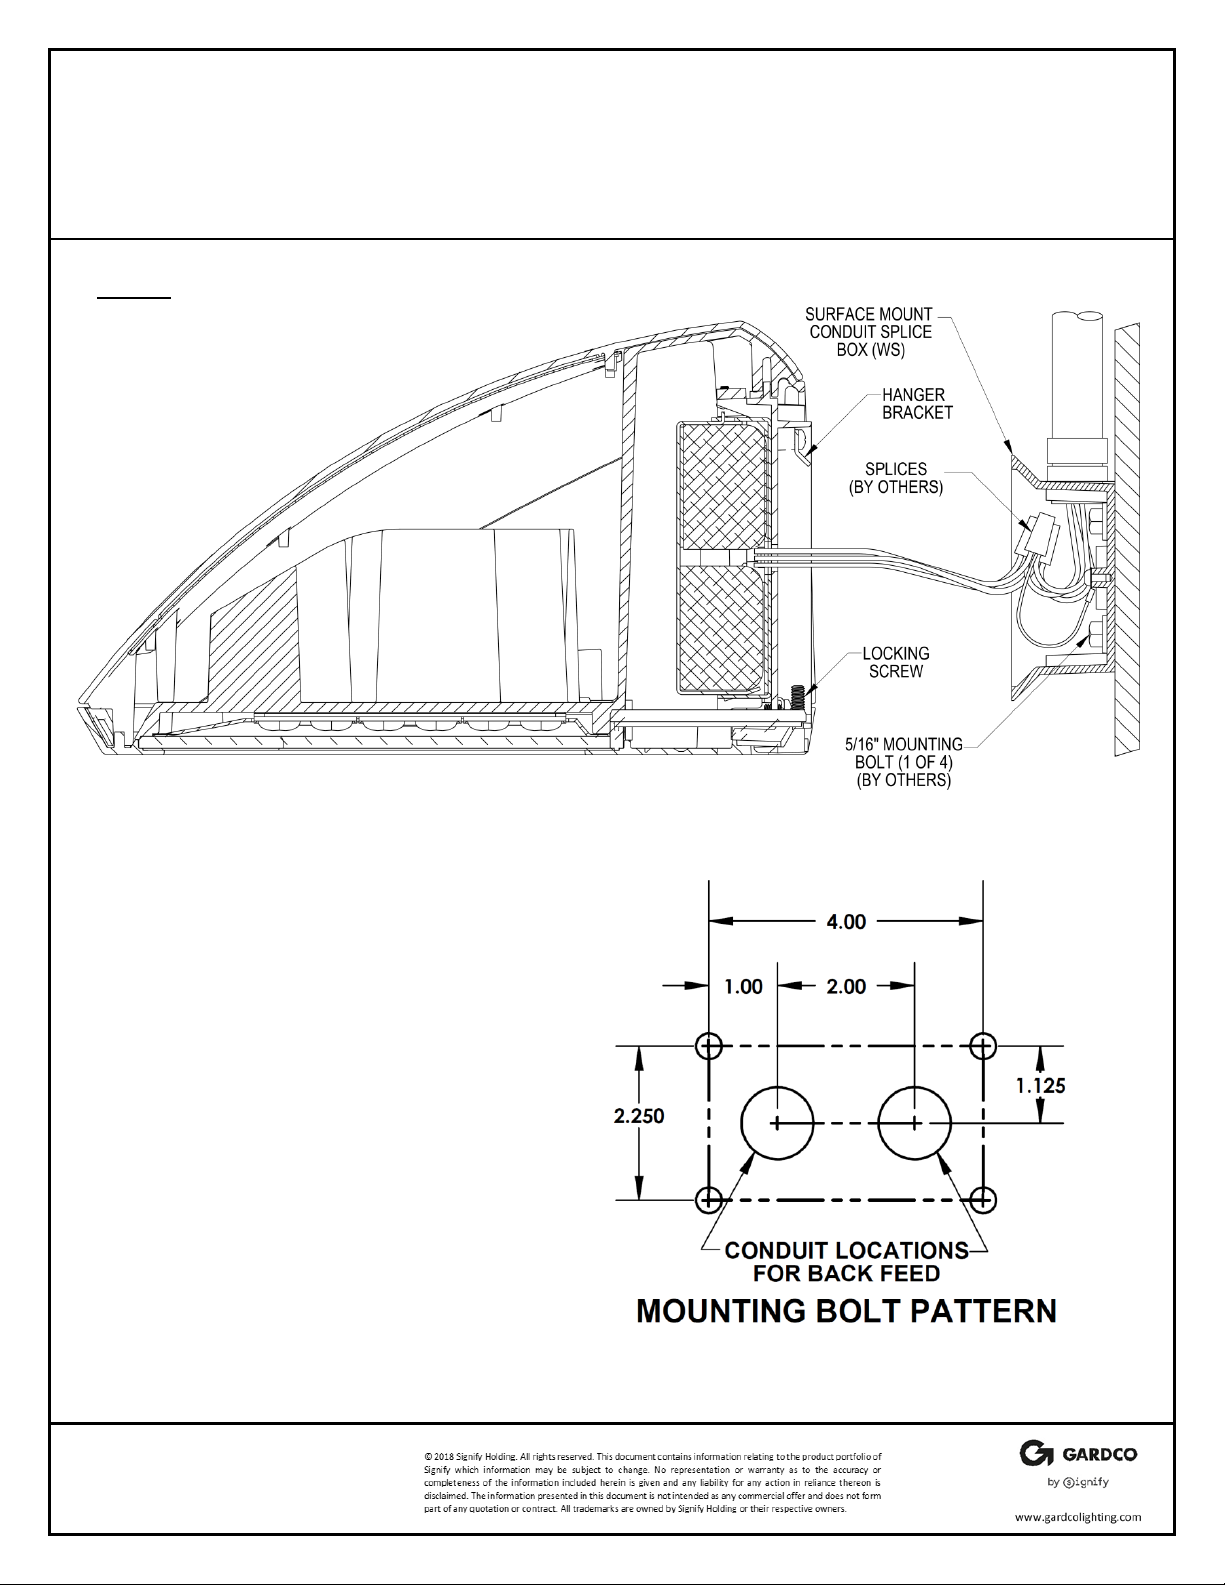
NOTE:
Splice box is secured to wall with 5/16”
bolts or screws (by others). Structural
members must be present in wall to
accept bolts.
1. Determine which hub(s) in surface mount
splice box are to be used in this
installation. Install and seal electrical
fitting(s) in hub(s). Install and seal plug(s)
in unused hub(s). Apply sealant to the two
unused holes in the top angled wall of the
splice box. Install conduit section(s) into
fittings as required.
2. Determine mounting location of splice
box. Apply a bead of sealant around each
mounting hole on the outside of the box.
For installations where conduit enters
through the back of the splice box, apply a
bead of sealant on the outside of the box
around the conduit hole used. Secure box
to wall with 5/16” bolts (by others) making
sure box is level.
3. Complete conduit installation and route
supply wires into splice box.
(cont. p. 3 of 3)
FOR WS (WALLMOUNT, SURFACE CONDUIT) OPTION,
161 SCONCE
Page 3

Signify Classified - Internal
443561201270 Rev. C
Page 3 of 3
INSTALLATION INSTRUCTIONS
FOR WS (WALLMOUNT, SURFACE CONDUIT) OPTION,
161 SCONCE
4. Make electrical connections. Luminaire line to supply line, common to common, and ground to ground,
including splice box ground.
5. Place splices and excess wire in splice box. Carefully engage hanger bracket to splice box being careful not to
pinch wires. Allow luminaire to rest against box. Tighten locking screws.
FIXTURE INSTALLED
ON WS OPTION
© 2018 Signify Holding. All rights reserved. This document contains information relating to the product portfolio of Signify which information may be subject to change. No
representation or warranty as to the accuracy or completeness of the information included herein is given and any liability f or any action in reliance thereon is disclaimed. The
information presented in this document is not intended as any commercial offer and does not form part of any quotation or contract. All trademarks are owned by Sign ify Holding
or their respective owners.
 Loading...