

signia StreamLine TV User Manual

Hearing
Systems
StreamLine TV
User Guide

2
Content
Before you art 4
Included in delivery 6
Components 8
Getting arted 10
Positioning 10
Connecting to power supply 11
Connecting to your electronic device 13
Pairing hearing inruments 20
Daily use 23
Using the transmitter 23
Power and TV indicator 26

3
Important safety information 30
Personal safety 30
Product safety 33
Important information 36
Explanation of symbols 36
Maintenance and care 39
Troubleshooting 41
Technical information 46
Disposal information 48
Conformance information 48

4
Before you art
This device is intended as a wireless transmitter of
sound from a TV or from other electronic devices
to hearing inruments. It is intended to be used by
children (> 36 months) and adults together with their
hearing inruments.
CAUTION
Read this user guide thoroughly and completely and
follow the safety information in this document to avoid
damage or injury.

5
Compatible hearing inruments
StreamLine TV works with our specic wireless hearing
inruments. Your Hearing Care Professional will advise
you on the compatible models.

6
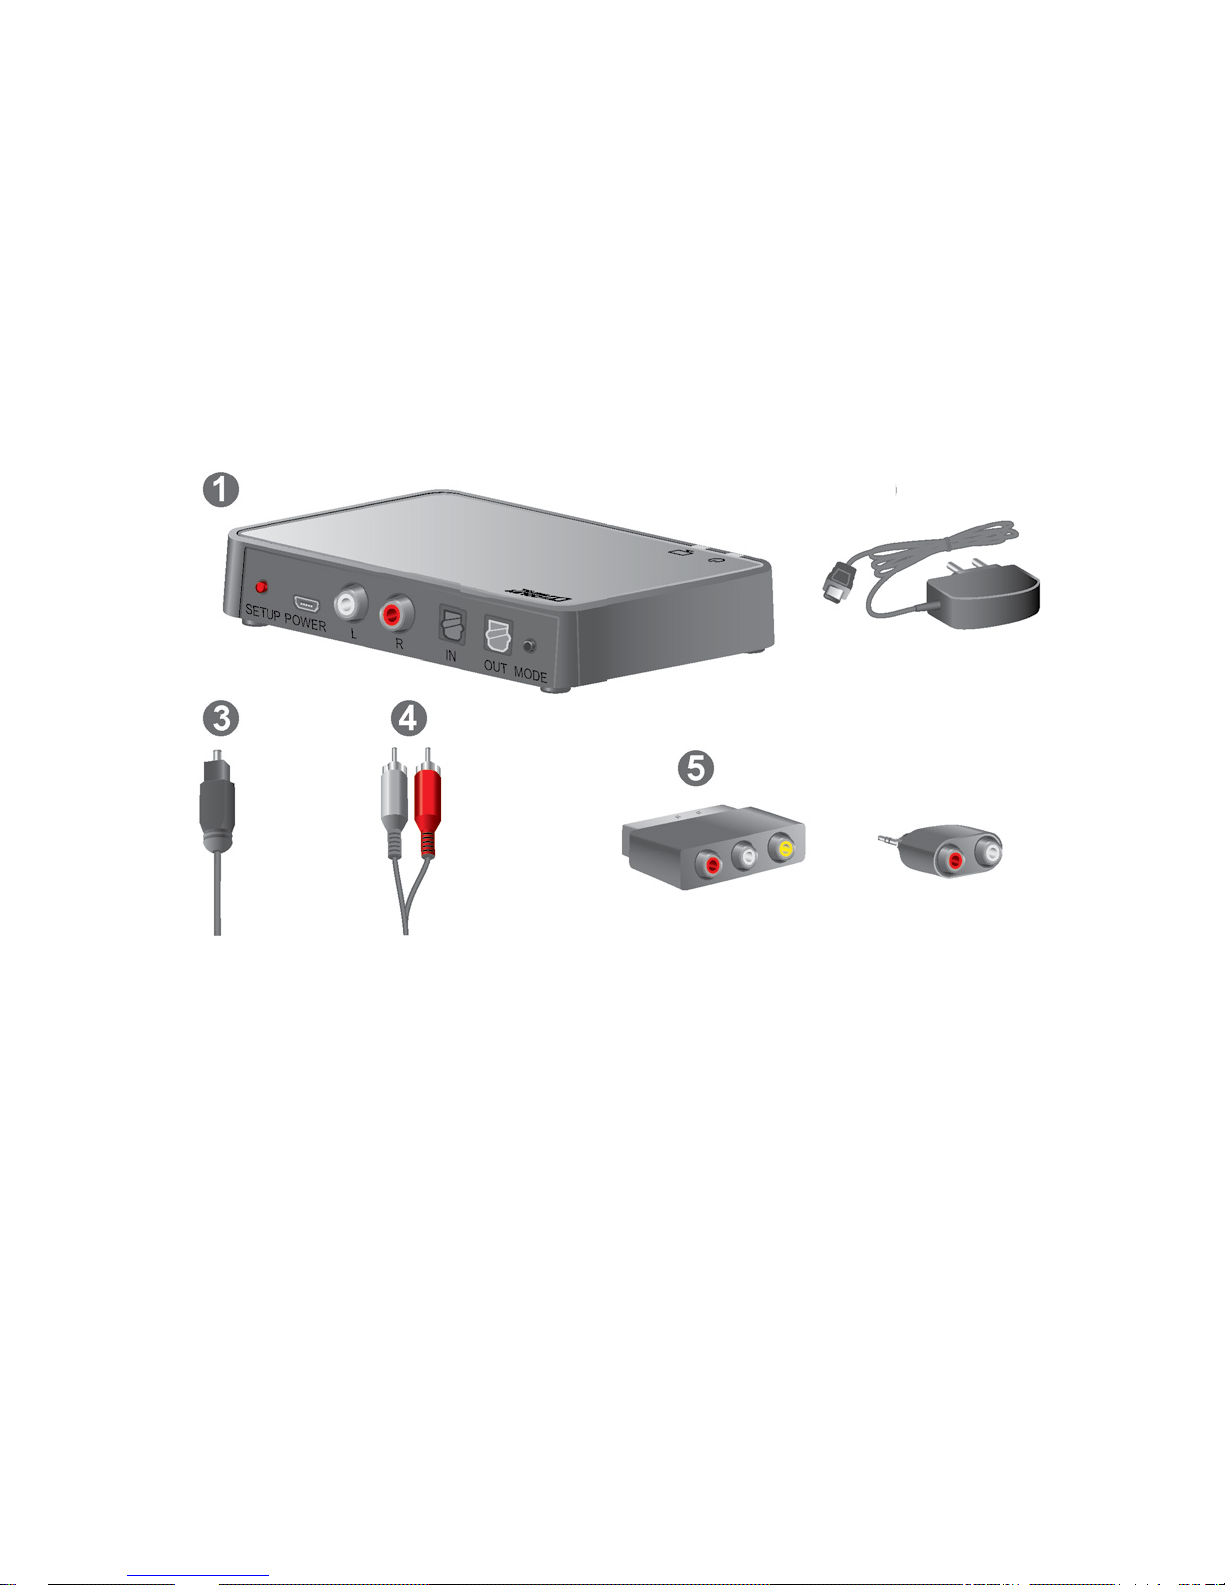
Included in delivery
➊
StreamLine TV
➋
USB power cable and power plug with
country‑specic adapter
➌
TOSLINK cable
➍
RCA (cinch) cable
➎
SCART adapter
➏
Mini jack adapter
7

8
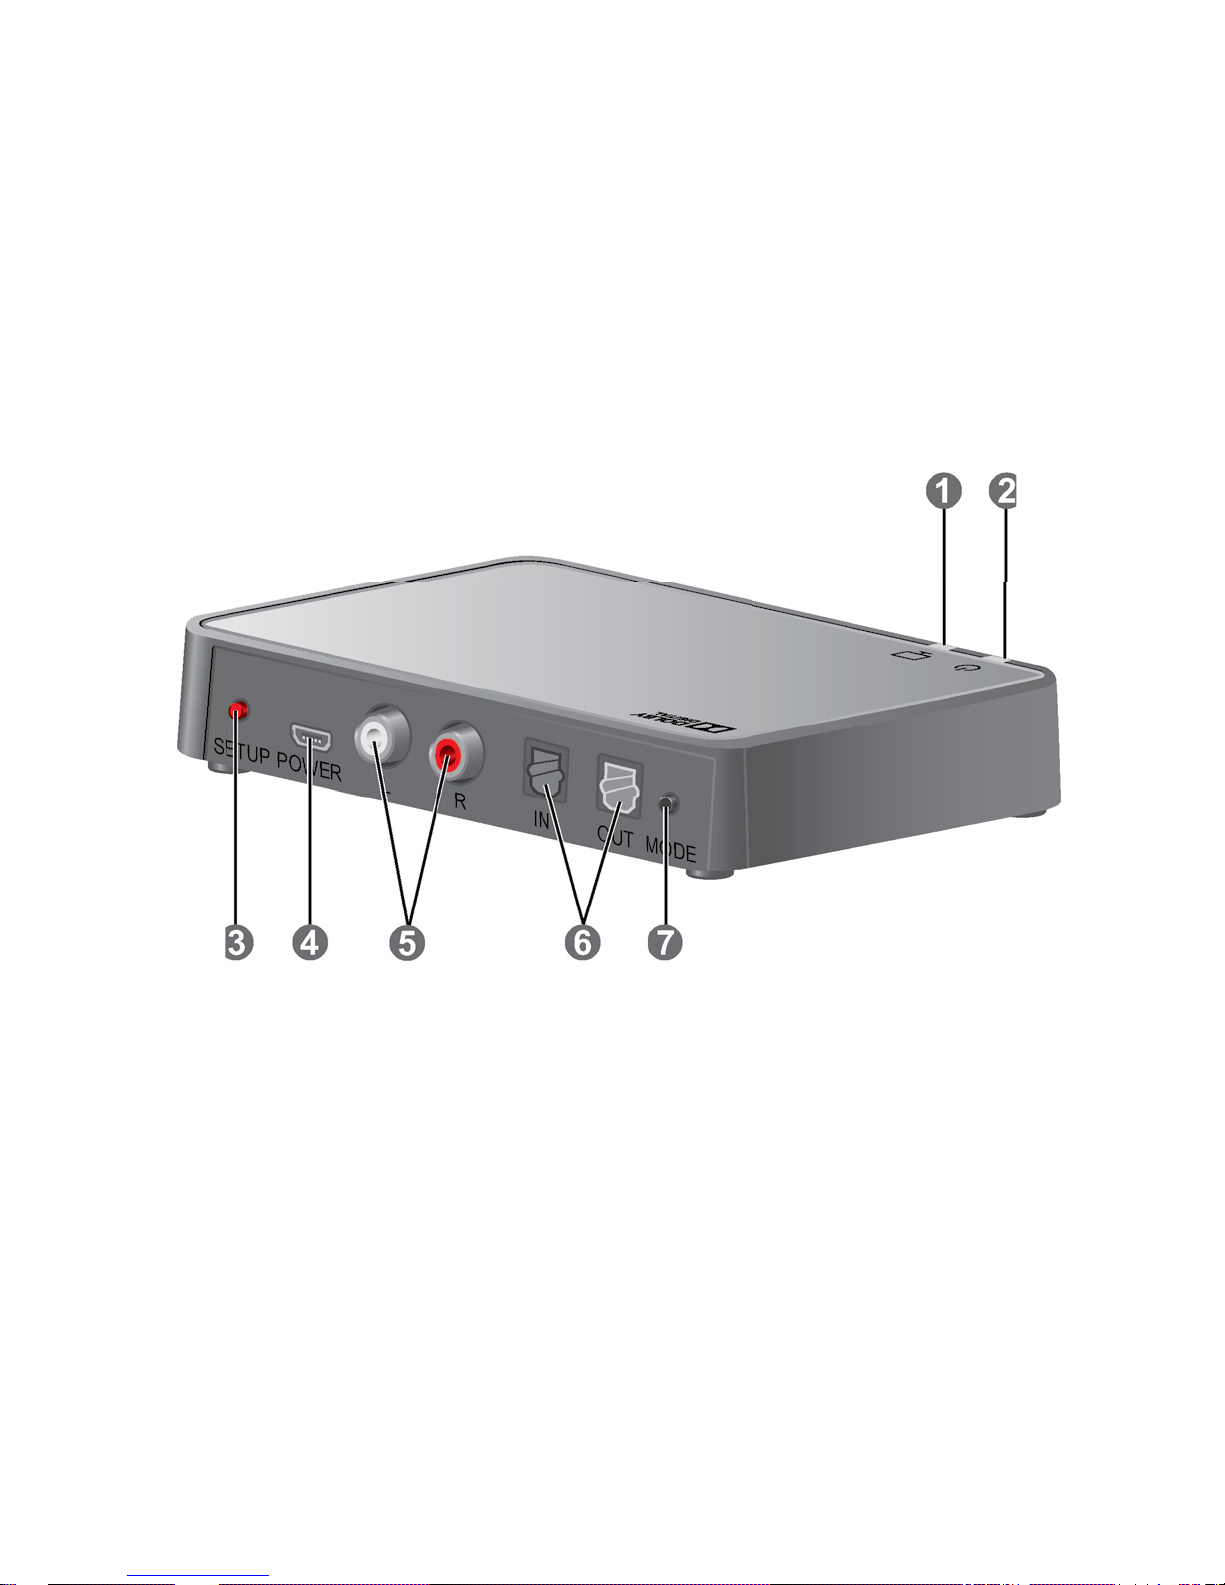
Components
➊
TV indicator
➋
Power indicator
➌
Setup button
➍
Power connection
➎
RCA connections (left and right)
➏
TOSLINK connections (in and out)
➐
Mode button (only for Hearing Care Professionals)
9
10
Getting arted
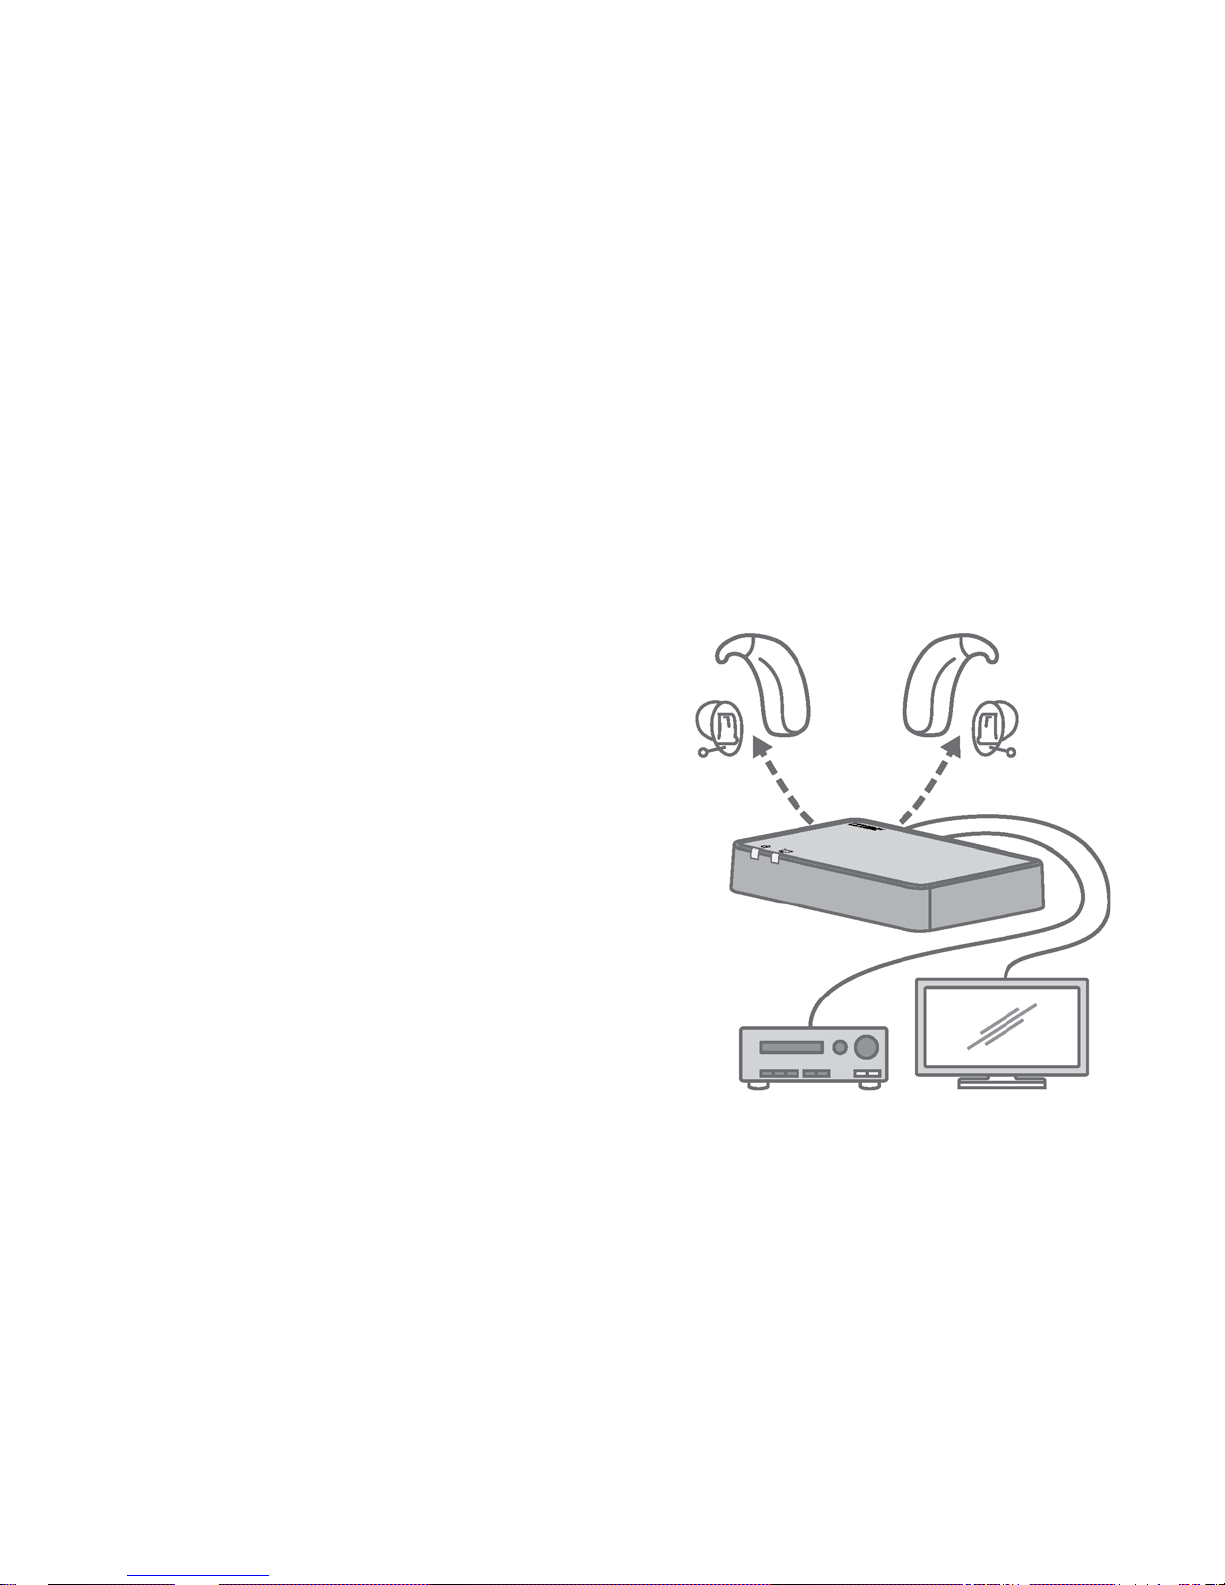
Positioning
Position the transmitter close to
your electronic device, so that
they can be easily connected
with cables. For be connection
to your hearing inruments,
position the transmitter
horizontally and in
direct line of sight with
your hearing inruments.
11
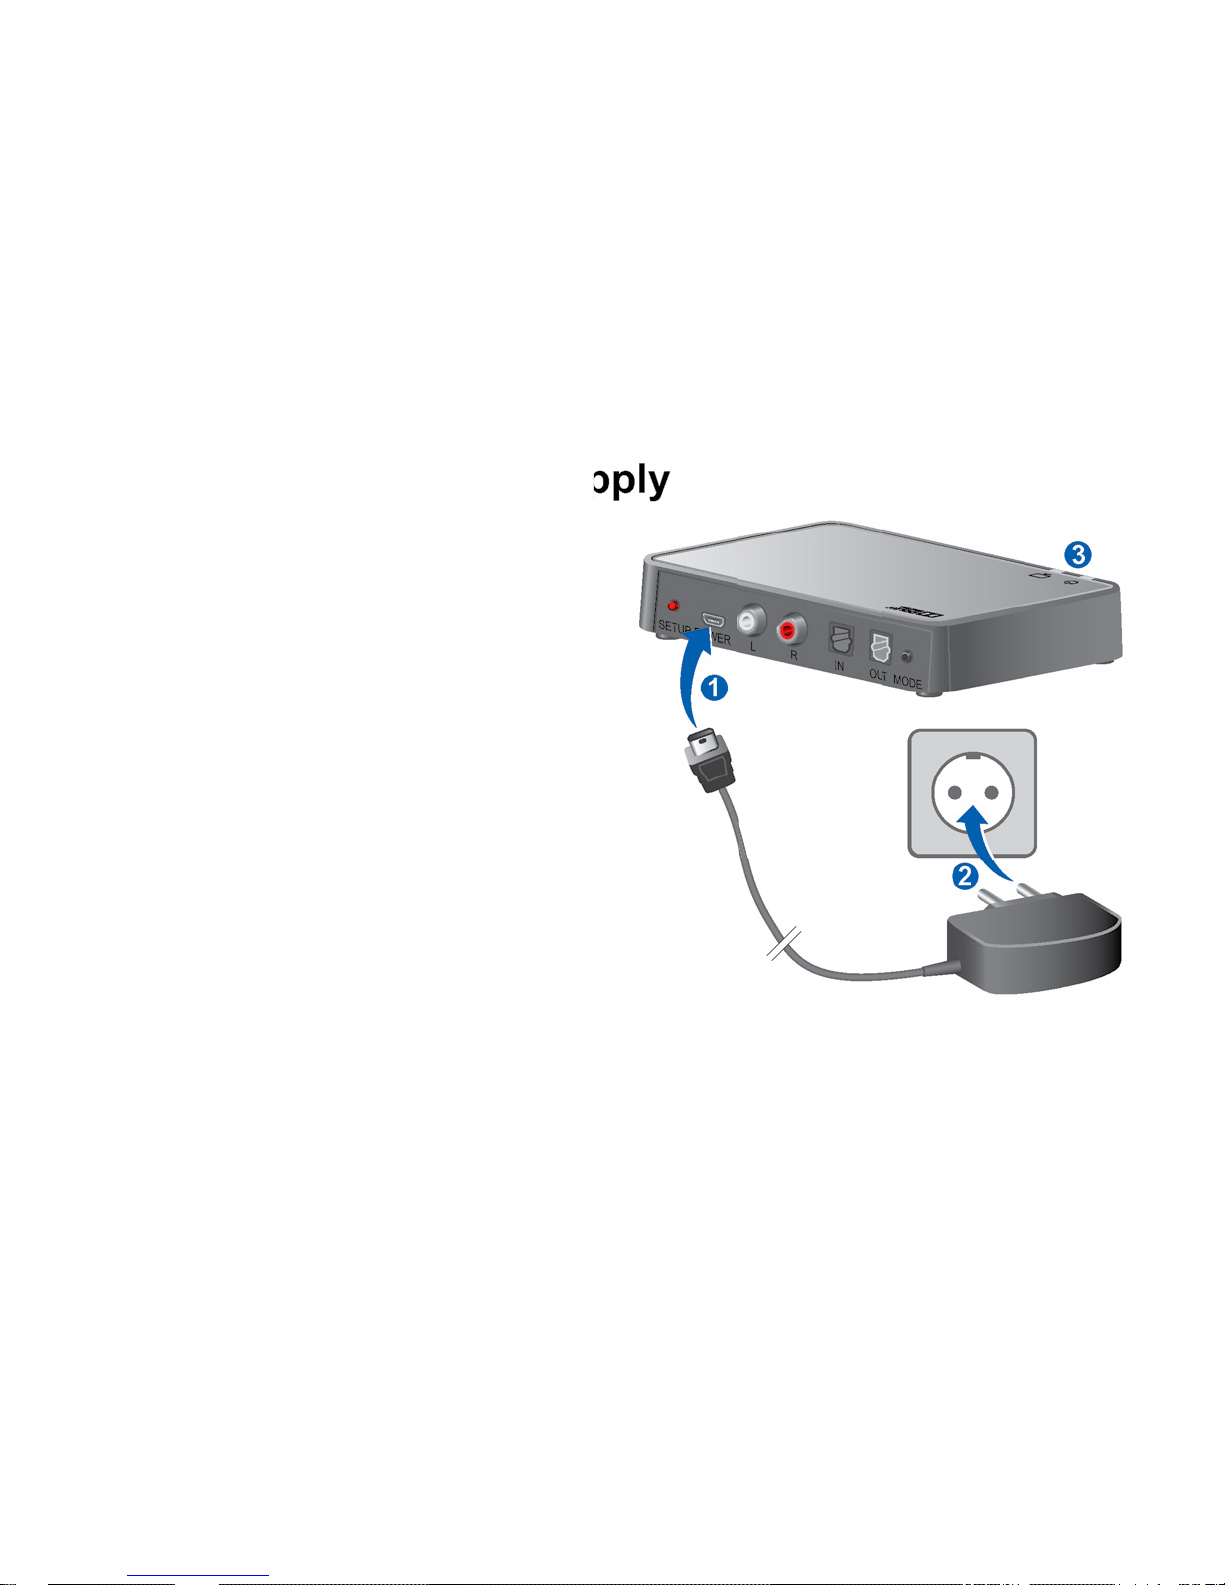
Connecting to power supply
Only use the USB power
cable and power plug that
came with the transmitter.
XConnect the micro USB
side of the power cable to
the power connection of
the transmitter
➊
.
XConnect the power plug to
the power supply
➋
.
12
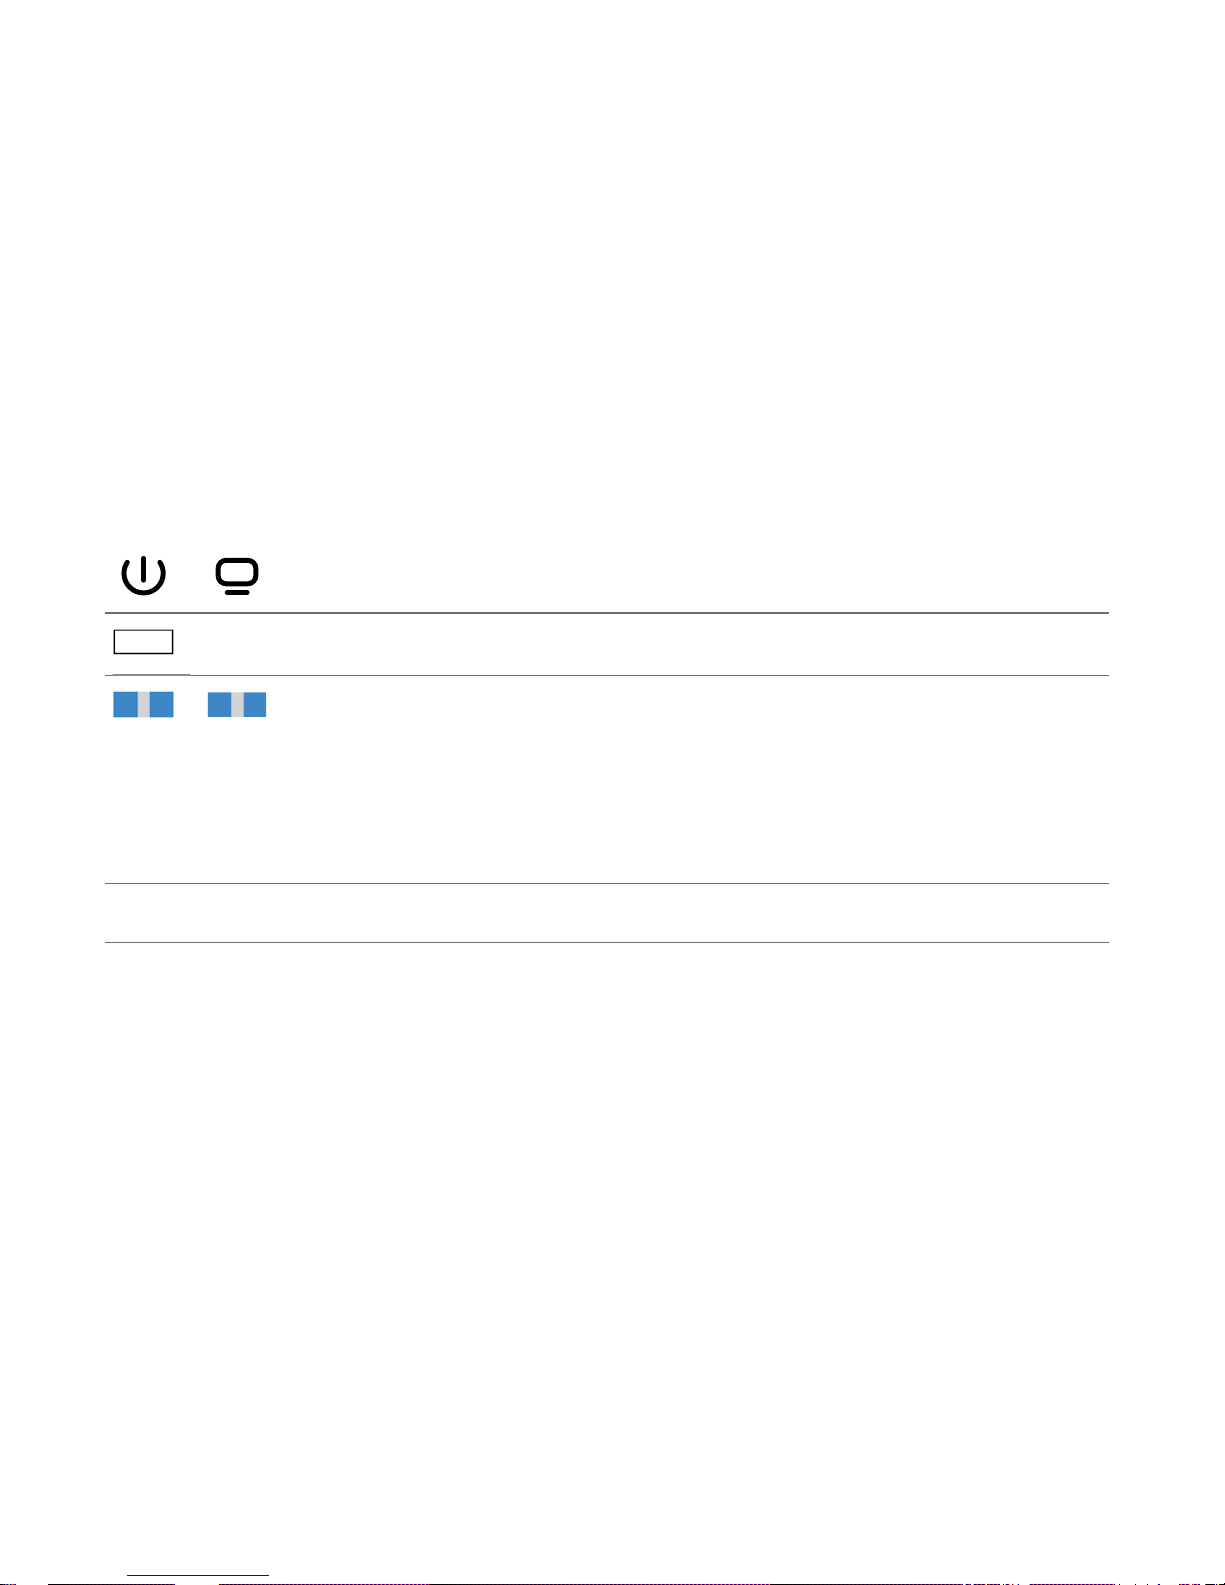
X
Observe the indicators ➌:
Description
‑ The transmitter is arting up.
If after a few seconds, both indicators ash
blue, the transmitter is on but not paired to
any hearing inrument. Refer to the section
"Pairing hearing inruments".
other Refer to the section "Power and TV indicator".
13
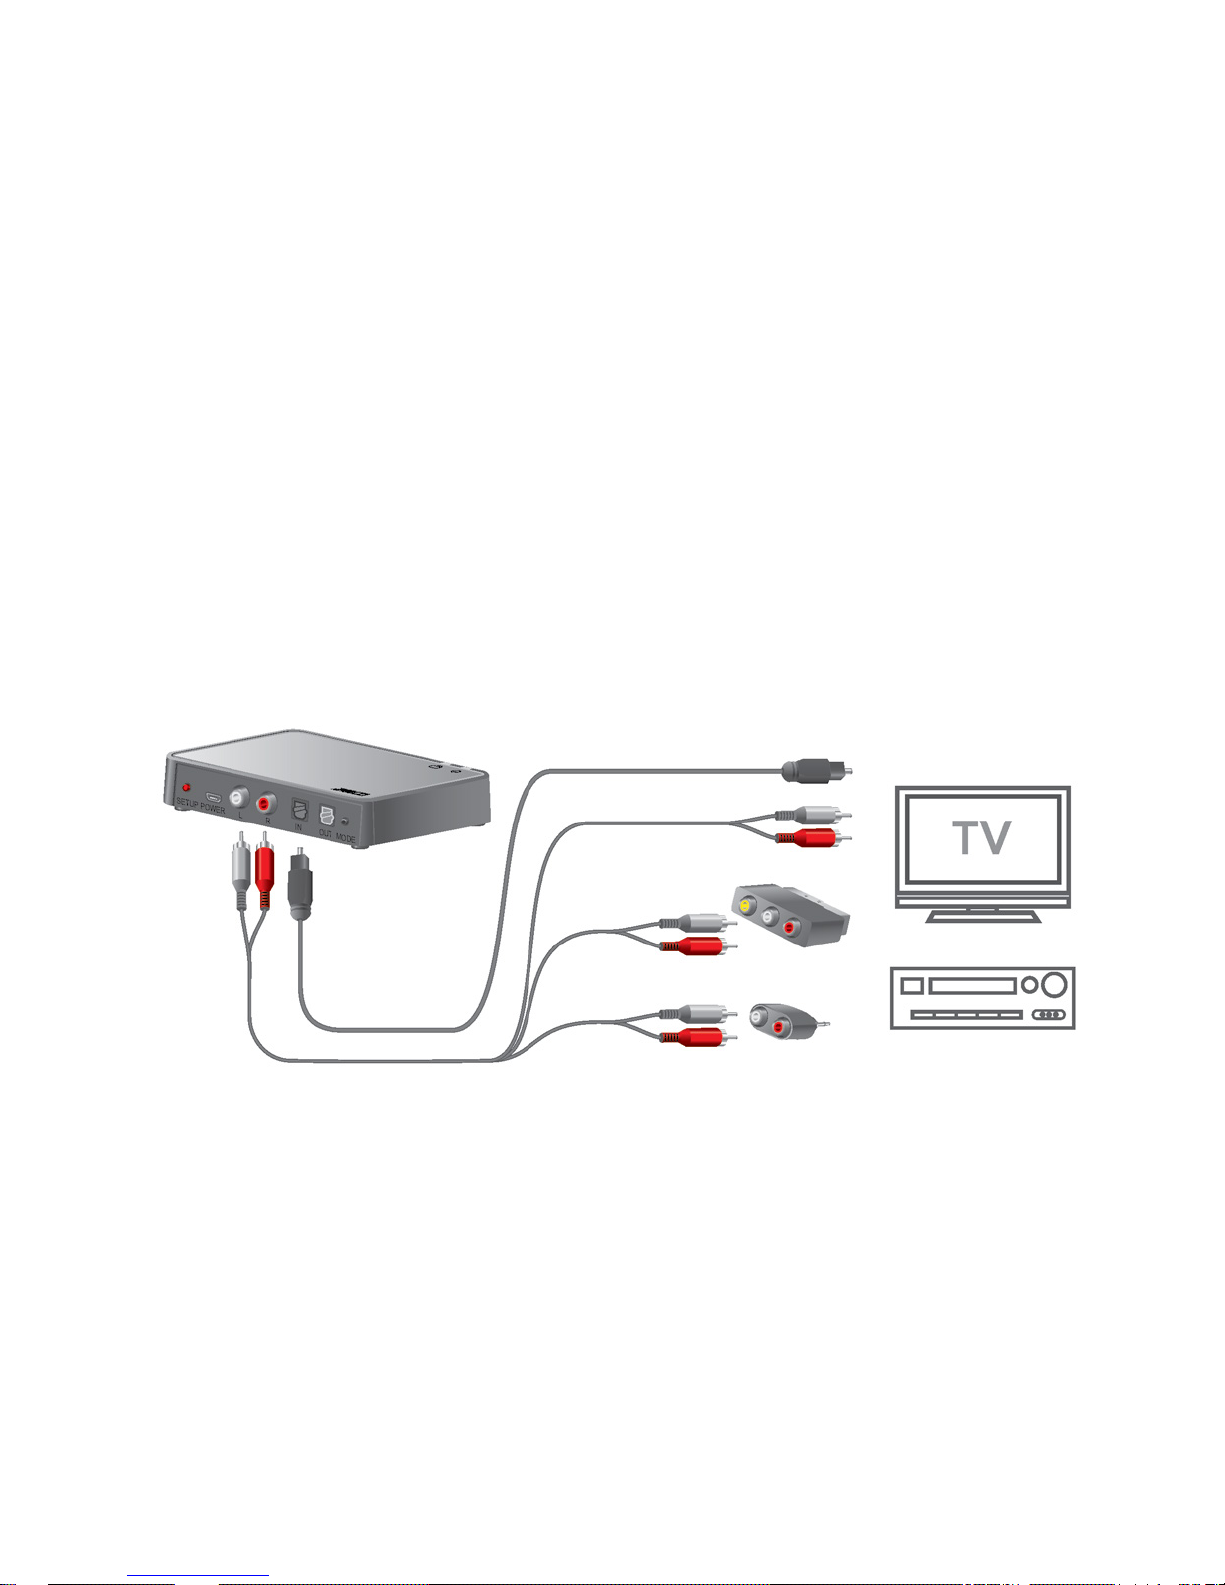
Connecting to your electronic device
You can connect the transmitter to your electronic device
with the TOSLINK cable or with the RCA cable. We
recommend using the TOSLINK connection. Use the
supplied cables and adapters.

14
We recommend to connect either the TOSLINK input or the
RCA input of the transmitter.
If both inputs of the transmitter are used, the electronic
device that is connected via TOSLINK cable has the higher
priority and only the audio signal of this device will be
reamed to your hearing inruments.
15
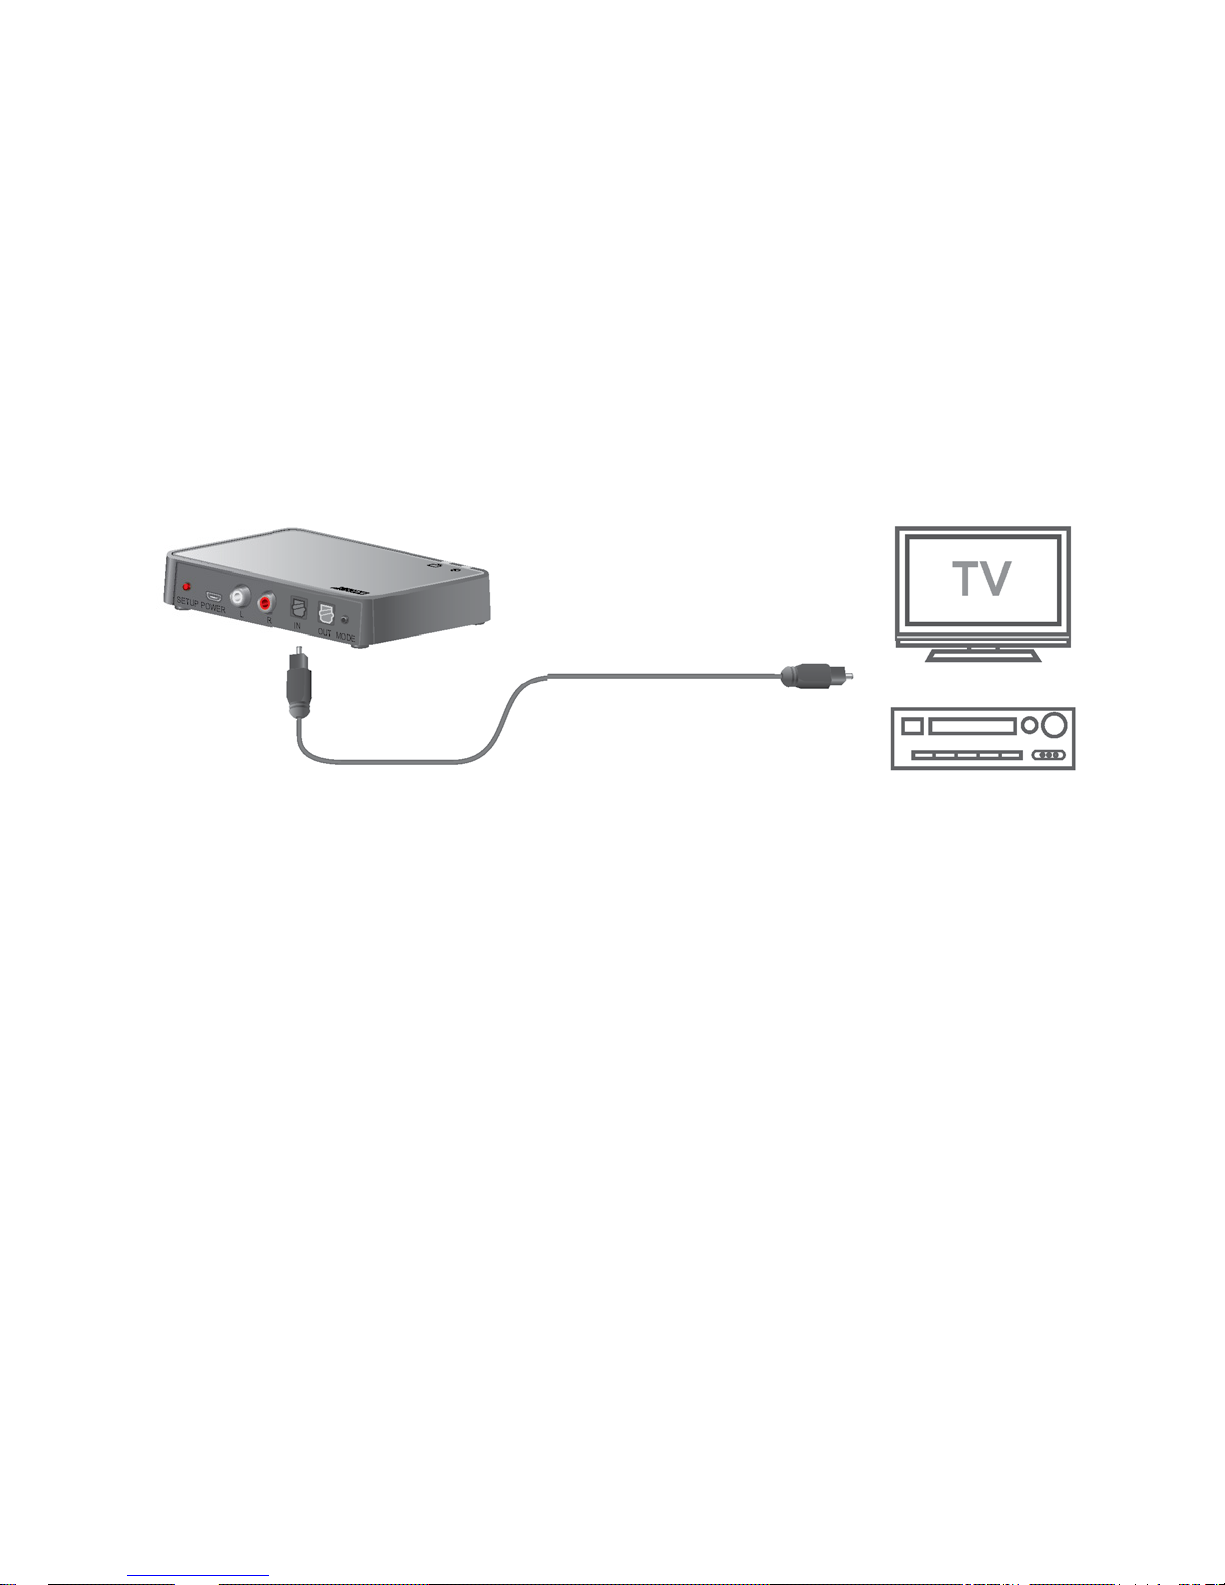
TOSLINK connection
XBefore connecting the cable, remove the protection caps
from the TOSLINK cable plugs.
XPlug the cable into the TOSLINK input of your transmitter
and into the TOSLINK (optical audio) output of your
electronic device.
To prevent the TOSLINK cable from breaking, do not
forcefully bend it.

16
Further information:
●
Refer to the electronic device's manual: Set the
output format of the electronic device to either PCM
(pulse‑code modulation) or Dolby
®
Digital*.
●
The TOSLINK output of your transmitter may be used to
connect further TOSLINK devices such as external Dolby
decoders or surround sound syems.
* Dolby and the double‑D symbol are regiered trademarks of Dolby Laboratories.
17
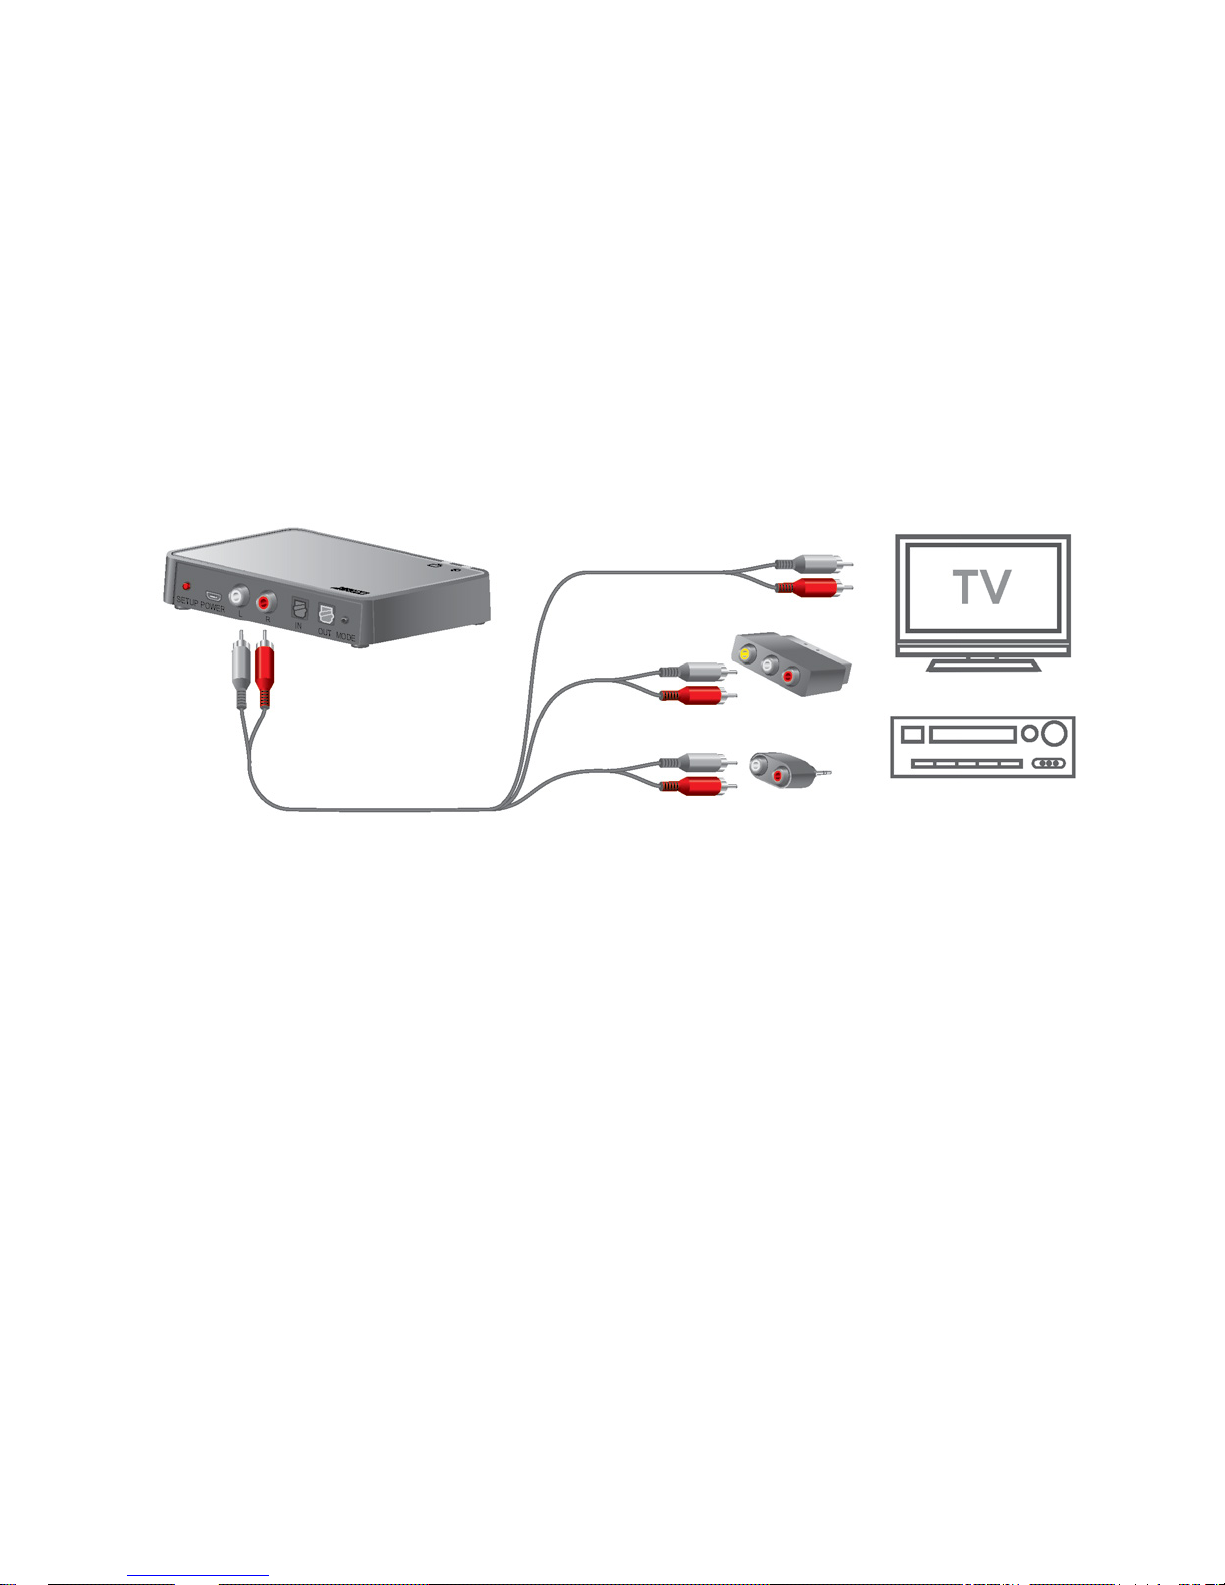
RCA connection
XPlug the cable into the RCA connections of your
transmitter.
XPlug the other side of the cable into the RCA output of
the electronic device. Or via adapter into the SCART or
mini jack output of the electronic device.
 Loading...