

Page 1
CLOVER 4
Handheld Video Magnifier
User Guide
Rev E
Page 2
Contents
Precaution 1
Quick Start 3
Overview 3
Compositions 5
Accessories 8
Battery and Charging 9
Writing Stand 14
Operation 15
Page 3
Power Button 15
Beep Type 16
Magnification 18
Color Mode 19
Brightness 22
Two-Color Tuning 23
Lighting 25
Freeze 25
TV Connection 27
Memory 29
Page 4
Auto power saving 29
Restore 30
Troubleshooting 31
The unit does not turn on 31
Black screen or White screen 31
The image does not change 32
Smudges or blemishes on the screen 33
Specifications 34
Page 5
1
Precaution
Before using Clover 4 for the first time, you
must charge its battery. Refer to Battery and
Charging section for more details.
Always operate the unit in a place where the
temperature is between 10°C and 35°C(50°F
and 95°F).
Page 6
2
Keep the unit away from wet areas, rain, and
other sources of liquids. Do not submerge the
unit.
Do not attempt to repair the unit. Any
unauthorized attempt will void the product
warranty. Contact your distributor to service.
Use the supplied power adapter and battery.
Page 7
3
Quick Start
Overview
Thank you for purchasing CLOVER 4.
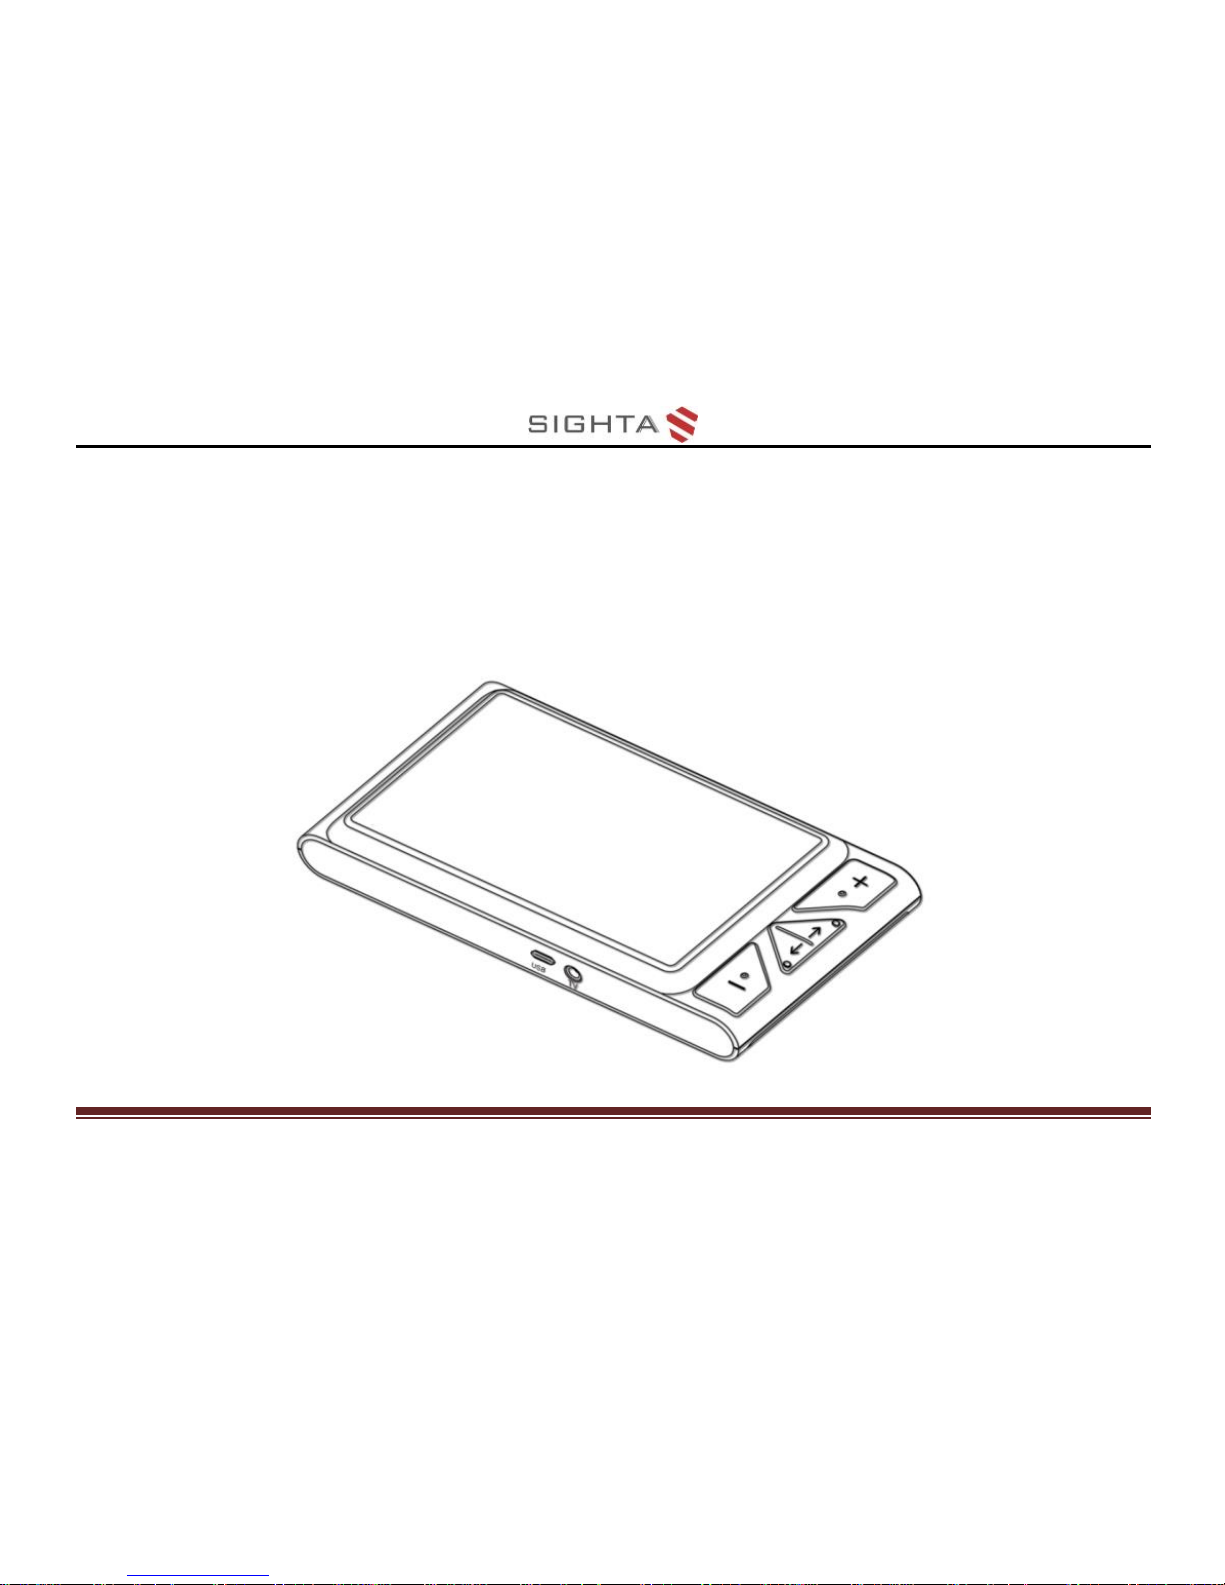
CLOVER 4 is a portable, handheld video magnifier
with a 4.3 inch widescreen LCD display, providing
sharp, clear images that are easily viewed in various
magnification levels and color modes.
The unit allows you to put it on or close to the object.
It supports continuous zoom, and the images can be
Page 8
4
frozen for further viewing. It also has an integrated
fold-away writing stand. This unit is ideal for viewing
labels, books, newspapers and so on.
Page 9
5
Compositions
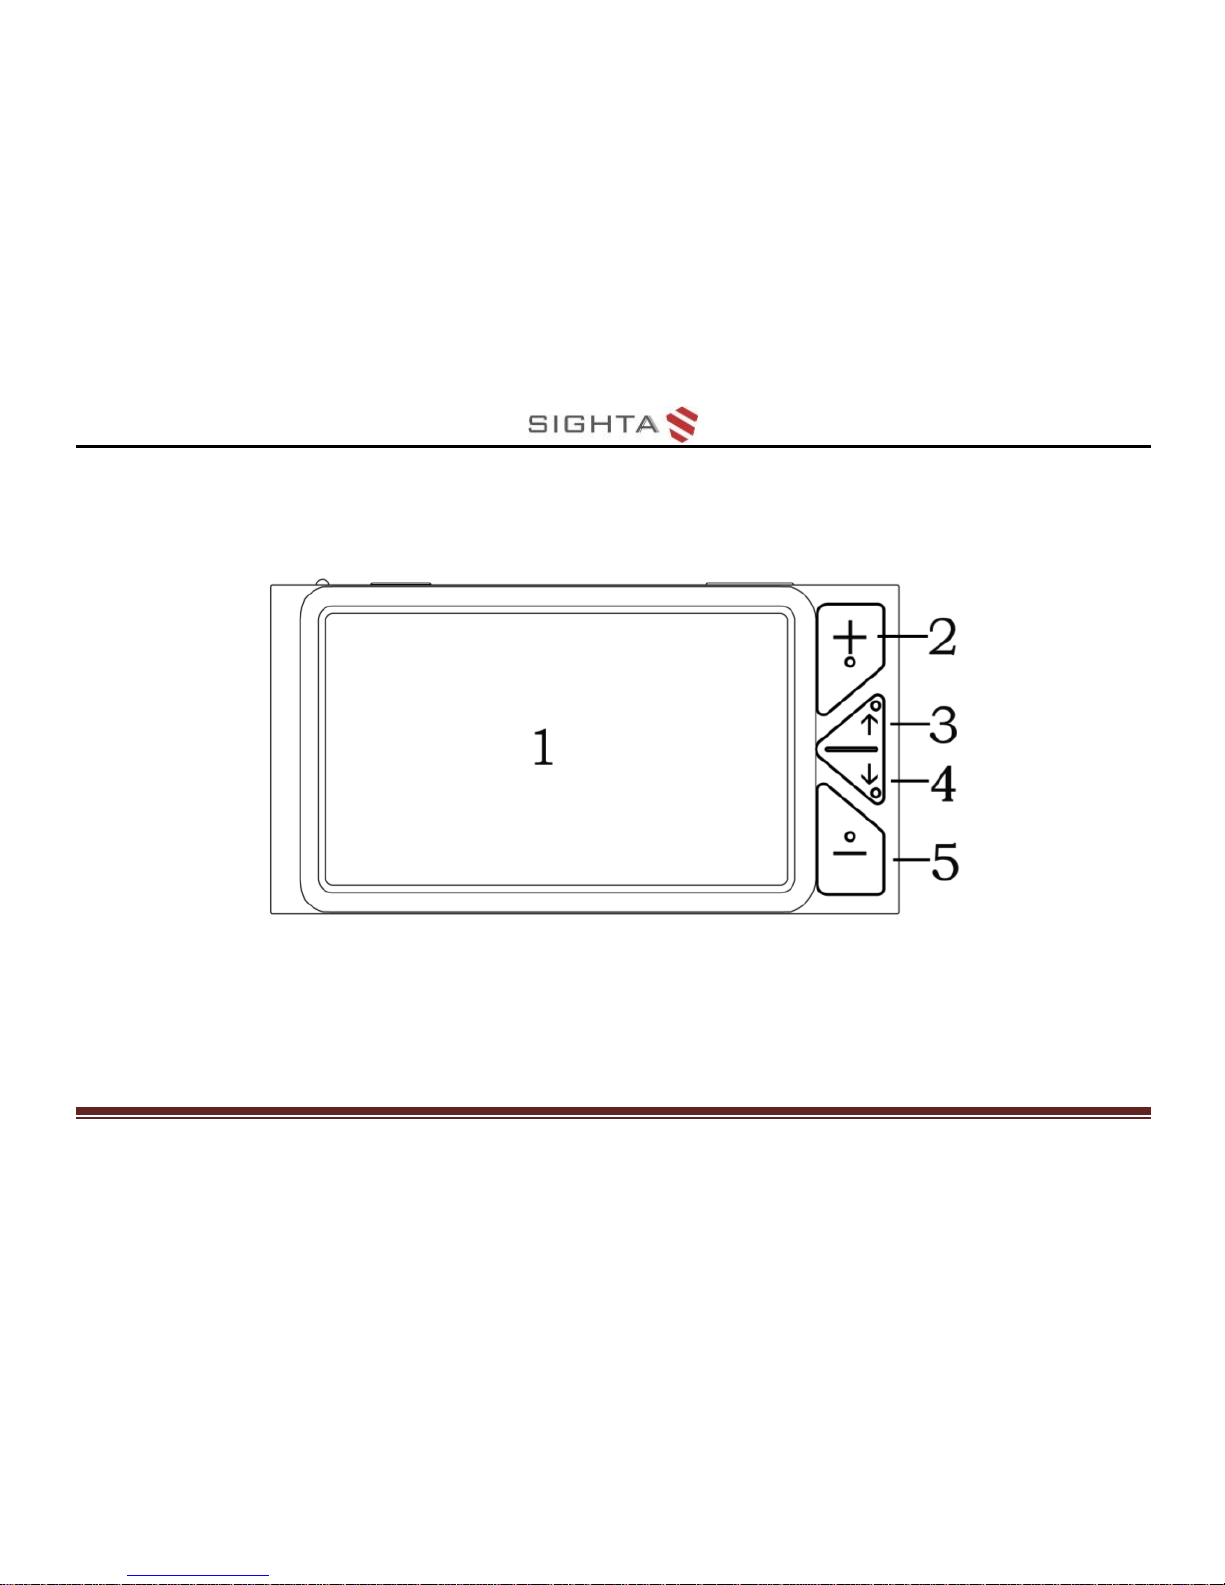
1. LCD Screen
2. Zoom In
3. Color Mode Up
4. Color Mode Down
5. Zoom Out
Page 10
6
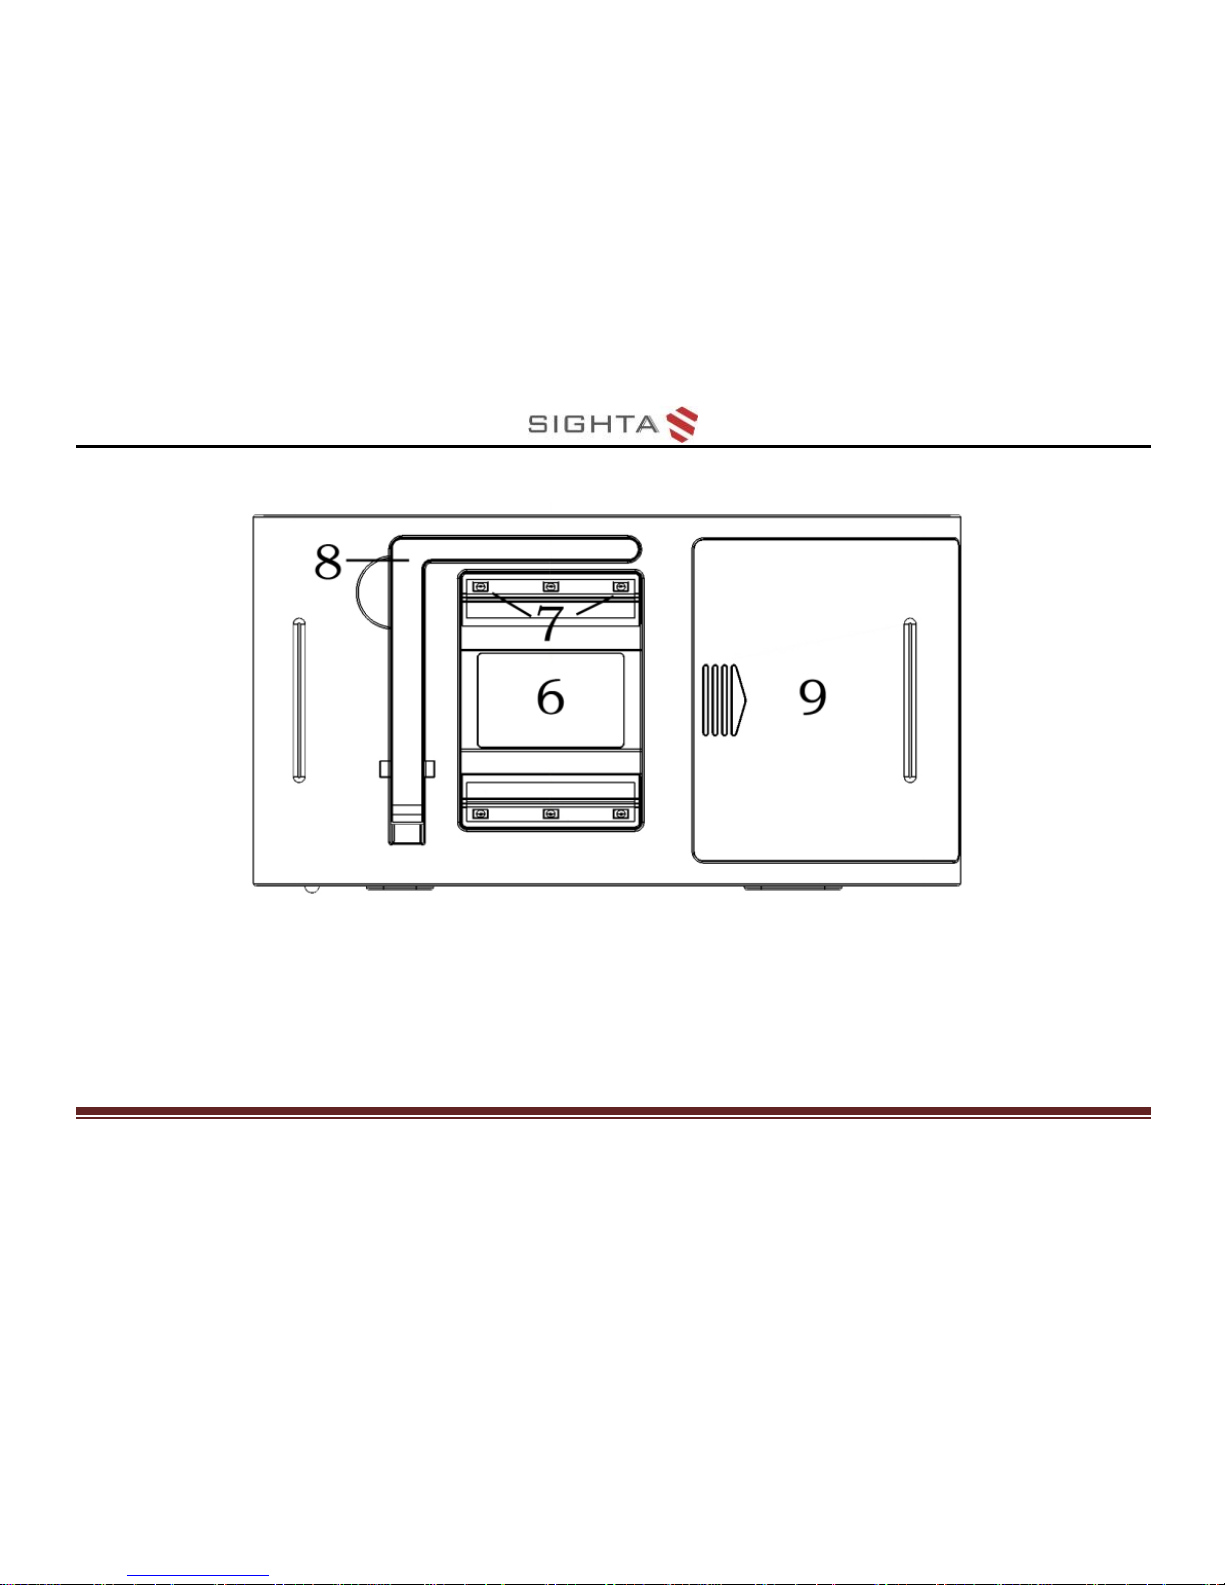
6. Camera
7. LED Lights
8. Writing Stand
9. Battery Slot
Page 11

7
10. Power LED
11. Power
12. Beep
13. Freeze
14. USB Type-C Port
15. TV Port
Page 12
8
Accessories
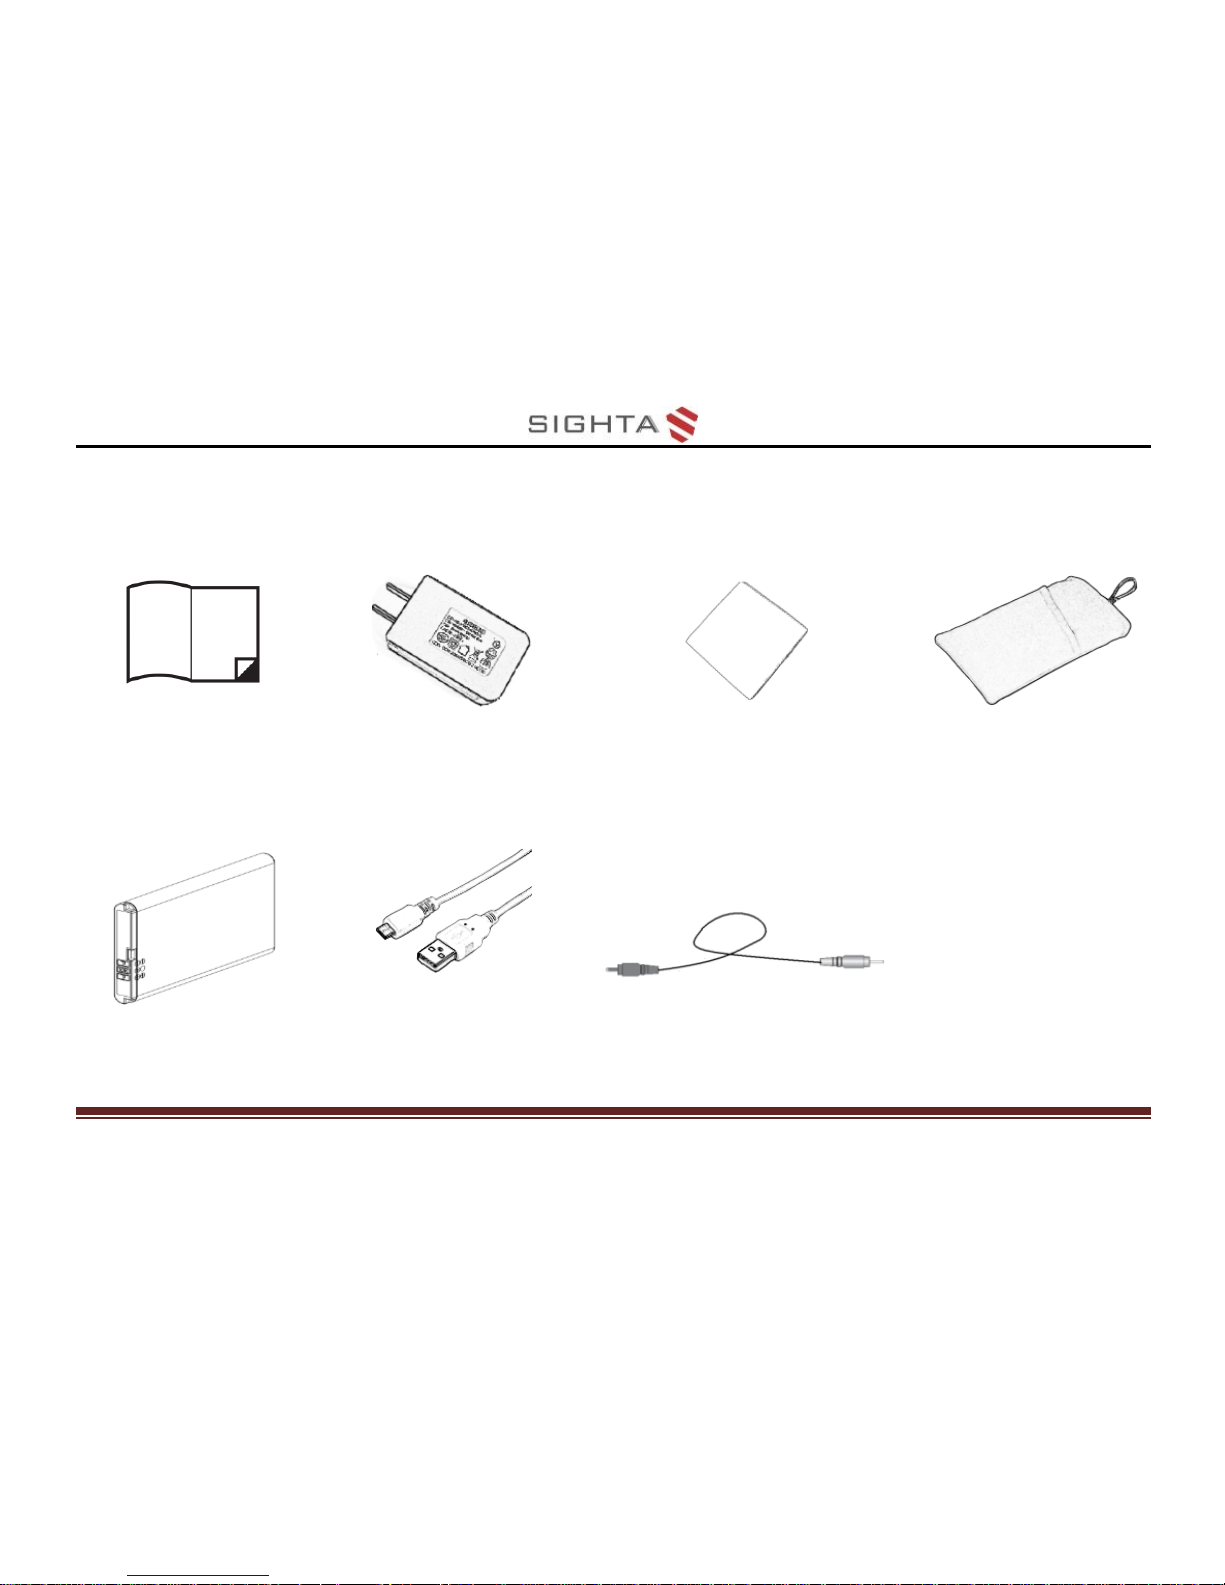
User Manual
Power
Adapter
Cleaning Cloth
Carrying
Case
Battery
USB Cable
TV Cable
Page 13
9
Battery and Charging
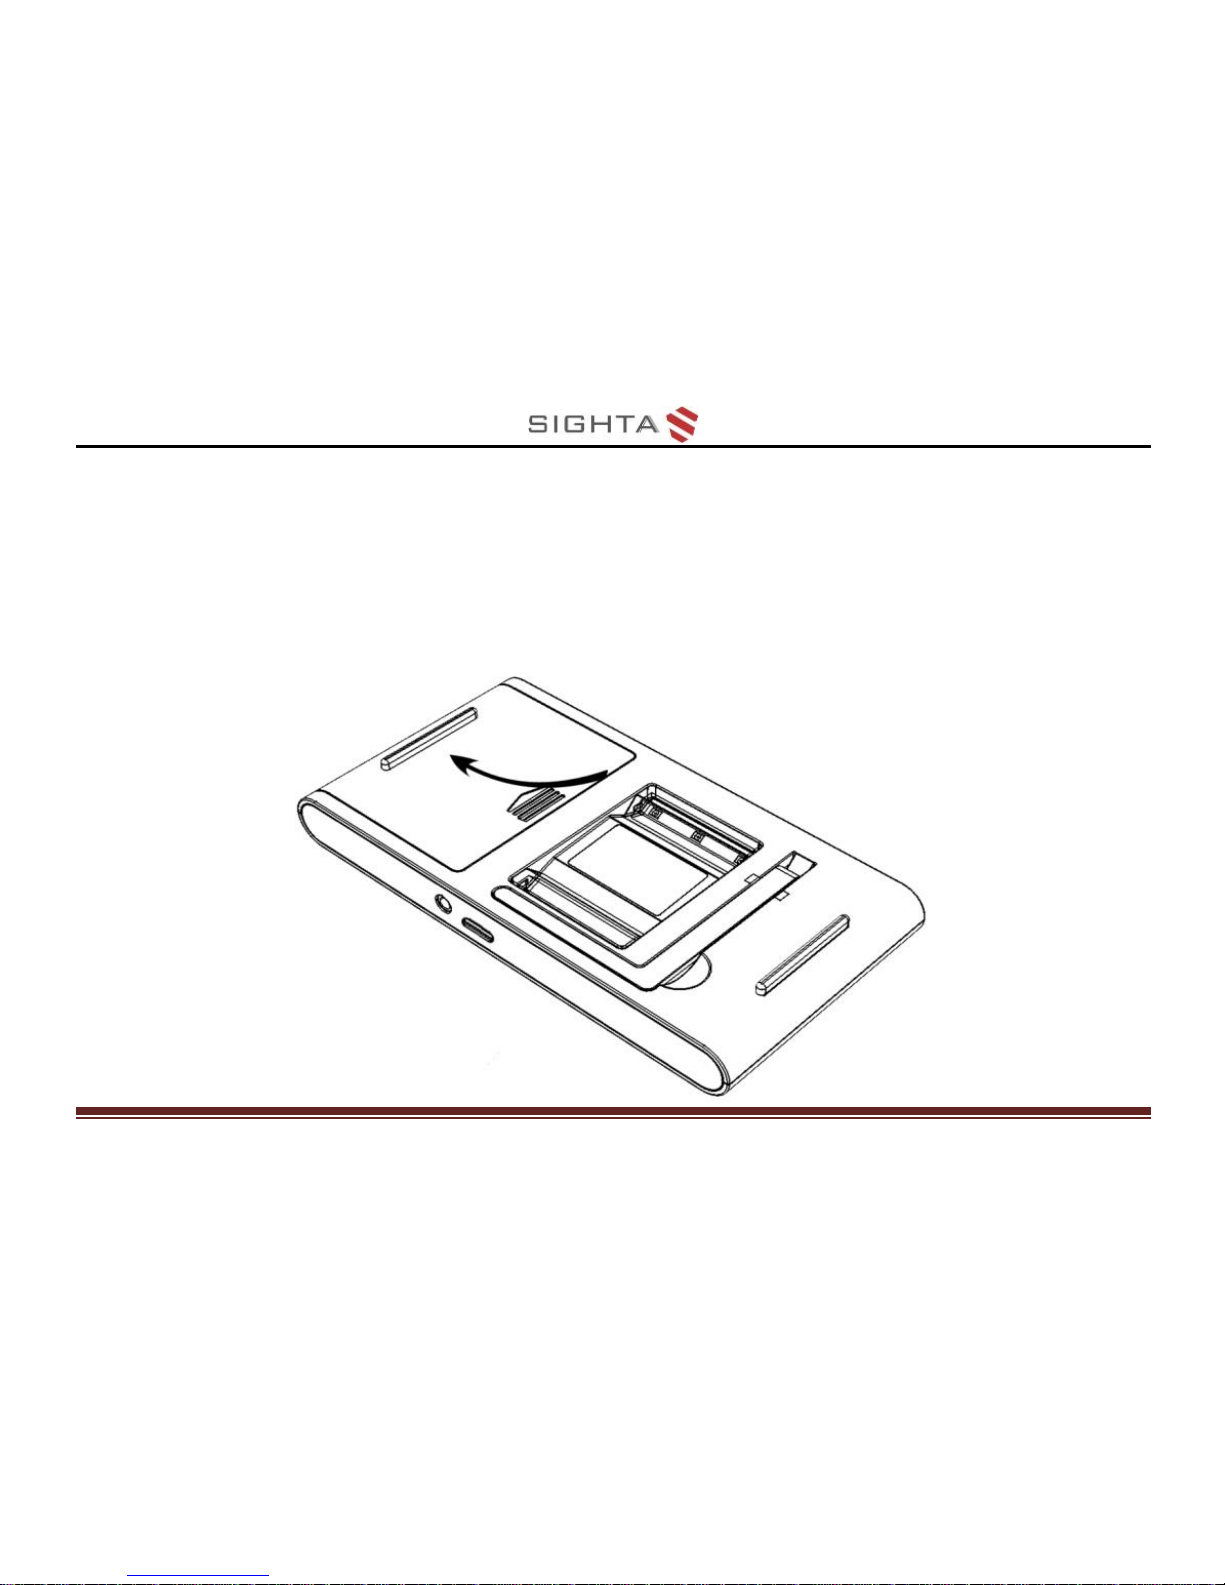
Battery installation
1. Turn the unit to make the back face up
Page 14
10
2. Press the arrow icon on the battery cover and slide
outward to open the battery cover
3. Insert the battery to the right position in battery slot
4. Place and slide back the battery cover
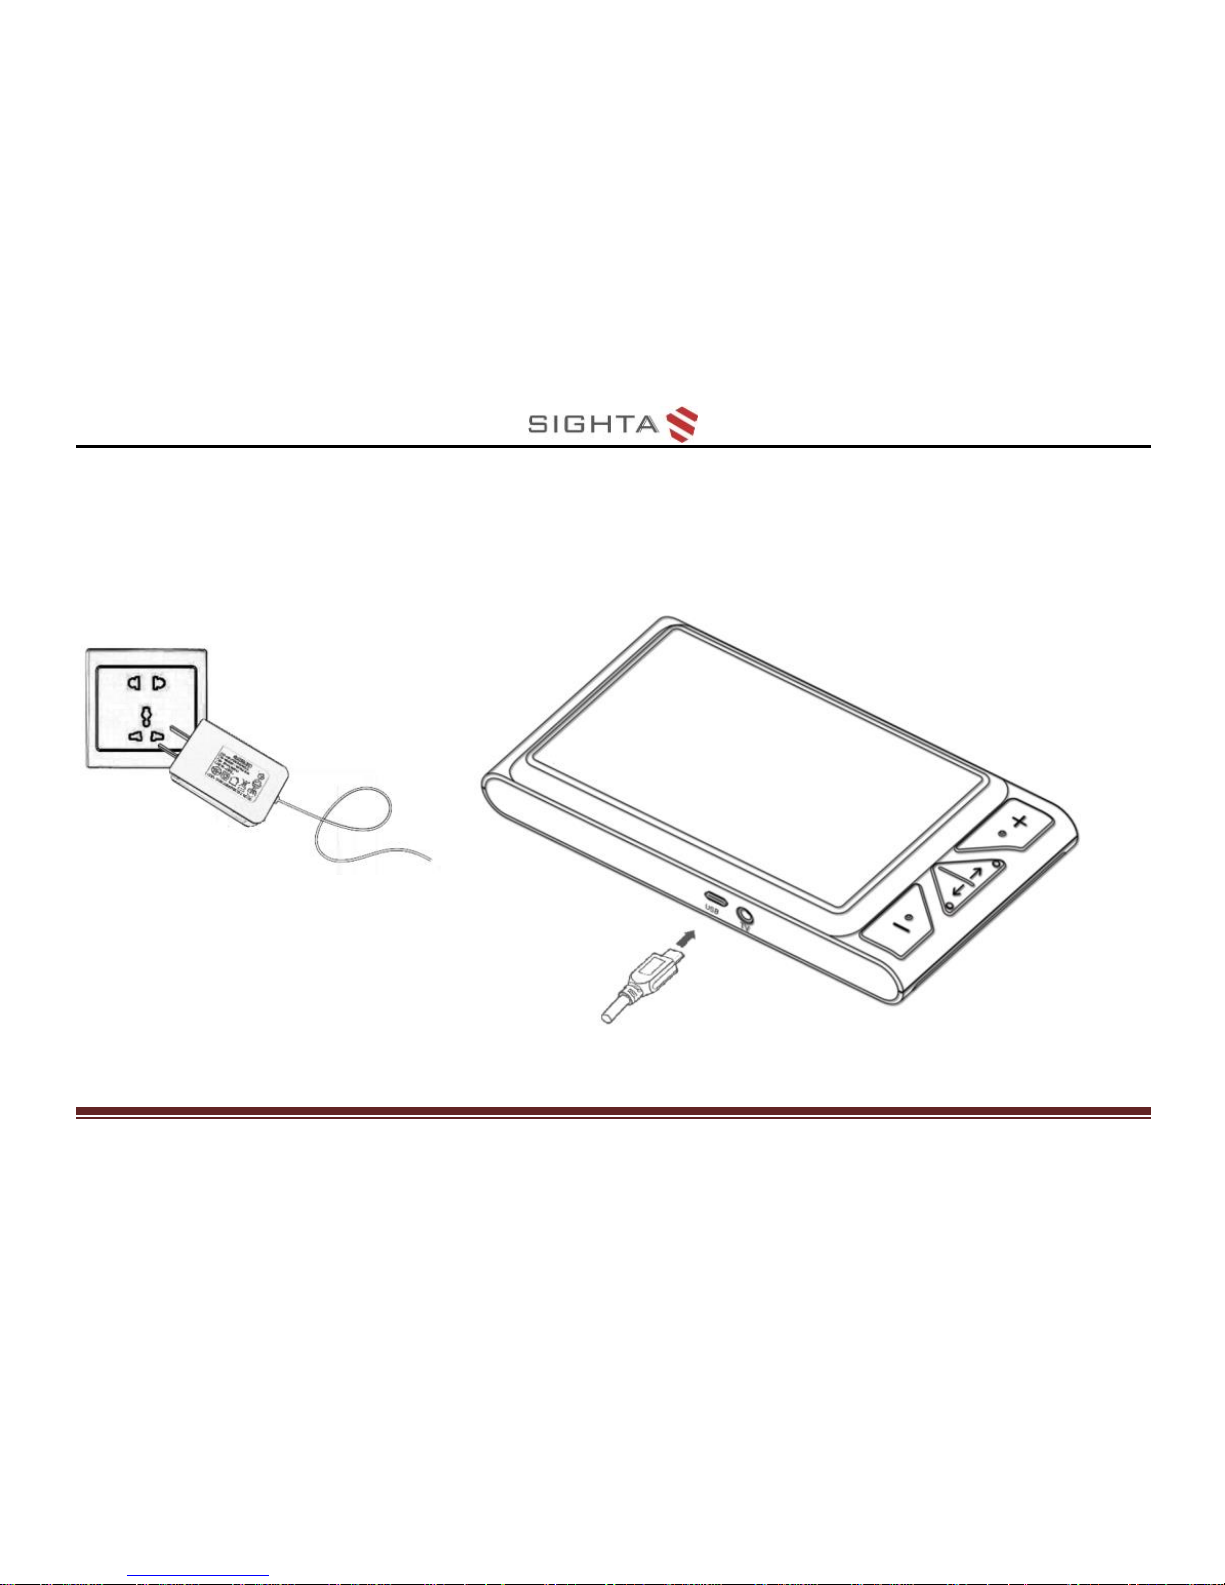
Charging the Battery
1. Connect the supplied USB cable to the power
adapter
2. Connect the supplied USB cable to the USB port
on the unit
Page 15
11
3. Plug the power adapter into an AC outlet and start
charging
Page 16
12
The Status of Power LED Indicator
Charging when the unit is off, the power LED will
be green, and then auto turn off when fully
charged. A full charge will take about 5 hours, and
will support the unit working continuously for
about 3 ~ 3.5 hours
Charging when the unit is on, the power LED will
be green
Page 17
13
When the unit is on and the power adaptor is not
connected, the power LED will be green when the
battery level is high and will be red when the
battery level is low. When the red light starts to
flash, you will need to charge the battery
You can also check the battery status by pressing
the power button. Please refer to the following
instructions for more details
Page 18
14
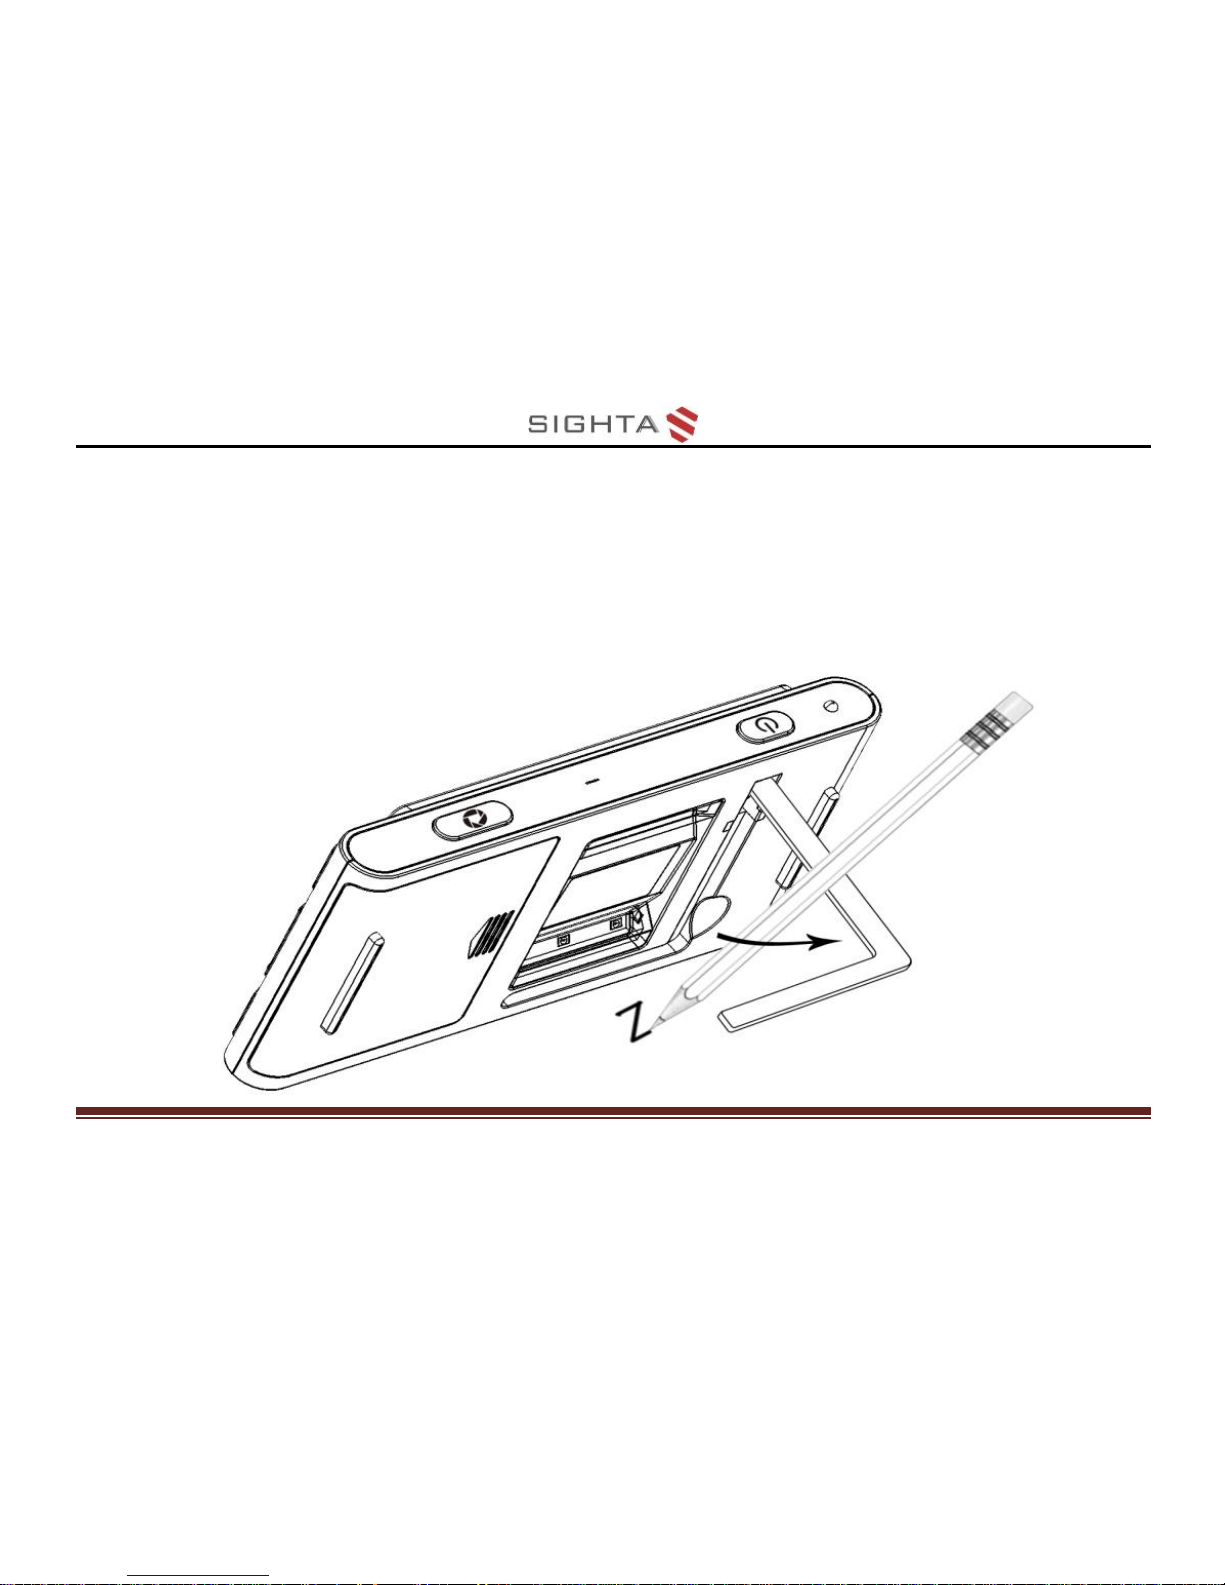
Writing Stand
Open the writing stand as the following figure shows.
And you can write under the camera.
Page 19
15
Operation
Power Button
Press and hold the power button for 3 seconds
to turn on the unit when it is off
Press and hold the power button for 3 seconds
to turn off the unit when it is on
Page 20
16
When the unit is on, press the power button to
check the current status of battery capacity, color
mode, freeze mode and beep
Press other buttons when holding the power
button will make combo functions. Refer to the
following instructions for more details
Beep Type
Unit on/off beep
Page 21
17
Button beep
Threshold beep
Low battery beep
Beep Control:
Press and hold the freeze button for 3
seconds to turn on/off the beep
Page 22
18
Magnification
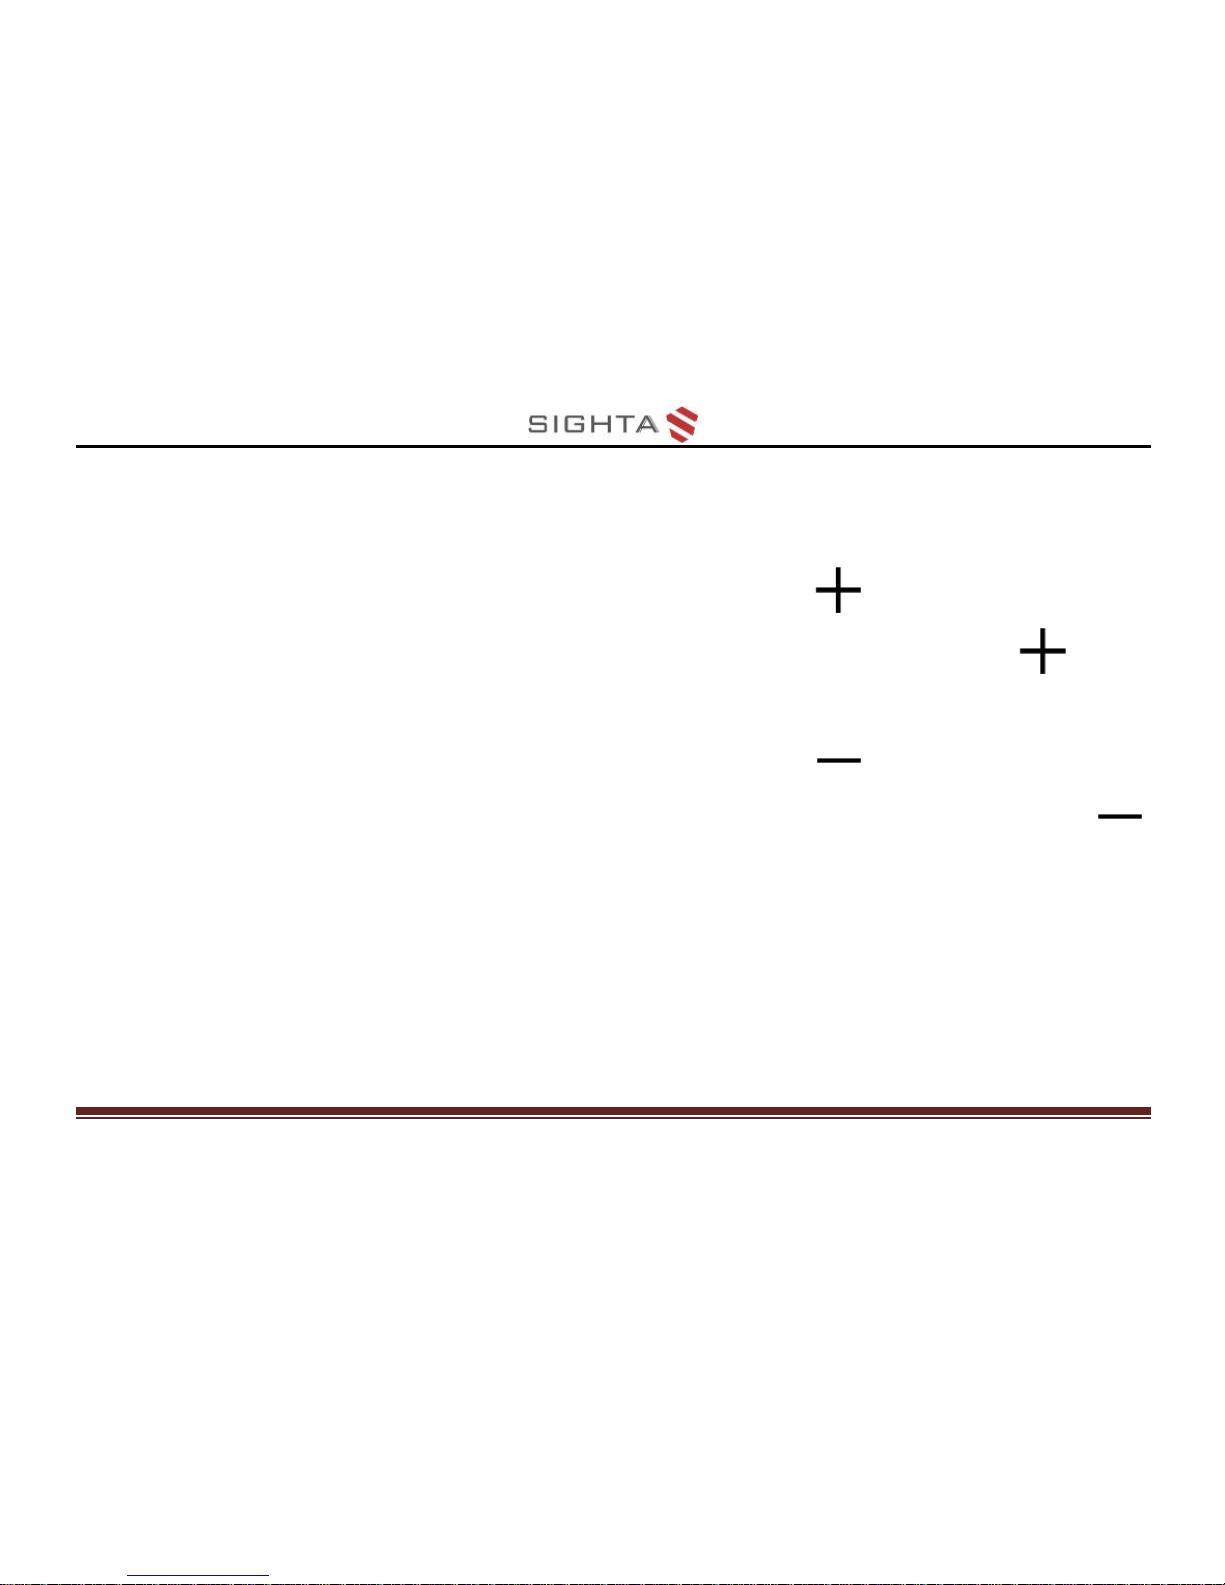
Press the Zoom In button to increase
magnification, and hold the Zoom In button for
continuous increase
Press the Zoom Out button to decrease
magnification, and hold the Zoom Out button
for continuous decrease
Normal magnification mode: 3.5x ~ 16x
Page 23
19
Color Mode
A color mode is a pre-defined color combination.
Full color mode is suitable for pictures and maps.
Enhanced Contrast mode is combined with different
foreground and background colors and can help
users to read more clearly.
Press the Color Mode Down button to cycle in
one direction through the color combination list
Press the Color Mode Up button to cycle in the
other direction through the color combination list
Page 24
20
Press the Color Mode Up button and the Color
Mode Down button at the same time to quickly
switch between Full color mode and current
Enhanced Contrast mode
Holding the Color Mode Up button and the
Color Mode Down button at the same time for
5 seconds to switch between the Simplified Color
Combination List and the Integrated Color
Combination List (factory default)
Page 25
21
The Simplified Color Combination List (6 modes):
Full Color
White on Black
Black on White
Yellow on Black
White on Blue
Yellow on Blue
The Integrated Color Combination List (20 modes)
Full Color
White on Black
Black on White
Yellow on Black
Black on Yellow
White on Blue
Blue on White
Yellow on Blue
Blue on Yellow
Green on Black
Page 26
22
Black on Green
Violet on Black
Black on Violet
Blue on Black
Black on Blue
White on Green
Green on White
White on Red
Red on White
Red on Black
Brightness
Brightness is adjustable both in Full color mode and
Enhanced Contrast mode. Factory default value will
be highlighted green.
Page 27
23
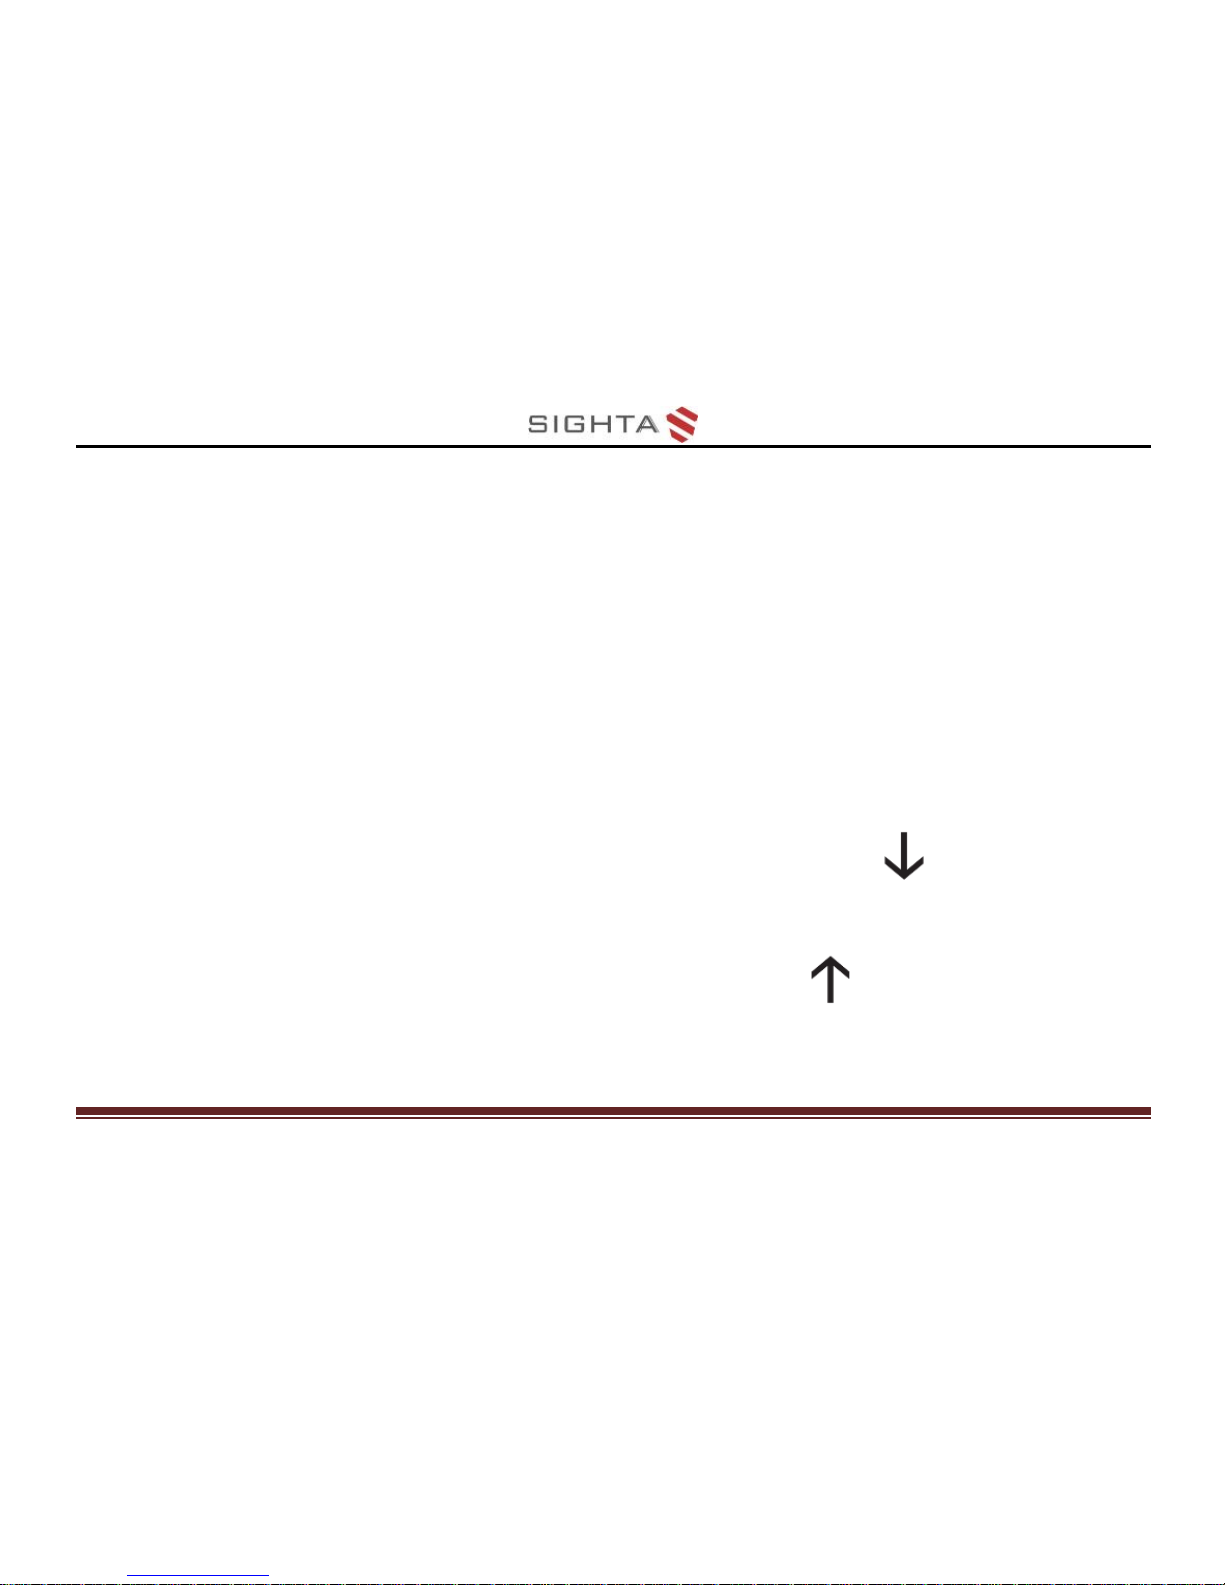
Combo: Power button and Zoom In button ,
increase the brightness
Combo: Power button and Zoom Out button
,decrease the brightness
Two-Color Tuning
By fine adjusting the combination of foreground and
background color in Enhanced Contrast mode, the
tuning will improve the adaptability for viewing
Page 28
24
different materials. Factory default value will be
highlighted green.
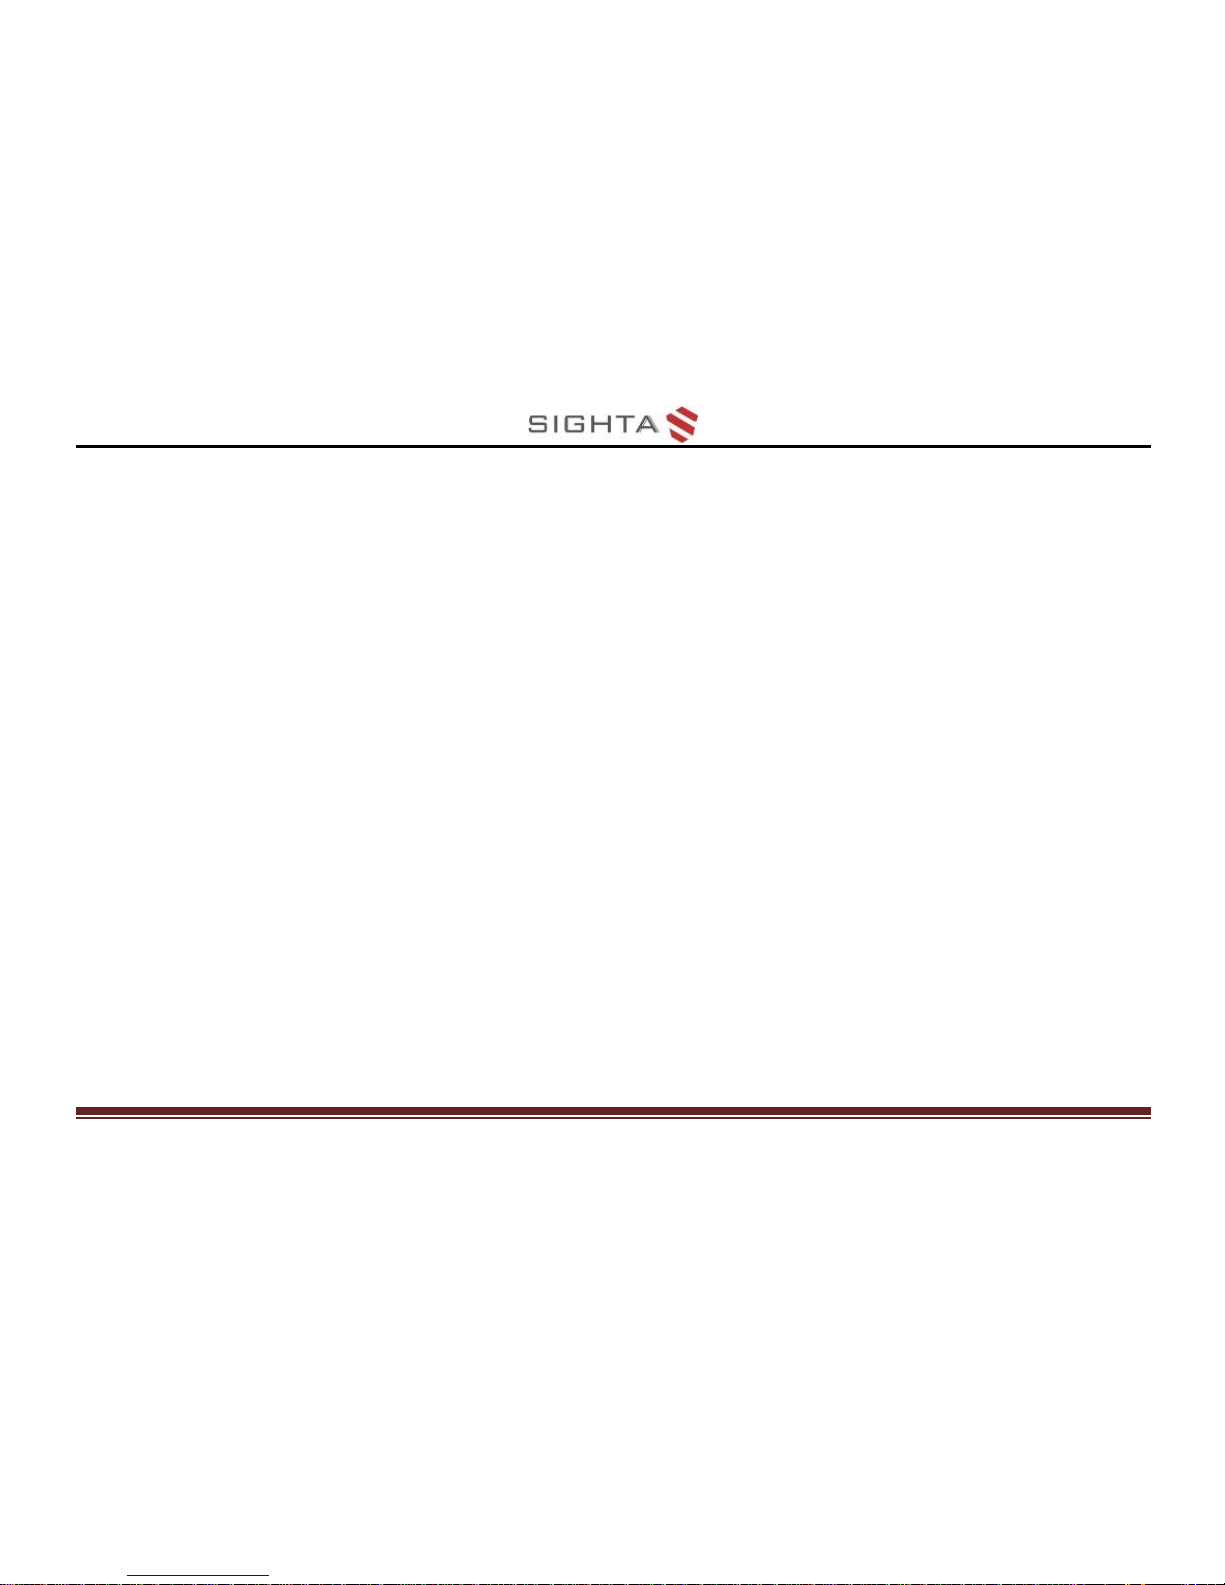
Combo: Power button and Color Mode Up
button ,more background color
Combo: Power button and Color Mode Down
button ,more foreground color
Page 29
25
Lighting
Combo: Power button and Freeze button ,
turn on/off the LED Lighting
Freeze
Freezing an image on the LCD screen can be useful
for further viewing. Magnification and color changing
are also allowed for a better view. However, the
brightness adjusting is not allowed when the image
is frozen.
Press Freeze button to lock the active image
Page 30
26
Press again Freeze button to unlock
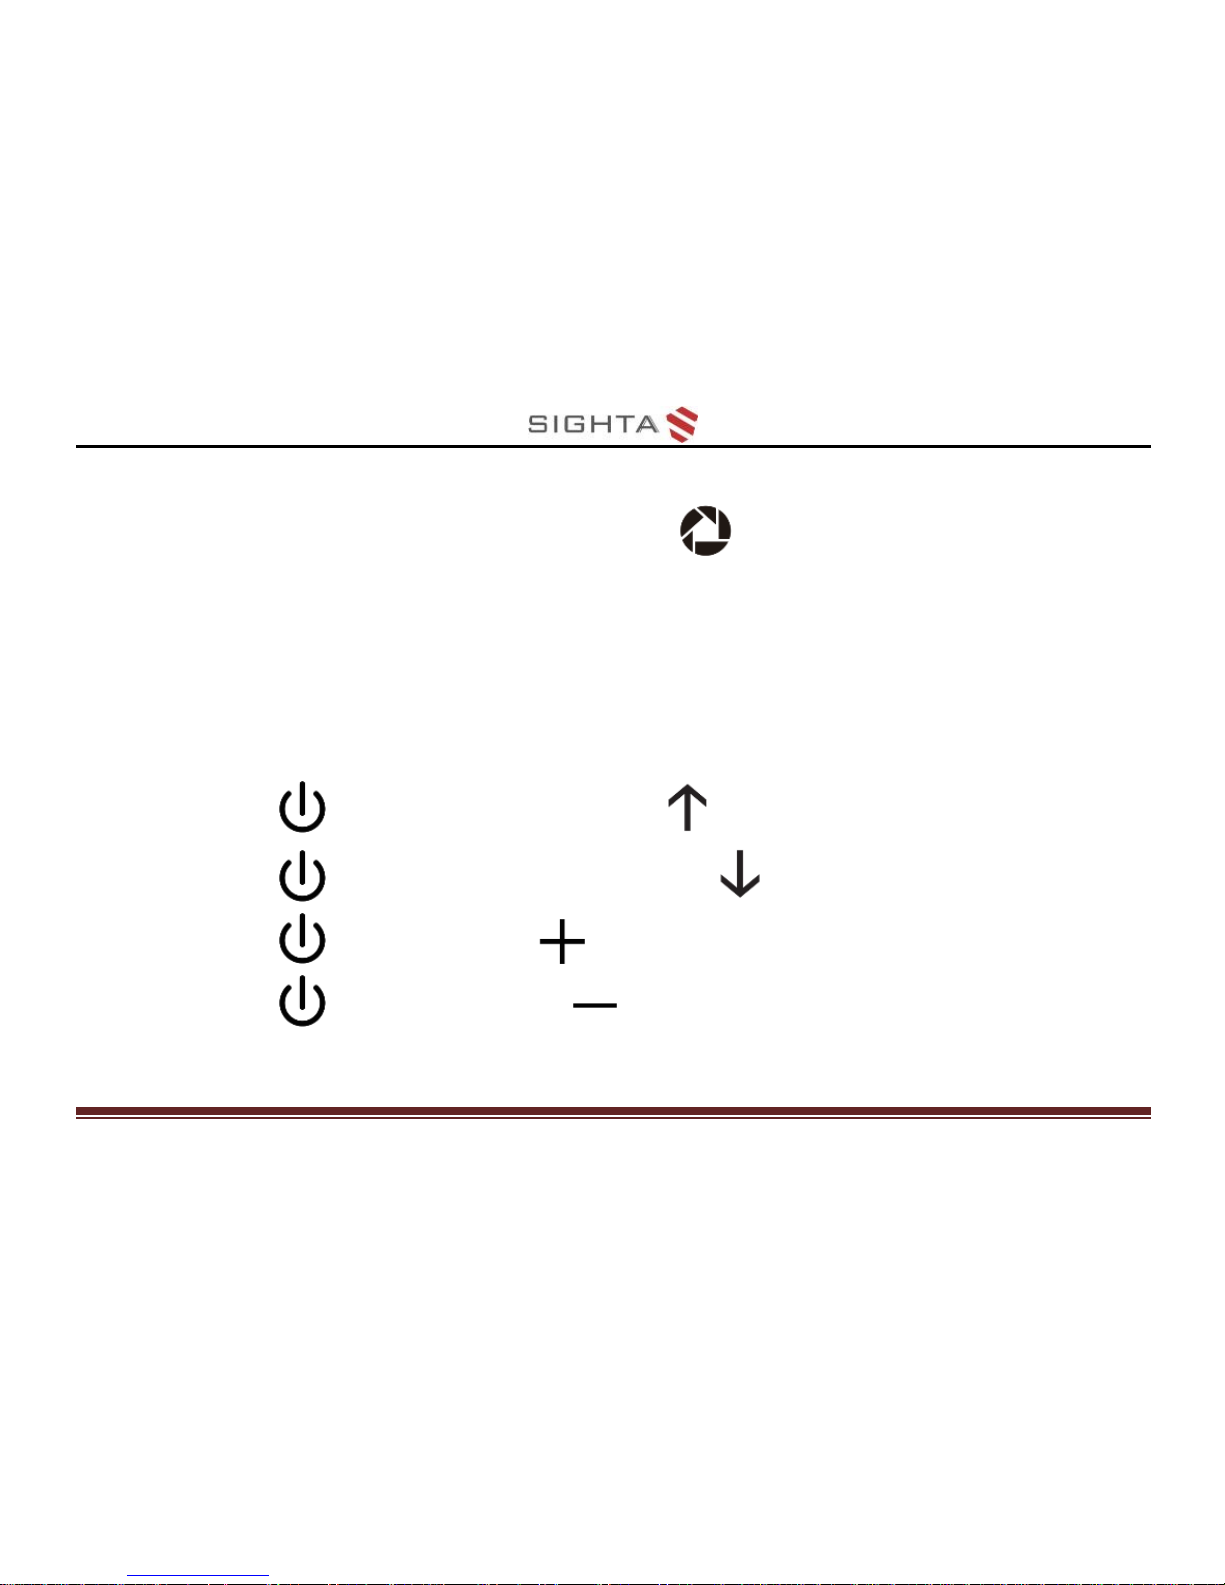
When increase the magnification of the locked
image, you can use the following combo button to
navigate
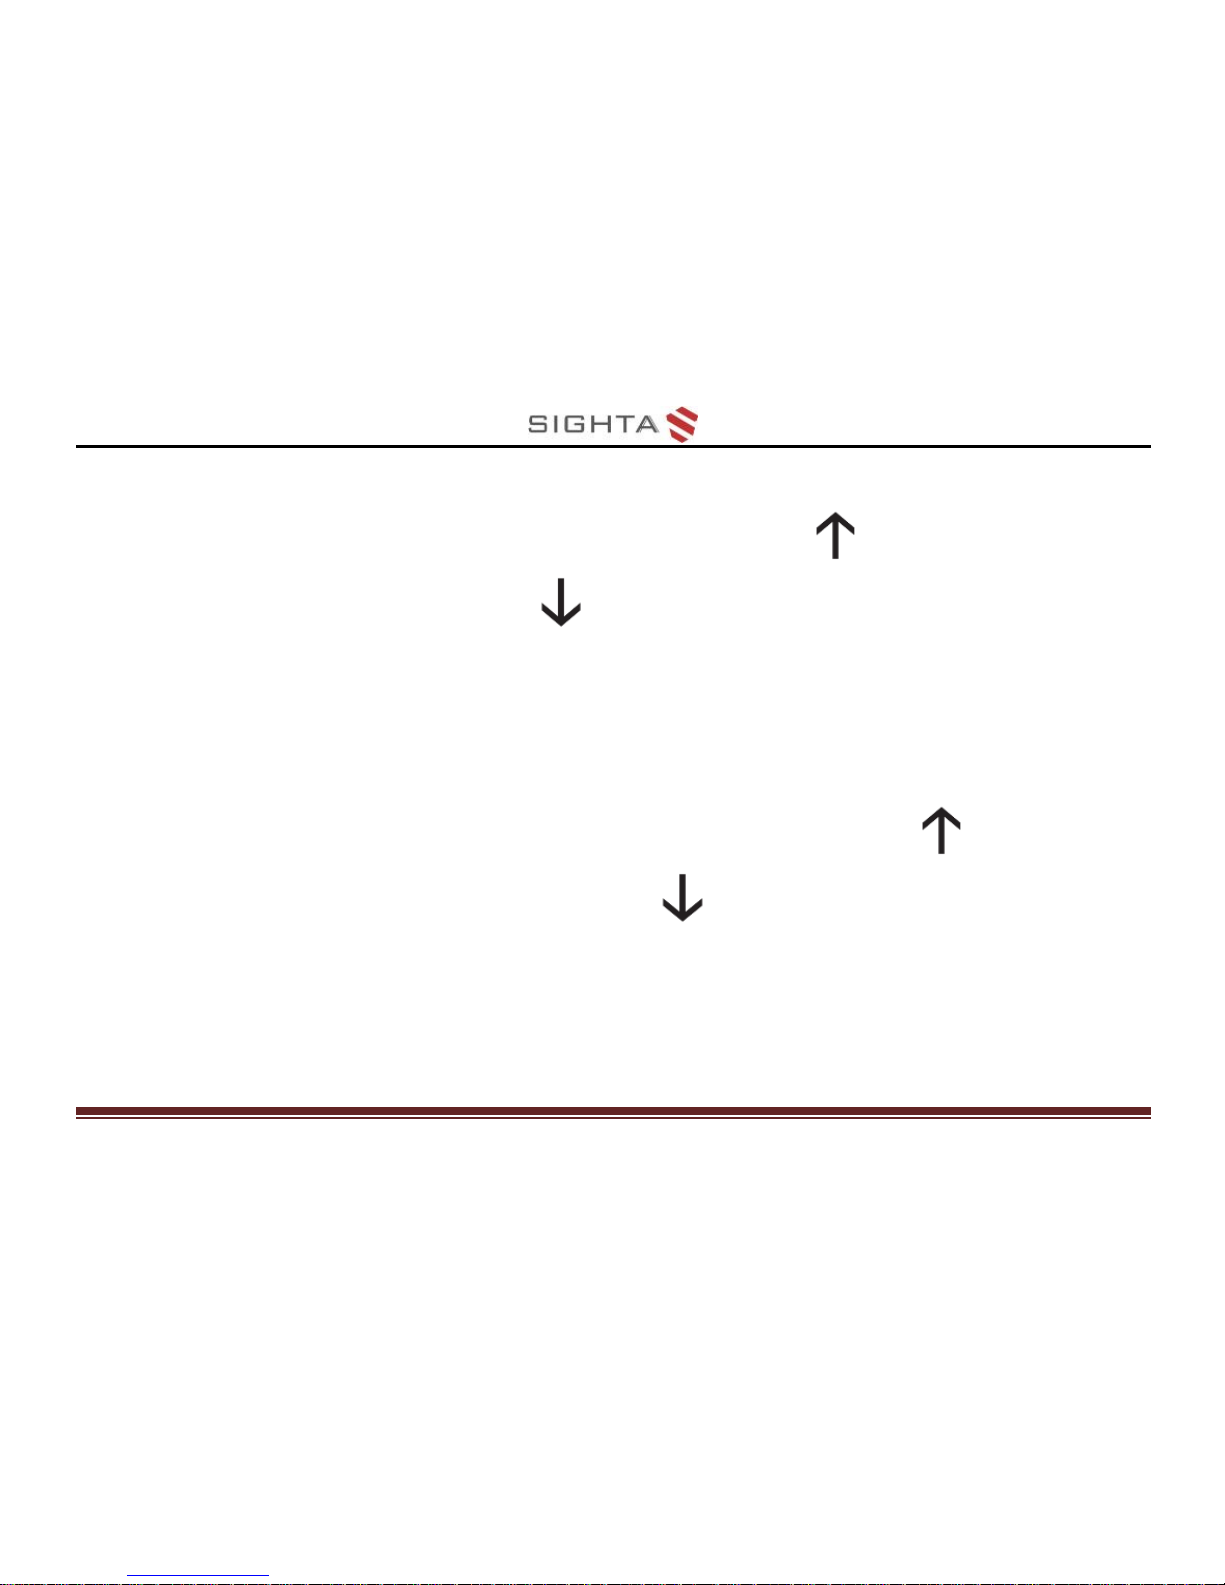
Power & Color Mode Up , navigate upward
Power & Color Mode Down , navigate downward
Power & Zoom In , navigate leftward
Power & Zoom Out , navigate rightward
Page 31
27
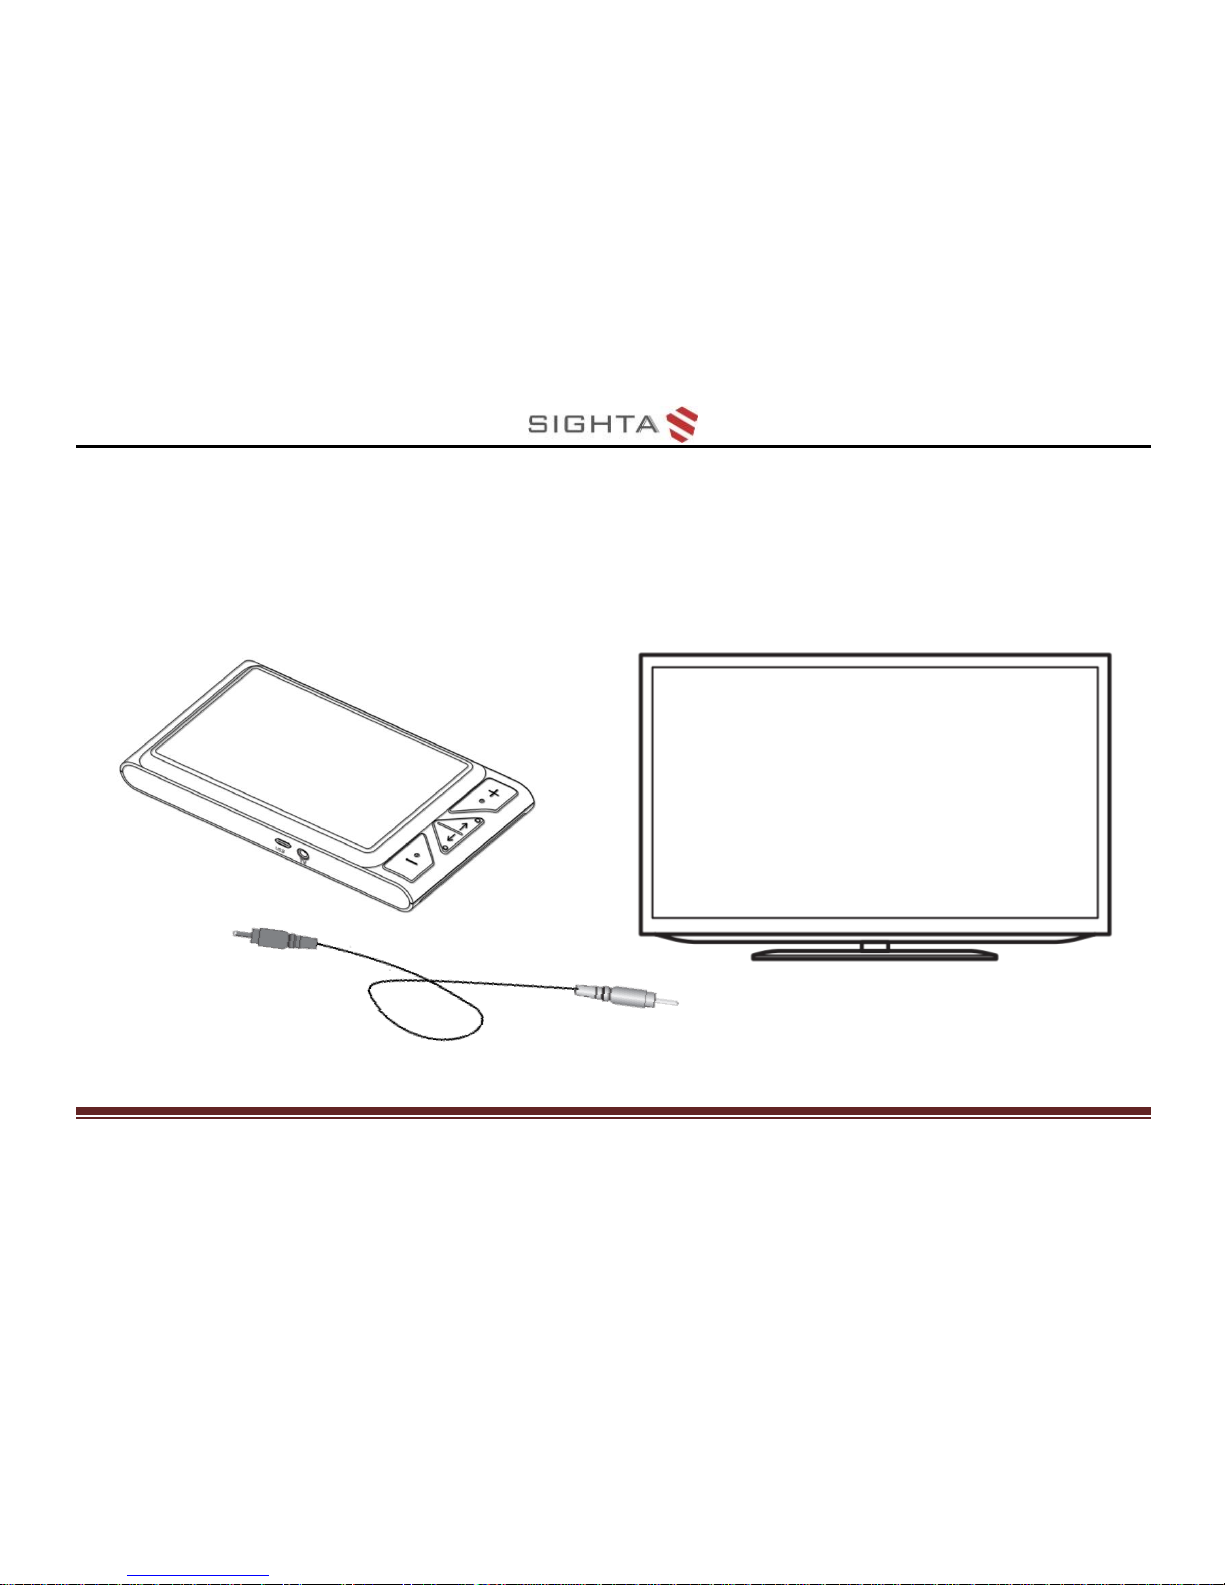
TV Connection
Connect to your TV for better and larger viewing.
Page 32
28
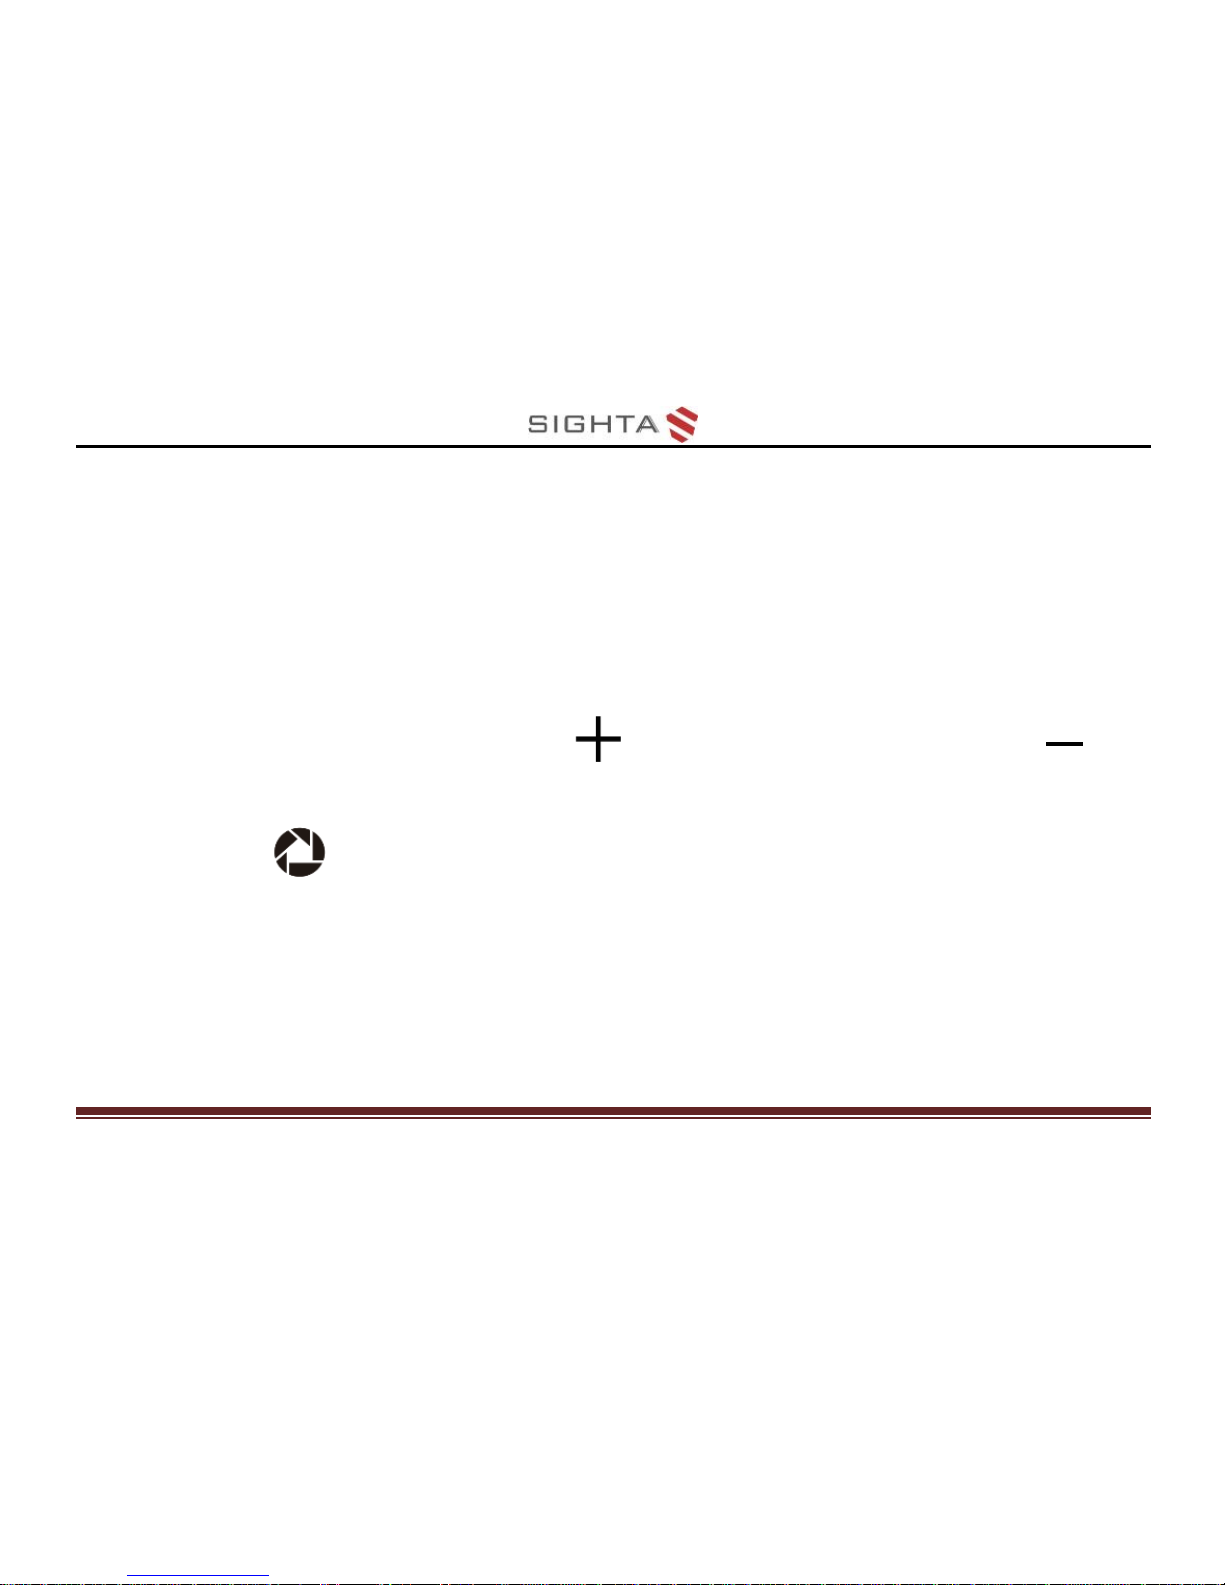
When plugging the TV Cable in the TV port on the
unit, you need to select the appropriate TV output
mode (PAL or NTSC mode).
Press Zoom In button or Zoom Out button to
choose PAL or NTSC modes, then press Freeze
button to confirm your selection and then the
image shall be shown on TV
After unplugging the TV cable, the image will
automatically return to the LCD screen of the unit
Page 33
29
Memory
The unit will memorize automatically the most recent
settings such as color mode, magnification and beep
when power is off normally. And the unit will apply
these settings when power is on next time.
Auto power saving
If no operation and no moving for over 3 minutes, the
unit will turn off automatically.
Page 34
30
Restore
Holding the Freeze button and the Zoom Out
button at the same time for 3 seconds to reset
to the default factory settings. Auto power off
when resetting is done.
Page 35
31
Troubleshooting
The unit does not turn on
Connect to the power adapter
Charge the battery
Reinstall the battery
Black screen or White screen
If the unit is sitting on a flat pure surface, the
screen may be black or white. Lift the unit to
ensure the change happens
Page 36
32
Adjust the magnification
Adjust the color mode
When the unit is connected to TV, the screen is
black
Restart the unit
Reinstall the battery
The image does not change
If the unit enter into the freeze mode, the image
will not change
Page 37
33
Press power button to check the current status
Restart the unit
Reinstall the battery
Smudges or blemishes on the screen
Adjust brightness
Clean the LCD screen and camera
Please contact your local distributor if the problem is
not solved.
Page 38
34
Specifications
Display:4.3 inch widescreen LCD
Size:<=152*80*22mm
Weight:<180 grams (Battery included)
Color Mode:Simplified 6 modes; Integrated 20 modes
Magnification:Approximately 3.5x ~ 16x
Battery:Rechargeable & detachable Li battery
Nearly 3~3.5 hours continuous use
Charges in approximately 5 hours
Power Adapter:USB port; input 110-240V; output 5V/1A
 Loading...