

Page 1
AirCard® 555 Wireless Network Card
User Guide
2130142
Rev 1.0 Beta
Page 2

Page 3

Preface
Important Notice Because of the nature of wireless communications, trans-
mission and reception of data can never be guaranteed. Data
may be delayed, corrupted (i.e., have errors) or be totally lost.
Although significant delays or losses of data are rare when
wireless devices such as the Sierra Wireless modem are used in
a normal manner with a well-constructed network, the Sierra
Wireless modem should not be used in situations where
failure to transmit or receive data could result in damage of
any kind to the user or any other party, including but not
limited to personal injury, death, or loss of property. Sierra
Wireless, Inc. accepts no responsibility for damages of any
kind resulting from delays or errors in data transmitted or
received using the Sierra Wireless modem, or for failure of the
Sierra Wireless modem to transmit or receive such data.
Safety and Hazards Do not operate the Sierra Wireless AirCard 555 wireless
network card in areas where blasting is in progress, where
explosive atmospheres may be present, near medical
equipment, life support equipment, or any equipment which
may be susceptible to any form of radio interference. In such
areas, the Sierra Wireless modem MUST BE POWERED OFF.
The Sierra Wireless modem can transmit signals that could
interfere with this equipment.
Limitation of
Liability
Do not operate the Sierra Wireless modem in any aircraft,
whether the aircraft is on the ground or in flight. In aircraft,
the Sierra Wireless modem MUST BE POWERED OFF. When
operating, the Sierra Wireless modem can transmit signals that
could interfere with various onboard systems.
Note: Some airlines may permit the use of cellular phones while the
aircraft is on the ground and the door is open. Sierra Wireless
modems may be used at this time.
The driver or operator of any vehicle should not operate the
Sierra Wireless modem while in control of a vehicle. Doing so
will detract from the driver or operator's control and operation
of that vehicle. In some states and provinces, operating such
communications devices while in control of a vehicle is an
offence.
The information in this manual is subject to change without
notice and does not represent a commitment on the part of
Sierra Wireless, Inc. SIERRA WIRELESS, INC. SPECIFICALLY
DISCLAIMS LIABILITY FOR ANY AND ALL DIRECT,
INDIRECT, SPECIAL, GENERAL, INCIDENTAL, CONSEQUENTIAL, PUNITIVE OR EXEMPLARY DAMAGES
Rev. 1.0 Sep.01 3
Page 4
AirCard 555 Network Card User Guide
Patents Portions of this product are covered by some or all of the
INCLUDING, BUT NOT LIMITED TO, LOSS OF PROFITS OR
REVENUE OR ANTICIPATED PROFITS OR REVENUE
ARISING OUT OF THE USE OR INABILITY TO USE ANY
SIERRA WIRELESS, INC. PRODUCT, EVEN IF SIERRA
WIRELESS, INC. HAS BEEN ADVISED OF THE POSSIBILITY OF SUCH DAMAGES OR THEY ARE FORESEEABLE
OR FOR CLAIMS BY ANY THIRD PARTY.
following US patents: 5515013, 5617106, 5629960, 5682602,
5748449, 5845216, 5847553, 5878234, 5890057, 5929815, 6169884,
6191741, 6199168, D367062, D372248, D372701, D416857,
D442170 and other patents pending.
Licensed by QUALCOMM Incorporated under one or more of
the following United States Patents and/or their counterparts
in other nations:
4901307 5490165 5056109 5504773
5101501 5506865 5109390 5511073
5228054 5535239 5267261 5544196
5267262 5568483 5337338 5600754
5414796 5657420 5416797 5659569
5710784 5778338
Copyright ©2001 Sierra Wireless, Inc. All rights reserved.
Trademarks Sierra Wireless and the Red Swoosh design are trademarks of
Sierra Wireless, Inc. Heart of the Wireless Machine
AirCard
Other trademarks are the property of the respective owners.
All product specifications are subject to change without notice.
Other trademarks are the property of the respective owners.
®
are registered trademarks of Sierra Wireless, Inc.
®
and
Contact
Information
Sales Desk: phone: 1-604-232-1488
hours: 8:00am to 5:00pm Pacific Time
e-mail: sales@sierrawireless.com
Technical Support: phone: 1-604-231-1128
hours: 6:00am to 5:00pm Pacific Time
e-mail: support@sierrawireless.com
4 2130142
Page 5

Preface
address: Sierra Wireless, Inc.
13811 Wireless Way
Richmond, BC
Canada V6V 3A4
fax: 1-604-231-1109
web: www.sierrawireless.com
Your comments and suggestions on improving this documentation are welcome and appreciated. Please e-mail your
feedback to
documentation@sierrawireless.com. Thank you.
Consult our web site for up-to-date product descriptions,
documentation, application notes, firmware upgrades, troubleshooting tips, and press releases:
www.sierrawireless.com
Rev. 1.0 Sep.01 5
Page 6

AirCard 555 Network Card User Guide
6 2130142
Page 7

Table of Contents
Introducing the AirCard® 555 Network Card . . . . . . . . . . . . . . . . . . . . . . . . . . . . . . 1
A Network Card, a Modem, and a Phone . . . . . . . . . . . . . . . . . . . . . . . . . . . 2
Package Contents . . . . . . . . . . . . . . . . . . . . . . . . . . . . . . . . . . . . . . . . . . . . . . 2
About This Guide . . . . . . . . . . . . . . . . . . . . . . . . . . . . . . . . . . . . . . . . . . . . . . . 2
Getting Started . . . . . . . . . . . . . . . . . . . . . . . . . . . . . . . . . . . . . . . . . . . . . . . . . . . . . . . 3
The AirCard 555 Software . . . . . . . . . . . . . . . . . . . . . . . . . . . . . . . . . . . . . . . . . . . 3
Account Activation and Configuration . . . . . . . . . . . . . . . . . . . . . . . . . . . . . . . . 3
Care and Maintenance of Your AirCard 555 Wireless Network Card . . . . . . . 5
Installation on Notebook PCs . . . . . . . . . . . . . . . . . . . . . . . . . . . . . . . . . . . . . . . . . . 7
System Requirements . . . . . . . . . . . . . . . . . . . . . . . . . . . . . . . . . . . . . . . . . . . . . . 7
Software Installation Procedures . . . . . . . . . . . . . . . . . . . . . . . . . . . . . . . . . . . . . 8
Driver Installation . . . . . . . . . . . . . . . . . . . . . . . . . . . . . . . . . . . . . . . . . . . . . . . . . . 9
Windows 98, 2000, and Me: . . . . . . . . . . . . . . . . . . . . . . . . . . . . . . . . . . . . . . . 9
Windows 95 Driver Installation . . . . . . . . . . . . . . . . . . . . . . . . . . . . . . . . . . 11
Windows NT Driver Installation . . . . . . . . . . . . . . . . . . . . . . . . . . . . . . . . . . 12
Card Insertion & Removal . . . . . . . . . . . . . . . . . . . . . . . . . . . . . . . . . . . . . . . . . . 17
Inserting the AirCard . . . . . . . . . . . . . . . . . . . . . . . . . . . . . . . . . . . . . . . . . . . 17
Removing the AirCard . . . . . . . . . . . . . . . . . . . . . . . . . . . . . . . . . . . . . . . . . . 17
Account Configuration Procedures . . . . . . . . . . . . . . . . . . . . . . . . . . . . . . . . . . 17
The Watcher Window & Indicators . . . . . . . . . . . . . . . . . . . . . . . . . . . . . . . . . . . . . 19
Components of the Watcher Window . . . . . . . . . . . . . . . . . . . . . . . . . . . . . . . . 20
The Menu Bar . . . . . . . . . . . . . . . . . . . . . . . . . . . . . . . . . . . . . . . . . . . . . . . . . . . . 20
The Minimize, Toggle Full/Compact and Close Boxes . . . . . . . . . . . . . . . . . . 20
Connection Status Area . . . . . . . . . . . . . . . . . . . . . . . . . . . . . . . . . . . . . . . . . . . . 21
Call Status Box . . . . . . . . . . . . . . . . . . . . . . . . . . . . . . . . . . . . . . . . . . . . . . . . . . . 23
Indicator Area . . . . . . . . . . . . . . . . . . . . . . . . . . . . . . . . . . . . . . . . . . . . . . . . . . . . 23
Rev 1.0 Sep.01 7
Page 8

AirCard 555 Wireless Network Card User Guide
Taskbar Icons . . . . . . . . . . . . . . . . . . . . . . . . . . . . . . . . . . . . . . . . . . . . . . . . . . . . 24
Data Connections . . . . . . . . . . . . . . . . . . . . . . . . . . . . . . . . . . . . . . . . . . . . . . . . . . . 27
Dial-Up Connections . . . . . . . . . . . . . . . . . . . . . . . . . . . . . . . . . . . . . . . . . . . . . . 28
Incoming Data Calls . . . . . . . . . . . . . . . . . . . . . . . . . . . . . . . . . . . . . . . . . . . 28
QNC Connections . . . . . . . . . . . . . . . . . . . . . . . . . . . . . . . . . . . . . . . . . . . . . . . . . 29
1xRTT High Speed Connections. . . . . . . . . . . . . . . . . . . . . . . . . . . . . . . . . . . . . 29
Voice Connections . . . . . . . . . . . . . . . . . . . . . . . . . . . . . . . . . . . . . . . . . . . . . . . . . . . 31
The Dial Pad . . . . . . . . . . . . . . . . . . . . . . . . . . . . . . . . . . . . . . . . . . . . . . . . . . . . . 32
The Scratch Pad . . . . . . . . . . . . . . . . . . . . . . . . . . . . . . . . . . . . . . . . . . . . . . . . . . 33
Outgoing Calls. . . . . . . . . . . . . . . . . . . . . . . . . . . . . . . . . . . . . . . . . . . . . . . . . . . . 34
Incoming Calls. . . . . . . . . . . . . . . . . . . . . . . . . . . . . . . . . . . . . . . . . . . . . . . . . . . . 34
The Watcher Menu Options . . . . . . . . . . . . . . . . . . . . . . . . . . . . . . . . . . . . . . . . . . . 35
The View Menu . . . . . . . . . . . . . . . . . . . . . . . . . . . . . . . . . . . . . . . . . . . . . . . . . . . 35
Always On Top . . . . . . . . . . . . . . . . . . . . . . . . . . . . . . . . . . . . . . . . . . . . . . . . 35
Docking . . . . . . . . . . . . . . . . . . . . . . . . . . . . . . . . . . . . . . . . . . . . . . . . . . . . . . 35
Toggle Full/Compact . . . . . . . . . . . . . . . . . . . . . . . . . . . . . . . . . . . . . . . . . . . 36
The Tools Menu. . . . . . . . . . . . . . . . . . . . . . . . . . . . . . . . . . . . . . . . . . . . . . . . . . . 37
Mobile Messenger… . . . . . . . . . . . . . . . . . . . . . . . . . . . . . . . . . . . . . . . . . . . 38
Phone Book . . . . . . . . . . . . . . . . . . . . . . . . . . . . . . . . . . . . . . . . . . . . . . . . . . . 43
Call Log . . . . . . . . . . . . . . . . . . . . . . . . . . . . . . . . . . . . . . . . . . . . . . . . . . . . . . 43
Dial-Up Manager . . . . . . . . . . . . . . . . . . . . . . . . . . . . . . . . . . . . . . . . . . . . . . 45
KeyGuard . . . . . . . . . . . . . . . . . . . . . . . . . . . . . . . . . . . . . . . . . . . . . . . . . . . . . 47
Options… . . . . . . . . . . . . . . . . . . . . . . . . . . . . . . . . . . . . . . . . . . . . . . . . . . . . 47
Administration > Activation Wizard… . . . . . . . . . . . . . . . . . . . . . . . . . . . . 64
Administration > Modem Update… . . . . . . . . . . . . . . . . . . . . . . . . . . . . . . 64
The Help Menu . . . . . . . . . . . . . . . . . . . . . . . . . . . . . . . . . . . . . . . . . . . . . . . . . . . 64
Help Topics… . . . . . . . . . . . . . . . . . . . . . . . . . . . . . . . . . . . . . . . . . . . . . . . . . 65
About Watcher… . . . . . . . . . . . . . . . . . . . . . . . . . . . . . . . . . . . . . . . . . . . . . . 66
8 2130142
Page 9

Table of Contents
The Network Adapter Manager . . . . . . . . . . . . . . . . . . . . . . . . . . . . . . . . . . . . . . . . 69
Windows 95, 98, NT & Me. . . . . . . . . . . . . . . . . . . . . . . . . . . . . . . . . . . . . . . . . . . 70
Switching Primary Cards . . . . . . . . . . . . . . . . . . . . . . . . . . . . . . . . . . . . . . . 70
Windows 2000 . . . . . . . . . . . . . . . . . . . . . . . . . . . . . . . . . . . . . . . . . . . . . . . . . . . . 71
On-Line Help and Version Information . . . . . . . . . . . . . . . . . . . . . . . . . . . . . . . 72
Closing the Network Adapter Manager . . . . . . . . . . . . . . . . . . . . . . . . . . . . . . . 72
Technical Specifications . . . . . . . . . . . . . . . . . . . . . . . . . . . . . . . . . . . . . . . . . . . . . . 73
LED Operation . . . . . . . . . . . . . . . . . . . . . . . . . . . . . . . . . . . . . . . . . . . . . . . . . . . . 73
Radio Frequency & Electrical Specifications . . . . . . . . . . . . . . . . . . . . . . . . . . 74
Environmental Specifications . . . . . . . . . . . . . . . . . . . . . . . . . . . . . . . . . . . . . . . 74
Regulatory Information . . . . . . . . . . . . . . . . . . . . . . . . . . . . . . . . . . . . . . . . . . . . . . . 75
Rev 1.0 Sep.01 9
Page 10

AirCard 555 Wireless Network Card User Guide
10 2130142
Page 11

1: Introducing the AirCard 555
Network Card
• A Network Card, a
Modem, and a Phone
• Package Contents
• About this Guide
The AirCard 555 wireless network card fits into a standard
Type II PC card slot (available on most notebook PCs) and
functions as a wireless network card, a modem, and a mobile
phone. This card allows you to connect to the Internet, send
and receive e-mail, connect to a corporate network, and make
phone calls, without the need of a network cable or phone line.
Basics
AirCard 555
Note: Do not insert the
AirCard 555 wireless network
card into a PC card slot before
installing the software.
The AirCard 555 functions in notebook PCs with these
Windows® operating systems: 95, 98, NT, 2000, and Me.
The AirCard 555 operates over a type of wireless network
called CDMA (Code Division Multiple Access). This network
technology has many features beyond providing a wireless
link, including:
• SMS (Short Messaging Service), which allows others to
send messages to your AirCard
• QNC (Quick Net Connect), which provides a direct
Internet connection
Use of the AirCard 555 requires that you have an account that
gives you access to a CDMA network.
Every CDMA network operates on one of three radio
frequency bands. As a dual band product, the AirCard 555
operates on two of these bands, providing a wide coverage
area.
The AirCard operates on the original CDMA network (IS 95A)
that provides data transmission speeds of up to 14.4 kbps
(kilobits per second). The Venturi compression software
included on your CD can increase this speed to a maximum of
56 kbps. The AirCard also runs on the newer 1xRTT network
technology that provides data transmission speeds up to 144
kbps. The AirCard 555 provides all the advantages of 1xRTT
where it is available while allowing you to use the older
CDMA IS 95A standard where 1xRTT has not yet been implemented. The benefits to you are that you can use the AirCard
in any area that has coverage (assuming there are no account
restrictions) and you will be able to take advantage of the
fastest possible data transmission speed.
Rev 1.0 Sep.01 1
Page 12

AirCard 555 Network Card User Guide
Note: More information about
CDMA networks is available on
the CDMA Development Group
web site, www.cdg.org.
A Network Card, a Modem, and a Phone
Where 1xRTT is available, the AirCard 555 is a true network
card that works just like the network cards familiar to most
corporate computer users. Once installed and configured, the
AirCard connects instantly to the CDMA network with a few
mouse clicks. You can just insert the AirCard 555, click a few
buttons, launch your Internet browser, and you’re ready to
web surf.
As a modem, the AirCard 555 allows you to dial up any other
modem or receive faxes. You can also connect a headset to the
AirCard 555 and use it as a phone.
Package Contents
Your AirCard 555 package contains the following components:
• AirCard 555 wireless network card
• Antenna
• CD containing the AirCard software, this user guide, and
the Venturi software user guide
• Quick reference card
If you want to use the AirCard as a phone, a headset is
necessary. Any standard headset with a 2.5 mm jack should
work.
About This Guide
This user guide is designed to provide you with all the information you need to install and use your network card.
• Section 1 (which you are reading) gives you an overview
of the AirCard 555, providing the background information that is the basis for understanding the following
sections.
• Section 2 provides step-by-step instructions on installing,
configuring, and using the AirCard 555 on notebook PCs.
• Section 3 provides electrical, radio frequency, and other
parameters of the AirCard 555 for those who require
technical information.
• Section 4 provides regulatory information.
There is a separate user guide on the AirCard CD for the
Venturi compression software.
2 2130142
Page 13

2: Getting Started
• The AirCard 555
Software
• Account Activation and
Configuration
• Care and Maintenance
Before you can begin using the AirCard 555 wireless network
card, you must:
1. Install the AirCard 555 software.
2. Activate an account and configure the AirCard to use your
account, unless the AirCard has been pre-activated.
This section provides an overview of this process.
The AirCard 555 Software
The AirCard comes with this software:
Basics
AirCard 555
Note: You must run Watcher
anytime you use the
AirCard 555.
• An application called Watcher that you use to manage the
AirCard and monitor your connections
• An application called the Network Adapter Manager that
allows you to switch between the AirCard 555 and other
network cards
• Venturi compression software that speeds up your data
transmission rate (in network areas where it is supported)
• The driver software that forms the interface between the
network card and your Windows operating system
Detailed installation instructions are provided in the next
chapter. You can avoid problems by installing the application
software prior to inserting the AirCard, using the instructions
in Chapter 3.
Account Activation and Configuration
Companies that operate CDMA networks and provide access
to these networks are called service providers. You must have
an account with a CDMA service provider to use the
AirCard 555. The process of setting up an account is called
activation.
Rev 1.0 Sep.01 3
Page 14

AirCard 555 Network Card User Guide
If you purchased the AirCard from a service provider, you
may already have an account. (That is, your network card is
pre-activated.) Otherwise, you can refer to the Sierra Wireless
web site, www.sierrawireless.com, for a list of service
providers.
When selecting a service provider, it is important to consider
the following:
• Coverage
Note: Most service providers
have coverage maps on their
web sites.
Note: The fee for service is
usually higher when you are
roaming (connecting to a
network other than the one
belonging to your service
provider).
There are CDMA networks, that operate in the frequency
bands supported by the AirCard 555, throughout North
America and parts of Latin America, Asia, New Zealand
and Australia. However, each service provider operates a
network that covers a limited geographical area within the
overall CDMA coverage area. Most service providers have
“roaming” agreements with other service providers, so
that they can offer service outside of the coverage area of
their own networks. For example, assuming you live in
Vancouver and travel frequently to Seattle, you can obtain
an account with a Vancouver service provider that has a
roaming agreement with a service provider in Seattle. You
would then have local service in Vancouver, and roaming
service in Seattle. (Most service providers charge more for
roaming service than local service.)
Select a service provider that gives you network coverage
in all areas you intend to use the AirCard 555.
• Pricing
Each service provider has its own pricing options. There
are flat rate accounts which provide you a maximum number of minutes of network usage for a fixed monthly fee.
There are accounts for which you are charged for network
usage by the minute or by the amount of data transmitted.
You may want to shop around to find the best value.
Your service provider will activate your account. To do so
your service provider requires from you:
• The billing information used to collect payment for your
network usage
• The ESN (electronic serial number) assigned to your
modem during the manufacturing process. (This number
is printed on a label on the AirCard and can be displayed
in Watcher.)
You require from your service provider:
• A phone number for your AirCard
• An activation code that gives you access to the window in
which the phone number is entered
4 2130142
Page 15

Chapter 2: Getting Started
• An SID (System Identifier) that identifies your home
network area and is used in conjuction with your phone
number to identify your account when you connect to the
CDMA network.
Unless your AirCard has been pre-activated, Watcher will
automatically detect that no account has been configured
when you run it for the first time. Watcher will then autolaunch the Activation Wizard to guide you through the
activation and configuration process.
Care and Maintenance of Your AirCard 555 Wireless Network Card
As with any electronic device, the AirCard must be handled
with care to ensure reliable operation. Follow these guidelines
in using and storing the AirCard:
• Do not apply adhesive labels to the AirCard. This may
cause the AirCard to become jammed inside the card slot.
• Optimal signal strength is usually obtained when the
antenna is perpendicular to the modem. The antenna
should bend easily at the hinge. Do not forcefully bend the
antenna.
• When storing or transporting your PC in a case (such as a
notebook case), remove the AirCard antenna and store it in
a compartment where it cannot be crushed or broken.
• The AirCard should fit easily into your PC slot. Forcing
the AirCard into a slot may damage connector pins.
• Protect the card from liquids, dust, and excessive heat.
• When not installed in your computer, store the AirCard in
a safe place.
Basics
AirCard 555
Rev 1.0 Sep.01 5
Page 16

AirCard 555 Network Card User Guide
6 2130142
Page 17
3: Installation on Notebook PCs
• System Requirements
• Software Installation
Procedures
• Driver Installation
Procedures
• Card Insertion &
Removal
• Account Configuration
Procedures
This chapter guides you through the steps necessary to making
the AirCard operational on a notebook PC. The basic steps are:
1. Insert the AirCard CD into your CD-ROM drive and
install Watcher, the Network Adapter Manager, and the
Venturi compression software.
2. Insert the AirCard into the PC card slot and install the
AirCard driver from the CD.
3. If the AirCard has not been pre-activated, use the
Activation Wizard to configure the AirCard.
on Notebook PCs
Installation and Use
Note: Most problems in using
the AirCard can be avoided by
installing the software prior to
inserting the AirCard, and by
following the detailed software
and driver installation instructions in this chapter.
Before you begin the installation process, ensure your PC is
running a supported operating system and meets the
hardware requirements described below.
System Requirements
The AirCard 555 wireless network card is supported on:
• Windows 95 OSR2 and higher
• Windows 98 / 98 SE
• Windows 2000
• Windows NT 4.0 with Service Pack 6a
• Windows Me
To install the AirCard, you require these system resources:
Table 3-1: System Resource Requirements
Card Slots 1 Type II PCMCIA (PC Card) Slot
Communications Ports 1 Available
Disk Drive CD-ROM
I/O Resources 1 IRQ, 40 bytes I/O Space
Memory 32 MB
Disk Space 7 MB
Rev 1.0 Sep.01 7
Page 18

AirCard 555 Network Card User Guide
Software Installation Procedures
Follow these steps to install Watcher, the Network Adapter
Manager, and the Venturi compression software:
Note: Users of Windows 2000
and Windows NT must be
logged in with administrative
privileges to install the AirCard
software.
1. If the AirCard CD is not already in your CD-ROM drive,
insert it. The CD should auto-start and display a menu.
2. If the CD does not auto-start, select
d:\launch.exe where d is the drive letter of your CD-ROM
drive.
3. From the CD start-up window, select
(BETA) and documentation
installation
4. Use the
wizard noting the following:
· The first series of windows in the InstallShield Wizard
installs Watcher, the second series installs the Network
Adapter Manager, and the third series installs the
Venturi compression software.
· You must indicate your acceptance of the terms of the
license agreement by clicking
installation.
· Using the default settings for the Destination Location
and Program Folder is recommended unless you have
special requirements and an advanced understanding of
PC configuration. (The Destination Location dictates
where the software is installed. The Program Folder
dictates the name assigned to the software in the Add/
Remove Programs in the Control Panel.)
to launch the InstallShield Wizard.
Next and Back buttons to navigate through the
and then notebook software
Start > Run and enter
notebook installation
Yes to proceed with the
· A check box allows you to choose to display release
notes. The release notes list known issues in the software
and are displayed in the Windows Notepad. (If you
choose to display them, when you are finished reading,
use the close box in the upper right corner of the
window to close the Notepad.)
· A check box allows you to choose to have a desktop
shortcut for Watcher. This gives you the option of
launching Watcher by double clicking an icon on your
desktop (as well as from the Start menu).
· Click
8 2130142
Finish to close the last screen of each wizard. On
the final screen of the Venturi installation, select a radio
button to choose to restart your PC now or later before
clicking
Finish.
Page 19

Chapter 3: Installation on Notebook PCs
· If you choose to re-start your PC later, use the exit option
in the lower left corner of the window to close the CD
start-up menu. YOU MUST RE-START YOUR PC TO
COMPLETE INSTALLATION OF THE VENTURI
SOFTWARE.
Once your PC is re-started, Watcher, the Network Adapter
Manager, and the Venturi compression software are installed.
You can proceed to install the driver.
Driver Installation
Note: A driver is software that
forms the interface between a
device (such as the AirCard) and
the operating system on your PC
(such as Windows 98).
Note: Do not forcefully connect
the antenna, or forcefully insert
the AirCard. This may damage
connector pins.
There is an AirCard driver for each supported operating
system on the AirCard CD. The AirCard will not function
properly unless the appropriate driver for your operating
system is installed.
In Windows 95, 98, 2000, and Me, driver installation is done
through a wizard. Windows NT does not have a wizard to
facilitate driver installation.
Windows 98, 2000, and Me:
To install the AirCard driver in Windows 98, 2000 or Me,
follow these instructions:
1. Insert the AirCard CD into your CD-ROM drive, if not
already inserted, and close any Windows programs that
are running.
2. If the CD start-up menu is displayed, use the
the lower left corner of the screen to exit the menu.
3. Attach the antenna to the AirCard and, with the label
facing up, carefully insert the AirCard into your PC card
slot. Windows should detect that a new device has been
inserted and launch the wizard that guides you through
the driver installation.
4. Follow the instructions corresponding to your operating
system below.
exit option in
on Notebook PCs
Installation and Use
Windows 98
1. Click
Next on the first window of the Add New Hardware
Wizard to proceed to the next window.
2. Select
3. Ensure that
Search for the best driver for your device (Recommended)
and click
enter
CD-ROM drive, and click
Next to proceed to the next window.
Specify a location is the only check box selected,
d:\Drivers\Win98 where d is the drive letter for your
Next to proceed.
Rev 1.0 Sep.01 9
Page 20

AirCard 555 Network Card User Guide
4. Click Next on the window that displays the file name.
5. Click
6. If you are prompted to restart your PC, click
Finish and repeat steps 1 to 4 as prompted.
Yes.
Otherwise, restart your PC from the Start menu. (You
must restart your PC to complete the driver installation.)
Windows 2000
1. Click
Next on the first window of the Found New
Hardware Wizard to proceed to the next window.
2. Select
3. Ensure that
4. Enter
5. Click
Search for a suitable driver for my device (recommended)
and click
locations, is selected and click
CD-ROM drive, and click
Next.
Specify a location, under Optional search
Next to proceed.
d:\Drivers\Win2k, where d is the drive letter for your
OK to proceed.
Next on the window that displays the file name.
6. If the Digital Signature Not Found window displays, click
Yes.
7. Click
8. If you are prompted to restart your PC, click
Finish to proceed. Repeat steps 1 to 6 as prompted.
Yes.
Otherwise, restart your PC from the Start menu. (You
must restart your PC to complete the driver installation.)
Windows Me
1. Click
Specify the location of the driver (Advanced) on the first
window of the Add New Hardware Wizard and click
Next
to proceed.
2. Select the
button, and the
d:\Drivers\WinMe where d is the drive letter of your CD-
ROM drive. Click
3. If prompted, “What would you like to install?”, select
updated software (Recommended)
4. Click
5. Click
6. If you are prompted to restart your PC, click
Search for the best driver for your device radio
Specify a location check box, then enter
Next to proceed to the next window.
The
and click Next.
Next on the window that displays a file name.
Finish and repeat steps 1 to 4 as prompted.
Yes.
Otherwise, restart your PC from the Start menu. (You
must restart your PC to complete the driver installation.)
Once your PC is restarted, the driver is installed and you can
proceed to configure the AirCard to use your account (if it was
not pre-activated).
10 2130142
Page 21

Chapter 3: Installation on Notebook PCs
Windows 95 Driver Installation
Note: Windows system files may be required to complete installation
of the AirCard 555 driver. These files are located on the Windows CD
and may be stored on your hard drive in .CAB files. Ensure you have
your Windows CD, or know the location of the .CAB files before
proceeding.
Depending on how Windows 95 was installed on your PC and
what devices have since been installed, your PC card
(PCMCIA) slots may or may not have been enabled and the
TCP/IP stack may or may not be installed.
These instructions guide you through these steps:
1. Verifying that the PC card slots are enabled
2. Verifying that TCP/IP is installed
3. Installing the driver
Verifying That the PC Card Slots Are Enabled
1. Open the Control Panel by selecting
Control Panel
.
2. Double click the PC card icon.
3. If the PC Card (PCMCIA) Properties window is displayed,
the slots are enabled and you can proceed to the section
titled Verifying That TCP/IP Is Installed.
4. If the PC Card (PCMCIA) Wizard is displayed, the slots
are not yet enabled, and the wizard guides you through
the enabling process. (Generally it is sufficient to click
at each window.) Click
click
Yes when prompted to restart the PC.
Finish on the final window and
Start > Settings >
Next
on Notebook PCs
Installation and Use
Verifying That TCP/IP Is Installed
1. If the Control Panel is not already open, select
Settings > Control Panel
to open it.
Start >
2. Double click the Network icon.
3. Look for TCP/IP next to any listing on the Configuration
tab. If TCP/IP is listed, you can close the window and
proceed to the section titled Installing the Driver.
4. If TCP/IP is not listed, click the
Add... button to open the
Select Component Type window.
5. Select
6. Select
Protocol in the component type list and click the
Add... button to open the Select Network Protocol window.
Microsoft under Manufacturers and TCP/IP under
Network Protocols, then click the
OK button.
Rev 1.0 Sep.01 11
Page 22

AirCard 555 Network Card User Guide
7. Verify that a listing for TCP/IP appears in the Network
window and then click the
OK button to close the window.
8. If you are prompted that your network is not complete,
make the selections appropriate to your network configuration.
9. If you are prompted for the Windows CD, remove the
AirCard CD and insert the Windows CD in your CD-ROM
drive, or enter the path to the .CAB files.
10. Click
Yes at the prompt to restart your PC. Once the PC
has restarted, proceed to the next section.
Installing the Driver
1. Insert the AirCard CD into your CD-ROM drive, if it is not
already inserted, and close any Windows programs that
are running.
2. If the CD start-up menu is displayed, use the
exit option in
the lower left corner of the screen to exit the menu.
3. Attach the antenna to the AirCard and, with the label
facing up, carefully insert the AirCard into your PC card
slot. Windows should detect that a new device has been
inserted and launch the wizard that guides you through
the driver installation.
4. Click
Next on the first window of the Update Device Driver
Wizard to proceed to the next window.
5. Click the
Other Locations... button to open the Select Other
Location window.
6. Enter
d:\Drivers\Win95 where d is the drive letter for your
CD-ROM drive and click
OK. The wizard should search for
and find the Windows 95 AirCard driver on the CD-ROM
drive.
7. Click
Finish and repeat steps 4 to 6 as prompted.
8. If you are prompted to insert the Windows 95 CD, remove
the AirCard CD and insert the Windows CD.
9. If you are prompted to restart your PC, click
Yes.
Otherwise, restart your PC from the Start menu. You must
restart your PC to complete the driver installation.
Windows NT Driver Installation
Since Windows NT does not have the “Plug and Play” feature
included in other Windows operating systems, installing the
AirCard driver requires more steps. Installation involves:
1. Verifying that your PC card slots are enabled
2. Checking whether Networking is installed
12 2130142
Page 23

Chapter 3: Installation on Notebook PCs
3. Installing the network card driver (procedures depend on
whether or not Networking is already installed)
4. Installing the modem driver
Note: You must re-install the Windows NT Service Pack following
installation of the AirCard driver. Ensure you have your Service Pack
CD before you begin. (Version 6a is supported.)
Note: Windows system files may also be required to complete the
installation. These files are located on the Windows NT CD and may
also be stored as .CAB files on your hard drive. If the .CAB files are
not available to you, the recommendation is to copy the Windows NT
driver from the AirCard CD to a directory on your hard drive. The
Windows NT driver is located on the CD in the directory
\Drivers\WinNT.
on Notebook PCs
Installation and Use
Windows NT Users: Your PC
must be off whenever you insert
or eject the AirCard.
1. If your PC is on, close any Windows programs that are
running and shut down the PC.
2. Attach the antenna to the AirCard, and with the label
facing up, carefully insert the AirCard into your PC card
slot. Power on your PC.
3. Insert the AirCard CD into your CD-ROM drive, if it is not
already inserted.
4. If the CD start-up menu is displayed, use the
exit option in
the lower left corner of the screen to exit the menu.
Verifying That the PC Card Slots Are Enabled
1. Open the Control Panel by selecting
Control Panel
from the taskbar.
Start > Settings >
2. Double click the PC card icon.
3. If a window titled PC Card (PCMCIA) Properties displays,
the slots are already enabled. Close this window and
proceed to the next section.
4. If the PC Card (PCMCIA) Wizard displays, the slots are
not yet enabled, and the wizard guides you through the
installation process. (Generally it is sufficient to click
at each window.) Click
should be prompted to restart your PC. Click
Finish on the final window and you
Yes and
Next
allow the PC to shut down. Then restart it.
Determining Whether Networking is Installed
1. If the Control Panel is not open, select
Control Panel
.
Start > Settings >
2. Double click the Network icon.
Rev 1.0 Sep.01 13
Page 24

AirCard 555 Network Card User Guide
3. If the Network window opens, networking is already
installed. Proceed to the section Installing the Network Card
Driver When Networking Is Already Installed.
4. If a dialog box appears, prompting you to install
Networking, the component has not yet been installed.
Proceed to the section Installing the Network Card Driver
When Networking Has Not Been Installed.
Installing the Network Card Driver When Networking Has Not Been Installed
1. Click
Yes to the prompt, “Do you want to install it now?”
to launch the wizard that installs Networking.
2. Click the check boxes on the first window of the wizard so
that
Wired to the network: is checked and Remote access to
the network: is not checked. Click
3. Click the
Select from list... button to open the Select
Next to proceed.
Network Adapter window.
4. Click the
Have Disk... button to open the Insert Disk
window.
5. If you have copied the driver from the AirCard CD to your
hard drive, enter the path to the driver and click
OK to
open the Select OEM Option window.
6. If you are installing the driver from the AirCard CD, enter
d:\Drivers\WinNT where d is the drive letter for your CD-
ROM drive and click
OK to open the Select OEM Option
window.
7. If Sierra Wireless AirCard 555 is highlighted, click
OK. The
Sierra Wireless AirCard 555 should appear in the Network
Setup Wizard under Network Adapters. Otherwise click
Cancel and repeat the previous two steps.
8. Click
9. Ensure
Next to display a list of network protocols.
TCP/IP Protocol is checked (as well as any other
protocols appropriate to your network configuration) and
click
Next to display a list of network services.
10. Select the services appropriate to your network configu-
ration and click
Next. (For the purpose of installing the
AirCard 555, it does not matter what selections you make
in this window.)
11. Click
Next.
12. If the Windows NT Setup window appears, system files
are required to install the components you checked. Either
insert the Windows NT CD and enter your CD-ROM drive
letter, or enter the path to the .CAB files. Click
Continue.
14 2130142
Page 25

Chapter 3: Installation on Notebook PCs
Note: Use the Windows NT
Diagnostics window to locate an
available IRQ and I/O space.
13. Use the drop down menus to select an I/O Port, Interrupt,
Memory, and Com Port, noting that the AirCard 555
requires 1 IRQ and 40 bytes of I/O Space. Click
Continue.
14. If the Windows NT Setup window displays again, enter
the path to your CD-ROM drive or the .CAB files.
15. Click
Yes at the DHCP prompt to proceed to a display of
network bindings. (DHCP or Dynamic Host Configuration
Protocol is required by the AirCard 555 regardless of your
network configuration.)
16. Click
17. Click
Next to start the Network component.
Next to proceed to the window in which you enter a
Computer Name and Workgroup or Domain.
18. Enter the information appropriate to your network config-
uration and click
19. Click
20. Click
Finish on the final window of the wizard.
Yes at the prompt to restart your PC. (You must
Next.
restart your PC to complete the driver installation.)
21. When the PC restarts, re-install your Service Pack.
22. On completion of this step, the driver is installed and you
can proceed to configure the AirCard to use your account
(if it was not pre-activated).
on Notebook PCs
Installation and Use
Installing the Network Card Driver When Networking Is Already Installed
1. Click the
2. Click the
Adapters tab in the Network window.
Add... button to open the Select Network Adapter
window.
3. Click the
Have Disk... button to open the Insert Disk
window.
4. If you have copied the driver from the AirCard CD to your
hard drive, enter the path to the driver and click
OK to
open the Select OEM Option window.
5. If you are installing the driver from the AirCard CD, enter
d:\Drivers\WinNT where d is the drive letter for your CD-
ROM drive and click
OK to open the Select OEM Option
window.
6. If Sierra Wireless AirCard 555 is highlighted, click
OK. The
Sierra Wireless AirCard 555 should appear under Network
Adapters in the Network Setup Wizard. Otherwise, click
Cancel and repeat the previous two steps.
Rev 1.0 Sep.01 15
Page 26

AirCard 555 Network Card User Guide
Note: Use the Windows NT
Diagnostics window to locate an
available IRQ and I/O space.
7. Use the drop-down menus to select an I/O Port, Interrupt,
Memory, and Com Port, noting that the AirCard 555
requires 1 IRQ and 40 bytes of I/O Space. Click
8. Select the
button and click the
9. Click
10. Click
Obtain an IP address from a DHCP Server radio
Close button.
Yes to confirm that you want to use DHCP.
No if prompted to restart your PC. (You must restart
Continue.
your PC after the modem driver installation.)
Installing the Modem Driver
1. In the Control Panel, double click the Modem icon to open
the Modem Properties window.
2. Click the
Add button to open the Install New Modem
wizard.
3. Select
4. Select the
5. Enter
6. Click
7. Verify th at
8. Select the
Don’t detect my modem, I will select it from a list and click
Next.
Have Disk button.
d:\Drivers\WinNT\mdmac555 where d is the drive letter
for your CD-ROM drive and click
OK.
Sierra Wireless AirCard 555 Modem is displayed
and click
Next.
Selected Ports radio button and select the same
Open.
communications port you selected when you installed the
network card driver. Click
9. Click
Finish.
Next.
10. If you are prompted that Dial-Up Networking needs to be
configured, click
11. Click
Add in the Remote Access Setup window.
Yes.
12. Select the AirCard 555 listing under RAS Capable Devices
and click
13. If you are prompted to restart your PC, click
OK.
Yes.
Otherwise restart your PC from the Start menu.
14. When the PC restarts, re-install your Service Pack.
On completion of this step, the driver is installed and you can
proceed to configure the AirCard to use your account (if it was
not pre-activated).
16 2130142
Page 27

Chapter 3: Installation on Notebook PCs
Card Insertion & Removal
Inserting the AirCard
The AirCard should be inserted into the PC card slot with the
label facing up.
Note: If you are using Windows NT, the PC must be off whenever you
insert or eject the AirCard.
In Windows 95, 98, 2000, and Me, when you insert the
AirCard, the following should occur:
• If sound effects are enabled, the PC beeps
• The PC Card icon appears in the status area (if it is not
already displayed for another card, and unless the feature
has been disabled)
• Wat cher launches.
The AirCard is powered as soon as you insert it.
on Notebook PCs
Installation and Use
Note: See Chapter 2 (Getting
Started) for an explanation of
account activation and configuration.
Removing the AirCard
To remove the AirCard (Windows 95, 98, 2000, or Me):
• Close Watcher if it is open.
• Click the PC Card icon in the status area to display the
option to stop the card.
• Click on “Stop Sierra Wireless AirCard 555 PC Card
Parent”.
• Click
OK in the dialog box that notifies you that it is safe to
remove the card.
Account Configuration Procedures
The final step to making the AirCard operational is configuring it to use your account.
If you purchased a pre-activated AirCard, this step is not
necessary. Once the application software and driver are
installed, the AirCard is ready for use.
Otherwise, you must use the Activation Wizard to activate and
configure your account. Future releases of the AirCard
software will allow for Manual Activation and Voice-Assisted
Activation but only Manual Activation is available in the Beta
Rev 1.0 Sep.01 17
Page 28

AirCard 555 Network Card User Guide
release. Manual Activation involves phoning a service
provider, exchanging information, and entering your account
information into the appropriate fields in the wizard. You
require a phone, other than the AirCard, to use this method.
To activate an account and configure your AirCard:
1. Insert the AirCard into your PC card slot, if not already
inserted.
2. If the Activation Wizard does not auto-launch, run
Watcher (by selecting
Watcher for AirCard 555) and in Watcher select Tools >
Administration > Activation Wizard.
3. Use the
Next and Back buttons to navigate through the
Start > Programs > Sierra Wireless >
Activation Wizard, noting the following:
· Use the radio buttons to select
Manual Activation as the
method of activation you want to use.
· Obtain the billing information listed on the second
window of the wizard before phoning the service
provider or proceeding to the next window.
· Tell the representative the ESN number listed in the
wizard, and enter the information the representative
gives you, to activate and configure the AirCard.
4. Click
Finish on the final window of the wizard.
On completion of this step, the AirCard is ready for use. The
next chapter explains how to use Watcher to manage and
monitor your connections.
18 2130142
Page 29

4: The Watcher Window &
Indicators
• Components of the
Watcher Window
• The Menu Bar
• The Minimize, Toggle
Full/Compact, and
Close Boxes
• Connection Status
Area
• Call Status Box
• Indicator Area
• Taskbar Icons
Watcher is the application that allows you to manage and
monitor the connection between the AirCard 555 network card
and the CDMA network. You use Watcher to:
• Determine your signal strength, roaming status, 1xRTT
availability, and other network connection parameters
• Initiate voice and data calls
• View call statistics and SMS messages
• Enable and disable features like Always On Top (that
allows you to set the Watcher window to display in front
of other application windows), and KeyGuard (that
prevents accidental dialing)
• Set options related to SMS messages, sounds played, voice
calls, and the lock code security feature (that you can use
to prevent others from using your AirCard)
on Notebook PCs
Installation and Use
Anytime you use the AirCard you must run Watcher.
Watcher should auto-launch anytime you insert the AirCard
555. You can also launch Watcher by:
• Double clicking the Watcher icon on your desktop
• Selecting
555 > Watcher
Rev 1.0 Sep.01 19
Start > Programs > Sierra Wireless > AirCard
Page 30

AirCard 555 Network Card User Guide
Components of the Watcher Window
The Watcher window has these components:
• A menu bar on the upper left side of the window
• The Minimize, Toggle Full/Compact and Close buttons in
the top right corner
• The Data and Voice tabs on the upper right side of the
window
• A section of the window that resembles an LCD screen
(beneath the menu bar) that includes these areas:
· The connection status area at the top
· The call status box in the middle
· The indicator area at the bottom
The Menu Bar
Chapter 7 gives a detailed description of each option in each of
Watcher’s four menus: View, Tools, Help, and Advanced.
The Minimize, Toggle Full/ Compact and Close Boxes
20 2130142
Page 31

Chapter 4: The Watcher Window & Indicators
• The Minimize button closes the Watcher window but leaves
the application running. When Watcher is minimized, the
Watcher icon in the status area can be used to determine
the AirCard status. (See the final page of this chapter.)
• The
Toggle Full/Compact button is used to switch between
the full Watcher window and the compact view:
The compact view allows you to see connection status
information while you use other applications.
• The
Close button is used to exit Watcher.
Connection Status Area
on Notebook PCs
Installation and Use
The Connection Status area uses these icons:
Table 4-1: Connection Status Area Icons
Icon Meaning
The Signal Strength indicator uses bars to
show the intensity of the radio signal. The
number of bars increases as signal
strength increases to a maximum of five
bars.
When the bars are dimmed and the
antenna icon is crossed out, no connection
is possible for one of these reasons:
• no antenna is attached
• you are outside the CDMA network
coverage area
• the signal strength is too weak
• a network or account problem is
preventing the AirCard 555 from
obtaining service
Rev 1.0 Sep.01 21
Page 32

AirCard 555 Network Card User Guide
Table 4-1: Connection Status Area Icons
Icon Meaning
The In Use indicator shows whether a call is in progress. Depending
on the in use state, one of these icons is displayed:
When the In Use indicator is a handset, a
voice call is in progress.
When the In Use indicator is a modem, a
data call is in progress.
When the In Use indicator is a modem with
“1x”, a 1xRTT data call is in progress. (For
a description of 1xRTT data calls, see the
next chapter.)
When the In Use indicator is a large “X”, a
fatal error has occurred and the AirCard is
inoperable. (This may be resolved by
closing Watcher and restarting your
computer.)
The 1x indicator shows whether 1xRTT is
available in this area.
Where 1xRTT is available, you can make
high speed data connections, if your billing
plan allows for it. (Depending on your
billing plan, there may be a surcharge for
1xRTT data connections.)
The Roaming Status indicator shows
whether you are roaming onto the network
of a service provider other than your own.
When the indicator is off (gray), you are
within the local coverage area of your
service provider. When the indicator is on
(solid black), you are in a “preferred”
roaming area. When the indicator is
blinking, you are within the coverage area
of a CDMA network but not in a “preferred”
roaming area.
Your coverage area and billing charges
depend upon your service provider and the
type of account you have. There may be
surcharges for roaming service that vary
based on whether you are in a preferred
roaming area or a non-preferred roaming
area. If there is no roaming agreement
between your service provider and the local
carrier, you may be unable to complete
calls in non-preferred roaming areas.
22 2130142
Page 33

Chapter 4: The Watcher Window & Indicators
Call Status Box
The Call Status Box displays one of these messages:
• Ready to Connect indicates that you have a network
connection but there is no call in progress.
• Dialing indicates that the AirCard is attempting to connect
to a phone number.
• Time … the name of the person to with whom you are connected
(or “Unknown” if the name is not obtainable), and the phone
number indicates that a voice call is in progress. The time
shown is the duration of the call.
on Notebook PCs
Installation and Use
Note: Watcher begins timing
outgoing calls from the time the
call is initiated—not from the
time the call is answered.
• Time…Rx…Tx… indicates that a data call is in progress.
The time shown is the duration of the call. Rx shows the
number of bytes of data received. Tx shows the number of
bytes of data transmitted.
Indicator Area
The Indicator area displays icons that notify you when you
receive messages and indicate whether certain options and
features are enabled. The icons are black when “on” and gray
when “off”.
Table 4-2: Indicator Area Icons
Icon Meaning
The SMS message indicator shows
whether you have unread messages. A
blinking SMS message icon indicates that
there are one or more unread messages
that are flagged as urgent. To display the
SMS Manager window (in which the
messages are displayed) select Tools >
Mobile Messenger… or click the icon.
The voice mail indicator shows whether
you have unheard voice messages. To
hear the messages, you must dial your
voice messaging system. Click this icon to
connect to your voice messaging system.
The missed call indicator displays if you
failed to answer an incoming call. To view
the phone number(s) of any missed calls,
click the icon to display the call log.
Rev 1.0 Sep.01 23
Page 34

AirCard 555 Network Card User Guide
Table 4-2: Indicator Area Icons
Icon Meaning
The auto-answer indicator shows whether
Watcher is set to automatically answer
incoming calls. You can enable and disable
this feature under Tools > Options.
The headset indicator shows whether a
headset is connected to the AirCard.
This indicator shows whether the silent
ringer feature is enabled. When enabled,
no sound is played when an incoming call
is received. You can enable and disable
this feature under Tools > Options.
The privacy indicator shows whether
encryption is in use on voice calls.
(Encryption prevents your calls from being
monitored.) The AirCard uses encryption
where it is available on the network.
The compression indicator shows whether
V.42bis compression is in use. Where
V.42bis is available on the network, the
AirCard uses this compression scheme to
increase throughput and the effective data
transmission speed.
Taskbar Icons
Watcher displays an icon in the status area (which is usually
located in the lower right corner of your screen). The status
area icon indicates your connection status or notifies you when
you have voice mail or SMS messages, or when you have
missed a call.
Table 4-3: Status Area Icons
Icon Meaning
There is no CDMA network connection.
The AirCard is connected to the CDMA
network.
24 2130142
Page 35

Chapter 4: The Watcher Window & Indicators
Table 4-3: Status Area Icons
Icon Meaning
You missed (failed to answer) an incoming
call. You can view the number of the caller
in the call log.
You have an unread SMS message.
You have voice mail.
on Notebook PCs
Installation and Use
Rev 1.0 Sep.01 25
Page 36

AirCard 555 Network Card User Guide
26 2130142
Page 37

5: Data Connections
• Dial-Up Connections
• QNC Connections
• 1xRTT High Speed
Connections
The Data tab on the main Watcher window is used to make
data connections for any of these purposes:
• Browsing the Internet
• Sending and receiving e-mail
• Dialing into your corporate network
• Sending and receiving faxes
The AirCard 555 network card offers three types of data
connections:
on Notebook PCs
Installation and Use
Note: You cannot have a data
and a voice connection at the
same time. If you have a data
connection when an incoming
call occurs, your caller will get a
busy signal or be put through to
your voice mail box.
Note: Depending on your billing
plan, there may be a surcharge
for 1xRTT calls.
• Dial-up connection – in this type of connection, the
AirCard 555 functions as a modem. You provide the phone
number and the AirCard dials the number. Using this type
of connection, you can connect to any other modem and
receive faxes. The maximum speed of this type of
connection is 14.4 kbps. (When Venturi software
compression is in use, you will experience higher
throughput and a maximum data transmission speed of 56
kbps.)
• QNC (Quick Net Connect) connection – in this type of
connection, the AirCard dials a modem pool that makes a
direct Internet connection. The data transmission speed for
this type of Internet connection is the same as for a dial-up
connection but the time required to initiate the connection
is shorter. QNC availability is dependent on your service
provider.
• 1xRTT high-speed network connection – in this type of
connection, the AirCard functions as a network card. The
AirCard establishes a high-speed Internet connection to
the CDMA network. (You do not need to provide a phone
number and there is no dialing involved.) The maximum
speed of this connection is 144 kbps but it is only available
in areas where 1xRTT has been implemented.
The 1xRTT connection provides access to the Internet.
Once the connection is established, you can open your
browser and connect to any web site that is accessible
through the Internet, or access other Internet services (such
as e-mail).
Rev 1.0 Sep.01 27
Page 38

AirCard 555 Network Card User Guide
Dial-Up Connections
These steps are required to make a dial-up connection:
1. Set up the number in the Dial-Up Manager. (This step is
only necessary the first time you dial the number.) The
Dial-Up Manager is displayed by selecting
Manager
, or by clicking the Dial-Up Manager button to the
right of the Connect button. Chapter 7 explains how to the
use the Dial-Up Manager.
2. Select the connection name from the pull-down menu on
the Data tab of the main Watcher window. The number is
then displayed in the
Dial-Up # field.
Tools > Dial-Up
Note: If you change the number
in the Dial-Up # field, the record
is not changed. The next time
you select the connection, the
old number appears. If you want
to permanently change the
record, you can do so in the DialUp Manager.
3. If necessary, change the phone number in the Dial-Up #
field. (For example, depending on your location, you may
need to add or remove the area code.)
4. Click the
Connect button.
Watcher then initiates the connection. Progress is shown in the
call status area. Once the connection is established, the call
statistics (duration, bytes transmitted, and bytes received) are
displayed.
To terminate a call:
1. Click the
the
Cancel button (during the connection process) or
Disconnect button (once the connection is established).
Incoming Data Calls
By default the AirCard is set to answer all calls as voice calls.
To receive a fax or data call, you must set the AirCard to
answer appropriately. This setting is in the Options window
(
Tools > Options) on the General tab. See Chapter 7 for a detailed
explanation.
28 2130142
Page 39

Chapter 5: Data Connections
QNC Connections
The QNC connection is set up for you when Watcher is
installed. All you need to do to make a QNC connection is:
1. Select
2. Click the
Once connected you can use any Internet application (such as
Internet Explorer, Netscape Navigator, or your e-mail application).
Quick 2NetSM (14.4 kbps) from the drop-down menu
on the Data tab of the main Watcher window.
Connect button.
1xRTT High Speed Connections
When the 1xRTT indicator is on, the 1xRTT connection
is available to you.
To make a 1xRTT connection:
1. Select
2. Click the
Express Network 1xRTT from the drop-down menu
on the Data tab of the main Watcher window.
Connect button. (No phone number or dialing is
required.)
on Notebook PCs
Installation and Use
Note: Depending on your billing
plan, there may be a surcharge
for 1xRTT service.
Once the connection is established, you can use any Internet
application (such as Internet Explorer, Netscape Navigator, or
your e-mail application).
Rev 1.0 Sep.01 29
Page 40

AirCard 555 Network Card User Guide
30 2130142
Page 41

6: Voice Connections
• The Dial Pad
• The Scratch Pad
• Outgoing Calls
• Incoming Calls You can use your AirCard 555 network card as a mobile phone
simply by connecting a headset. Any standard headset with a
2.5 mm jack can be used.
Note: The headset connects to
the circular connector on the end
of the AirCard next to the
antenna.
The AirCard 555 has several voice features:
• The volume controls allow you to adjust the loudness of
what you hear.
• The mute button allows you to turn off the speaker so that
you cannot be heard.
• The
• The Any-Key Answer feature allows you to answer an
• The Auto-Answer feature can be enabled to automatically
• The KeyGuard feature prevents accidental dialing.
• The Silent Ringer feature prevents any sound from
• The Missed Call indicator notifies you of any incoming
• A scratch pad provides an easily accessible temporary
• The call log records details about all incoming and
• If your billing plan with your service provider includes
Send button allows you to redial the previously dialed
number.
incoming call by pressing any button on the dial pad
except
answer incoming calls within a specified number of rings.
occurring when you receive calls.
calls that were not answered.
place to record very brief notes.
outgoing calls, providing useful information such as the
phone numbers of missed calls.
Conference Calling (Three-Way Calling), Voice Mail, Call
Alert, or Caller-ID, they are supported by the AirCard.
End, Clr or the volume controls.
on Notebook PCs
Installation and Use
Rev 1.0 Sep.01 31
Page 42

AirCard 555 Network Card User Guide
The Dial Pad
The dial pad for the AirCard is in Watcher and is displayed
when you click the Voice tab.
Table 6-1: The Watcher Dial-Pad
Dial Pad
Buttons
0-9, #, *
(or the same
keys on your
keyboard)
Send
(<Enter> on
your
keyboard)
End
(<Esc> on
your
keyboard)
Function
Use these buttons to enter the digits (and other
characters) you want to dial. The numbers are
displayed in the call status area until you press
Send, End, or Clr, or you receive an incoming
call.
Any of these buttons can be used to answer an
incoming call if the Any-Key Answer feature is
enabled.
If you click (or press) these buttons during a
call, the AirCard beeps and the characters are
displayed in the call status area.
Use this button to dial numbers and to answer
incoming calls. When you are not receiving an
incoming call, clicking Send dials the numbers
in the call status area. If no numbers are
displayed, Watcher re-dials the last number you
dialed.
Use this button to hang-up or end a call, or to
clear all the digits and characters in the call
status area (i.e. to cancel a call that you’ve
started to enter). This button also clears status
messages.
Clr
(<Backspace>
on your
keyboard)
Use this button to clear the last number you’ve
entered. If you hold this button down for one
second, it has the same effect as the End key.
This button can also be used to hang-up or end
a call.
32 2130142
Page 43
Chapter 6: Voice Connections
Table 6-1: The Watcher Dial-Pad
Dial Pad
Buttons
Volume Keys
(Up Arrow and
Down Arrow)
Mute Key Use this key during a call to prevent the caller
Use the Up Arrow to increase the headset
volume you hear. Use the Down Arrow to
decrease the volume.
from hearing what you say.
When no call is in progress, this key enables
and disables the Silent Ringer feature.
Function
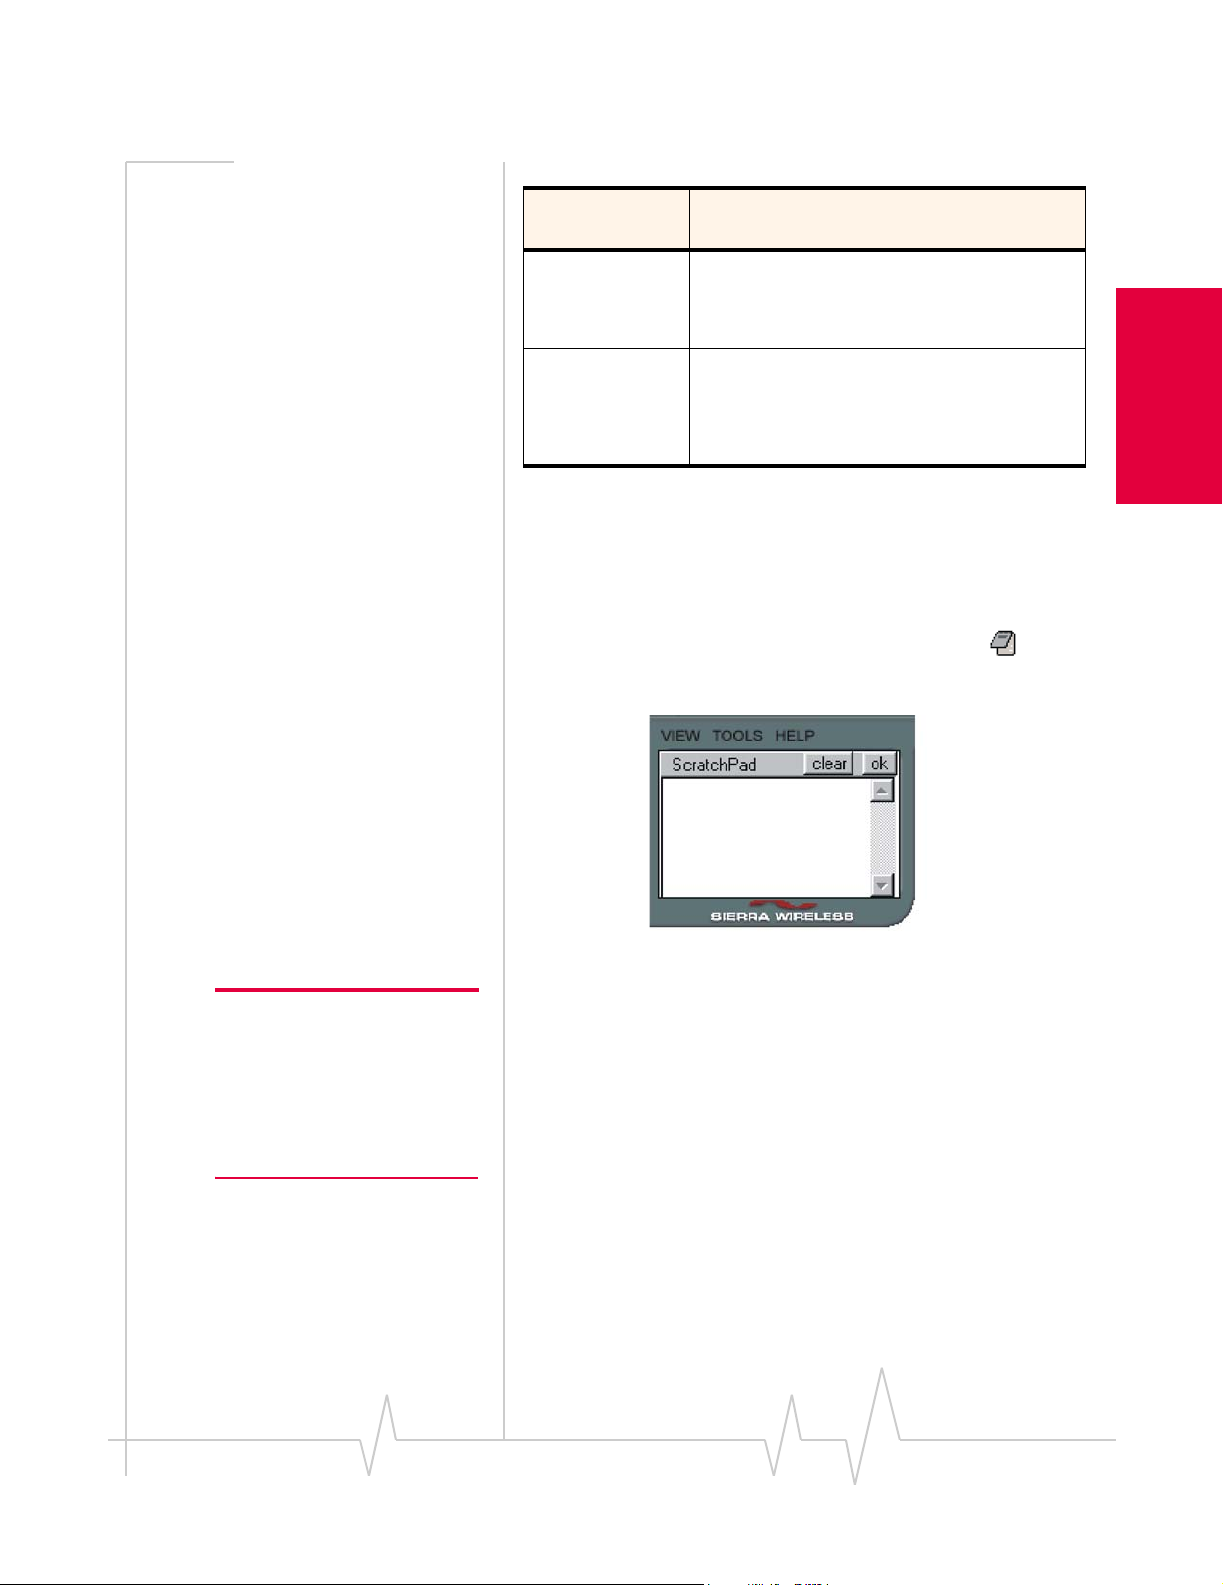
The Scratch Pad
The scratch pad gives you a place to record very brief notes
(such as a name and phone number) temporarily.
Display the scratch pad by clicking the Scratch Pad
button on the right side of the Watcher window.
on Notebook PCs
Installation and Use
Note: The standard function
keys for copy (<Ctrl> C), cut
(<Ctrl> X), and paste (<Ctrl> V)
can be used to move text from
the scratch pad to another application (such as the Windows
Notepad).
To enter text:
1. Type the text from yo ur keybo ard.
To erase all the text in the scratch pad:
1. Click the
clear button.
To close the scratch pad (saving any text in it):
1. Click the
ok button.
Rev 1.0 Sep.01 33
Page 44

AirCard 555 Network Card User Guide
Outgoing Calls
To initiate a call:
1. Connect a headset to the AirCard, if one is not already
connected.
Note: If you click the Send
button without entering a
number, the AirCard re-dials the
last number you dialed.
Note: The Options window,
displayed when you select Tools
> Options, allows you to
customize the sound played
when you receive an incoming
call and to enable and disable
the Silent Ringer feature.
Note: If an incoming call occurs
while you have a data
connection , your caller will get a
busy signal or be put through to
your voice mail box.
2. Enter the number you want to dial by either clicking the
number buttons on the dial pad or typing the numbers on
your keyboard.
3. Click the
Send button.
As the call is being dialed, Watcher displays “Dialing” and the
phone number.
You can also initiate a call from the call log. The call log is
displayed when you select
Tools > Call Log and is described in
Chapter 7.
Incoming Calls
Depending on how certain features are configured, when you
receive an incoming call the following occurs:
• A sound is played, unless the Silent Ringer feature is
enabled.
• If Watcher is in compact view when you receive the call,
the Watcher window maximizes.
To answer a call:
1. Connect the headset, if it is not already connected, and put
it on.
2. Click the
is enabled, click any key except
Send button. (Or, if the Any-Key Answer feature
End or Clr.)
34 2130142
Page 45

7: The Watcher Menu Options
• The View Menu
• The Tools Menu
• The Help Menu
This chapter describes each option in each of the Watcher
menus.
The View Menu
The options under the View menu allow you to:
• Set the Watcher window to always display on top of other
application windows.
• Set the Watcher window to jump to the edge of the screen
(dock) when you reposition the window.
• Switch between the compact version of the Watcher
window and the full version.
on Notebook PCs
Installation and Use
Always On Top
When Always On Top is enabled, the Watcher window
displays in front of all other application windows, even when
you position another window over Watcher. This allows you
to view connection status indicators while using another application, such as your Internet browser.
To enable or disable Always On Top:
1. Select
A check mark next to the option indicates that it is enabled.
Always On Top from the View menu.
Docking
When Docking is enabled, the Watcher window jumps to the
edge of your screen when the window is dragged close to an
edge. This allows you to easily position the window to a corner
of your screen.
Rev 1.0 Sep.01 35
Page 46

AirCard 555 Network Card User Guide
To enable or disable Docking
1. Select
A check mark next to the option indicates that it is enabled.
Docking from the View menu.
Toggle Full/Compact
The Watcher window has two sizes:
The Full Window
The Compact Window
The full window is required to initiate data connections and
make voice calls, but if all you require from Watcher is status
information, you can use the compact view.
To switch from the full window to the compact window:
1. Select
1. Click the Toggle Full/Compact button (next to
Toggle Full/Compact from the View menu.
Or
the
Close button in the upper right corner
of the Watcher window).
36 2130142
Page 47

Chapter 7: The Watcher Menu Options
To switch from the compact window to the full window:
Note: The Watcher window
switches to full view automatically when you receive an
incoming call.
1. Click the Toggle Full/Compact button.
Or
1. Right click on the Watcher window.
2. Select
Toggle Full/Compact from the shortcut menu.
The Tools Menu
on Notebook PCs
Installation and Use
The options under the Tools menu allow you to:
• Send and receive SMS messages.
• View the call log that lists the phone numbers and other
details of voice and data calls you’ve made and received.
• Maintain the Dial-Up Manager in which you enter the
phone numbers and details required to make data calls.
• Enable and disable features like KeyGuard, Auto-Answer,
Any-Key Answer, the Lock Code, and certain alerts and
warning messages.
• Configure options related to SMS messages, the call log,
the location of the Watcher window on your screen, and
sounds used to notify you of incoming calls and messages.
Rev 1.0 Sep.01 37
Page 48

AirCard 555 Network Card User Guide
Mobile Messenger…
The Mobile Messenger… window is used to display SMS
messages you receive and to send SMS messages.
Note: Check with your service
provider to see if you have a
subscription to SMS service.
SMS (Short Messaging Service) is a feature that some service
providers offer, that allows you to send and receive short
messages through the CDMA network. Depending on your
service provider, one or more of these methods of sending
SMS messages may be available to you:
• Some wireless service providers have web pages on which
anyone can enter a message and direct it to your phone
number. In this case, anyone who has access to the Internet
can send you a message, provided he or she knows your
phone number and can locate the appropriate web page.
• Some service providers allow SMS messages to be sent
through Internet e-mail applications. Your phone number
is then used as an e-mail address (example:
6045553993@serviceprovider.com).
• Some products, such as the AirCard 555, have software
that allows you to send messages to other subscribers,
using their phone numbers to direct the message.
The
Mobile Messenger… option in the Tools menu allows you to
read, create and send SMS messages.
Reading SMS Messages: The Inbox
Incoming messages are stored in the Inbox until you delete
them or until they expire (depending on your settings in the
Options window).
The SMS indicator notifies you when new messages are
received by displaying the icon below. The ToolTip (displayed
when you position the mouse pointer on top of the icon)
identifies how many unread messages you have.
If the icon is flashing, one or more of the messages is tagged as
urgent.
To read a message(s):
1. Double click the SMS icon, or select
Messenger…
2. Click the
38 2130142
to display the Mobile Messenger window.
Inbox tab if it is not already selected.
Tools > Mobile
Page 49

Chapter 7: The Watcher Menu Options
on Notebook PCs
Installation and Use
Note: Unread messages are
displayed in bold.
Note: The Delete All and
message expiry features do not
delete unread messages (that
have never been displayed).
The message header is displayed in the top of the window,
showing the address or phone number from which the
message was sent, the beginning of the message, and the
call back number.
3. Click the message header to display the message in the
lower section of the window.
Messages marked with an exclamation mark (!) have been
tagged by the sender as being urgent or important.
To delete messages:
1. Use the check boxes to the left of the messages to select the
messages you want to delete.
2. Select
Edit > Delete.
3. Confirm that you want to delete the messages by clicking
Yes.
To delete all messages:
1. Select
Edit > Delete All.
2. Confirm that you want to delete the messages by clicking
Yes.
Watcher also has a feature that allows you set an expiry period
after which messages are automatically deleted. This is set in
the Options window. (Select
window, and click the
Tools > Options to display the
SMS tab. This is described below under
the Options… heading.)
Rev 1.0 Sep.01 39
Page 50

AirCard 555 Network Card User Guide
Note: The Reply to Sender
menu option is only available if
the e-mail address of the person
who sent you the message is
included in the message. This
won’t be available if, for
example, the message was sent
from a web site.
Note: The Call back Sender
menu option is only available if
the message includes a valid call
back number.
To forward a message:
1. Select the message header.
2. Select
File > Forward Message… to open the Message
window.
3. In the Message window you can edit the message, append
text to the message, and send it. (See the detailed instructions below.)
To reply to a mes sage:
1. Select the message header.
2. Select
File > Reply to Sender…to open the Message window.
3. In the Message window create the message and send it.
(See the detailed instructions below.)
To phone the sender of a message:
1. Select the message header.
2. Select
File > Call back sender.
Watcher then dials and attempts to connect to the call back
number.
To exit the Mobile Messenger window:
1. Select
File > Close or click the close box in the upper right
corner.
Note: In the Options window you
can enable and disable the
option to save outgoing
messages to the Outbox.
Sending SMS Messages: The Outbox
The Outbox is the place where your outgoing messages are
stored. Click the Outbox tab in the Mobile Messenger window
to display the Outbox contents:
40 2130142
Page 51

Chapter 7: The Watcher Menu Options
The third column from the left indicates the status of each
message in the Outbox:
Table 7-1: Outgoing Message Status Icons
Icon Meaning
Saved
The message has been saved in the Outbox but not yet
sent.
Sent
The message has been sent successfully to the CDMA
network but has not yet been delivered to the
recipient(s).
Delivered
The message has been delivered to the recipient(s)’ mail
box(es).
Partially Sent
The message has been sent to the network but the
network did not respond. (This may indicate a network
problem.)
Not Sent
The message was sent to the network and the network
responded with an error. The error message is shown in
the Status field when you display the message.
on Notebook PCs
Installation and Use
Some possible reasons for a failure to send are:
• You do not have a subscription to a service that
allows you to send SMS messages.
• The e-mail address in the To field is not valid.
• The message exceeded the maximum length for
SMS messages.
• There is a network problem or a problem with your
account.
To send a message from the Mobile Messenger window:
1. Select
File > New Message to open the Message window:
Rev 1.0 Sep.01 41
Page 52

AirCard 555 Network Card User Guide
Note: A message can have up
to 16 recipients.
2. Enter the recipients for the message by typing e-mail
addresses, or click the
To button to display the Add SMS
Recipients window.
The SMS Recipients window allows you to create a list of
e-mail addresses for the
To: field of the Message window.
In this window, you can:
· Enter a new address and click
Add-> to add it to the list
of recipients.
· Select an address and click
<-Remove to delete if from the
list of recipients.
Use this window to create a recipient list and click
OK to
return to the Message window.
3. If you want to send a message that is tagged as urgent or
important, select
High from the Priority drop-down menu.
4. Type the message in the lower portion of the window.
5. If you want to save the message in the Outbox and send it
later, select
File > Save.
6. If you want to send the message immediately, click the
Send button, or select File > Send.
To erase a message and start again:
1. Select
Edit > Clear.
42 2130142
Page 53

Chapter 7: The Watcher Menu Options
To open a message that is saved in the Outbox:
1. Double click the message header to open the message in
the Message window.
You can then edit the message and change or add recipients.
Exiting the Mobile Messenger Window
To exit from the Mobile Messenger window and return to the
main Watcher window:
1. Select
If there are any unsaved messages, Watcher prompts you to
indicate whether you want to save them.
File > Close.
Or
Click the
dow.
Close box in the upper right corner of the win-
Phone Book
This feature is not yet available.
on Notebook PCs
Installation and Use
Call Log
The call log maintains a record of your outgoing and incoming
calls. In the Options window (displayed when you select
Options) on the General tab, you can choose to keep a record of:
• none of your calls
• all of your calls
• the last 50 calls
• the last 100 calls
To display the call log:
1. Select
Tools > Call Log
Tools >
Rev 1.0 Sep.01 43
Page 54

AirCard 555 Network Card User Guide
For each message, the call log displays:
• The call direction (see below)
• The date and time the call was made or received
• The phone number of the caller (for incoming calls), or the
phone number that you dialed (for outgoing calls)
• The name of the caller (for incoming calls), or the name of
the person called (for outgoing calls), if available
• The type of call (data, voice, or fax)
Table 7-2: Call Direction Icons
Icon Meaning
Incoming Call
This is a call that you answered.
Outgoing Call
This is a call that you made.
Note: The Dial option in the File
menu can be used to establish a
voice call to any number in the
From or To column.
Note: The Add to PhoneBook
menu option will be available in
future versions.
Missed Call
This is a call you received but did not
answer.
To phone a number contained in one of the call records:
1. Double click the record.
Or
1. Select the number.
2. Select
File > Dial.
This can be used to place voice calls only.
To save the information in the call log to a text file:
1. Select
File > Save As….
2. Use the Save As dialog box to select a location and name
for the file and click
Save.
To delete a record:
1. Select the record.
2. Select
Edit > Delete.
To delete all records in the call log:
1. Select
Edit > Delete All
2. Click Yes to confirm the deletion.
To select what type of calls are displayed:
44 2130142
Page 55

Chapter 7: The Watcher Menu Options
Note: Clicking All in the View
menu causes all call types to be
displayed.
1. Use the View menu to select the call types:
· When
· When
Voice logs is checked, all voice calls are displayed.
Data logs is checked, all dial-up data calls are
displayed.
· When
Fax logs is checked, all fax calls are displayed.
To sort the cal ls:
1. Click any column heading to sort by that column in
ascending order.
2. Click the same column heading again to sort by the same
column in descending order.
For example, to sort the calls by name, click the Name column
heading. This sorts the records from A to Z. If you click the
Name column heading again, the records will be sorted from Z
to A.
Dial-Up Manager
The Dial-Up Manager is where dial-up data connections are
set up. (See Chapter 5 for a description of the types of data
connections.)
In the Dial-Up Manager you can:
• Add new records for phone numbers to which you want to
connect.
• Change existing records.
• Set the default connection.
• Select and establish a connection.
on Notebook PCs
Installation and Use
Note: The default connection is
the one established if you click
the Connect button on the main
Watcher window without making
a selection from the drop-down
menu.
To add a phone number to the Dial-Up Manager:
1. Select
Tools > Dial-Up Manager to open the Dial-Up Manager
window.
Rev 1.0 Sep.01 45
Page 56

AirCard 555 Network Card User Guide
2. Click the Add… button to open the Connection Properties
window.
3. Enter a name for the connection and complete the
remaining fields noting the following:
· If the phone number must be preceded with an area
code, click the
code. Click the
Use area code check box and enter the area
Use 1 check box if the phone number
must be prefixed with a 1.
· If dialing into a system that requires you to enter a user
name and password, enter this information. If you want
to save the information so that it is not necessary to enter
it each time you connect, click the
Save password check
box.
4. Click
OK to close the window and save the information
you entered, or
Cancel to close the window without saving.
To change an existing record in the Dial-Up Manager window:
1. Click the connection to select it and click the
Properties…
button to open the Connection Properties window.
2. Enter the new information in the appropriate fields. (The
Connection Name cannot be changed.)
3. Click
OK to close the window and save the information
you entered, or
Cancel to close the window without saving.
To delete a record in the Dial-Up Manager window:
1. Click the connection to select it and click the
2. When prompted to confirm the deletion, click
Delete button.
Yes.
To connect to a number in the Dial-Up Manager window:
1. Click the connection to select it and click the
Connect
button.
46 2130142
Page 57

Chapter 7: The Watcher Menu Options
The AirCard then attempts a connection to the phone number
you selected.
To set a number as the default in the Dial-Up Manager
window:
1. Click the connection to select it and click the
button.
Set as Default
KeyGuard
Note: Use the KeyGuard feature
if you are concerned that you
might inadvertently press Send
and dial a number.
The KeyGuard feature is designed to prevent accidental
dialing. When the feature is enabled, clicking the
or any other button on the dial pad, has no effect.
To enable or disable KeyGuard:
1. Select
A check mark next to the option indicates that it is enabled.
KeyGuard from the Tools menu.
Send button,
Options…
The Options window allows you to configure Watcher and the
AirCard 555 to your preferences. In the Options window you
can:
• Enable and disable several features, including: Auto-
Answer, Any-Key Answer, the Inactivity Time-Out, AutoConnect, SMS Message Expiry, and the Lock Code.
• Select whether certain warning messages are displayed to
warn you of circumstances such as your data connection
being lost.
• Configure options related to call logging, the Watcher
window, the call back number in SMS messaging, sounds
that notify you of incoming calls, new SMS messages, and
new voice mail.
on Notebook PCs
Installation and Use
Use of the Options Window
In the Options window, buttons, drop-down menus, and check
boxes are provided to allow you to select your preferences.
Use
OK to exit the Options window, saving any changes
you’ve made, or
The
Restore Defaults button causes all the fields on all the tabs
to revert to the settings they had at installation.
Rev 1.0 Sep.01 47
Cancel to exit without saving.
Page 58
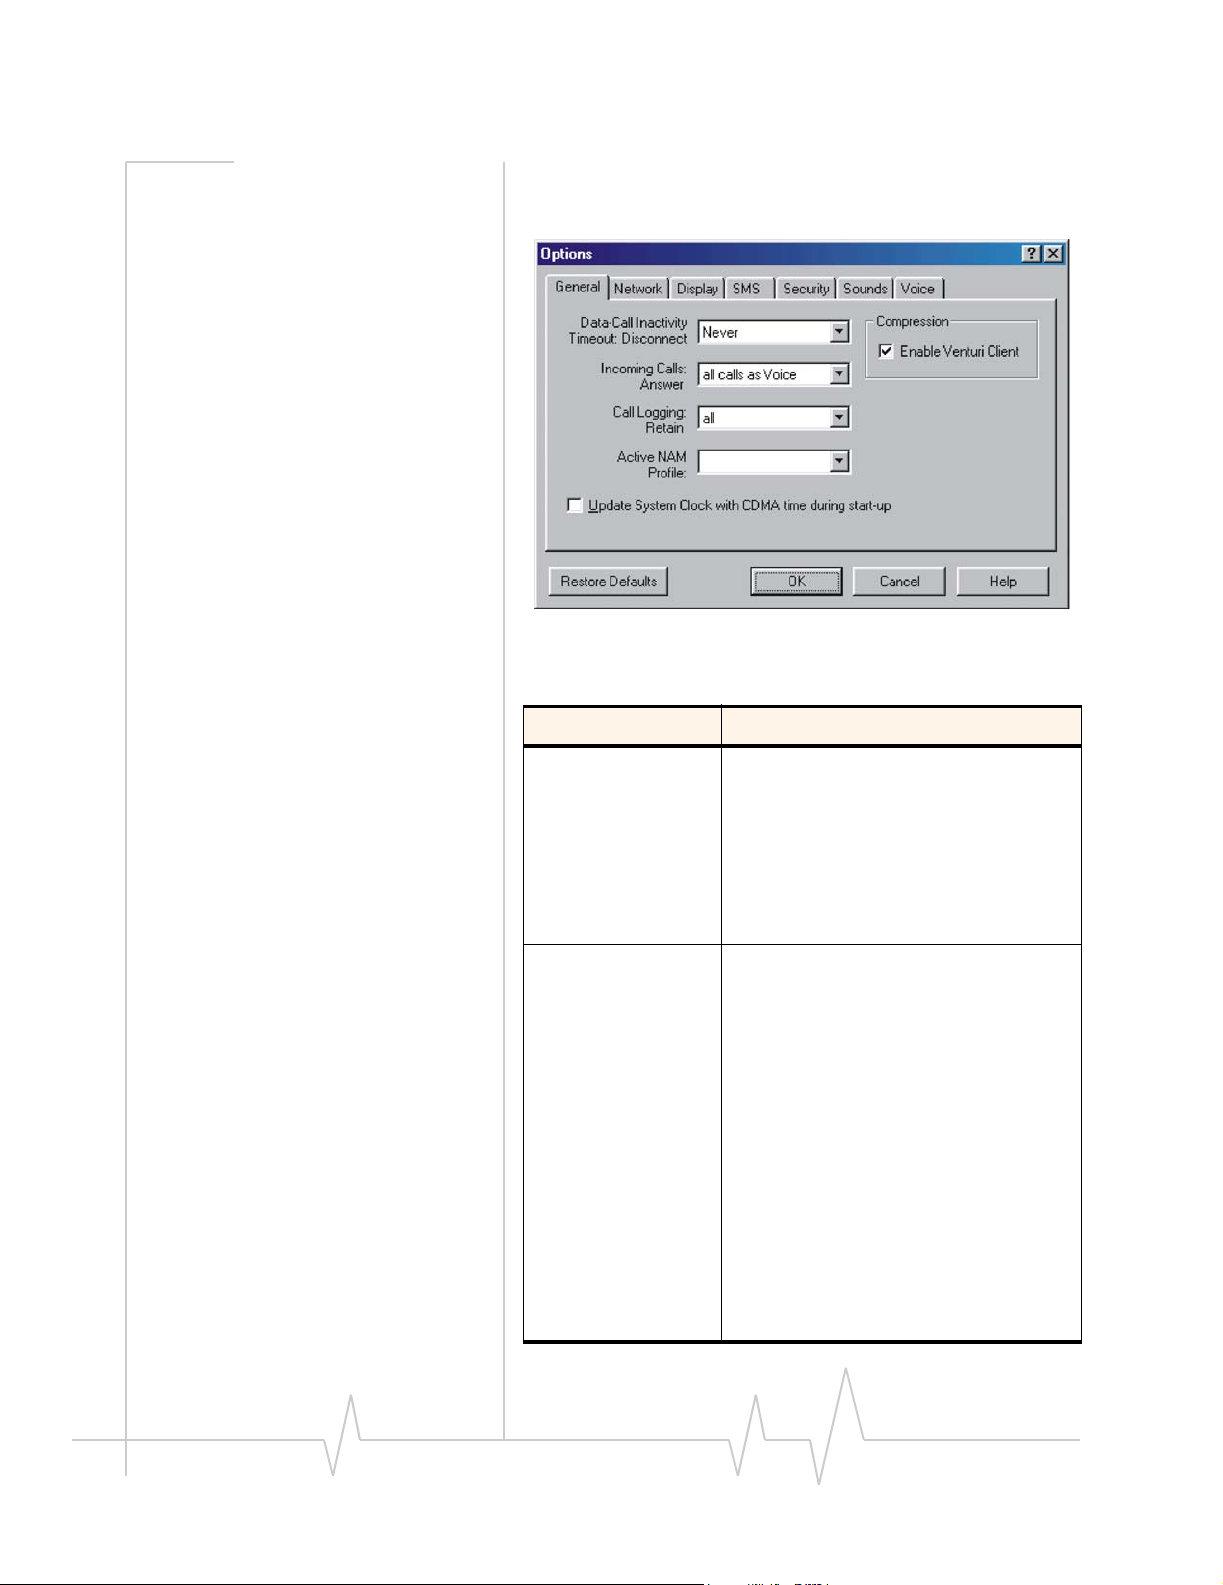
AirCard 555 Network Card User Guide
General Tab
Table 7-3: General Tab Options
Field Description
Data Call
Inactivity
Timeout:
Disconnect
Incoming Calls
Answer
The Inactivity Timeout terminates your
connection to the CDMA network
automatically when the AirCard is inactive
for the amount of time you specify here.
(The AirCard is inactive when no data
transmission is occurring.) Select Never to
disable the feature. Otherwise, select the
number of minutes after which you want to
automatically disconnect.
By default the AirCard is set to answer all
calls as voice calls. To receive a fax or data
call, you must set this field appropriately,
before the call is answered. This means
that anyone wanting to send a fax, or
establish a data connection with the
AirCard, must notify you in advance so that
you can change this field before the call is
made.
This setting reverts to “all calls as Voice”
whenever Watcher is restarted.
If you select “next call as Fax” or “next call
as Data”, the AirCard maintains the setting
for one call, or until Watcher is restarted.
If you select “all calls as Fax” or “all calls as
Data”, the AirCard maintains the setting
until you select another option.
48 2130142
Page 59

Chapter 7: The Watcher Menu Options
Table 7-3: General Tab Options
Field Description
Call Logging
Retain
Active NAM*
Profile
You have the option of maintaining records
of your outgoing and incoming calls in the
call log. (The call log is displayed when you
select Tools > Call Log, and is described
above.)
This field allows you to specify the number
of calls retained. Select none, all, last 50
calls, or last 100 calls from the drop-down
menu.
The AirCard allows you to configure and
use up to two accounts (with two different
phone numbers). This may be useful to
users who want, for example, to have one
account for business calls and one for
personal calls.
This drop-down menu lists these items:
Auto-Select, NAM 1, and NAM 2. If one
account has been activated, NAM 1 has a
phone number next to it, and if two
accounts have been activated, NAM 1 and
NAM 2 have phone numbers.
When Auto-Select is in effect, the AirCard
uses the account most appropriate to your
location, based on the coverage of your
accounts.
on Notebook PCs
Installation and Use
To configure a second account (where only
one account has been activated):
1. Select the option NAM 2 from this
drop-down menu and click OK.
2. Stop, eject and re-insert the AirCard.
3. Launch Watcher; the Activation
Wizard should launch. You can then
configure a second account.
If two accounts are configured, both phone
numbers should be displayed in this dropdown menu. To switch from one account to
the other:
1. Select the phone number from the
drop-down menu.
2. Stop, eject and reinsert the AirCard.
Rev 1.0 Sep.01 49
Page 60

AirCard 555 Network Card User Guide
Table 7-3: General Tab Options
Field Description
Update System
Clock with CDMA
time during startup
Enable Venturi
Client
All PCs have an internal clock called the
system clock. Depending on your
configuration, the time according to this
clock is usually displayed in the status
area, in the lower right corner of your
screen.
Generally you would use the Windows
Control Panel to change the time on the
system clock. This field gives you the
option of setting the time of your system
clock automatically from the CDMA
network each time you connect. This might
be useful to you if you frequently change
time zones. Use the check box to enable
and disable this feature. (It is enabled when
checked.)
Venturi Client is compression software that
increases data throughput between the
CDMA network and the AirCard, effectively
increasing the data transmission speed.
This compression can only be used where
it is available on the network. The Venturi
Client software necessary to using this
compression, is normally installed when
you install Watcher and the Network
Adapter Manager
When this option is enabled (assuming the
Venturi Client software is installed) Venturi
compression is used where available to
increase throughput. When disabled,
Venturi compression is not used even
when it is available on the network.
Use the check box to enable and disable
support for Venturi compression.
* NAM stands for Number Assignment Module and is information
stored in the flash memory of the AirCard. The information includes
your phone number parameters specific to your service provider.
50 2130142
Page 61
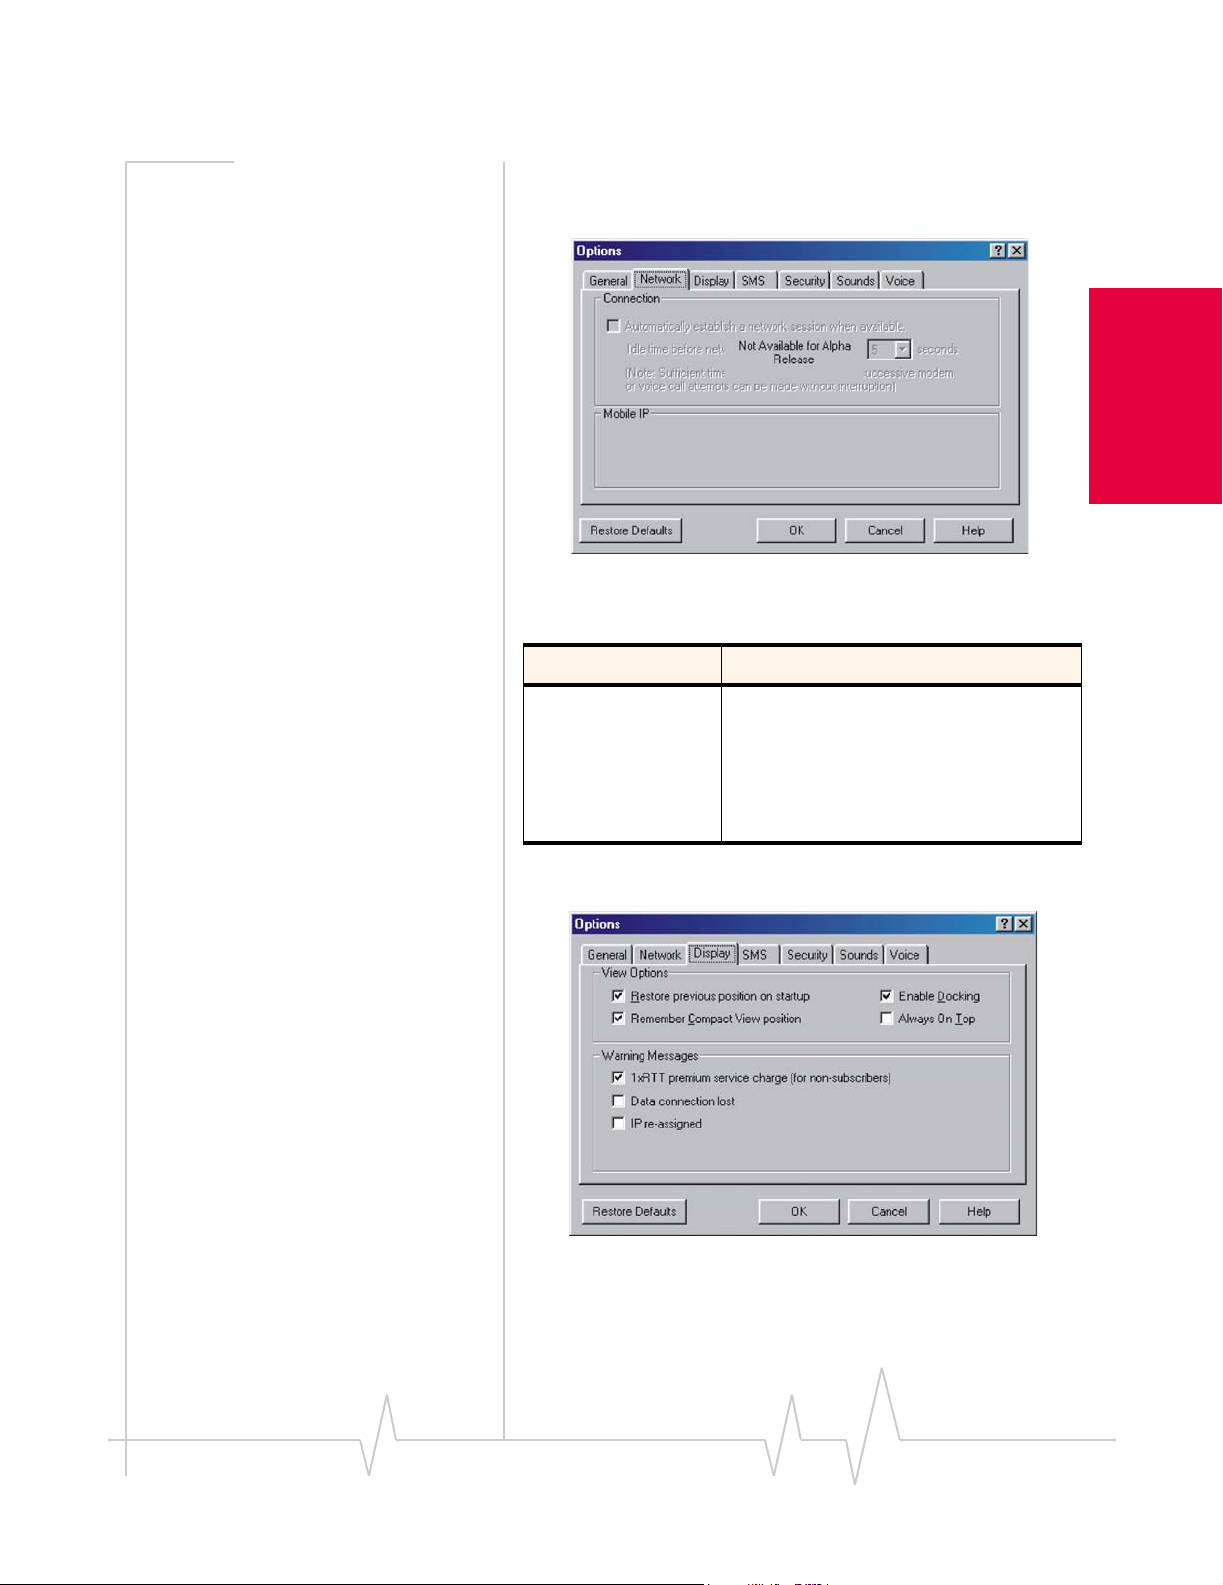
Chapter 7: The Watcher Menu Options
Network Tab
Table 7-4: Network Tab Options
Field Description
on Notebook PCs
Installation and Use
Automatically
establish a
network session
when available
Display Tab
In future releases the AirCard will have a
feature to allow for an immediate 1xRTT
connection whenever the AirCard is
inserted, where 1xRTT service is available.
(See Chapter 5 for a description of 1xRTT
connections.) This option is not yet
available.
Rev 1.0 Sep.01 51
Page 62

AirCard 555 Network Card User Guide
Table 7-5: Display Tab Options
Field Description
Restore previous
position on
startup
Remember
Compact View
position
This field determines where the full
Watcher window appears when launched.
(The full and compact views of the Watcher
window are shown in the Toggle Full/
Compact section above.)
If this feature is disabled, Watcher always
displays in the center of your screen.
If you enable this feature and move the
Watcher window, the window will re-appear
in its new position if you close and re-open
it, or change the view to compact and then
full again.
Use the check box to enable and disable
the feature. (The feature is enabled when
checked.)
This field determines where the compact
Watcher window appears.
If this feature is enabled, when you switch
from the full view to the compact view, the
Watcher window remains in the same
place.
If this feature is disabled, when you switch
from the full view to the compact view, the
Watcher window displays in the position it
last occupied.
Use the check box to enable and disable
this feature. (The feature is enabled when
checked.)
Enable Docking When Docking is enabled, the Watcher
window jumps to the edge of your screen
when the window is dragged close to an
edge. This allows you to easily position the
window in a corner of your screen.
Use the check box to enable and disable
this feature. (The feature is enabled when
checked.) You can also enable and disable
this feature by selecting View > Docking.
52 2130142
Page 63

Chapter 7: The Watcher Menu Options
Table 7-5: Display Tab Options
Field Description
Always on Top When Always On Top is enabled, the
1xRTT premium
service charge
(for nonsubscribers)
Watcher window displays in front of all
other application windows, even when you
position another window over Watcher.
This allows you to view connection status
indicators while using another application,
such as your Internet browser.
Use the check box to enable and disable
this feature. (The feature is enabled when
checked.) You can also enable and disable
this feature by selecting View > Always on
Top.
When this feature is enabled, a warning
message is displayed any time you select
1xRTT from the drop-down menu on the
main Watcher window, to remind you that
you may be charged extra for this service.
(Depending on your billing plan, your
service provider may apply a surcharge to
1xRTT service.)
Use the check box to enable and disable
this feature. (The feature is enabled when
checked.)
on Notebook PCs
Installation and Use
Rev 1.0 Sep.01 53
Page 64

AirCard 555 Network Card User Guide
Table 7-5: Display Tab Options
Field Description
Data connection
lost
IP re-assigned All devices connected to the Internet
When this feature is enabled, a warning
message is displayed any time you lose
your connection to the CDMA network.
Use the check box to enable and disable
this feature. (The feature is enabled when
checked.)
require an IP (Internet Protocol) address. In
some technologies, a device is assigned a
permanent IP address and that IP address
can never be used by another device.
Where DHCP (Dynamic Host Configuration
Protocol) is used, the network maintains a
pool of IP addresses and assigns them to
devices as needed. The AirCard 555 uses
DHCP so that it is assigned an IP address
by the network. This means that the IP
address for your AirCard changes each
time you connect, and sometimes during a
connection.
When this feature is enabled, a warning
message is displayed each time the
network assigns a new IP address to the
AirCard.
Use the check box to enable and disable
this feature. (The feature is enabled when
checked.)
SMS Tab
54 2130142
Page 65

Chapter 7: The Watcher Menu Options
Table 7-6: SMS Tab Options
Field Description
SMS Messages:
Expire
Override
Callback #
This feature allows for the automatic
deletion of SMS messages that have been
in your Inbox for a specified amount of
time. The SMS messaging feature is
described in detail under the heading
Mobile Messaging… above.
To disable automatic deletion of messages,
select Never from the drop-down menu.
To enable automatic deletion of messages,
select a number of days from the dropdown menu.
Only messages that have been “read”
(displayed in the Mobile Messenger
window) are deleted by this feature.
Manual deletion of messages is covered in
the section on Mobile Messaging… above.
When you send SMS messages, you have
the option of specifying a call back number
so that the message recipient will know
how to reach you. By default, your call back
number is your AirCard phone number.
This feature allows you to use a different
number than the AirCard phone number.
To set a new call back number, click the
check box to enable the feature and enter a
number in the field. (Leave the field blank if
you prefer to have no call back number on
your messages.)
on Notebook PCs
Installation and Use
To disable the feature (and use the AirCard
phone number as your call back number),
click the check box so that it is not
checked.
Rev 1.0 Sep.01 55
Page 66

AirCard 555 Network Card User Guide
Table 7-6: SMS Tab Options
Field Description
Save to Outbox You have the option of retaining, in the
Outbox, a copy of messages that you send.
See the Mobile Messenger… section for
details about the Outbox.
This feature allows you to specify whether
outgoing messages are saved in the
Outbox. If you do not want to save any
messages, select never. If you want to be
prompted as you send each message, as
to whether you want to retain a copy, select
ask first. If you want to retain a copy of all
messages you send, select automatically.
Note that if you do not save messages to
the outbox you do not receive status
messages, such as the one that notifies
you of a successful delivery.
56 2130142
Page 67

Note: Locking the AirCard 555
does not prevent you from
dialing 911.
Chapter 7: The Watcher Menu Options
Security Tab
Table 7-7: Security Tab Options
Field Description
on Notebook PCs
Installation and Use
Lock modem The Lock Code feature can be used to
Lock Modem Now This field allows you to enable the Lock
prevent others from using your AirCard and
your account. When the Lock Code is
enabled, you are prompted to enter a code
any time Watcher is launched, and if the
wrong code is entered, Watcher closes.
(This makes it impossible to use the
AirCard without knowing the lock code.) By
default the lock code is the last four digits
of your phone number.
To disable the feature, select never from
the drop-down menu. To enable the
feature, so that you are prompted for a lock
code the next time you launch Watcher,
select on power up from the drop-down
menu. (The Lock Code feature will then
remain enabled until you disable it by
selecting never in this field.)
Code feature immediately. (If you select on
power up in the previously described dropdown menu, you need to close Watcher
before the lock code comes into effect.)
When you click the button, Watcher
prompts, “Lock the modem now?”. Click
Yes at this prompt to lock the AirCard.
Rev 1.0 Sep.01 57
Page 68

AirCard 555 Network Card User Guide
Table 7-7: Security Tab Options
Field Description
Change Lock
Code
Sounds Tab
This button allows you to set a new lock
code.
To change the lock code:
1. Click the Change Lock Code button.
2. Enter your existing lock code (the last
four digits of your phone number
unless you have changed it) at the
prompt.
3. Enter a new lock code.
4. Enter your new lock code for confir-
mation.
5. Click OK.
58 2130142
Page 69

Chapter 7: The Watcher Menu Options
Table 7-8: Sounds Tab Options
Field Description
Enable This field allows you to enable and disable
all sounds.
When this box is checked, you have the
option of individually enabling and disabling
the Call Alert, Incoming Call, New SMS
Message, and New Voice mail sounds.
When the box is not checked, there are no
sounds to notify you of any of these events.
Use the check box to indicate whether you
want all sounds enabled or disabled.
Call Alert Depending on your billing plan, you may
have a feature called Call Alert. When you
are on a call, this feature notifies you when
you have another incoming call. You can
then ignore the new incoming call or put
your current caller on hold and answer the
new call. (Contact your service provider if
you require more information about Call
Alert.)
If you have Call Alert, you can use this field
to select whether a sound is played to
notify you of another incoming call when
you are already on a voice call.
Use the check box to enable and disable
the sound assigned to Call Alert. The play
button (with the arrow head on it) allows
you to hear the sound assigned to this
feature. If you have another sound file you
would prefer to play for call alerts, you can
use the Browse button to select it. (Any
*.wav file can be used.)
on Notebook PCs
Installation and Use
Rev 1.0 Sep.01 59
Page 70

AirCard 555 Network Card User Guide
Table 7-8: Sounds Tab Options
Field Description
Incoming Call This field allows you to select whether a
New SMS
Message
sound is played when you receive a call.
When this is disabled, the Silent Ringer
icon is displayed in the indicator area of the
main Watcher window. The only notification
you will then have of an incoming voice call
is the “Voice Call From …” or “Roam Call
From …” message displayed in the call
status area.
Use the check box to enable or disable the
sound. The play button (with the arrow on
it) allows you to hear the sound assigned to
incoming calls. If you have another sound
file you would prefer to use, you can use
the Browse button to select it. (Any *.wav
file can be used.)
This field allows you to select whether a
sound is played when your receive a new
SMS message.
When this is enabled, a sound is played
each time a message arrives. When
disabled no sound is played.
Use the check box to enable or disable the
sound. The play button (with the arrow on
it) allows you to hear the sound assigned to
new SMS messages. If you have another
sound file you would prefer to use, you can
use the Browse button to select it. (Any
*.wav file can be used.)
New Voicemail This field allows you to select whether a
sound is played when a new voice mail
message arrives.
When this is enabled, a sound is played
when voice mail arrives. When disabled, no
sound is played.
Use the check box to enable or disable the
sound. The play button (with the arrow
head on it) allows you to hear the sound
assigned to new voice mail. If you have
another sound file you would prefer to use,
you can use the Browse button to select it.
(Any *.wav file can be used.)
60 2130142
Page 71

Chapter 7: The Watcher Menu Options
Table 7-8: Sounds Tab Options
Field Description
Headset Volume This slider allows you to adjust the volume
of the ear piece on your headset. This
affects only the volume of what you hear.
(That is, it does not adjust the volume of
the speaker.) This performs the same
function as the volume controls on the main
Watcher window.
To increase the volume, drag the slider to
the right. To decrease the volume, drag the
slider to the left.
Voice Tab
on Notebook PCs
Installation and Use
Table 7-9: Voice Tab Options
Field Description
Auto-Answer
Incoming Calls
This field allows you to enable and disable
the Auto-Answer feature, and when
enabled to select the number of rings after
which a voice call is answered.
To disable the feature, select off from the
drop-down menu. To enable the feature,
select the number of rings after which
Watcher automatically answers the call.
Rev 1.0 Sep.01 61
Page 72

AirCard 555 Network Card User Guide
Table 7-9: Voice Tab Options
Field Description
Auto-Retry This field allows you to enable and disable
Any-Key Answer This field allows you to enable and disable
the Auto-Retry feature, and when enabled
to select the interval between retrys.
At times when a large number of users are
connected to a single base station on the
CDMA network, you may be unable to
make a network connection on your first
attempt. When enabled, Auto-Retry
attempts the connection up to five times at
the interval you select. When disabled, the
AirCard does not retry automatically.
To disable the feature, select off.
Otherwise, select the interval at which you
want automatic retrys to occur.
the Any-Key Answer feature.
When enabled, you can answer an
incoming call by clicking any button on the
dial pad except End and Clr. When
disabled, you must click the Send key to
answer incoming calls.
Use the check box to enable and disable
the feature. (The feature is enabled when
checked.)
AutoHyphenation
This field allows you to enable and disable
the Auto-Hyphenation feature.
When enabled, a hyphen is automatically
inserted after the area code, and between
the first three and last four digits of a phone
number, as you enter the number. (This
has no effect on what is dialed.) When
disabled, no hyphen is inserted as you
enter a phone number.
Use the check box to enable and disable
the feature. (The feature is enabled when
checked.)
62 2130142
Page 73

Chapter 7: The Watcher Menu Options
Table 7-9: Voice Tab Options
Field Description
Tone Length DTMF (Dual Tone Multi-Frequency) is the
system used by touch tone phones under
which a specific frequency or tone is
assigned to each key. There is a standard
length for these tones. However, some
voice mail systems require a shorter or
longer than normal length tone.
This field allows you to set the AirCard to
use a shorter or longer tone for systems
that require it.
The recommendation is to select normal
unless your service provider indicates that
a different tone is required.
Mute When DTMF mute is enabled, there is no
audible tone while the AirCard dials.
Use the check box to enable and disable
the feature. (The feature is enabled when
checked.)
Minute Alert This field allows you to enable and disable
the Minute Alert feature.
When enabled, the AirCard beeps at one
minute intervals while you are on voice
calls. This allows you to keep track of the
duration of your call.
on Notebook PCs
Installation and Use
Use the check box to enable and disable
the feature. (The feature is enabled when
checked.)
Service Alert The field allows you to enable and disable
the Service Alert feature.
When enabled, the AirCard emits a tone
whenever it goes from being out of service
to being in service, and whenever it goes
from being in service to being out of
service.
Use the check box to enable and disable
the feature. (The feature is enabled when
checked.)
Rev 1.0 Sep.01 63
Page 74

AirCard 555 Network Card User Guide
Table 7-9: Voice Tab Options
Field Description
Voice Mail
Change …
Depending on your billing plan, you may
have a Voice Mail feature that allows
callers to leave you a message when you
don’t answer a call. If you have this feature,
then you access your voice messages by
dialing a number specific to your service
provider.
When the AirCard is configured, the phone
number your service provider uses for
voice mail is automatically set up for you. If
this number should change, you can
change the number here. To change the
number:
1. Click Change…
2. Enter the new phone number in the
window that appears.
3. Click OK.
Administration > Activation Wizard…
The Activation Wizard is used to configure the AirCard to use
your account. An overview of this process is provided in the
chapter Getting Started, under the heading Account Configu-
ration and Activation.
Use of the Activation Wizard is described in Chapter 3 (Instal-
lation on Notebook PCs) under the heading Account Configuration
Procedures.
Administration > Modem Update…
This option is not available in the Beta release.
The Help Menu
The options in the help menu allow you to:
• Use the on-line help
• Display version information
64 2130142
Page 75

Chapter 7: The Watcher Menu Options
Help Topics…
The AirCard 555 network card comes with complete on-line
help. To get help on any topic:
Note: Help is available in most
Watcher windows by clicking the
Help button or by pressing <F1>.
1. Select Help > Help Topics….
If the topic you want to display has a link on the main
window, click the link.
If you do not see the topic you want to display, use the
Find, or Help Topics buttons to display the corresponding
Index,
window:
In the
Index window, a list of topics is displayed in the lower
portion of the window. Search for an index entry by either
typing the first few letters in the field at the top, or use the
scroll bars to scan the list of entries. When you locate an entry
you want to display, click the entry and click
Display.
on Notebook PCs
Installation and Use
In the
Help Topics (Contents) window, use the scroll bar to
locate a topic of interest. Topics that have a book icon next to
them can be expanded by double clicking the icon. Double
click a topic to display its window.
Rev 1.0 Sep.01 65
Page 76

AirCard 555 Network Card User Guide
In the Find window, select a radio button to generate a
database. Then use the word matching options to locate the
help section you want to display.
About Watcher…
The About window displays version information.
The information displayed in this window is:
• The phone number of your account
• The Electronic Serial Number (ESN), a number assigned to
each AirCard 555 by the manufacturer
• The IP (Internet Protocol) Address currently assigned to
the AirCard
• The version of Watcher (Software) in use
66 2130142
Page 77

Chapter 7: The Watcher Menu Options
• The version of the AirCard driver (software that forms the
interface between the AirCard and your operating system)
in use
• The hardware version
• The version of firmware (software that resides in the flash
memory of the AirCard) in use
• The version of the bootloader (a component of the
firmware) in use
If you have an Internet connection, you can go to the Sierra
Wireless web site by clicking the
www.sierrawireless.com button.
on Notebook PCs
Installation and Use
Rev 1.0 Sep.01 67
Page 78

AirCard 555 Network Card User Guide
68 2130142
Page 79

8: The Network Adapter Manager
• Windows 95, 98, NT &
Me
• Windows 2000
• On-Line Help and
Version Information
• Closing the Network
Adapter Manager
The AirCard 555 wireless network card comes with an application, called the Network Adapter Manager, that is designed
to manage multiple network interface cards.
To understand the purpose of the Network Adapter Manager,
it is necessary to understand that the AirCard behaves differently for each type of connection. The AirCard 555 behaves as:
on Notebook PCs
Installation and Use
Note: If you install the Sierra
Wireless AirCard 300 or
AirCard 400 software, it is
necessary to re-install the
Network Adapter Manager from
the AirCard 555 CD.
Note: The Network Adapter
Manager launches automatically
whenever Windows is started.
Unless you manually exit the
application, it remains running
from the time you start Windows
until you shut down. Generally,
the only evidence that the
Network Adapter Manager is
running is the status area icon.
• A modem during dial-up data connections
• A phone during voice connections
• A network interface card during 1xRTT connections
It is only while the AirCard 555 is behaving as a network
interface card (when there is an active 1xRTT connection) that
the Network Adapter Manager is of use.
When you have more than one network interface card
inserted, Windows routes the data traffic through only one of
the cards. This means that when you have a 1xRTT connection
with the AirCard 555, and you have another network interface
card (such as an Ethernet or Token Ring LAN card) inserted,
data traffic is routed through either the AirCard 555 or the
LAN card — not both. The card through which data traffic is
being routed is the “primary” card. The Network Adapter
Manager shows you which card is primary by displaying an
icon in the status area (usually located in the lower right corner
of your screen).
Depending on which card is primary, the Network Adapter
Manager displays one of these icons.
Rev 1.0 Sep.01 69
Page 80

AirCard 555 Network Card User Guide
The tooltip, displayed when you position the pointer over the
Network Adapter Manager icon in the status area, identifies
the primary card:
Windows 95, 98, NT & Me
In Windows 95, 98, NT, and Me, the Network Adapter
Manager can be used to switch between the AirCard 555 and
other network interface cards.
Switching Primary Cards
If you initiate a 1xRTT connection with the AirCard 555 while
a LAN card is primary, the Network Adapter Manager
automatically makes the AirCard the primary card. That is,
making a 1xRTT connection while a LAN card is in use has the
effect of re-routing data traffic from the LAN card to the
AirCard 555.
Note: Switching between cards
while using a network application
is NOT recommended. For
example, if you use the Network
Adapter Manager to switch from
using your LAN card to the
AirCard while an e-mail application is running, the e-mail
application may behave unpredictably. The recommendation is
to close network applications,
switch cards, and launch the
applications again.
The Network Adapter Manager also has a menu through
which you can switch primary cards. To switch cards:
1. Right click the Network Adapter Manager icon in
the status area to display the shortcut menu.
2. Select the card you want to use as the primary card from
the menu.
Or
Select
Show Options from the menu. In the window that
appears, use the radio buttons to select the card you want
to use as the primary card and click
OK.
70 2130142
Page 81

Chapter 8: The Network Adapter Manager
Windows 2000
Windows 2000 has more advanced device handling capabilities than Windows 95, 98, NT, and Me. If more than one
network card is detected, Windows 2000 automatically routes
network traffic through the card that provides the highest
transmission speed.
Generally a wireline LAN card (such as an Ethernet card)
provides faster transmission speed than a wireless card (such
as the AirCard). If, for example, you have an AirCard and an
Ethernet card installed and active on your laptop, Windows
routes network traffic through the Ethernet card because it
offers the higher transmission speed. If you then want to take
the computer to another location, you can stop the Ethernet
card (see below), disconnect the cable to the Ethernet card, and
Windows 2000 will automatically begin routing network traffic
through the AirCard.
on Notebook PCs
Installation and Use
Since Windows 2000 has this enhanced method of handling
multiple PC cards, the Network Adapter Manager does not
allow you to switch cards from the shortcut menu in this
operating system.
In Windows 2000 you can control which card is the primary
card by stopping the cards you do not want to use.
To stop a card:
1. Click the PC card icon in the status area.
2. A listing of active cards is displayed.
3. Click the card you want to stop in the listing.
Rev 1.0 Sep.01 71
Page 82

AirCard 555 Network Card User Guide
On-Line Help and Version Information
To display on-line help for the Network Adapter Manager:
1. Right click the Network Adapter Manager status area icon.
2. Select
To display version information for the Network Adapter
Manager:
1. Right click the Network Adapter Manager status area icon.
2. Select
Help from the shortcut menu.
About Network Adapter Manager from the menu.
Closing the Network Adapter Manager
To close the Network Adapter Manager:
1. Right click the Network Adapter Manager status area icon.
2. Select
Exit from the shortcut menu.
72 2130142
Page 83

9: Technical Specifications
• LED Operation
• Radio Frequency &
Electrical
Specifications
• Environmental
Specifications
This chapter describes the function of the LED, and provides
technical product data for the AirCard 555 wireless network
card.
LED Operation
The AirCard 555 has a single red/green LED on the antenna
end of the card. The LED operates as follows:
Table 9-1: LED Operation
LED Behavior Indicates
Solid amber* The AirCard is powering up.
Blinking amber The AirCard is searching for a channel.
Solid green A call is in progress.
Blinking green The AirCard has acquired a channel and is
in idle mode (no call is in progress).
Solid red An error has occurred.
* Amber is used to describe the color of the LED when both red and
green are lit.
Technical
Specifications
Rev 1.0 Sep.01 73
Page 84

AirCard 555 Network Card User Guide
Radio Frequency & Electrical Specifications
Table 9-2: Radio Frequency & Electrical
Specifications
Approvals Compliant with:
IS95A, IS95B, IS-98D, IS-707A, IS707A-1,
CDMA Developers Group
FCC
Industry Canada
Voltag e +5 Vdc from PCMCIA Slot
Current Maximum: 680 mA
Typical: 150 mA
Transmitter
Power
Transmit PCS: 1850 to 1910 MHz
Receive PCS: 1930 to 1990 MHz
Channel Spacing 1.25 MHz
Freq. Stability ± 150 Hz
200 mW (+23 dBm)
Cellular: 824 to 849 MHz
Cellular: 869 to 894 MHz
Environmental Specifications
Table 9-3: Environmental Specifications
Operating Temp. -30 to +60 °C (ambient, outside PCMCIA
enclosure)
Storage Temp. -30 to +85 °C
Humidity 95%, non-condensing
Vibration 15 g peak 10 to 2000 Hz (non operating)
Drop 30” (76.2 cm) on to vinyl covered concrete
74 2130142
Page 85

10: Regulatory Information
This device complies with Part 15 of the FCC Rules. Operation
of this device is subject to the following two conditions: (1) this
device may not cause harmful interference, and (2) this device
must accept any interference received, including interference
that may cause undesirable operations. FCC guidelines
stipulate that the antenna should be more than 17mm (0.68”)
from all persons.
FCC ID: N7NACRD555
Where appropriate, the use of the equipment is subject to the
following conditions:
CAUTION Unauthorized modifications or changes not
expressly approved by Sierra Wireless, Inc. could void
compliance with regulatory rules, and thereby your authority
to use this equipment.
WARNING (EMI) – United States FCC Information – This
equipment has been tested and found to comply with the
limits pursuant to Part 15 of the FCC Rules. These limits are
designed to provide reasonable protection against harmful
interference in an appropriate installation. This equipment
generates, uses, and can radiate radio frequency energy and, if
not installed and used in accordance with the instructions,
may cause harmful interference to radio communication.
However, there is no guarantee that interference will not occur
in a particular installation.
If this equipment does cause harmful interference to radio or
television reception, which can be determined by turning the
equipment off and on, the user is encouraged to try to correct
the interference by one or more of the following measures:
• Reorient or relocate the receiving antenna
• Increase the separation between the equipment and
receiver
• Connect the equipment into an outlet on a circuit different
from that to which the receiver is connected
• Consult the dealer or an experienced radio/TV technician
for help
WARNING (EMI) – Canada – This digital apparatus does not
exceed the Class B limits for radio noise emissions from digital
apparatus as set out in the interference causing equipment
standard entitled “Digital Apparatus”, ICES-003 of the
Department of Communications.
Rev 1.0 Sep.01 75
Regulatory Information
Page 86

AirCard 555 Network Card User Guide
Cet appareil numérique respecte les limites de bruits radioélectriques applicables aux appareils numériques de Classe B
prescrites dans la norme sur le matériel brouilleur: “Appareils
Numériques”, NMB-003 édictée par le ministre des Communications.
If you have purchased this product under a United States
Government contract, it shall be subject to restrictions as set
forth in subparagraph (c)(1)(ii) of Defense Federal Acquisitions
Regulations (DFARs) Section 252.227-7013 for Department of
Defense contracts, and as set forth in Federal Acquisitions
Regulations (FARs) Section 52.227-19 for civilian agency
contracts or any successor regulations. If further government
regulations apply, it is your responsibility to ensure
compliance with such regulations.
76 2130142
Page 87

Page 88

 Loading...