


SIEPEM Technology CJ 100 User Manual
IP CAMERA
Chapter 1 Features
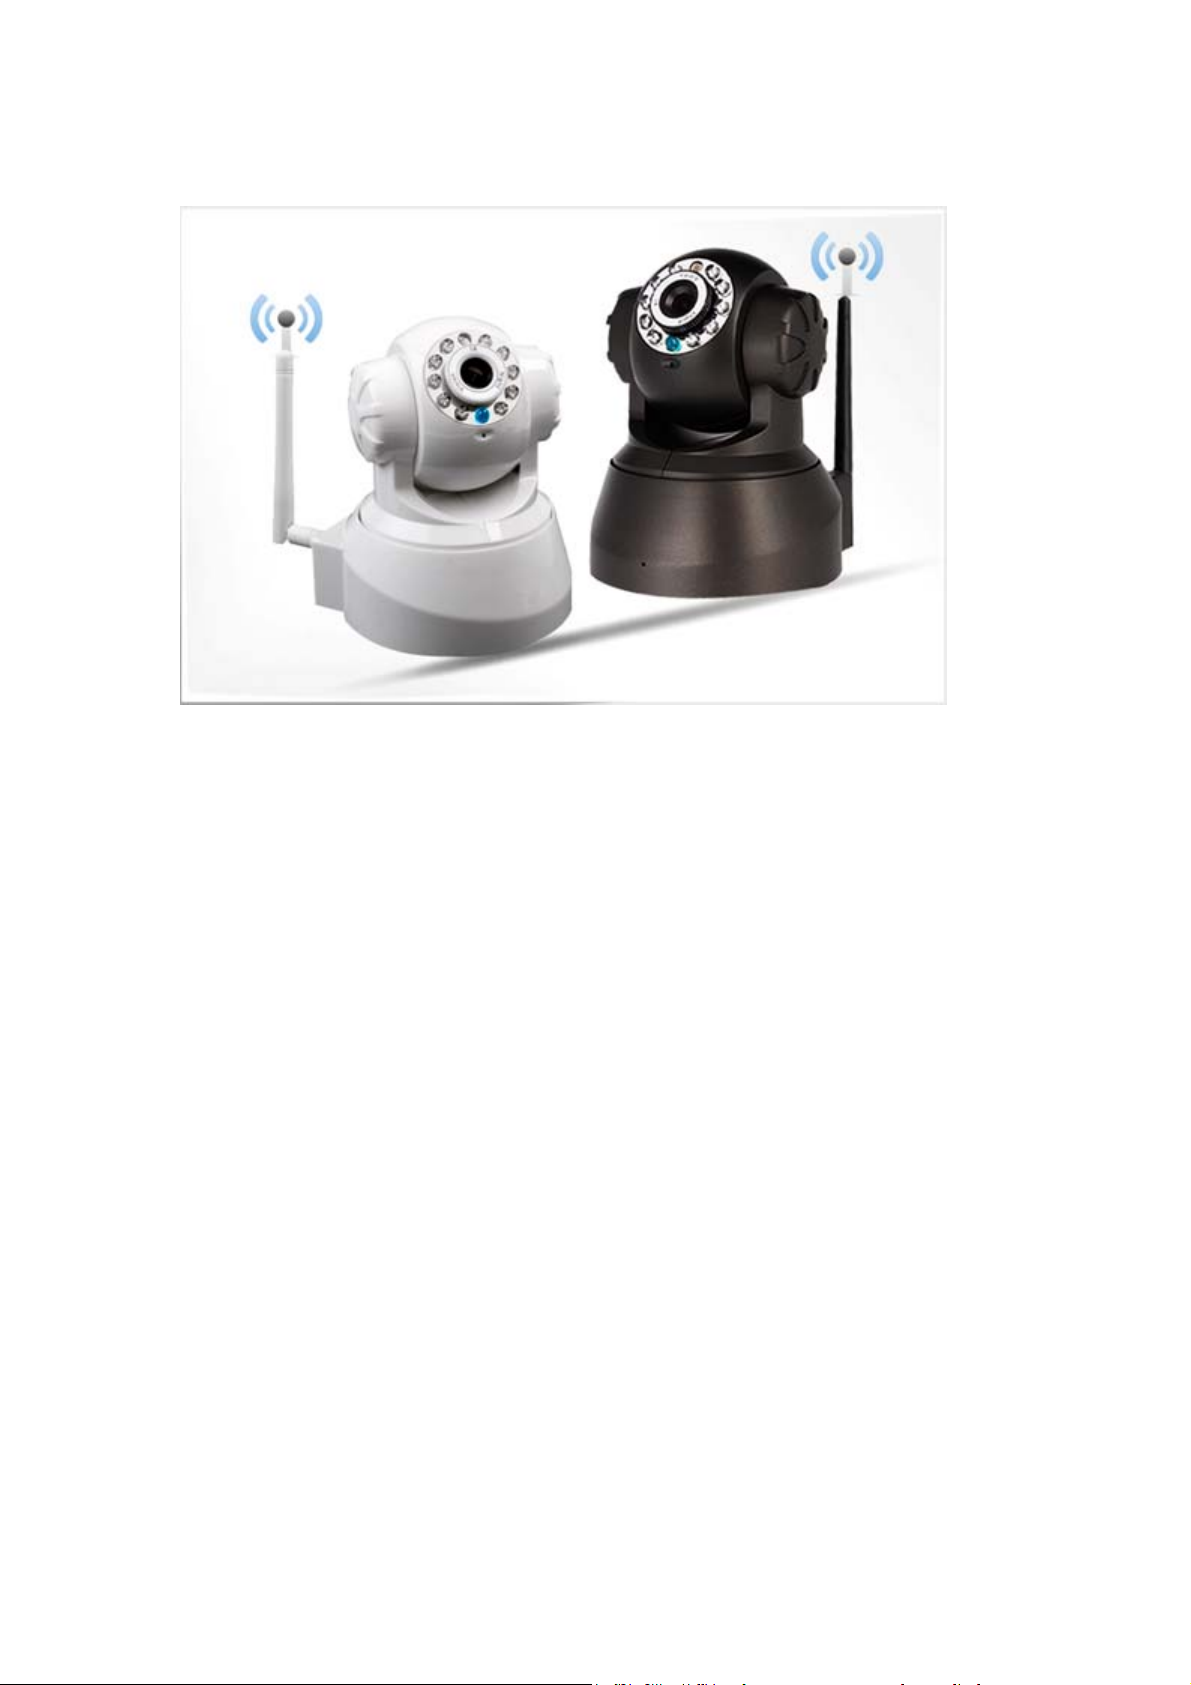
NEW
CJ-100 is the latest model developed by SIEPEM, Inc., it is suitable for family,
offices and chain store monitoring. It is the latest version.
●P2P (peer to peer) technology, without annoying IP settings simply fill out the
ID number can be obtained surveillance video.
●Wi-Fi compliant with wireless standards IEEE 802.11b/g;
●Suport Pan/Tilt control up and down,rotation, auto-cruise from different
angles (Pan:355°& Tilt:120°);
●Auto IR-LED illumination for night vision (up to 10 metres);
●Nice blue indicator light ;
●Two-dimensional code scanning functions.
Chapter 2 Installation
2.1
First: connect the camera with hub, switch or router by Cat.5 straight-through
1)
cable or cross-over cable with standard RJ-45 interface.
Second: connect the camera with power supply by the adaptor supplied (DC5V,
2)
2A).
Caution: Please ensure that the adaptor matches with the electricity (Input: AC 100V
or 220V, Output: 5V DC/2A).
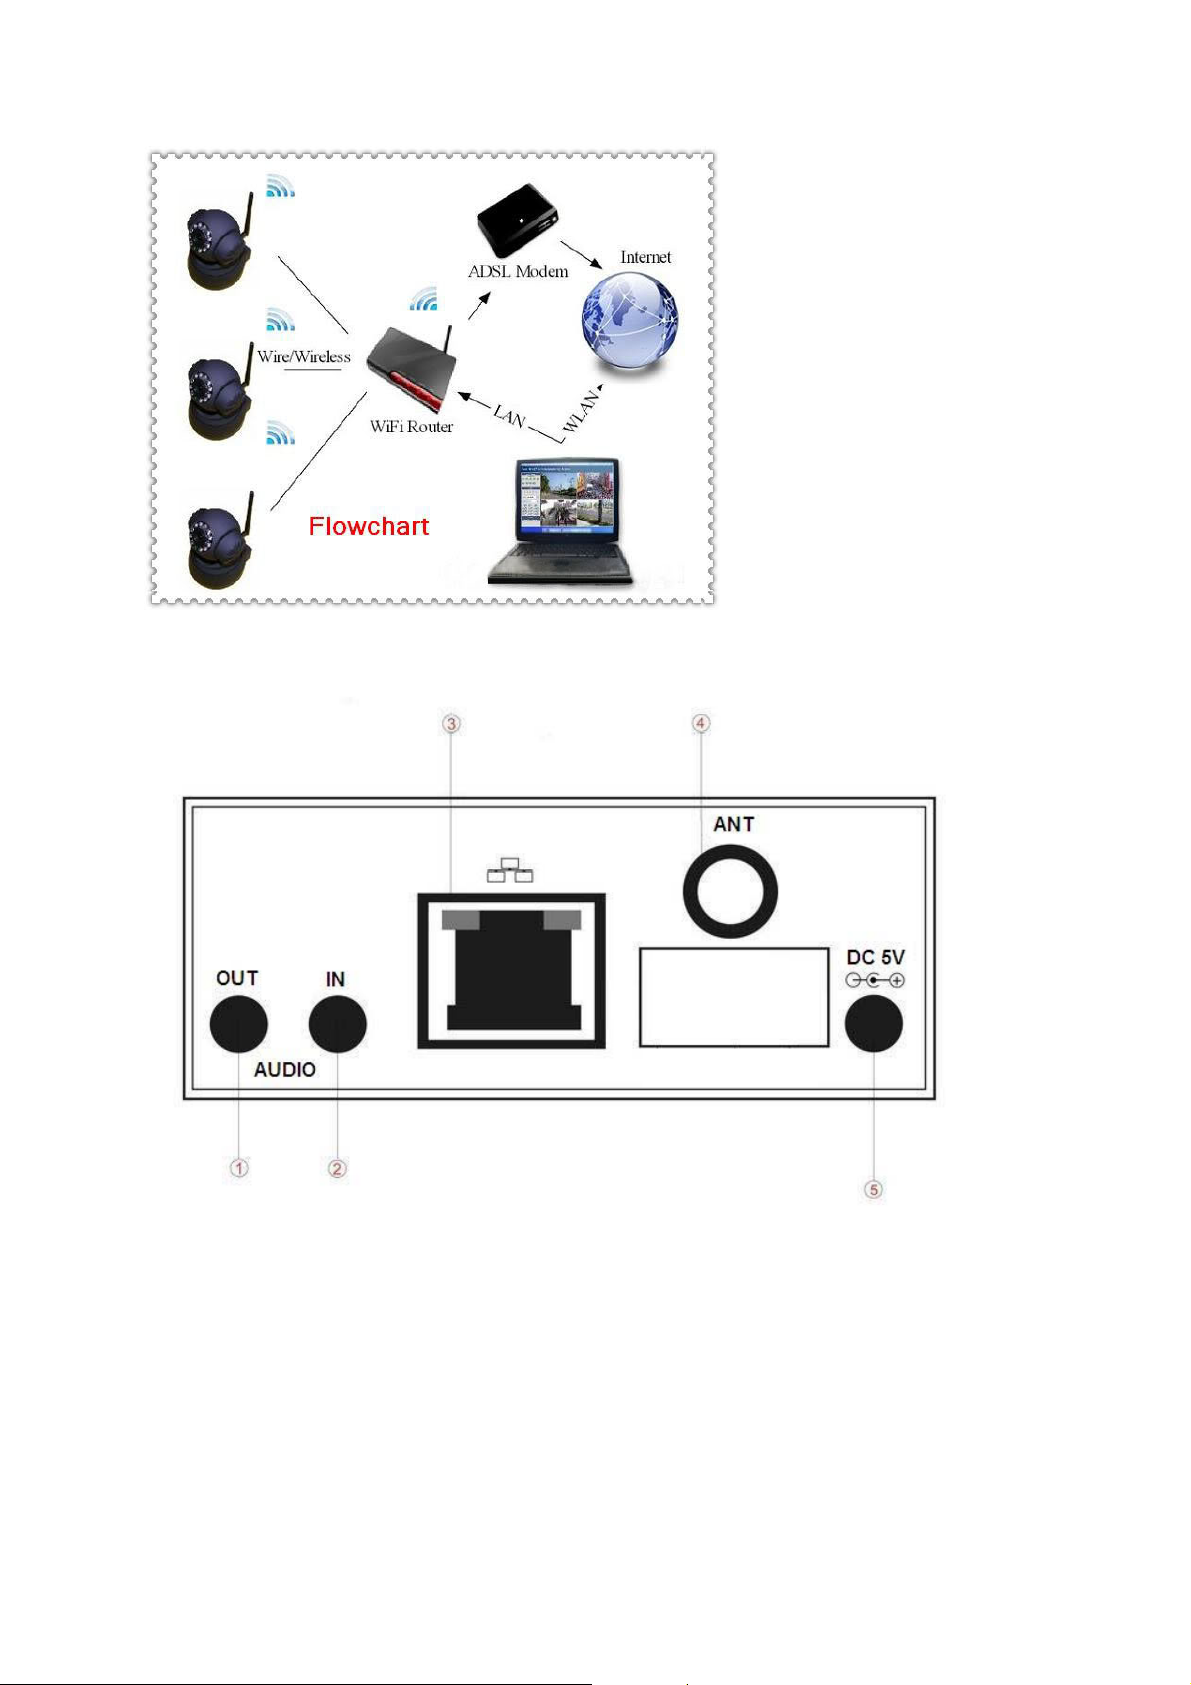
2.2 Interface
Chapter 3 Cellphone monitor
3.1 cellphone must be connected to the internet(WIFI/GPRS/3G)
3.2 install software on your cellphone
Android:Acquire software from CD.
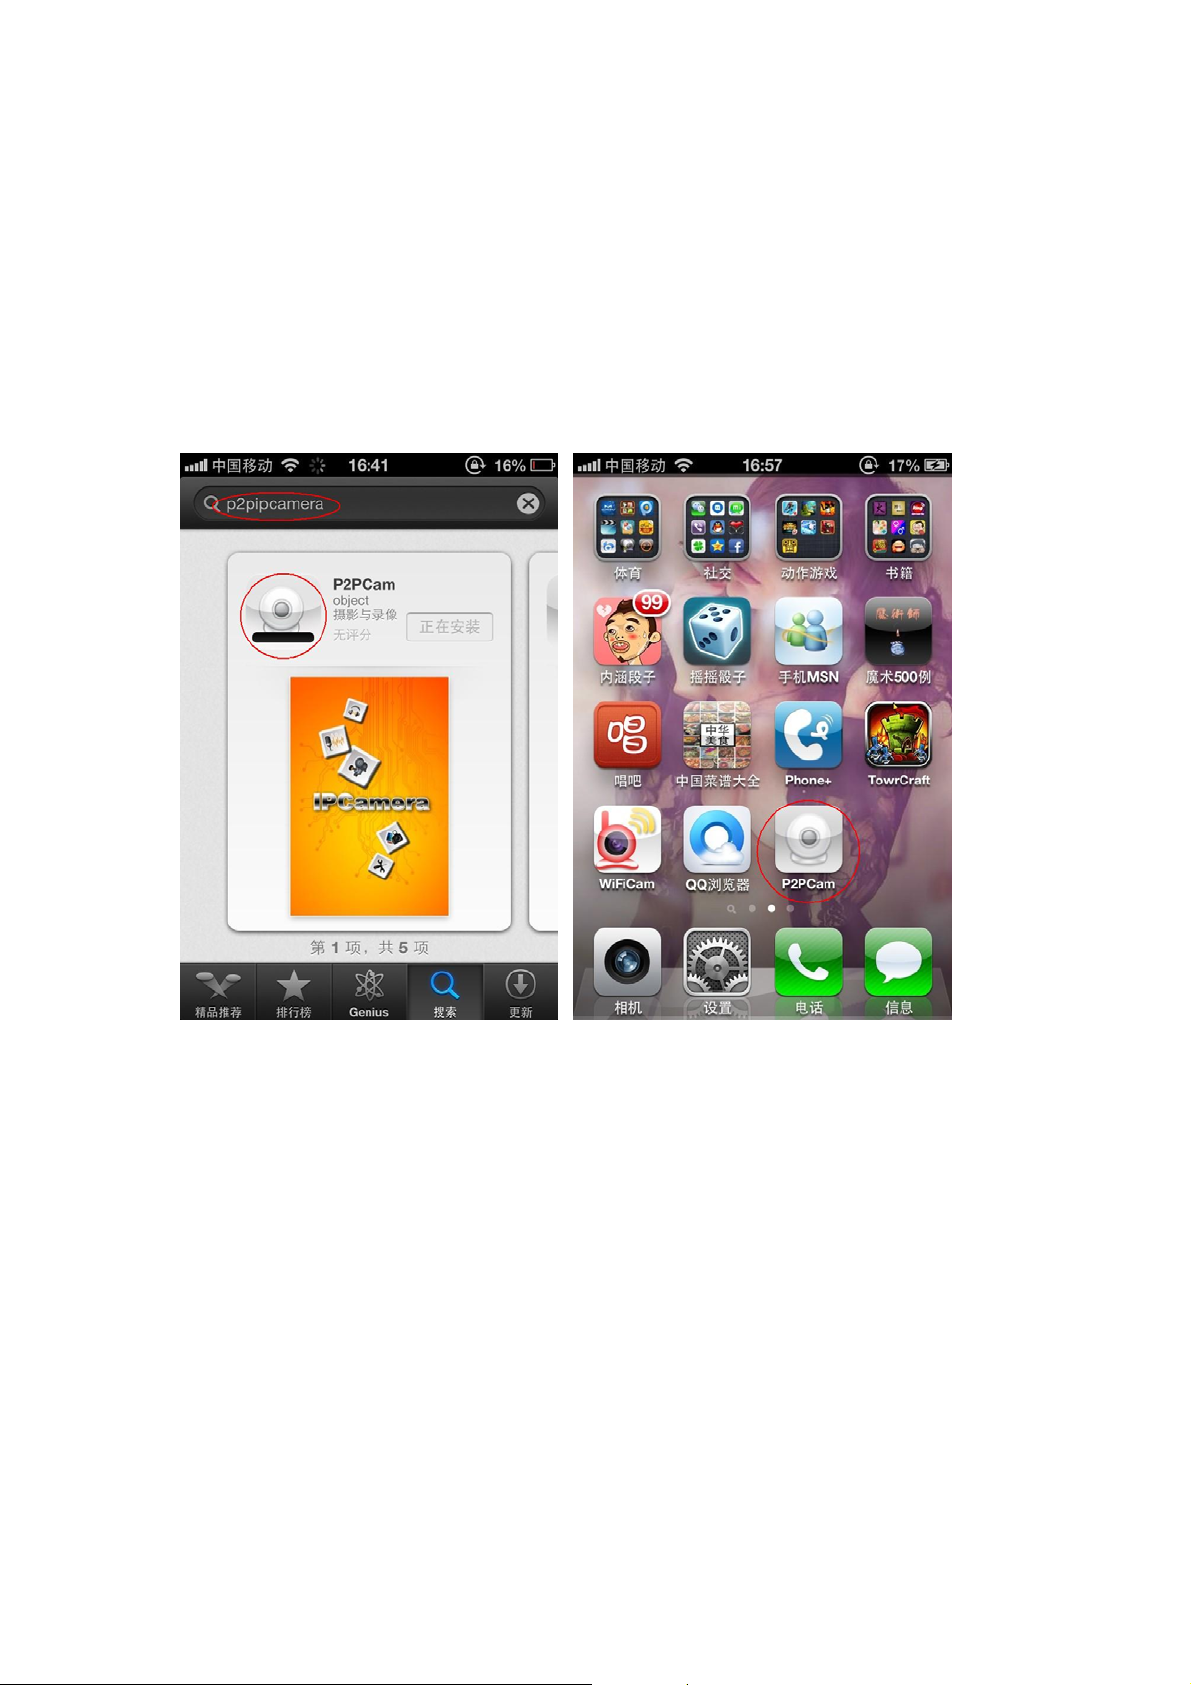
Iphone:Acquire “P2Pwificam” from App Store. You can search for “P2Pwificam”
(This application supports Iphone system that is higher than 4.3 released.)
3.3 Add Camera:
“Add Camera” click “+”
Enable users to edit camera ID, user's name and password setting and the
change of equipment alias .
“Scan”Two-dimensional code scanning acquire camera ID.

3.4 Device list.
3.5 Function:
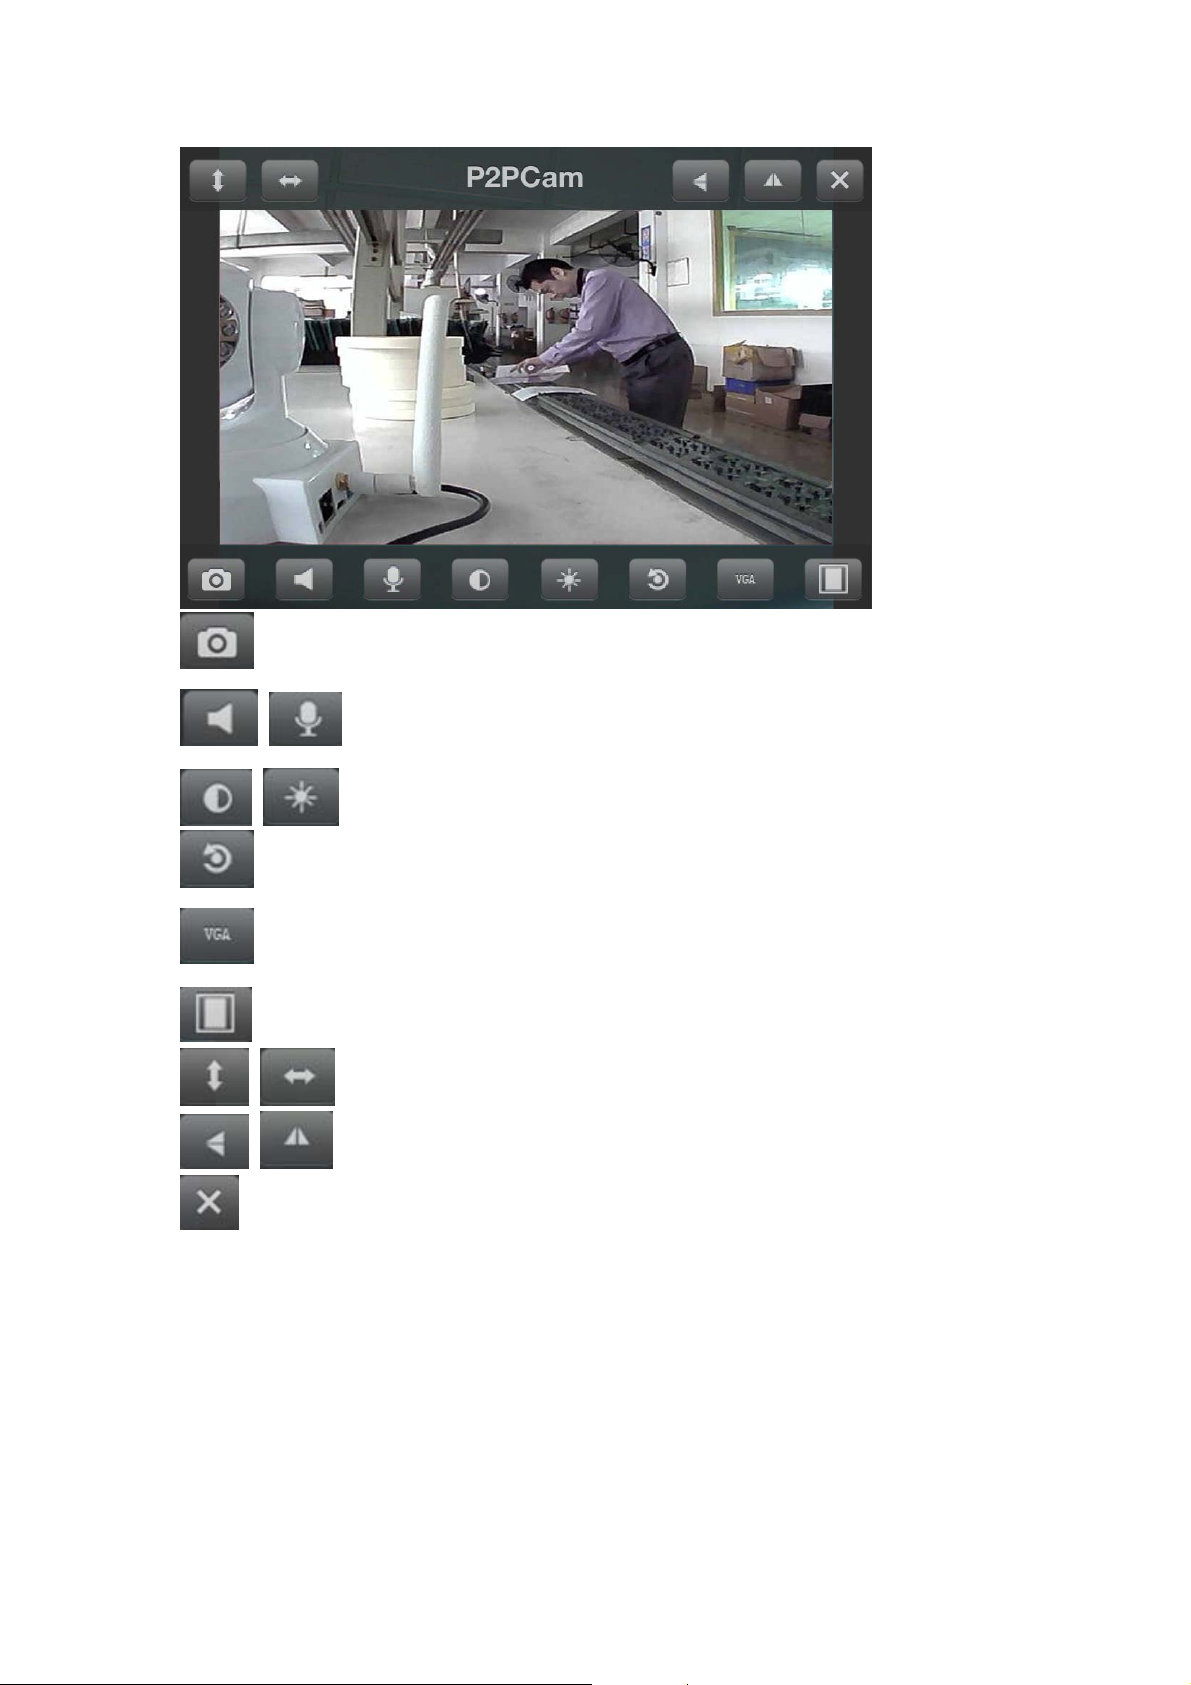
snapshot
speaker/mic (can not be open at the same time)
birghtness/contrast
restore the default
resolution : VGA(640×480)QVGA(320×240)
ratio
cruise
Flip /Mirror
close
touch screen to control PTZ
Chapter 4 PC Software Instruction
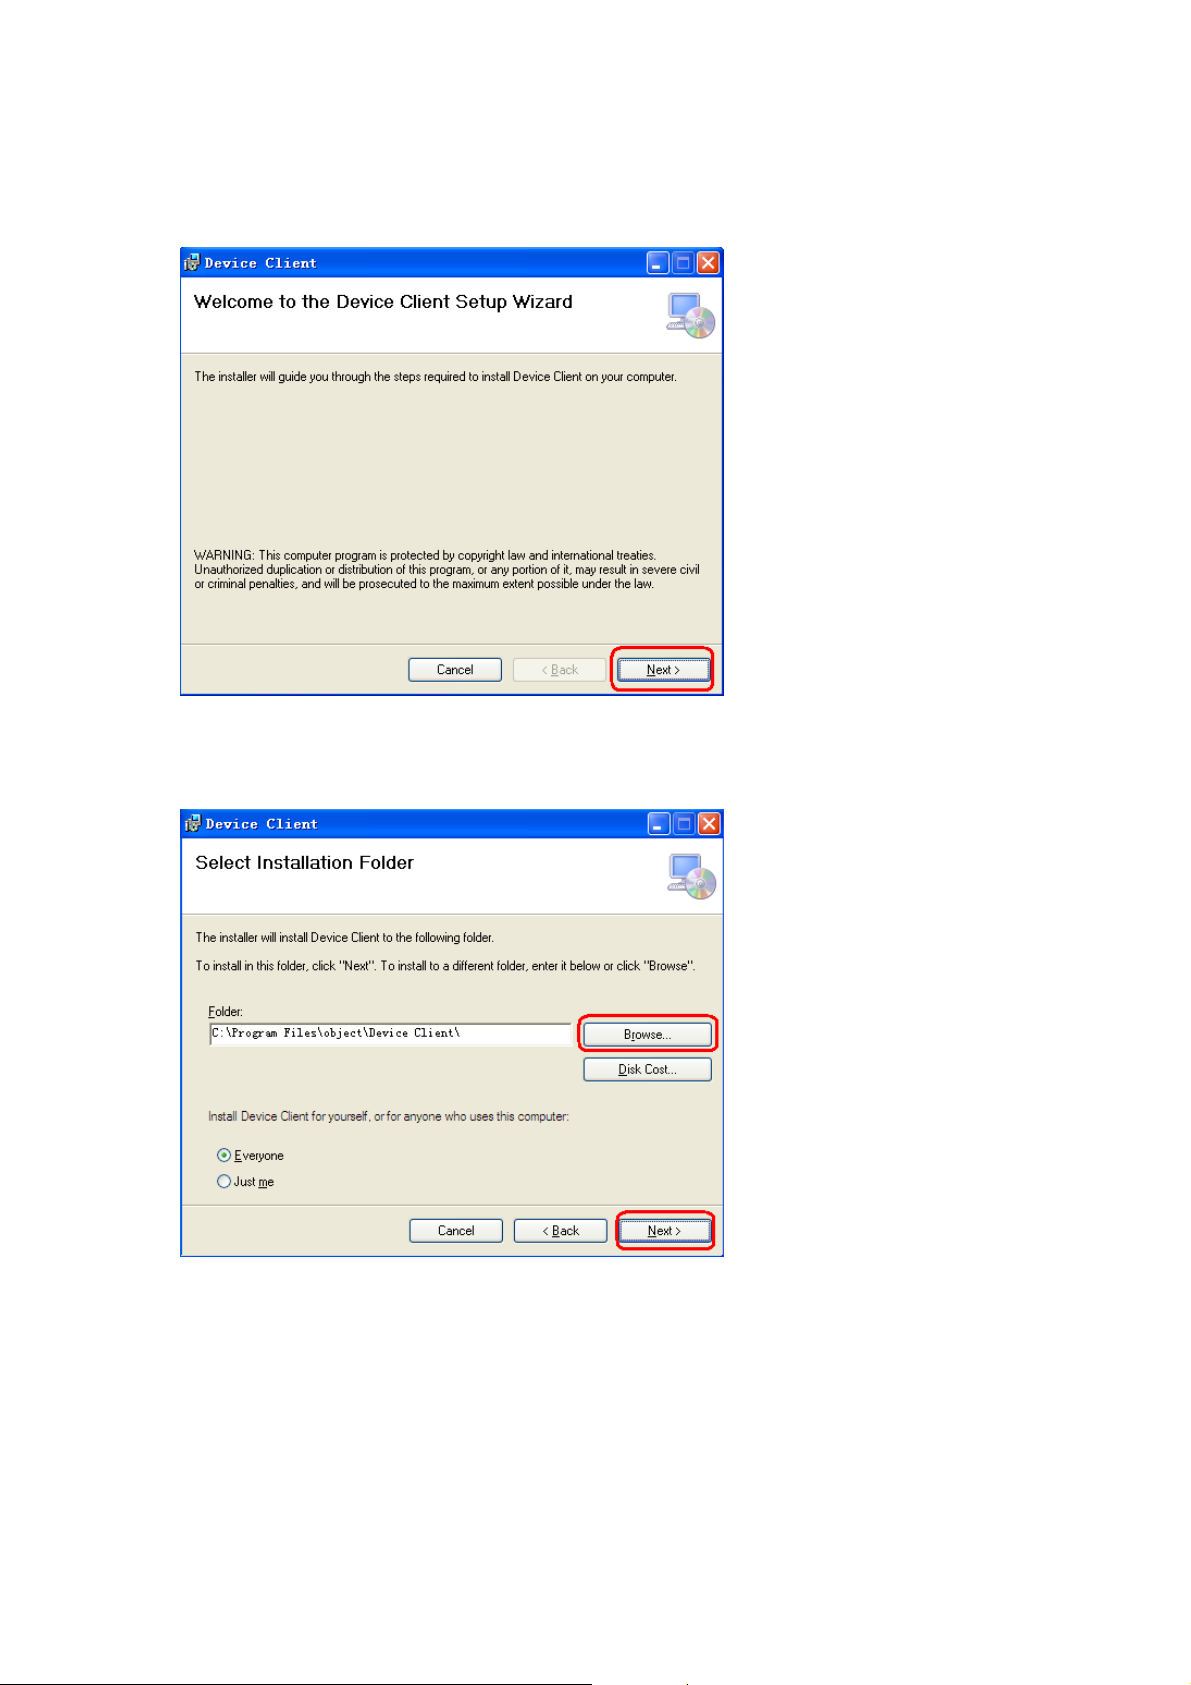
4.1 Find “MonitorClient.msi” in the CD and run it like below pic.
4.2
Click "Browser" to select setup path(default path "C:\Program Files\object\Device
Client "),then click "Next" like below pic.
4.3 Click "Next",then go the below pic.
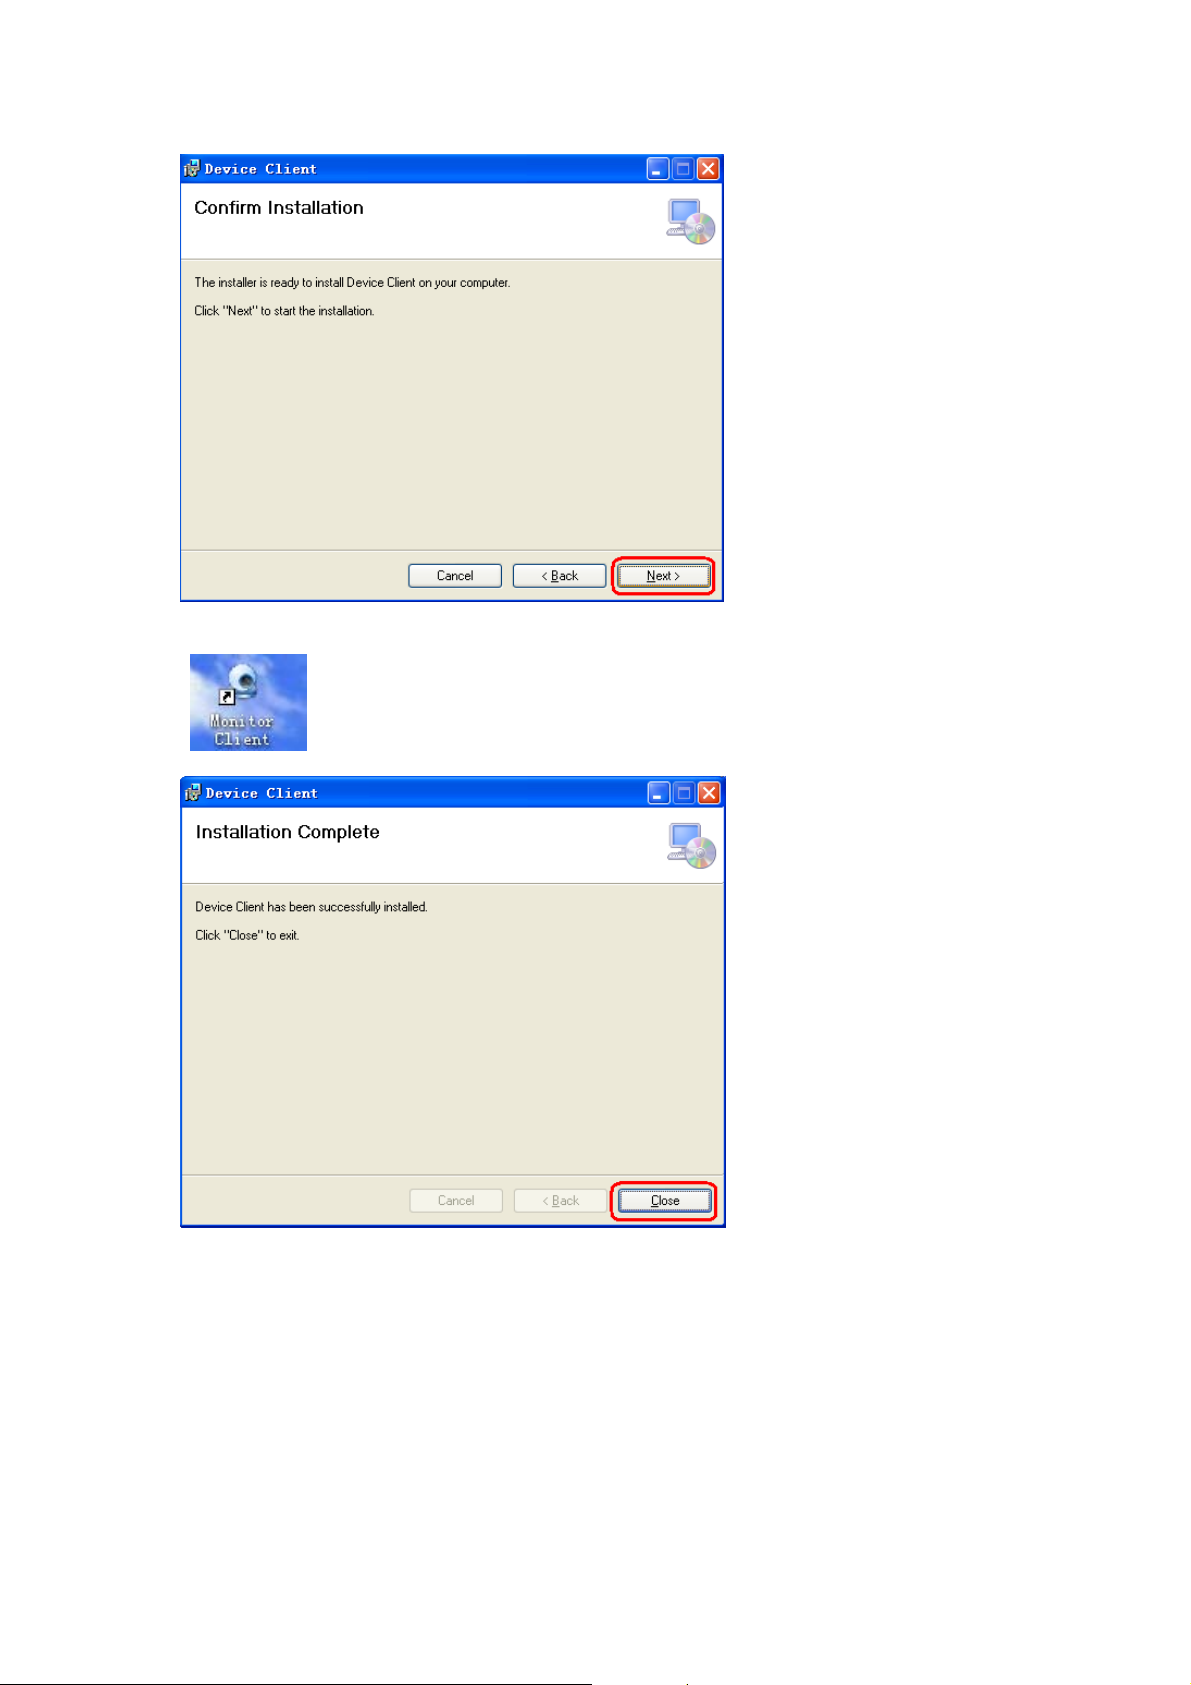
4.4 Click "Finish" to end the setup,at the time it will come up this icon in the desktop
“ ”.
4.5 Click“System—Device list”
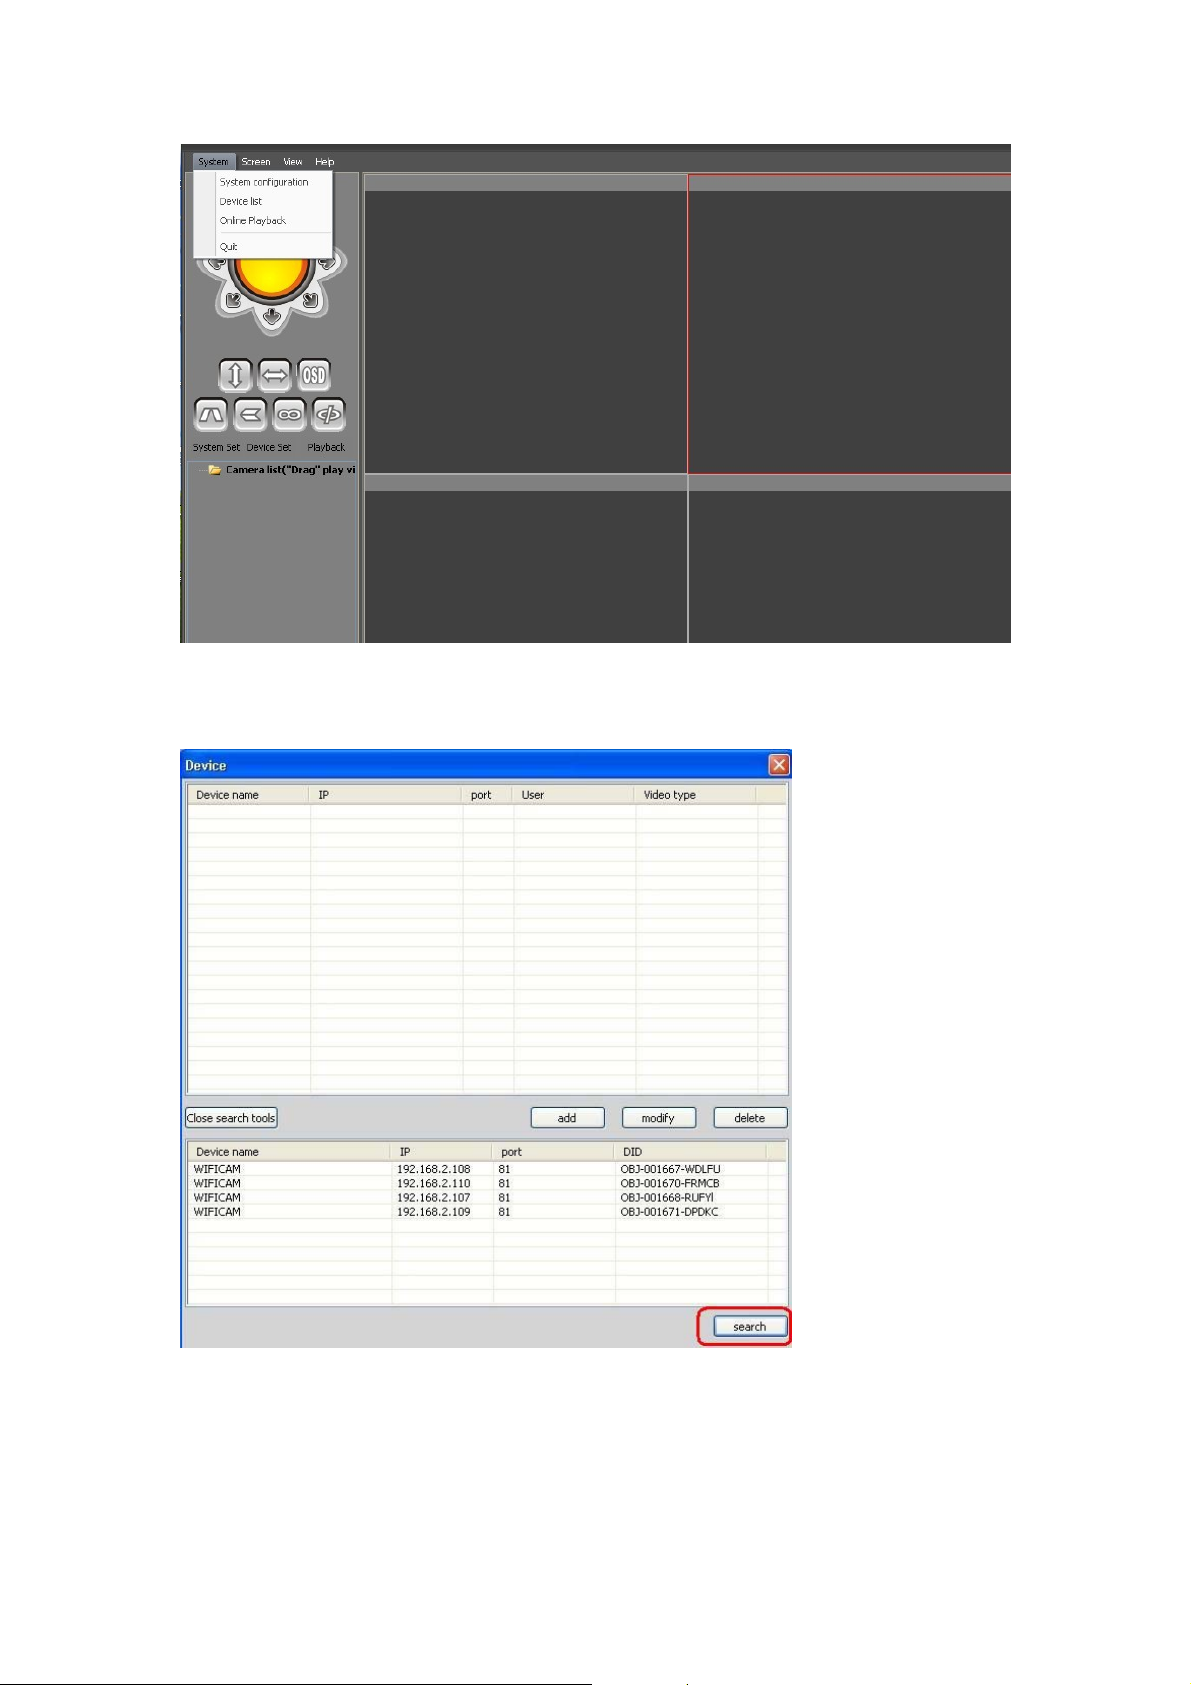
4.6 Add a lan camera :
Open search tools,click “search”