

Page 1
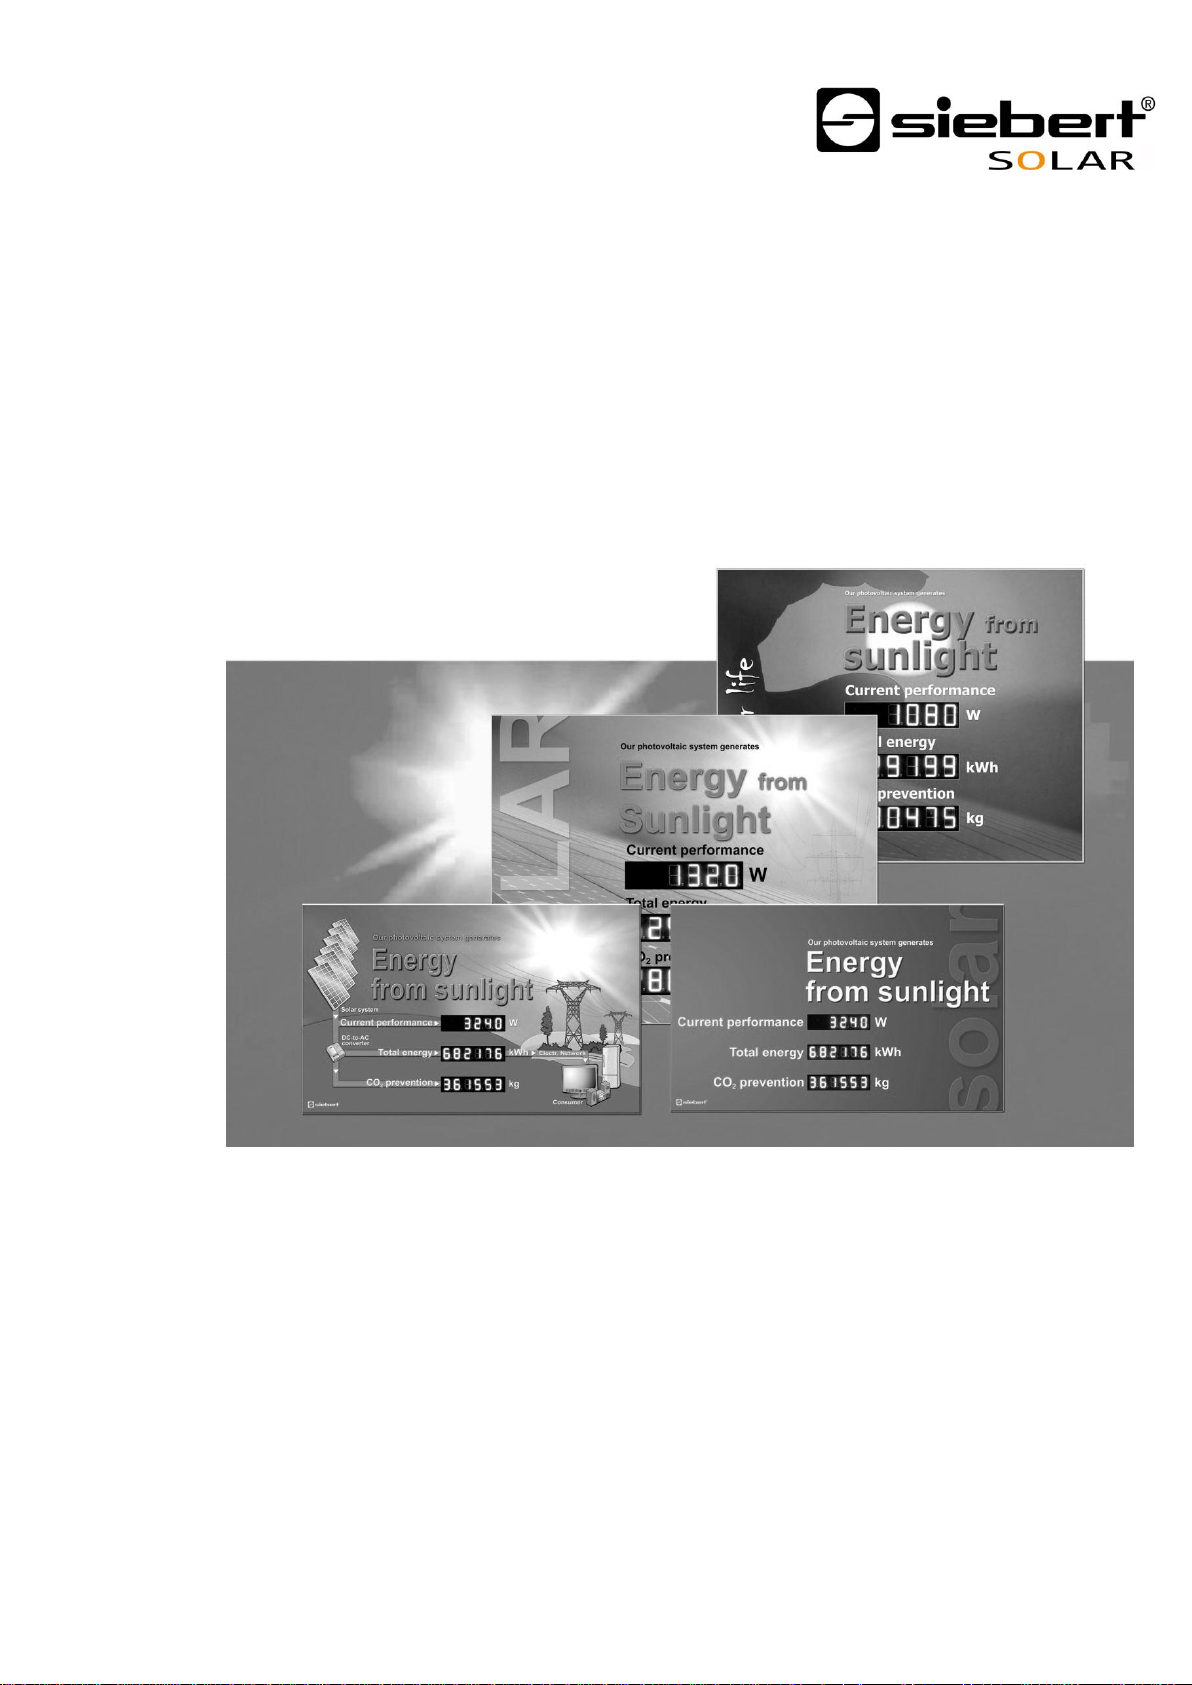
Series XC460/XC470
Digital display for the photovoltaic
Operating instructions
Page 2

Table of contents
1 Safety instructions 3
Important information ......................................................................................................................................... 3
Warning notice.................................................................................................................................................... 3
Intended use ....................................................................................................................................................... 3
Special safety precautions for installation .......................................................................................................... 3
Qualified staff...................................................................................................................................................... 4
Grounding ........................................................................................................................................................... 5
Mounting and installation .................................................................................................................................... 5
Transport ............................................................................................................................................................ 5
Disposal .............................................................................................................................................................. 5
2 Important information 6
Copyright ............................................................................................................................................................ 6
Disclaimer ........................................................................................................................................................... 6
Liability ................................................................................................................................................................ 6
Cleaning ............................................................................................................................................................. 6
Accuracy of the display ...................................................................................................................................... 6
3 Important start-up instructions 7
4 Product description 8
5 Installation 10
Requirements to the installation site ................................................................................................................ 10
Installation material .......................................................................................................................................... 10
Mounting the unit .............................................................................................................................................. 10
Power supply connection ................................................................................................................................. 10
6 Data source connection 11
Power meter/inverter/data logger with S0 interface ......................................................................................... 11
Inverter/data logger with RS485 interface ........................................................................................................ 12
Inverter/data logger with RS232 interface ........................................................................................................ 13
Ethernet connection ......................................................................................................................................... 14
7 Start-up and configuration 15
Configuration of the display .............................................................................................................................. 15
Start-up and test ............................................................................................................................................... 15
Controls ............................................................................................................................................................ 15
8 Technical data 16
9 Service and Support 18
BAL XC460_XC470 1.13 2/18
Page 3
DANGER!
Disregarding this warning notice leads to death or serious bodily harm.
DANGER!
Disregarding the warning notice can lead to death or serious bodily harm.
DANGER!
Disregarding the warning notice can lead to minor physical injuries or property damage.
CAUTION!
Carefully seal the electrical equipment for safety reasons after commissioning.
1 Safety instructions
Important information
Read these operating instructions before starting the unit. They provide you with important information
on the use, safety and maintenance of the units. This helps you to protect yourself and prevent
damage to the unit.
During the lifetime of the unit keep the operating instructions in an accessible place at all times. Hand
over the operating instructions to any future owner of the unit. It is to be considered as part of the
product.
The manufacturer is not liable if the information in these operating instructions are not complied with.
Warning notice
Information intended to help you to avoid death, bodily harm or considerable damage to property is
highlighted by the warning triangle shown here; it is imperative that this information be properly
heeded.
Intended use
The unit is intended for use in photovoltaic systems. It may only be operated within the limit values
stipulated by the technical data.
During configuring, installing, testing, commissioning and maintenance of the unit, the applicable
standards and safety regulations have to be observed.
Trouble-free, safety operation of the unit requires proper transport, storage, installation, mounting and
careful operation and maintenance of the unit.
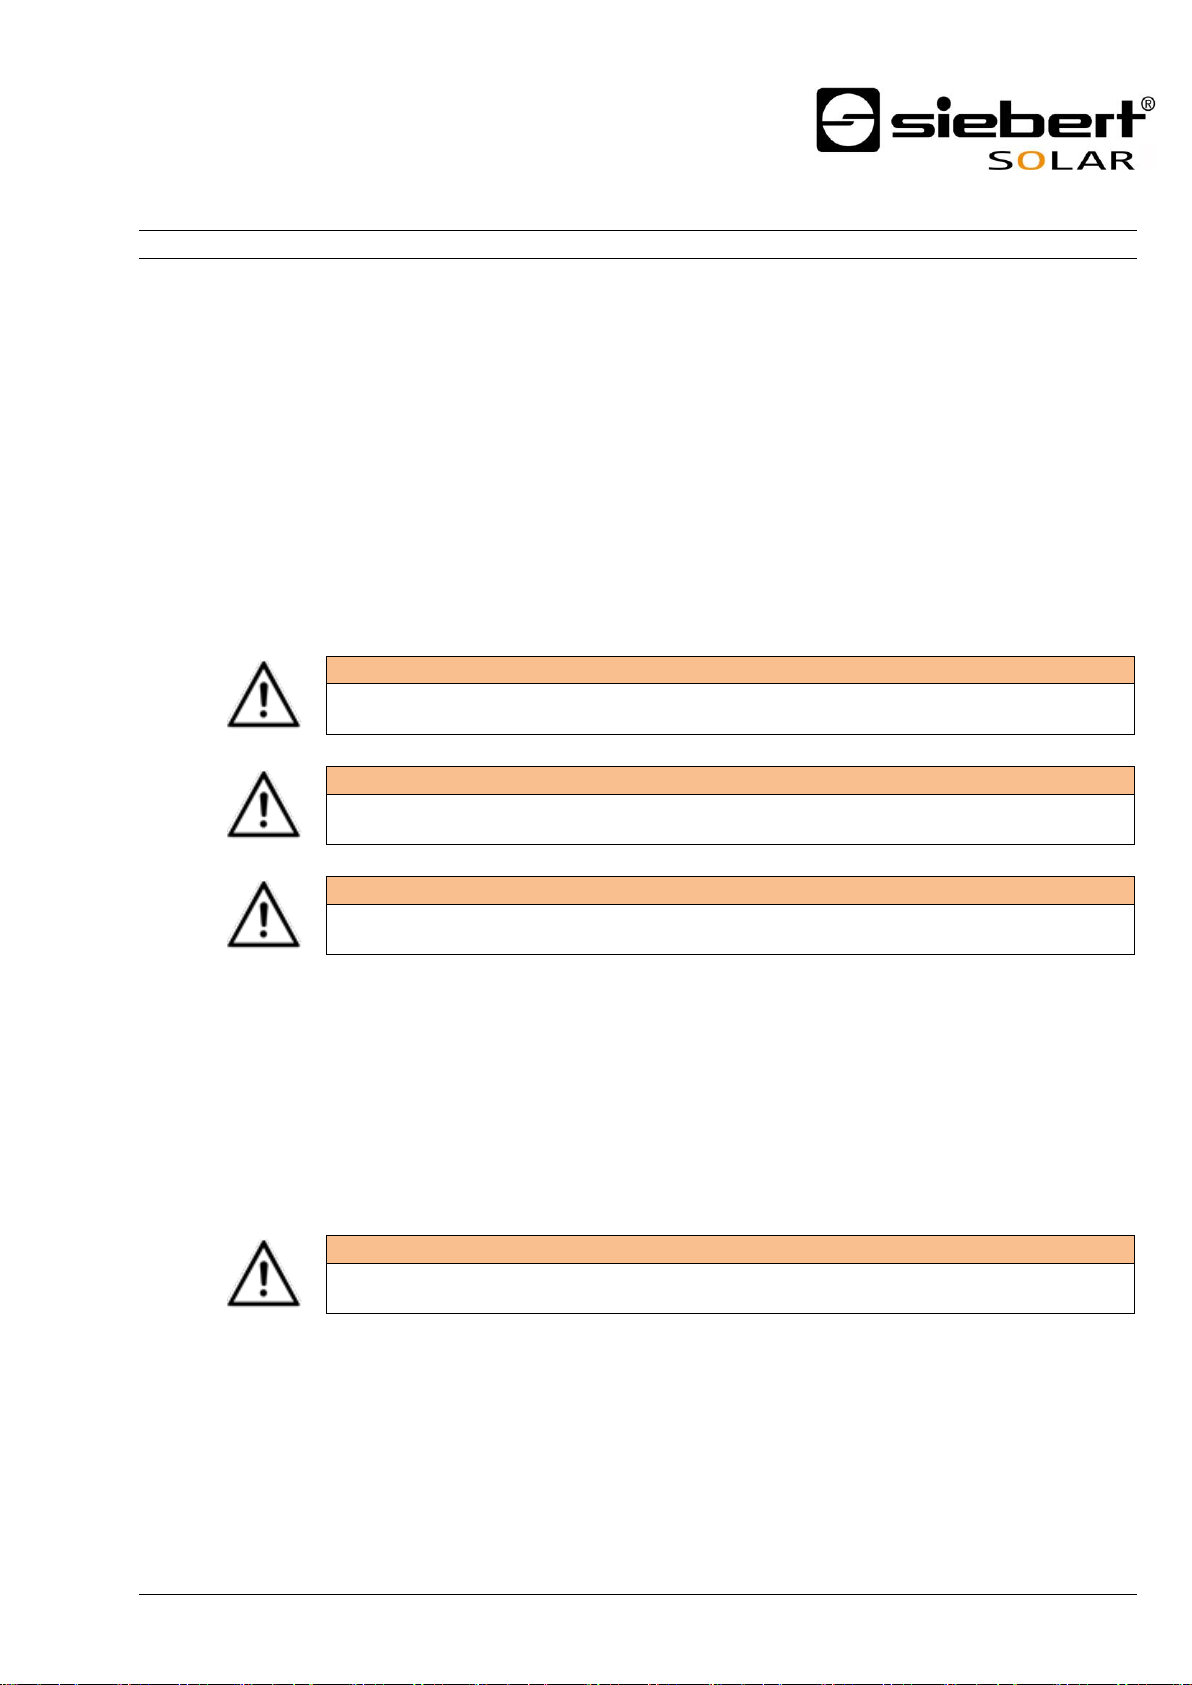
Special safety precautions for installation
Devices for indoor use have 16,5 mm wide connectors (upper figure):
Spread the connectors a bit to ensure a firm connection between the profiles. Check that the connectors are
pressed so tightly that extraction of the connectors without tools (lever) is not possible. The key to seal the unit
is included in the mounting kit.
Devices for outdoor use have 25 mm wide connectors (lower figure):
The connectors must be secured with the enclosed screws.
BAL XC460_XC470 1.13 3/18
Page 4
plastic lever
included
Fig.1
connectors 16,5 mm
acrylic glass pane
housing profile
If the connectors once should solve themselves
too easy, then spread them a little bit with a slot
screwdriver.
Fig. 2
connectors 25 mm
acrylic glass pane
housing profile
Qualified staff
The operating instructions are intended for trained professional electricians, familiar with the safety
standards of electrical technology and industrial electronics.
Components inside the unit are voltage-carrying during operation. For this reason mounting and
maintenance work may only be performed by professionally trained personnel while observing the
corresponding safety regulations.
For safety reasons and due to the required compliance with the documented unit properties the repair
and replacement of components and modules may only be carried out by the manufacturer or an
authorized specialized company.
BAL XC460_XC470 1.13 4/18
Page 5

Grounding
The unit is equipped with a metal housing. It complies with safety class I and requires a protective
earth connection. The connecting cable for the operating voltage must contain a protective earth wire
of a sufficient cross section (DIN VDE 0106 part 1, DIN VDE 0411 part 1).
The unit has no power switch. It is in operation immediately after applying operating voltage.
Mounting and installation
The attachment options for the units were conceived in such a way as to ensure safe, reliable
mounting. The user must ensure that the used fixing material guarantees, under the given surrounding
conditions, a secure mounting.
When installing and commissioning please note the appropriate national and regional regulations.
Transport
The unit must be transported clean and dry in the original packing. The transport temperature must be
between –40 °C and +70 °C. Temperature fluctuations of more than 20 °C per hour are nonpermissible.
Disposal
The unit is made of low-emission materials and is therefore recyclable. For an environmentally safe
recycling contact a certified waste management enterprise. Units or parts which are no longer needed
are to be disposed of in accordance with the regulations in effect in your country.
BAL XC460_XC470 1.13 5/18
Page 6

2 Important information
Copyright
This documentation is protected by copyright. All rights are reserved.
No part of this documentation may be translated without written permission by Siebert
Industrieelektronik GmbH. No part of this documentation may be reproduced in any form by print,
photocopy or other methods, or processed by using electronic systems, duplicated or disseminated.
Siebert®, LRD® and XC-Board® are registered trade marks of Siebert Industrieelektronik GmbH. As far
as other product names or company names are mentioned in this documentation they may be trade
marks or trade names of their respective owners.
Disclaimer
This documentation has been prepared with utmost care. For any mistakes we can not accept any
liability. Corrections, improvement suggestions, criticism and suggestions are welcome. Please write
to: editing@siebert-solar.com
Liability
Availability and technical specifications of the product are subject to change. The data specified is
indicated solely for product description. They are not intended to be guaranteed in a legal sense.
Cleaning
For the care of the front panel use a scratch-free cloth. Do not push in the front pane during cleaning.
The unit must not be cleaned with a steam cleaner.
Accuracy of the display
If the digital display is connected to a data output unit (inverter, data logger, etc.) via its data interface
(RS232, RS485 or Ethernet) it is purely an information output unit. It displays the data received via the
data interface in readable digits. For the accuracy of information displayed, however, the data output
unit is responsible. For problems or faulty display the data output unit has to be checked and to
observe its operating instructions.
For problems or damages which are caused by changes of the data output unit (p. e. modified protocol
structure, or modified product characteristics) no liability is assumed.
These operating instructions do not replace the operating instructions of the data output unit.
BAL XC460_XC470 1.13 6/18
Page 7

3 Important start-up instructions
During the commissioning of the display you need the following facilities for configuration:
1. PC with the software Siebert SolarDisplayConfigurator
2. A suitable cable depending on the type of display
With displays of the type ...-01 with S0, RS232 or RS485 interface the configuration is done via the
serial interface (RS232) of the display.
For configuration via RS232 you need to have ready the following items:
A coss-type cable for the RS232 interface between the PC and the display.
If your PC does not have such an interface, you need an USB on RS232 converter. Siebert offers
such a converter, together with the matching ready-made cable, as accessories.
With displays of the type ...-05 with Ethernet interface the configuration is done via the Ethernet.
Please have ready the following items:
A cross-type Ethernet cable if you connect the PC for configuration directly with the display.
A patch cable, if you connect the PC for configuration over a switch or router with the display.
For configuration via Bluetooth, you need a Bluetooth-enabled PC. If your PC does not have a
Bluetooth interface, you need an USB-to-Bluetooth converter. Siebert offers such a converter.
BAL XC460_XC470 1.13 7/18
Page 8

Order-code
Application
XC460/XC470-xxx-N-xx
Units for indoor use, protection type IP40
XC460/XC470-xxx-A-xx
Units for outdoor use, protection type IP54
Order-code
Interface
XC460/XC470-xxx-x-01
S0 PULSE, RS232, RS485 (screw-type terminals)
XC460/XC470-xxx-x-05
Ethernet (RJ45)
4 Product description
The following figure shows the display in working condition:
The displays of the XC460/XC470 series are available for indoor or outdoor use:
The displays of the XC460/XC470 series are differed in the following interface versions:
BAL XC460_XC470 1.13 8/18
Page 9

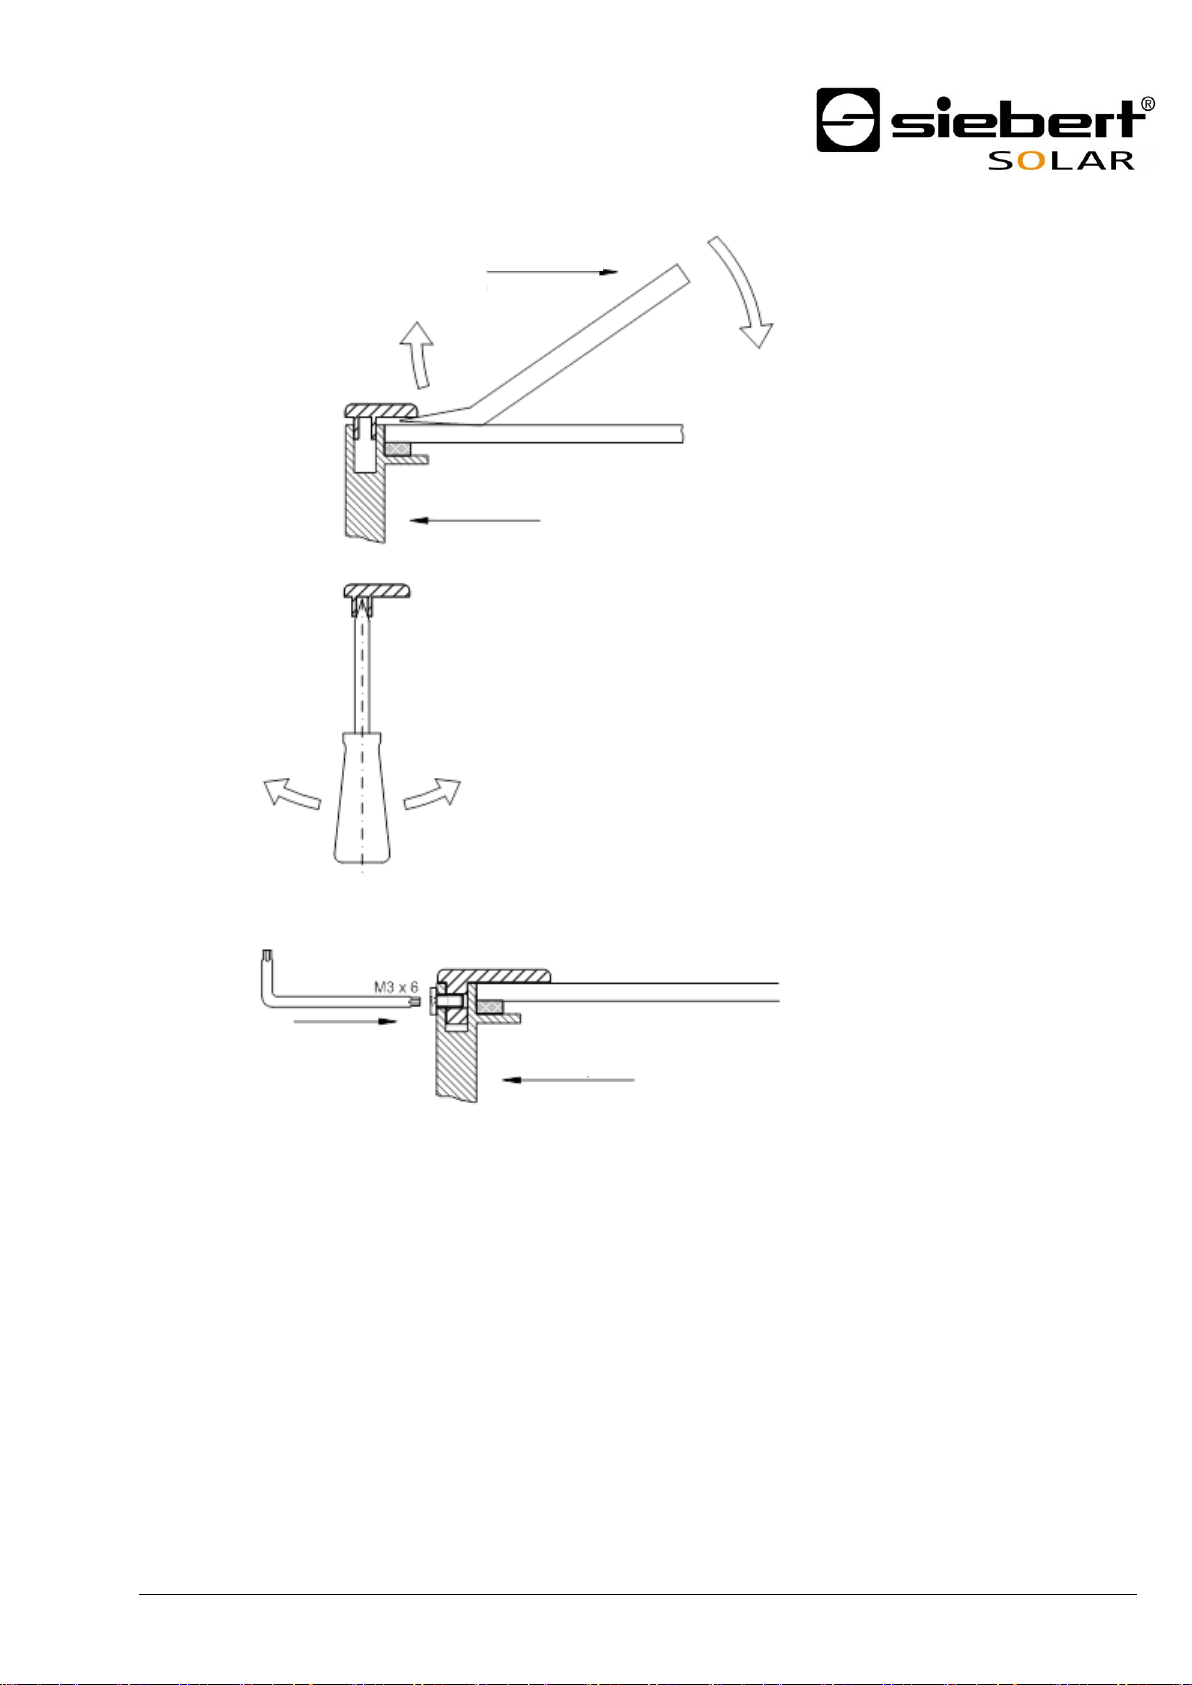
For installation and connection of the data source you must open the display.
Open the cam locks at the bottom of the device using the included square wrench.
Hinge up the front and fix it with the prop on the right side of the device.
The following chapters describe the necessary steps for installation and commissioning.
BAL XC460_XC470 1.13 9/18
Page 10

CAUTION!
If the wall surface is uneven the housing can be distort and damaged when mounting.
5 Installation
Requirements to the installation site
The display is designed for wall mounting. The wall surface has to be plane and free of irregularities.
The wall must have a sufficient capacity.
Installation material
A small parts mounting kit is included in delivery.
Mounting the unit
The lines for data and power supply are fed through the guide holes in the back of the housing. For
devices for outdoor use the supplied cable sleeves are to be inserted into the through-holes.
Mount the unit using the mounting holes with screws and dowels on the wall.
You can screw the display either from inside, or on the outside with the aid of the metal tabs included
in the mounting kit.
Please note that at first the metal tabs are screwed with the display and that the display is mounted on
the wall after that.
Instead use according proper mounting material if the screws and dowels included do not match.
Power supply connection
After mounting the device on the wall you connect the line for the power supply to the terminal. Make
sure that the 230V line was damaged nowhere during insertion into the device.
The unit has a metal housing. It corresponds with protection type I and needs a protective conductor
connection. The connecting cable for the power supply must contain a protective ground wire
connection with sufficient cross-section (DIN VDE 0106 part 1, DIN VDE 0411 part 1).
The protective ground wire (yellow/green) can be connected either to the yellow or the green terminal.
When first powered on numbers appear on all digits. Depending on the unit version, during later
power-up – after implemention of the configuration – the decimal points light up.
BAL XC460_XC470 1.13 10/18
Page 11

The digital display is purely an information output device. It converts the sent data from the inverter/data
logger/power meter into visual information but does not define the content of the numerical information.
The picture shows a schematic representation
To configure the device via the RS232 interface an additional connection via the RS232 port is required. After
the configuration has been done this connection is no longer needed.
The RS232 pin assignment is described in chapter Inverter/data logger with RS232 interface.
Continue chapter “Start-up and configuration”.
6 Data source connection
Power meter/inverter/data logger with S0 interface
Each power meter, data logger or inverter with impulse interface according to IEC/EN 62053-31 or DIN
43864 is suitable for the use with the large size displays.
The connection of the counter is at the designated S0- und S0+ terminals.
As connecting cable type J-Y(St)-Y, 2 x 0,6 mm² or similar is used. The maximum length is 200
meters.
1. When connecting pay attention to the correct polarity of the two signals.
2. Clamp down the shield of the data cable to the grounding clamp.
BAL XC460_XC470 1.13 11/18
Page 12

The picture shows a schematic representation
To configure the device via the RS232 interface an additional connection via the RS232 port is required. After
the configuration has been done this connection is no longer needed.
The RS232 pin assignment is described in chapter Inverter/data logger with RS232 interface.
Continue chapter “Start-up and configuration”.
Inverter/data logger with RS485 interface
The connection of the inverter/data logger is at the point marked RS485 terminal as shown below.
As connecting cable type J-Y(St)-Y, 2 x 2 x 0,6 mm² or similar is used. The maximum length is 1.000
meters.
1- Clamp down the shield of the data cable to the grounding clamp.
2. Connect RX+ of the display with TX+ of the data logger/inverter.
3. Connect RX- of the display with TX- of the data logger/inverter. For this use a twisted pair of
conductors.
4. Connect the GND of the display with the GND of the data logger/inverter. The last wire in the
cable is not needed. Cut this last wire off or use it as an additional GND wire.
Between RX+ and RX- a 120 Ω terminating resistor is installed.
BAL XC460_XC470 1.13 12/18
Page 13

The picture shows a schematic representation
To configure the device via the RS232 interface an additional connection via the RS232 port is required. After
the configuration has been done this connection is no longer needed.
The RS232 pin assignment is described in chapter Inverter/data logger with RS232 interface.
Continue chapter “Start-up and configuration”.
Inverter/data logger with RS232 interface
The connection of the inverter/data logger is at the point marked RS232 terminal as shown below.
As connecting cable type J-Y(St)-Y, 2 x 2 x 0,6 mm² or similar is used. The maximum length is 10
meters.
1. Clamp down the shield of the data cable to the grounding clamp.
2. Connect RXD of the display with TXD of the data logger/inverter. For this use together with the
GND signal a twisted pair of conductors of the cable.
3. Connect the TXD of the display with the RXD of the data logger/inverter. For this use together with
the GND signal a twisted pair of conductors of the cable.
BAL XC460_XC470 1.13 13/18
Page 14

Ethernet connection
Devices with the ending number -05 are intended for use in an Ethernet network. The connection to a
network is limited to plug in the network connector.
If you connect the device to the network via a switch or a hub, then you need an Ethernet patch cable
CAT5 or higher.
If you connect the device directly to the remote station, e.g. with a PC for configuration or with the
inverter/data logger, you need a cross cable CAT5 or higher.
All other settings (network addresses, protocols, etc.) will be set with the SolarDisplayConfigurator.
BAL XC460_XC470 1.13 14/18
Page 15

7 Start-up and configuration
Configuration of the display
For configuration of the display you need a PC with serial interface. The necessary steps required for
configuration are described in detail in the documentation of the program SolarDisplayConfigurator.
Start-up and test
Expediently perform a functional test before you close the device permanently.
After you successfully completed the configuration the PC is no longer needed.
Controls
With the button on the printed circuit board the system can be reset to its basic configuration. Turn off
the power supply of the display and keep the button pressed while the power supply is turned back on.
On the printed circuit board there is an LED that flashes quickly after starting. After a few minutes the
LED turns off.
BAL XC460_XC470 1.13 15/18
Page 16

View from below
Front view Side view
Front view Side view
View from below
Rear view
Holes for wall
mounting 11
8 Technical data
The following figures show the housing dimensions and the holes for wall mounting.
BAL XC460_XC470 1.13 16/18
Page 17

Series XC460
Series XC470
Dimensions (W x H x DT)
800 x 500 x 70 mm
800 x 1000 x 70 mm
LED display digit heigt
25 mm
55 mm
Upper LED display
6 digits
6 digits
Middle LED display
6 digits
6 digits
Lower LED display
6 digits
6 digits
Power supply
100…240 V AC, 50/60 Hz
100…240 V AC, 50/60 Hz
Power consumption
25 W max
50 W max
Protection type
IP54
IP54
Weight
approx. 18 kg
approx. 32 kg
Operating temperature
0…40 °C (-20…50 °C)
0…40 °C (-20…50 °C)
Storage temperature
-25…85 °C
-25…85 °C
() Values in brackets are valid for units with equipment package for outdoor use.
BAL XC460_XC470 1.13 17/18
Page 18

9 Service and Support
If you have any questions or want to take advantages of our services, please contact one of the following
addresses:
Germany Siebert Industrieelektronik GmbH
Siebertstrasse, D-66571 Eppelborn
Phone +49 (0)6806 980-0
Fax +49 (0)6806 980-999
info.de@siebert-solar.com
France Siebert France Sarl
4 rue de l’Abbé Louis Verdet, F-57200 Sarreguemines
BP 90 334, F-57203 Sarreguemines Cédex
Phone +33 (0)3 87 98 63 68
Fax +33 (0)3 87 98 63 94
info.fr@siebert-solar.com
Italy Siebert Italia Srl
Via Galileo Galilei 2A, I-39100 Bolzano (BZ)
Phone +39 (0)471 053753
Fax +39 (0)471 053754
info.it@siebert-group.com
The Netherlands Siebert Nederland B.V.
Jadedreef 26, NL-7828 BH Emmen
Phone +31 (0)591-633444
Fax +31 (0)591-633125
info.nl@siebert-solar.com
Austria Siebert Österreich GmbH
Mooslackengasse 17, A-1190 Wien
Phone +43 (0)1 890 63 86-0
Fax +43 (0)1 890 63 86-99
info.at@siebert-solar.com
Switzerland Siebert AG
Bützbergstrasse 2, Postfach 91, CH-4912 Aarwangen
Phone +41 (0)62 922 20 43 (German)
Phone +41 (0)62 922 20 44 (French)
Fax +41 (0)62 922 33 37
info.ch@siebert-solar.com
Other countries Please find the addresses as follows:
www.siebert-solar.com
So that we can help you quickly and efficiently please have the following information ready on demand:
1. Information on the type plate, in particular type and serial number
2. Detailed description of the problem and the circumstances
3. Telephone and fax number and email address under which you can be contracted
for queries
BAL XC460_XC470 1.13 18/18
 Loading...