

Page 1
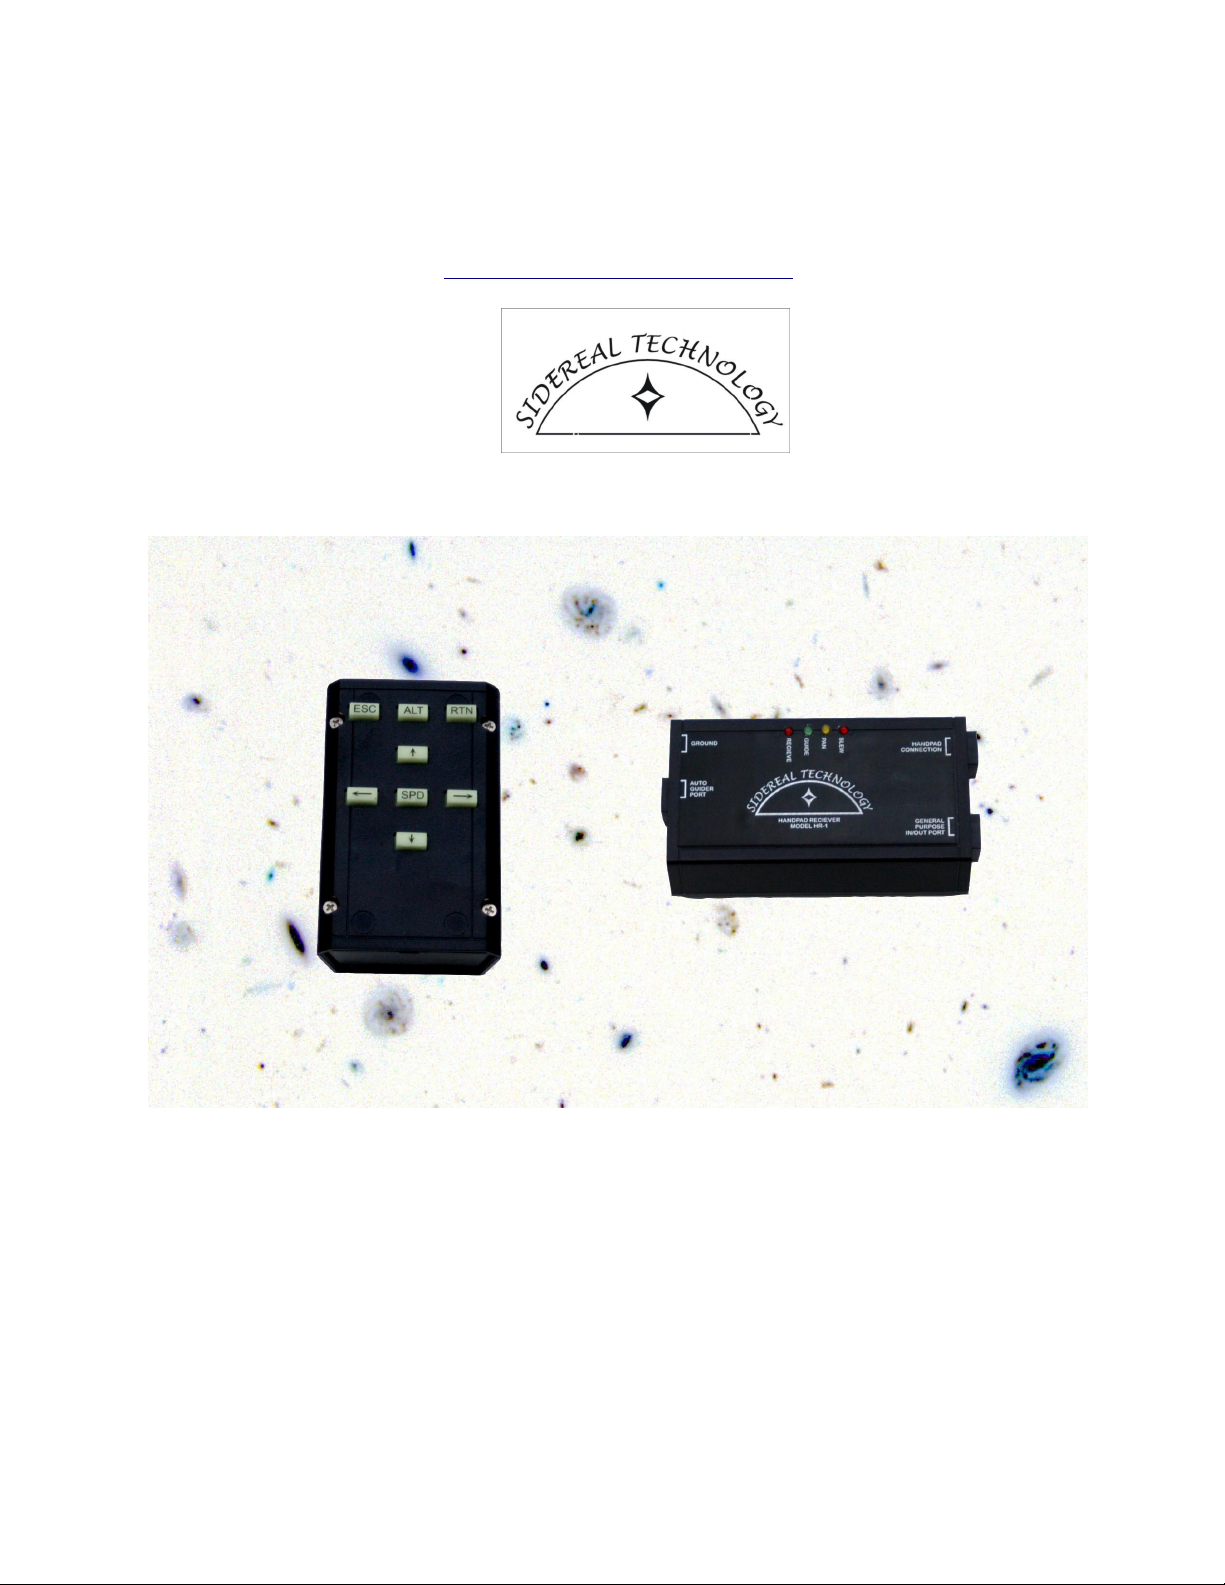
SIDEREAL TECHNOLOGY RADIO HANDPAD
MODEL HR-1 and MODEL HT-1
USER INSTRUCTION MANUAL
http://www.siderealtechnology.com/
Last revised July 27, 2005
Copyright Sidereal Technology, 2005
Page 1 of 13
Page 2

Table of Contents
Features:...........................................................................................................................................3
Technical Information:.....................................................................................................................4
TECHNICAL SUPPORT:................................................................................................................4
Mounting the Receiver:....................................................................................................................5
Connecting the Receiver:.................................................................................................................5
Operation, All Systems:....................................................................................................................5
Setting Address: ...............................................................................................................................5
Normal Slew/Pan/Guide operation:..................................................................................................6
Flashlight Operation: .......................................................................................................................6
Keyboard Lock Mode: .....................................................................................................................6
Turning the Handpad On:.................................................................................................................7
Turning the Handpad Off:................................................................................................................7
DragNTrack and SlewNTrack Operation.........................................................................................7
Equatorial Mode Operation:.............................................................................................................8
Mel Bartels Stepper System Operation............................................................................................8
Argo Navis® Mode Operation:........................................................................................................9
Receiver LED's:................................................................................................................................9
Using the Handpad as a wired handpad:........................................................................................10
Trouble Shooting:...........................................................................................................................10
APPENDIX A - AGENCY APPROVALS:...................................................................................11
Appendix B: Receiver Wiring Diagram:........................................................................................12
Page 2 of 13
Page 3
This exciting new product from Sidereal Technology has many cool features in addition to
remote handpad control of your telescope or tracking platform. This product was engineered and
tested by amateur astronomers, for amateur astronomers!
Features:
1. Connects to the Sidereal Technology Dual Servo Controller for wireless remote control of
your telescope. Eliminates the wired Handpad for tangle free operation.
2. Emulates the old standard Mel Bartels Stepper System Handpad: The receiver has a mode
which emulates the original Mel Bartels handpad, so can be used with the Mel Bartels Stepper
system with only the application of a jumper.
3. Addressable: (easily changeable with a keyboard sequence). This allows many users with
many telescopes on the same telescope field.
4. Low Duty Cycle Transmit Time: Special micro controller routine only transmits about 1/20
of the time, even when a button is continually pressed. There are no transmissions when no
buttons are pressed. This allows multiple use from several identical handpads and telescopes
without interruption of any one user.
5. Instant, imperceivable delay between a button press and action of the telescope. This is a
real plus when centering an object at pan speeds, there will be no overshoot, as the scope starts
and stops movement at exactly the same time as you press and release the key (perception
anyway).
6. Built in Micro-Processor Based astronomers LED flashlight. There are 4 super bright
LEDs which work in tandem. Th brightness is adjustable from very dim to very bright in 16
linear perceived steps. The brightness is “remembered” across a power down.
7. Keypad lock feature: When in the locked mode, only the 4 direction keys work. This is a
great (nearly mandatory) feature for public star parties where the handpad is given to the
general public for panning the moon at high power (it also helps us more experienced
observers at 3:00 AM!!!!).
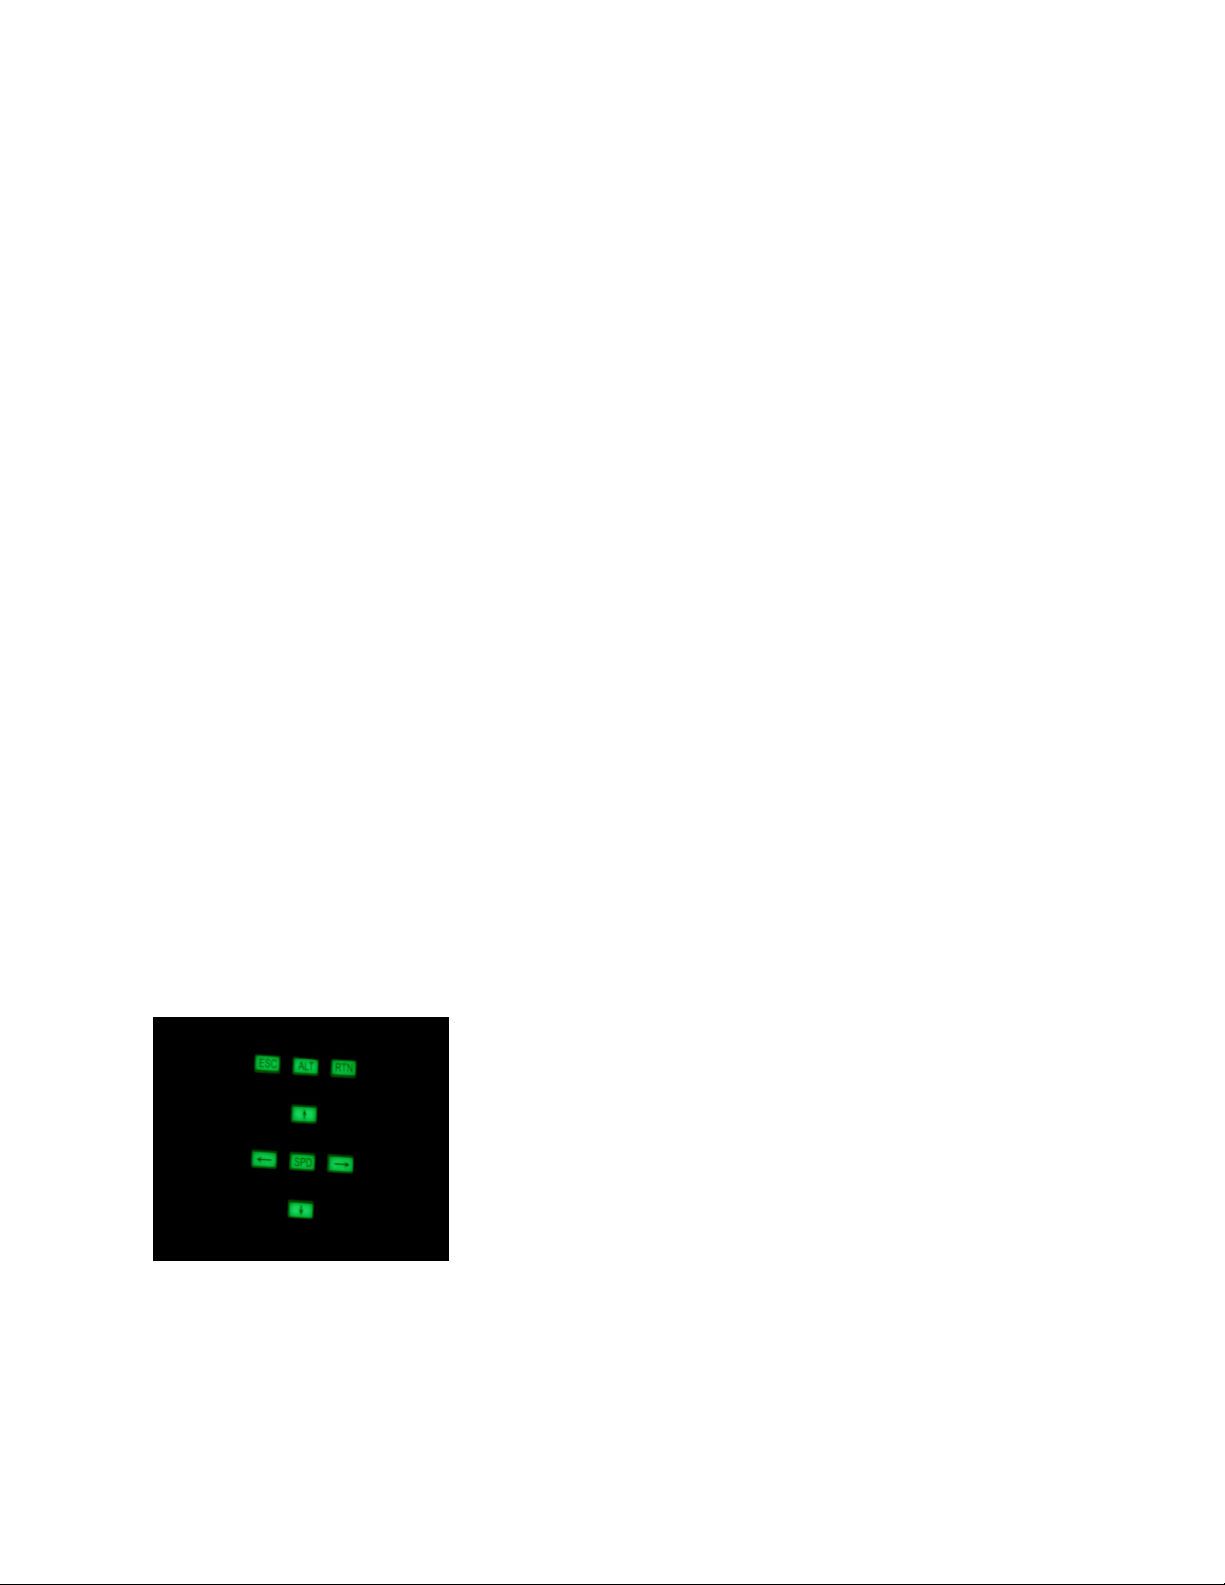
8. Glow in the dark keypad: A lot of research went into finding the perfect glow in the dark
base and the percentage used. This glow in the dark is not too bright for even the most
th
2 Second time exposure in a dark room
hardcore dark sky phenatics! Approval was given by both Chuck Dethloff and Howard Banich
(experienced dark sky observers from the Portland Oregon area). In addition to this, the glow
lasts all night long, making it easy to find on the observing table in the darkest night. Although
Page 3 of 13
Page 4

the labeling on the buttons may not be discernible, the shape (and thus the location of specific
keys) are easily discerned.
9. Keypad: Reliable, custom manufactured Silicone One Piece Push Button pad.
10.Industry standard, autoguider port is built in to the receiver. This port can be used to
autoguide a telescope, with or without the ASCOM driver or Mel Bartels scope control
software.
11.Auto Off for both the flashlight (10 minutes) and the transmitter (16 minutes).
12.Long Battery Life (Years, if buttons are not inadvertently left pressed). It uses easily
replaceable standard 9 volt alkaline batteries.
13.Wide keypad spacing for gloved operation.
14.Transmitter can be used with a direct connection to the telescope controller (in case of
interference or if the battery runs down (SiTech Controller Only).
15.Handy necklace is included.
Technical Information:
The transmitter and receiver utilize a pair of Lynx Technologies OOK (On Off Keying)
transmitter and receiver chips. The crystal controlled frequency used is 433.92 Mhtz. The
antenna is internal to both the transmitter and the reciever.
A very quick bit rate, and only 16 bits (including address, data bits and error checking) are
needed to activate the receiver. This is one reason for the perceived instantaneous response.
You can order the handpad without the radio components, and it will serve as a wired handpad
(SiTech Controller only). In order to upgrade from a wired handpad to a wireless system, you
will have to purchase a receiver, and send the handpad back to our factory for addition of the
radio components. The cost of the wired handpad, and upgrading to the wireless will add up to
the same price (except for shipping and handling).
TECHNICAL SUPPORT:
If you are using ScopeII and having issues, you need to contact Mel Bartels for Technical
Support. Mel is extremely patient and will work with you until you are up and working, if
necessary, he will provide telephone support.
If you are having problems with the controller, radio handpad, or the ASCOM driver, or are
having problems with the Argo Navis controlling your telescope, Sidereal Technology will help
you. We are available by email anytime. grayarea@tms-usa.com. Please be sure to include
“Servo” in the subject line, or your email may be rejected as spam. You will receive a response,
generally within 8-10 hours. You can also call Dan Gray anytime before 10:00 PM Pacific Time.
His phone number is 503-887-3701.
Page 4 of 13
Page 5

Mounting the Receiver:
The receiver should be mounted where there are no obscuring metal parts for best reception. If
you want to see the LED's for status, mount the unit close to where it will be visible from the
eyepiece side of your telescope.
You can use Velcro to mount the unit.
Connecting the Receiver:
The Receiver connector labeled “Handpad Connector” should be connected to the SiTech
Controller port labeled “Handpad”. Use a flat 6 conductor cable with two 6 position modular
jacks. Pin 1 should be connected to pin 1 on each connector. This cable is normally supplied
with the unit.
If connecting to a Mel Bartels Stepper system, the flat cable will be the same type, but you will
also need to connect a ground wire from the connector labeled “Ground” to the Ground of the
Stepper board. You must also be sure the jumper inside the receiver is set to the side labeled
“Stepper” instead of the side labeled “Servo”.
Operation, All Systems:
Setting Address: To select the address of the transmitter, hold down the “ALT” key, and press
the “<---”, “SPD”, “--->” keys, one at a time, in the left to right sequence. The LED's will start
flashing, and the 7 keys take on the value of 7 digits. The keys take on the following values:
________________
|
[ 1 ] [ 2 ] [ 3 ] |
|
[ 5 ] |
|
[ 6 ] [ 7 ] [ 8 ] |
|
[ 0 ] |
|
|
________________|
Now press any 3 key sequence that doesn't create a value over 255, and the transmitter is
programmed. You may start your sequence with one or two zero's if you like. The LED will stop
flashing to indicate successful change of address. The address is stored in the microprocessors
flash ROM.
Receiver address change: Unplug your receiver from the telescope controller. Wait about 2 or
3 seconds, then plug it back in. Within the first 10 seconds of power application, press both the
Page 5 of 13
Page 6

ESC key and the ENT key together, 3 or 4 times. The receiver will take on the address of the
transmitter. It may be a good idea to make sure no others on the telescope field are powering up
their receivers at this time!!!
It may also be a good idea to write your address down, so when at a star party, you may discuss
your chosen address with all of the (hopefully many other) Sidereal Technology radio handpad
users. You may also control other folks scopes if you get them to tell you their address (or use
process of elimination). This can make a really interesting evening of observing (Sidereal
Technology will not be responsible for any black eyes!!!!).
Normal Slew/Pan/Guide operation:
The arrow keys on the handpad will operate the telescope. You can move Altitude/Declination
and Azimuth/Right Ascension at the same time if using the SiTech Servo system. If using Mel
Bartels Stepper System, some simultaneous combinations are not possible.
To change speeds, simply press the center “SPD” button for 1/8th to 1/4 of a second. If using the
SiTech system, you will toggle between the Slew mode, to the Pan mode, and then the Guide
mode, then it will be in the slew mode again. You can watch the lights on the receiver to see
which mode you're in.
If using the Stepper system, your choices are Slew and Pan modes. The guide mode will only be
available from the Guide port, and also the Scope.exe software will have to be put in the guide
mode.
Flashlight Operation: The top center button (among many other uses) is used to turn the
flashlight on and off. When the flashlight is on, top right key presses (“ESC”) brighten the
flashlight, and top left key presses (“ENT”) dim the flashlight. When the flashlight is on, the
normal functions of the top right and top left key are disabled. The flashlight automatically turns
off after about 8-10 minutes.
Keyboard Lock Mode: In this mode, the only keys that are operational are the direction keys
(Up, Left, Right, and Down keys). You must select your preferred speed before locking the
handpad. This mode is very useful at public star parties, and provides the option to give the
handpad to the general public for panning the moon, etc., without re-initializing, slewing, etc. It
may also help you on those very late nights fumbling in the dark!
To lock the keypad, hold down the “ALT” key, and press the Up direction key (scope will not
move if the “ALT” key is pressed). When the handpad is in the locked mode and the flashlight is
off, the LED's will flash very faintly.
To unlock the keypad, hold down the “ALT” key, and press the Down direction key (scope will
not move if the “ALT” key is pressed).
After an automatic power down, the keyboard will automatically be unlocked.
Page 6 of 13
Page 7

Turning the Handpad On:
To turn the handpad on, simply press any key (except the “ENT” or “ESC” keys). The unit
powers up and remains on until about 15-16 minutes have elapsed, or a user turns it off.
Turning the Handpad Off:
To turn off the handpad, hold down the “ALT” key, and press the “SPD” button, then release
both at once. If this is not done, the transmitter will power down by itself (to save batteries) after
about 15 minutes.
DragNTrack and SlewNTrack Operation (Alt/Az scopes only):
Tracking Control:
The top right key will stop and start the tracking (flashlight must be off).
Initializing:
To initialize if your scope latitude is not known, point the telescope at the scope zenith, then
press and hold the top right key for more than 5 seconds (when the LED on the controller flashes
fast, you may let up). Now, point the scope at the Celestial Pole. Now press and hold the Top
Left key for more than 5 seconds (when the LED on the controller flashes fast, you may let up).
Your scope is now initialized, and the DragNTrack or SlewNTrack will be working (assuming
the Servo controller is properly configured).
Scope latitude is the effective latitude of your scope. It is the same as your own latitude if your
scope is level, but will be a slightly different latitude if the scope is not level in a north/south
direction.
If you want to save this automatically calculated latitude in the Servo Controllers' Flash ROM,
simply press and hold both the top right (ESC) key and the top left (ENT) key simultaneously for
more than 10 seconds.
Note: The latitude calculation was wrong on the SiTech Controller Firmware versions 1.5 and
earlier. If you have version 1.5 or earlier, you will have to enter the latitude using the
ServoConfig software, or upgrade to version 1.6 or later.
If your scope latitude is known, and it is programmed in the Sidereal Technology Dual Servo
Controller, simply point the scope at the Celestial pole, now press and hold the Top Left (ENT)
key for more than 5 seconds (when the LED on the Servo Controller flashes fast, you may let up).
Entering and Leaving the Guide Mode:
The guide mode can be entered if using SiTech Controller firmware version 1.6 or later by simply
pressing the SPD button and toggling through the speed sequences. If version 1.6 or later, the
controller will also automatically enter the guide mode if guiding signals appear on the reciever
AutoGuider port.
If you are using firmware version 1.5 or earlier, you will need to use the following methods.
Page 7 of 13
Page 8

To enter the Guide mode: Hold down the top right key (ESC), and press the Right button
(flashlight must be off).
To Leave the Guide Mode: Hold down the Top Right key (ESC) and press the Right button again
(flashlight must be off).
Equatorial Mode Operation:
Tracking Control:
The top right key will stop and start the tracking (flashlight must be off).
Entering and Leaving the Guide Mode:
The guide mode can be entered if using SiTech Controller firmware version 1.6 or later by simply
pressing the SPD button and toggling through the speed sequences. If version 1.6 or later, the
controller will also automatically enter the guide mode if guiding signals appear on the reciever
AutoGuider port.
If you are using firmware version 1.5 or earlier, you will need to use the following methods.
To enter the Guide mode: Hold down the top right key (ESC), and press the Right button
(flashlight must be off).
To Leave the Guide Mode: Hold down the Top Right key (ESC) and press the Right button again
(flashlight must be off).
To Leave the Guide Mode: Hold down the Top Right key (ESC) and press the Right button
again (flashlight must be off).
To Increase the tracking rate: Hold the top left key down (ENT) and press the Up key. Repeat
process for more increases.
To Decrease the tracking rate: Hold the top left key down (ENT) and press the Down key.
Repeat process for more decreases.
Platform Rewind: If using a platform, to rewind the platform, press the ESC and the ENT keys
simultaneously.
Mel Bartels Stepper System Operation Using “SCOPE.EXE”:
If not ordered from the factory as such, you will need to remove the cover from the receiver,
using the 4 Philips head screws. Find the jumper labeled: “Servo/Stepper”. Install the jumper
toward the side marked “Stepper”.
When the receiver is connected to a Mel Bartels controlled system (SiTech or original stepper
system), the 7 buttons take on the same action as the 7 buttons provided in the particular Mel
Bartels controlled system. Instead of a switch, there is a center push button labeled “SPD”. You
can push it for ¼ of a second or so, and it will switch from Pan speed to Slew speed. Push it
Page 8 of 13
Page 9

again for changing from Slew speed to Pan speed.
Argo Navis® Mode Operation:
It is now possible to connect the SiTech Controller to an Argo Navis. The encoders are
connected to the SiTech Controller, and the telescope location information is passed to the Argo
Navis via the serial connection. There is a section in the SiTech Controller manual on setting up
the Argo Navis and setting up the SiTech Controller configuration. The handpad operation is
very simple. After the SiTech Controller is connected to the Argo Navis, and power is applied to
them both, press the top left (ESC) and the top right (ENT) keys at the same time. This will
initiate communication with the Argo Navis. Now align the Argo Navis, following the Argo
Navis instructions. Once alignment is complete, you can select an object using the “Catalog”
menu of the Argo Navis. Now press both the ESC and ENT keys at the same time. The scope
will GoTo the selected object and start tracking. If the object is not centered, you can center it
using the handpad. If the scope is moved manually, you can return to the last object by pressing
the two buttons again.
Using the Radio Handpad with the SiTech ASCOM driver:
There are no special features used with the SiTech ASCOM driver. You can center objects as
you normally would, or manually slew if needed.
Receiver LED's:
There are 4 LED's on the reciever. Three LED's on the reciever are for indicating the current
handpad speed of the system. They are 3 different colors so you can easily see the current mode
with a quick glance at the reciever. The fourth LED flickers whenever the reciever recieves a
valid signal from the handpad transmitter.
Slew LED. This Red LED is on if the handpad is in the slew mode.
Pan LED: This Yellow LED is on if the handpad is in the Pan mode.
Guide LED: This Green LED is on when the SiTech Controller is in the guide mode. The LED
is on medium brightness if the controller is in the guide mode, but it is on brighter when there is a
guiding signal present. When the controller is in the guide mode, guiding pulses can appear on
the external Guide port, or the handpad arrow keys.
Whenever a guide signal is present on the guide port, the receiver will put the SiTech Controller
in the Guide mode. To exit from the guide mode, press the middle SPD button.
Receive LED: This Red LED flickers each time a valid radio signal with a valid address and valid
checksum is received.
If the receiver is used on a Mel Bartels Stepper system, the Guide mode LED only illuminates
when a guide signal is received. The receiver only assumes that the Stepper system is in the
guide mode.
Page 9 of 13
Page 10

Using the Handpad as a wired handpad:
There is a 6 position modular connector on the end of the handpad. This can be connected to the
SiTech Controller directly. Any SiTech handpad will work for this, whether it has radio
components or not. If your handpad has radio components, the radio is disabled when connected
to the SiTech controller. This can be useful if the battery runs down in the middle of the night
with no 7-11 around the corner, or if there is interference for some reason.
You can purchase the handpad without the radio components. It will then simply serve as a wired
handpad. You will not be able to use the guide mode from the handpad (from software only), and
then you will have no indication of which mode you are in (unless it is on-screen).
It will not work properly as a wired handpad on Mel Bartels Stepper System.
Trouble Shooting:
Problem: There are no LED's on when the system is connected to the scope controller.
Solutions: Check the modular cable. If this is a Stepper system, check that the ground wire is
connected between the reciever and the controller.
Problem: The recieve light doesn't flicker when I press keys on the transmitter. The LED
flashlight works properly on the transmitter.
Solution: The transmitter and the reciever are on different addresses. Please set the addresses of
both units (see section titled “Setting Addres”).
Problem: Sometimes I let up on the key, but the telescope keeps moving for 1 second longer.
Solution: This is caused by interference, or a poor radio connection. Occasionally, you may have
interference from some unknown source. When you let up on a key, the transmitter sends out
TWO sequences to stop the telescope. If radio interference interferes with this signal, and both
stop sequences are missed, the telescope will keep moving until 1 second later it detects a lack of
the next expected “keep going” burst, and it will stop by itself. Using the radio chips we've
selected, this shouldn't be much of a problem. If it is, try mounting the receiver closer to the
eyepiece.
Problem: I'm using an Argo Navis, and I press the top two buttons, but the telescope doesn't
GoTo. It's tracking ok.
Solution: Assuming you've already been using it earlier in the evening, be sure the flashlight is
off. Make sure the transmitter hasn't turned itself off. If it has, you will have to press any other
key to power it on. Make sure the handpad isn't locked.
Page 10 of 13
Page 11

APPENDIX A - AGENCY APPROVALS:
FCC:
This equipment has been tested and found to comply with the limits for a class B digital device,
pursuant to part 15 of the FCC Rules. These limits are designed to provide reasonable protection
against harmful interference in a residential installation. This equipment generates, uses and can
radiate radio frequency energy and if not installed and used in accordance with the instructions,
may cause harmful interference to radio communications. However, there is no guarantee that
interference will not occur in a particular installation. If this equipment does cause harmful
interference to radio or television reception, which can be determined by turning the equipment
off and on, the user is encouraged to try to correct the interference by one or more of the
following measures:
* Reorient or relocate the receiving antenna.
* Increase the separation between the equipment and receiver.
* Connect the equipment into an outlet on a circuit different from that to which the receiver is
connected.
* Consult the dealer or an experienced radio/TV technician for help.
The user is cautioned that changes and modifications made to the equipment without the approval
of manufacturer could void the user's authority to operate this equipment.
C-Tick
Manufacturers Name: Sidereal Technology
Manufacturers Address: 6040 N. Cutter Circle #302
Portland, OR 97217 (USA)
Australia Representative Name:
Wildcard Innovations
ACA Suppliers Code: N11511
Declares that the products
Dual Servo Telescope Controller, Model DSTC 1
Handpad Transmitter, Model HT1
and Handpad Receiver, Model HR 1
conforms to the following standards:
EMC: AS/NZS 3548 Class B Complies
AS/NZS 61000-4-3 Complies, Criterion A
These units are not for mains connections.
Industry Canada:
United Sates Company number: 5942A
Canadian Representative: Nova Astronomics
Canadian Representative Company number: 5930A
Page 11 of 13
Page 12

Page 12 of 13
Page 13

Appendix B: Receiver Wiring Diagram:
Page 13 of 13
CONNECT TO GROUND
ON BARTELS STEPPER
SYSTEM (ONLY ONE
IS NECESSARY)
NC
GND
EAST (LEFT)
NORTH (UP)
SOUTH (DOWN)
WEST (RIGHT)
AUTO GUIDER PORT
GND
GND
1
2
3
4
5
6
Jumper here for Servo System
Jumper here for Stepper System
GUIDE MODE
RECIEVING
HANDPAD RECIEVER
MODEL HR-1
SLEW MODE
PAN MODE
I/O PORT
+5VOLTS
6
UP/NORTH
5
4
GROUND (+5 VOLTS ON STEPPER)
DOWN/SOUTH
3
2
LEFT/EAST
RIGHT/WEST
1
TO SERVO OR STEPPER
HANDPAD PORT
6 +5 VOLTS
5
IN/OUT 4
4
GROUND
IN/OUT 3
3
2
INPUT 2
INPUT 1
1
GENERAL PURPOSE
I/O PORT
 Loading...