

SICK IDM120, IDM260, IDM140, IDM240, IDM160 Quick Start Manual
2
3
4
5
6
2
3
4
5
6
1
2
3
4
5
8
1
7
1
3
4
5
6
2
8023457/2018-08-28
SICK AG
E
rwin-Sick
-Straße 1
D-79183 Waldkirch
www.sick.com
IDM Corded
RS-232 serial USB HID and USB COM
Q U I C K S T A R T e n
1 About this document
This Quickstart serves as a quick reference for the installation and operation of
IDM hand-held scanners.
They are configured by scanning individual configuration codes or a sequence of
configuration codes. Configuration codes are presented in this document; factory
settings are indicated by the symbol ◆.
Supplementary and other relevant documents:
•
Further language versions of this document (available online).
•
Operating instructions for IDM hand-held scanners (available online).
These documents and additional information, such as application examples and
downloads of associated documents and associated software, can be found on
the SICK product page on the Internet at www.sick.com/[product_family],
for example for the product family IDM240: www.sick.com/IDM24x
2 Product description
Product families
IDM120
IDM140
USB HID (human interface device):
The scanner functions as a generic USB keyboard.
Emulation of the USB COM port :
The scanner functions as a conventional serial RS-232 device.
Prior to use, you must install the USB COM software driver (available at
www.sick.com).
NOTE
If USB devices are not connected as USB HID (human interface device), but
as VCP (virtual COM port) instead, the Windows API does not monitor the con‐
nection and does not re-establish the connection automatically if it is lost.
The connection must be monitored in the application software (such as within
the driver access layer) that the COM port uses as its data input source.
4 Setup
4.1 IDM Set Up Tool software
The IDM Set Up Tool software is a Windows-based configuration software package
for IDM hand-held scanners. Configuration via the software is an alternative to the
configuration described below, which involves scanning configuration codes.
The software can be downloaded free of charge at www.sick.com. The IDM oper‐
ating instructions contain a detailed description of the configuration using the IDM
Set Up Tool software.
4.2 Quick setup of host interface
To change the interface, scan one of the following configuration codes:
USB COM port
emulation
RS-232 serial USB HID turbo mode
USB HID standard
mode ◆
IDM160/IDM260
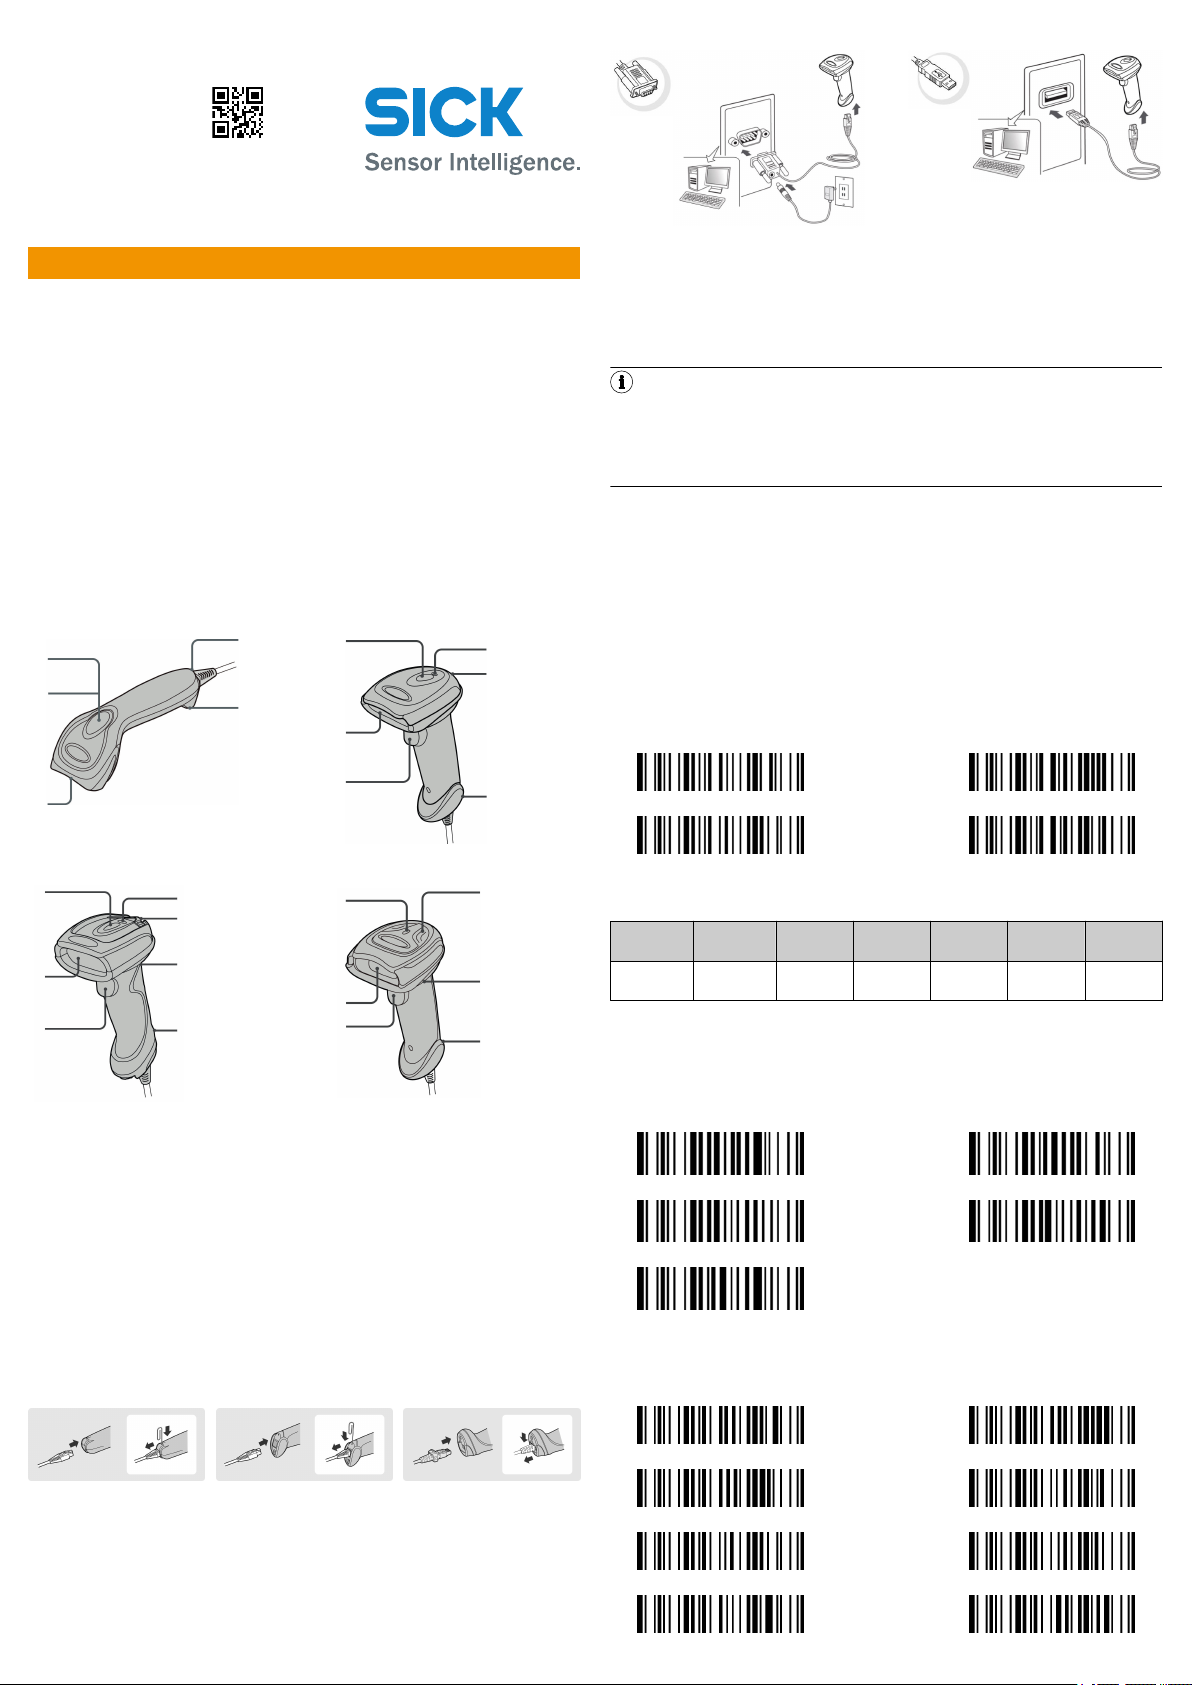
1
2
3
4
Operating indicator
Status indicator
Trigger
Viewing window
IDM240
5
6
7
8
Beeper
Unlocking opening for
connecting cable
Mounting eye (metal)
Mounting eye (plastic)
3 Preparation
3.1 Connecting/disconnecting the connecting cable
IDM hand-held scanners have a serial RS-232 interface and a USB interface.
IDM120/IDM140/IDM240: To disconnect the connecting cable, insert a
b
straightened paper clip into the unlocking opening, push it in, and then pull
out the released connecting cable.
IDM160/IDM260: To disconnect the connecting cable, push the tab on the
b
male connector downward and then pull out the released connecting cable.
IDM120 IDM140/IDM240 IDM160/IDM260
4.3 Quick setup of keyboard interface
The characters are output via the keyboard interface in the following sequence:
Preamble Data length Prefix ID
1–15
characters
2–4
characters
1 or 3
characters
Scanned
data
Variable 1 or 3
Suffix ID Postamble
characters
1–15
characters1character
Data set
suffix
To make a quick change to the data set suffix when using the keyboard interface
(USB), the configuration codes shown below can be used. Information on configur‐
ing other segments of the sequence, such as preamble or postamble, can be
found in the operating instructions.
4.3.1 Data set suffix
None RETURN ◆
TAB SPACE
ENTER
4.3.2 Keyboard layout
The USA keyboard layout is set as default. To change the layout to another coun‐
try, scan one of the codes below.
USA ◆ France
3.2 Connecting the host interface
Various host devices can be connected to the hand-held scanners via a serial
RS-232 interface or a USB interface.
Establish the connection in line with the illustrations shown:
b
8023457/2018-08-28/en IDM Corded | SICK 1
Germany Canadian French
United Kingdom-UK Spain
Latin America Netherlands
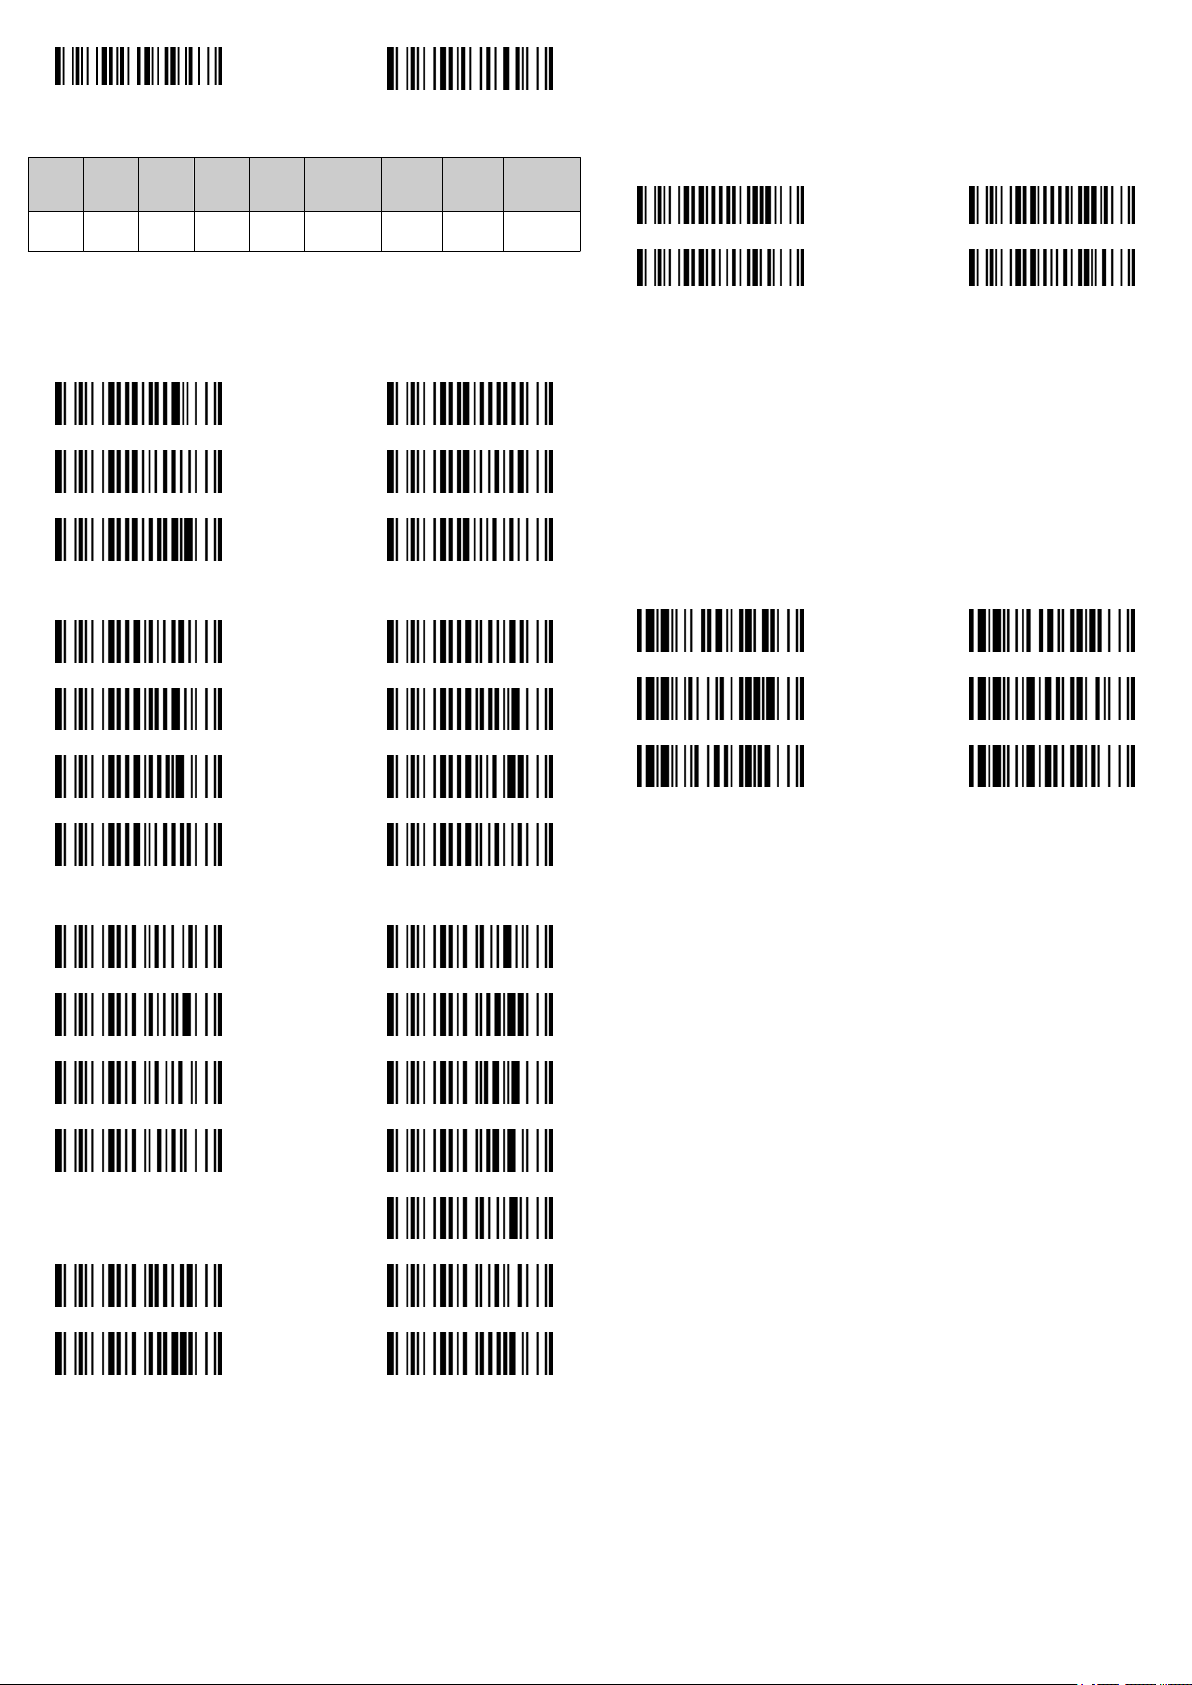
Japan Sweden/Finland
4.4 Quick setup of serial interface
The characters are output via the serial interface in the following sequence:
Pream‐
STX
ble
1 char 1–15
chars
Data
length
2–4
chars
Prefix
ID
1 or 3
chars
Scann
ed
Suffix ID
data
Variable 1 or 3
chars
Post‐
amble
1–15
chars
ETX
Data set
suffix
1 char 1 char
To quickly change the data set suffix when using the serial interface (RS-232 or
USB COM port), the configuration codes shown below can be used. Information on
configuring other segments of the sequence, such as preamble or postamble, can
be found in the operating instructions.
4.4.1 Data set suffix
None LF
Tab SPACE
CR ◆ CRLF
4.4.2 Baud rate
115,200 BPS 57,600 BPS
•
Force mode (for applications with fast bar code processing rates, for example):
The illumination of the hand-held scanner is permanently switched on and
the scanner reads bar codes without actuating the trigger. To start the mode,
the trigger must be actuated once.
•
Flash mode: The hand-held scanner reads a bar code automatically when an
object enters the reading range. A further scan is then only triggered when
an object next enters the reading range. To start the mode, the trigger must
be actuated once.
Trigger mode ◆ Presentation mode
Force mode Flash mode
4.6 System commands
•
Factory settings: After scanning the Factory default command, all parameters
are reset to their default values.
•
Master default: After scanning the Master default command, the scanner
retains the following preset parameters: Host interface selection, Keyboard inter‐
face setting (with the exception of data set suffix, preamble, postamble), Serial
interface setting (with the exception of data set suffix, preamble, postamble),
and Scanner/laser emulation setting. The other parameters are reset to the
default values.
•
Save configuration: Once the scanner has been configured, you can save the
configuration by scanning the Save configuration command. If you scan User
default, the scanner loads the saved configurations. If you scan Master default
or Factory default, the user-defined configuration is deleted.
•
Use configuration software: Scanning the IDM Set Up link command enables the
hand-held scanner to be configured via the IDM Set Up Tool configuration
software.
System information Master default
38,400 BPS 19,200 BPS
9,600 BPS ◆ 4,800 BPS
2,400 BPS 1,200 BPS
4.4.3 Data frame
7, odd, 1 7, odd, 2
7, mark, 1 7, mark, 2
7, even, 1 7, even, 2
7, space, 1 7, space, 2
IDM Set Up link Save configuration
Factory default User default
7, none, 2
8, none, 1 ◆ 8, none, 2
8, odd, 1 8, even, 1
4.5 Quick setup of operating mode
To activate the required operating mode, scan one of the following configura‐
b
tion codes:
•
Trigger mode: To read a bar code, the trigger must be actuated manually.
•
Presentation mode (for hands-free applications): The illumination of the handheld scanner is off until an object is detected in the reading range. The handheld scanner then reads in bar codes automatically without actuating the
trigger.
8023457/2018-08-28/en IDM Corded | SICK 2
 Loading...