

Page 1

Page 2

Copyright by Carl Valentin GmbH / 7960091.0819
Information on the scope of delivery, appearance, performance,
dimensions and weight reflect our knowledge at the time of printing.
We reserve the rights to make modifications.
All rights, including those regarding the translation, are reserved.
No part of this document may be reproduced in any form (print,
photocopy or any other method) or edited, copied or distributed
electronically without written permission from Carl Valentin GmbH.
Due to the constant further development of our devices discrepancies
between manual and device can occur.
Please check www.carl-valentin.de for the latest update.
Trademarks
All named brands or trademarks are registered brands or registered
trademarks of their respective owners and may not be separately
labelled. It must not be concluded from the missing labelling that it is
not a registered brand or a registered trademark.
Carl Valentin GmbH
Postfach 3744
78026 Villingen-Schwenningen
Neckarstraße 78 – 86 u. 94
78056 Villingen-Schwenningen
Phone
Fax
+49 7720 9712-0
+49 7720 9712-9901
E-Mail
Internet
info@carl-valentin.de
www.carl-valentin.de
Page 3

Scanner SICK CLV622
Table of Contents
08.19
Operating Manual
3
Table of Contents
1 General Notes ........................................................................ 5
1.1 Environmentally-Friendly Disposal .......................................... 5
1.2 Product Description ................................................................. 6
2 Technical Data ....................................................................... 7
3 Installation of Scanner Bracket ............................................ 9
3.1 Spectra II ................................................................................. 9
4 Configuration ....................................................................... 11
4.1 Settings of the Scanner Software .......................................... 11
4.1.1 Reading Configuration ................................................... 12
4.1.2 Code Configuration ........................................................ 13
4.1.3 Data Processing ............................................................. 13
4.1.4 Network/Interfaces/IOs ................................................... 16
4.2 Saving the Settings in the Scanner ....................................... 17
4.3 Loading a Configuration File ................................................. 17
5 Function Menu Scanner ...................................................... 19
5.1 Scanner Mode ....................................................................... 19
5.2 Scanner Type ........................................................................ 20
5.3 Scanner Setup ....................................................................... 20
5.4 Scan Offset ............................................................................ 20
5.5 Scan Length .......................................................................... 21
5.6 Scan Mode ............................................................................ 21
5.7 Scan Delay ............................................................................ 22
5.8 Scan Timeout ........................................................................ 22
5.9 Interface Parameter ............................................................... 22
6 Parameter Sets for Scanner Mode ..................................... 23
6.1 Scanner Variable ................................................................... 25
7 Error Messages .................................................................... 27
8 Index ..................................................................................... 29
Page 4

Table of Contents
Scanner SICK CLV622
4
Operating Manual
08.19
Page 5
Scanner SICK CLV622
General Notes
08.19
Operating Manual
5
1 General Notes
By means of the scanner option the immediate verification of printed
bar codes is possible. Moreover errors such as defective printhead,
transfer ribbons etc. can be avoided.
The bar code scanner is a state-of-the-art device which complies with
the recognized safety-related rules and regulations. Despite this, a
danger to life and limb of the user or third parties could arise and the
bar code scanner or other property could be damaged while operating
the device.
The bar code scanner may only be used while in proper working order
and for the intended purpose. Users must be safe, aware of potential
dangers and must comply with the operating instructions. Faults, in
particular those which affect safety, must be remedied immediately.
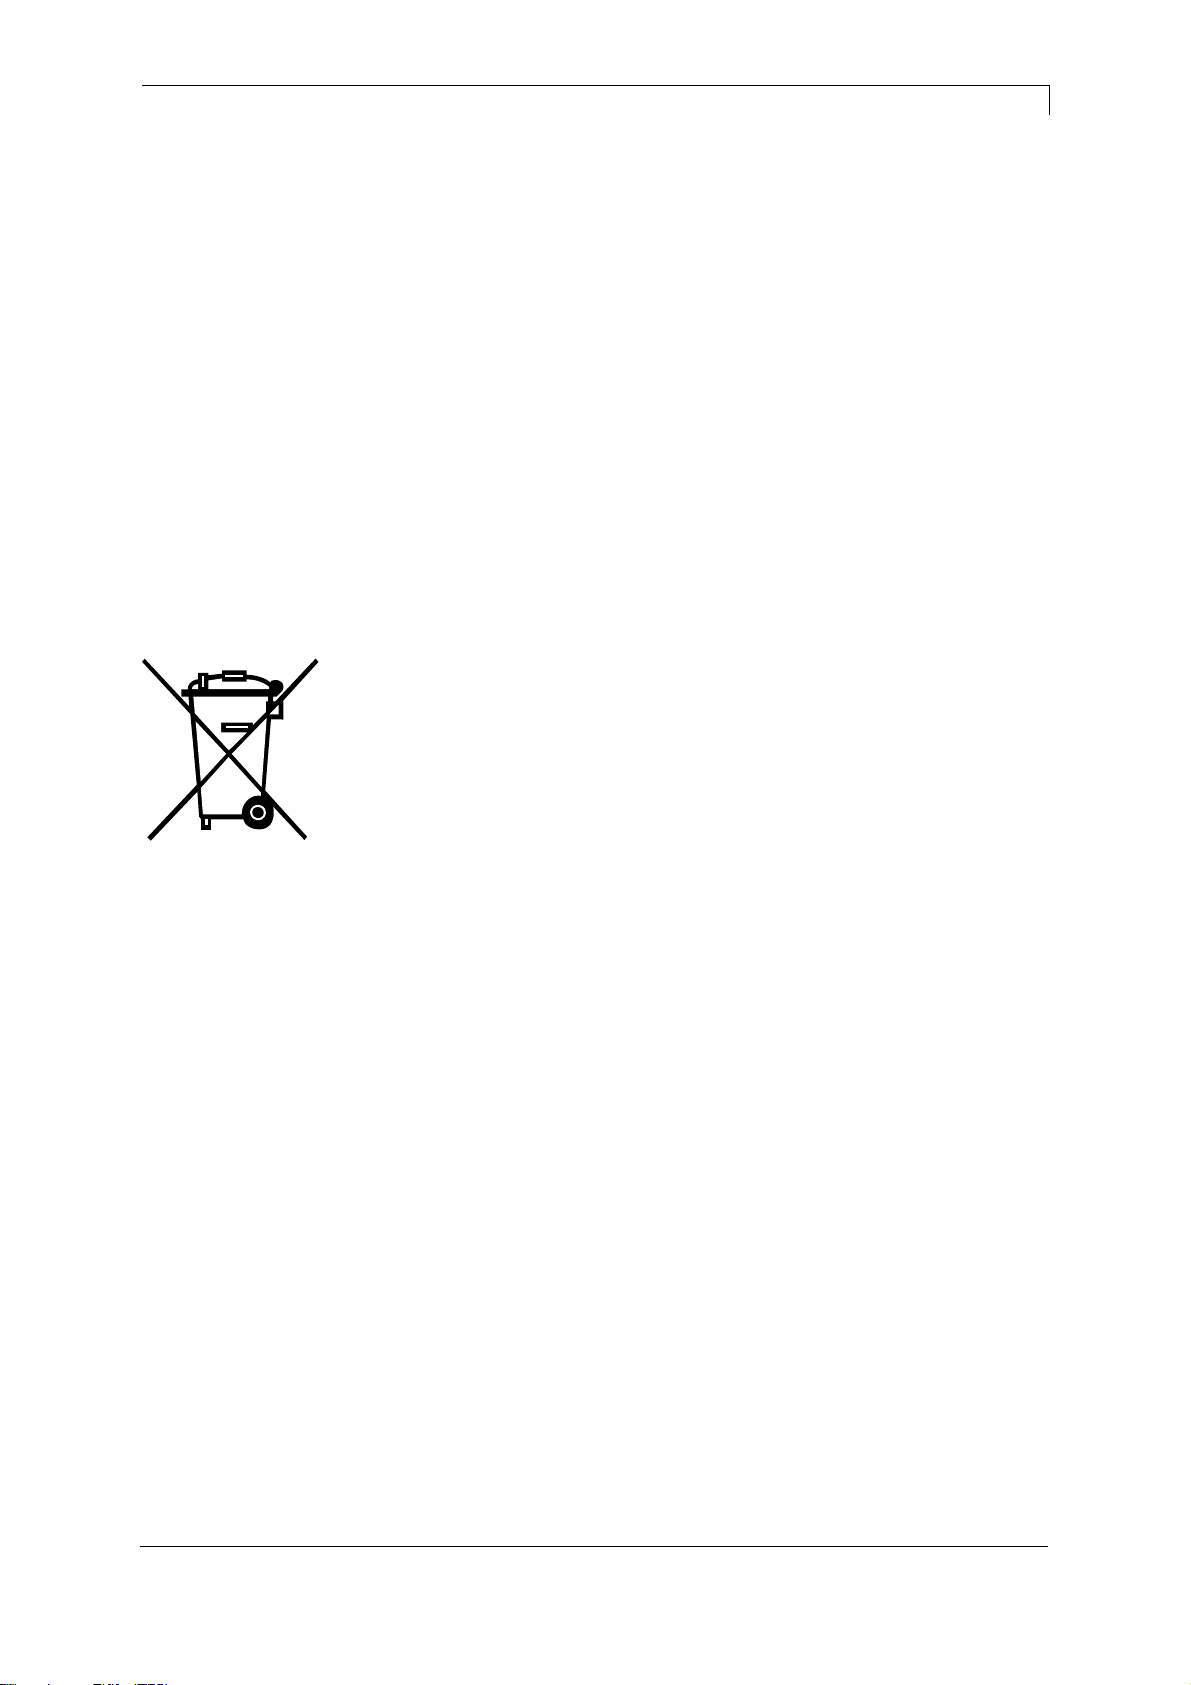
1.1 Environmentally-Friendly Disposal
Manufacturers of B2B equipment are obliged to take back and
dispose of old equipment that was manufactured after 13 August
2005. As a principle, this old equipment may not be delivered to
communal collecting points. It may only be organised, used and
disposed of by the manufacturer. Valentin products accordingly
labelled can therefore be returned to Carl Valentin GmbH.
This way, you can be sure your old equipment will be disposed of
correctly.
Carl Valentin GmbH thereby fulfils all obligations regarding timely
disposal of old equipment and facilitates the smooth reselling of these
products. Please understand that we can only take back equipment
that is sent free of carriage charges.
The electronics board of the printing system is equipped with a
battery. This must only be discarded in battery collection containers or
by public waste management authorities.
Further information on the WEEE directive is available on our website
www.carl-valentin.de.
Page 6
General Notes
Scanner SICK CLV622
6
Operating Manual
08.19
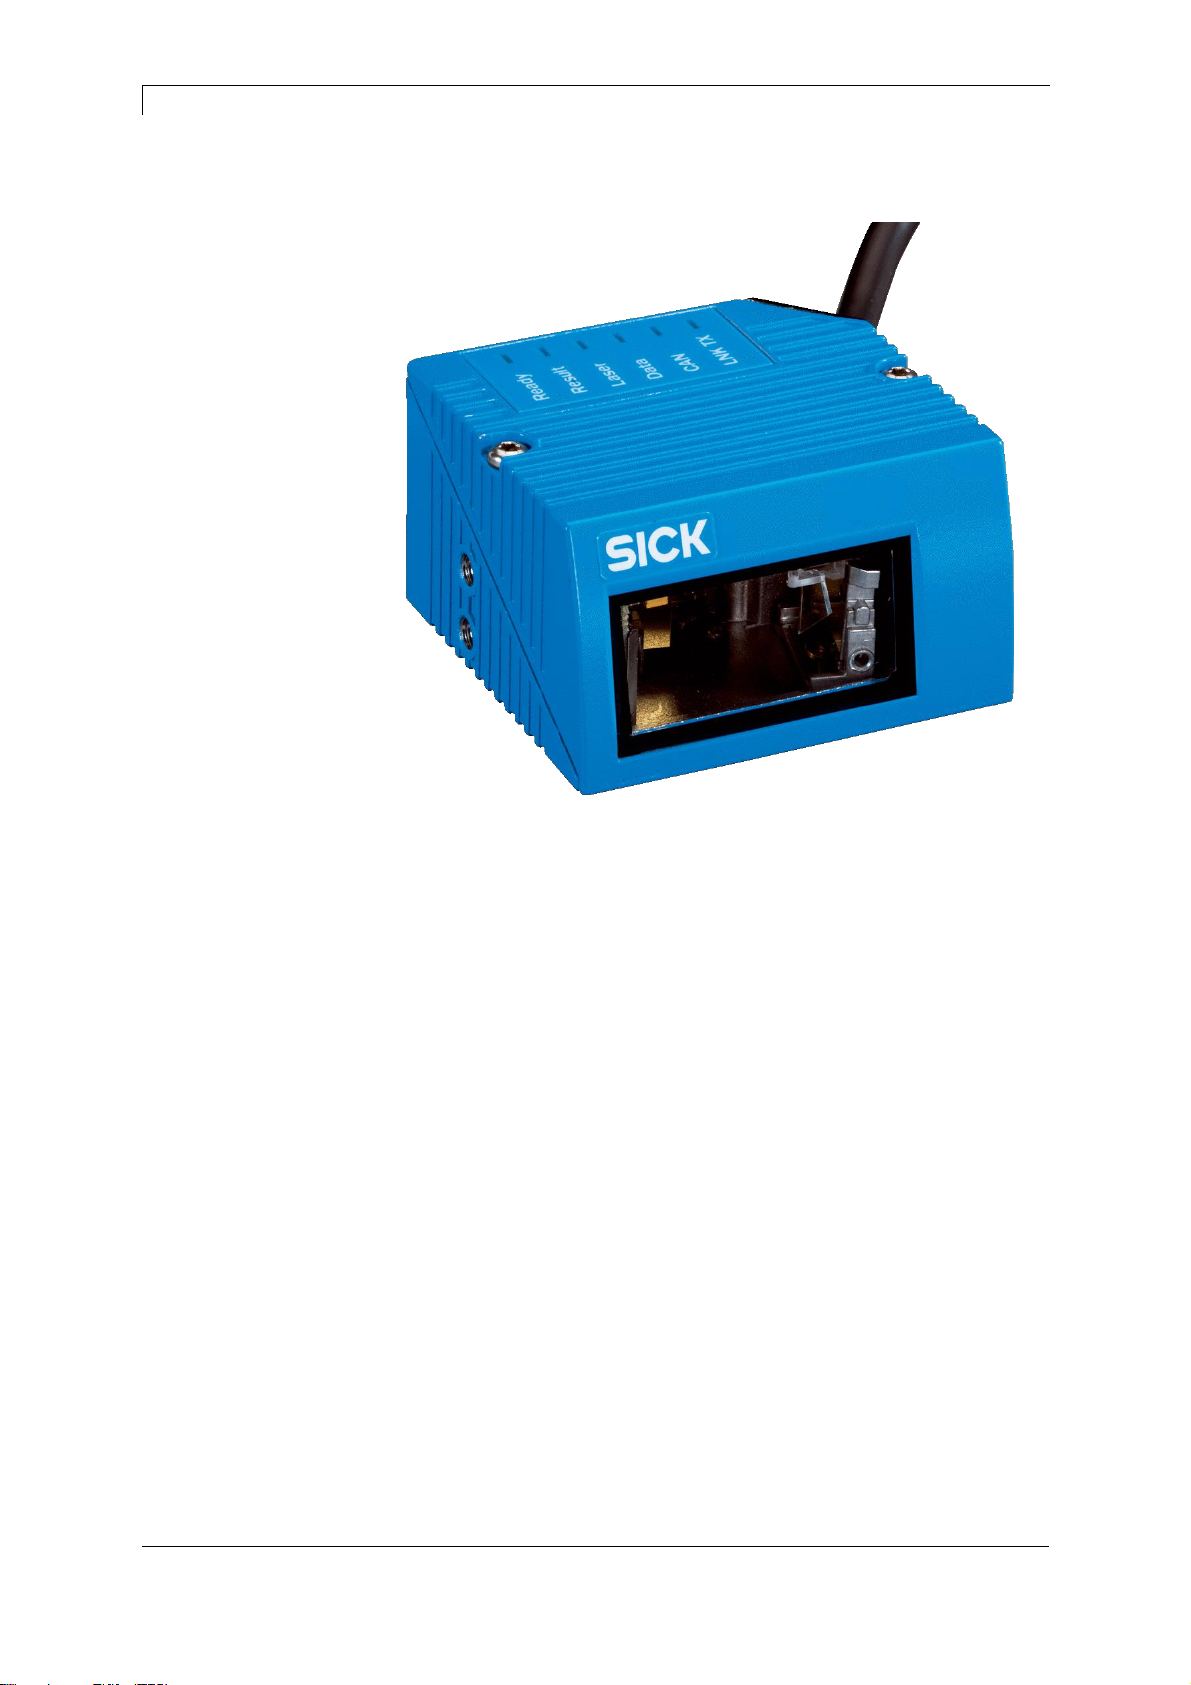
1.2 Product Description
Figure 1
The CLV622 is a compact, powerful and easy-to-use bar code
scanner designed for a variety of applications.
The SMART620-Code reconstruction allows accurate detection of
damaged, dirty and partially dirty bar codes.
The data can be transferred to the controller in the desired format.
This results in less programming effort.
Even at high conveyor speeds, the CLV622 can provide real-time
code identification.
The compact desig and simple operation facilitate the installation in
space-critical situations.
Page 7
Scanner SICK CLV622
Technical Data
08.19
Operating Manual
7
2 Technical Data
Features
Version
Mid range
Connection type
Cable
Reading field
Front
Scanner design
Line scanner
Focus
Fixed focus
Light source
Visible red light (655 nm)
Laser class
2 (IEC 60825-1:2014, EN 60825-1:2014)
Aperture engle
≤ 50°
Scanning frequency
400 Hz … 1,200 Hz
Code resolution
0.2 mm … 1 mm
Reading distance
60 mm … 365 mm
Mechanics/electronics
Electrical connection
1 x 15-pin D-Sub HD male connector (0.9 m)
Supply voltage
10 V DC … 30 V DC
when connecting to the printer: 24 V DC
Power consumption
4.5 W
Housing
Aluminum die cast
Housing color
Light blue (RAL 5012)
Front screen
Glass
Enclosure rating
IP65 (DIN 40 050)
Protection class
III (VDE 0106/IEC 1010-1)
Weight
225 g, with connecting cable
Dimensions (L x W x H)
61 mm x 66 mm x 38 mm
MTBF
40,000 h
Performance
Readable code structures
1D
Bar code types
All current code types, Code 39, Code 128, Code 93,
Codabar, GS1-128 / EAN 128, UPC /GTIN / EAN, 2/5
Interleaved, Pharmacode, GS1 DataBar, Telepen,
MSI/Plessey
Print ratio
2:1 … 3:1
No. of codes per scan
1 … 20 (standard decoder)
1 … 6 (SMART620)
No. of characters per reading interval
1 … 500
No. of multiple readings
1 … 99
Page 8
Technical Data
Scanner SICK CLV622
8
Operating Manual
08.19
Interfaces
Serial
RS 232, RS 422
Function
Host, AUX
Data transmission rate
0.3 kBaud … 115.2 kBaud, AUX: 57.6 kBaud (RS-232)
Reading pulse
automatically; via the serial interface to the printer
Optical indicators
6 LEDs (ready, result, laser, cata, CAN, LNK TX)
Acoustic indicators
Beeper/buzzer (can be switched off, can be allocated as a
result indication function)
Configuration software
SOPAS ET
Ambient data
Electromagnetic compatibility (EMV)
EN 61000-6-3 (2001-10) / EN 61000-6-2:2005
Vibration resistance
EN 60068-2-6 (1995)
Shock resistance
EN 60068-2-27 (1993)
Ambient operating temperature
0 °C … +40 °C
Storage temperature
–20 °C … +70 °C
Permissible relative humidity
90 %, non-condensing
Ambient light immunity
2,000 lx, on bar code
Scanner SICK CLV622
Page 9
Installation of Scanner Bracket
08.19
Operating Manual
9
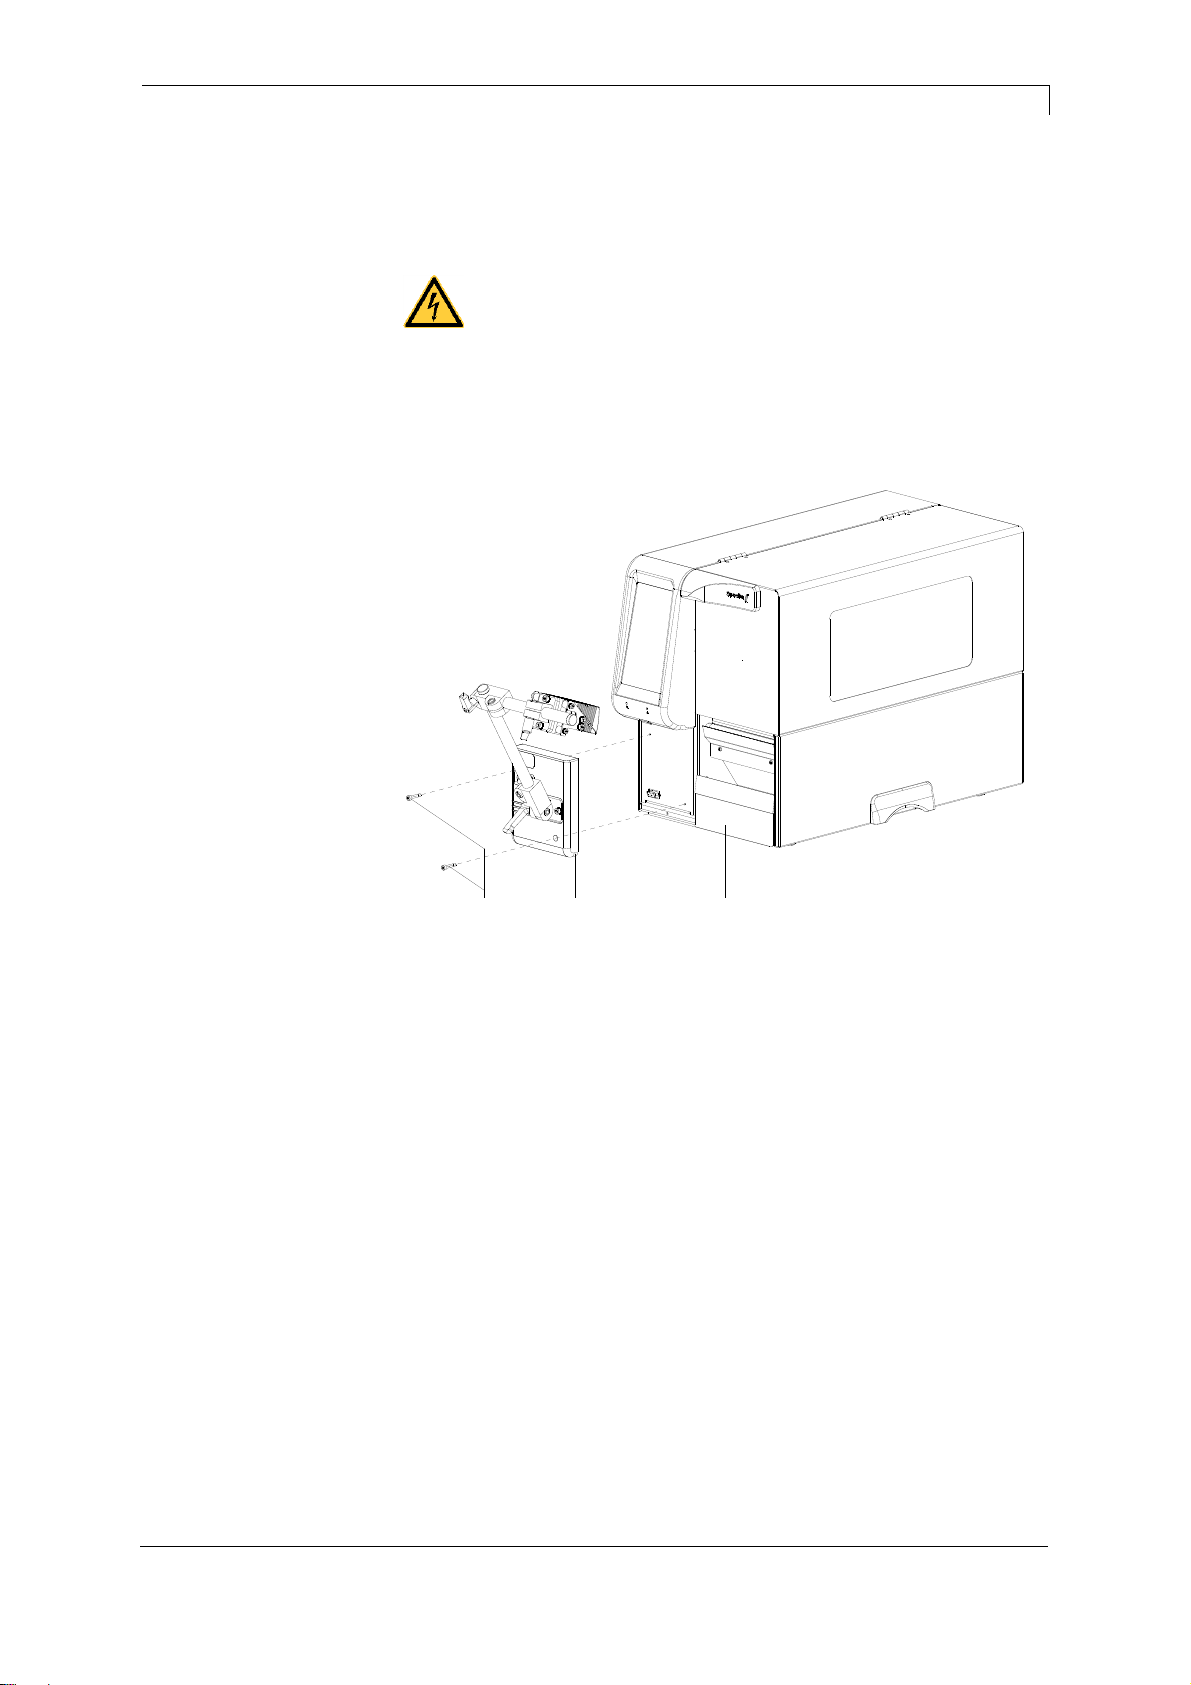
3 Installation of Scanner Bracket
3.1 Spectra II
DANGER!
Risk of death via electric shock!
Before installation/dismantling of the option scanner,
disconnect the label printer from the mains supply and
wait for a moment until the power supply unit has
discharged.
Figure 2
1. Open the right printer cover.
2. Remove the lower front panel.
3. Fasten the scanner bracket (B) with the fixing screws (C) at the
printer (A).
It is important to pay attention to the plug connection!
4. Insert the label material (as described in the operating manual).
ABC
Page 10

Installation of Scanner Bracket
Scanner SICK CLV622
10
Operating Manual
08.19
Page 11

Scanner SICK CLV622
Configuration
08.19
Operating Manual
11
4 Configuration
The CLV622 must be configured accordingly to operate on a Spectra
II. For this, the PC software SOPAS Engineering Tool can be
downloaded from the SICK website (www.sick.com). After installing
this software, the scanner must be connected via a 1:1 serial cable
(D-SUB 9-pin) to the serial interface which is integrated in the scanner
bracket.
Alternatively, the scanner can also be connected to an optional
connection module SICK CDB620 for the configuration, and the
connection to the PC can be made from there.
4.1 Settings of the Scanner Software
After starting the software SOPAS ET, it searches for the connected
scanner and displays it on the user interface.
Figure 3
By double-clicking on the scanner symbol or by clicking 'Open device
window …' in the context menu, the device window is opened
(standard or advanced). In the advanced display, a tree structure is
displayed on the left side. Different parameter ranges can be selected
there.
Page 12

Configuration
Scanner SICK CLV622
12
Operating Manual
08.19
Figure 4
After selecting a parameter range, the corresponding parameters are
displayed on the right side and can be changed there.
4.1.1 Reading Configuration
Various settings regarding the signal to start the scanner can be
made.
Figure 5
Do not change the setting 'Start by / User defined command' because
the scanner is to be controlled by the printer which sends the start
command (K) and the stop command (I).
Figure 6
Normally no settings are necessary.
Object trigger control
Illumination control
Page 13

Scanner SICK CLV622
Configuration
05.19
Operating Manual
13
Figure 7
Normally no settings are necessary.
4.1.2 Code Configuration
Settings regarding the codes to be scanned can be made.
Figure 8
4.1.3 Data Processing
Settings for the data processing can be adjusted here.
Figure 9
PowerSave control
Page 14

Configuration
Scanner SICK CLV622
14
Operating Manual
08.19
Settings for the output control can be adjusted here.
Figure 10
The default settings for the data transmission point ('as soon as
possible') and the output condition ('Good Read') should not be
changed.
Figure 11
Normally no settings are necessary. At print start, the printer sends
the number of codes to be scanned (min/max) to the scanner.
Figure 12
Normally no settings are necessary.
Output control
Evaluation conditions
Matchcode Teach-In
Page 15

Scanner SICK CLV622
Configuration
05.19
Operating Manual
15
Figure 13
Normally no settings are necessary.
Figure 14
No changes should be made here, othewise the communication
between printer and scanner may not work.
Filter/sorter for the
output formatting
Output format
Page 16

Scanner SICK CLV622
Configuration
08.19
Operating Manual
16
4.1.4 Network/Interfaces/IOs
Figure 15
The interface Serial Host is used as connection between the scanner
and printer. If the interface parameters (baud rate, etc) are changed,
they must be adjusted accordingly in the function menu 'Scanner' of
the printer.
Figure 16
No settings are necessary as the scanner is not controlled via the
digital inputs.
Serial
Digitale Eingänge
Page 17

Scanner SICK CLV622
Configuration
05.19
Operating Manual
17
Figure 17
No settings are necessary as the digital outputs are not used. If
necessary, the beeper can be switched on as feedback from the
scanner.
4.2 Saving the Settings in the Scanner
To save the settings in the scanner, in the menu under the device
name (CLV62x), select the function 'Parameter/Save permanent'. This
can also be done with clicking on the symbol .
4.3 Loading a Configuration File
To load an existing configuration file from the PC, the function
'Device/Import SDV file …' must be selected.
After selecting the file name (*.sdv), the parameters are loaded and
can be saved in the scanner as described above.
Digital outputs / beeper
Page 18

Page 19

Scanner SICK CLV622
Function Menu Scanner
08.19
Operating Manual
19
5 Function Menu Scanner
5.1 Scanner Mode
This display provides the possibility to set the desired scanner mode
(Mode), the number of acceptable non-readable (NoRd) as well as the
number of label feedings (Flab).
0 =
Off
1 =
Mode 1 (data comparison), i.e. bar code date which was read by
the scanner is compared with the printed data.
2 =
Mode 2 (check readability), i.e. it is only checked if the scanner
can read the printed bar codes.
3 =
Mode 3 (check readability, graphic), i.e. it is only checked if the
scanner can read the printed bar codes. This mode is to use if
the bar code is available as graphic (e.g. printing with printer
driver). In this case the printer cannot recognize that a bar code
is placed onto the label.
Indication of number of successive non readables, i.e. when the
printer indicates an error message.
Value range: 0 … 9
1 = the printer stops at the first label which cannot be red from the
1 = scanner and shows an error message.
0 = the printer do not stop at non-readable. A message appears at
0 = the display only.
In many cases the scanner cannot be positioned directly on the
printhead. In this case, use this parameter to set a label feed between
1 and 5. The illustration shows the meaning of this parameter.
Operating mode (Mode)
Non-readable (NoRd)
Label feed (VEti)
Page 20

Function Menu Scanner
Scanner SICK CLV622
20
Operating Manual
08.19
5.2 Scanner Type
The different scanners are controlled by different commands and/or
the scanners return the scanned data in different manners. Therefore
this window provides the possibility to select the scanner model
corresponding to the connected scanner.
5.3 Scanner Setup
With this parameter, the position of the scanner can be set. However,
first of all you have to connect the scanner, select the corresponding
scanner model in 'scanner type' window, set the corresponding
interface and correctly to set the parameters in the 'interface
parameter' window.
After pressing the enter key (red button) the scanner is set to on and
tries to read bar codes continuously. In case a bar code is read then
the read data is indicated in the display and the scanner is
immediately again set to on. Is the scanner in the correct position it
starts to flicker. Is the scanner not in the correct position then it is set
to on as long as again a bar code is read. The scanner is to position in
the way that at feeding labels of 1 the bar code is directly read at the
printhead.
5.4 Scan Offset
In scan mode 'while print' the scanner is switched On if the first pixel
line is printed (= of bar code which is to scan). The scanner is
switched Off either by reading the bar code (Good Read) or explicitly
by the printer, if the last pixel line is printed (= of the bar code which is
to scan - No Read). By means of this value the switch On and Off
position of scanner in printing direction can be shifted.
In scan mode 'after print), the label is advanced by the set offset,
before the scanner is switchen On and after scanning again retracted.
Page 21

Scanner SICK CLV622
Function Menu Scanner
05.19
Operating Manual
21
5.5 Scan Length
If this parameter is set to 0 (AUTO), the switch on and off position of
scanner is calculated by means of position and height of bar code
onto the label. If the parameter Scan Length is not 0, so this defines
the length of scan sector. The start of scan sector is then set by the
parameter 'Scan Offset'.
This parameter is not relevant in scan mode 'after print'
The following drawing shows the meaning of the parameters 'Scan
Offset' and 'Scan length'.
Bar code
Printing direction
Scanner
On
Scanner
Off
Scan
Offset
Scan
Length
Figure 18
5.6 Scan Mode
With this parameter can be adjusted, at which time the scanning of the
bar code is to be effected - during printing or after printing.
While printing
The scanning of bar code is effected while the
label is printed. By means of the parameter
'number of feeding labels' can be defined which
label should be scanned. With the parameters
'Scan offset' and 'Scan length' the scan sector
can be specified.
After printing
The scanning of bar code is effected after the
label was printed. With the parameter 'Scan
delay' the time can be varied between printing
the label and switching on the scanner. With the
parameter 'Scan timeout' the time can be
specified which is available for scanning the
label. After successful scanning of bar code the
next label is printed and/or in dispensing mode
the printer changes to 'waiting' mode.
Page 22

Function Menu Scanner
Scanner SICK CLV622
22
Operating Manual
08.19
5.7 Scan Delay
In scan mode 'after print' the scanner is switched On after the label
was printed. With this value the time can be specified between printing
the label and switching On the scanner.
This parameter is not relevant in scan mode 'while print'.
5.8 Scan Timeout
In scan mode 'after print' can be specified with this value the time
which is available for scanning the label. If the parameter 'scan
timeout' is set to 0, the printer waits until the bar code could be read. If
the bar code is not read withing the fixed time the printer switches Off
the scanner again (non readable). When reaching the fixed number of
consecutive non-readable an error message appears at the display.
This parameter is not relevant in scan mode 'while print'.
5.9 Interface Parameter
Set the parameter of serial interface at which the scanner is
connected to the printer.
COMx
0 = Off
1 = On
2 = On, no error message at interface errors
Baud rate
1200, 2400, 4800, 9600, 19200, 38400, 57600 Baud
P - Parity
N = None
O = Odd
E = Even
D – Data bits
7, 8 Bits
S – Stop bits
1, 2 Bits
Page 23

Scanner SICK CLV622
Parameter Sets for Scanner Mode
08.19
Operating Manual
23
6 Parameter Sets for Scanner Mode
Set scanner operating mode
SOH
F C D M - - r M P N F - - - -
ETB
M: 0 = Off
M: 1 = Mode 1 (data comparison)
M: 2 = Mode 2 (check only readability)
M: 3 = Mode 3 (check only readability, graphic)
P: 0 = Interface COM1
P: 1 = Interface COM2
P: 1 = This parameter is ignored because COM2 is always used as
P: 1 = scanner interface
N: – = 0 bad readings (NoReads)
N: 0 = 1 bad readings
N: 1 = 2 bad readings
N: 2 = 3 bad readings
N: 3 = 4 bad readings
N: 4 = 5 bad readings
N: 5 = 6 bad readings
N: 6 = 7 bad readings
N: 7 = 8 bad readings
N: 8 = 9 bad readings
Number of consecutive bad readings after which an error message is
displayed. With '-' (0 NoReads) no error message occurs, i.e. the print
procedure is not interrupted. Only a warning will be shown on the
display.
F: 0 = No label feed (FeedLabel)
F: 1 = Feed by 1 label
F: 2 = Feed by 2 labels
F: 3 = Feed by 3 labels
F: 4 = Feed by 4 labels
F: 5 = Feed by 5 labels
Enquire scanner operating mode
SOH
F C D M - - w p p p p p p p p
ETB
Answer
SOH
A M P N F - - - - p p p p p p p p
ETB
Set scan offset
SOH
F C D M A - r N N N N - - - -
ETB
N = Scan offset in 1/10 mm
Enquiry scan offset
SOH
F C D M A - w p p p p p p p p
ETB
Antwort
SOH
A N N N N - - - - p p p p p p p p
ETB
N = Current scan offset in 1/10 mm
Page 24

Parameter Sets for Scanner Mode
Scanner SICK CLV622
24
Operating Manual
08.19
Set scan length
SOH
F C D M B - r N N N N - - - -
ETB
N = Scan length in 1/10 mm
Enquiry scan length
SOH
F C D M B - w p p p p p p p p
ETB
Answer
SOH
A N N N N - - - - p p p p p p p p
ETB
N = current scan length in 1/10 mm
Set scan mode
SOH
F C D M C - r N N N N - - - -
ETB
N: 0 = Scanning while printing
N: 1 = Scanning after printing
Enquire scan mode
SOH
F C D M C - w p p p p p p p p
ETB
Answer
SOH
A N - - - - - - - p p p p p p p p
ETB
N = current scan mode
Set scan delay (scanning after printing)
SOH
F C D M D - r N N N N - - - -
ETB
N = Scan delay in ms [0 … 9990]
Enquire scan delay
SOH
F C D M D - w p p p p p p p p
ETB
Answer
SOH
A N N N N - - - - p p p p p p p p
ETB
N = Current scan delay in ms
Set scan timeout (scanning after printing)
SOH
F C D M E - r N N N N - - - -
ETB
N = Scan timeout in ms [0 … 9990]
Enquire scan timeout
SOH
F C D M E - w p p p p p p p p
ETB
Answer
SOH
A N N N N - - - - p p p p p p p p
ETB
N = Current scan timeout in ms
Page 25

Scanner SICK CLV622
Parameter Sets for Scanner Mode
05.19
Operating Manual
25
Set scanner type
SOH
F C D M F - r N N N N - - - -
ETB
N: 5 = Zebra DS457
N: 6 = SICK ICR620
N: 7 = SICK CLV6XX
Enquire scanner type
SOH
F C D M F - w p p p p p p p p
ETB
Answer
SOH
A N - - - - - - - p p p p p p p p
ETB
N = Current set scanner type
6.1 Scanner Variable
In operating mode 1 (data comparison) the printer has to provide the
possibility to define the order of bar code data to scan multiple codes
onto a label. Because of this reason it is necessary to define the bar
code data in the text statements as scanner 'variable'. The text
statement has the following structure:
Scanner variable
SOH
BM
[n] = S V ( a ; f )
text data
ETB
'=SV'
Identification of scanner variable
a
Field active
0 = not active
1 = active, i.e. the code is scanned
f
Field number for definition of code order (1 …)
Examples
Text fix:
(SOH)BM[1]=SV(1;1)123456(ETB)
Text variable (counter):
(SOH)BM[1]=SV(1;1)=CN(10;0;4;+1;1)0001(ETB)
Page 26

Parameter Sets for Scanner Mode
Scanner SICK CLV622
26
Operating Manual
08.19
Page 27

Scanner SICK CLV622
Error Messages
08.19
Operating Manual
27
7 Error Messages
Error message
Cause
Remedy
68
Scanner
The connected bar code
scanner signals a device error.
Check the connection
scanner/printer.
Check thescanner (dirty).
69
Scanner NoRead
Bad print quality.
Printhead completely soiled or
defective.
Print speed too high.
Increase the contrast.
Clean the printhead or
exchange (if necessary).
Reduce the print speed.
70
Scanner data
Scanned data does not
correspond to the data which is
to print.
Exchange printhead.
94
Scanner Timeout
The scanner could not read the
bar code within the set timeout
time.
Defective printhead.
Wrinkles in the transfer ribbon.
Scanner wrong positioned.
Timeout time too short.
Check the printhead.
Check the transfer ribbon.
Position the scanner correctly,
corresponding to the set
feeding.
Select longer timeout time.
Page 28

Error Messages
Scanner SICK CLV622
28
Operating Manual
08.19
Page 29

Scanner SICK CLV622
Index
08.19
Operating Manual
29
8 Index
C
configuration, settings scanner software ........ 11, 12, 13, 14, 15, 16, 17
E
environmentally-friendly disposal ......................................................... 5
error messages .................................................................................. 27
F
function menu scanner
interface parameter ......................................................................... 22
scan delay ....................................................................................... 22
scan length ..................................................................................... 21
scan mode ...................................................................................... 21
scan offset ...................................................................................... 20
scan timeout ................................................................................... 22
scanner mode ................................................................................. 19
scanner setup ................................................................................. 20
type ................................................................................................. 20
G
general notes ........................................................................................ 5
I
installation, Spectra II ........................................................................... 9
P
parameter sets
scanner ............................................................................... 23, 24, 25
scanner variable ............................................................................. 25
product description ............................................................................... 6
T
technical data ................................................................................... 7, 8
Page 30

 Loading...