

Shurhold PRO ROTARY POLISHER User Manual
PRO ROTARY
POLISHER
USER’S GUIDE
SAFETY NOTES • FEATURES • INSTRUCTIONS • MAINTENANCE & CARE • MORE
ES
MANUAL DE
INSTRUCCIONES
ESPECIFICACIONES TÉCNICAS
LISTA DE PIEZAS
NOTAS SOBRE SEGURIDAD
INSTRUCCIONES
MANTENIMIENTO Y CUIDADO
GARANTÍA
FR
MANUEL DE
L’UTILISATEUR
SPÉCIFICATIONS
LISTE DES PIÈCES
CONSIGNES DE SÉCURITÉ
INSTRUCTIONS
MAINTENANCE ET ENTRETIEN
GARANTIE
IT NL
MANUALE DI
ISTRUZIONI
SPECIFICHE
ELENCO DELLE PARTI
NOTE DI SICUREZZA
ISTRUZIONI
MANUTENZIONE E CURA
GARANZIA
INSTRUCTIEHANDLEIDING
SPECIFICATIES
ONDERDELENLIJST
VEILIGHEIDSWENKEN
INSTRUCTIES
ZORG EN ONDERHOUD
GARANTIE
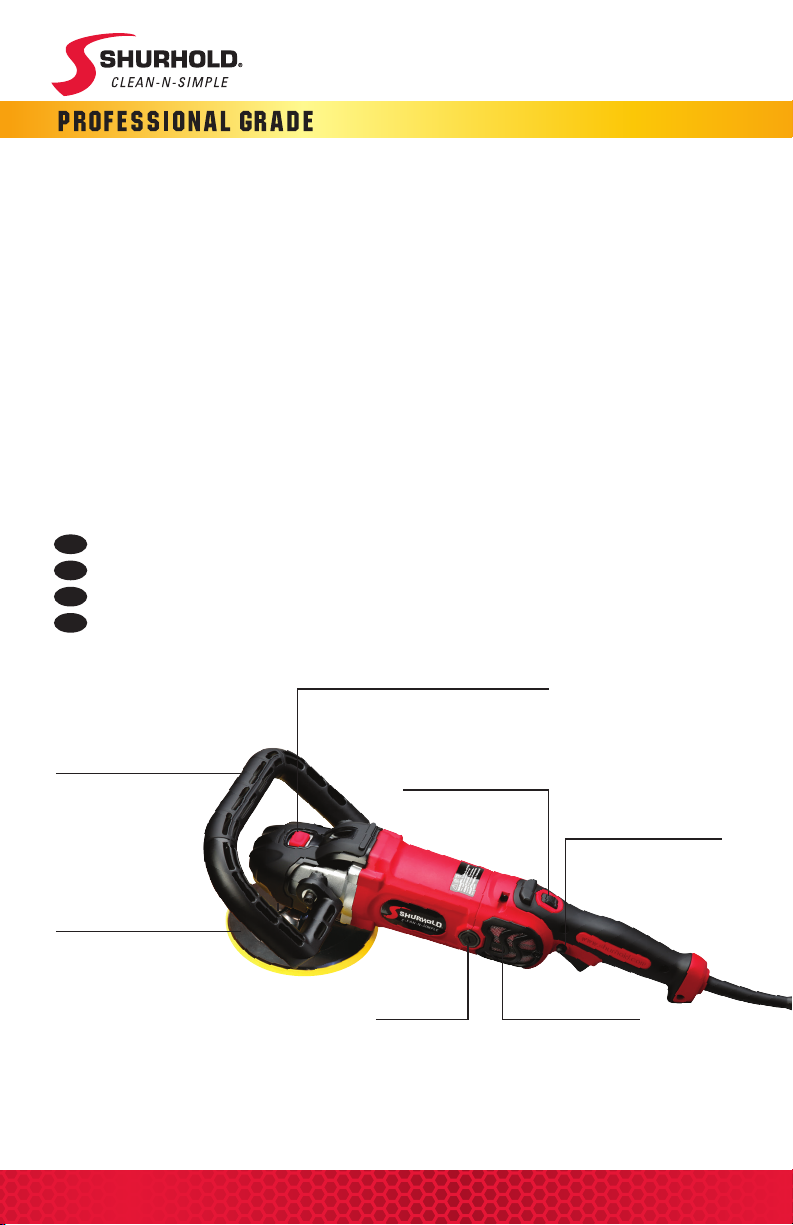
TABLE OF CONTENTS
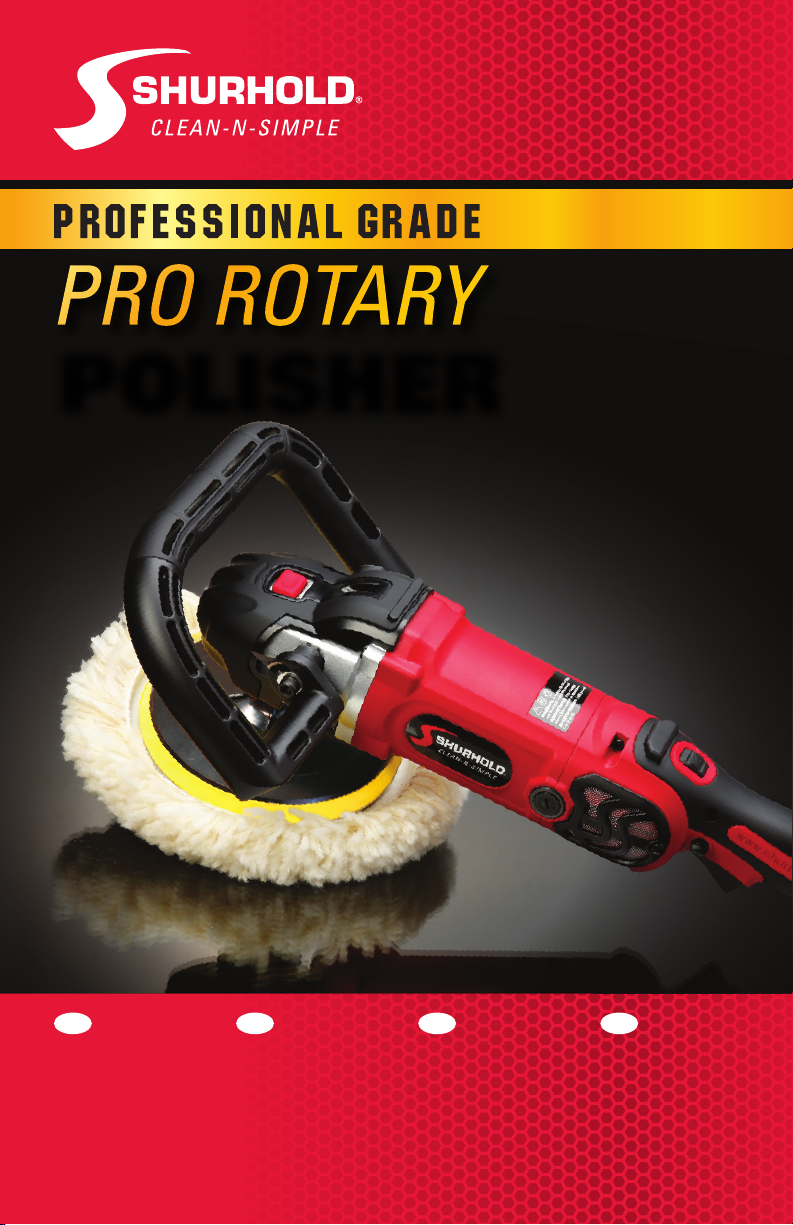
PRO ROTARY
POLISHER
Features ........................................................................................................................................2
Safety Notes ................................................................................................................................3
Warranty .......................................................................................................................................3
Basic Instructions .......................................................................................................................4
Maintenance & Care of Pro Rotary Polisher .........................................................................6
How to Care for Waxing and Polishing Pads .........................................................................7
How to Wax and Polish .............................................................................................................8
How to Remove Oxidation .......................................................................................................10
Pro Rotary Polisher Accessories ...........................................................................................12
Shurhold Detailing Products ...................................................................................................14
ES
Manual de instrucciones ................................................................................................16
FR
Manuel de l’utilisateur ....................................................................................................18
IT
Manuale di istruzioni .......................................................................................................20
NL
Instructie-handleiding .....................................................................................................22
Specifications/Parts List ..........................................................................................................24
FEATURES
3 Included Holding Options
Over Molded Head,
Soft Grip D-Handle or
Standard Side Handle
Quick Change
Backing Plate
Change Pads Quickly
Soft Start Protect Function
Heavy-Duty Motor
Provides High Power
Auto Shut-Off Carbon Brushes
Prevents Motor Damage
2
EZ Lock Spindle
Simple Backing Plate Changes and Extra
Heavy-Duty for Maximum Endurance
Ergonomic Thumb Dial
6 Ideal RPM Settings
EZ Access Ports
For Replacing
Motor Brushes
EZ Clean Air Intake Screens
Protect Internal Components
from Wool and Debris
Pro Rotary Polisher User’s Guide
Lock-On Trigger Switch
Convenient Ergonomics
to Reduce Fatigue

SAFETY NOTES
CAUTION
OBSERVE THE FOLLOWING BEFORE USING
The user is liable for any damage or accidents resulting from use not in
accordance with the intended use.
The noise level can exceed 85 dB(A) during operation.
Wear ear protectors.
Always wear safety goggles when using this machine.
It is recommended to wear gloves, sturdy non-slipping shoes and apron.
• Always disconnect the plug from the socket before carrying out any work on the
machine.
• Only plug-in when machine is switched off.
• Keep power cord clear from working range of the machine.
• Always lead the cord away behind you.
• Never reach into the spinning area of the machine when it is running.
• Only use tools whose permitted speed is at least as high as the highest no-load
speed of the machine.
• Dress properly. Do not wear loose clothing or jewelry. Keep your hair,
clothing and gloves away from moving parts.
• Always remove jewelry and other clothing or objects which may
scratch the surface as you polish.
INTENDED USE
The machine is intended for polishing and sanding of painted or fiberglass surfaces.
For reasons of electrical safety, the machine must not be damp or operated in a humid
environment. The machine may only be used for dry sanding, buffing or polishing.
ONE YEAR LIMITED WARRANTY
Pro Rotary Polisher is warrantied to be free from defects in material and workmanship for a
period of one year from original purchase date.
Damage resulting from, in particular, normal wear and tear, overloading, improper handling, or
caused by the user or other damage caused by not following operating instructions, or any fault
acknowledged at the time of purchase, is not covered under warranty.
Repairs will only be acknowledged if the equipment has not been dismantled before being sent
back to the suppliers or to an authorized SHURHOLD customer support workshop. Store the
operating instructions, safety notes, spare parts list and proof of purchase in a safe place. In
addition, the manufacturer’s current warranty conditions apply.
Visit www.shurhold.com/register to register for your One Year Limited Warranty.
www.shurhold.com
3
BASIC INSTRUCTIONS
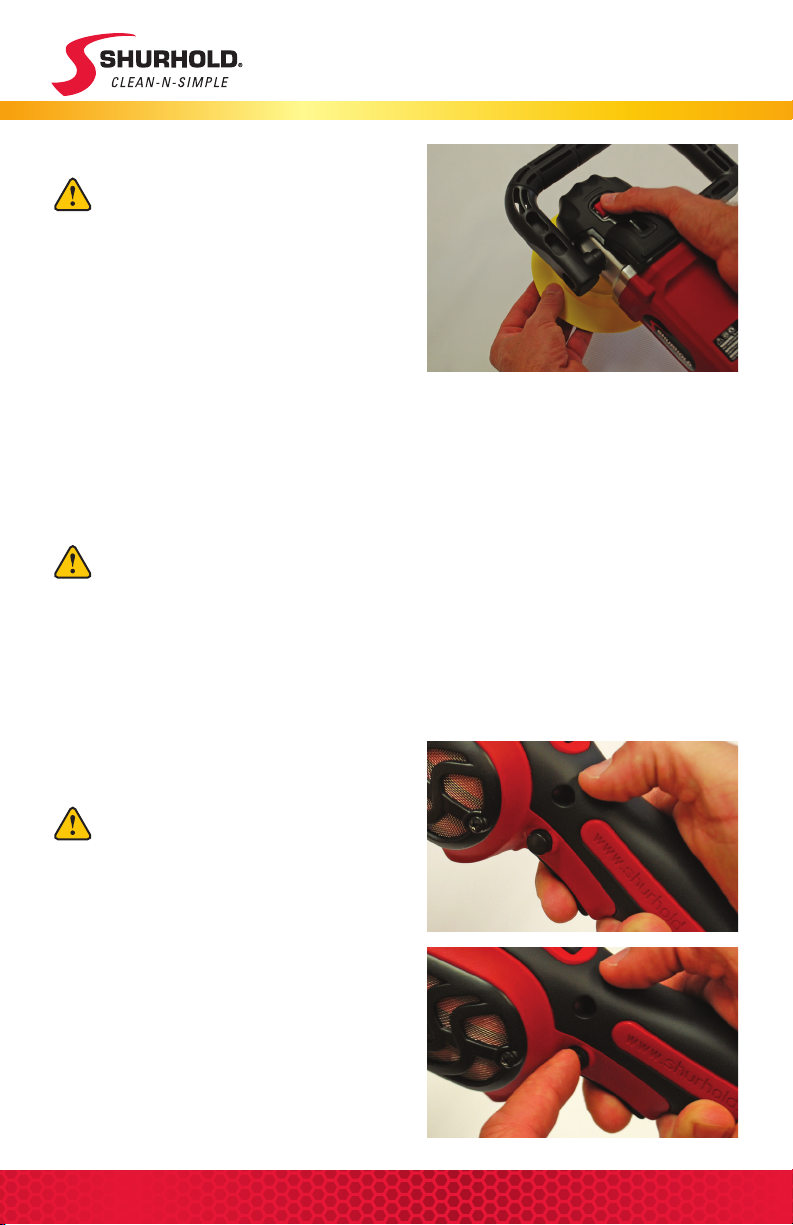
1 CHANGING THE BACKING PLATE
To reduce the risk of injury, turn unit
off and disconnect it from the power
source before installing and removing
accessories, before adjusting or making
repairs. An accidental start-up can cause
injury.
a. Press red button on top of head to
engage the EZ Lock Spindle. While locked,
spin Quick Change Backing Plate to
remove.
b. To install the plate, reverse the above procedure.
2 INSTALLING/REMOVING BUFFING PAD
To reduce the risk of injury, turn unit off and disconnect it from the power
source before installing and removing accessories, before adjusting or
making repairs. An accidental start-up can cause injury.
To install pad or disc on Velcro backing plate, center the pad or disc over plate and
press firmly.
To remove pad or disc from Velcro backing plate, grip pad or disc firmly and
pull from plate.
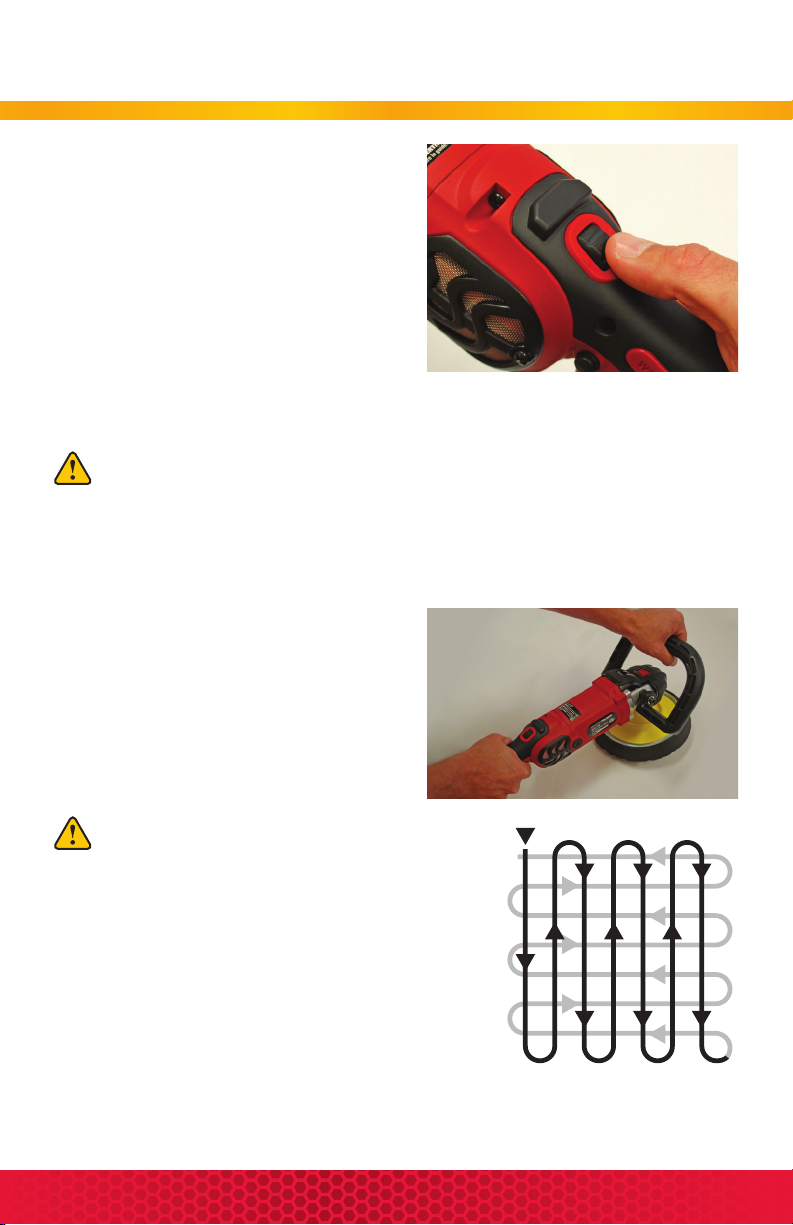
3 TO START AND STOP TOOL
Make certain that the switch is in
the “OFF” position, and the power
source is the same as that specified
on the tool’s nameplate.
First connect the tool to the power source.
To start tool, pull trigger on bottom of tool.
To stop tool, release trigger on bottom of
tool.
Tool may be locked in on position by
engaging trigger lock on left side of trigger.
4
Pro Rotary Polisher User’s Guide
4 SETTING THE SPEED
The machine speed can be set with the
speed dial located on the top of the unit.
The six ideal RPM settings are as follows:
1: 600 RPM
2: 1,100 RPM
3: 1,600 RPM
4: 2,100 RPM
5: 2,600 RPM
6: 3,200 RPM
5 USING THE POLISHER
If your workspace is so light that it can be moved by the rotating pad,
anchor it securely to prevent possible bodily injury.
a. Read and follow the directions supplied with the product (polishes, waxes,
cleaners, etc.)
b. Apply a small amount of the product directly to the polishing pad, or work surface
as directed by product manufacturer.
c. Grasp the polisher firmly with both hands.
One hand on D-Handle (shown), Standard
Handle, or polisher head and one hand on
the hand grip.
d. Position the polisher with the polishing
pad against the work surface and then start
the polisher.
NEVER run or stop the tool when it is
BEGIN HERE
not in contact with the work surface.
• Hold pad flat against surface, and slowly move the
pad in the pattern shown to the right. Overlap each
pass halfway, while polishing up and down, then left
to right.
• DO NOT apply additional pressure. Allow the polisher
to work under its own weight.
• DO NOT mix products (wax, polish, cleaner, etc.) on
the same pad. Label each pad to prevent confusion.
www.shurhold.com
5
MAINTENANCE & CARE
Always remove the power supply plug from the socket before carrying out any work
on the machine. The cool air openings in the motor casing must always be kept clean
and unobstructed to ensure air circulation. All maintenance and repair work which
requires the motor casing to be opened may only be carried out by an authorized
service center. (Please refer to warranty on page 3.) Keep unit clean and dry. Wipe
down and clean after each use. Do not submerse in water, or get wet. For best results
always start with clean dry pads. See page 7 for pad cleaning directions. To clean air
intake vent, mesh covering can be removed with a screwdriver.
CAUTION. The user is liable for any damage or accidents
resulting from use not in accordance with the intended use.
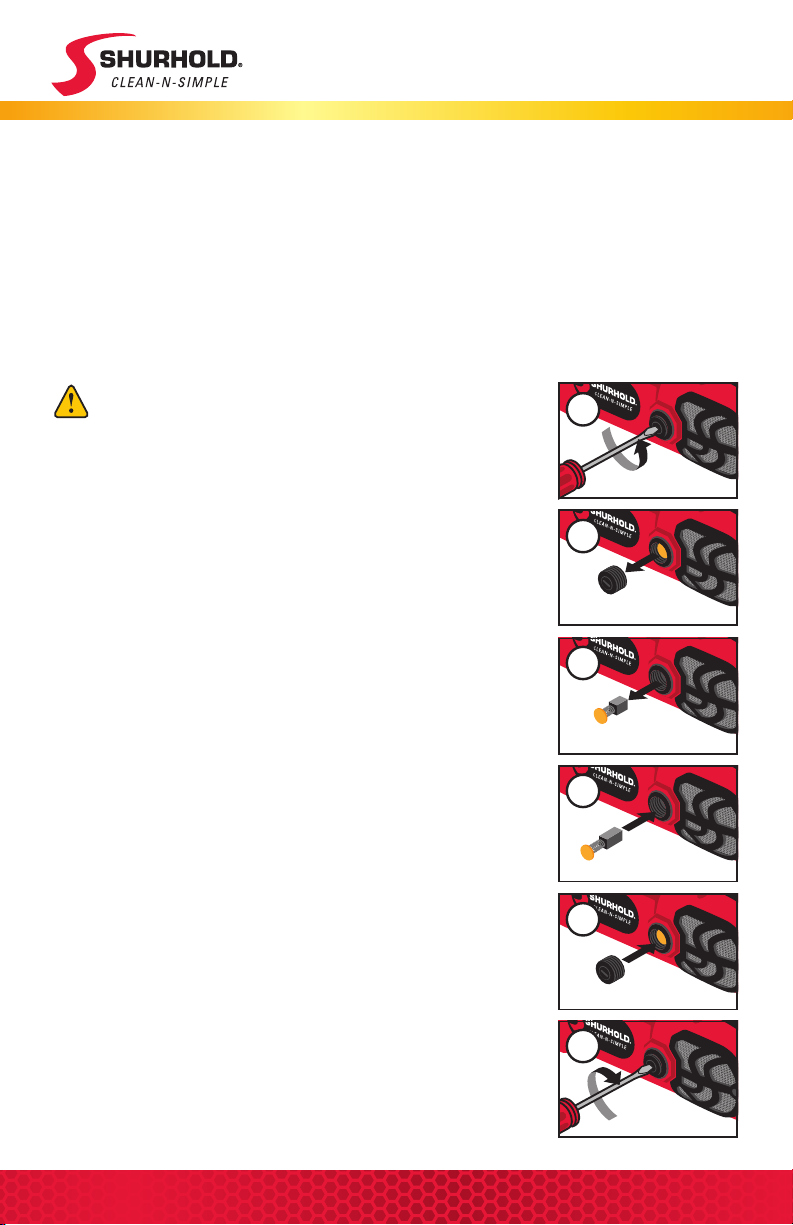
CARBON BRUSH REPLACEMENT
After extended use, the motor is designed to shut down
indicating the motors carbon brushes require replacement
(2 are included with product). To replace, be sure polisher is
disconnected from the power source, then follow the steps
below.
STEP 1
Loosen carbon brush housing lid with flat screwdriver.
STEP 2
Remove carbon brush housing lid.
STEP 3
Remove and discard old carbon brush.
STEP 4
Insert new carbon brush. Rotate brush to fit in the proper
orientation.
STEP 5
Replace carbon brush housing lid.
STEP 6
Secure carbon brush housing lid with flat screw driver.
1
2
3
4
5
Repeat Steps 1–6 on other side of unit, to replace the
second carbon brush.
6
6
Pro Rotary Polisher User’s Guide

BUFFING PAD CARE
HOW DO I CLEAN
MY BUFFING PADS?
Serious Pad Cleaner
Great for Cleaning and
Rejuvenating Buffing Pads
30803 - 12 oz. Serious Pad Cleaner
Serious Pad Cleaner is scientifically
formulated powdered cleaner for rejuvenating
buffing pads. Mixed with water this cleaner
dissolves compounds and waxes from wool,
foam and blended buffing pads cleaning
them to be used over and over. Also great for
microfiber and cotton bonnets.
Visit www.shurhold.com/cleanpads for the latest in how-to
videos including the proper cleaning and care of buffing pads.
Nothing is worse than getting ready to start a job with your Polisher and realizing your
pads are all dirty and gunked up from the previous application. It is very important to
always start a waxing or buffing job with a fresh set of pads. This does not mean a new
set, but rather pads that are in clean and good condition.
Dirty pads will work against you in 2 ways. First, if they are already loaded with wax or
compound they will not work efficiently, greatly increasing the time you will need for
buffing. Second, a dirty pad, one that may have been stored poorly or has grime embedded
in it can really damage your finish by grinding that dirt into the surface.
STEP 1
In a plastic container, mix 1 scoop (included) of Serious Pad Cleaner or 1 tbsp. per 1 gallon
(3.78 Liters) of warm water and stir thoroughly. (Mix only what is needed for application
and use within 7 days of mixing or more often with heavy use.)
STEP 2
Soak items to be cleaned for up to 15 minutes. Agitate and brush lightly. Thoroughly rinse
area with clean water. For extremely soiled area, let solution soak in longer.
STEP 3
Wash your pads immediately for easiest cleaning. Serious Pad Cleaner will remove caked
on and saturated compounds and waxes from your pads. Let pads air dry completely prior
to using again. For storing pads in between use, you should use a clear plastic baggie.
SAFETY & HANDLING: While this product is environmentally friendly and bio-degradable, please follow
these warnings. This is a concentrated citrus cleaner and may irritate your skin with prolonged exposure.
Due to its powerful cleaning properties, wear old clothes while using. Always wear protective gloves
and safety glasses. Do not mix with bleach or any other concentrated chemical cleaners. Keep unused
powder in a cool, dry place, out of reach of children and pets.
www.shurhold.com
7
WAXING & POLISHING
WAXING &
Pro Polish
POLISHING
Visit www.shurhold.com/waxing for the latest in how-to videos
including the proper technique for waxing and polishing.
Prior to the use of your Shurhold Pro Rotary Polisher, be sure your boat, car or other
desired surface is clean and dry. Avoid using your polisher on a dirty surface, it may
cause damage, such as scratches or swirls, to the paint or gel coat.
Shurhold recommends that a polymer based wax alternative, such as Shurhold’s Pro
Polish, be used for the most significant improvement in the surface’s appearance. Pro
Polish is a paint and fiberglass/gel coat cleaner, sealant and polish with UV inhibitors
that produces an ultra high gloss finish in one easy step. Formulated with cosmetic
grade ingredients, it contains no fillers or talc, protecting your finish against sun, salt,
acid rain and other harsh environmental elements.
For best results, use Shurhold’s Pro Polish, Pro Polish Pad and Microfiber Bonnet and
follow these steps:
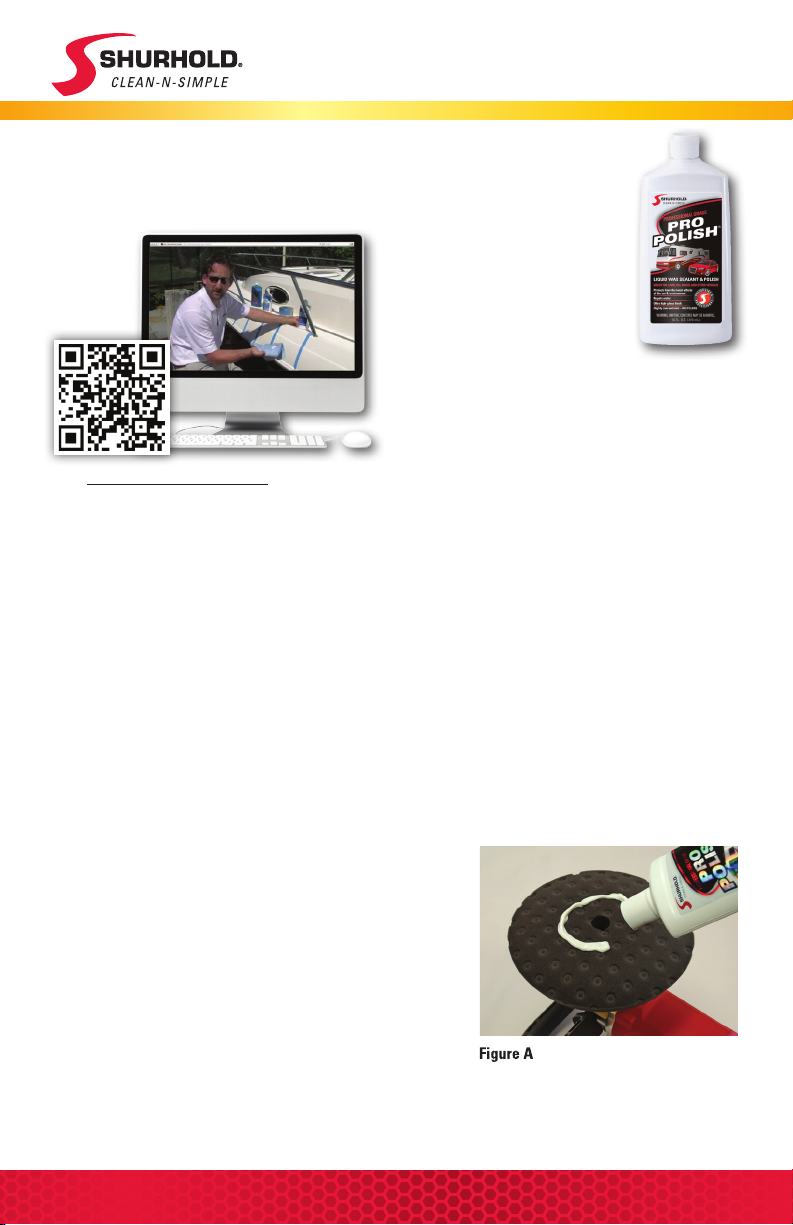
STEP 1
Start with a clean, dry Shurhold Pro Polish pad.
STEP 2
Apply Pro Polish to the pad in a ring pattern, as
shown in Figure A.
STEP 3
With the switch in the off position, dab the pad
against a 2 foot square area to distribute the polish.
Liquid Wax
Sealant & Polish
30202 - 16 oz. (47 3 mL)
30203 - 1 gal. (3.78 L)
Pro Polish is a surface cleaner,
sealant and polish with UV
inhibitors that produces an ultra
high gloss finish in one easy step. Bet ter than
a wax, Pro Polish is formulated with cosmetic
grade ingredients and contains no fillers or talc,
protecting your finish against sun, salt, acid rain
and other harsh environmental elements.
®
8
Pro Rotary Polisher User’s Guide
 Loading...