

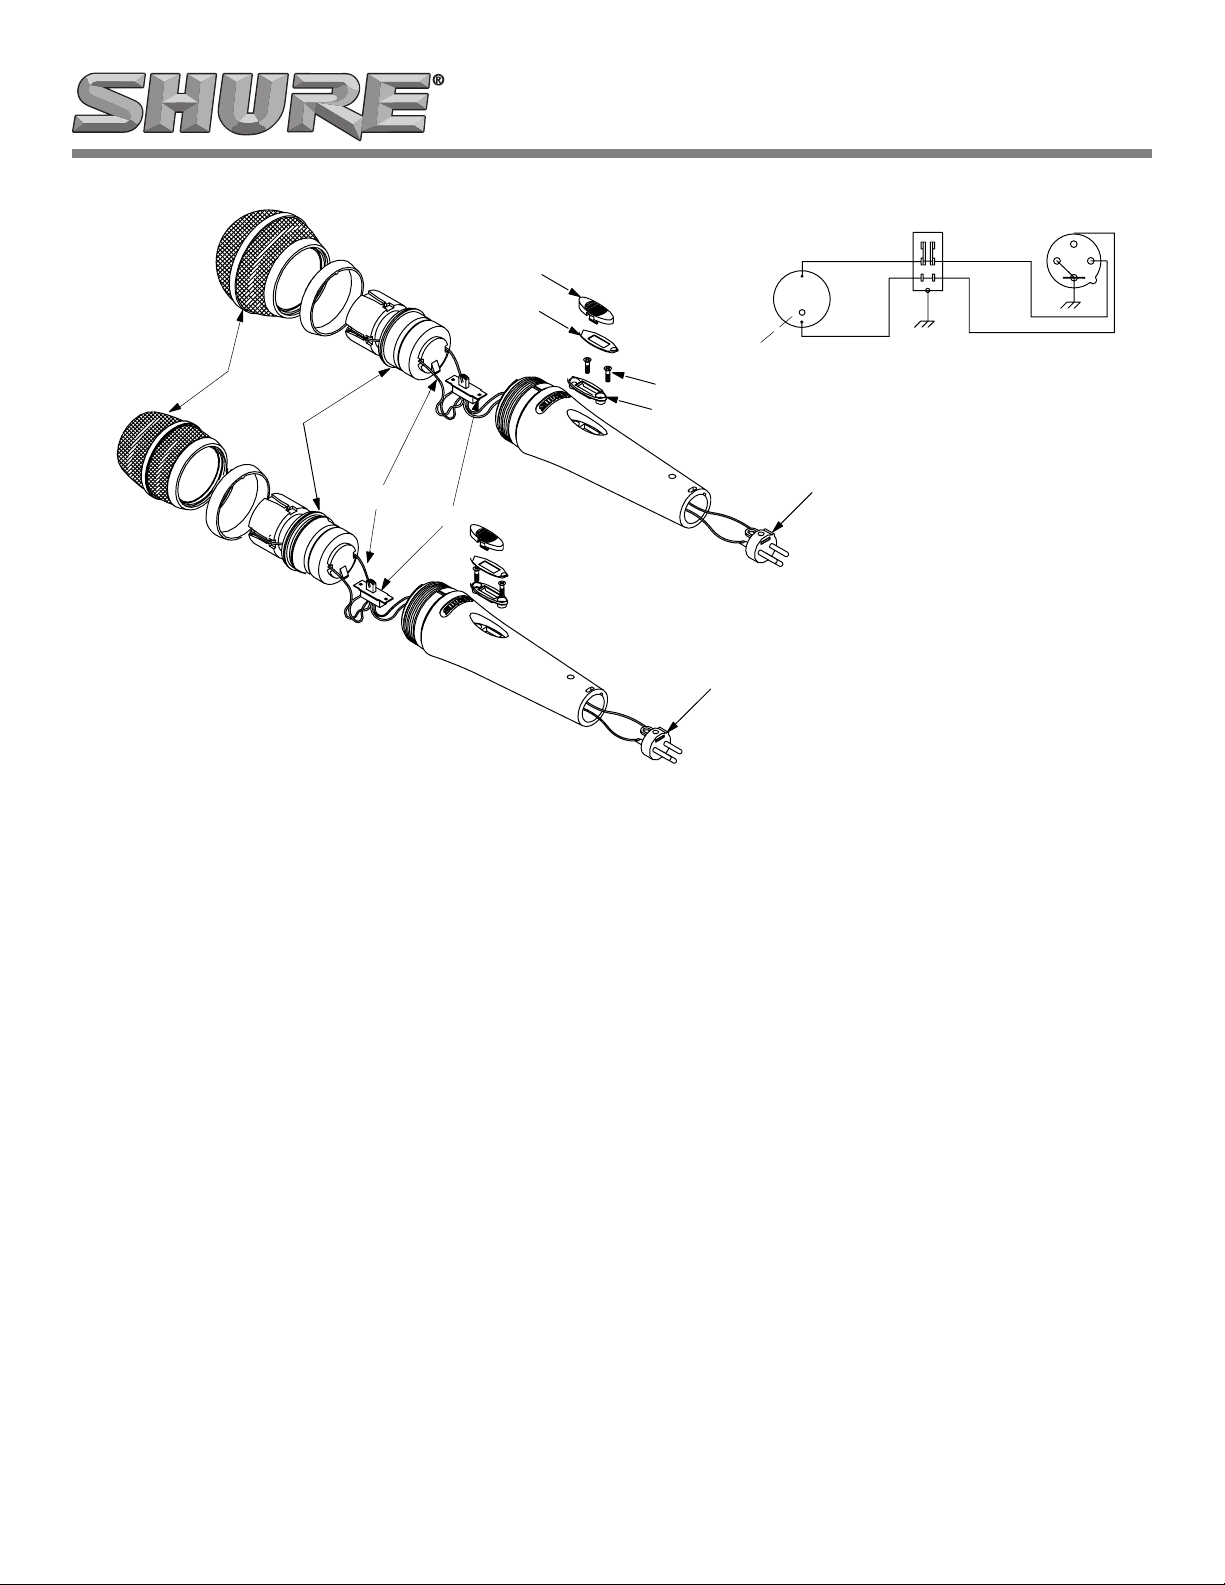
GRILLE
CARTRIDGE
PG58
GLAMOUR CAP
SCREW PLATE COVER
Shure Model RPM150, RPM152 and RPM154
Replacement Cartridges Instruction Sheet
SWITCH
SCREWS
ADAPTER
CARTRIDGE
RED DOT
GREEN
GREEN
ON
OFF
WIRING DIAGRAM
BLUE
YELLOW
3
1
2
WIRE LEADS
SWITCH
PG57
CARTRIDGE REPLACEMENT FOR MODELS PG57 AND PG58
Removing the old Cartridge
To avoid breaking the cartridge wire leads, perform the following procedure on a table or other flat surface to support
the cartridge and handle.
1. Snap off glamour cap using small flat-head screwdriver.
To access screws, peel off screw plate cover and discard. Remove screws from adapter using small Phillips
screwdriver.
2. Unscrew and remove the grille (turning counterclockwise). Gently pull out cartridge. Be careful not to break
the wire leads.
3. Unsolder and remove the wire leads of the old cartridge from the switch. Discard the old cartridge.
CAUTION: To prevent damage, use a soldering iron
between 25 and 40 watts.
XLR CONNECTOR
XLR CONNECTOR
Installing the new Cartridge
1. Solder wire leads from cartridge to switch. The wire lead
closest to the red dot connects to the OFF/YELLOW terminal. The other wire lead connects to the ON/BLUE
terminal. (See wiring diagram).
2. Insert adapter in handle pocket. Use needlenose pliers to hold switch in place and secure with screws.
3. Remove backing from supplied screw-plate cover and affix over adapter and screws.
4. Snap glamour cap over stem of switch. Ensure glamour cap is aligned properly.
5. Gently insert new cartridge into the case, being careful not to pinch the wire leads. Make sure the foam gasket on the cartridge is above the aluminum ring.
6. Realign ID ring over groove in handle and screw on grille until secure.
©2004 Shure Incorporated
27A3141 (Rev. 1)
Printed in U.S.A.
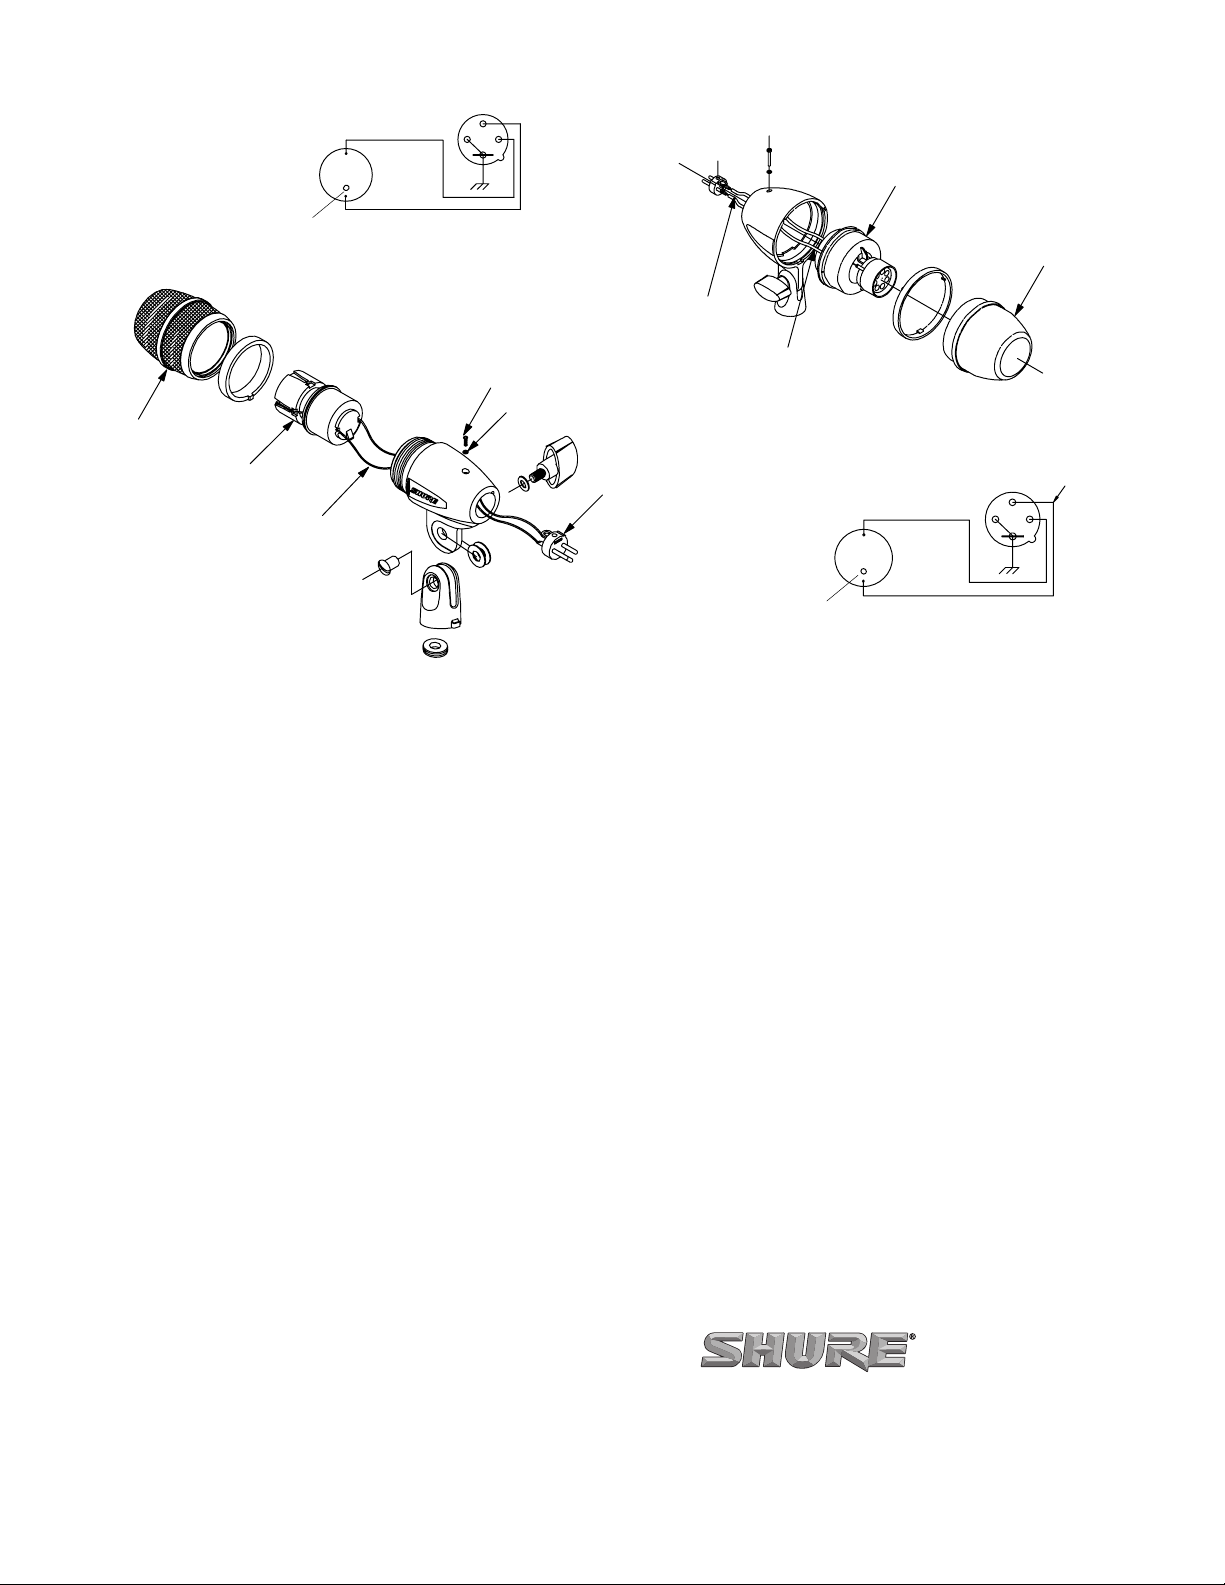
PG56 PG52
CARTRIDGE
RED DOT
GRILLE
GREEN
GREEN
WIRING DIAGRAM
3
1
2
SCREW
XLR CONNECTOR
WIRE LEADS
WASHER
SCREW
WASHER
WIRE LEADS
CARTRIDGE
GRILLE
CARTRIDGE
XLR CONNECTOR
WIRE LEADS
SCREW
CARTRIDGE REPLACEMENT FOR MODELS PG52 AND PG56
Removing the old Cartridge
To avoid breaking the cartridge wire leads, perform the following procedure on a table or other flat surface to support
the cartridge and housing.
1. Using Phillips screwdriver, remove screw and washer which secure XLR connector in place.
2. Using pliers, carefully pull out XLR connector from the housing. Unsolder the leads from the XLR connector.
CAUTION: To prevent damage, use a soldering iron
between 25 to 40 watts
3. Unscrew the grille from microphone housing. Remove old cartridge from the housing and discard.
MARKED WIRE
3
2
1
CARTRIDGE
RED DOT
GREEN
GREEN
WIRING DIAGRAM
Installing the New Cartridge
1. Identify the wire lead closest to the red dot on the new cartridge. Mark the wire lead, if it is not already marked.
2. Insert the wire leads into the microphone housing, directing the wire leads through the hole in the back so they both stick out.
3. Solder the marked wire lead (from red dot) to pin 3 of the XLR connector and the other wire lead to pin 2. Insert XLR connector into housing.
NOTE: When inserting the XLR connector, be
careful not to pinch the leads.
4. Using Phillips screwdriver, secure XLR connector with washer and screw.
NOTE: Do not overtighten the screw.
5. Gently insert the new cartridge into the housing. Be careful not to pinch the wire leads. Screw on grille and tighten.
SHURE Incorporated Web Address: http://www.shure.com
5800 W. Touhy Avenue, Niles, IL 60714-4608, U.S.A.
In U.S.A., Phone: 1-847-600-2000 Fax: 1-847-600-1212
In Europe, Phone: 49-7131-72140 Fax: 49-7131-721414
In Asia, Phone: 1-852-2893-4290 Fax: 1-852-2893-4055
International Fax: 1-847-600-6446
 Loading...