How it Works
Log In / Sign Up
Buy Points
How it Works
FAQ
Contact Us
Questions and Suggestions
Users
Shure
Loading...
P
PEISL-SP
Performance Gear
9
Performance Gear PG Wireless
PESOSP
PG
PG1
3
PG14/PG30
PG185
3
PG2
3
PG27
4
PG27-USB
3
PG 30
3
PG30 PG185
pg4
4
PG-42
3
PG42USB
3
PG48
5
PG52
6
PG56
3
PG57
7
PG58
6
PG81
3
PG88
2
PGA181
5
PGA181 PG Alta series
PGA27
5
PGA31
2
PGA31-TQG
PGA31TQG Headset
PGA 48
4
PGA48-QTR-E
2
PGA48-XLR-E
PGA52
6
PGA52-XLR
PGA56
7
PGA56-XLR
PGA57
5
PGA 57 ALTA SERIES
PGA57-XLR
PGA58
3
PGA58-BTS
PGA58-XLR-E
PGA81
4
PGA81-XLR
PGA98D
8
PGA98H
4
PGA98H-TQG
PGA98H-XLR
PGA Drum Bundle
PGADRUMKIT4
3
PGADRUMKIT5
4
PGADRUMKIT6
3
PGADRUMKIT7
4
PG Alta
PG ALTA PGA 57
PGASTUDIOKIT4
2
PGA STUDIO MICROPHONE KIT
PGDMK6
PG MICS
6
PGX
8
PGX1
PGX14/93
2
PGX14/BETA98H
pgx2
2
PGX4
2
PGXD
3
PGXD1
2
PGXD2
2
PGXD4
2
PGXD Series
PGXD WIRELESS
3
PGX WIRELESS
11
Phonograph
Phonograph M78S
Phonograph M92E
Phonograph M94E
Phonograph M97XE
Phonograph SA-10E
Phonograph SA-10M
Phonograph SFG-2
Phonograph SPS2
Phonograph SPS3
Phonograph SS4
Phonograph TTR-101
Phonograph TTR-103
Phonograph V15
Phonograph V15-II-D12
Phonograph V-15 III-DL
Phonograph V-15 III-G
Phonograph V-15 III-GZ
Phonograph V-15 Type II
Phonograph V-15 Type III
Phonograph V15 Type IV
Phonograph V15VXMR
6
Phonograph VN15E
Phonograph VN35E
Phonograph VN3-G
Phonograph WHITELABEL
PI 6000
Plus PLAY
Loading...
Loading...
Nothing found
PGA98H
Specification Sheet
1 pgs
104.36 Kb
0
USER GUIDE
28 pgs
1.66 Mb
0
User Manual
8 pgs
801.18 Kb
0
User Manual
5 pgs
1.05 Mb
0
Table of contents
Loading...
Shure PGA 98H USER GUIDE
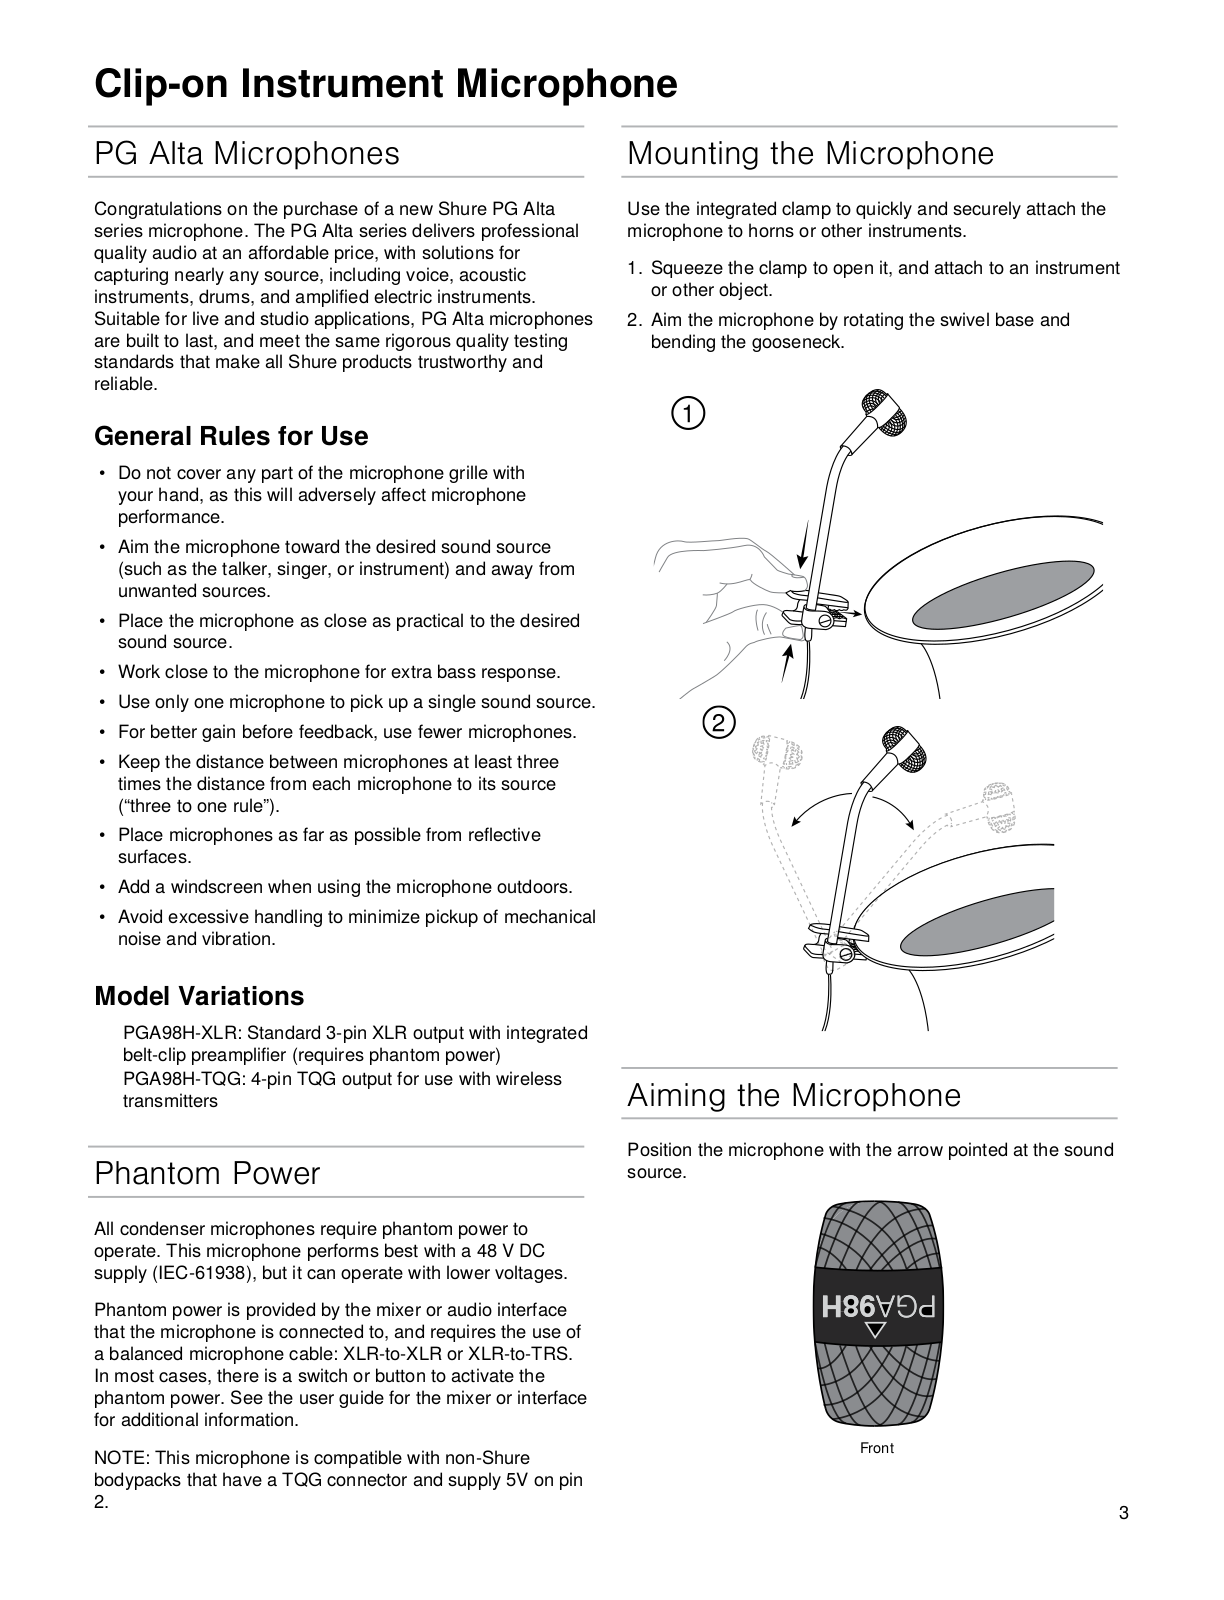
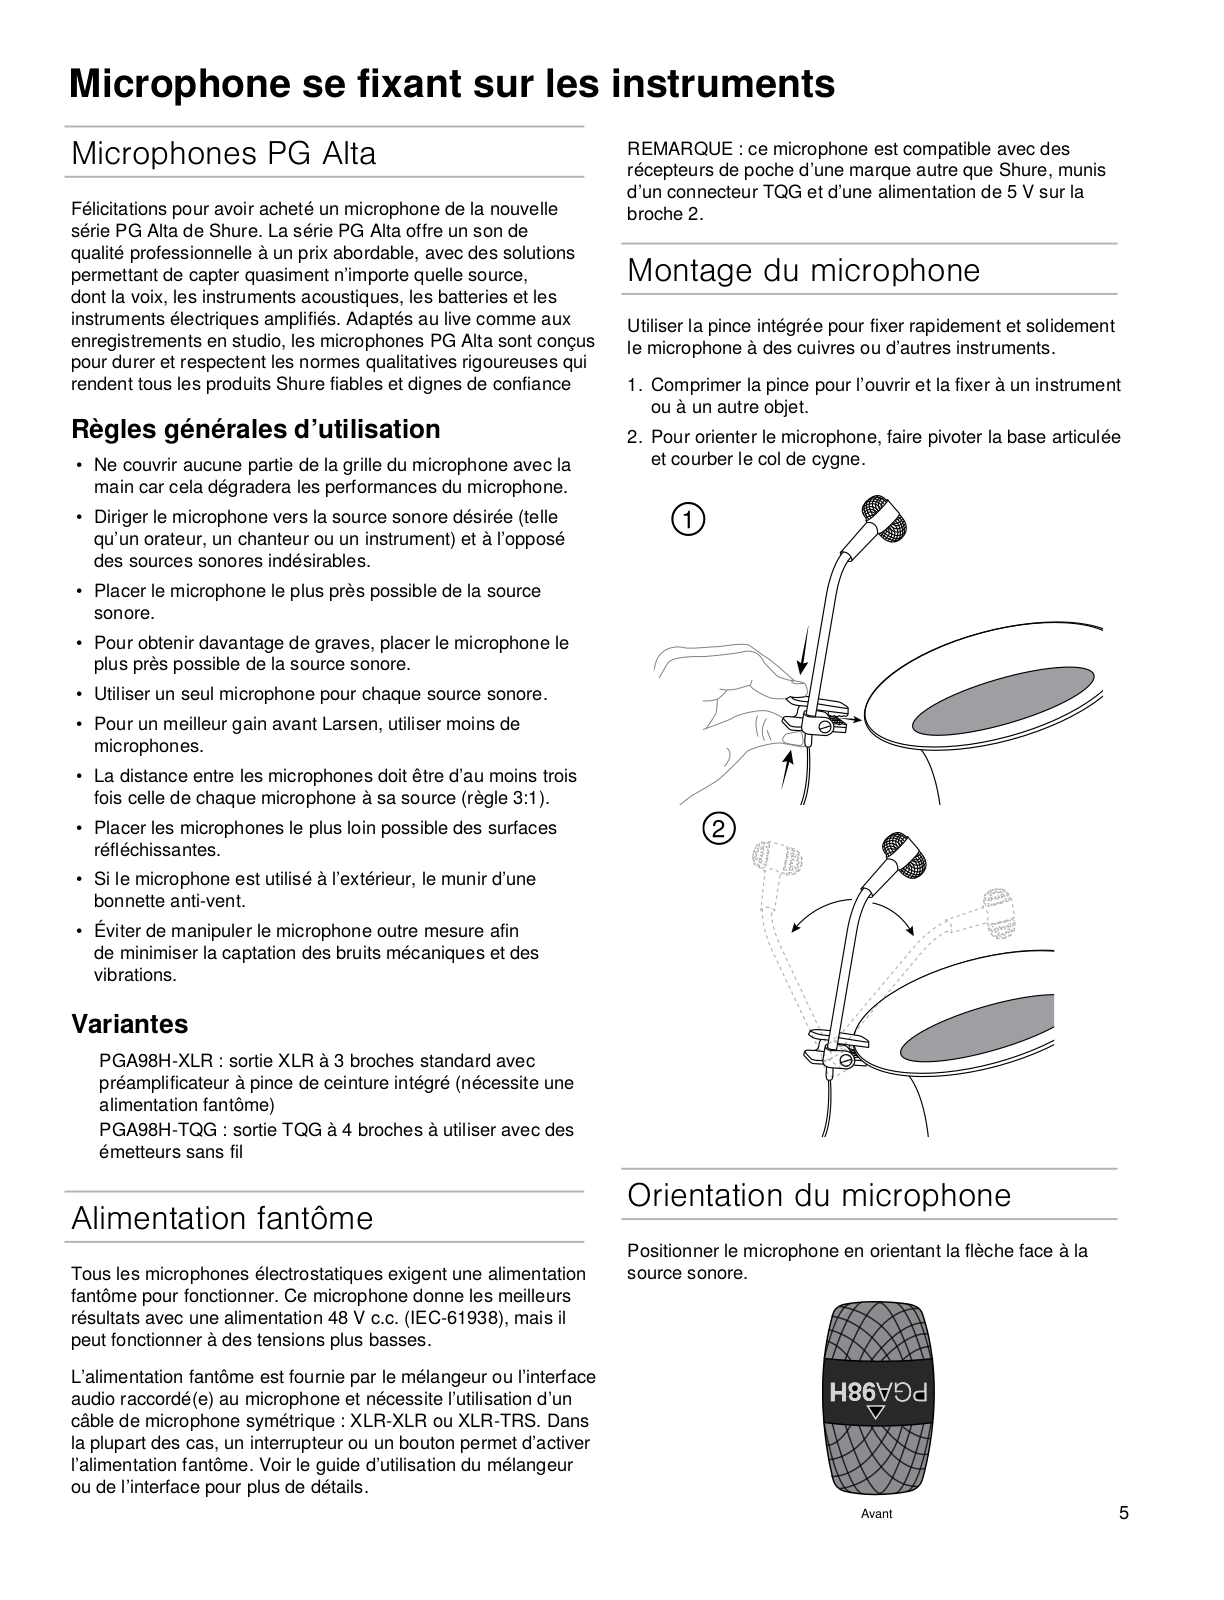
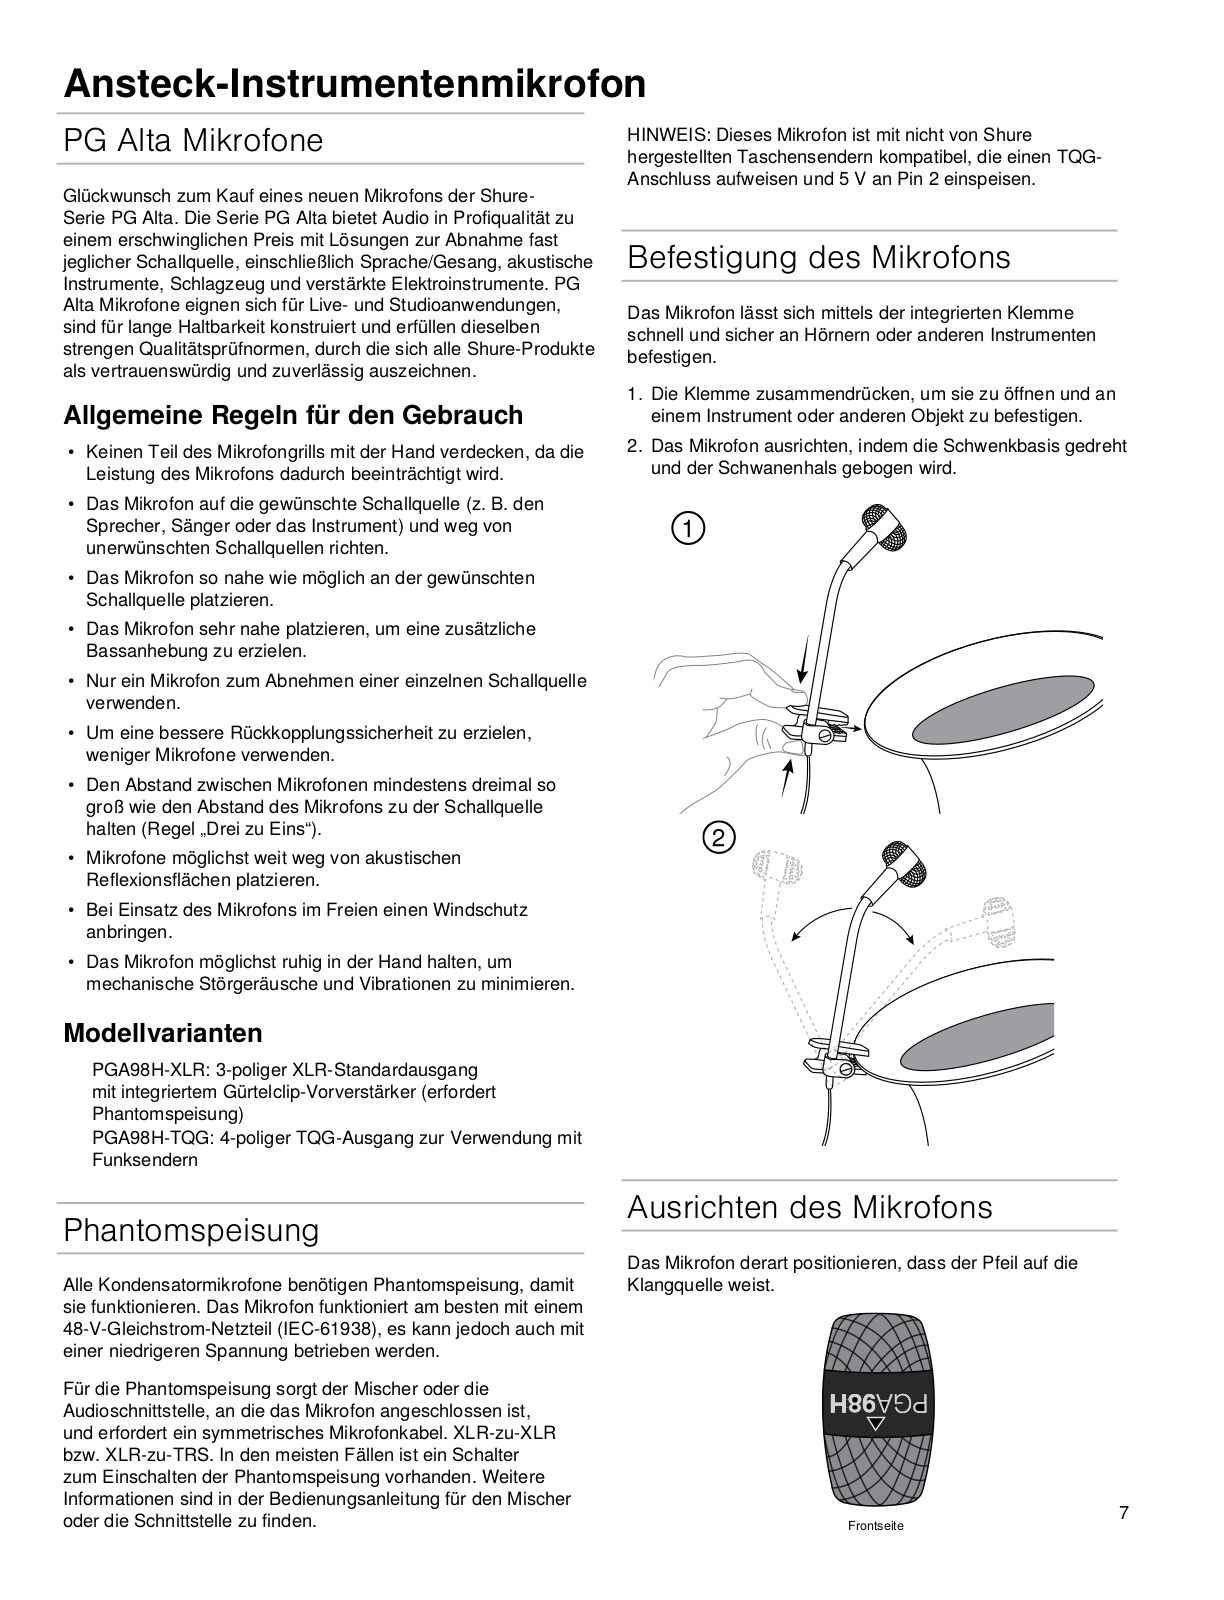
...
Shure USER GUIDE
Download
Specifications and Main Features
Frequently Asked Questions
User Manual
Download
Loading...
+
hidden pages
Unhide
You need points to download manuals.
1 point = 1 manual.
You can buy points or you can get point for every manual you upload.
Buy points
Upload your manuals
 Loading...