

Page 1
222 HARTREY AVE., EVANSTON.
MICROPHONES AND ELECTRONIC COMPONENTS
AREA CODE 3121866-2200 CABLE: SHUREMICRO
TWX:
910-231-0048 TELEX: 72.4381
IL.
60204 U.S.A.
MODEL
HF52
MOBILE VOICE PICKUP SYSTEM
GENERAL
The Shure Model HF52 Mobile Voice Pickup System
is a dynamic unit designed specifically for
free" operation in a variety of mobile applications,
including police, taxicab, and other radio-dispatched
vehicles. When properly installed, the HF52 will provide high-quality communications without the need for
holding the microphone or hand-keying the transmitter.
The HF52 is designed for use only on vehicles with
12-volt negative ground electrical systems.
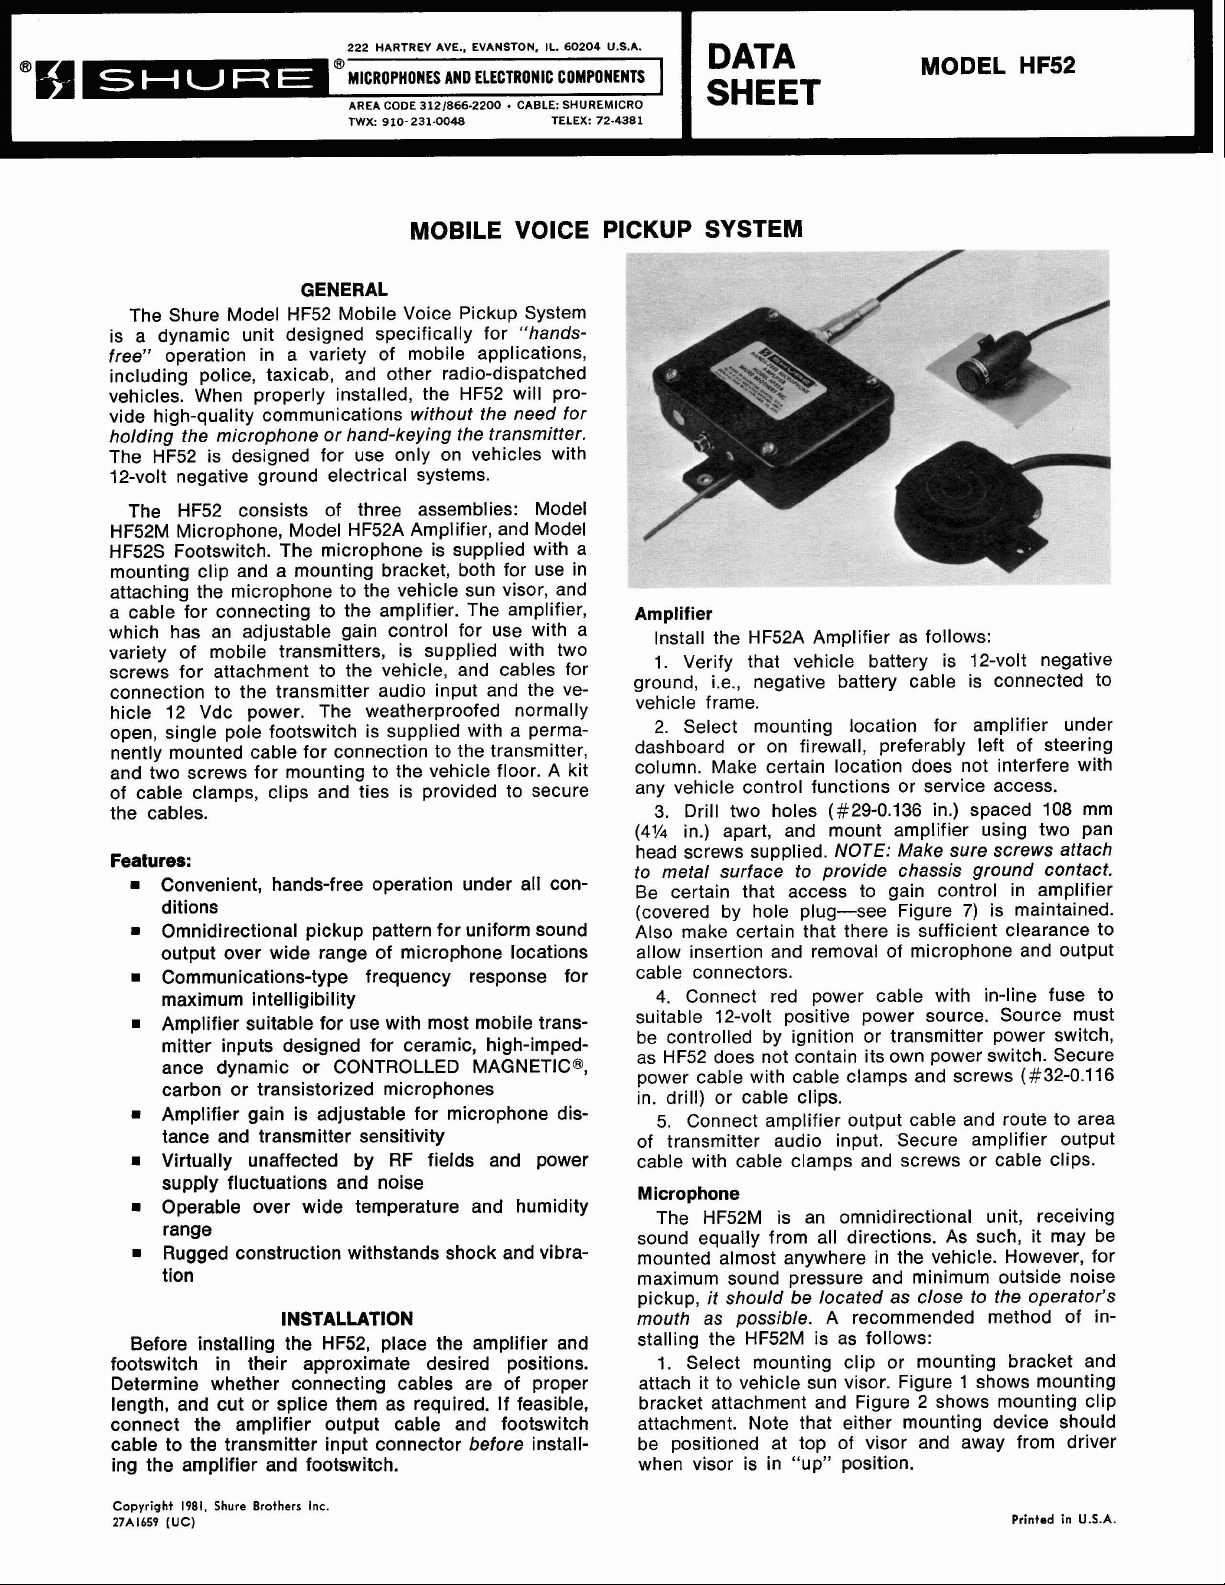
The HF52 consists of three assemblies: Model
HF52M Microphone, Model HF52A Amplifier, and Model
HF52S Footswitch. The microphone is supplied with a
mounting clip and a mounting bracket, both for use in
attaching the microphone to the vehicle sun visor, and
a cable for connecting to the amplifier. The amplifier,
which has an adjustable gain control for use with a
variety of mobile transmitters, is supplied with two
screws for attachment to the vehicle, and cables for
connection to the transmitter audio input and the vehicle 12 Vdc power. The weatherproofed normally
open, single pole footswitch is supplied with a perma-
nently mounted cable for connection to the transmitter,
and two screws for mounting to the vehicle floor. A kit
of cable clamps, clips and ties is provided to secure
the cables.
Features:
Convenient, hands-free operation under all conditions
=
Omnidirectional pickup pattern for uniform sound
output over wide range of microphone locations
.
Communications-type frequency response for cable C~~-~nectors.
maximum intelligibility 4. Connect red power cable with in-line fuse to
.
Amplifier suitable for use with most mobile trans-
mitter
carbon or transistorized microphones
=
Amplifier gain is adjustable for microphone distance and transmitter sensitivity
Virtually unaffected by
supply fluctuations and noise
Operable over wide temperature and humidity
range
.
tion
Before installing the HF52, place the amplifier and
footswitch in their approximate desired positions.
Determine whether connecting cables are of proper attach it to vehicle sun visor. Figure 1 shows mounting
length, and cut or splice them as required. If feasible,
connect the amplifier output cable and footswitch attachment. Note that either mounting device should
cable to the transmitter input connector before installing the amplifier and footswitch. when visor is in "up" position.
inputs designed
dynamic
Rugged withstands shock and vibra- mounted almost anywhere in the vehicle. However, for
Or
INSTALLATION
for
ceramic,
'ONTROLLED
RF
fields and power cable with cable clamps and screws or cable clips.
"hands-
high-imped-
Amplifier
Install the
1. Verify that vehicle battery is 12-volt negative
ground! i.e., negative battery cable is connected to
vehicle
2. Select mounting location for amplifier under
dashboard or on firewall, preferably left of steering
column. Make certain location does not interfere with
any vehicle control functions Or service access.
3. Drill two holes
(4Y4 in.) apart, and mount amplifier using two pan
head screws supplied.
to metal surface to provide chassis ground contact.
Be
certain
(covered by hole plug-see Figure
Also make certain that there is sufficient clearance to
allow insertion and removal of microphone and output
suitable 12-volt positive power SOUrCe. Source must
be controlled by ignition or transmitter power switch,
as HF52 does not contain its own power switch. Secure
power cable with cable clamps and screws (#32-0.116
in. drill) or cable clips.
5. Connect amplifier output cable and route to area
of transmitter audio input. Secure amplifier output
Microphone
The
sound equally from all directions. As such, it may be
maximum sound pressure and minimum outside noise
pickup, it should be located as close to the operator's
mouth as possible. A recommended method of installing the HF52M is as follows:
1. Select mounting clip or mounting bracket and
bracket attachment and Figure
be positioned at top of visor and away from driver
HF52A Amplifier as follows:
frame.
(#29-0.136 in.) spaced 108 mm
NOTE:
that
access
HF52M is an omnidirectional unit, receiving
Make sure screws attach
to
gain
control
2
shows mounting clip
in
7)
is maintained.
amplifier
I
Copyright
27A1659
1981,
(UC)
Shure Brothers
Inc.
Printed
in
U.S.A.
Page 2
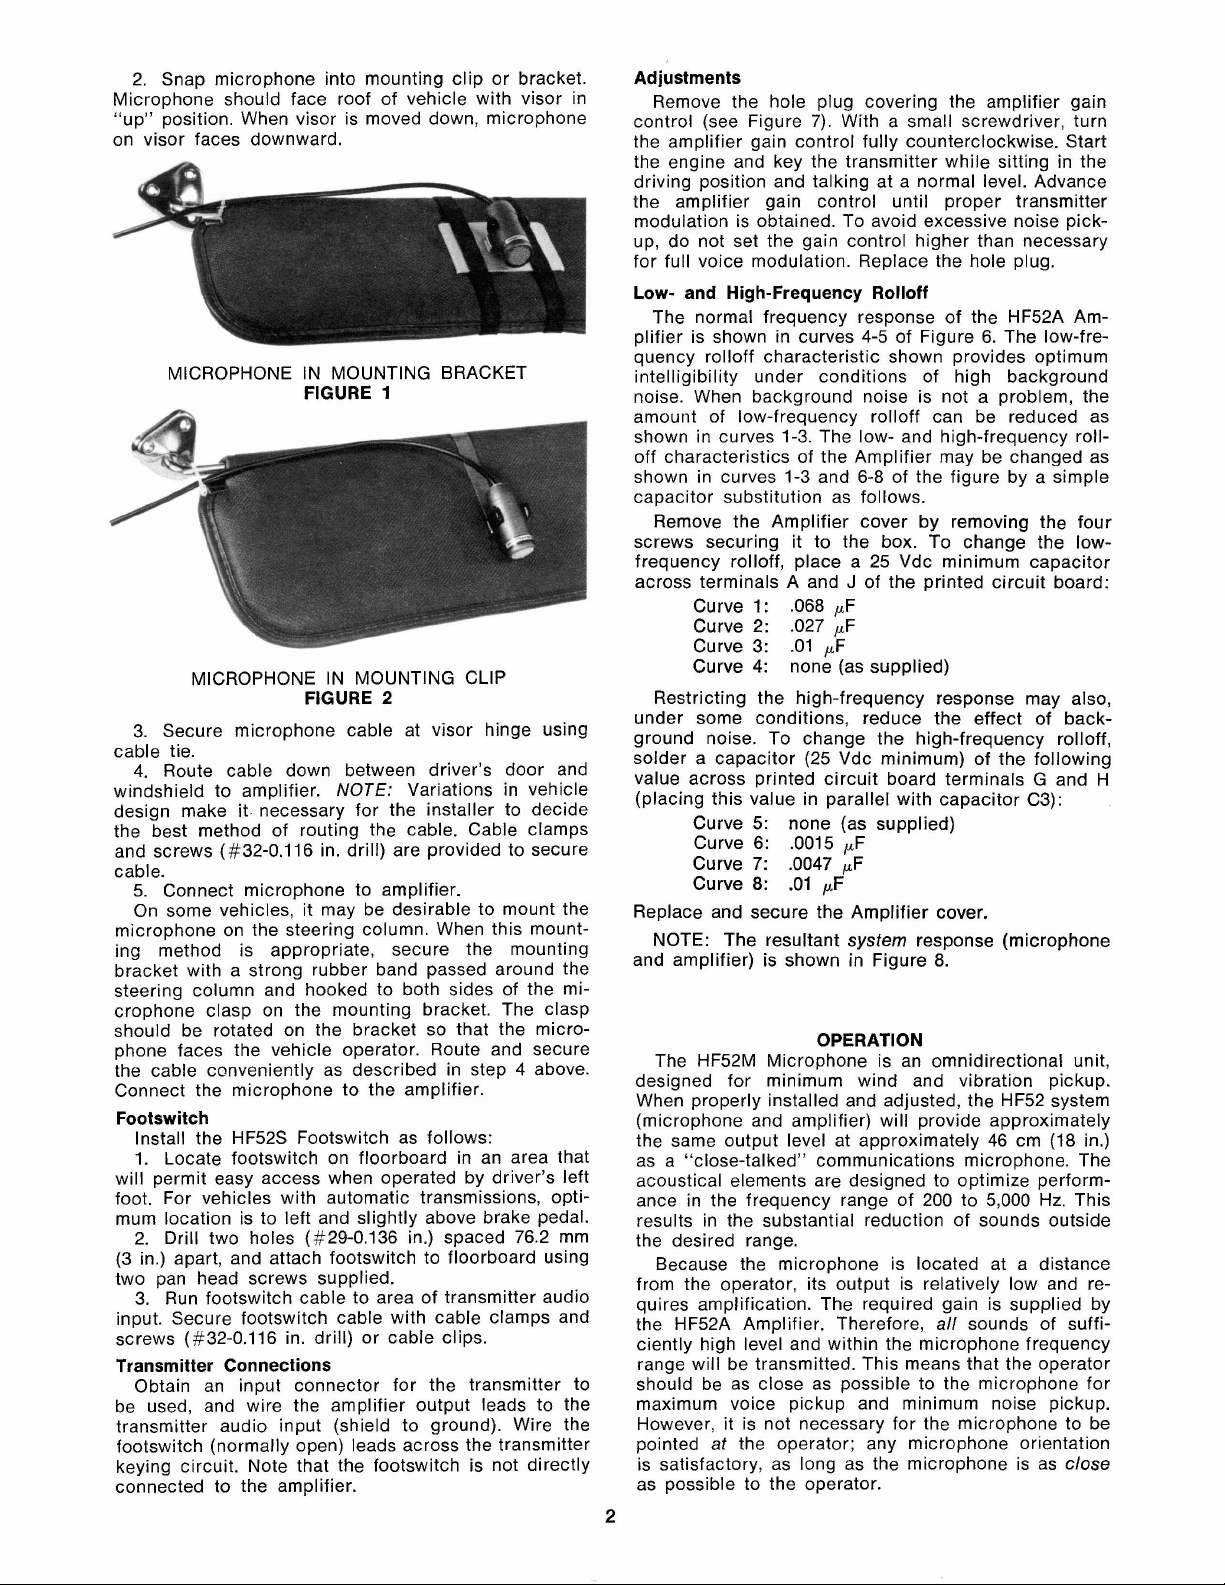
2. Snap microphone into mounting clip or bracket.
Microphone should face roof of vehicle with visor in
"up" position. When visor is moved down, microphone
on visor faces downward.
MICROPHONE IN MOUNTING BRACKET
FIGURE
MICROPHONE IN MOUNTING CLIP
FIGURE
3. Secure microphone cable at visor hinge using
cable tie.
4. Route cable down between driver's door and
windshield to amplifier.
design make it. necessary for the installer to decide
the best method of routing the cable. Cable clamps
and screws
cable.
5. Connect microphone to amplifier.
On some vehicles, it may be desirable to mount the
microphone on the steering column. When this mounting method is appropriate, secure the mounting
bracket with a strong rubber band passed around the
steering column and hooked to both sides of the microphone clasp on the mounting bracket. The clasp
should be rotated on the bracket so that the micro-
phone faces the vehicle operator. Route and secure
the cable conveniently as described in step 4 above.
Connect the microphone to the amplifier.
(#32-0.116 in. drill) are provided to secure
1
2
NOTE: Variations in vehicle
Footswitch
Install the HF52S Footswitch as follows:
1. Locate footswitch on floorboard in an area that
will permit easy access when operated by driver's left
foot. For vehicles with automatic transmissions, optimum location is to left and slightly above brake pedal.
2. Drill two holes
(3 in.) apart, and attach footswitch to floorboard using
two pan head screws supplied.
3. Run footswitch cable to area of transmitter audio
input. Secure footswitch cable with cable clamps and
screws
(#32-0.116 in. drill) or cable clips.
(#29-0.136 in.) spaced 76.2 mm
Transmitter Connections
Obtain an input connector for the transmitter to
be used, and wire the amplifier output leads to the
transmitter audio input (shield to ground). Wire the
footswitch (normally open) leads across the transmitter
keying circuit. Note that the footswitch is not directly
connected to the amplifier.
Adjustments
Remove the hole
control (see Figure 7). With a small screwdriver, turn
the amplifier gain control fully counterclockwise. Start
the engine and key the transmitter while sitting in the
driving position and talking at a normal level. Advance
the amplifier gain control until proper transmitter
modulation is obtained. To avoid excessive noise pickup, do not set the gain control higher than necessary
for full voice modulation. Replace the hole plug.
plug covering the amplifier gain
Low- and High-Frequency Rolloff
The normal frequency response of the HF52A Amplifier is shown in curves 4-5 of Figure 6. The
quency rolloff characteristic shown provides optimum
intelligibility under conditions of high background
noise. When background noise is not a problem, the
amount of low-frequency
shown in curves 1-3. The low- and high-frequency
off characteristics of the Amplifier may be changed as
shown in curves 1-3 and 6-8 of the figure by a simple
capacitor substitution as follows.
Remove the Amplifier cover by removing the four
screws securing it to the box. To change the
frequency rolloff, place a 25 Vdc minimum capacitor
across terminals A and
Curve 1:
Curve
Curve
Curve
Restricting the high-frequency response may also,
under some conditions, reduce the effect of background noise. To change the high-frequency
solder a capacitor (25 Vdc minimum) of the following
value across printed circuit board terminals G and H
(placing this value in parallel with capacitor C3):
Curve
Curve 6:
Curve 7: .0047
Curve 8: .O1
Replace and secure the Amplifier cover.
NOTE: The resultant system response (microphone
and amplifier) is shown in Figure 8.
,068 pF
2:
.027 pF
3:
.O1 pF
4:
none (as supplied)
5:
none (as supplied)
.0015 pF
rolloff can be reduced as
J
of the printed circuit board:
pF
pF
low-fre-
roll-
low-
rolloff,
OPERATION
The HF52M Microphone is an omnidirectional unit,
designed for minimum wind and vibration pickup.
When properly installed and adjusted, the HF52 system
(microphone and amplifier) will provide approximately
the same output level at approximately 46 cm (18 in.)
as a "close-talked" communications microphone. The
acoustical elements are designed to optimize performance in the frequency range of 200 to 5,000 Hz. This
results in the substantial reduction of sounds outside
the desired range.
Because the microphone is located at a distance
from the operator, its output is relatively low and requires amplification. The required gain is supplied by
the
HF52A Amplifier. Therefore,
ciently high level and within the microphone frequency
range will be transmitted. This means that the operator
should be as close as possible to the microphone for
maximum voice pickup and minimum noise pickup.
However, it is not necessary for the microphone to be
pointed
is satisfactory, as long as the microphone is as close
as possible to the operator.
at
the operator; any microphone orientation
all
sounds of suffi-
Page 3

The operator can help provide good commun~cations
by remembering these factors:
1. Keep vehicle windows closed to minimize out-
side noise while transmitting.
2. Bear in mind that passenger conversation or
other in-vehicle noise (radio, air conditioner, etc.) will
be transmitted.
3. Remember that higher vehicle speeds mean
higher background vehicle noise.
4. As with any communications system, care in
speaking clearly will promote intelligible communication.
SPECIFICATIONS
MICROPHONE
Type:
Frequency Response: 200 to 5,000 Hz (see Figure
Dynamic
3)
Dimensions: See Figure 5
....
(72
IN.)
MICROPHONE OVERALL DIMENSIONS
FIGURE 5
Net Weight: 98 grams (3% oz)
AMPLIFIER
Voltage Gain
(at 1,000 Hz): Adjustable,
38
to 59 dB
d
-
+I0
W
$
O
W
5
-10
L
20 lpO0 lO.000
TYPICAL FREQUENCY RESPONSE
Microphone Impedance:
Output Level (at 1,000 Hz):
Open circuit voltage
(without amplifier)
(0 dB
Power Level
(0 dB = 1 milliwatt per 10 microbars)
Phasing: Positive pressure on diaphragm produces
positive voltage on pin 2 of connector (see Figure
/
FREQUENCY
FIGURE
190 ohms at 1 kHz
.......... -79.0 dB
=
1
volt per microbar)
................
CODED
TERMINAL
IN
HERTZ
3
-
58.0 dB
24000
4)
Frequency Response: 200 to 10,000 Hz as shown in
curve 4-5 of Figure 6
AMPLIFIER FREQUENCY RESPONSE
FIGURE
Output Clipping Level:
mination)
Recommended Load Impedance: 100 ohms min.
(superimposed dc voltage up to
operation)
Output Impedance: Less than 10 ohms
Phasing:
Noise (300 Hz
(equivalent input noise at full gain)
Output is out of phase with input
-
20 kHz): - 11 8 dBV
6
1V min. (100-ohm output ter-
16V will not affect
&
Operating Conditions:
Temperature
Relative
Cable: Non-detachable 1.8m (70 in.) two-conductor
shielded plastic-jacketed cable
Connector: Two-pin male miniature audio*
Finish: Dark gray
*
Designed to mate with Switchcraft
alent connector.
MICROPHONE WIRING DIAGRAM
FIGURE
...
-40" to +74"C (-40" to +165"F)
Humidity .................... .5 to 95%
4
"Slim
Line
"I
II"
or equiv-
Total Harmonic Distortion (at 1,000 Hz):
mV output
500
Current Drain:
15 mA max. (no signal)
mA max. (100-ohm load, 750 mV output)
25
Operating Voltage:
ground
Fuse: 5A, 32V, 3AG
Operating Temperature Range:
-29" to +74"C (-20" to 165°F)
Dimensions: See Figure
+
10.0 to +I59 Vdc, negative
7
3
3%
max. at
Page 4

AMPLIFIER OVERALL DIMENSIONS
Net Weight:
Finish:
323 grams (111/2 oz)
Dark gray
SYSTEM
Frequency Response:
FIGURE
7
200 to 5,000 Hz (see Figure 8)
MICROPHONE CARTRIDGE AND CABLE
REPLACEMENT
To remove and replace the HF52M Microphone car-
tridge or cable and plug assembly, proceed as follows:
1. Using pliers or wrench, remove bushing at rear
of microphone.
2. Without allowing cable to turn, unscrew end cap
of microphone, exposing
3. Using spanner wrench or similar tool, unscrew
brass retainer bushing from inside case.
4. Carefully slide cartridge and attached cable out
of case.
5. Unsolder cartridge from cable.
6. Replace cartridge by soldering cable to new
cartridge (see Figure 4).
7. Replace cable by slipping bushing, end cap and
retainer bushing over new cable, and soldering new
cable to cartridge (see Figure 4).
8.
Reassemble microphone by performing steps 1
4
through
in reverse.
cablelcartridge connections.
REPLACEMENT PARTS
The following replacement parts may be ordered
from your dealer or from Shure Brothers Inc.
SYSTEM FREQUENCY RESPONSE
FIGURE
Output Level
Open Circuit Voltage
(0 dB
(at 1,000 Hz):
=
1
volt per microbar)
Combined Net Weight:
835 grams (1 Ib, 13 oz)
Packaged Weight:
1.13 kg (2 Ib, 71/2 oz)
8
...
.Variable, -43 to -21 dB
DESCRIPTION PART NO.
Microphone 97A297 (HF52M)
Microphone Cartridge .99A367
Microphone Cable & Connector
Amplifier .90A2707 (HF52A)
Gain Control Hole Plug .80A289A
Amplifier Cover .................. .95A833
Amplifier Output Cable .95C453
Footswitch ................ .90A2240 (H F52S)
A Parts List for the HF52A Amplifier is given on a
following page. The commercial alternates shown in
the list are not necessarily equivalent parts, but are
electrically and mechanically similar, and may be used
if direct factory replacements are not immediately
available. To maintain highest possible performance
and reliability, Shure Factory Replacement Parts
should be used.
.................
............
..................
..........
...........
...
.90A2573
GUARANTEE
This Shure product is guaranteed in normal use to
be free from electrical and mechanical defects for a
period of one year from date of purchase. Please
retain proof of purchase date. This guarantee includes
all parts and labor. This guarantee is in lieu of any
and all other guarantees or warranties, express or
implied, and there shall be no recovery for any consequential or incidental damages.
LI
I
FOOTSWITCH DIMENSIONS
FIGURE
9
SHIPPING INSTRUCTIONS
Carefully repack the unit and return it prepaid to:
Shure Brothers Incorporated
Attention: Service Department
1501 West Shure Drive
Arlington Heights, Illinois 60004
If outside the United States, return the unit to your
dealer or Authorized Shure Service Center for repair.
The unit will be returned to you prepaid.
Page 5

MODEL HF52A AMPLIFIER PRINTED CIRCUIT BOARD ASSEMBLY
MODEL
Reference
Designation
A1
Dl, D2
D3, D4
D5
D6
F1
J1
J
2
L1 - L4
Q1
Q2, Q3
Q4
Q5
Q6, Q7
Q8
R20
'Parts listed as
RKC Kit number is shown will be shipped in RKC quantities.
Replacement
Kit No.*
Qty.
-
-
RKC21
-
RKC22
-
-
-
-
RKC9
-
RKC66
RKC65
-
-
RKC Kits should be ordered by that kit number. Any orders received for piece parts where
HF52A AMPLIFIER PARTS LIST
Replacement Kit Consists
Part No.
-
-
4
-
1
90A8048
86A415
86A404
86A421
86A408
-
-
-
-
-
4
-
1
1
-
90AZ2600
90AR2600
80A250
86C349
86A349
86A348
86A335
86A334
86A8303
46D033
Of:
Description
Printed Circuit Board
Assem bly
Diode, Silicon,
Computer, 75V
Silicon Rectifier,
100V, 112A
Zener Diode, Silicon,
8.7V +5%, 1/2W
Zener Diode, Silicon,
*5%, 1W
-
22v
Fuse, 3AG, 5A, 32V
Connector, Two-Socket
Connector, Phono Pin Jack
Ferrite Bead Ring
Transistor, Silicon, NPN
Transistor, Silicon, NPN
Transistor, Silicon, NPN
Transistor, Silicon, PNP
Transistor, Silicon, NPN
Transistor, Silicon, NPN
Potentiometer,
100k
Commercial
Alternate
None
TI or GE
Motorola 1 N4002
Motorola 1 N5238B
Motorola 1 N4748A
Littelfuse 31 1005
Switchcraft SL-17-2F
Switchcraft 3501 FP
Stackpole 57-01 81
Motorola
Motorola 2N5088
Motorola 2N5087
TI TIS93
TI TIS92
Motorola 2N6121
CTS X201 R104B
IN4148
2N5210
5
Page 6

'E
.B
~t,
aNW
2
LCaNI
ZMHl
OU
SWHO
'
WHL
lMNl
051
=mwA
3m
SWHO
Cl31S0MW
QI
9NW
7t331d~
ICdh-0
33naobld
aNw
COS
AVW
Au
A~WA
I
NI aUWNIWW
IflcUNj
-%GI
'
nw
'3'0
13A3
WULNcn
135
aL
HllM 03tlnSW3W S39WllOA
WnWlNlW
01
TN)
SWHO93W
WAJA
(351~~?073~lNm
SUOISI=U
.AS
'
.M*/I
HllM 03BIEWOW S33WllOA '3.W
01
SS~-IN~
SWH033W
3SlMU3U.O
3W
39Wl70A AlddS AO'ZI HllM 03tlflSd3W 533WllOA 7lW
'
.WAJ.A
~EIUI-s
NMOHS
3SIMMtu.O
NI
X
C13UIZBdS
S170A
'
3UlCUl33l3
9jQLladW3
'I
(U
nv
5310
-.
stco~lswdv5
NI
ajw
aNv
cs
SITX
w
3aw
smn
01
llfl3M13 9NIA3X
tl3111WSNVMl
 Loading...