How it Works
Log In / Sign Up
Buy Points
How it Works
FAQ
Contact Us
Questions and Suggestions
Users
Shure
Loading...
#
85
819
838
839
849
869
885TT
888TT
2
890TT
901D
95A2041
95A8994
95C8603
2
98H
98H-C
91-01
2
91-02
2
91-05
2
A
A1200C
A1200MX
A120S
A15AS
3
A15BT
2
a15HP
2
A15LA
2
A15PRS
2
A15RF
A15TG
3
A202BB
A24QG
A268R
A27M
3
A2WS
A33LK
A367R
A400SM
A400SMXLR
A400XLR
A412B
A412MWS
A50D
A56d
2
A68B
A68C
A68L
A68P
A68R
A68S
A68SC
A710-HOUSING
A710-TB
A7WS
A81G
A820-NIC-Dante
A88SM
A89SM
A910-HCM
A95U
2
A95UF
2
A96F
2
A98C
A98D
A98H
A98KCS
A99
A99SMA
AC68
Access
ACCESS UHF
3
ACCESS VHF
2
AD1
AD124D/BETA58-G57-II
2
AD124D/KSM8B-G57-II
2
AD124D/SM58-G57-II
2
AD124Q/BETA58-G57-II
AD124Q/KSM8B-G57-II
AD124Q/SM58-G57-II
AD14D-G57-II
2
AD14Q-G57-II
AD2
5
AD24D/B58-G57-II
2
AD24D/KSM8B-G57-II
2
AD24D/SM58-G57-II
2
AD24Q/B58-G57-II
AD24Q/K8B-G57-II
AD24Q/SM58-G57-II
AD4D Axient
AD4DNP
AD4Q
2
AD4QNP-RST-02
AD610
AD651B,AD651FOB
Advance MXA310
ADX1
ADX1M
ADX2
ADX2/B58
2
ADX2/B87A
2
ADX2/B87C
2
ADX2/K8B
2
Loading...
Loading...
Nothing found
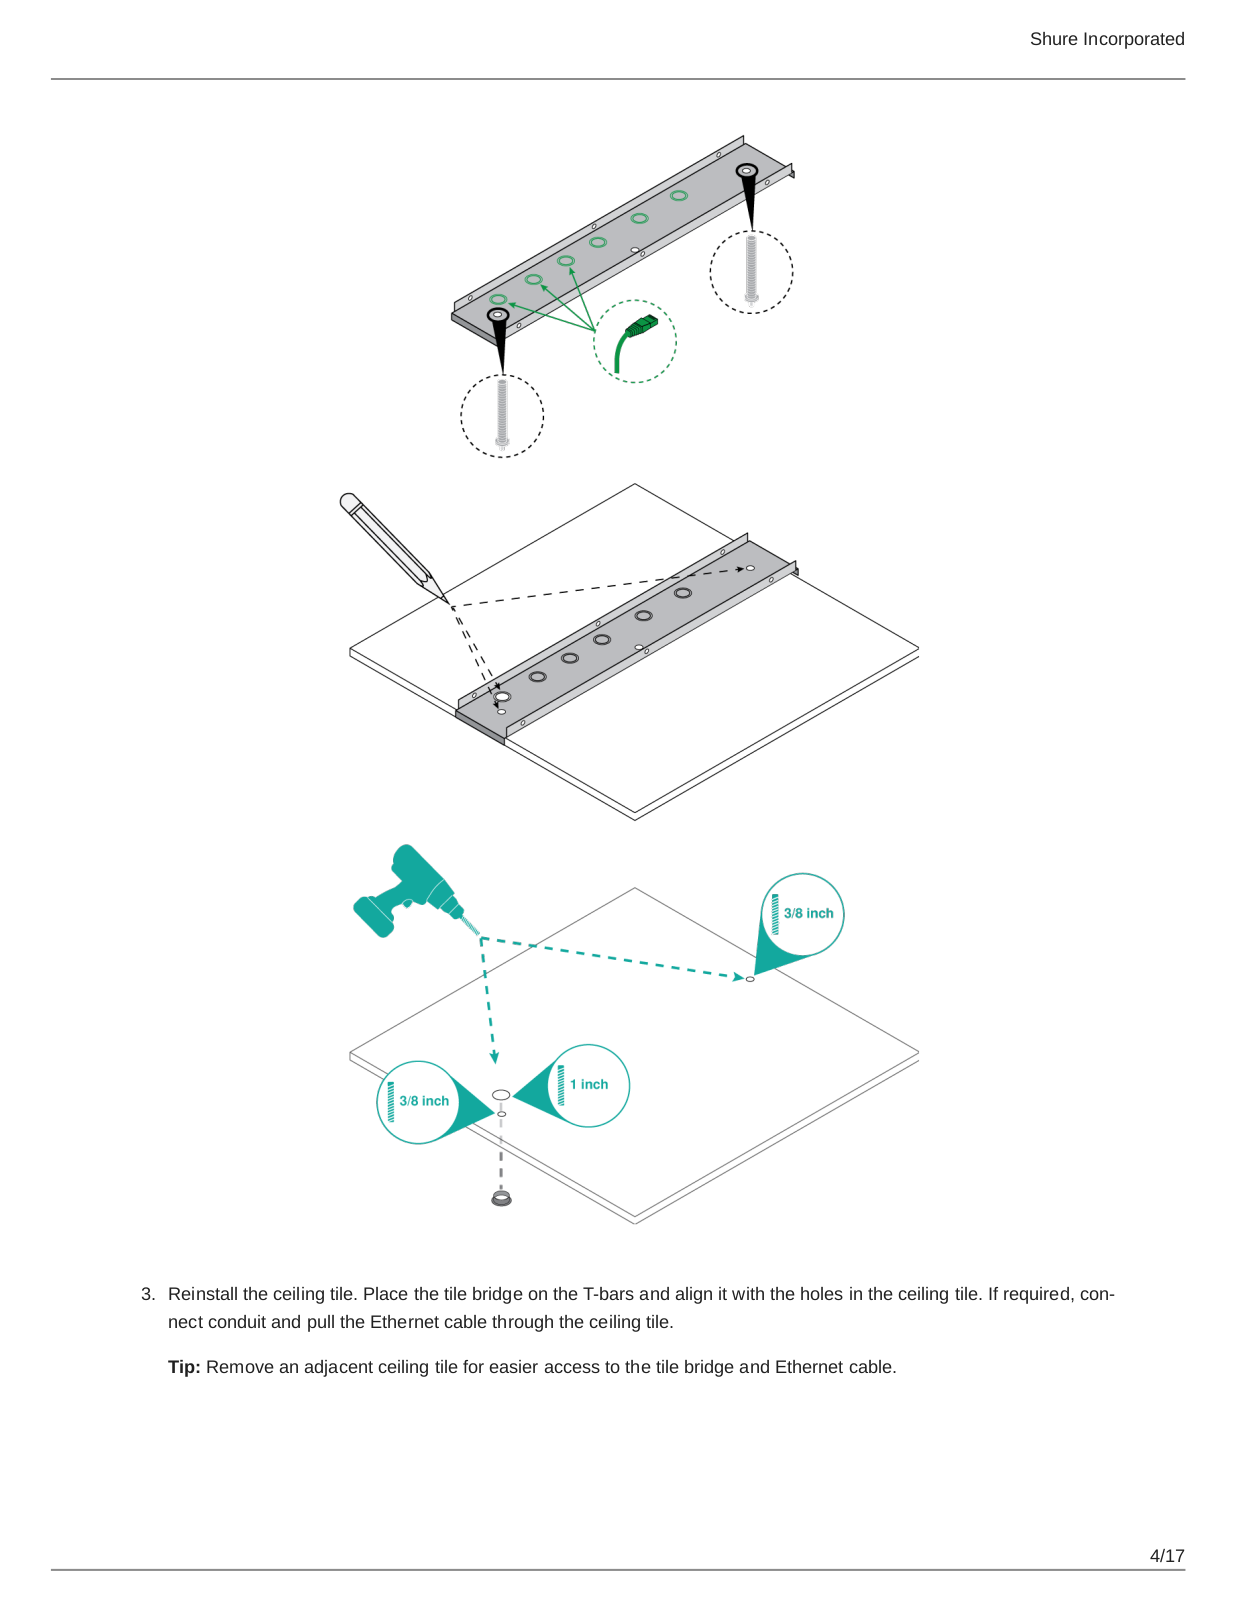
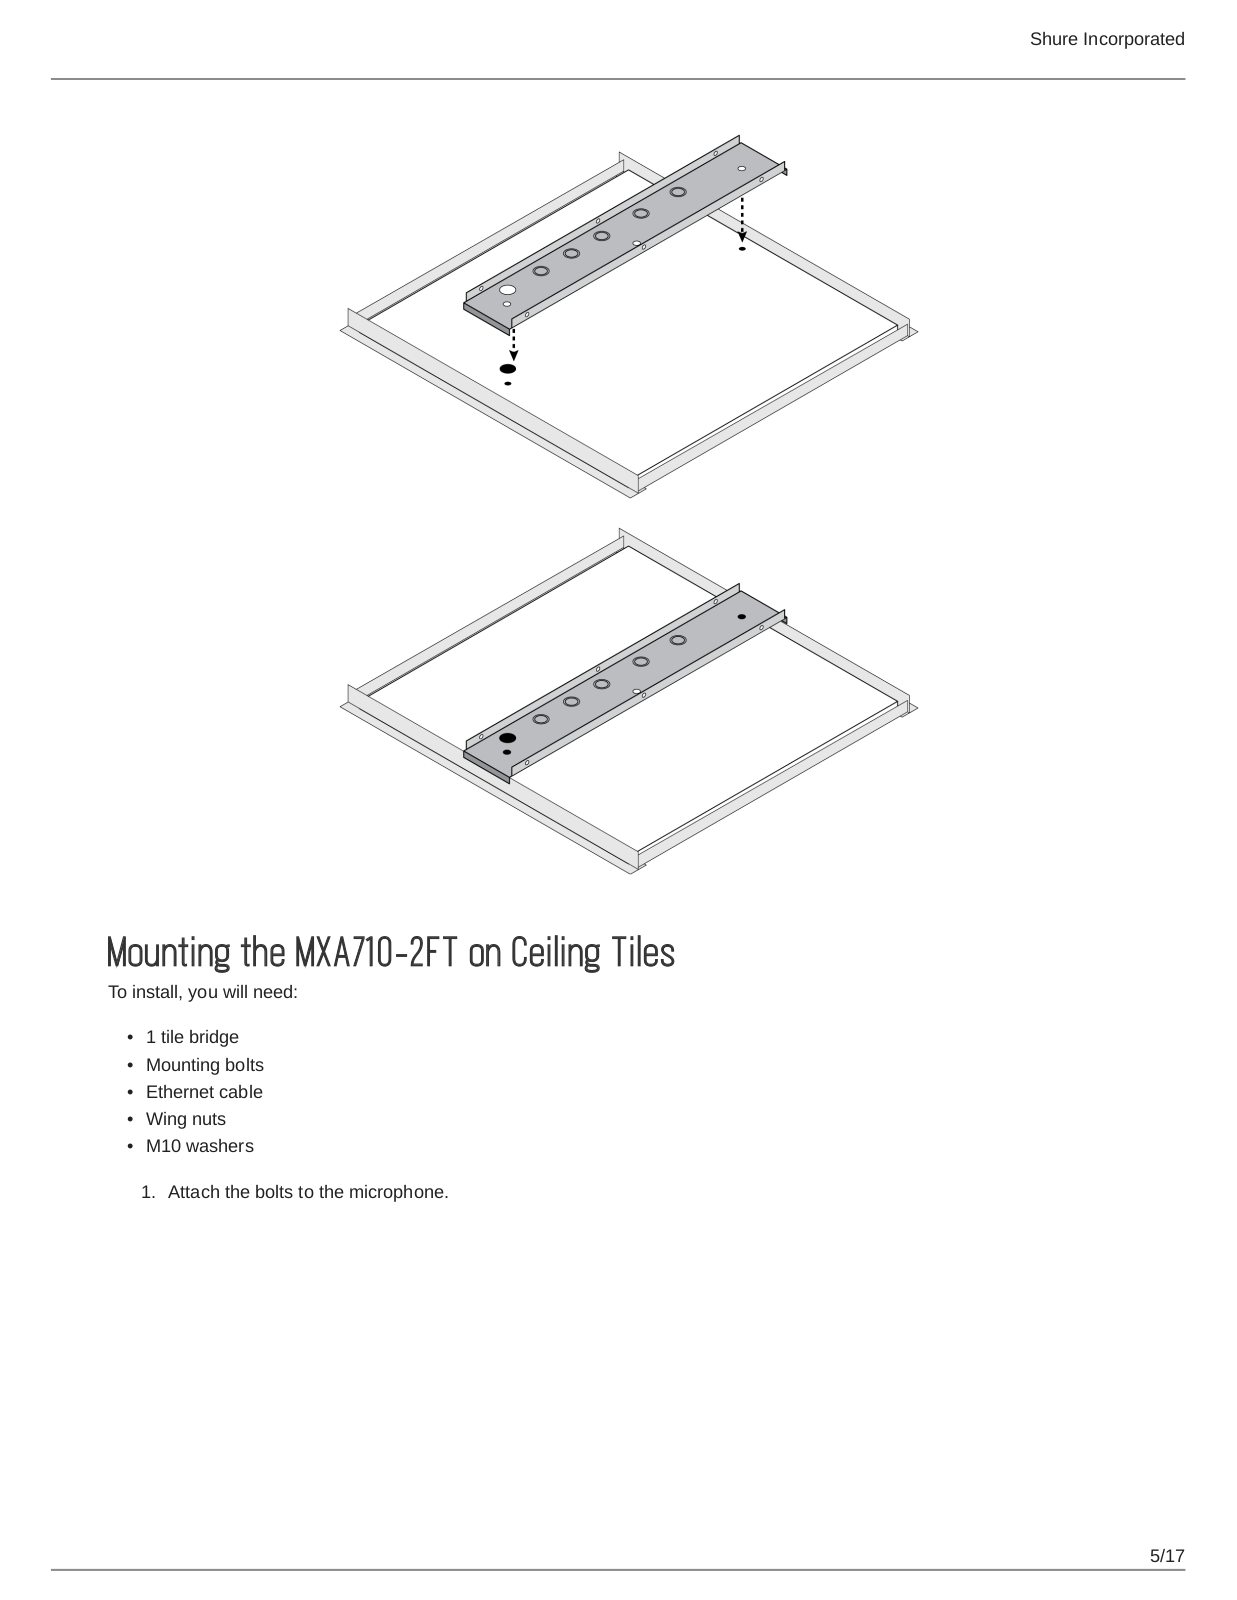
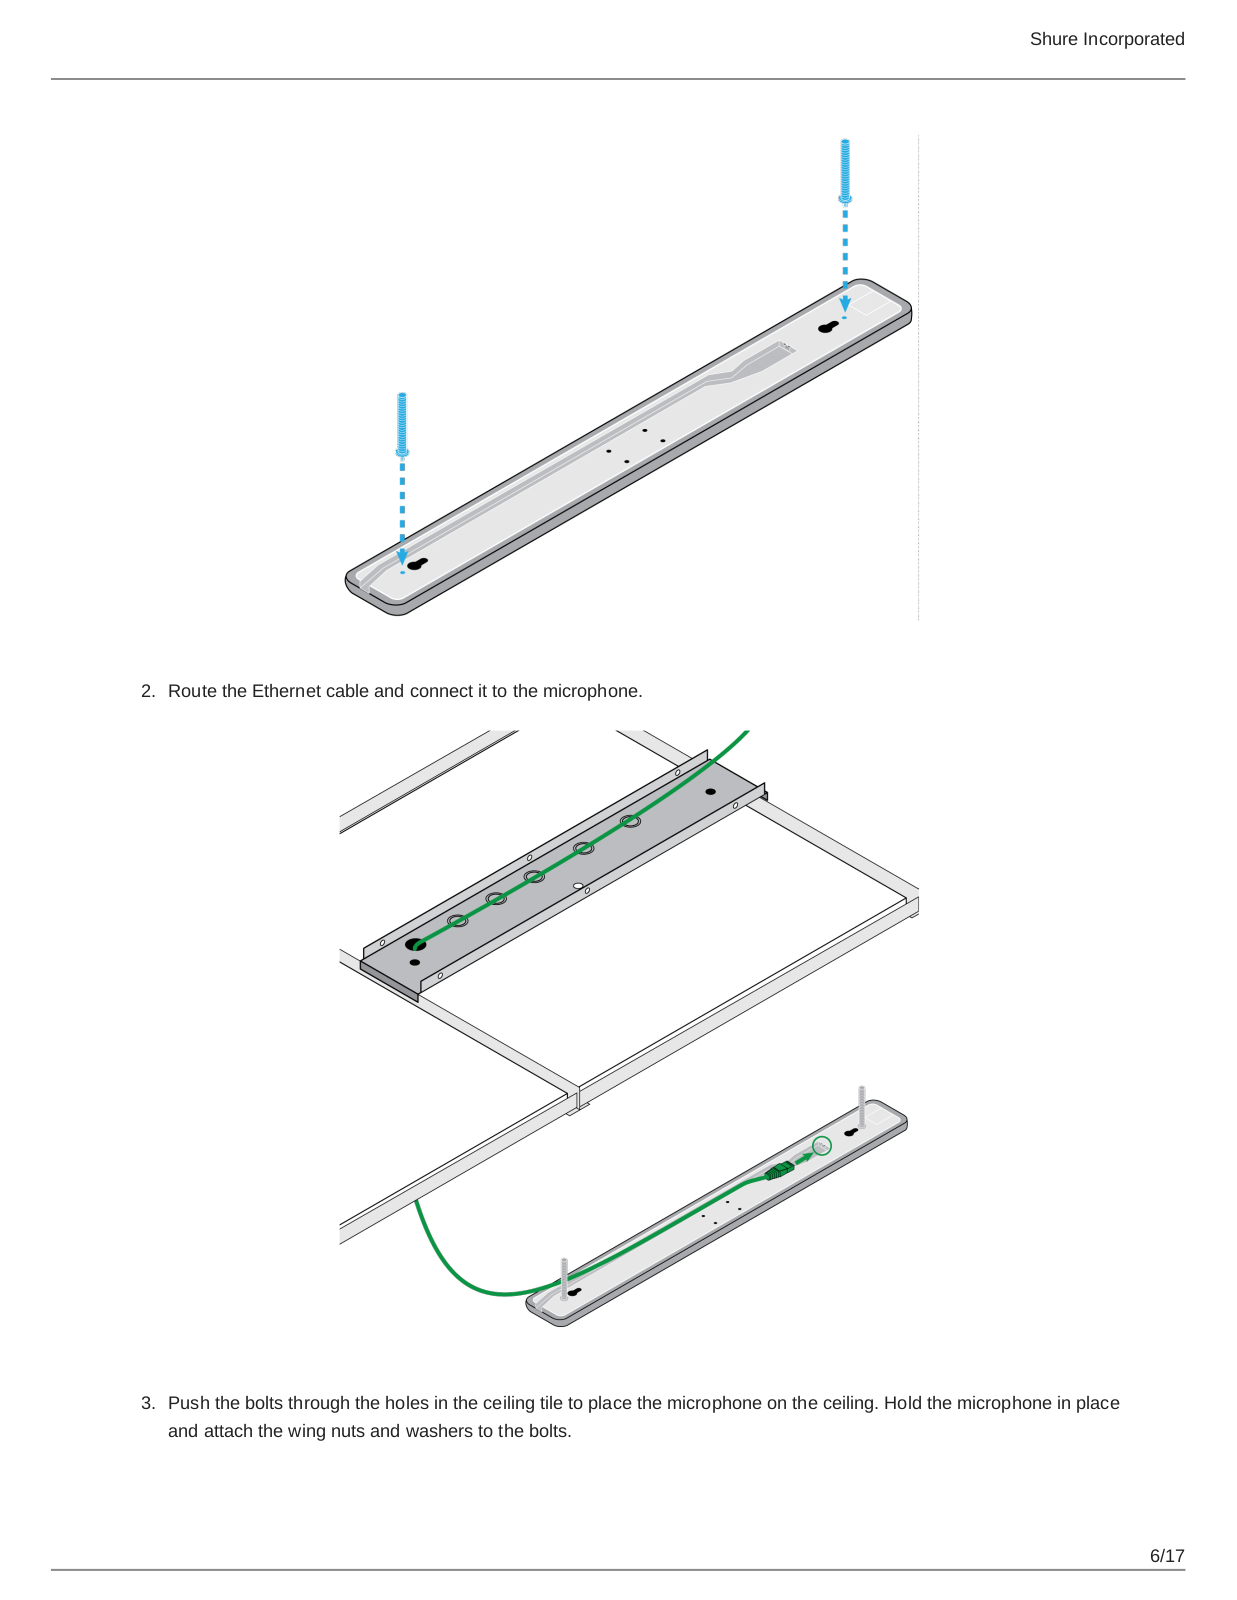
A710-TB
User Manual
17 pgs
1.92 Mb
0
Table of contents
Loading...
Shure A710-TB User Manual
...
Shure User Manual
Download
Specifications and Main Features
Frequently Asked Questions
User Manual
Download
Loading...
+
11
hidden pages
Unhide
You need points to download manuals.
1 point = 1 manual.
You can buy points or you can get point for every manual you upload.
Buy points
Upload your manuals
 Loading...