

Shurco TrapAdapt LiteALL Installation Instructions Manual

TrapAdapt™ - LiteALL™ Installation Instructions - read before installing
1
A
4
P/N 1128300 Rev. A
Item Part # Description
1. 1128281 LED Light
2. 1128280 Switch
3
3. 1706208 Switch Boot
4. 1705154 10-Amp Fuse
A. 1704187 Lock Nut - 1/2" NPT
B. 1703231 Cable Tie - 8"
STEP 1: Remove cover from battery box. Remove 7/8" and 3/8"
plugs from rear of battery box.
7/8" plug
3/8" plug
B
2
STEP 3: Route LiteALL™ wire along brace and down cart leg.
Insert ends of wire through 7/8" hole and secure dome
nut in hole using 1/2" NPT lock nut A.
liteall™
wire
install wire
from outside
of box
A
STEP 4: Remove slack from wire using cable ties B securing
wire to light mounting bar and cart down tube.
B
STEP 2: Install light to TrapAdapt™ cart. Secure with lock washer
and nut.
nut
lock washer
B
B
B
TrapAdapt™ - LiteALL™ Installation Instructions - read before installing
P/N 1128300 Rev. A
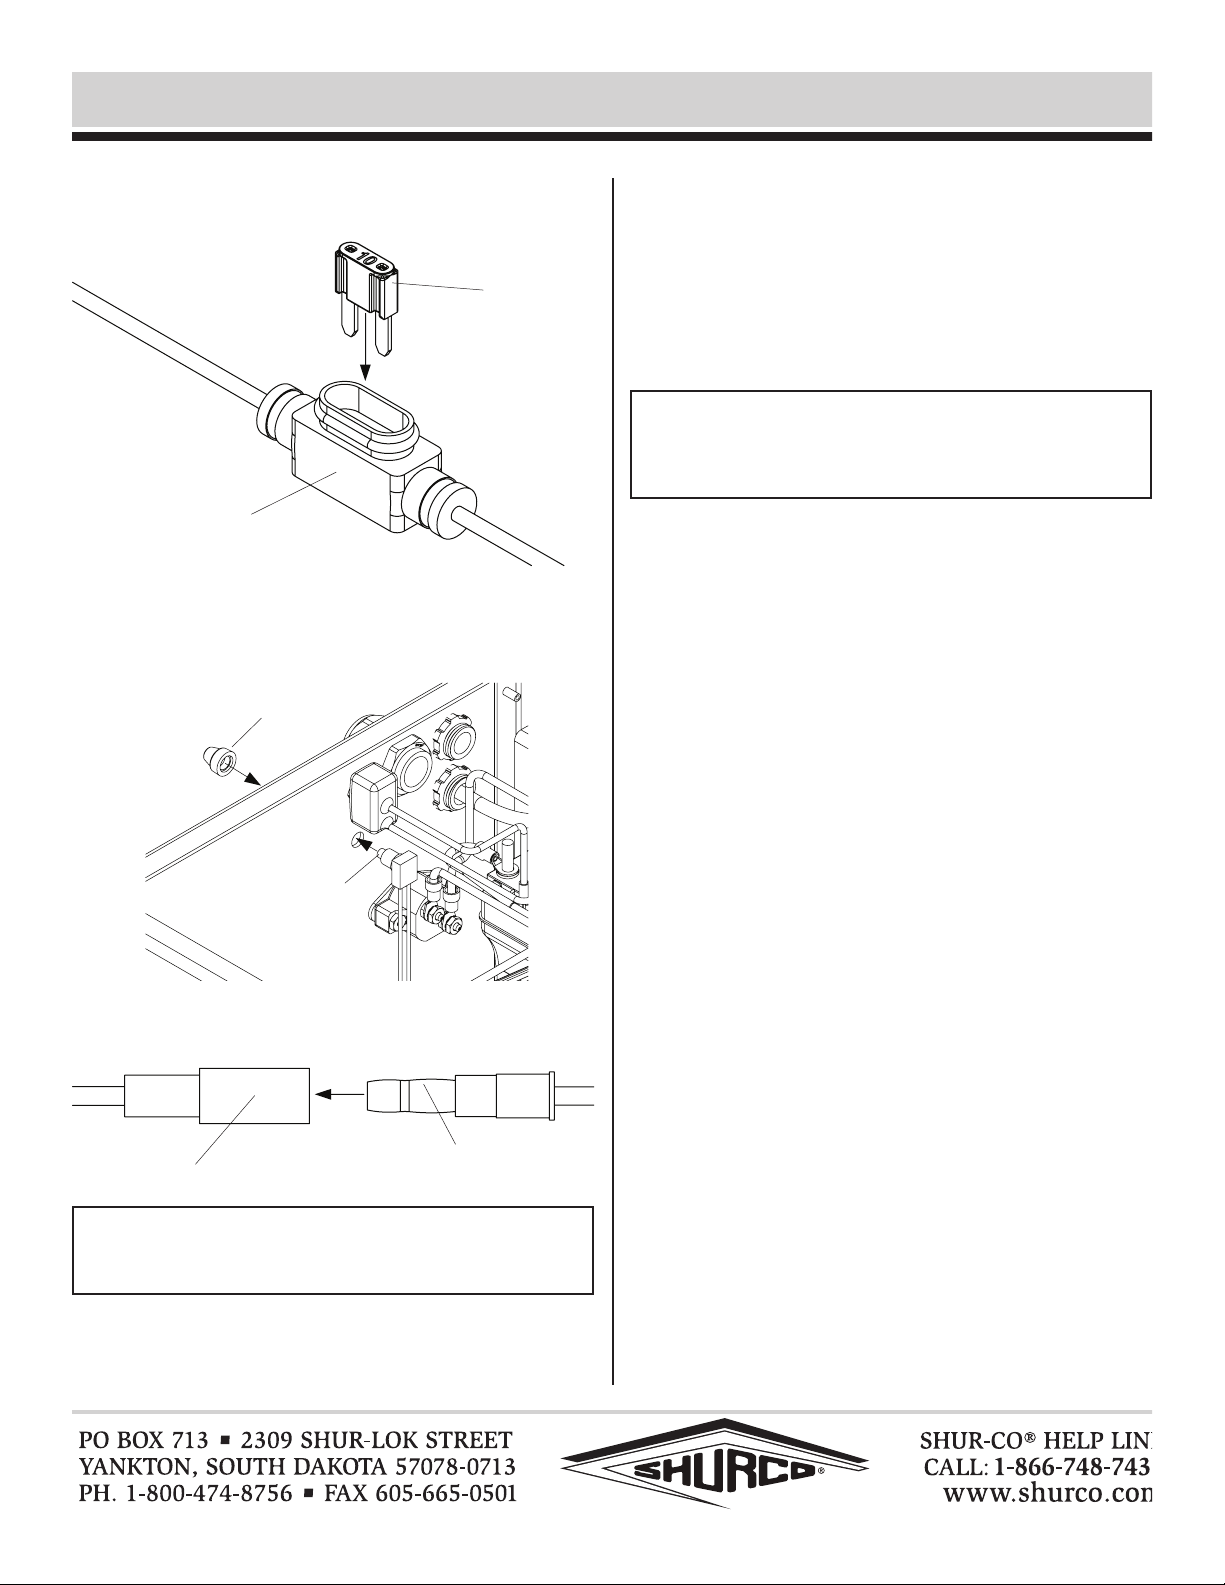
STEP 5: Install 10-Amp fuse into fuse holder on switch wire as-
sembly. Seal using fuse holder cover.
fuse
switch wire
assembly
STEP 6:
Install push button into 3/8" hole. Screw switch boot over
switch to secure push button to battery box.
switch boot
STEP 8: Secure block (-) ring terminal to negative (-) threaded
battery terminal. Secure red (+) ring terminal to positive
(+) threaded battery terminal.
STEP 9: Press push button switch. LED light should turn on and
off. Replace battery box cover.
NOTE: If light does not turn on, conrm fuse is installed
correctly and not blown. Ensure positive (+) ring (from switch)
and negative (-) ring (from light) are connected to correct
threaded battery post.
switch
STEP 7:
Plug male quick-disconnect into female quick-disconnect.
female
male
NOTE: If necessary, use pliers to gain additional grip on plug
ends to ensure male plug is inserted completely into female
plug. Leaving a gap could lead to shorting out of wires.
 Loading...