

Showco Spot 575 Instruction Manual
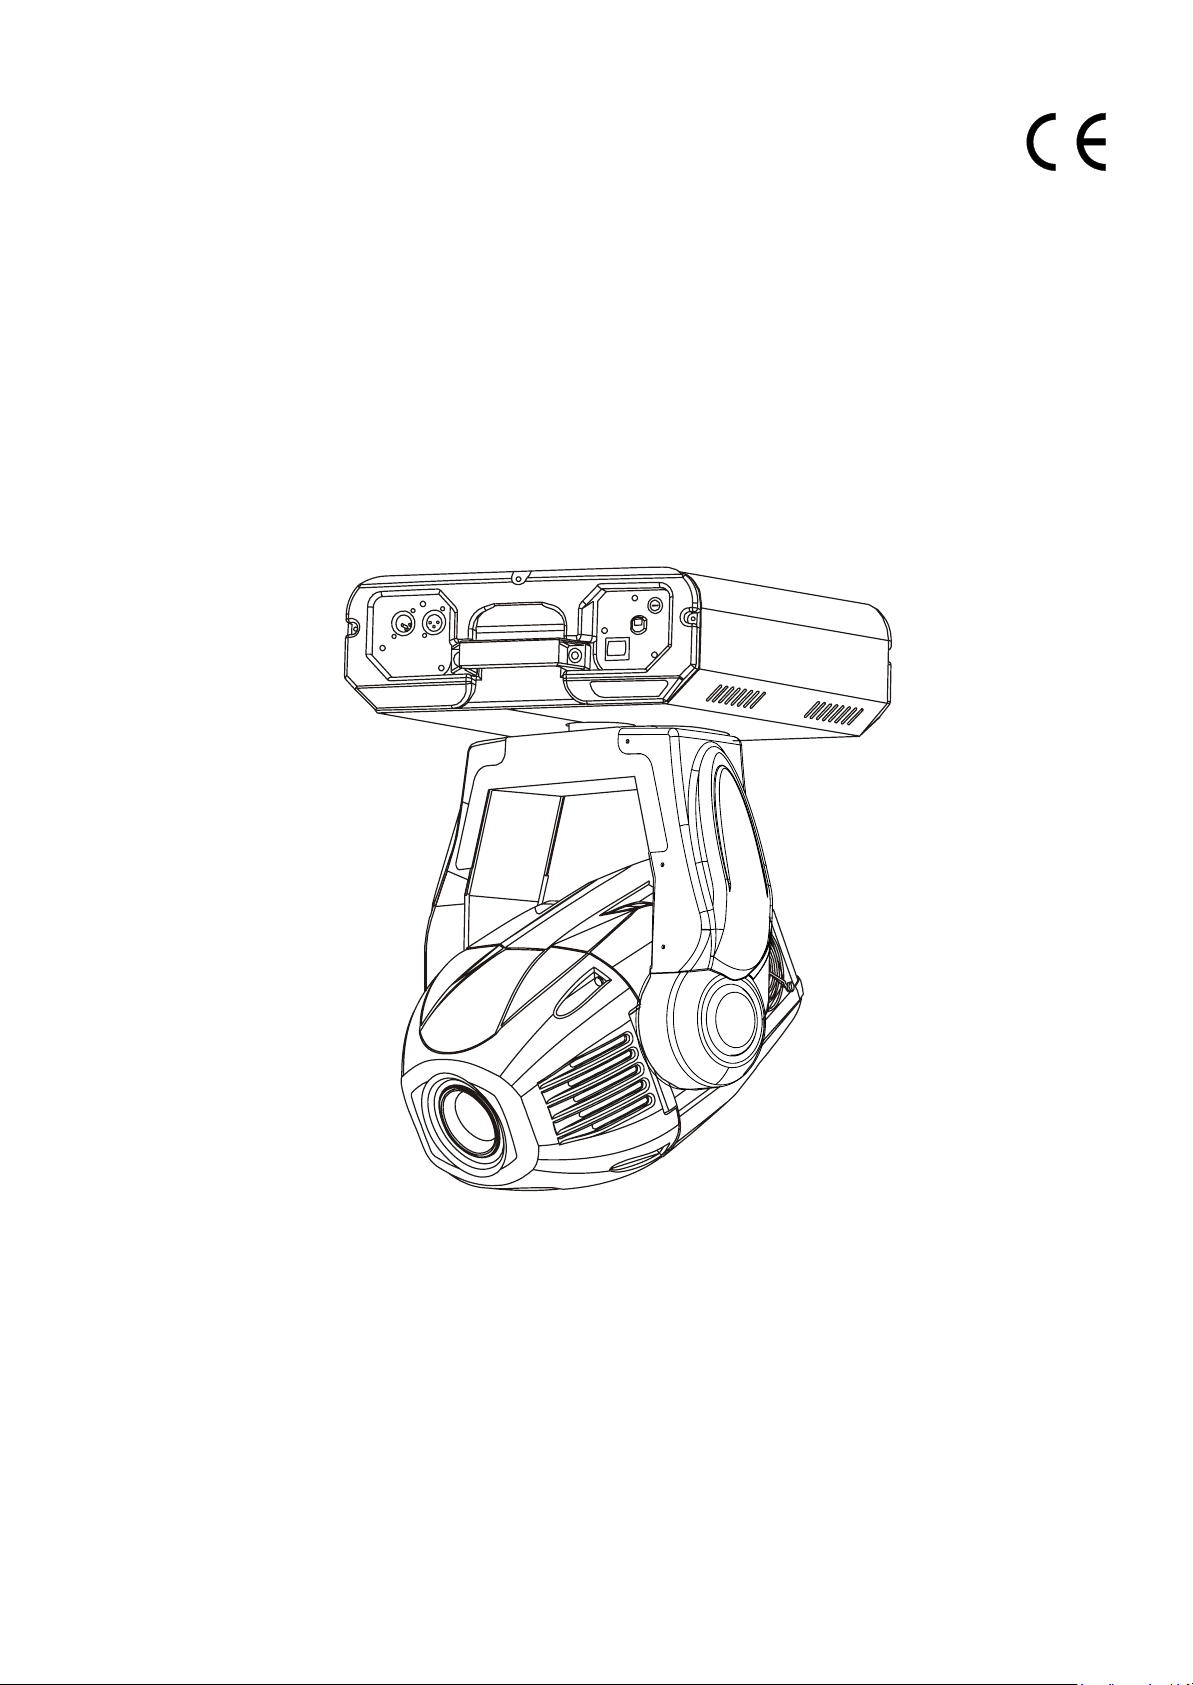
Showco Spot 575
www.carlosmendoza.com.mx
Please read over this manualbefore operation the light
www.carlosmendoza.com.mx

1.Open the box and ch eck ing
www.carlosmendoza.com.mx
C ongratulations on choosing our products! Please carefully read this instruction m anual in its
entirety and keep it well for using reference. This m anual contained about the installation and the
relative using information of this products. Please accordi
using this equipm ent.
This equipm ent w as m ade of new style, high intensity plastic and cast alum inium . It fully
show s the m odem times light characteristic with beauty structure. A nd it was made according to CE
standard. Fully up the interna
control. Can be use in large entertainm ent, theater, performing and playing hall, etc.
This product uses MSR 575/2 electrical arc lam p. When receiving this product please carefully
bring and put; and check that whether this equipm ent has been dam aged or not during transportation.
A nd please also check the follow ing thing was enclosed:
Signal line ----------------------- one piece Safety string -----------------------one piece
User M
anual-----------------------one set
tional standard of D M X 512 agreem ent. Master or slave in phase
ng to this m anual's relative speaking when
2. S a fety instructions
Every person involved with installation and maintenance of this device have to:
- be qualilfied
- fo llow the instru c tions of this m anual
CAUTION:
Ø K eep this device aw ay fro m rain and moisture!
Ø U nplug mains lead b e fo re opening the housing!
Ø FOR YOUR OW N SA FETY, PLEASE READ THIS USER M ANUAL CAREFULLY
Ø BEFOREYOU IN IT IA L STA RT - UP!
Ø
Be careful with your operations.
Ø With a high voltage you can su ffe r a dangerous electric shock when touching the
wire s!
Ø This device has left our prem ises in absolutely perfect condition. In order to maintain
this condition and to ensure a safe operation, it is absolutely necessary fo r the user to
fo llow the safety instru c tions and warning notes writtenin this m anual.
Im p ortan t:
Ø The m anufacturer will not accept liability fo r any re su lting dam ages caused by the non-
observance of this m anual or any unauthorized m odification to the device.
Ø Please consider that dam ages caused by m anual m odifications to the device are not
subject to w arra n ty.
Ø Never let the pow er-cord com e into c
and all connections with the mains with particular caution!
Ø Make sure that the available voltage is not higher than stated on the rear panel.
Ø Always plug in the pow er plug least. Make sure that the pow
position b e fo re you connect the device to the mains. The pow er-plug has to be
accessable after installing the device.
Ø Make sure that the pow er-cord is never crimped or dam aged by sharp edges. C heck the
device and the pow ercord fro m time to time.
ontact with other cab
les! H andle the pow er-cord
er-sw itch is set
to O FF-
1

Ø by the plug. Never pull out the plug by tugging the pow er-cord.
www.carlosmendoza.com.mx
Ø This device falls under protection class I. T herefore it is essen tial to connect the
yellow /green conductor to earth.
Ø The electric connection, re p a irs and servicing must be c arried out by a qualified
em
ploy
ee.
Ø Do not connect this device to a dimmer pack.
Ø Do not sw itch the fixture on and off in short intervals as this w ould reduce the lam p s
life .
Ø During the initial start-u p som e sm oke or sm ell may arise. This is a norm al process and
does not necessarily m
Ø Do not touch the device s housing bare hands during its operation (housing becom es hot)!
Ø For re p lacem ent use lam ps and fu se s of sam e type and ra ting only.
ean that the device is defective.
CAUTION :
EYE DAM AGES !
A void looking directly into th e light source(m ean t especially fo r epileptics) !
3. O perating determ inations
This device is a m oving-head spot fo r creating decorative effects and was designed fo r
Ø
indoor use only.
If the device has been exposed to drastic tem perature fluctuation (e.g. After transport-
Ø
ation), do not sw itch it on immediately. The arising condensation water might dam age
your device. L eave the device sw itched
Ø
Never ru n the device without lam p!
Ø
Do not shake the device. Avoid brute fo rc e when installing or operating the device.
Ø
Never lift the fixture by holding it at the projecto r-h ea d , as the m echanics may be
dam aged.A lways hold thefixtur
Ø
When choosing the installation-spot, please make su re that the device is not exposed to
extrem e heat, moistureor dust.T here should not be any cables lying around.You
endanger your ow n and the safety of others!
Ø
The minimum distance betw een light-output and the illum
than 2 meters.
Ø
Make sure that the area below the installation place is blocked when rigging, derigging
or servicing the fixture.Always fix the fixture with an appropriate safety-rope. Fix the
safety-rope at the correct holes only.
Ø
Only operate the fixture af
screw s are tightly fa stened.
Ø
The lam p must never be ignited if the objective-lens or any housing-cover is open, as
disch arge lam ps m ayexplose and em it a high ultrav iolet ra d iation, which may cause
burns.
Ø
The maximum am bient tem
lam p is sw itched off andthe fixture is out of operation fo r 5 minutes..
e at the tra
ter having ch
perature ta = 40 mus
off until it has reached room tem perature.
nsport handles.
inated surface must be
ecked that the housing is firm ly closed and all
t never be exceeded. Otherw ise, the
more
2
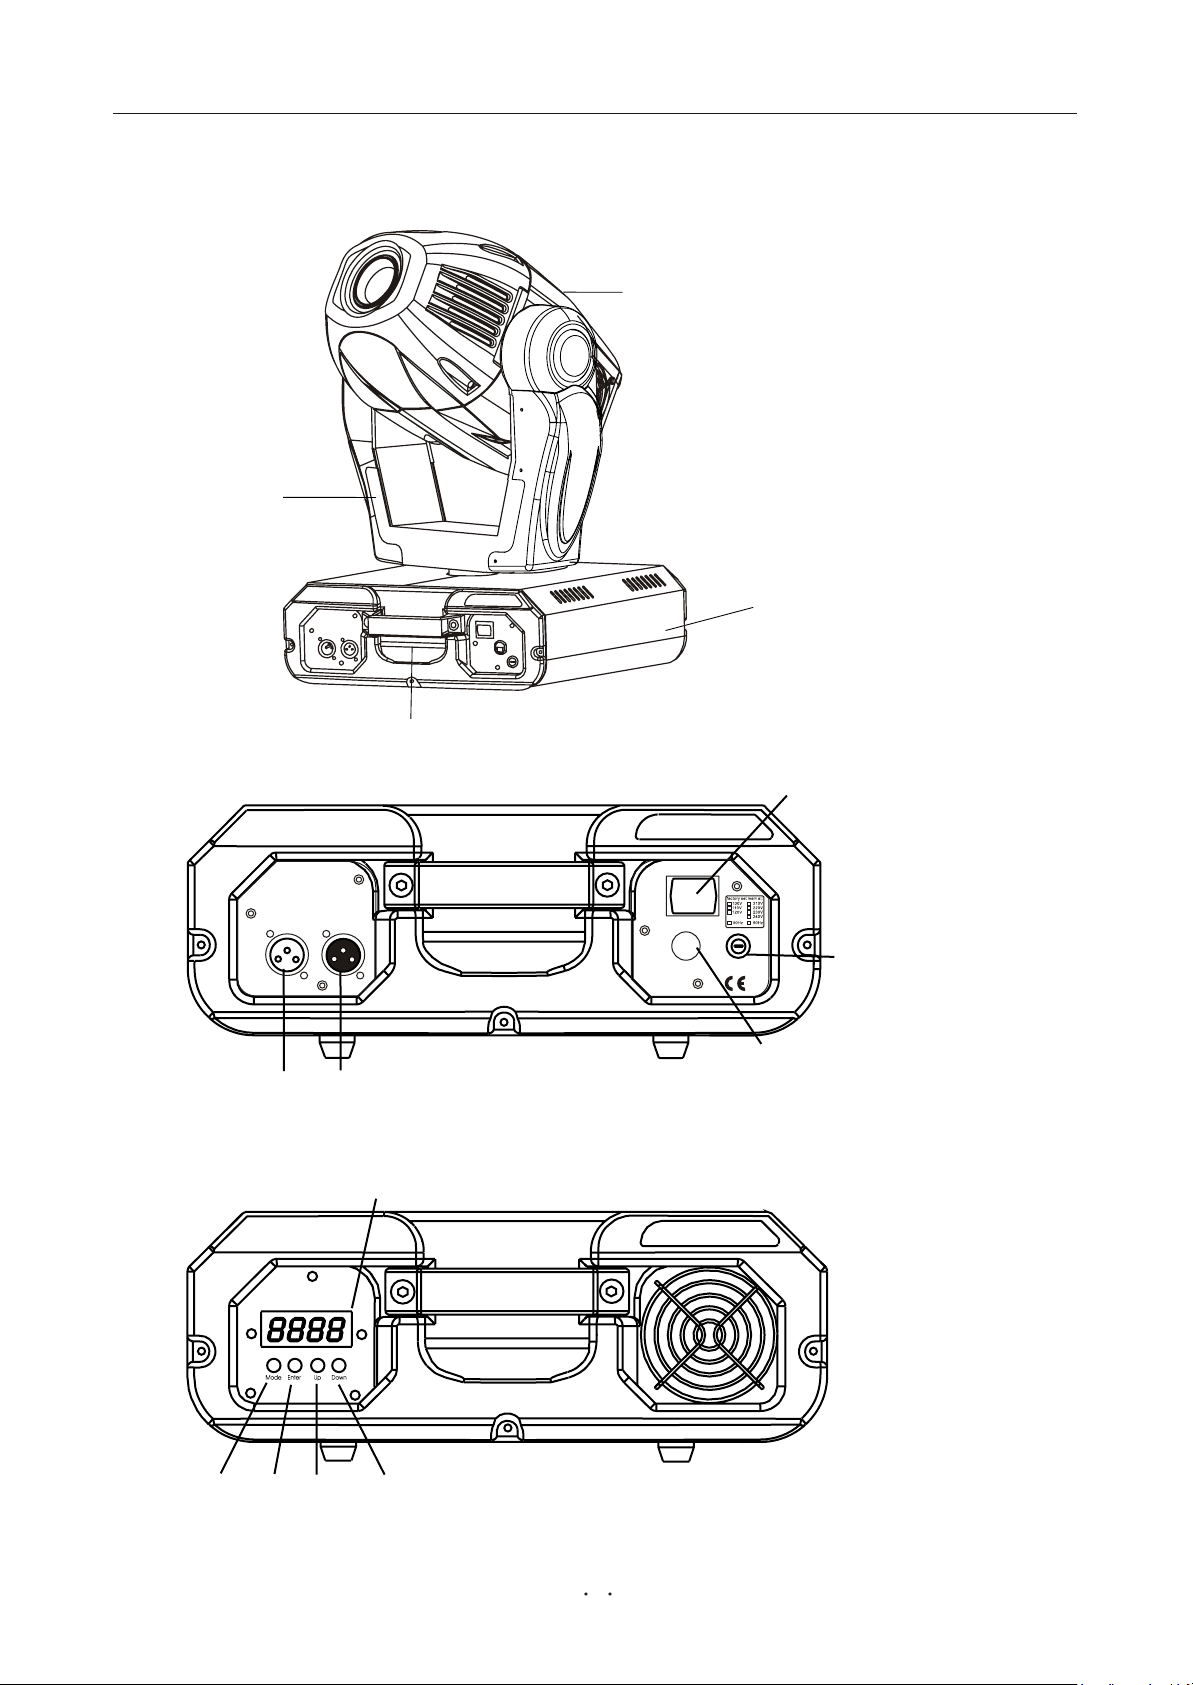
4.D escription of th e device
POW ER
LAM P:
MSR 575/2
POW ER SUPPLY
FUSE 10A
OUT DMX IN
www.carlosmendoza.com.mx
2
Serialnumber:
LIGHTING CONTROL PROTOCOL:DM X512
SERIAL DATALINK
OUT DMX IN
1=G ND
2=SIG.3=SIG.+
1
1 - Mov
2- Yo k
ing head
e
3- Carry handles
4 - Bas
e
4
3
5
R ear panel:
5 - Power sw itch
6 - DMX output
7 - DM X input
8 - Power cord
LAM P:
MSR 575/2
POW ER SUPPLY
FUSE 10A
9 - Fu
9
se holder
10
6
11 12
8
7
14
Front panel:
M ode-button
10 11 - Enter-button
12 - Up-button
13 - Down-button
- Display
14
13
3

5.In sta llion
A
B
A
B
www.carlosmendoza.com.mx
5.1Fitting th e lam p
To insert the lam p MSR 575/2 95V /575W GX-9,5 loosen the lam p cover at the rear of
head (se e the draw ings ) byrem ow ing the 3 fa stening screw s which are marked "X ,Y,Z".
C arefu lly pull out the cover with the lam p socketassem bly.If changing the lam p, rem ove
the old lam p fro m the socket. In se rt the lam p to the socket.
Do not install a lam p with a higher wattage! A lam p like this generates tem peratures the
device is not de-signed fo r.Damages caused by non-observance are not subject to w arra n ty.
Please follow the lam p m anufacturer notes!D o not touch the glass-bu lb with bare hands
during the installation! Make su re that thelam p is installed tightly into the lam pholder
system .
R eclose the lam p cover and tighten the 3 screw s.
.Lam p assem bly:
Remove the screw s X,Y and Z for re -lam ping
X
Disconnect the fixture fro m A C power before re -lam ping.
Lam p is hot! Risk of fire ! Protect hands and eyes.
Wait at least 15m in.Before opening the cove rs
Lam p cover
WARNING!
and re m o ving lam p fro m the fixture.
Do not operate this fixture with opened housing-cover!
5.2 Lam p adjust
The SPOT 575 lam pholder is aligned at
the factory. Due to differe n c e s betw een
lam ps , fine adjustment mayim prove light
p e rfo rm an ce .Strike the lam p,open the shutter
and the iris,set the dimmer intensity onto
100% and fo c u s the light on a flatsurface
(w all).Center a hot-spot(the
brightest part of
the image) by using the 3 adjustment screw s
"A ,B,C".Turn one screw after another a
quarte r-turn clokw ise(counte r-clokw ise. If
you cannot detect the hot-spot,adjust the
lam p until the light is evenly distributed.
Minimum distance fro m flammablemateriald=0.5m .
Maximum room tem perature t=40
Exteriorsurface tem perature T=80 .
Notfordom esticuse.
Z
Adjust lam p position by turning screw s A , B and C
3 phillips screw s "X ,Y,Z"
Remove the screw s X,Y and Z for re -lam ping
X
Disconnect the fixture fro m A C power before re -lam ping.
Lam p is hot! Risk of fire ! Protect hands and eyes.
Wait at least 15m in.Before opening the cove rs
and re m o ving lam p fro m the fixture.
Minimum distance fro m flam m ablemateriald=0.5m .
Maximum room tem perature t=40
Exteriorsurface tem perature T=80 .
W ARNING!
Notfordom esticuse.
Z
Adjust lam p position by turning screwsA, B and C
3 adjustm ent screw s "A ,B,C"
4
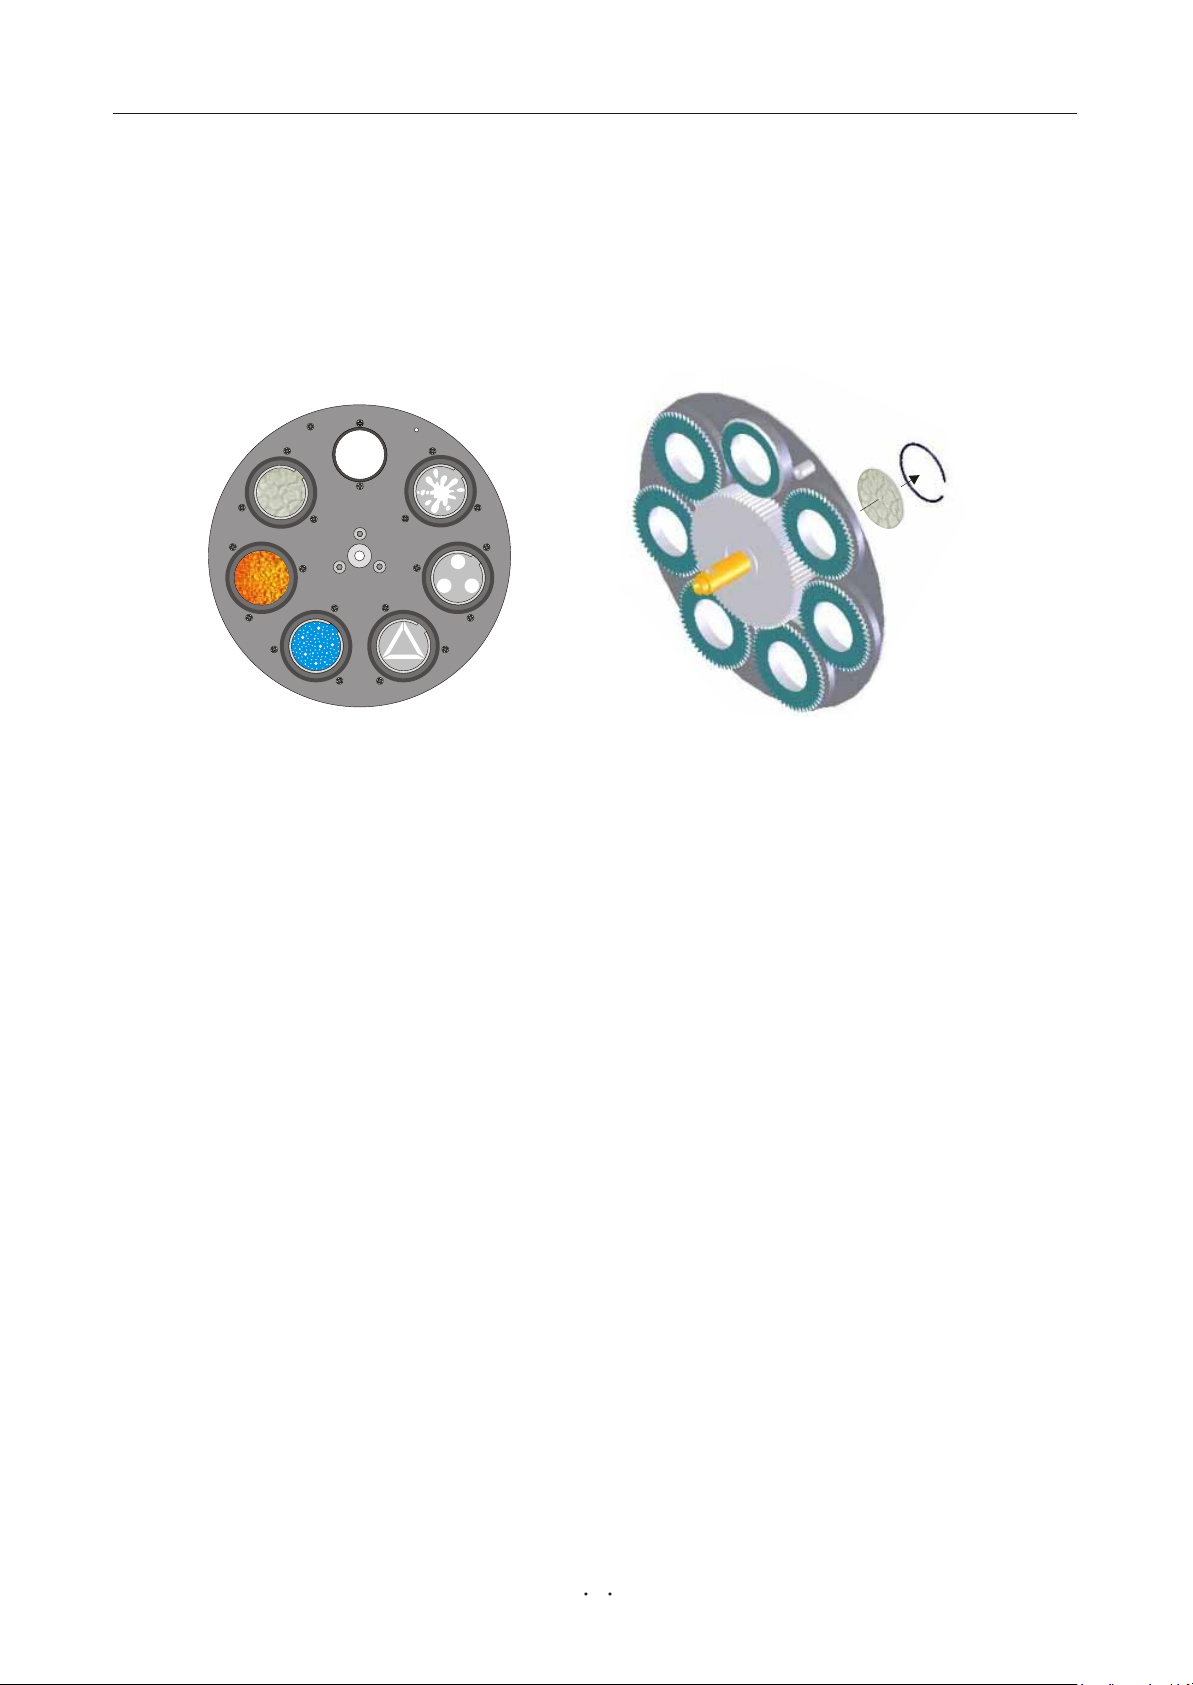
5.3 In serting/E xchanging gobos
www.carlosmendoza.com.mx
DANGER:Install the gobos with the device sw itched off only.U nplug fro m mains b e fo re !
If you wish to use other fo rm s and patterns as the standard-gobos, or if gobos are to be
exchanged, open the topcover of the head by loosening 2 screw s on the top cover.R em ove
the fixation ring with an appropriate tool. R em ove the
the fixation ring together and insert it in the front of the gobo.
CAUTION:Never unscrew the screw s of the ro tating goboas the ball bearing will
otherw ise be opened!
°×¹â
gobo and insert the new gobo. P ress
5.4 Rigging th e fixture
DANGER TO LIFE:Please con sider th e respective national norm s during th e
installation!T he installation must only be carried out by an authorized dealer!
Ø The installation of the projector has to be built and constru c ted in a way that it can hold 10
times the weight fo r 1 hour without any harm ing d efo rm a tion.
Ø Th
e installation mu
appropriate catch net. This secondary safety attachm ent must be constru c ted in a way that
no part of the installation can fall dow n if the main attachm ent fa ils.
Ø When rigging, de
place, on bridges, under high working places and other endangered areas is fo rb idden.
Ø The operator has to make sure that safety -re lating and m achine-technical installations are
approved by an expert b e fo re taking into ope
b e fo re taking into operation another time.
Ø The operator has to make sure that safety -re lating and m achine-technical installations are
approved by an expert after every four year in the course of an acceptance test.
Ø The operator has to make sure that sa
approved by a sk illed person once a year.
Ø The projector should be installed outside areas where persons may walk by or be seated.
Ø IM P O R TA N T ! OVERHEAD RIGGING REQUIRES EXTEN SIV E EX PERIENCE,
including (but not limited to)calculating working load limits, installation ma
used, and periodic safety inspection of all installationm aterial and the projector. If you
lack these qualifications, do not attem pt the installation yourself, but instead use a
professional stru ctural rigger. Im proper installation can re su lt in bodily injur
da
m age to property.
Ø The projector has to be installed out of the reach of people.
Ø If the projector sh all be low ered fro m the ceiling or high joists, professional trussing
system s have to be used. The projector must never be fixed sw inging freely in the
Ø Caution
concerning the safety of a p ossible installation, do NOT install the projector!
Ø B efo re rigging make sure that the installation area can hold a minimum point load of 10
times the projector s we
:Projectors may cause sev ere injuries when crashing dow n! If you have doubts
st always be secured with a secondary safety attachm ent, e.g. an
rigging or servicing the
ight.
fixture staying in the area below the installation
ration fo r the fi
fety -re lating a
nd m achine-technical installations are
rst time and after changes
terial bei
y and or
ng
room .
5
 Loading...