

Page 1

ACCESS ORY
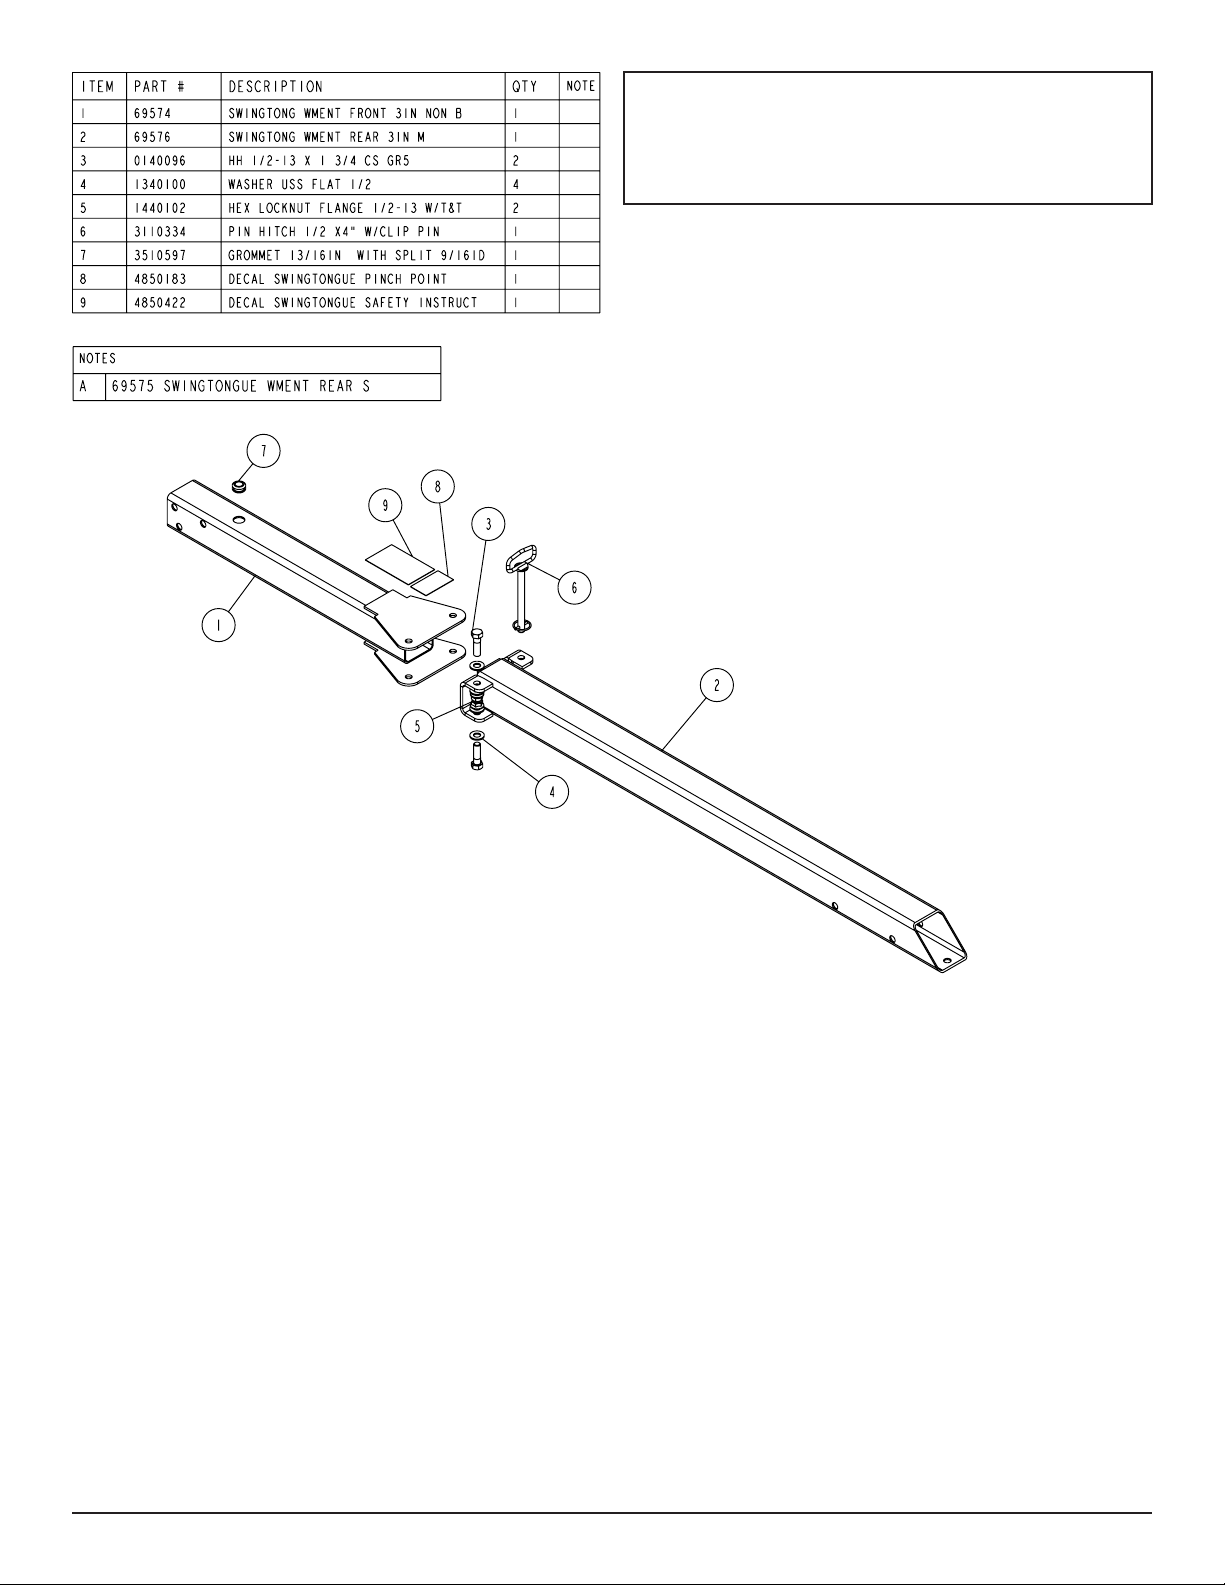
3” Swing Tongue Assemblies for
Non-Brake Trailers
The 3” non-brake swing tongue assembly is a replacement tongue that can be installed in any 2x3 trailer frame that is not equipped with
a brake system. It will replace a standard tongue and allows the front 30” section of the tongue (including the coupler) to be swung to the
side so that it will t in a shorter storage area.
The winch post assembly must never be attached to the swing section of the tongue. The tongues are available in two different length
rear sections to accommodate the mounting of the winch post. Choose the correct length that best adapts to the winch post setting for
your boat.
Removing the Old Tongue from the Frame
• Remove the boat from the trailer.
• Measure the location of the winch post with respect to the frame
tongue channel before removing it so you know where it needs
to be re-installed on the new tongue. Remove the winch post
assembly by removing the three-3/8” x 4” hex bolts.
• Remove the coupler from the front of the old tongue.
• Remove the safety chains by removing the bolts that attach
them to the old tongue.
• Remove the ½” x 1 ½” hex bolt holding the tongue cap and the
rear of the tongue into the tongue channel.
• Remove the ½” x 4” hex cross bolt that attaches the tongue in
the front of the tongue channel.
Midwest Industries, Inc. Ida Grove, IA 51445 800.859.3028 www.shorelandr.com 0003846
Page 1 08/16/07
• Disconnect the side frame wire harnesses from the tongue harness. Remove the tongue harness.
• Remove the old tongue assembly from the frame.
Installing the New Swing Tongue to the Frame
• Locate the new swing tongue and slide the rear section into the
frame tongue channel.
• Align the cross hole in the new tongue with the hole in the
frame tongue channel. Insert the ½” x 4” cross bolt just removed
through the aligned hole to secure it in position. Place on the
ange lock nut. DO NOT tighten at this point.
• Route the tongue wire harness just removed down through the
hole in the top of the tongue, then backwards to the swing end.
Page 2
CAUTION:
Always check the tongue wire harness as you swing the
tongue back into the towing position to prevent the wires
from getting pinched and/or cut in the hinge area.
• Route the wires through the bottom hole provided in the swing
hinge plate and out the rear of the tongue. Place the wires
secure with the bolts and ange lock nuts removed from the old
tongue.
through the hole provided in the tongue cap.
• Tighten all of the bolts not tightened at this time.
• Reconnect the tongue harness to the frame harnesses. Push
the excess wire back into the tongue.
• Align the hole in the rear of the tongue, the tongue channel and
the tongue cover. Secure with the ½” x 1 ½” hex bolt and ange
lock nut removed earlier. Tighten the bolt just installed plus the
cross bolt installed earlier.
• Re-attach the safety chains using the hardware removed from
the old tongue.
• Place the coupler on the new swing tongue, align the holes and
• Assembly is complete.
• Position the winch post assembly on the new swing tongue so
it matches the distance from the frame tongue channel it was
mounted on the old tongue. Secure in place using the bolts removed earlier.
• Place the boat on the trailer. Winch the boat into the winch post
bow roller and check for proper winch post adjustment.
• If satisfactory, assembly is complete.
Midwest Industries, Inc. Ida Grove, IA 51445 800.859.3028 www.shorelandr.com 0003846
Page 2 08/16/07
 Loading...