

Shop-Vac Shop Sweep 405EDI User Manual
General Safety Information
Never operate this
unit when flammable materials or vapors are present because
electrical devices produce arcs or sparks that can
cause a fire or explosion.
IMPORTANT
SAFETY
INSTRUCTIONS
When using an electrical appliance, basic
precautions should always be followed, including
the following: READ ALL INSTRUCTIONS BEFORE
USING THIS APPLIANCE.
This appliance is provided with double insulation.
Use only identical replacement parts. See
instructions for servicing of double insulated
appliances.
Servicing for Double Insulated Appliances
A double insulated appliance is marked with one
or more of the following: the words “Double
Insulation” or “Double Insulated” or the Double
Insulation symbol (See Figure 2).
In a double insulated appliance, two systems of
insulation are provided instead of grounding. No
grounding means is provided on a double
insulated appliance, nor should a means for
grounding be added to the appliance. Servicing a
double insulated appliance requires extreme care
and knowledge of the system, and should be done
only by qualified service personnel. Replacement
parts for a double insulated appliance must be
identical to the parts they replace.
To reduce the risk of fire, electric shock, or
personal injury:
1. Do not leave appliance when plugged in.
Unplug from outlet when not in use and before
servicing.
2. Do not use on wet surfaces – Do not expose to
rain – store indoors.
3. Do not allow to be used as a toy. Close
attention is necessary when used by or near
children.
4. Use only as described in this manual. Use only
Manufacturer’s recommended attachments.
5. Do not use with damaged cord or plug. If
appliance is not working as it should, has been
User Manual
Shop Sweep®Indoor/Outdoor Vac
Model 405EDI
Read carefully before attempting to assemble, install, operate or maintain the product described. Protect yourself and others by
observing all safety information. Failure to comply with the instructions could result in personal injury and/or property damage!
Retain instructions for future reference.
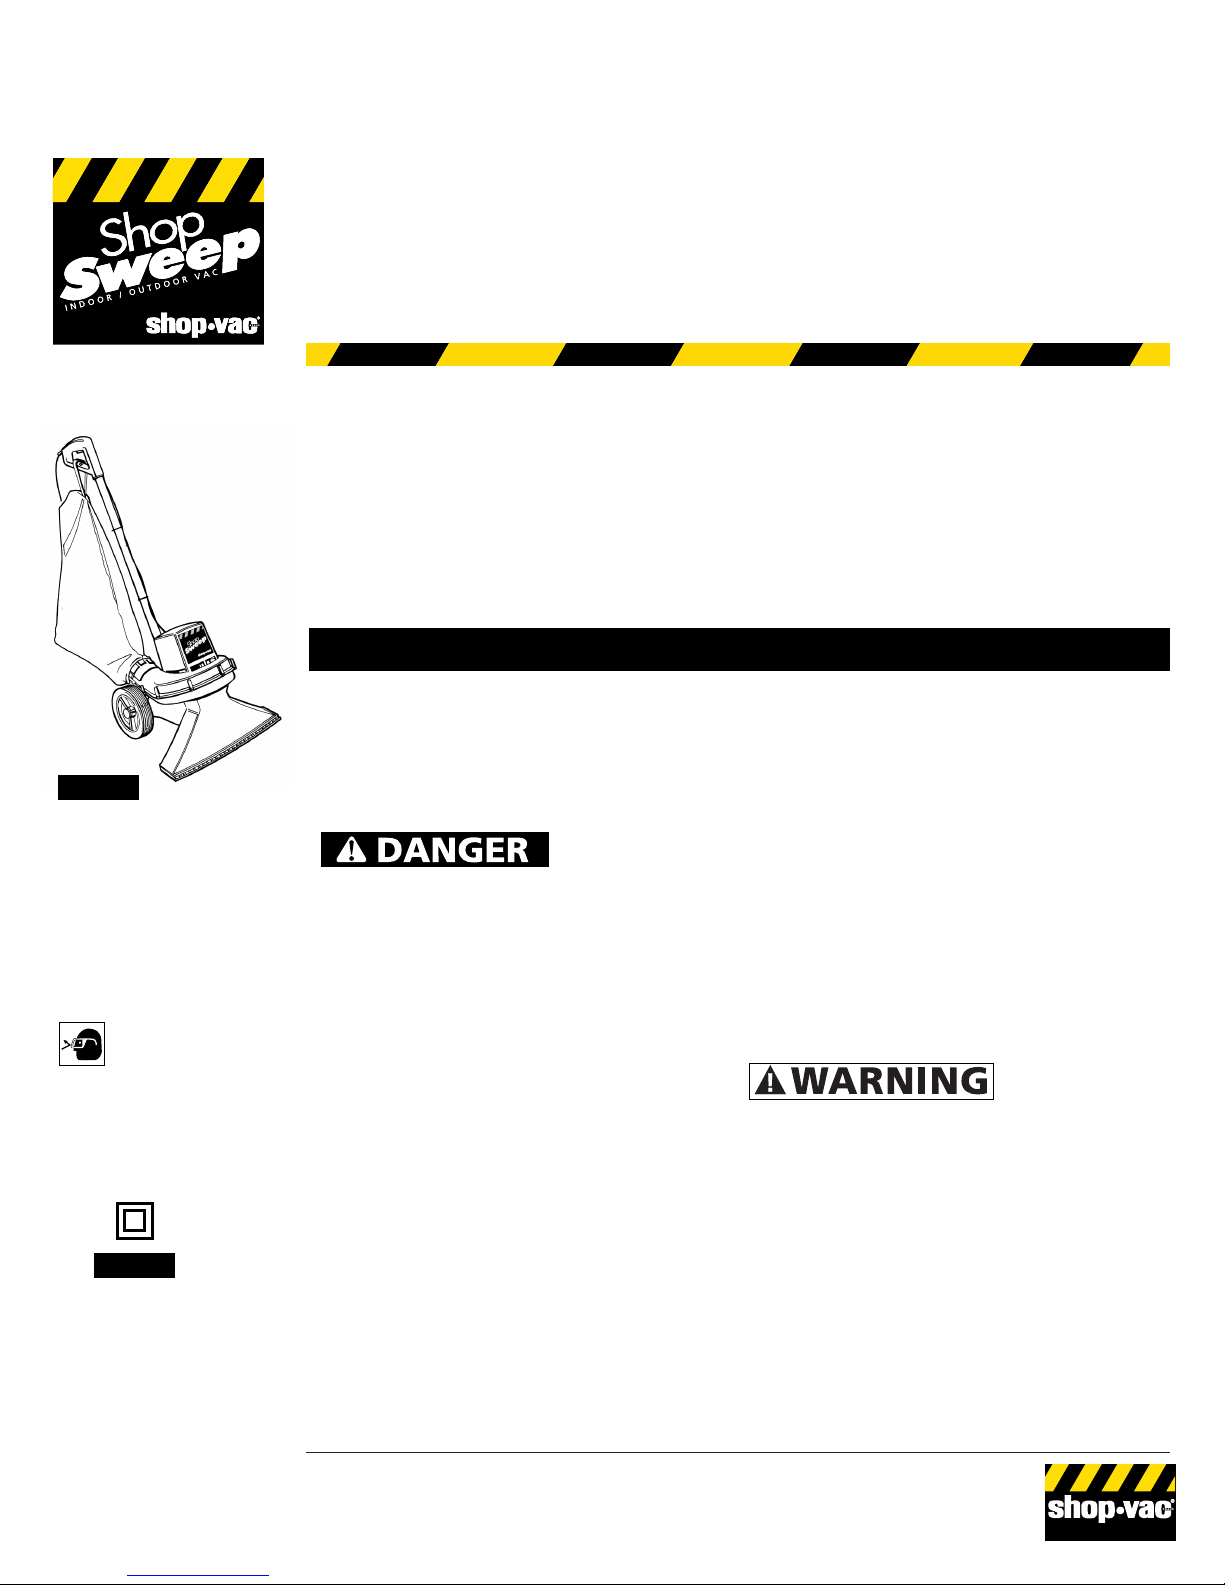
Description
The Shop Sweep Indoor/Outdoor Vac is designed to be used indoors or outdoors to clean litter, dirt and
debris – even leaves and lawn clippings from hard surface areas or low-pile commercial carpeting. The
Indoor/Outdoor Vac features a wide collection nozzle. Special features include a heavy-duty eight
gallon collection filter bag with a durable nylon zipper, two adjustment height settings and seven inch
rubber wheels. Powerful 1.25 (peak) horsepower single-stage electric motor is coupled to a high impact
impeller and a safety operating switch. UL & CSA Listed.
Specifications
8 Gallons 120V, 191/2x391/2x36” 19 Lbs.
(29.5 liters) 50/60 Hz AC
(49.5 x 100.3 x 91.4 cm)
(8.62 kg)
6.0 Amps
Electrical Unit
Capacity Rating Dimensions Weight
Commercial/Industrial Use
Figure 2
Shop-Vac Corporation
2323 Reach Road
P.O. Box 3307
Williamsport, PA 17701-0307
(570) 326-3557
Website: www.shopvac.com
Shop-Vac Canada, LTD
1770 Appleby Line
Burlington, Ontario L7L5P8
(905) 335-9730
87511-79
Rev. 6/03
DRY PICK UP
ONLY
ALWAYS
WEAR EYE
PROTECTION
Figure 1
General Safety Information
(continued)
dropped, damaged, left outdoors or dropped
into water, return it to a service center.
6. Do Not: pull or carry by cord, use cord as a
handle, close a door on cord or pull cord
around sharp edges or corners. Do not run
appliance over cord. Keep cord away from
heated surfaces.
7. Do not unplug by pulling on cord. To unplug,
grasp the plug; not the cord.
8. Do not handle plug or appliance with wet
hands.
9. Do not put any object into openings. Do not
use with any openings blocked; keep free of
dust, lint, hair and anything that may reduce
air flow.
10. Keep hair, loose clothing, fingers and all parts
of body away from openings and moving
parts.
11. Do not pick up anything that is burning or
smoking, such as cigarettes, matches or hot
ashes.
12. Do not use without dust bag and/or filters in
place.
13. Turn off all controls before unplugging.
14. Use extra care when cleaning on stairs.
15. Do not use to pick up flammable or
combustible liquids such as gasoline or use in
areas where they may be present.
16. Do not use your cleaner as a sprayer of
flammable liquids such as oil base paints,
lacquers, household cleaners, etc.
17. Do not vacuum toxic, carcinogenic,
combustible or other hazardous materials such
as asbestos, arsenic, barium, beryllium, lead,
pesticides or other health endangering
materials. Specially designed units are
available for these purposes.
18. Don’t leave the cord lying on the floor once
you have finished the cleaning job. It can
become a tripping hazard.
19. Use special care when emptying heavily
loaded collection bag.
20. To avoid spontaneous combustion, empty
collection bag after each use.
21. The operation of a utility vac can result in
foreign objects being blown into eyes, which
can result in eye damage. Always wear safety
goggles when operating vacuum.
22. STAY ALERT. Watch what you are doing and
use common sense. Do not use vacuum cleaner
when you are tired, distracted or under the
influence of drugs, alcohol or medication
causing diminished control.
Hazardous moving
parts! Keep hands
and feet away from opening. To reduce the risk
of injury from moving parts, unplug before
servicing.
SAVE THESE
INSTRUCTIONS
To avoid electric
shock, do not use
on wet surfaces — do not expose to rain — store
indoors.
Unpacking
Unpack the Indoor/Outdoor Vac from its shipping
carton and remove any loose parts. Before the
shipping carton is discarded, make sure that all
loose parts and literature have been removed.
Assembly
The Indoor/Outdoor Vac comes partially
assembled. Before operation, the handle and
collection bag must be attached.
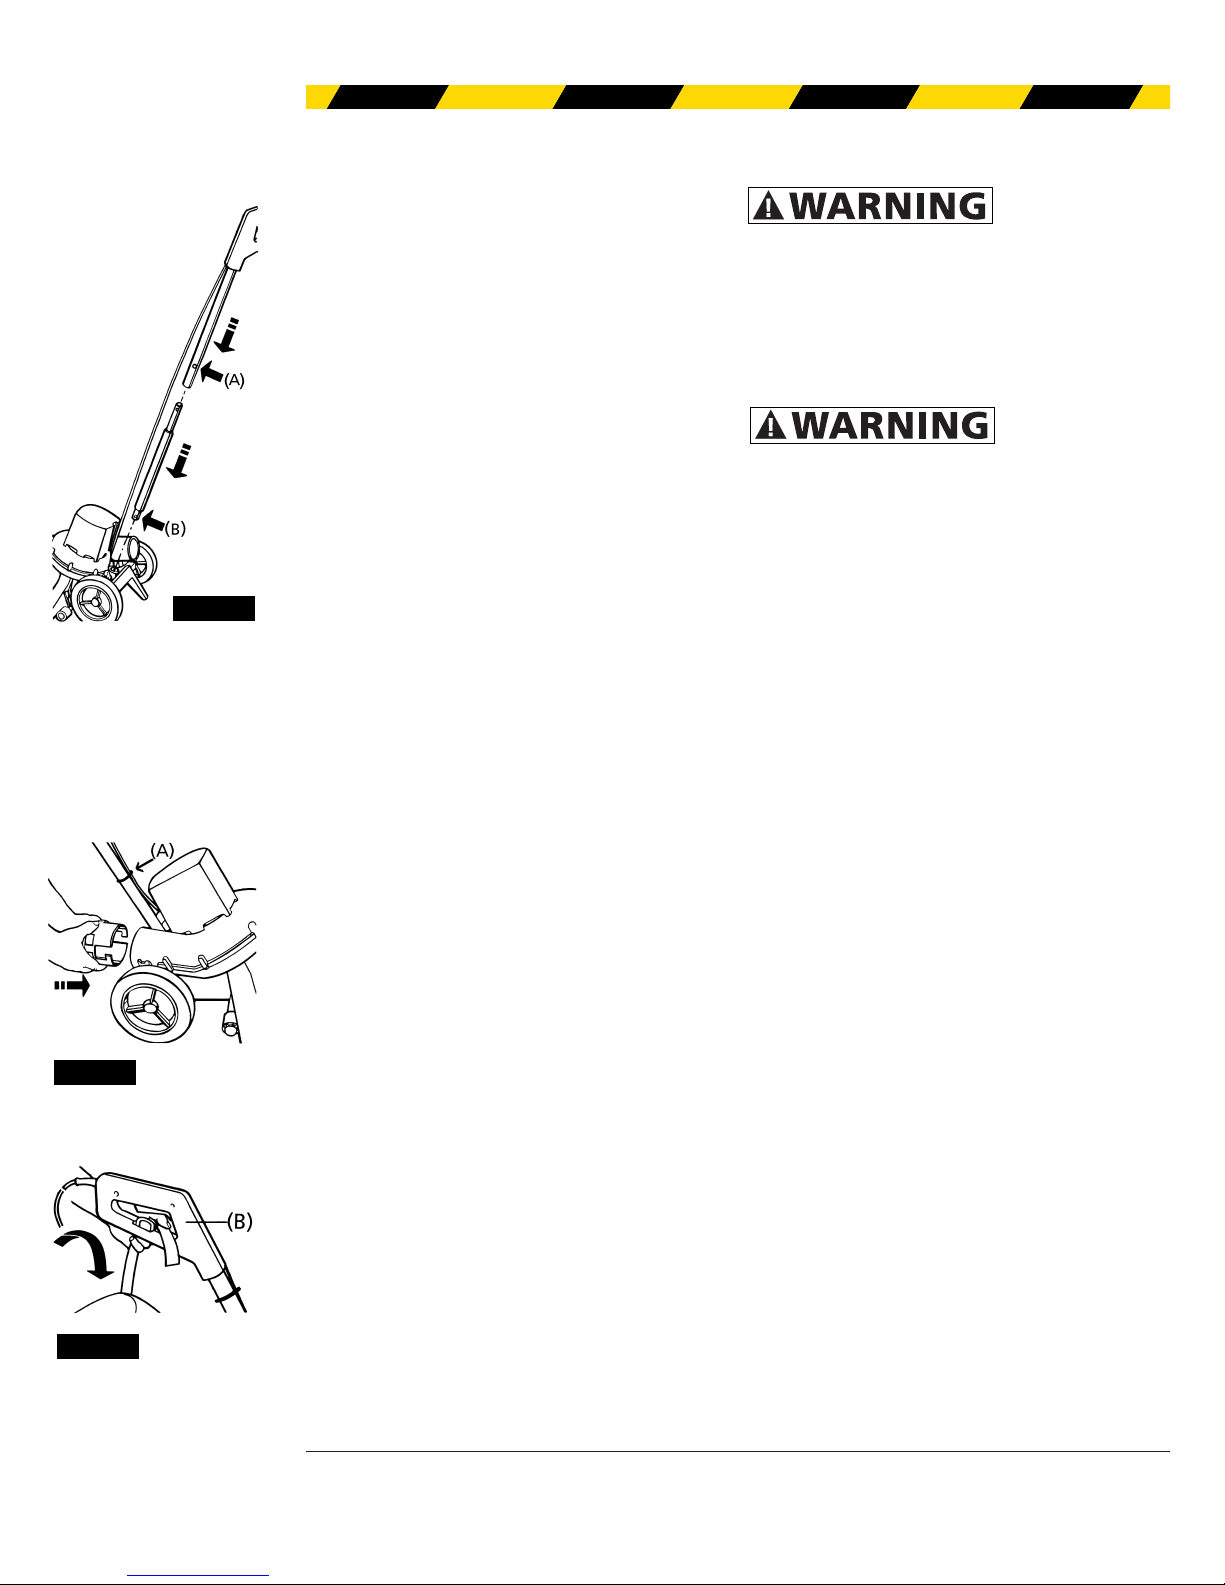
HANDLE ASSEMBLY
1. Attach upper and lower handle sections and
secure at point (A) with
1
/4- 20 x 11/4" carriage
bolt and
1
/4- 20 acorn nut (See Figure 3(A)).
2. Place handle assembly into the motor carriage
unit and secure with
1
/4- 20 x 11/2" Hex Head
machine screw,
1
/4external tooth lockwasher
and
1
/4- 20 Hex nut (See Figure 3(B)).
3. Secure the cable to the tube using the ties
provided (See Figure 4 (A) and 5(B) for tie wrap
locations).
COLLECTION BAG ASSEMBLY
1. Install the exhaust gasket into the discharge
port of the vac.
2. Connect the collection filter bag and adapter to
the discharge port of the vac (See Figure 4).
Twist slightly until locked into position. Secure
power cord with the supplied wire ties (A).
3. Secure the end of the collection bag to the
upper handle (B) with the strap connection
provided (See Figure 5).
EXTENSION CORDS
A 2-conductor, type SJTW-A/SJTW, power supply
cord of adequate size must be used for safety,
and to prevent loss of power and overheating.
2
Figure 3
Figure 4
Figure 5
Use the table below to determine A.W.G. wire
size required.
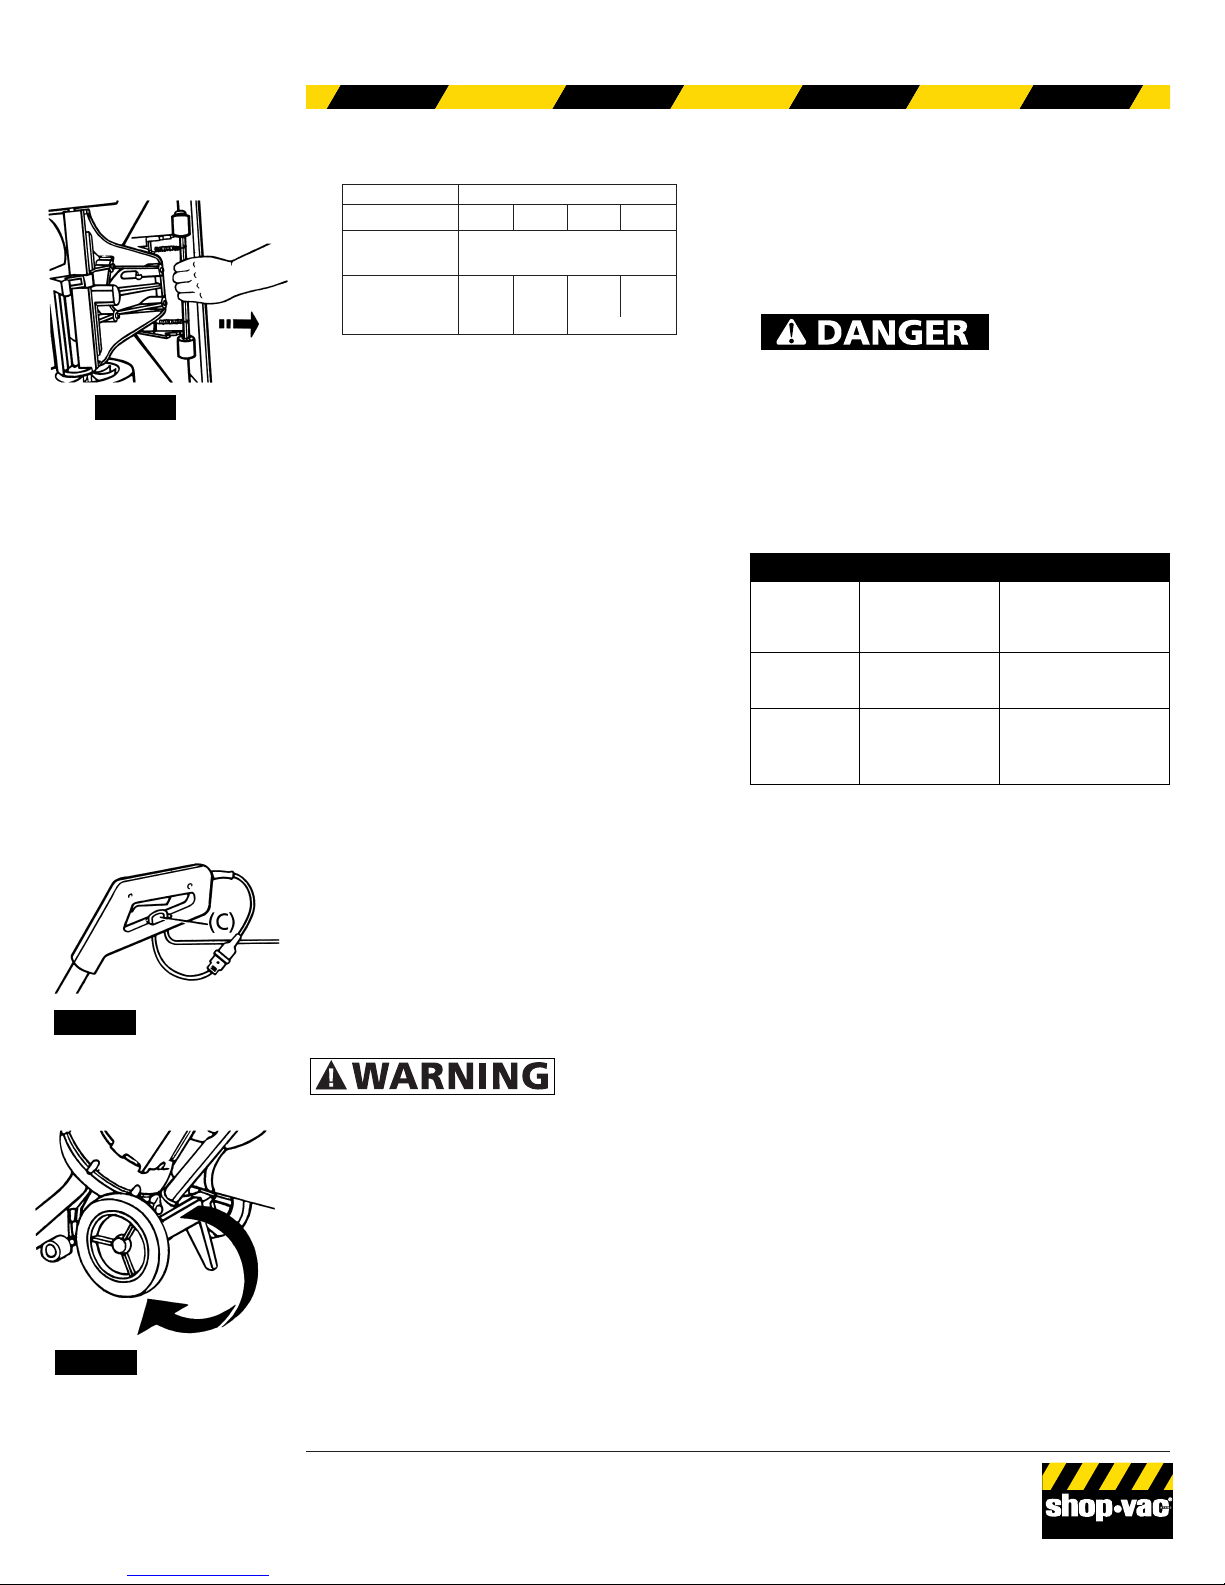
HEIGHT ADJUSTMENT
The Indoor/Outdoor Vac has a 2-position height
adjustment. Adjust the front wheels by placing
the axle in the slot that best suits your cleaning
requirements (See Figure 6).
1. Inspect power cord for loose or damaged
wiring. Make necessary repairs.
Operation
1. Connect cord to a 2-wire extension cord.
2. The cable restraint is designed to hold a loop of
your extension cable. This helps to avoid the
plug and socket connections coming loose if
the cable is pulled accidentally
(See Figure 7(C)).
3. Disengage stand. To disengage, tilt unit
forward slightly. With your toe, gently push the
stand underneath the unit until it snaps into
the retaining spring (See Figure 8).
4. The Indoor/Outdoor Vac has a powerful motor.
It can pick up some objects which may damage
the impeller. Avoid rocks or hardware (screws,
nuts, etc.) when possible.
5. Never operate on a wet surface.
Maintenance
Be sure
to disconnect
power supply before attempting to service or
remove any components.
EMPTYING BAG
The collection bag can be easily emptied by
removing the strap connection from the upper
handle. Next, remove the adapter from the
discharge port and remove collection bag. Unzip
zipper and empty debris into a suitable container.
Note: Make sure exhaust gasket is in place before
reattaching collection bag.
LUBRICATION
No lubrication is necessary as the motor is
equipped with lifetime lubricated bearings.
STORAGE
Empty collection bag before storing. Store
indoors; do not expose to rain.
This
equipment
incorporates parts such as switches, motors, or the
like, that tend to produce arcs or sparks, that can
cause an explosion. Do not pick up flammable,
combustible, or hot materials. Do not use around
explosive liquids or vapors, as electrical devices
produce arcs or sparks which can cause a fire or
explosion – do not use at filling stations or
anywhere gasoline is stored or dispensed.
3
Volts Total length of cord in feet
120V
25 50 100 150
Ampere Rating
More Not More
AWG
Than Than
0-6 18 16 16 14
6-10 18 16 14 12
10-12 16 16 14 12
12-16 14 12 Not recommended
Vacuum will Loose connection Check plug at
not start receptacle
Check cord connection
to motor housing
Weak suction Obstruction Clean nozzle
Full collection bag Clean discharge port
Empty bag
Blowing Obstruction Clean discharge port
debris
Full collection bag Empty bag
Exhaust gasket not Install gasket
installed properly
Troubleshooting Chart
Symptom Possible Cause(s) Corrective Action
Figure 6
Figure 7
Figure 8

— Replacement Parts Illustration
1 Motor Cover 82905-04-3 1
2 Strain Relief Bushing 34004-99-4 1
3 Wire Nut 05001-99-5 2
4 Blower HSG - Upper 82901-02-6 1
5 Motor 13431-97-8 1
6
1
/
4
x 11/4 “ Screw HH AB * 4
7 Blower HSG - Lower 82902-00-8 1
8 10 x 3/4”Screw PH Pan AB * 8
9 Nozzle 82903-21-2 1
10 10 x 3/4”Screw PH Pan AB * 2
11 Axle 11.60 LG 32725-03-8 1
12 Roller 82919-00-2 2
13 Spring 82918-00-4 2
14 Wheel Retainer 32726-00-2 2
15
1
/
4
x 11/4 “ Screw HH AB * 4
16 Carrier 82904-00-4 1
17 Spring for Kickstand 82997-00-8 1
18 Axle 32725-06-1 1
19 Wheel - 7” 82989-00-5 2
20 Wheel Retainer 32726-00-2 2
21 Exhaust Gasket 82975-01-2 1
22 Connector for Bag 82977-00-0 1
23 Collection Filter Bag 82909-28-4 1
24 Kickstand 82996-00-0 1
25
1
/4 - 20 x 11/2HH Mach. Screw
*1
26
1
/4 - 20 Hex Nut * 1
27 Wire Tie 00422-02-2 2
Replacement Parts List
Reference Part
Number Description Number Qty.
28 Handle - Lower 82926-01-5 1
29
1
/4 - 20 Acorn Nut * 1
30 Carriage Bolt 1/4 - 20 x 11/4"* 1
31 Handle - Upper 82916-00-8 1
32 8 x 3/4” PH Pan Hd AB * 4
33 Grip Half-Left 82986-00-1 1
34 Power Cord 04519-96-3 1
35 Switch 12100-22-8 1
36 6 x 3/4” PH Pan Hd AB * 4
37 Cord Clamp 00498-00-6 2
38 Grip Half - Right 82985-00-3 1
39 Cord Protector 12226-00-7 1
40 Intermediate Cord 04520-96-1 1
41
1
/4” External Tooth Lockwasher * 1
Reference Part
Number Description Number Qty.
37
38
36
30
27
13
34
33
2
3
32
40
35
24
22
31
29
23
25
21
20
26
17
19
16
15
4
28
5
1
6
7
18
9
14
12
10
39
11
8
Limited
One-Year
Warranty
Shop-Vac Corporation warrants
the vacuum cleaner contained in
this package for one year from
date of purchase to correct by
repair or parts replacement
without charge any product
defect due to faulty material or
workmanship, provided that the
vacuum cleaner is not used for
rental service. This warranty
does not cover accessories.
Simply return the complete unit,
(transportation prepaid), to the
Authorized Shop-Vac Service
Center nearest you. (A complete
list of Authorized Shop-Vac
Service Centers is included with
each vacuum cleaner.) Shop-Vac
assumes no responsibility for
damage or faulty performance
caused by misuse or careless
handling, or where repairs or
modifications have been made
or attempted by others. Proof of
purchase date is required. This
warranty gives you specific legal
rights, and you may also have
other rights which vary from
state to state.
Figure 9
* Standard hardware item, purchase locally.
41
 Loading...