

Shop-Vac K-SQ14 User Manual
User Manual
Please review before operating vac.
Wet/Dry Vacuum
MODEL K-SQ14
Household and Workshop Use.
ATTENTION!
Read all safety rules carefully before attempting to operate.
Retain for future reference.
DANGER!
Never operate this unit when flammable materials or vapors
are present because electrical devices produce arcs or
sparks that can cause a fire or explosion. NEVER OPERATE
UNATTENDED.
IMPORTANT SAFETY INSTRUCTIONS
When using an electrical appliance, basic precautions should always be followed, including the following:
READ ALL INSTRUCTIONS BEFORE USING THIS APPLIANCE.
WARNING -
1. Do not leave appliance when plugged in. Unplug from
outlet when not in use and before servicing.
2. Do not expose to rain - store indoors.
3. Do not allow to be used as a toy. Close attention is
necessary when used by or near children.
4. Use only as described in this manual. Use only
Manufacturer's recommended attachments.
5. Do not use with damaged cord or plug. If appliance is
not working as it should, has been dropped, damaged,
left outdoors or dropped into water, contact Shop-Vac
Corporation for assistance.
6. Do Not: pull or carry by cord, use cord as a handle,
close a door on cord or pull cord around sharp edges or
corners. Do not run appliance over cord. Keep cord
away from heated surfaces.
7. Do not unplug by pulling on cord. To unplug, grasp the
plug; not the cord.
8. Do not handle plug or appliance with wet hands.
9. Do not put any object into openings. Do not use with
any openings blocked; keep free of dust, lint, hair and
anything that may reduce air flow.
10. Keep hair, loose clothing, fingers and all parts of body
away from openings and moving parts.
11. Do not pick up anything that is burning or smoking,
such as cigarettes, matches or hot ashes.
12. Do not use without dust bag and/or filters in place.
13. Turn off all controls before unplugging.
14. Use extra care when cleaning on stairs.
15. Do not use to pick up flammable or combustible liquids
such as gasoline or use in areas where they may be
present.
16. Do not use your cleaner as a sprayer of flammable
liquids such as oil base paints, lacquers, household
cleaners, etc.
17. Do not vacuum toxic, carcinogenic, combustible or
other hazardous materials such as asbestos, arsenic,
barium, beryllium, lead, pesticides or other health
TO REDUCE THE RISK OF FIRE, ELECTRIC SHOCK OR INJURY:
endangering materials. Specially designed units are
available for these purposes.
18. Do not pick up wood or coal ash; soot, cement, plaster
or drywall dust without cartridge filter or collection filter
bag in place. These are very fine particles that may
pass through the foam and disc filters and affect the
performance of the motor or be exhausted back into
the air.
19. Do not leave the cord lying on the floor once you have
finished the cleaning job. It can become a tripping
hazard.
20. Use special care when emptying heavily loaded tanks.
21. To avoid spontaneous combustion, empty tank after
each use.
22. The operation of a utility vac can result in foreign
objects being blown into eyes, which can result in eye
damage. Always wear safety goggles when operating
vacuum.
23. STAY ALERT. Watch what you are doing and use
common sense. Do not use vacuum cleaner when you
are tired, distracted or under influence of drugs,
alcohol or medication causing diminished control.
24. The appliance is not intended for use by young children
or infirmed persons without supervision.
25. The appliance is not intended for use by persons
(including children) with reduced physical, sensory or
mental capabilities, or lack of experience and
knowledge, unless they have been given
supervision or instruction concerning use of the
appliance by a person responsible for their safety.
26. Young children should be supervised to ensure that
they do not play with the appliance.
27. If the supply cord is damaged, it must be replaced by
the manufacturer or its service agent or a similarly
qualified person in order to avoid a hazard.
SHOP-VAC AUSTRALIA PTY LTD
Patents Issued and Pending.
SAVE THESE INSTRUCTIONS
WARNING - DO NOT LEAVE VACUUM UNATTENDED WHEN IT IS PLUGGED IN AND/OR OPERATING.
UNPLUG UNIT WHEN NOT IN USE.
LIMITED THREE-YEAR WARRANTY
Shop-Vac warrants the vacuum cleaner for three years from the date of purchase to correct by repair or parts replacement without charge, any
product defect due to faulty material or workmanship provided that the vacuum cleaner is not used for rental service. This warranty does not
cover accessories. Simply return the complete unit, with a copy of the receipt, to the place where you purchased your vacuum cleaner. Shop-Vac
assumes no responsibility for damage or faulty performance caused by misuse or careless handling, or where repairs have been made or
attempted by others. Proof of purchase date is required. This warranty gives you specific legal rights, and you may also have other rights which
vary from state to state. Our goods come with guarantees that cannot be excluded under the Australian Consumer Law. You are entitled to a
replacement or refund for a major failure and for compensation for any other reasonably foreseeable loss or damage. You are also entitled to have
the goods repaired or replaced if the goods fail to be of acceptable quality and the failure does not amount to a major failure.
DOUBLE INSULATION
Do not operate if cord, plug or appliance is damaged. In your double insulated appliance, two systems of insulation are provided instead of
grounding. No grounding means is provided nor should a means for grounding be added to the appliance.
NOTE: If power cord needs to be replaced, use only a Shop-Vac Service Agent.
EXTENSION CORDS
Use only a cord extension set that complies with AS3199. Conductor size must be 1.0mm
from 25 - 32 metres.
NOTE: STATIC SHOCKS ARE COMMON IN DRY AREAS OR WHEN THE RELATIVE HUMIDITY OF THE AIR IS LOW. THIS IS ONLY TEMPORARY AND
DOES NOT AFFECT THE USE OF THE APPLIANCE. TO REDUCE THE FREQUENCY OF STATIC SHOCKS IN YOUR HOME, THE BEST REMEDY
IS TO ADD MOISTURE TO THE AIR WITH A CONSOLE OR INSTALLED HUMIDIFIER.
2
for length up to 25 metres and 1.5mm2 for length
UNPACKING AND SET-UP
Remove tank cover and any accessories which may have been
1.
shipped in the tank.
2.
Before replacing tank cover, please refer to DRY PICK UP or WET
PICK UP OPERATION in this manual to ensure you have the proper
filters installed for your cleaning operation.
Replace tank cover.
3.
4.
Slip cleaner end of flexible hose into the intake port.
5.
Attach the extension wands to the accessory end of the hose.
Twist slightly to tighten the connection.
6.
Attach one of the cleaning accessories (depending on your
cleaning requirements) to the extension wand. Twist slightly to
tighten the connection
7.
Plug the cord into the wall outlet. Your cleaner is ready for use.
I = ON O = OFF
MOUNTING WALL BRACKET
1. Select mounting location at a wall stud and/or provide a surface which is strong enough to hold the combined weight of the vacuum with a
full tank of debris and accessories.
WARNING - INADEQUATE MOUNTING COULD ALLOW THE UNIT TO FALL, CAUSING INJURY AND/OR
DAMAGE TO THE UNIT.
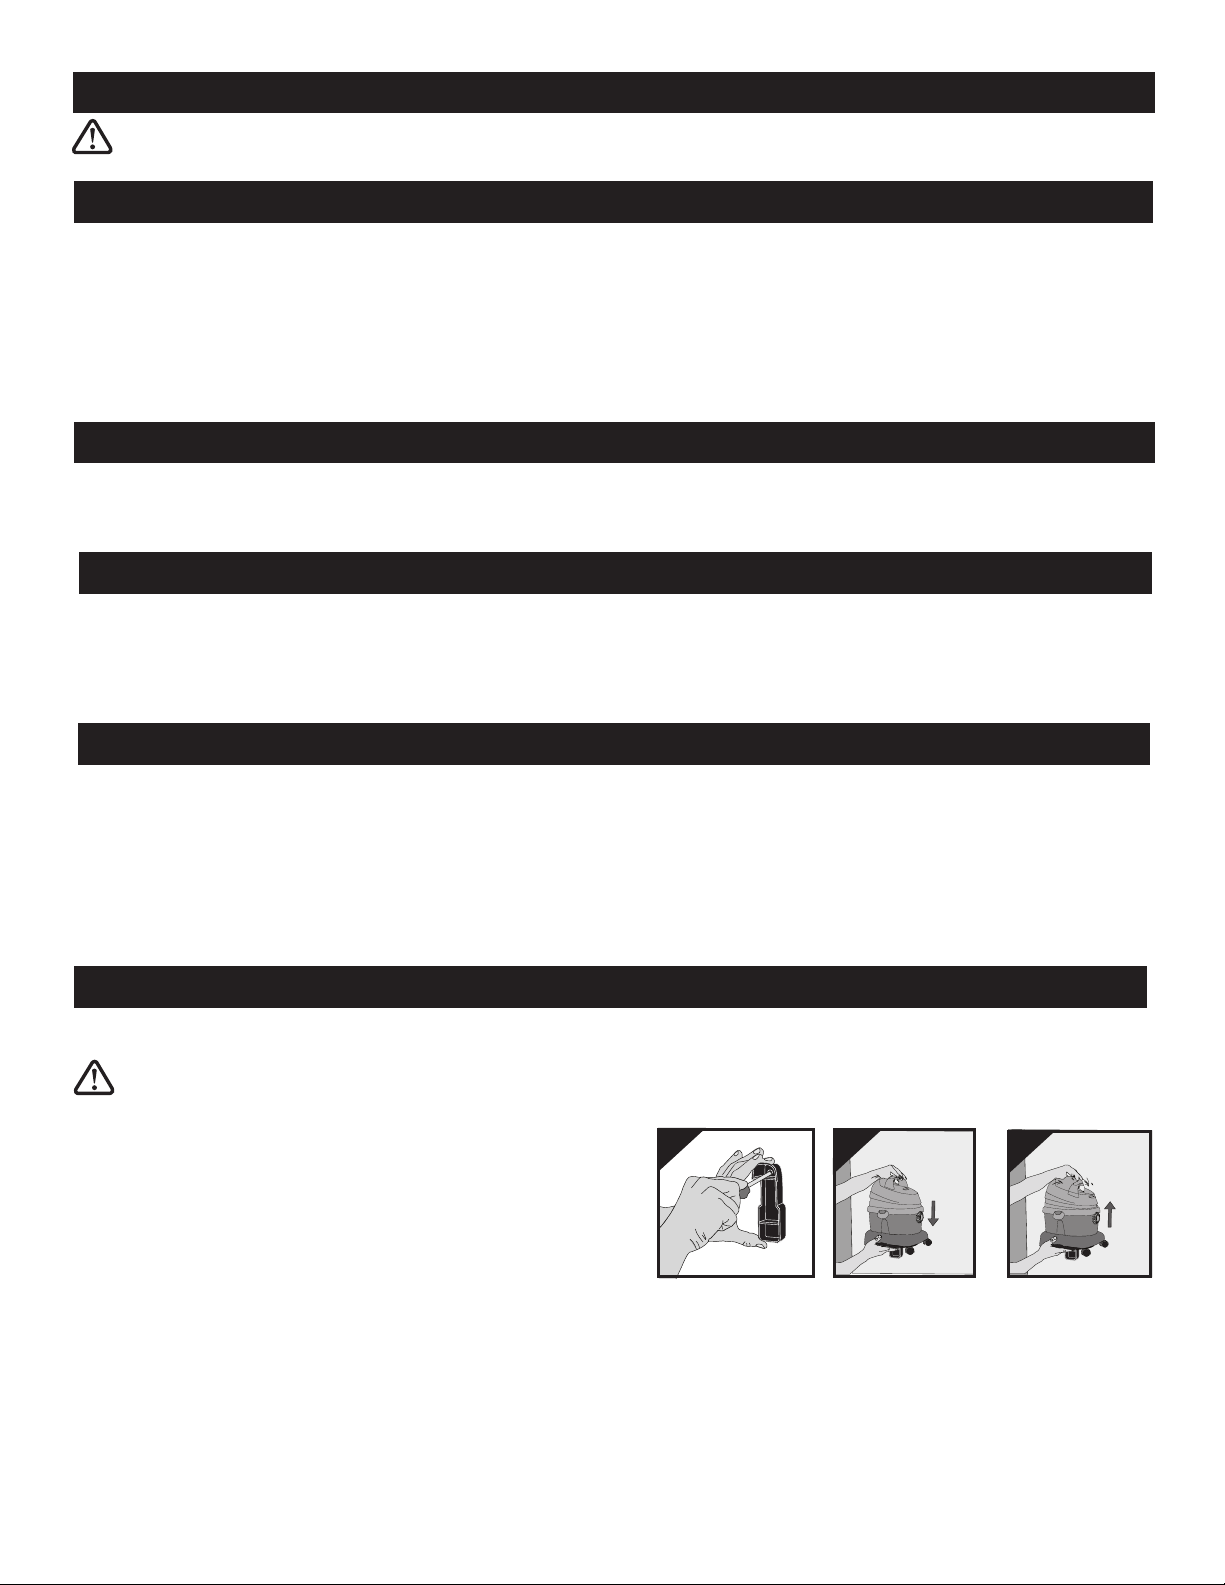
2. Secure wall bracket to mounting surface with 2 screws provided or
other suitable fastener. (NOTE: The screws provided are adequate
ONLY for mounting into wood. Be sure to use the proper, suitable
fasteners for mounting vacuum to a surface other than wood.) Be sure
wall bracket is level (Figure 1).
3. Install vacuum by aligning groove on either side of tank to engage as
the vacuum is lowered onto the wall bracket (Figure 2).
4. To avoid possible injury or damage by dislodging vacuum from wall bracket or dropping tank during unlatching, always remove the entire
vacuum from wall bracket and set on floor to empty tank or service filter.
5. Before removing vacuum from wall bracket, check to make sure tank cover is secured to tank. To remove vacuum from wall bracket, grasp
top handle with one hand and tank bottom with other hand. Slide vacuum off of wall bracket by lifting straight up on vacuum (Figure 3).
1
2
3
 Loading...