

Shoprider Cadiz S-889SL User Manual
Cadiz
Model: S-889SL
USER MANUAL
Please ensure that this manual is read and understood before
using the scooter.
Aug 2012
KB&S16440

Contents Page
Introduction 3
Intended Use 3
Feature Guide 4
Safety Advice 5
Adjustments
Tiller angle 6
Seat slide 6
Seat swivel 6
Seat height 6
Armrest width 7
Dis-assembly 7
Tiller Controls 8 & 9
Freewheel Operation 9
Starting to Drive
Getting Started 10
Moving Off 10
Steering 10
Reversing 10
Gradients and Kerbs 10 & 11
Technical Specification 11
Batteries and Battery Charger 12
Maintenance 13 & 14
Troubleshooting
Circuit Breaker 14
Fuses 14
Check List 15
Further Information 15
Warranty
2

Introduction
Congratulations on your purchase of the
Cadiz
scooter. This scooter
incorporates comfort and style with the latest in technology. The large tyres,
powerful motor and full suspension ensure a comfortable ride. It is also
complemented with a full light set that includes front and rear lights, indicators
and hazard warning lights enabling it to be used on public roads.
Intended Use
The
Cadiz
was carefully designed for persons with limited mobility. It is for
predominantly outdoor use by a single occupant up to a maximum weight of
160kg / 25st.
The intended user should possess the necessary physical, visual and cognitive
skills to operate the scooter safely. If you have any doubt, please consult your
dealer / prescriber.
Note: Persons with lower body amputations should not use this device
unless evaluated with artificial limbs fitted, as stability may be
compromised due to an irregular centre of gravity.
The
Cadiz
is a Class 3 invalid carriage and is not legally defined as a motor
vehicle, and therefore the user is not required to possess a driving license. It is
exempt from MOT certification. It must however be registered with the DVLA
and display a nil duty vehicle license (tax disk).
A Class 3 invalid carriage can only be used by a person suffering from some
physical defect or physical disability aged 14 or over, or by an able bodied
person who is demonstrating a vehicle before sale, training a disabled user or
taking the vehicle to or from a place for maintenance or repair.
A Class 3 invalid carriage can be used on public roads, but not on motorways,
cycle lanes or bus lanes. When used on pavements or in pedestrian areas the
scooter MUST be switched to its lower speed limit (see page 8). It is not
recommended that the scooter is used on a dual carriageway, but if it is
necessary an amber coloured flashing beacon must be used to warn other road
users of your presence.
It is important that the user reads and understands the safety advice given within
this manual before attempting to operate the product to avoid possible injury to the
user or bystanders and avoid damage to the scooter or surrounding property.
3
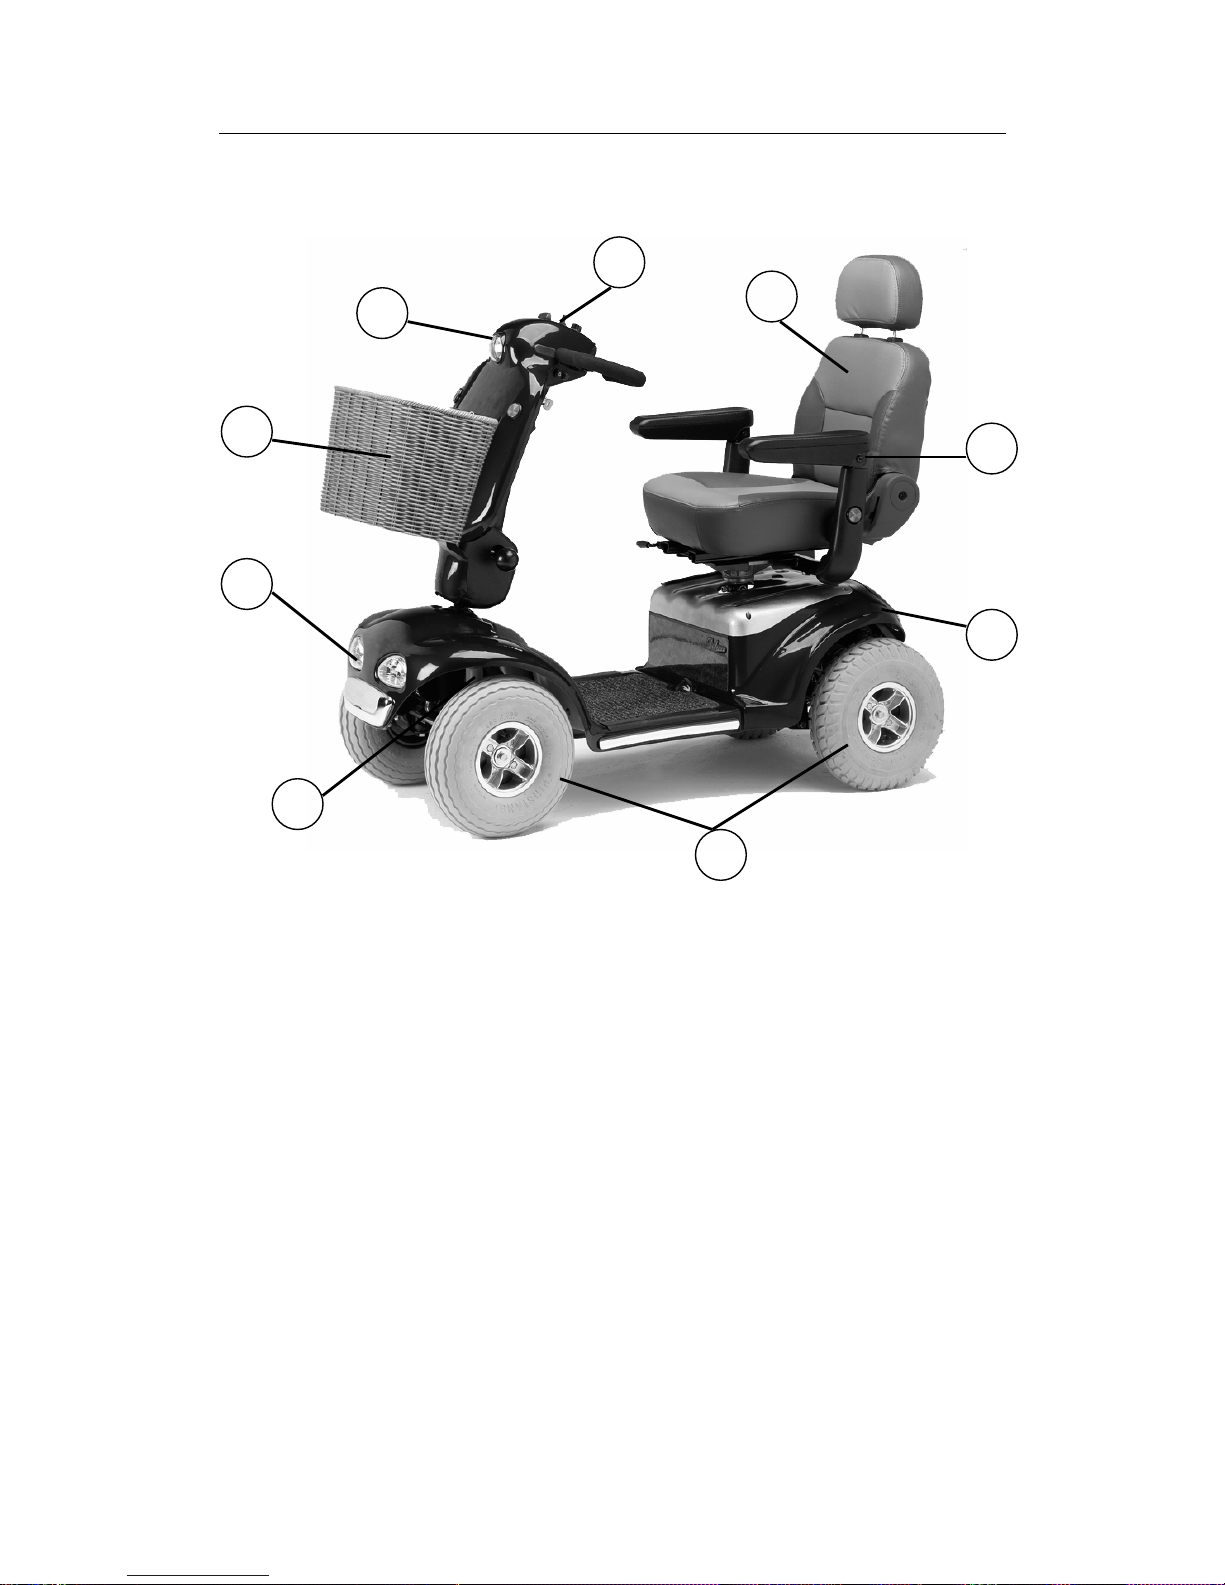
Feature Guide
1. Upper headlight
2. Adjustable angle ‘Delta’ type tiller control
3. Fully adjustable ‘Captains’ seat
4. Width adjustable armrests
5. Rear lights with indicators
6. 13” non marking wide profile pneumatic tyres
7. Full Suspension
8. Lower headlights
9. Front basket
1
2 3 5 6 7 9 8 4
4

Safety Advice
DO:
Read this manual carefully before using your scooter.
Turn the power off when transferring to and from the scooter.
Select a slow speed when going down gradients or over uneven ground.
Keep your feet inside the scooter whilst driving.
Ensure the batteries are fully charged before your journey.
Avoid rough or soft terrain and long grass wherever possible.
Be aware of other road users and pedestrians. If driving on the road you
MUST adhere to the Highway Code.
Use lights whenever necessary.
Turn the power off when not in use.
Follow the maintenance guide to ensure safe operation of the scooter.
Always remove the keys if leaving the scooter unattended. Unauthorised
persons/children may use the scooter resulting in injury.
DO NOT:
Carry passengers.
Carry bags, luggage or walking aids on or near the tiller control other
than in the basket provided.
Exceed inclines over 8° (14%).
Traverse inclines.
Attempt inclines if the surface is slippery.
Turn sharply at full speed.
Exit or enter the scooter unless the power is switched off.
Switch off the power whilst driving – this will cause the scooter to stop
abruptly. (see emergency procedures – page 16)
Use the scooter where you cannot safely or legally walk.
Attempt to climb kerbs over 10cm (4”) high.
Use the scooter in high winds (38mph+) if fitted with a canopy.
Use the scooter if under the influence of alcohol or any medication.
Use a mobile phone whilst driving.
Attempt to negotiate steps or escalators.
Transport the scooter with the user onboard.
Attempt to tow any other devices.
Exceed the stated weight limit.
Connect any other devices to the batteries as this could cause permanent
damage and void your warranty.
Use any other batteries/charger other than those supplied by RMA.
Travel through water or over soft terrain (mud, sand etc.).
Lift the scooter by the chassis covers or any plastic part.
Store the scooter outdoors uncovered for any period of time. We
recommend that the scooter is stored in a dry garage, shed or porch to
prevent the possibility of any moisture ingress.
Every care has been taken to ensure that your scooter will give you safe, reliable
service provided you adhere to the advice given above.
5
Adjustments
Tiller Angle Adjustment
On the left side of the tiller base is a black hand
knob. Pull the knob outwards to release the pin and
select the required angle. Release the knob and
ensure the pin is securely located in one of the five
adjustment holes.
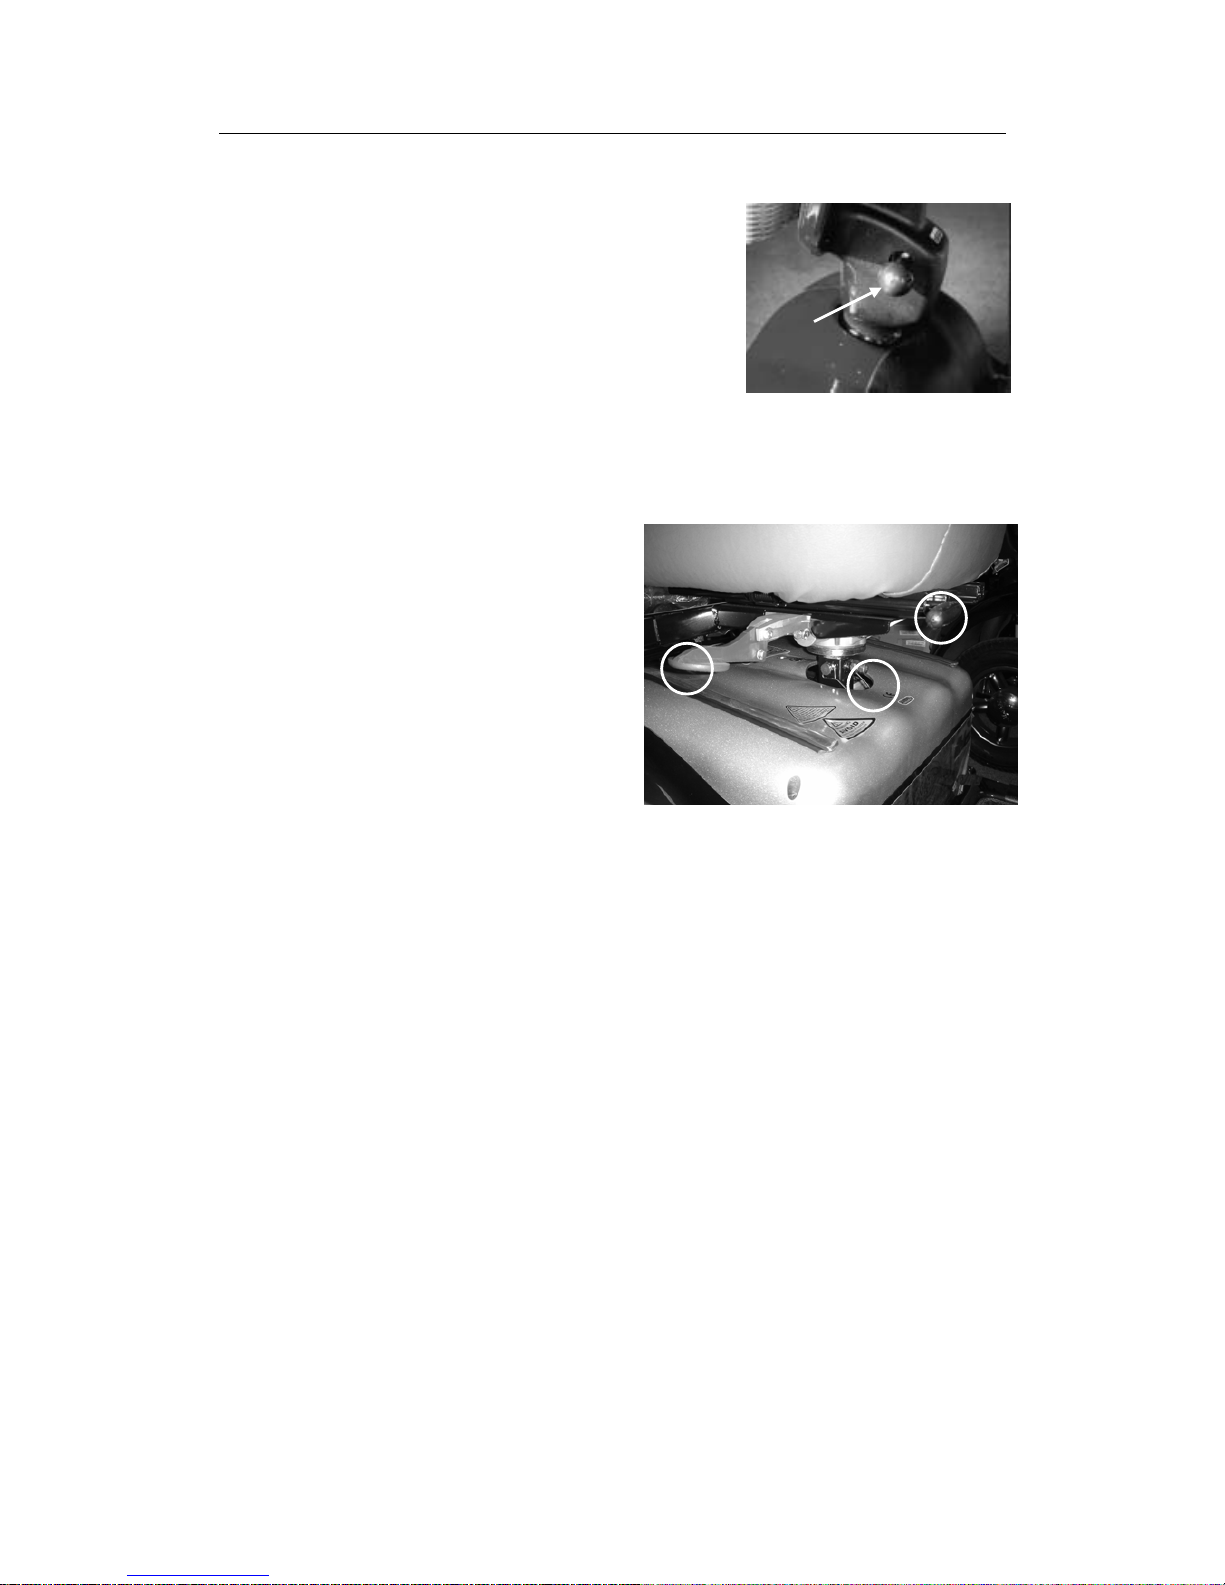
Seat Slide Adjustment
Your Captain seat can move forward or
backwards similar to a car seat. Lift lever
(1) up and slide the seat to the required
position. Release the lever to lock it back
in place.
Seat Swivel adjustment
For easy transfers, the seat can be swivelled to the side. Lift the red lever (2) and
carefully rotate the seat to get on or off. Pulling up on this lever and the seat
simultaneously will allow the seat to be removed.
Always ensure the seat is locked in the forward facing position when in use.
DO NOT attempt to drive when swivelled as this may result in injury.
Seat Height Adjustments
First, remove the seat by pulling up on the red lever and lifting the seat
simultaneously. The seat height may be adjusted by undoing the bolt (3) and
removing the locking pin. Adjust the seat adapter to the required height. Reinsert the locking pin fully and ensure the lock wire is in place. Re-tighten the
bolt and replace the seat.
Red Lever
1
3 2
6
 Loading...