

ShoppingAll SA-LH08 User Manual
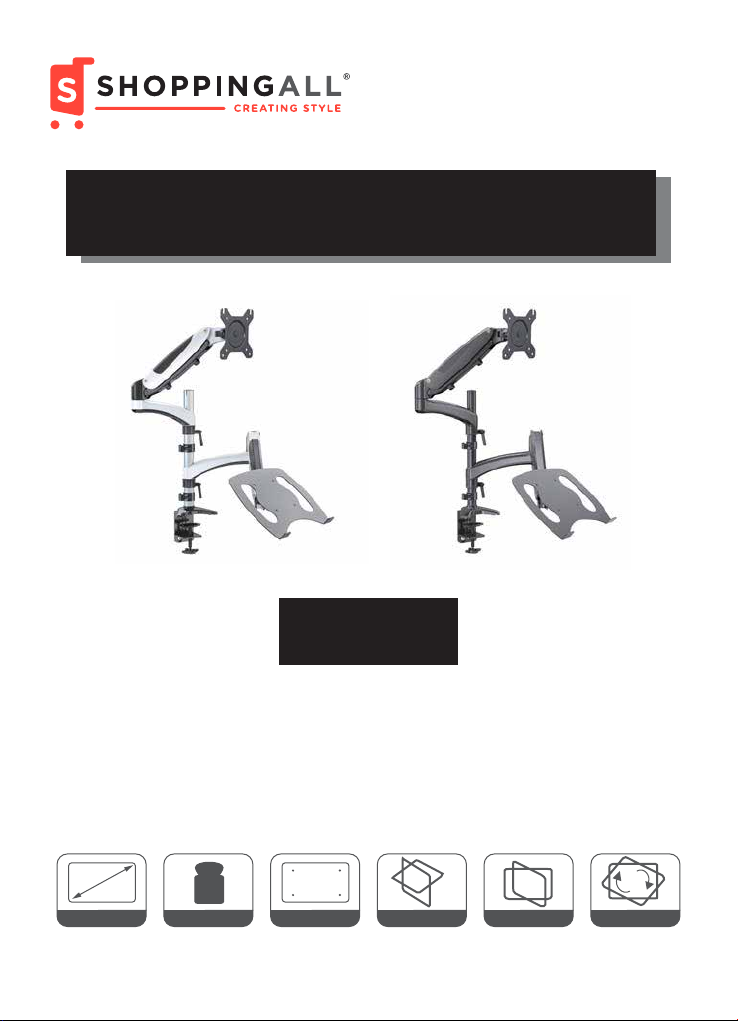
Gas Spring Monitor Desk mount
SA-LH08
Thank you for choosing our p roduct. ShoppingAll is dedicated to providing
the highest level of quality and service to our customers.
Please do not hesitate to contact us if you have any issue.
Call: +1 (855) 266-9166
Mon-Fri 8:00am – 9:00pm (Eastern Time) (Canada/USA)
Email: Support@ShoppingAll.com Website: www.ShoppingAll.com
Load
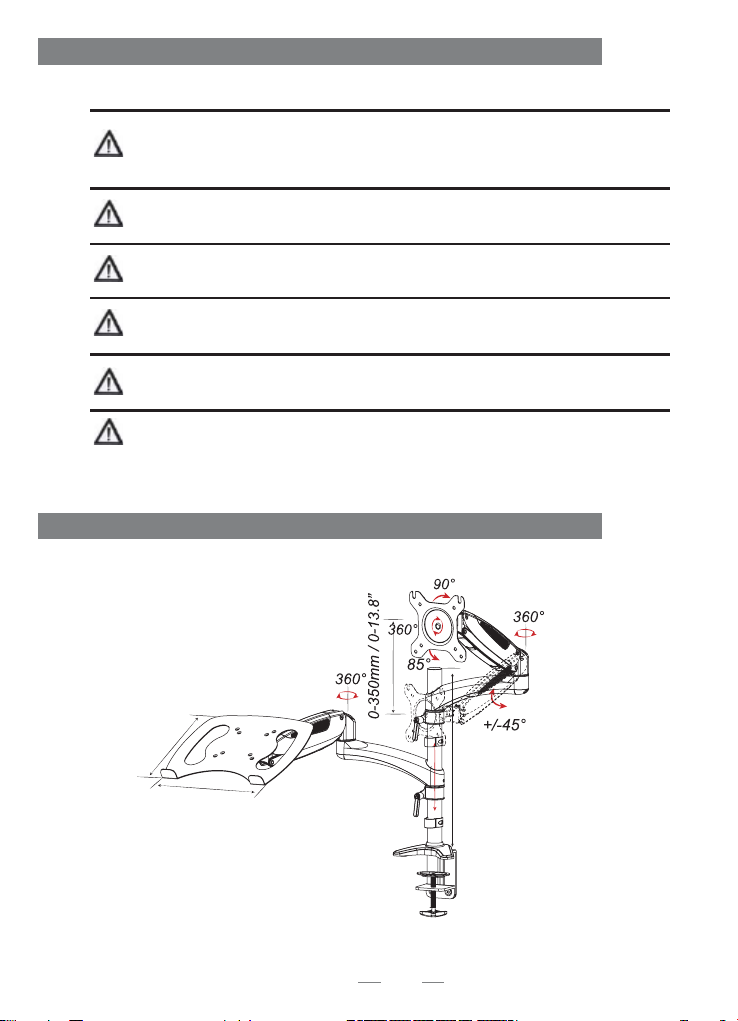
15” - 32” 75x75, 100x100
0-8kgs/0-17.6lbs
VESA
Tilt
-90°/+85°
Swivel
180°
Rotate
360°
WARNING STATEMENTS
Warning
Prior to the installation of this product, the installation instruction must be read
and completely understood. Failure to do so may result in personal injury ,
property damage or voiding of factory warranty.
Do not install on a structure that is prone to vibration, or movement. Reinforce
the structure as required before installation.
Recommended mounting surfaces: Wooden studs or solid-flat concrete. If the mount
is to be installed on any surface other than wooden studs, use suitable hardware.
Pay attention to the weight capacity of the mount. Exceeding the limitation can
result in impairment or serious injury and property damage.
Never operate the mount if parts are missing or damaged. Contact your local
service center for warranty service.
Do not use this product for any purpose or in any configuration not explicitly
specified in this instruction. We hereby disclaim any and all liability for injury or
damage arising from incorrect assembly, Incorrect mounting, or incorrect use of
this product.
PRODUCT LINE GRAPH
Max.242/9.5”
Max.320/12.6”
400mm/15.7”
01
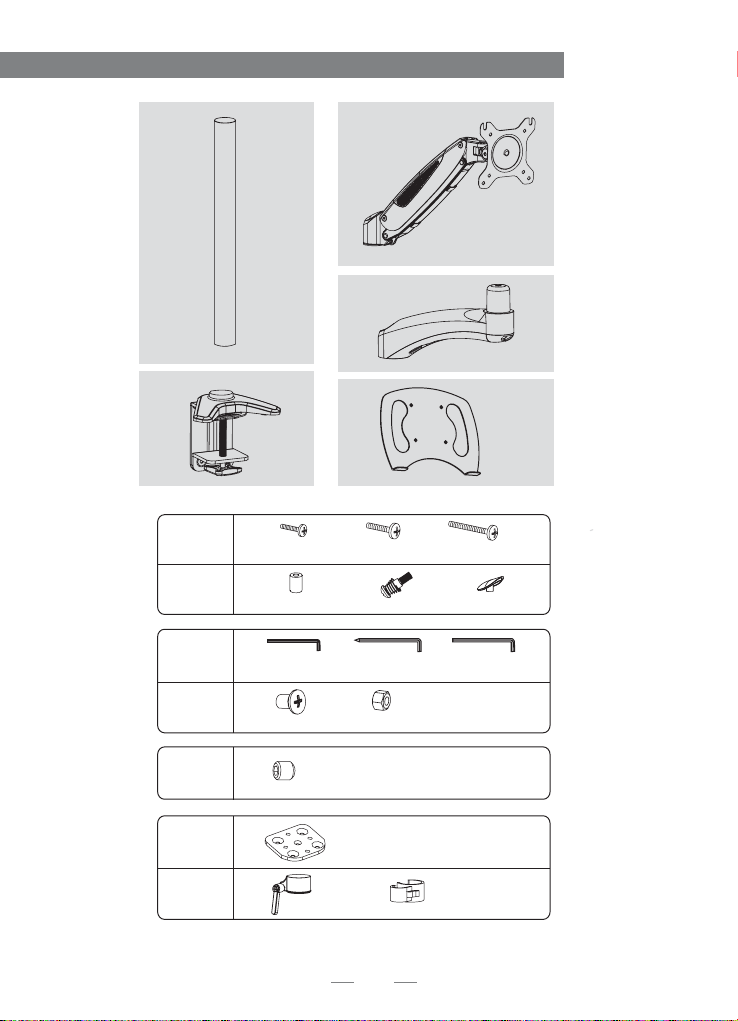
PARTS INCLUDED
(x1)
(x2)
b
A
B
C
D
Extra screw
E
F
a
(x1)
(x2)
d
M4x8 (x8) M4x12 (x8) M4x30 (x8)
12X5.8X16 (x8)
(x1)
S=3mm
M5x12(x4)
(x2)
(x2)
S=4mm
M5(x4)
(x1)
M6x25 (x2)
(x1)
S=5mm
(x2)
c
e
(x2)
(x1)
02
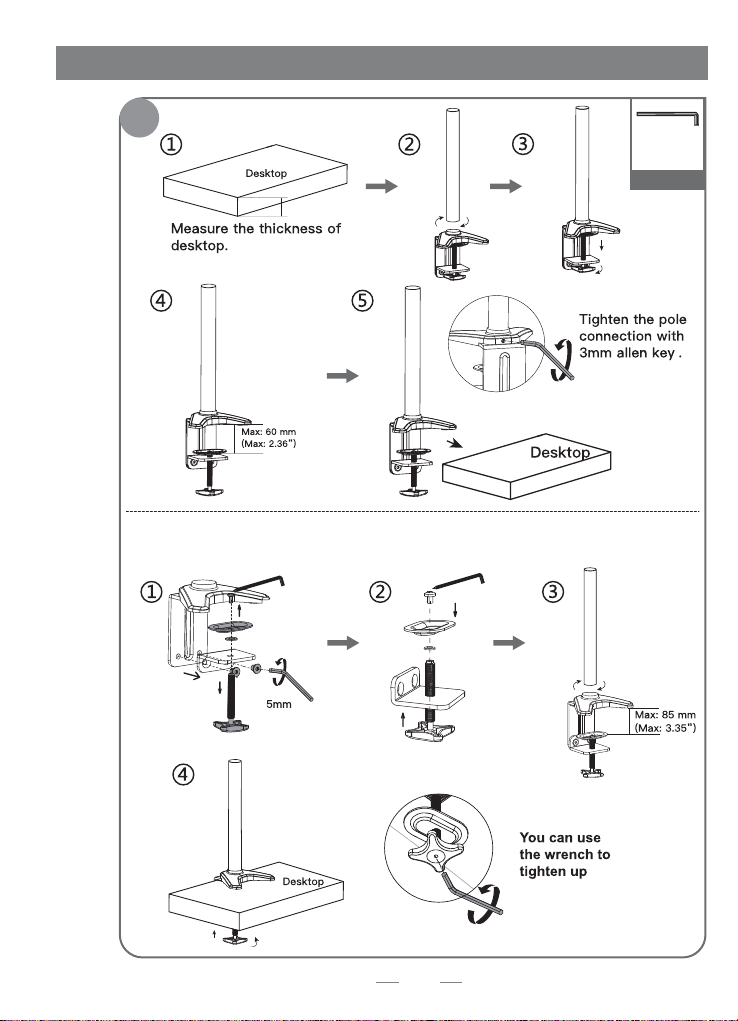
Clamp Installation Steps
1
S=3mm
S=3mm
S=4mm
S=5mm
C
For desk thickness more than 2.36"(60mm) but within 3.35"(85mm), remove clamp
screw and attachment entirely and reattach clamp screw with bottom plate
upside-down.
S=4mm
S=4mm
03
S=5mm
 Loading...