

Page 1
Table Saw Extension Table Kit
ITEM D3108
ASSEMBLY INSTRUCTIONS
COPYRIGHT © NOVEMBER, 2002 BY WOODSTOCK INTERNATIONAL, INC.
P.O. Box 2309, Bellingham, WA 98227
WARNING: NO PORTION OF THIS MANUAL MAY BE REPRODUCED IN ANY SHAPE
OR FORM WITHOUT THE WRITTEN APPROVAL OF WOODSTOCK INTERNATIONAL, INC.
PRINTED IN TAIWAN
Page 2

INTRODUCTION
Thank you for purchasing Woodstock
International’s Table Saw Extension Table. This
table is designed to fit most 27" wide table saw
extension kits.
Woodstock is pleased to provide these instructions
to assist in the installation process. They represent
our effort to offer the finest documentation avail
able. If you feel that there are areas which could
be improved, we encourage you to write us with
your comments at the following address:
Step 2. Mount the extension rail and rail support
to the table saw, parallel to the surface of the table
before beginning. Note
—the right-hand table
saw wing must be removed before you attempt to
install the extension table.
Step 3. Place the extension table upside down.
Step 4. At the corners of one end of the table,
-
position each leg upright 90˚ to the bottom of the
table, and mount the legs with (8) #8 x
screws into the bottom of the table.
5
⁄8" wood
Technical Documentation
Woodstock International, Inc.
P.O. Box 2309
Bellingham, WA 98227
Tel: (360) 734-3482
Fax: (360) 671-3053
ASSEMBLY
Step 1. Carefully remove the box contents, and
lay them out for identification. You should have:
Extension Table .......................................1
Leg ..........................................................2
Leg Brace ................................................
Hardware Bag
5
-Wood Screw #8 x
-Self-Tapping Screw
-Flat Washer
-Hex Bolt
-Flat Washer
-Hex Nut
-Hex Bolt
-Hex Nut
1
-Foot
⁄2"-12 unc ................................2
1
3
⁄8"-16 x 13⁄4" ....................8
3
3
⁄8"-16 ................................8
3
⁄8"-16 x 3⁄4" ......................2
1
⁄2"-12 ................................2
⁄8" ......................8
1
⁄4" x 3⁄4" ..........2
⁄4" ................................2
⁄8" ...............................22
2
Step 5. Secure the braces to the legs with the (2)
3
⁄8"-16 x 3⁄4" hex bolts and (2) 3⁄8" flat washers.
Step 6. Secure the braces to the table with the
(2) 1⁄4" x 3⁄4" self-tapping screws and (2) 1⁄4" flat
washers.
Step 7. Thread the (2)
1
⁄2"-12 foot, then thread the feet onto the end of
1
⁄2"-12 hex nuts onto each
the legs.
Step 8. With a helper, place the extension table
(with attached legs) upright between the fence
rails, so that the side of the table without legs butts
up against the edge of the table saw table.
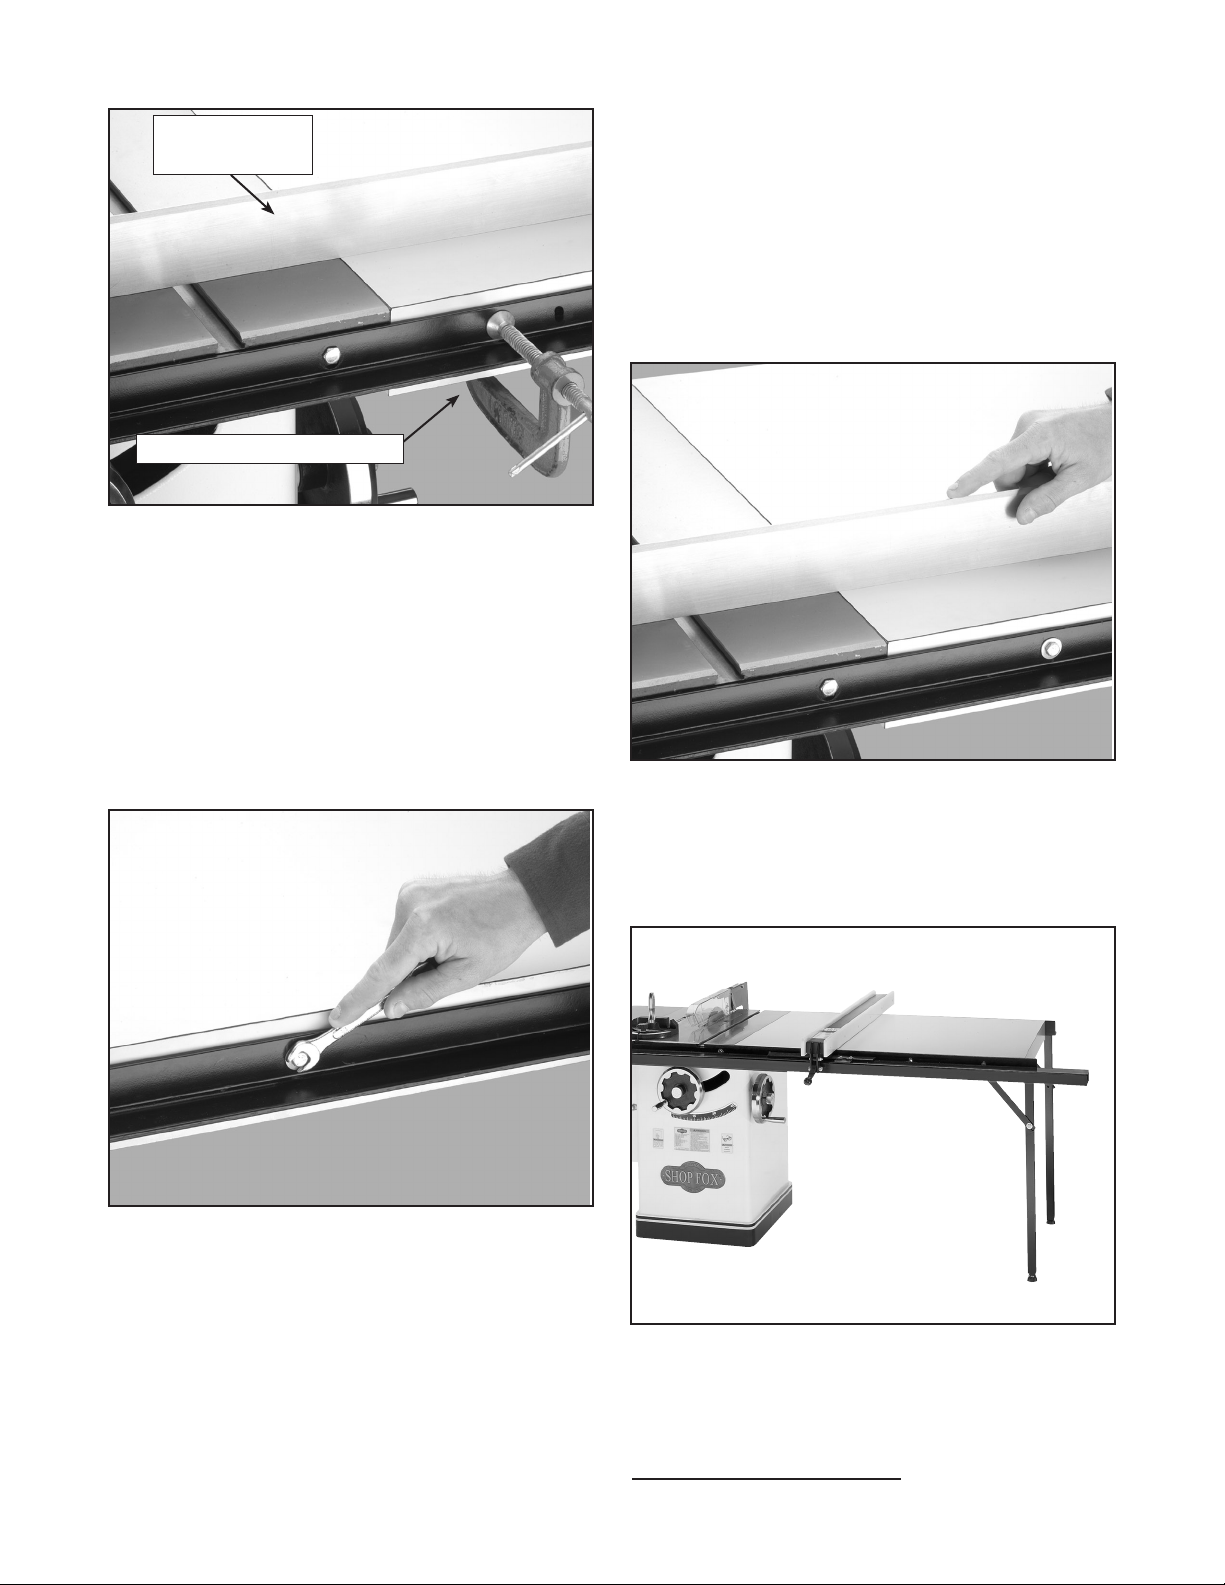
Step 9. Clamp the extension table to the rails to
hold it in position.
Step 10. Use a straightedge to make sure the
extension table is even with the saw table across
its entire length.
In the event that any hardware is missing, please
feel free to contact our customer service depart
ment, or for the sake of expediency, you can find
these common items at your local hardware store.
-
Page 3
Straightedge
Against Table
Table Clamped To Rails
Step 11. Attach the rails to the table with the (8)
3
⁄8"-16 x 13⁄4" hex bolts, (16) 3⁄8" washers and (8)
3
⁄8"-16 nuts. The assembly order should be hex
bolt, flat washer, rail, extension table, flat washer,
and hex nut. Note—some assemblies will require
3
⁄8" holes drilled through the table to match fence
rail holes for mounting.
Step 12. Use the straightedge to verify that the
extension table is flush with the saw table and is
even along its entire length. Minor adjustments
may be made by adjusting the rail-to-table hex
1
bolts or by rotating the feet. Note—lock the
hex nuts to keep the feet in place after adjustments
are final.
⁄2"-12
Step 13. Mount the fence to the rails, and slide
the fence back and forth to ensure proper opera
tion.
If you have any questions or need help
troubleshooting, please contact Woodstock
International Service and Support at 1-360734-3482 or send e-mail to:
[email protected].
-
Page 4

WARRANTY
Woodstock International, Inc. (Woodstock) warrants this product against defects in workman
ship and materials under normal use and service
for a period of one year. This warranty extends
to the original purchaser from the date of pur
chase. This warranty does not apply to defects
due directly or indirectly to misuse, abuse, neg
ligence, accidents, repairs or alterations or lack
of maintenance.
This is Woodstock’s sole written warranty and
any and all warranties that may be implied by
law, including any merchantability or fitness,
for any particular purpose, are hereby limited
to the duration of this written warranty. We do
not warrant or represent that the merchandise
complies with the provisions of any law or
acts. In no event shall Woodstock’s liability
under this warranty exceed the purchase price
paid for the product and any legal actions
brought against Woodstock shall be tried in
the State of Washington, County of Whatcom.
We shall in no event be liable for death, injuries
-
to persons or property or for incidental, contin
gent, special or consequential damages arising
from the use of our products.
To take advantage of this warranty, the product
-
or part must be returned to the original place of
purchase. Proof of purchase must accompany
the merchandise. Woodstock reserves the right
to change specifications at any time since we
constantly strive to achieve better quality equip
ment.
We make every effort to ensure that our products
meet high quality and durability standards and
we hope you never need to use this warranty.
-
-
 Loading...