

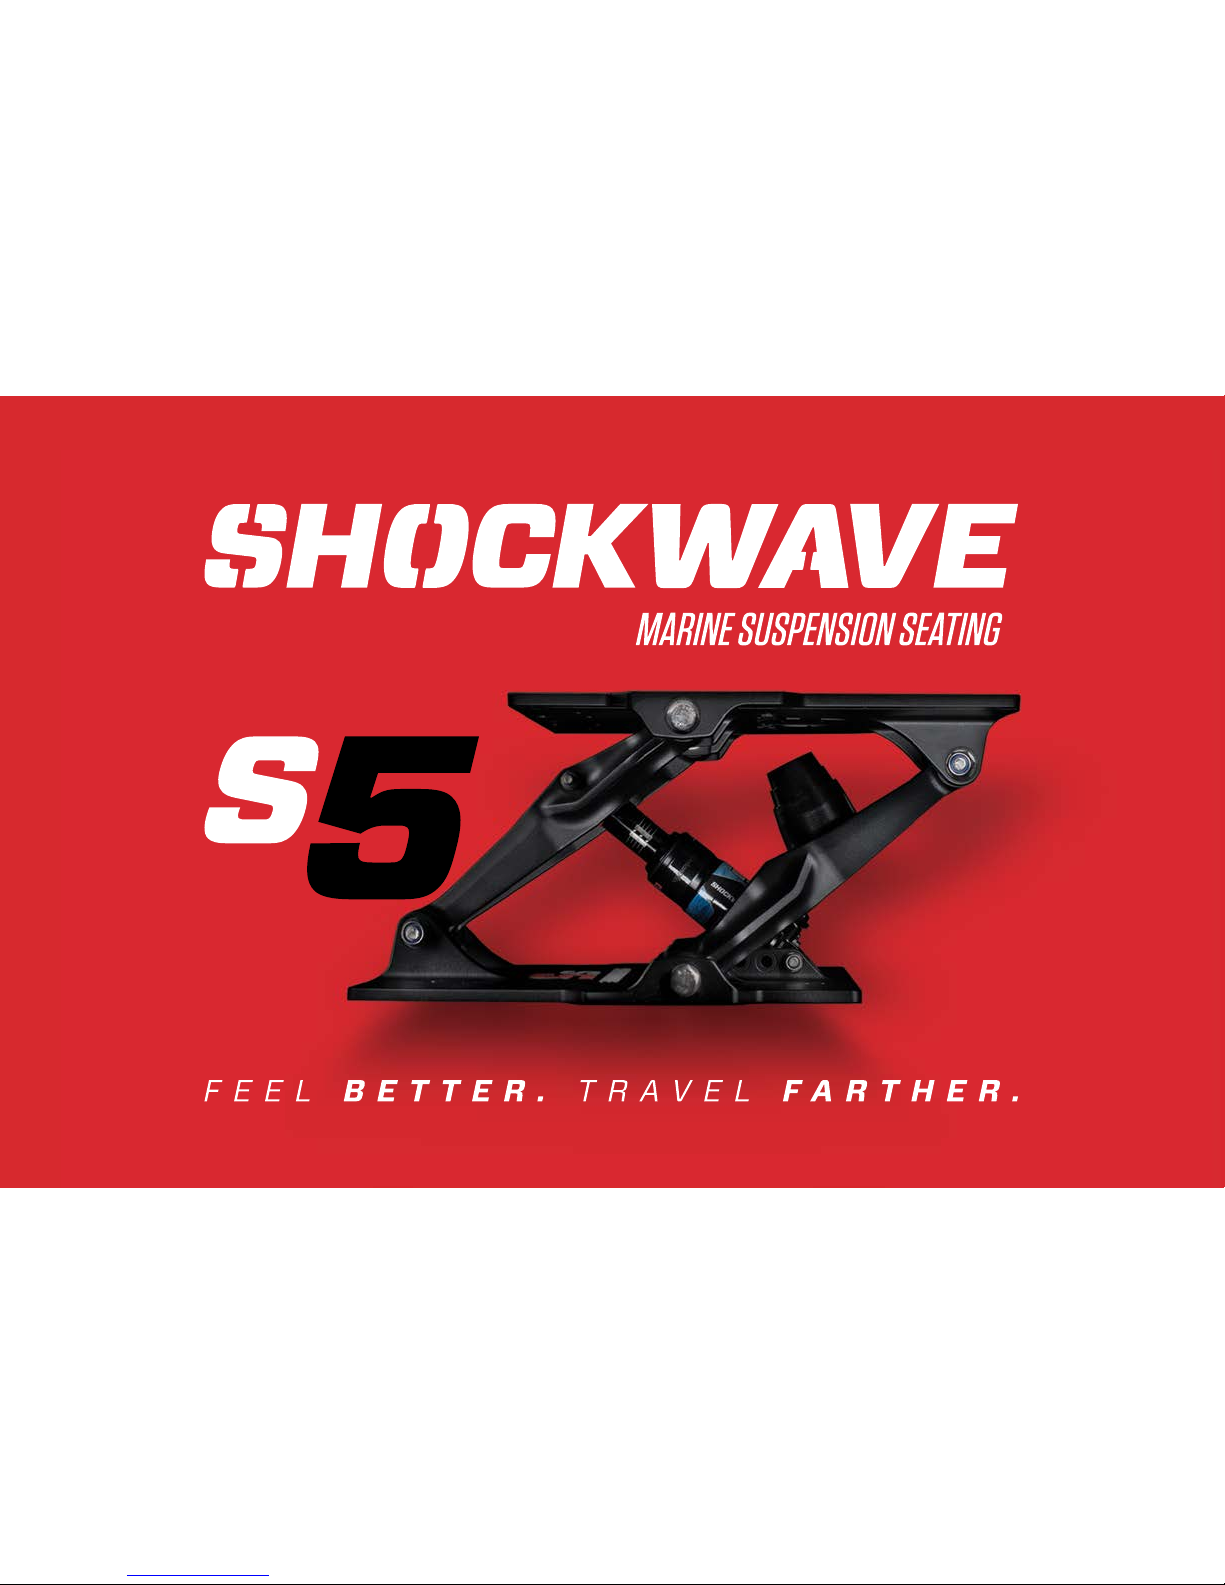
USER MANUAL
MARINE
SUSPENSION
MODULE

INCLUDED WITH YOUR S5 PURCHASE:
• SHOCKWAVE S5 Marine Suspension Module
• SHOCKWAVE S5 User Manual
• SHOCKWAVE S5 Drill Template
• Spacer Kit - 2 spacers to change
suspension module height
• 2 Product Cards -Warning Card and Care Instructions
• 2 Stickers – SHOCKWAVE (all purposes)
SHOCKWAVE EQUIPPED (for your boat)
ACCESSORIES SOLD SEPARATELY:
• SHOCKWAVE S5 Pump
• Corbin2 Seat
• Corbin2 Seat with Flip Bolster
• SHOCKWAVE S5 Swivel Slide, Swivel, Slide, and
Height Adjust
At SHOCKWAVE, we’ve proven that innovation
and attention to the highest safety standards can
protect boaters from the shock of wave impact.
As avid boaters ourselves, we understand what our
customers value most – and we create the best
marine suspension seats in the world to provide
a safer, more comfortable and exciting ride.
For customer inquiries and service support please
call +1.778.426.8544 or
email support@shockwaveseats.com
CUSTOMER SERVICE
ADDRESS 2074 Henry Ave. Sidney BC
Canada V8L 5Y1
WEBSITE www.shockwaveseats.com
SALES
+1.778.426.8545
RECEPTION +1.778.426.8546
HOURS 8AM to 5PM PST
JOIN THE SHOCKWAVE COMMUNITY
@SHOCKWAVESEATS
@SHOCKWAVESEATS
youtube.com/shockwaveseats
USER MANUAL CONTENTS
MOUNTING YOUR SUSPENSION MODULE 4
SETTING UP THE SUSPENSION MODULE
5
STEPS TO SET UP THE SUSPENSION MODULE 6
SHOCK COMPRESSION ADJUSTMENT SETTINGS 7
CHANGING SUSPENSION MODULE HEIGHT 8
REBOUND ADJUSTMENT 9
SERVICE TIPS 10
HOW TO VIDEOS 11
DRAWINGS AND EQUIPMENT LIST 12
SUSPENSION MODULE DRAWING (SW-05026) 13
ACCESSORIES 14
EMERGENCY PROCEDURES/TROUBLESHOOTING 15
GENERAL BOATING BEST PRACTICE AND SAFETY 16
CAUTIONS AND WARNINGS 17
WARRANTY AND WARRANTY POLICY 18
SHOCKWAVE COMMUNITY 19
4
MOUNTING YOUR SUSPENSION MODULE
GETTING STARTED
Congratulations on your purchase of a SHOCKWAVE S5 Marine Suspension
Module. We hope you enjoy this new boating experience offering you access to
new possibilities on the water.
• There must be sufficient deck structure
to support the weight of seat and
occupant within the vessels
operational envelope
• Thin or weak decks or mounting boxes
should have large washers or fish plates
on the bolting surfaces, if needed, to
prevent fasteners from pulling through
• There must be no flex in the seat
mounting or deck plate when the seat
is loaded
• Do not attach any equipment to the
suspension module
• Do not mount the suspension module in
the middle of an unsupported deck plate
• Ensure that the movement of the
suspension module does not interfere
with the vessel structure or equipment
• Properly torque deck mount
and fasteners
• Check operation of suspension module
after installation as it must not bind
or stick
• Remove the two attached spacers from
your SHOCKWAVE S5 - these will be
required if you need to adjust to one of
the two additional ride height positions.
See page 8 for instructions on changing
suspension module height
• Through-bolt the suspension module
or bolt to stainless steel inserts bonded
into the deck or equivalent structure
The suspension module must not be modified.
We have created a series of ‘how to’
videos on our website to help you
install your SHOCKWAVE S5. Visit
www.shockwaveseats.com/howto
for more information.
5
Strength of decks and deck mountings is the responsibility of the
boat builder or installer of the seats. SHOCKWAVE assumes no
liability for suspension modules that are incorrectly installed.
Incorrectly installed suspension modules can cause serious
injury or death and can cause damage to the vessel and the seat.
Prior to use be sure to pressurize the shock absorber! Do not
operate the seat without sufficient pressure in shock absorber or
serious injury and damage to the suspension module will result.
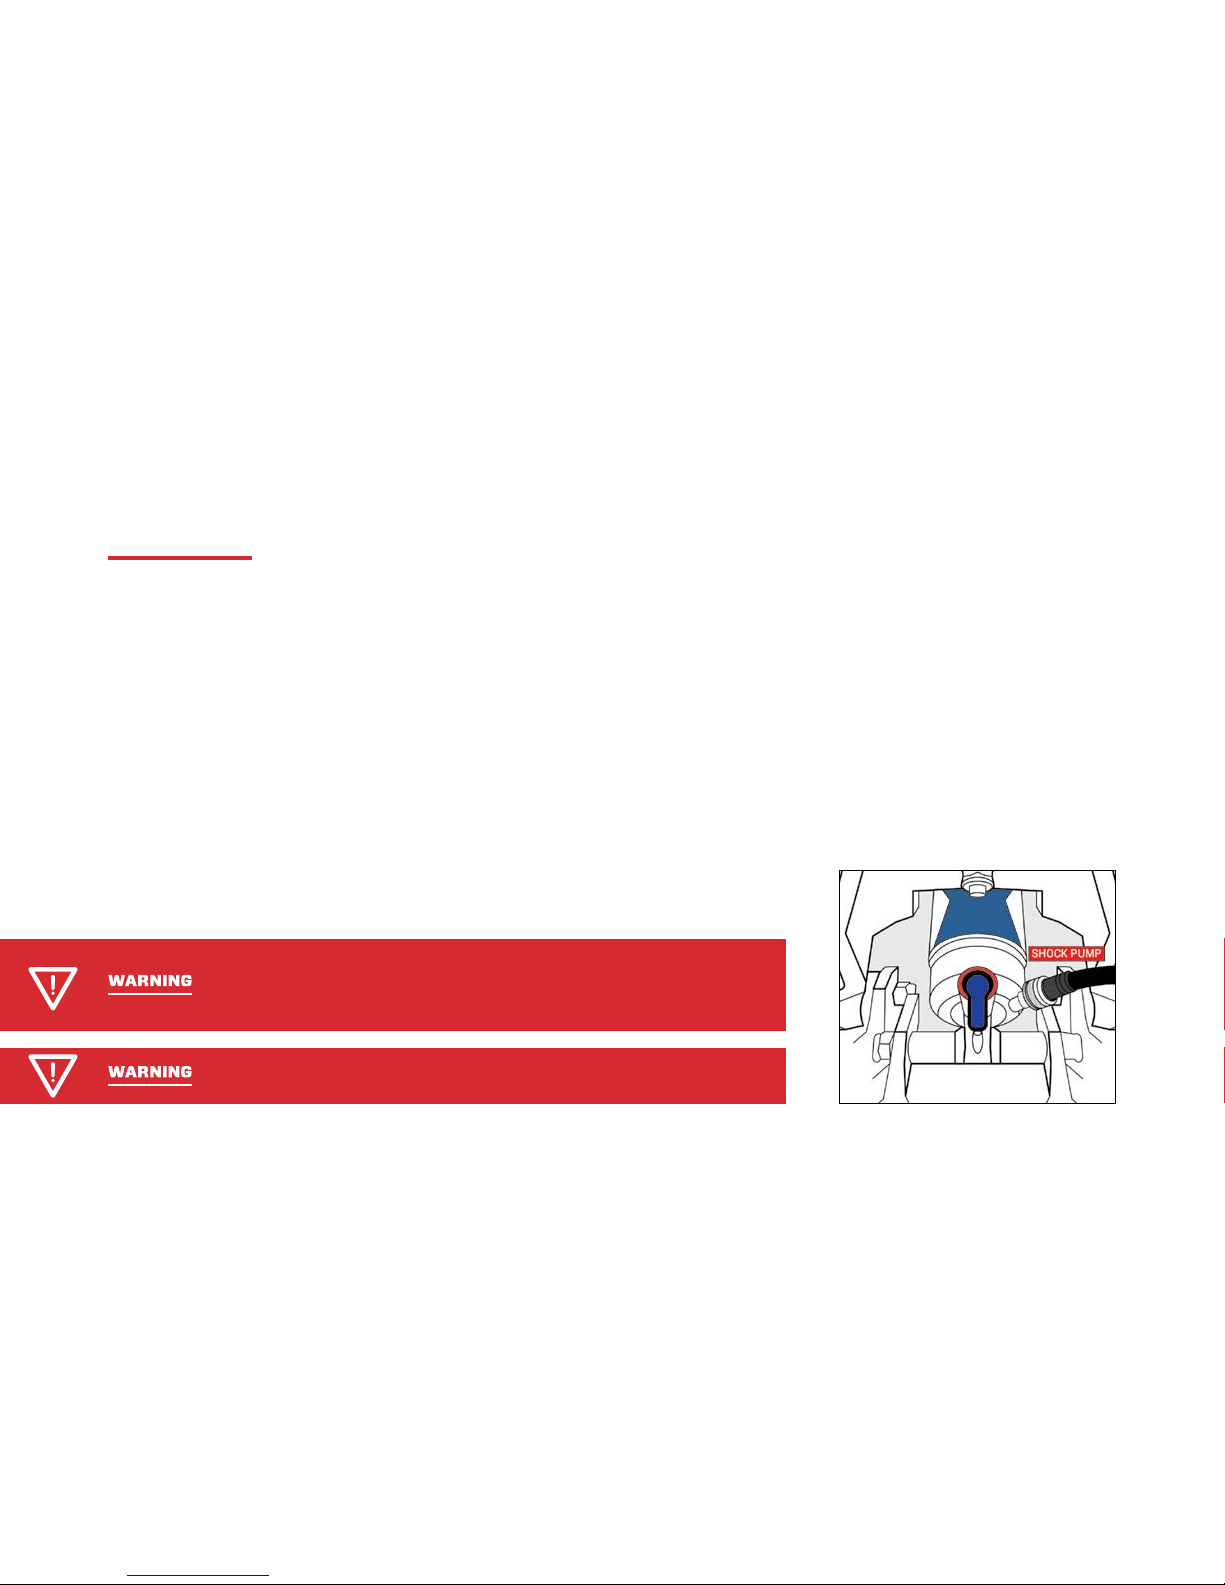
SETTING UP THE SUSPENSION MODULE
To achieve the best performance from the suspension module’s shock absorber, the pressure should be adjusted to attain
the proper sag setting. Sag is the amount the suspension compresses under the occupant’s weight and seat. Sag should be
set at 20% of total shock travel.
Warranty is void on suspension modules where incorrect
installation caused damage to the module.
6
STEPS TO SET UP THE SUSPENSION MODULE
1 Turn the 3-position lever at the base of the shock
absorber to the SOFT position. See page 5.
2 Pressurize the shock absorber to 100 PSI and remove
the pump.
3 Cycle the shock absorber through its travel by
bouncing on the seat 5 times. This will equalize the
positive and negative air chambers.
4 Use the pump to pressurize the shock absorber
(in PSI) to match the weight in pounds (lbs), of the
occupant and seat. Remove the pump before step 5.
5 Cycle the shock absorber through its travel by
bouncing on the seat 5 times.
6 Push the red o-ring against the rubber air sleeve.
7 Gently sit on the seat.
8 Get out of the seat.
9 Check the sag percentage marking on the Shock
absorber shaft. Sag is correct if the o-ring sits at
the 20% mark.
10 If the sag value is not at the desired level, inflate
or deflate the shock absorber in 10 PSI increments
and repeat steps 5-8 until the desired sag level
is achieved.
Do not sit on the seat with the SHOCKWAVE S5 Pump attached!
Damage will occur to the shock and pump. Note, SHOCKWAVE
S5 PUMP sold separately.
Do not exceed 350 PSI. The maximum shock absorber pressure.

7
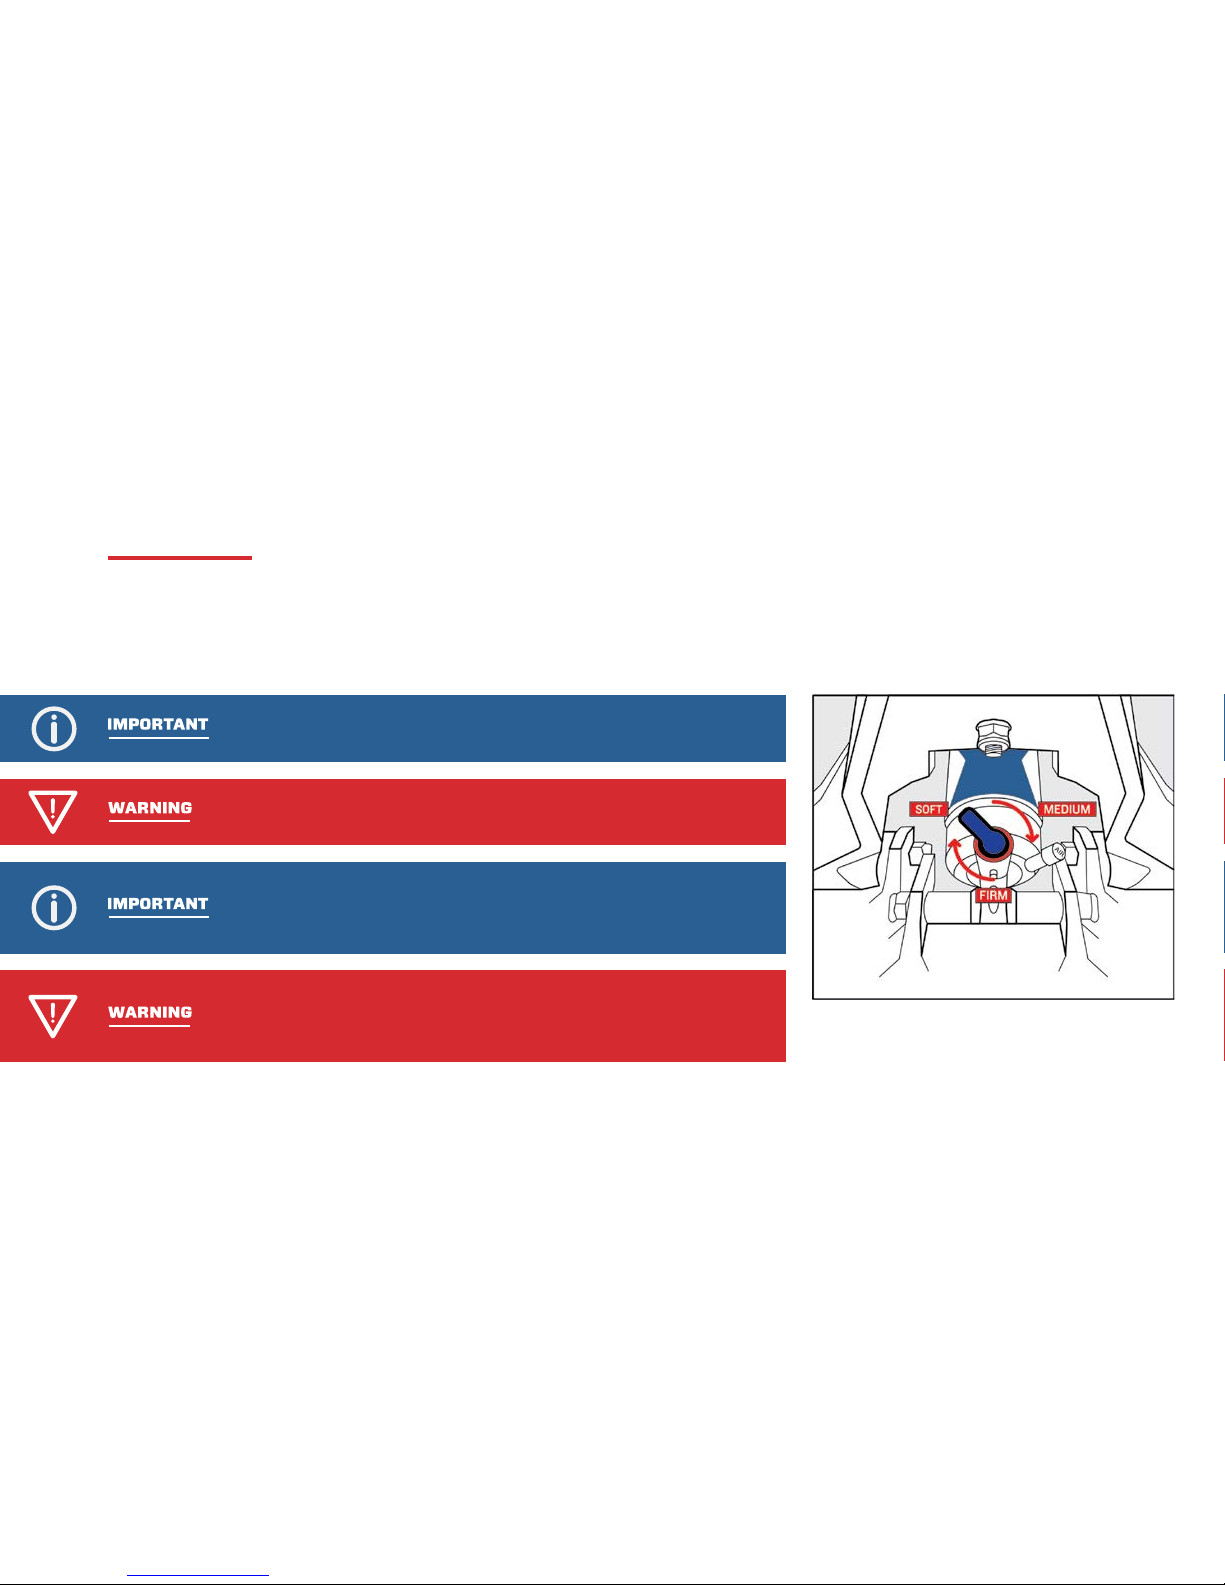
SHOCK COMPRESSION ADJUSTMENT SETTINGS
1 SOFT/MIN MODE
For operating in flat water and
light chop where the likelihood of
experiencing a slam is low. Mostly
inshore use. Gives a soft ride.
2 MEDIUM MODE
For operating in moderate to rough
conditions where some slamming
could occur. Gives a medium ride.
3 FIRM MODE
For operating in big seas and at higher
speeds where regular slamming will
occur. Gives a firm ride.
Setting the sag height is designed to be a starting point. To get the most out of the suspension module the shock absorber
can be fine-tuned. This is done using a combination of compression and rebound damping to optimize ride quality as well
as for varying sea conditions.
The suspension module comes with a 3-position blue lever that is designed to
make quick adjustments to optimize the performance of the shock absorber in
varying sea conditions. You can select three settings:

8
Blue
Spacer
10in
251mm
Rear Mount
No
Spacer
Front Mount
8in
201mm
Red
Spacer
Mid Mount
9in
235mm
8-inch Height Configuration
9-inch Height Configuration
10-inch Height Configuration
CHANGING SUSPENSION MODULE HEIGHT
• Once you set the height of your
seat on your boat, if required, the
height of your suspension module
position can be changed by 1-inch
(25mm) to Mid Mount or 2-inch
(50mm) to Rear Mount.
• Remove the bolt from the front
mount and place it into either the
Mid mount or Rear Mount position.
• For the Mid Mount setting,
install the smaller, red spacer to
the top module plate using the
supplied fastener.
• For the Rear Mount setting,
install the larger, blue spacer to
the top module plate using the
supplied fastener.
The SHOCKWAVE S5 comes with the shock absorber in the front mount position
which is the lowest height configuration.
If a higher installation height is required you will need to install one of the two
spacers provided. These are required to properly change the height of your
suspension module. Use the procedure below to change the suspension
module height.
Do not change the suspension module height without using the
appropriate spacer.

9
REBOUND ADJUSTMENT
Rebound dampening controls the rate of speed at which the shock returns to the proper position after compressing. The
rebound adjustment is dependent on the air pressure setting. Higher pressure requires slower rebound settings. Use the
procedure below to find the correct rebound setting.
REBOUND ADJUSTER
FASTER REBOUND
• In high frequency and small wave
activity a faster rebound can improve
your suspension performance.
• Turning the red rebound adjuster
fully counter-clockwise maximizes
the shock rebound rate. This setting
is the fastest to return the seat to
your sag height.
SLOWER REBOUND
• In low frequency and large wave
activity a slower rebound can improve
your suspension performance.
• Turning the red rebound adjuster
fully clockwise reduces the shock
rebound rate. This setting is the
slowest to return the seat to your
sag height.
Do not sit on the seat with the SHOCKWAVE S5 Pump attached!
Damage will occur to the shock and pump. Note, SHOCKWAVE
S5 PUMP sold separately.

10
CLEANING Rinse your suspension module with fresh
water after each use to prevent build up of salt and
corrosion. Wash and treat surfaces with appropriate
products every month or as often as possible to prolong
appearance and service life.
LEAKS The shock absorber uses a patented sealing
system. The shock absorber should hold pressure
between settings and should only need to be topped up
occasionally. While it is recommended to regularly check
sag and damper settings, the shock absorber does not
require constant pressure adjustment.
SHOCK LEAK-DOWN Check the fill valve to see if debris
is interfering with its operation or perform a simple soap
solution test to identify the source of the problem.
BOLT TORQUE (TIGHTNESS) All fasteners are prone
to becoming loose from sustained high performance use.
SHOCKWAVE recommends that all bolts should be visibly
inspected for signs of being loose. Always use a threadlocking sealant on threads to prevent loosening of parts.
SERVICE TIPS
Be sure to wash your suspension module properly. Thoroughly
wash module with fresh water and boat or car wash detergent,
removing all contaminants and surface corrosion.

HOW TO VIDEOS
For complete instructions, including video tutorials of
how to install your Shockwave S5, please visit
www.shockwaveseats.com/howto, where we have a
comprehensive guide for installation options.
For further instruction, please contact your Shockwave S5
dealer or email support@shockwaveseats.com.
11

12
DRAWINGS AND EQUIPMENT LIST
• The name and location of major components
• A breakdown of the major components in your suspension module order
The illustrated part breakdown is designed to provide a functional overview of the SHOCKWAVE S5
Marine Suspension Module and provide a reference to points covered in the user manual. These
drawings show:
These drawings can be used to order spare parts and for replacing or repairing parts.

13
ITEM QTY PART NO. DESCRIPTION
1 1 SW-04963 S5-PRO BOTTOM-PLATE
2 1 SW-04964 S5-PRO TOP PLATE
3 1 SW-04938 S5 CAST A-ARM FORWARD
4 1 SW-04937 S5 CAST A-ARM AFT
5 12 SW-04747 S5 PIVOT BUSHING
6 6 SW-04748 S5 BUSHING SPACER
7 1 SW-04867 SHOCK ABSORBER
8 6 FA-M12X110-HH-CS S5 BOLT HEX HEAD
9 12 FA-1/2-FW-AN960C816L WASHER, FLAT
10 2 FA-5/16-FW-AN960C816L WASHER, FLAT
11 4 FA-3/8-FW-AN960C816 WASHER, FLAT
12 6 FA-M12LN-S5
13 3 FA-M8LN-S5
14 1 FA-M8X130-AS-C5-NC-S5 SCREW, SOCKET, HEADCAP
15 1 FA-M8X85-AS-C5-NC-S5 SCREW, SOCKET, HEADCAP
16 1 SW-04754 BUMPSTOP
17 1 FA-M8X30-AS-CS-NC-S5
SCREW, SOCKET, HEADCAP
METRIC
PROPRIETARY AND CONFIDENTIAL
NOTICE: THIS DRAWING MAY REVEAL DESIGNS OR INFORMATION PROPRIETARY TO PROFESSIONAL COMPONENTS LTD. BY ACCEPTANCE OF
REPRODUCTIONS, RECIPIENTS AGREE TO PROTECT PROFESSIONAL COMPONENTS LTD. RIGHTS AND ARE WARNED AGAINST USE OF THE DOCUMENT
FOR ANY PURPOSE OTHER THAN THAT FOR WHICH IT WAS ISSUED.
SUSPENSION MODULE DRAWING (SW-05026)

ACCESSORIES
CORBIN2 SEAT
The Corbin2 is designed to add an extra element of
comfort and support for your suspension module. Crafted
in the U.S., these seats are the definition of quality and
strength, made using only the best materials available
today. Available in Onyx (black), Desert (tan) and
Storm (white).
THE CORBIN2 SEAT WITH FLIP BOLSTER
The Corbin2 with flip bolster is ideal for the boater who
requires a high-quality comfortable ride with the option
to operate standing up when needed. Available in Onyx
(black), Desert (tan) and Storm (White).
SWIVEL SLIDE
The ultimate in adjustability for your suspension module,
this swivel and slide system is designed specifically for
the S5 and built to the same high level of durability and
corrosion resistance. The slide offers 5 inches of fore-aft
travel and the 360-degree swivel locks in place in any of 16
positions for excellent flexibility.
SLIDE
The SHOCKWAVE S5 high-quality seat slide offers a full
5 inches of fore-aft travel allowing for comfortable seating
options for a wide variety of occupants and uses.
SWIVEL
This remarkable SHOCKWAVE S5 seat swivel offers
360-degree swivel. It locks in place in any of its 16
positions for excellent flexibility.
SHOCKWAVE S5 PUMP
The high-pressure shock pump is required for the setup
and operation of your suspension module. It features
an integrated pressure gauge and bleed valve for simple
adjustment with a maximum inflation pressure of 350 psi.
HEIGHT ADJUST
The SHOCKWAVE S5 height adjust system integrates
seamlessly with your suspension module to provide a full
3 inches of vertical travel at the touch of a button. Built to
last and made with the highest-quality components this
is the perfect option for giving your S5 the ultimate
in adjustability.
14

15
EMERGENCY PROCEDURES/TROUBLESHOOTING
CONDITION CAUSE SOLUTION(S)
Suspension module is lower than normal or
shock absorber will not pressurize
Suspension module is bottoming out
Seat is “bucking off” or bouncing occupant
Squeaking noise when underway
Moving components or accessories will
not move
Suspension module is topping. Ride is rough
and erratic. Noise heard or shock felt when
seat comes to top of travel
• Leak in system
• Worn or corroded fill valve
• Defective shock absorber
• Check system for leaks by applying soapy
water to system connections and look for
bubbles. If leak found replace
shock absorber.
• Remove fill valve core and replace with
new one from auto supply store
• Replace shock absorber - this is required
only on extremely rare occasions
• Shock pressure is too low
• Shock pressure is too high
• Rebound rate is too high
• Loose components
• Shock absorber mounting bolts are dry
• Bearing or sliding mechanism is corroded,
dry or binding
• Adjust red rebound adjuster as per
instructions on page 9 of this manual
• Tighten loose components
• Apply grease to shock mounting bolts
• Disassemble if necessary and lubricate
with marine grade grease
• Reduce shock air pressure
• Attach pump and add air as per this manual

GENERAL BOATING BEST PRACTICE AND SAFETY
OPERATE IN THE VESSEL’S DESIGN ENVELOPE
Driving a boat beyond its limitations can have damaging
effects on the hull, engines and equipment. SHOCKWAVE
seats are designed to provide shock mitigation to the
occupant. They will not protect the occupants from injury
caused from operating the vessel outside of its
operational envelope.
OPERATE THE VESSEL IN YOUR CREW’S PHYSICAL
CONDITIONING ENVELOPE
Personal fitness is a limiting
factor to the amount of sustained G Loads a person can
endure without injury. If you have inexperienced, relatively
unfit or overweight persons aboard, extra caution must be
exercised to prevent injury. The helmsman must be keenly
aware of the shock loads being transmitted to others not in
a suspension seat or standing as serious injury can occur.
Installation of SHOCKWAVE seats provides an extra level
of protection but they will not protect a person from ALL
shock loads.
OPERATE IN YOUR OWN ABILITY ENVELOPE
SHOCKWAVE seating will increase the confidence of the
helmsman. Sometimes over confidence can lead to loss of
control. Generally, the seats will permit greater control of
the vessel and helmsman should focus on using the control
advantages of shock mitigated seating to better look after
the vessel and crew.
DO NOT SIT IN SEATS WITH HARD OR SHARP
OBJECTS. DO NOT WALK ON SEATS
Ensure that sharp
objects and heavy gear are worn so that they will not
tear upholstery.
DO NOT TIE THE BOAT UP WITH THE
SUSPENSION MODULE
As tempting as it may be
SHOCKWAVE seats are not designed to tie up the boat.
A sudden surge or wave will likely bend the seats or
attachment brackets and compromise performance.
TIE EVERYTHING DOWN Pay attention to how you
have stowed your gear. Elastic shock cords and ratchet
tie-downs should be used to secure all gear. Plastic
containers of oil and other fluids must be protected from
chafing and puncture. Electronic equipment must be
secured to prevent damage from shock loads.
CHECK ALL EQUIPMENT Conventional mounting
brackets for heavy items such as fire extinguishers
are subject to much more loading than without shock
mitigation. Make sure all of your equipment brackets are
tight. Recheck major equipment bolts regularly. Wiring,
cables and fluid hoses should be bundled tightly and not
allowed to flail. Do not allow any objects under the seats or
footrests, as they will limit the stroke of the seat, damage
the objects or damage the seat.
SHOCKWAVE Marine Suspension Modules are designed to mitigate shock and vibration encountered in high-speed vessel operation in rough seas. Following the suggestions in
this section will ensure that you are getting the most out of the product.
ENSURE THAT THE SUSPENSION MODULE IS
FUNCTIONING PROPERLY
Refer to the Caution Notes
in the next section. The following is provided as a general
checklist. Providing you have done everything correctly in
the Caution Notes - do not operate the seat if:
• The shock absorber setting or ride height is incorrect
• Components are loose, broken or missing
• The suspension module makes a strange noise
USE SEAT BELTS If supplied - Seat belts prevent
occupants from being ejected from the vessel and the
seat. When not in use, the seat belt buckle clasp should be
fastened to prevent damage to the suspension module.
ADJUST HEIGHT AND FORE AND AFT
ADJUST CORRECTLY
If supplied - Correct ergonomics
and posture enhances the ability to operate the vessel
safely and reduces the risk of shock and vibration related
injury. Take the time to adjust the seat on the suspension
module so that it’s comfortable.
RINSE THE SUSPENSION MODULE WITH FRESH
WATER AFTER EACH USE
Rinse suspension module
with fresh water after each use or every week if being
stored outside to prevent a buildup of salt and debris.
16

17
CAUTION AND WARNINGS
DO NOT
• Operate seat without sufficient pressure in
shock absorber or serious injury and damage to
suspension module will result.
• Place hands near module when in use. Serious
injury can result.
• Modify the equipment by drilling extra holes,
removing material, or adding extra equipment.
Serious injury can result.
• Use the suspension module if it is or appears to be
damaged. Serious injury can result.
• Use the suspension module if module to deck
attachments are loose. Serious injury can result.
• Use the suspension module if module resting height
is lower than normal. This may be an indication of a
damaged shock and serious injury can result.
• Operate the suspension module with insufficient
air pressure in shock to prevent bottoming. Serious
injury and damage to seat can result.
• Use the suspension module for uses other than its
intended purpose. Use of the seating for other than
its intended purpose may result in damage to the
equipment or bodily harm.
• Use the suspension module if fasteners are loose.
Damage to the equipment or bodily harm may result.
• Attempt to open, perform maintenance or repair
the suspension module while craft is underway.
Damage to the equipment or bodily harm may result.
• Place items under or around the suspension module
that may interfere with the suspension modules
range of motion. Damage to the equipment or bodily
harm may result.
Your SHOCKWAVE S5 Marine Suspension Module will mitigate the effects of shock and vibration, reducing the potential of injury, but it will NOT prevent the possibility of injury.
The increased level of comfort and control provided by SHOCKWAVE S5 marine suspension seating will allow the craft to operate at higher speeds in sea states which create high
shock loads on the craft and potentially the occupants. HIGH SHOCK LOADS COULD POTENTIALLY EXCEED THE SEAT’S CAPABILITY TO MITIGATE.
Operating marine craft in a high shock load environment is inherently hazardous. Tolerance to the effects of shock and vibration vary from person to person and it is the
responsibility of the craft operator to ensure the safety of each person on board. Pain and/or discomfort are indicators of a potential injury. Constantly monitor the physical state
of the craft and the personnel on board. Hazardous operation of the craft may result in serious injury, death or damage to the craft.
Follow IMPORTANT instructions located throughout this User Manual to prolong the
appearance and service life of your SHOCKWAVE S5 Marine Suspension Module.

18
TIME LIMIT ON COMMENCING LEGAL ACTION
It is agreed that you have one year from the accrual
of a claim to commence any legal action arising from
the purchase or use of the MARINE AND OTHER or
SUSPENSION SEATS, or be barred forever.
Failure to give prompt written notice within thirty
(30) days of the discovery of any defect in material or
workmanship that occurs within the warranty period
will void the warranty.
WARRANTY AND WARRANTY POLICY
Your sole and exclusive remedy against SHOCKWAVE
SEATS arising from the purchase or use of MARINE
AND OTHER and SUSPENSION SEATS is limited
to repair or replacement of defective materials
or defective workmanship, after verification by
SHOCKWAVE Seats. All warranty claims must have
prior approval from SHOCKWAVE Seats warranty
department. Products will be repaired or replaced at
the sole discretion of SHOCKWAVE Seats.
These warranties will become null and void if:
• The seat is abused or altered
• The seat is involved in an accident
• The seat is improperly installed
• The seat is used for other than its intended use
• There is damage to the cushions and covers
caused by cuts, burns, or abuse
WARRANTY DISCLAIMERS AND
LIMITATIONS OF LIABILITY
THE ABOVE EXPRESSED WARRANTIES SHALL BE
THE EXCLUSIVE WARRANTIES, AND SHOCKWAVE
SEATS MAKES NO OTHER WARRANTIES,
EXPRESSED OR IMPLIED. SHOCKWAVE SEATS
EXPRESSLY DISCLAIMS ANY IMPLIED WARRANTIES
OF MERCHANTABILITY AND IMPLIED WARRANTIES
OF FITNESS FOR A PARTICULAR PURPOSE.
IT IS AGREED THAT SHOCKWAVE SEATS SHALL NOT
BE LIABLE FOR INCIDENTAL OR CONSEQUENTIAL
DAMAGES, including, but not limited to, loss of
income, loss of use, lost profits, damage to other
property, the cost of removing and reinstalling the
INDUSTRIAL SEATING or SUSPENSION SEATS,
attorney’s fees, and any liability you may have with
respect to any other person.
SHOCKWAVE Seats expressly warrants that all mechanical seat components in its MARINE AND OTHER and SUSPENSION SEATS shall be free from defects in material and
workmanship for three years from the date-of-sale provided such seats are subject to normal use and receive proper maintenance. SHOCKWAVE SEATS expressly warrants that
the cushions and seat covers shall be free from defectively sewn seams for a period of 90 days or 750 hours, whichever comes first, excluding normal wear and tear.

JOIN THE SHOCKWAVE COMMUNITY
@SHOCKWAVESEATS
@SHOCKWAVESEATS
youtube.com/shockwaveseats

 Loading...