

Page 1
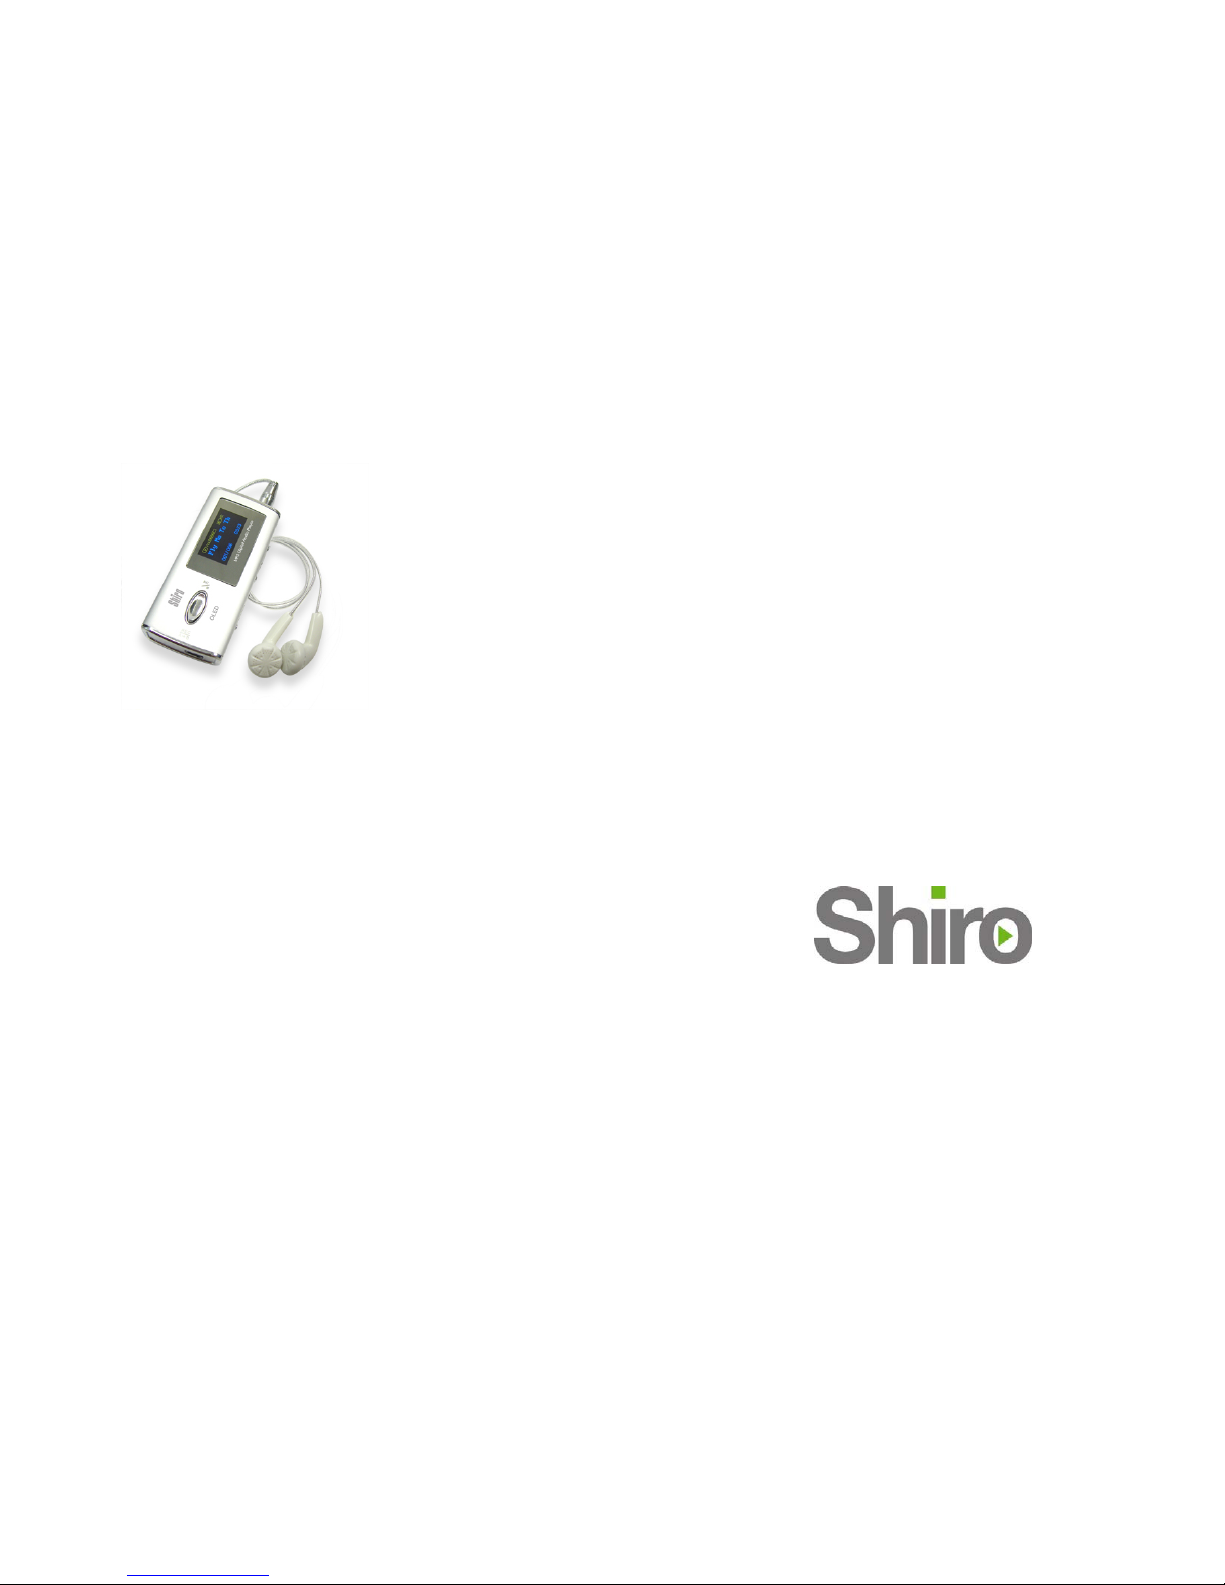
TX MP3 Digital Audio
Player
User Guide
Version 2.0
Page 2

2
Table of Contents
Precaution 3
Package Includes 3
Features 4
Hardware Description 5
LCD Description 6
Basic Operation 6
MP3, WMA & WAV MUSIC MODE 7
VOICE MODE 9
FM MODE 10
RECORDING MODE 11
SETTING MODE 12
ABOUT MODE 12
Connection to Computer 13
Troubleshooting Steps 17
Technical Specification 19
Page 3

3
Precautions
If you plan not to use this unit for a long time, please do turn off the power to avoid damage
caused due to battery leakage and corrosion.
Do not operate the player un der extremely hot, cold, dusty or damp environment.
Do not drop the player from hi gh heights.
The battery life may be different along with different operation conditions, manufa cturers
and production time.
Under the following conditions, please charge the battery:
* The icon
appears and there is indication of battery has no power
* No response when operating the key
* The player is stopped during the normal operation.
Package Includes
• TX MP3 Digital Audio Player
• USB Cable
•
Line-In Cable
•
CD Driver (Windows 98SE)
•
Mini to Standard USB Adapter
•
1xAAA battery
•
Stereo Earphone
•
User Guide
Page 4

4
Features
OLED Display
Large screen and user friendly picture menu
MP3/WMA/WAV digital play
Line-In direct recording to WAV format
FM Radio receiver, capable of storing 30 channels
FM Recording, capable of storing FM Radio content
No driver is required for Windows 2000/XP/ME
128MB/256/512MB, USB Flash Drive capability
Digital Audio Recording, 128MB: 8 hours
A-B repeat function
5 EQ band for different sound effects
ID3 Tag support
Low power consumption with Screen Saver mode
Support for LRC version 0.2 format
Hi-Speed USB 2.0 for fast data transfer
Page 5
5
Hardware Description
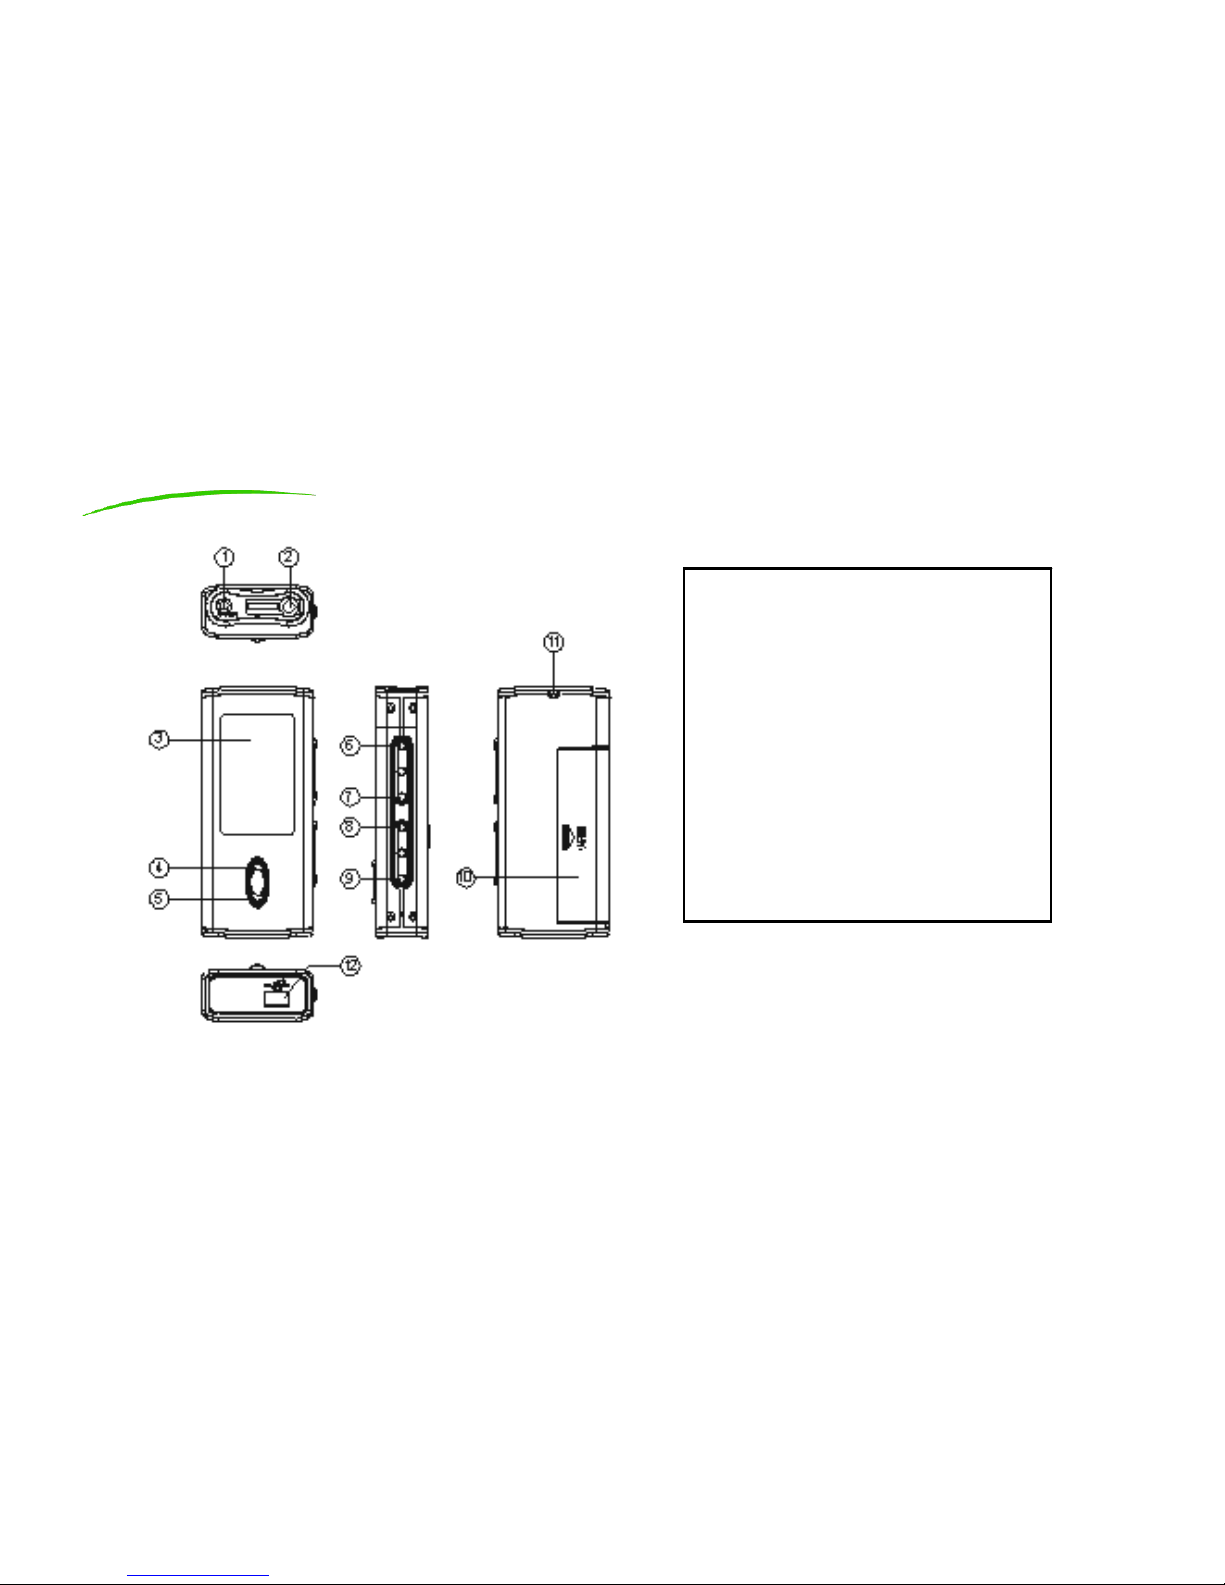
1.Line in audio input port
2.Earphone input port
3.OLED display
4.Play/Pause/stop
5.Record/A-B repeat
6.EQ mode/De lete
7.Menu
8.Volume -/ previous fast back
9.Volume +/next fast forward
10. Battery box
11.Hole for hanging cord
12.USB port
Page 6
6
LCD Description
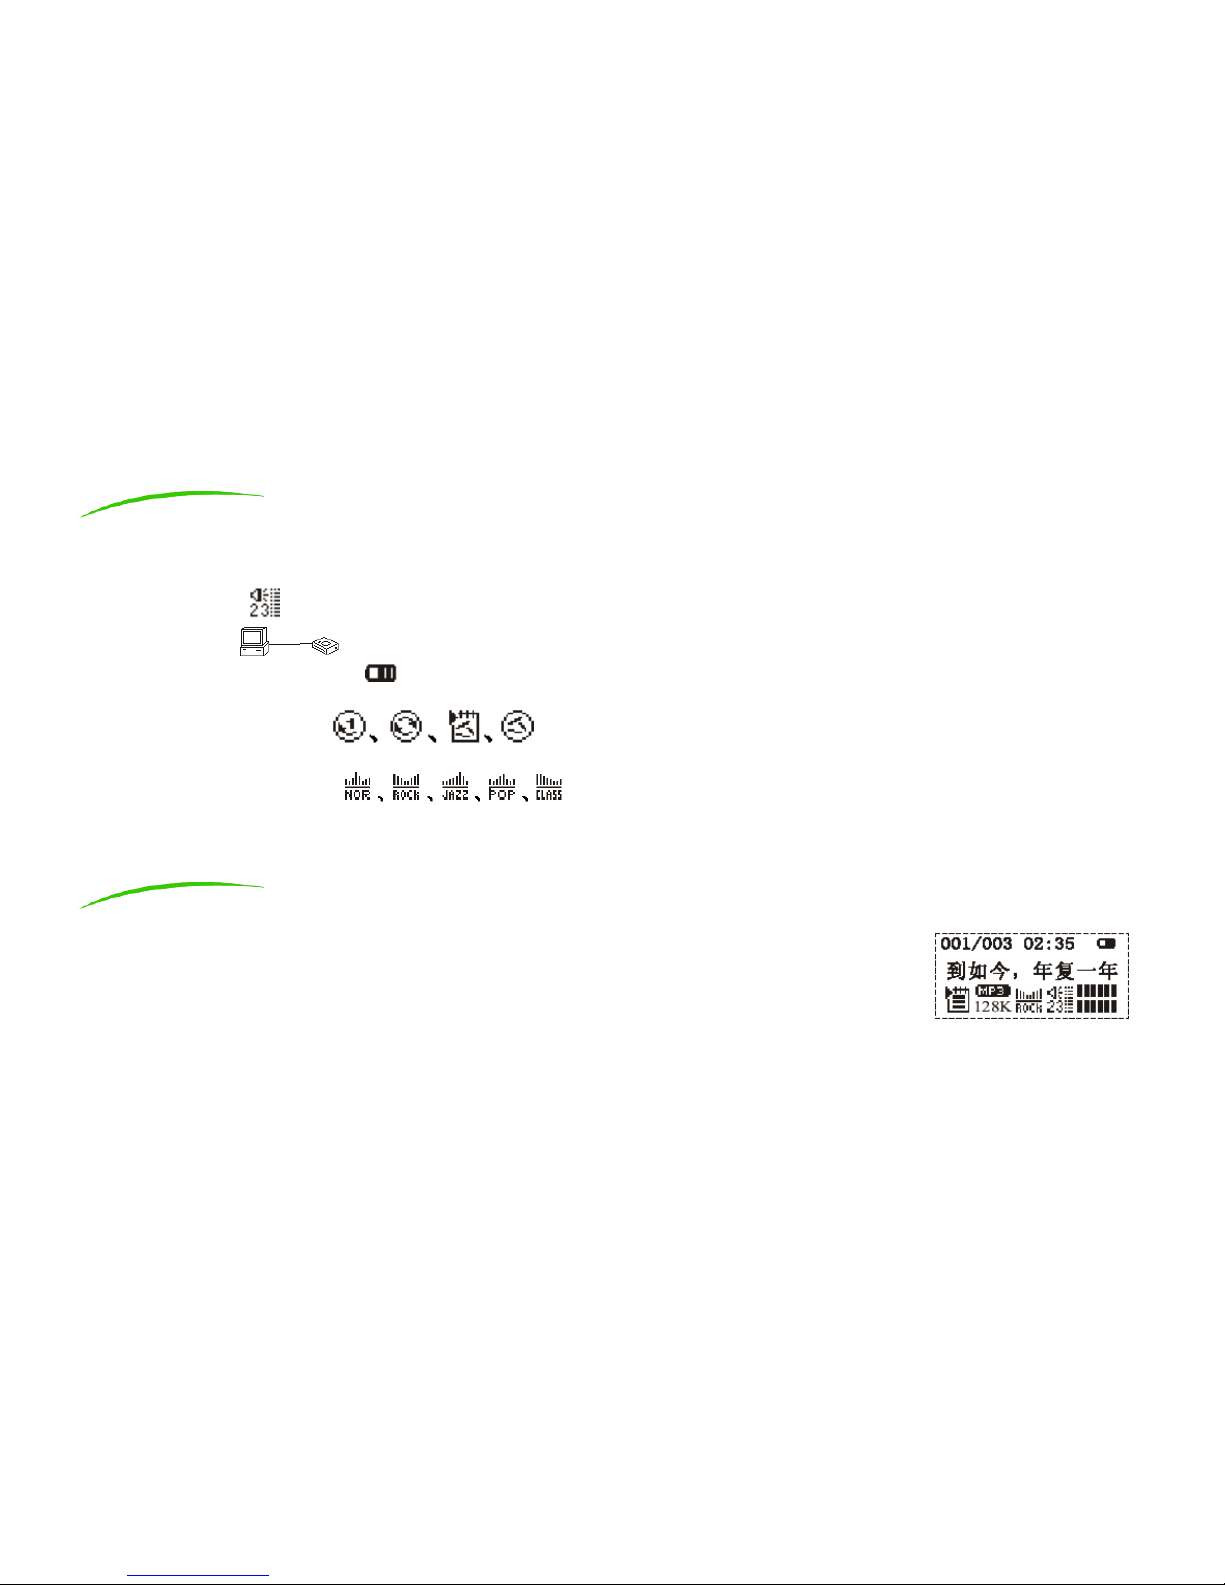
Music Mode
Voice Mode
FM Radio Mode
Volume Size
USB Status
Battery Power Indication
Music or Recording Name, track serial number, time display e.g. “The Carribean.mp3 001/006 00:08”
Cycle Mode Selection
Cycle modes include 5 modes: Normal, R epeat One, Repeat All, Shuffle, Shuffle All mode.
Sound Effect Selection
The sound effect includes Normal, Rock, Jazz, Classic and Pop.
Basic Operation
1) On/Off
Turn on the player: Press ln/ to turn on the player, the LCD will have start-up display.
Then the player will enter the stop status of MUSIC mode, displaying the track serial
number, total number of tracks, track played, total track time, battery power indication
symbol, song name, singer’s name, play mode symbol, type of music, bit rate of music,
equaliser symbol, volume symbol and visualization symbol.
Turn off the player: Press ln/ key until the LCD shutdown progress bar ends.
Page 7

7
2) Battery Low
When the power indicator on the pl ayer is , please change the battery.
MP3, WMA & WAV MUSIC MODE
This player can play MP3 (third player of MPEG1, third layer of MPEG2 and third layer of MPEG2.5), WMA and WAV
format music files.
1) Play
Under the stop mode or pause mode, press ln/ key to start playing the current track. LCD will display the
track serial n u mber, total number of tracks, track played, total track time, battery power indication
symbol, song name, singer’s name, play mode symbol, type of music, bit rate of music, equaliser symbol,
volume symbol and visualization symbol. If the song being played is supported with LRC format file, the
lyrics will be played together with the music.
2) Pause/Stop
Under the play mode, press ln/ for pause/stop. The visualization symbol will stop moving. Press ln/
again to continue playing.
3) Previous / next, fast forward / fast backward
Press down “+” key to forward to next track and “-“ key to forward to previous track. Press and hold “+” or
“-“ for volume increase or decrease. To fast forward or back forward, press MENU key. Navigate using “+”
or “-“ key to Setting and click MENU. Select FF&RW and click MENU. You will notice the Fast/Back Forward
WWXX symbol will start to flash. Press down “+” or “-“ to adjust. Click MENU when done.
Page 8

8
4) EQ Band change
Press MENU. Navigate using “+” or “-“ key to SETTING and click MENU. Navigate using “+” or “-“ key to
EQ. Click MENU to enter and select the EQ band. Once d one, press MENU key. Another alternative is to
press the EQ/DEL key while the music is playing.
5) Play mode
Under music or voice mode, press MENU key to enter. Navigate using “+” or “-“ key to Setting. Press
MENU. Navigate using “+” or “-“ key to PlaySequence and press MENU. Select the Play mode required.
Once done, press MENU.
6) A-B Repeat
While the music or voice audio is playing, press REC/AJB key. The LCD will display A-. Press REC/A->B key
again to set the end point. The clip audio will play continuously. To cancel, press REC/AJB and start to
play from the B point.
You can also press ln/ to cancel A-B repeat and stop the playback.
7) Delete
While the music is playing, press and hold ln/ key for about 2 seconds and let go. The music will be in
Stop mode . Press and hold EQ/DEL key for about 2 seconds and let go. The player will confirm your
deletion. Select Yes or No using “+” or “-“ key and press MENU key to confirm. There will be a message
informing you File Deleted.
Page 9

9
VOICE MODE
Note: This player only support WAV file in IMA ADPCM format. Please refer Troubleshooting Section for
more details. WAV does not support ID3 Tag.
Click on MENU key and navigate using “+” or “-“ key to VOICE. Click MENU key to enter.
a) To Record
Press REC/AJB key for about 2 seconds and let go. You will notice the LCD will display the current
recording time and the maximum recording time. To stop, press REC/AJB key again. The file will be saved
as VXXX.WAV whereas XXX refers to the number from 000 to 999. The file number will increment by 1 after
every successful recording operation.
b) To Play/Pause
Press ln/ key to start to play the current WAV file. Press ln/ key again to pause.
c) To Stop
Press and hold ln/ key for about 2 seconds and let go. You will see the visualization symbol stops. You
can only delete the file in STOP mode.
Page 10

10
d) To Delete
You can only delete the file in STOP mode. Pres s and hold EQ/DEL key for ab out 2 seconds. There will be a
message asking your confirmation to delete. Select Yes or No using “+” or “-“ key and press MENU key to
confirm. There will be a message informing you File Deleted.
FM MODE
Click on MENU key and navigate using “+” or “-“ key to FM TUNER. Click MENU key to enter. The RADIO word
will display on the top middle of the screen.
a) Auto Program Search
b) Under FM TUNER mode:
I) Manual Program Search: Press MENU button and the word RADIO will change to SEARCH. Use ‘+’
or ‘-‘ to increment/decrement by 0.1MHz. Once you have confirmed the channel, press MENU
again. The word SEARCH will change to SAVE. To confirm press REC/AJB key to save the
current channel.
II) Auto Program Search: Press MENU and you will see the word RADIO will change to SEARCH.
Press EQ/DEL and “-” key simultaneously and the player will auto scan and save all 30 channels.
You will see the word SEARCH changed to AUTO. To stop, press REC/AJB key.
III) Forced Mono Channel: When FM frequency modulation program ha s bad stereo effect, press
ln
/ key to achieve forced mono func tion. This can reduce noise. Press ln/ key again to
resume stereo.
IV) Volume Control: While FM is playing, press and hold “+” or “-“ to increase or decrease volume.
V) FM Recording: Press and hold REC/AJB key for abou t 2 seconds and let go. The source should be
FM. Navigate using ‘+’ or ‘-‘ key to Rate. Press MENU key to change the rate between 8, 1 1, 16,
22, 32KHz. Navigate to Record and press MENU key to start recording. Once done, press
REC/AJB key. The file will be saved as FXXX.WAV where XXX is 000 to 999.
VI) Exit: Press and hold MENU key for about 2 seconds and navigate to other mode.
Page 11

11
RECORDING MODE
Click on MENU key and navigate using “+” or “-“ key to Record. Click MENU key to enter.
a) Line-In Recording (Ensure you have connected the Line-In cable to the input e.g. CD-ROM, Sound Card
etc)
The source will display as Mic. Press MENU key to navigate to LineIn. Navigate using ‘+’ or ‘-‘ key to Rate.
Press MENU key to change the rate between 8, 11, 16, 22, 32KHz. Navigate to Record and press MENU key
to start record ing. You will see the current recording time and the maximum recording time. When you are
done, press REC/AJB key. The file will be saved as LXXX.WAV where XXX refers from 000 to 999. The file
number will increment by 1 after every successful recording operation. You can listen to the file under
MUSIC mode.
b) Microphone Recording
The source will display as MIC. Navigate using ‘+’ or ‘-‘ key to Rate. Press MENU key to change the rate
between 8, 11, 16, 22, 32KHz. Navigate to Record and press MENU key to start recording . You will see the
current recording time and the maximum recording time. When you are done, press REC/AJB key. The file
will be saved as VXXX.WAV where XXX refers from 000 to 999. The file number will increment by 1 after
every successful recording operation. You can listen to the file under VOICE mode.
c) Exit
To exit the mode, navigate using “+” or “-“ to Cancel and press MENU key.
Note: Under Mode, you can select Song/Album depending whe ther you are recording a whole CD album or a
particular song.
Page 12

12
SETTING MODE
Under this mode you can also perfor m Language, AutoPowerOff and Screen Saver sele ction. Click on MENU key
and navigate using “+” or “-“ key to Setting. Press MENU key to enter.
a) AutoPowerOff
Navigate using “+” or “-“ key to AutoPowerOff. Press MENU key to enter. Press “+” or “-“ key to select
Disable, 1 Min, 2 Mins, 5 Mins, 10 Mins. Finally press MENU key to confirm and return to previous menu.
If you select Disable, the pla yer can’t be turned off automatically until the battery is depleted.
b) Screen Saver
Navigate using “+” or “-“ key to Screen Save. Press MENU key to enter. Press “+” or “-“ key to select Off,
5s, 10s, 30s, 60s. Finally pre ss MENU key to confirm and return to previous menu.
If you select Off, the screen saver will not appear.
c) Language
Navigate using “+” or “-“ key to Language. Press MENU key to enter. Press “+” or “-“ key to select English,
Simplified Chinese, Traditional Chinese. Finally press MENU key to confirm and return to previous menu.
If you select Shutdown, the screen saver will not appear.
ABOUT MODE
Under this mode you can check the total and remaining memory available. Click on MENU key and navigate using
“+” or “-“ key to ABOUT. Press MENU key to enter.
Page 13
13
Connection to Computer
Note:
a. This player can be used in Windows 2000/XP/ME without installing driver except Windows 98SE.
b. When installing the driver, do not connect this player to computer.
c. For Windows 2000 operating system, you must install Windows 2000 Service Pack 3.0 patch program
provided in the Driver CD.
a) Driver Installation
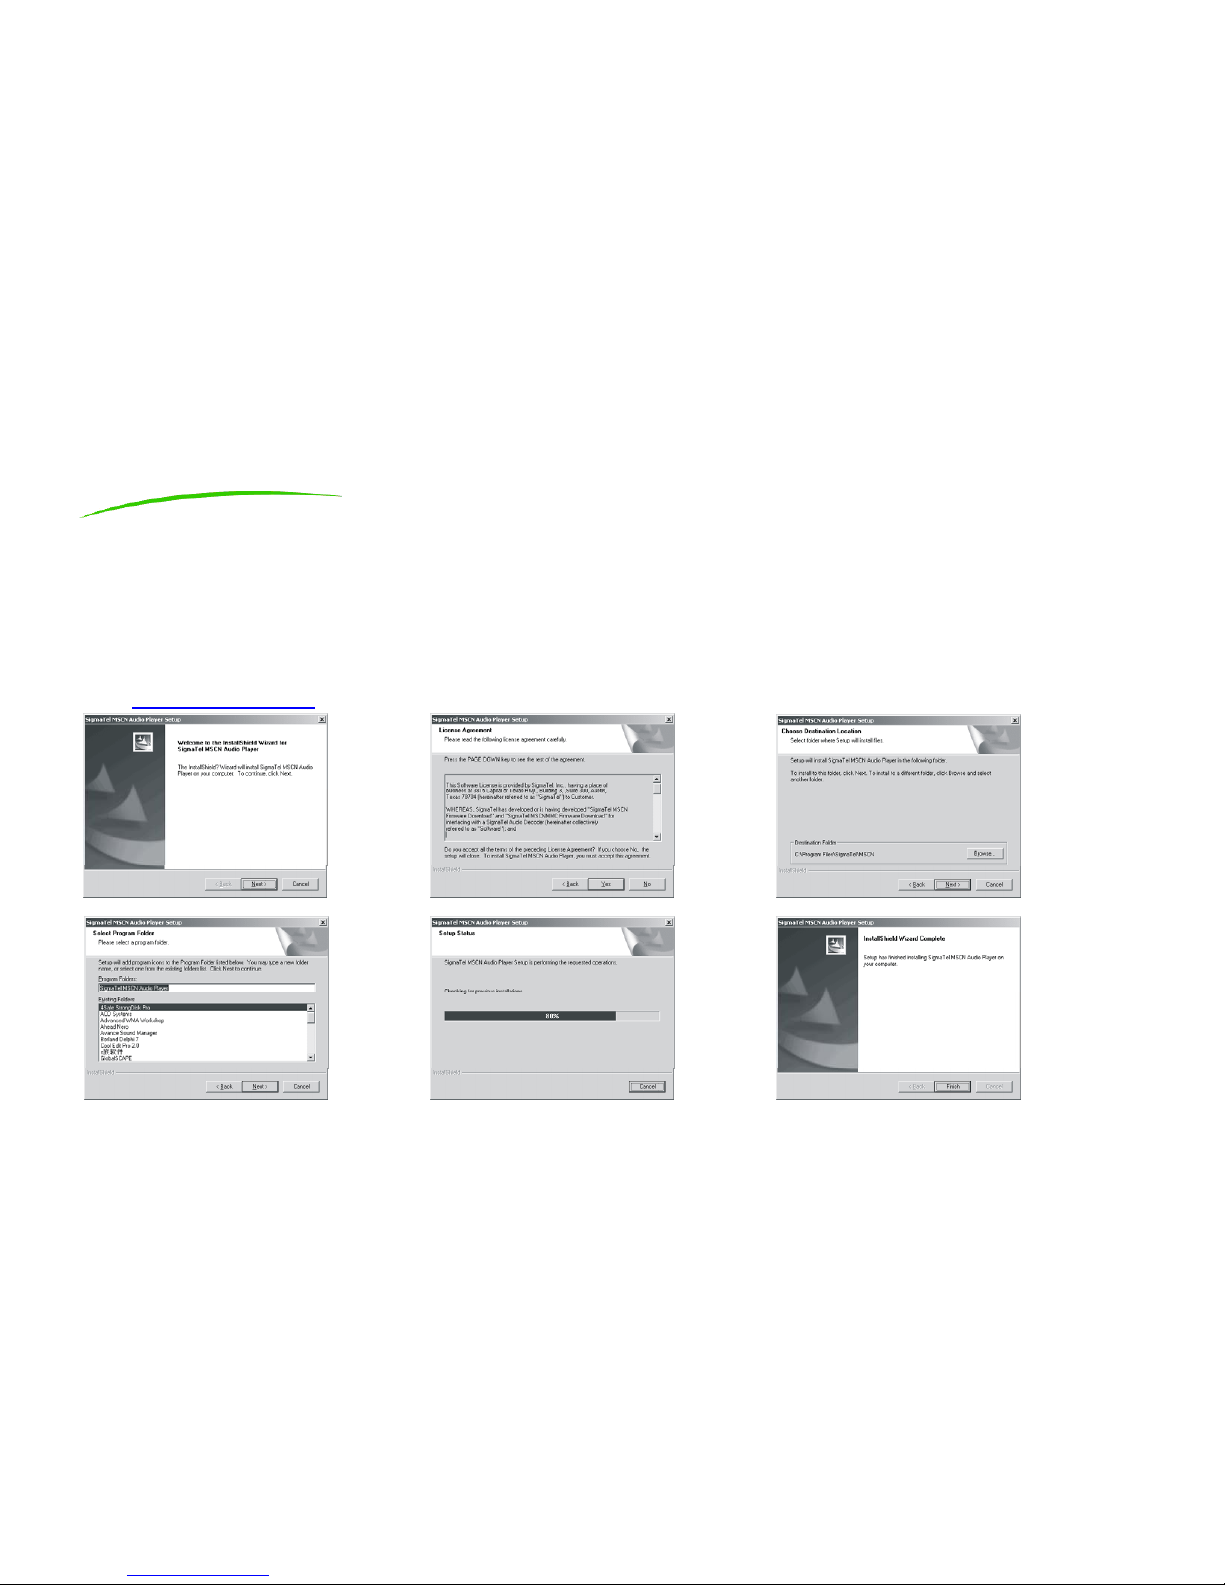
Put in the supplied Driver CD into the CD-ROM or download the driver from our website,
www.shirocorp.com
. Double-click the Setup.exe file and follow on-screen instructions.
Page 14
14
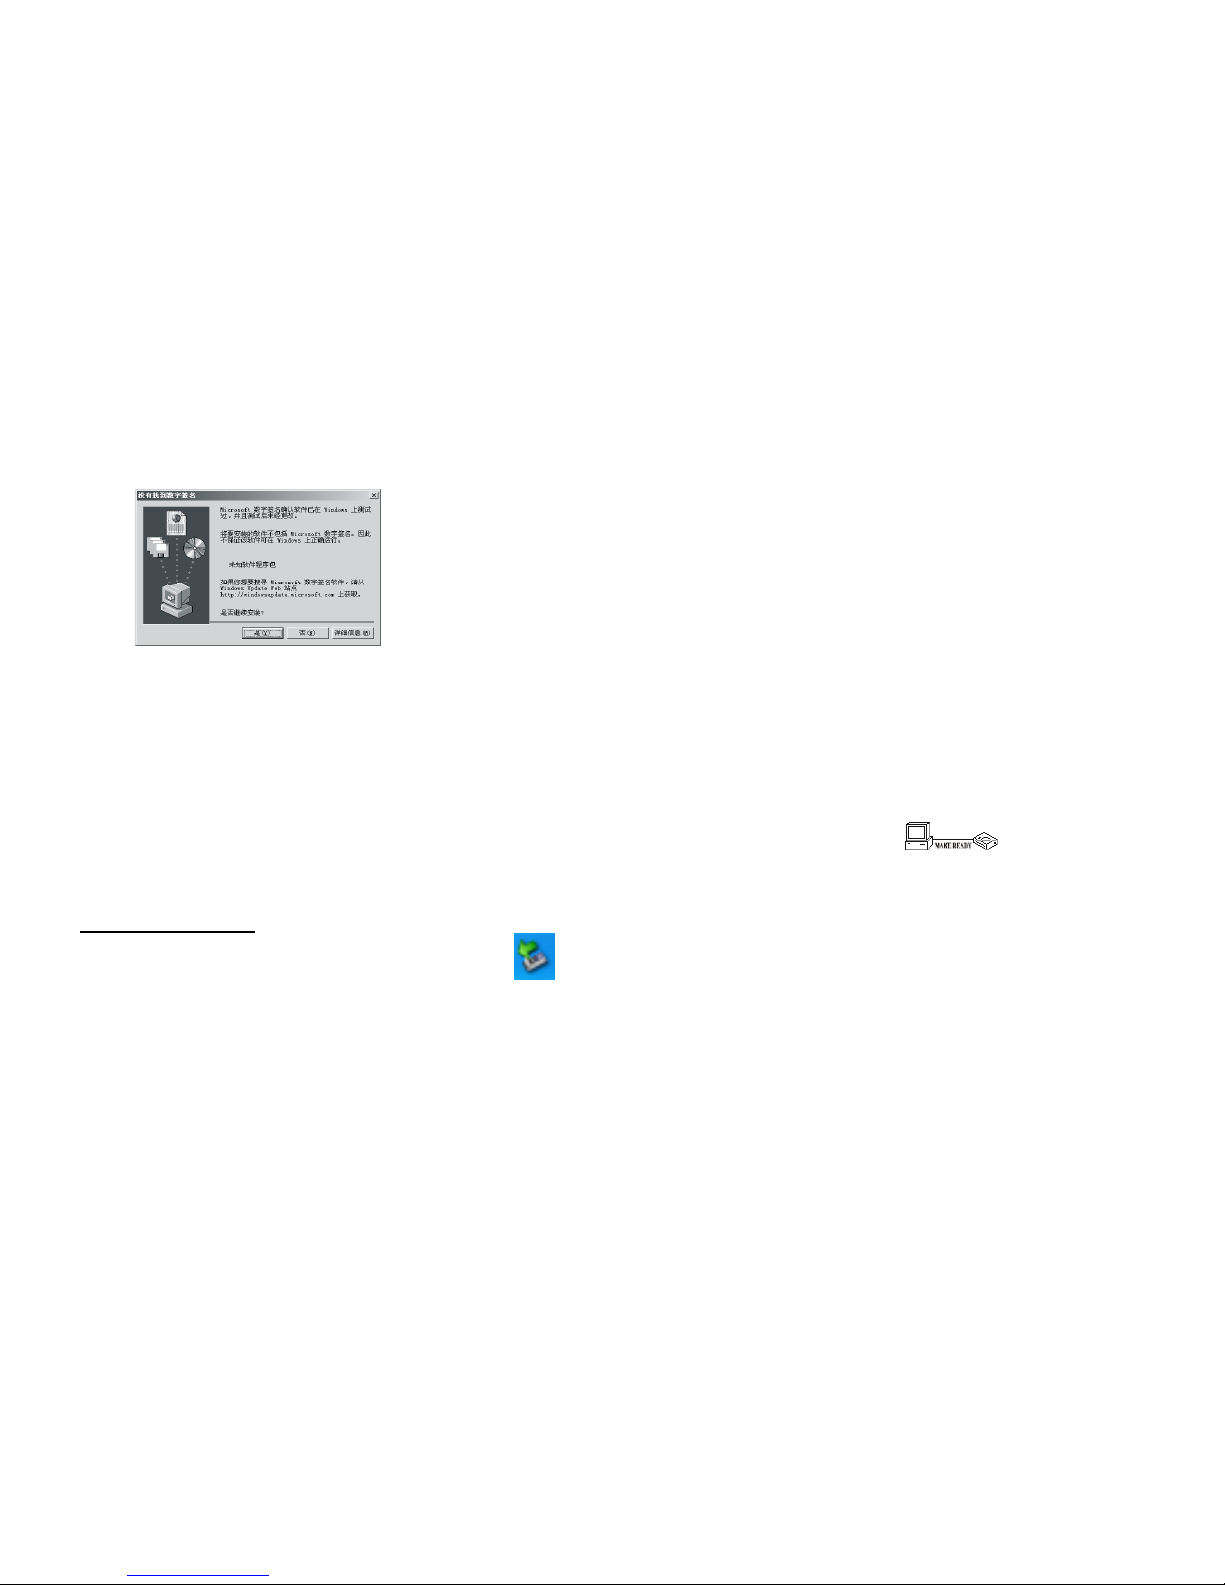
Note: If you see Digitally Unsigned windows, click Yes.
b) Connect to Computer
Connect the player to the computer USB port. Make sure the unit is powered on so that the com puter can start
detecting the player. The computer will automati cally load the driver. After the installation is completed ,
double-click on My Computer > Removable Disk. You can now perform data upload/download.
c) Disconnecting from Computer
If you want to pull out the player from the USB port, ensure the player screen is READY.
.
Alternatively, you can also remove through the computer. See b elow.
Windows® 98/98SE
1. Locate the Safely Remove Hardware icon
on the system tray. Right-click on it.
2. Click on Stop USB Mass Storage Device.
3. After a while, an Information window will appear. Click OK.
4.
You can safely remove the player from the USB port on the computer.
Page 15
15
Windows® ME/2000/XP
1. Locate the Safely Remove Hardware icon
on the system tray. Right-click on it.
2. Click on Unplug or eject hardware or Safely Remove Hardware.
3. Click Stop to stop the USB Mass Storage Device.
4. Click OK to start.
5. You should see a message informing the device is now ready to be removed.
6. You can safely remove the player from the USB port on the computer.
d) Upgrade/Firmware Restore
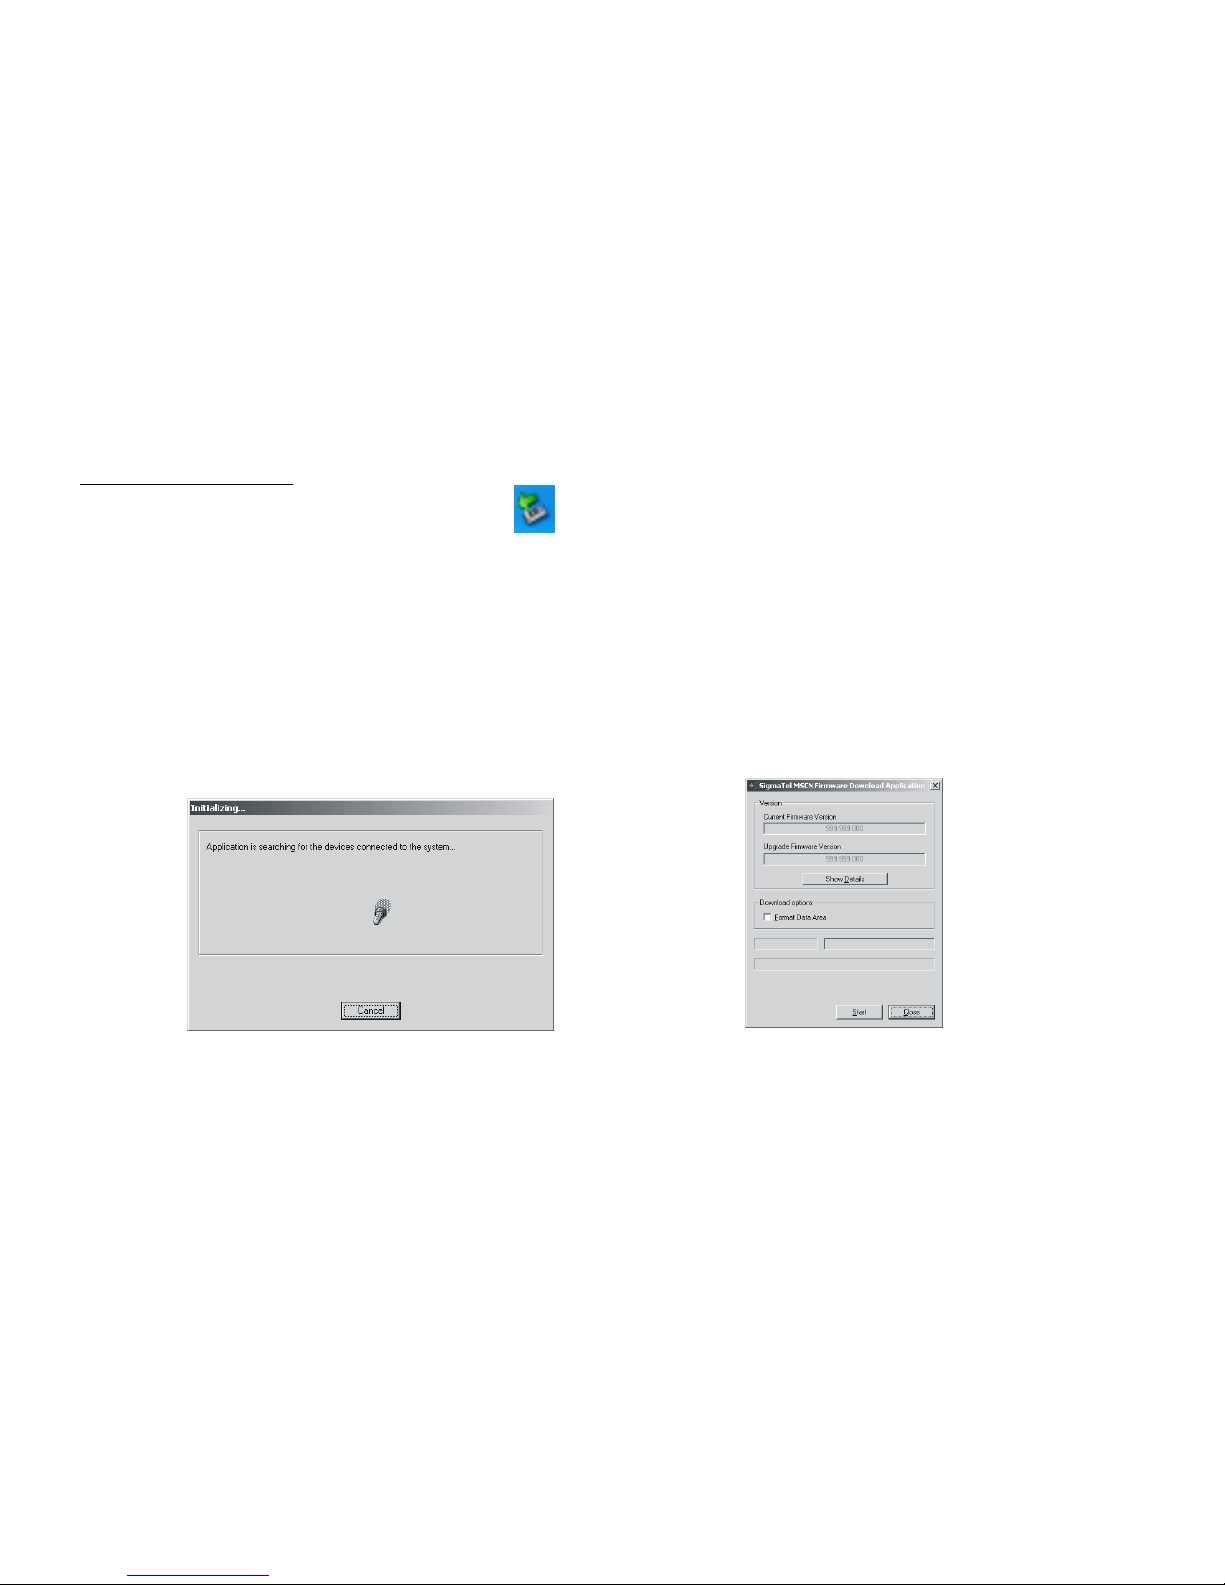
1. Connect the player to the computer and power it up. Click on Start > Program > SigmaTel MSCN Audio
Player > Firmware Download.
2. You will see the following window.
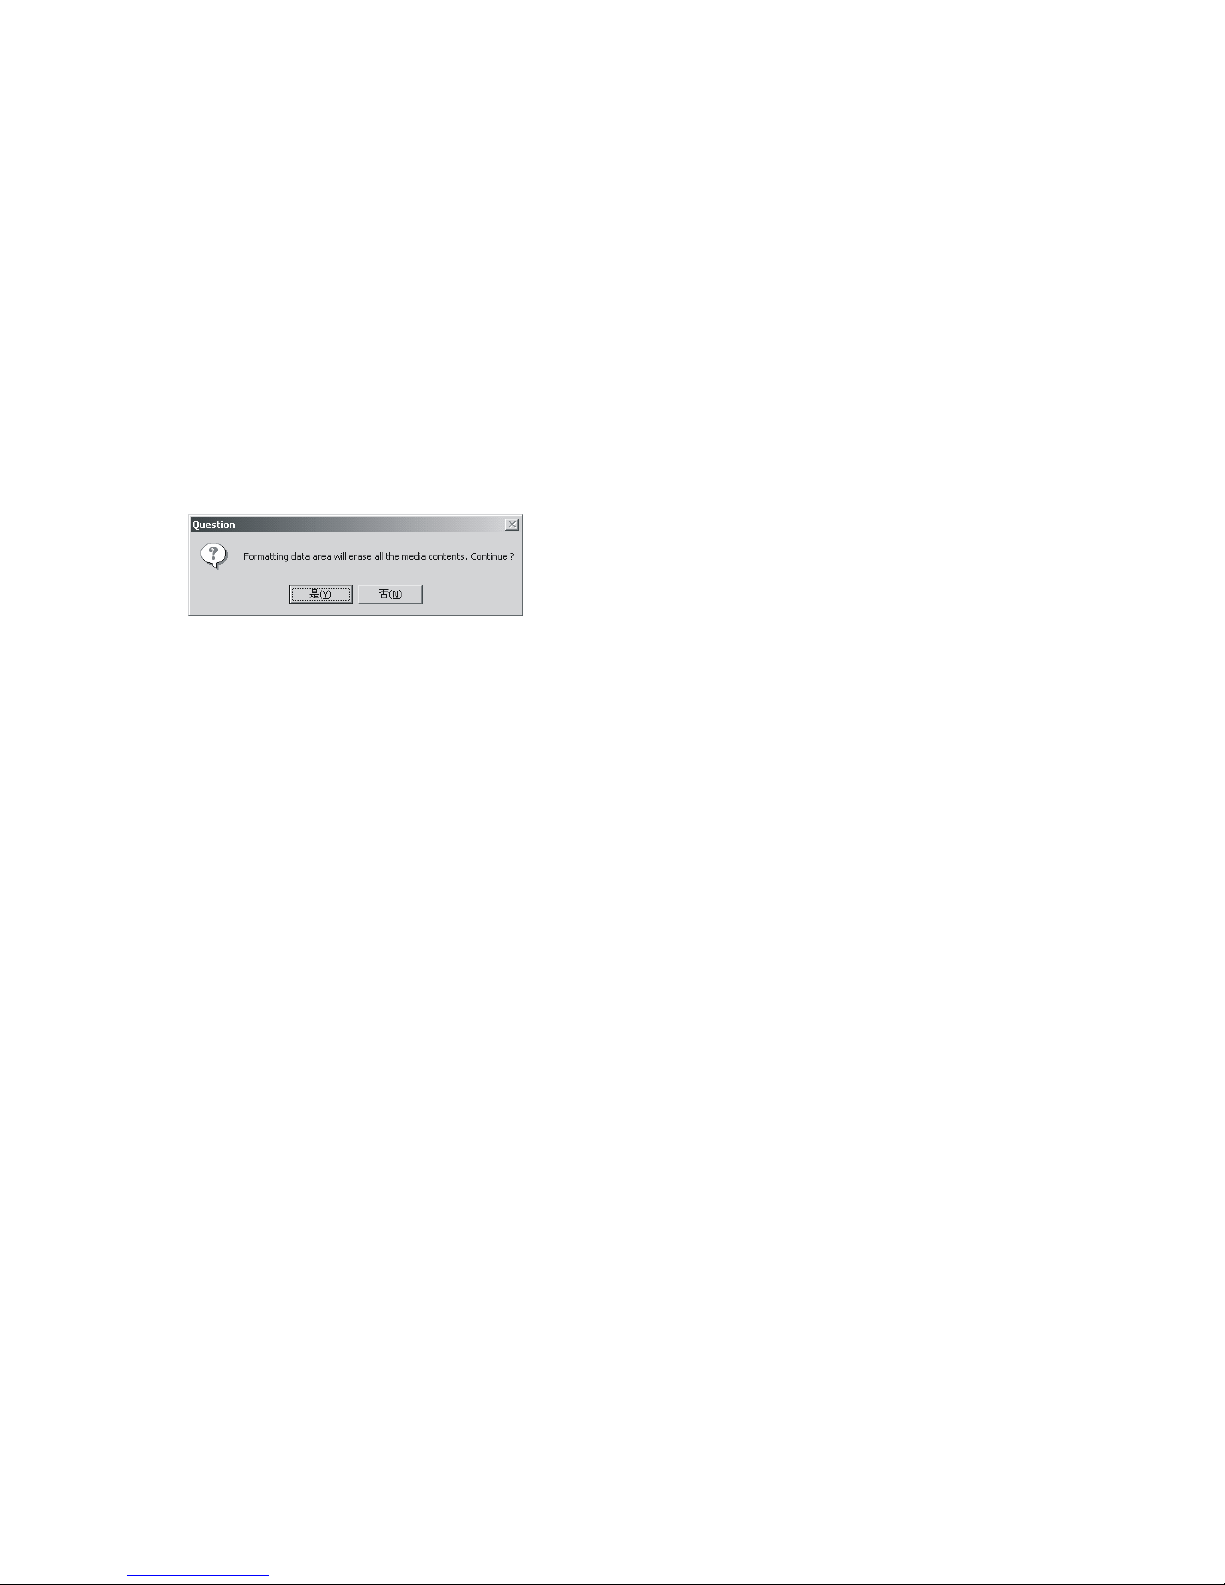
3. If you would like to format the data area of the flash memory while upgrading the program, just
check the box of Format Data Area in the software upgrading windows. The system will pop up one
Page 16
16
window, as shown below. To format the data area in the flash memory, please click Yes in the
window.
4. Click Start button to start upgrading.
5. Click on Close button to complete firmware upgrading.
e) Formatting the MP3 Digital Audio Pla yer
1. Connect the player with the computer and power it up.
2. The computer will detect the player as Removable Disk.
3. Right-click on the disk and select Format option.
4. Then the formatting window will appear.
5. Click Start to start forma tting.
6. When done, click OK button to close.
f) Uninstall Driver
1. Please disconnect the player from the computer.
2. Click on Start > Programs > SigmaTel MSCN Audio Player > Uninstall.
3. The program will prompt for confirmation, press OK to start uninstallation.
4. Once done, press Finish to close.
Page 17

17
Troubleshooting Steps
1) Why can’t this MP3 player play some MP3?
Answer: The standard MP3 refers to MPEG1 third layer, MPEG2 third layer and MPEG2.5 third layer. For other
MPEG1 second layer, although it takes mp3 as the affix, it is not the standard MP3 and can’t be played in this
unit.
2) Why is the memory capacity displayed in the operation system different from the n ominal value?
Answer: Because the built-in software of MP3 player will use a little space in the memory, the memory capacity
displayed in the operation syst em will be less than the nominal value. This conforms to the relevant standard.
3) About WAV format
This player only supports WAV file if it is IMA ADPCM format. If you want to store other formats of WA V with t his
player, please make a new folder in the removable disk, and then store WAV file in this new folder. Please don’t
put other formats of WAV into the root dire ct or y and VOICE folder of the mobile disk; otherwise when playing the
WAV file, it may cause firmware corruption.
4) Why is the response speed of the MP3 player slow?
Answer: Because after MP3 player is in use for a long time or has frequent file deletion, its internal flash memory
may have fragment (similar to fragment of the har d disk), result ing in the slow spe ed. Do a Format to defrag the
disk.
Page 18

18
5) If the built-in software of the MP3 player is damaged, what shall I do?
Answer: This is caused due to improper operation. For details, please refer to Upgrade/ Firmware Recovery as
mentioned in Upgrade/Firmware Restore.
6) In case the player has abnormal behaviour (e.g. Not responding to button clicks), what sha ll I do?
Answer: When MP3 player has abnormal sit uation due to improper operation, power off t he player by removing
the battery, and then turn on the unit again to recover.
7) MP3 player is not in use for a long time. When it is used again, what shall I do if it cannot be turned on?
Answer: The AAA battery could have leaked and caused the battery contact to fail. Please refer to the warra nty
for any exchange or servicing information.
Page 19

19
Technical Specification
Memory: 128MB/256/512MB (refer to the marking on the packaging box)
Recording Duration: 8hrs for 128MB
Dimension: 71mm x 32mm x 15mm
Weight: 24 gram (without battery)
Battery: 1xAAA 1.5V or 1.2 NiMH
Recording Media: Flash Memory
Microphone: Built-in capacitance microphone
Output: Dual channel earphone, above 8 ohms
FM Frequency Range: 87.5 – 108MHz
Temperature: 0-40 degree Celsius
Copyright November 2004. All Rig h t s Reserved.
Page 20

20
LIMITATION OF LIABILITY AND DAMAGES.
IN NO EVENT WILL MANUFACTURER AND MANUFACTURER’S RESELLERS (COLLECTIVELY REFERRED TO AS
“THE SELLERS”) BE LIABLE FOR DAMAGES OR LOSS, INCLUDING BUT NOT LIMITED TO DIRECT, INDIRECT,
SPECIAL WILLFUL, PUNITIVE, INCIDENTAL, EXEMPLARY, OR CONSEQUENTIAL, DAMAGES, DAMAGES FOR LOSS
OF BUSINESS PROFITS, OR DAMAGES FOR LOSS OF BUSINESS OF ANY CUSTOMER OR ANY THIRD PARTY ARISING
OUT OF THE USE OR THE INABILITY TO USE THE PRODUCT OR THE SOFTWARES, INCLUDING BUT NOT LIMITED
TO THOSE RESULTING FROM DEFECTS IN THE PRODUCT OR SOFTWARE OR DOCUMENTATION, OR LOSS OR
INACCURACY OF DATA OF ANY KIND, WHETHER BASED ON CONTRACT, TORT OR ANY OTHER LEGAL THEORY,
EVEN IF THE PARTIES HAVE BEEN ADVISED OF THE POSSIBILITY OF SUCH DAMAGES. BECAUSE SOME STATES
DO NOT ALLOW THE EXCLUSION OR LIMITATION OF LIABLITY FOR DAMAGES, THE ABOVE LIMITATION MAY
NOT APPLY TO THE PARTIES. IN NO EVENT WILL THE SELLERS’ TOTAL CUMULATIVE LIABLIITY OF EACH AND
EVERY KIND IN RELATION TO THE PRODUCT OR ITS SOFTWRE EXCEED THE AMOUNT PAID BY CUSTOMER FOR
THE PRODUCT.
 Loading...