

Page 1
1
MX MP3 Digital Audio Player
(USB 2.0)
User Guide
Version 1.0
Page 2

2
Table of Contents
1 Overview .....................................................................................5
1.1 Specifications............................................................................5
1.2 Button Function Definitions .....................................................7
1.3 Button Pressing Modes.............................................................8
1.4 Recording Function of the A-B Button.....................................8
1.5 Short-Cut Function of the MODE Button ................................8
1.6 Standard Control Interface ......................................................9
1.7 Battery Level...........................................................................11
2 Main Menu ...............................................................................11
3 Turn On/Off .............................................................................12
4 Musical File Playback .............................................................12
4.1 The Stop Interface...................................................................13
4.2 Functions in the Playing Interface .........................................17
4.3 Lyrics Show Interface .............................................................25
4.4 Auto Off...................................................................................27
5 Record .......................................................................................27
5.1 The General Interface of the Recorder ..................................27
5.2 The Stop Interface...................................................................28
Page 3

3
5.3 The Recording Interface .........................................................29
5.4 The Pause Interface ................................................................30
6 Voice..........................................................................................31
6.1 Functions in the Stop Interface ..............................................31
6.2 The Stop Menu Interface ........................................................32
6.3 Functions in the Playing Interface .........................................34
6.4 Disk Error...............................................................................37
7 FM .............................................................................................38
7.1 Interface..................................................................................38
7.2 Listen to the Radio..................................................................38
7.3 FM Submenus .........................................................................39
7.4 Saving Radio Station ..............................................................40
7.5 Deleting Radio Station ...........................................................40
7.6 Deleting All.............................................................................40
7.7 American Band .......................................................................40
7.8 Japanese Band ........................................................................40
8 JPEG Viewer............................................................................41
9 Settings......................................................................................42
Page 4

4
9.1 Clock Setting Interface ...........................................................43
9.2 LCD Set...................................................................................44
9.3 Language ................................................................................44
9.4 Power off.................................................................................45
9.5 Battery Charge .......................................................................46
9.6 Replay mode ...........................................................................46
9.7 Memory info............................................................................46
9.8 Firmware Version...................................................................47
10 UDISK.....................................................................................47
11 Upgrade ..................................................................................49
12. Notice .....................................................................................51
Page 5

5
1 Overview
96x64 full-color MP3 Player adopts the ATJ2085 standard
solution. In addition to the four functions of playing MP3/WMA
files, digital recording, USB Disk storage and FM radio, the
player also has the added ability of playing MTV movie files (A
special software is required to perform necessary conversions.),
as well as the added function of viewing JPEG pictures.
The common functions of the product:
Recognize up to 99-recorded files in each directory.
Delete either single or all files in the current directory of
the player.
Off Status Memorization: When turned on, the player can
return back to the last off-status, including the last
musical file played and the recording position.
Resume playing: The player can memorize the position
where it stops playing the musical file in a directory.
Once the Play button is pressed after the player is on, the
player will resume playing the last musical file where it
stopped last time.
1.1 Specifications
65,000 OLED full-color Display
Support MP3, WMA, WMV and MTV function
Support JPEG picture browsing
Play music with 16-Level Speed
Page 6

6
Full band FM stereo radio, with a total of 20 memory
stations.
Double-screen lyrics sync display to facilitate lyrics
learning and memorizing
Friendly volume fading playback function
Graphical operation interface, removable disk folder
management
Built-in microphone, hi-fi recording, short-cut start, 35
hours continuous recording (128M Flash)
USB 2.0 (Full-Speed) interface, with a max speed of
1000K Byte/S
Powerful expandability, online firmware upgrading
Convenient language learning features, a true digital
repeating device, segment A-B repeating, follow
speaking by contrasting with original sound, 16-level
variable-speed playback
For Windows ME/2000/XP, Mac OS 10.X and Linux
Kernel 2.4.2 or higher, no drivers are needed. For
Windows 98, driver is required
Lithium Battery
Page 7
7
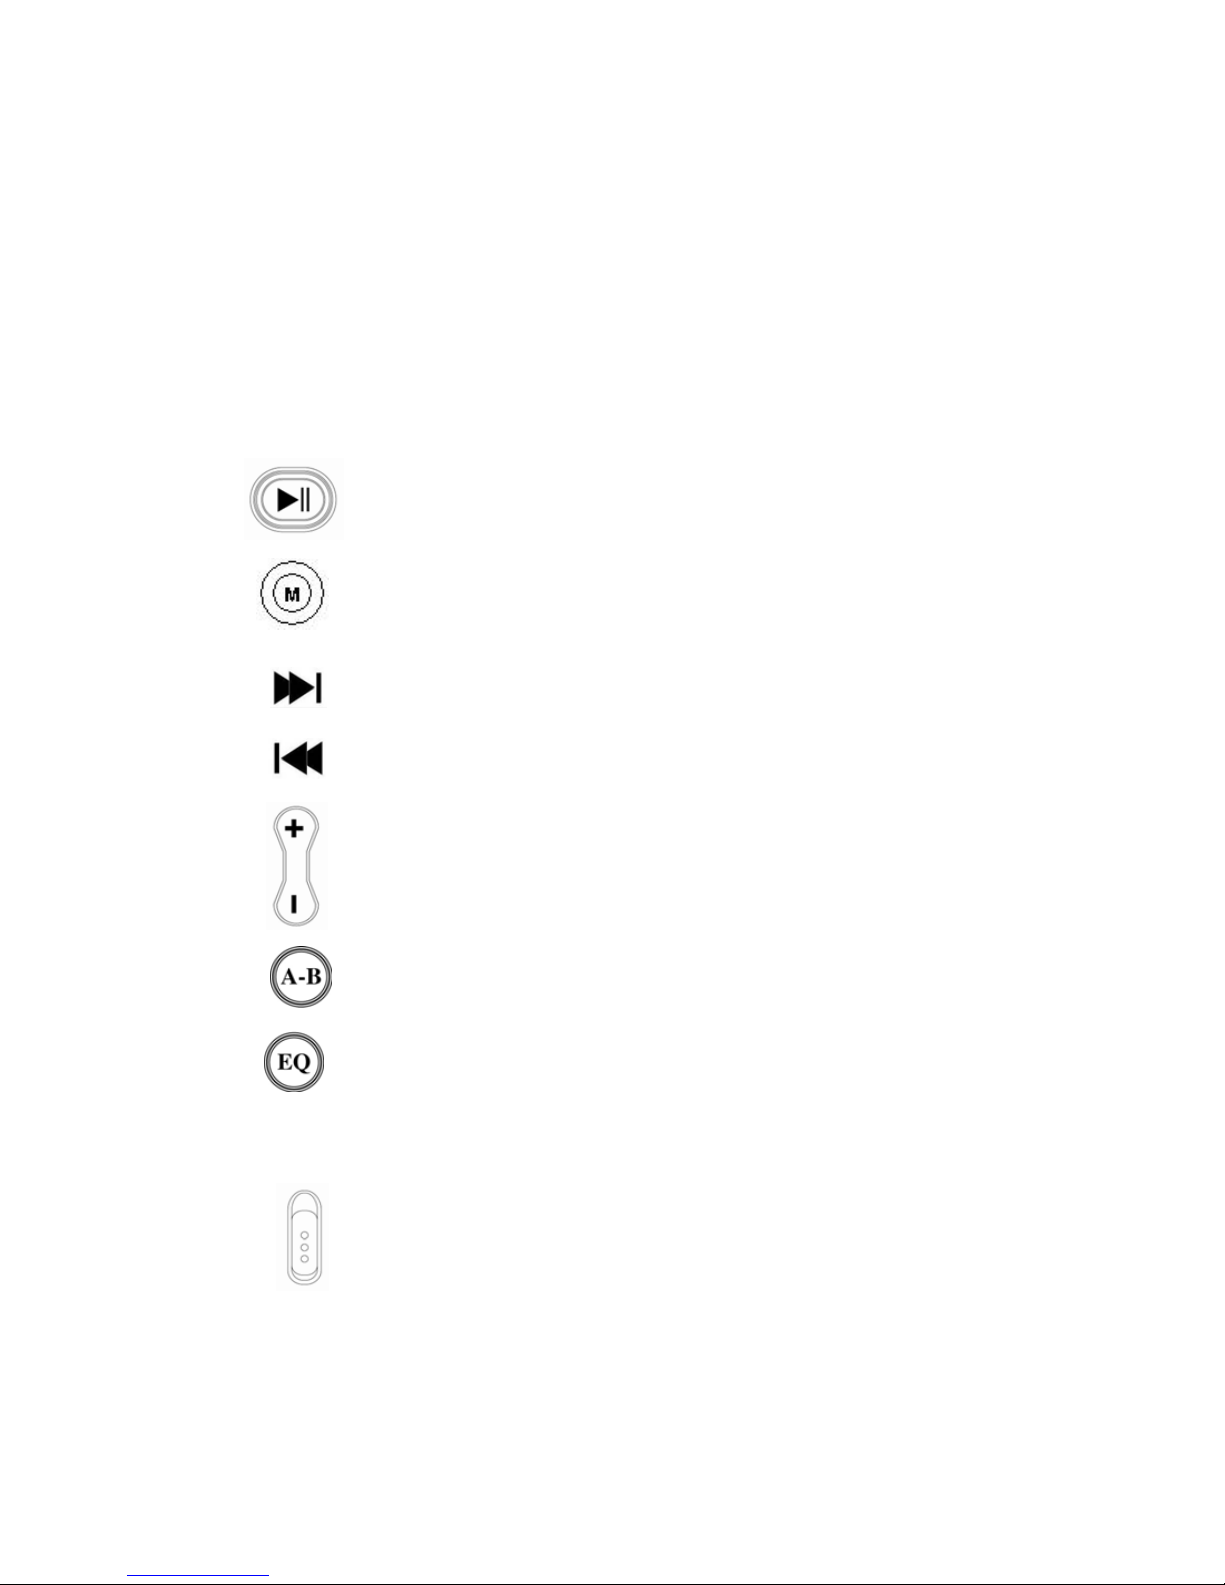
1.2 Button Function Definitions
There are 9 buttons.
PLAY: Turn On, Turn Off, Play, Pause, and Stop
MODE: Switching Working Mode, Menu Options,
Interface Switching
NEXT: Move to Right, Forward
LAST: Move to Left, Backward
VOL+: Volume Increment, Last Item
VOL-: Volume Decrement, Next Item
A-B/REC: Special A-B / Recording Hot Button
EQ: Selection of equalizer mode of the musical file
directly without entering the option menu when
musical file is in play mode
POWER ON: Turn on or off the power
Page 8

8
1.3 Button Pressing Modes
There are three types of pressing mode for the button:
1.3.1 Short-Press
For button with both long and short press functions,
the button will function as a short-press once they are released
within 1.2 seconds (E.g. Play, Stop, Last, Next).
For button with short-press function only, the button
will respond once it is released.
1.3.2 Long-Press: Press and hold button for longer than 1.2
seconds. (E.g. On/Off, Forward/Backward)
1.3.3 Hold On: Press and hold button to adjust the values
sequentially. Release button when done. (E.g. Volume
Adjustment)
1.4 Recording Function of the A-B Button
A-B button functions as a hot recording button in all other
interface except in the recorded file playback, musical file
playback interface, repeat interface, upgrading interface and U
Disk interface. A short-press of the A-B button will take you to
the recording interface and start recording.
1.5 Short-Cut Function of the MODE Button
In the music playback, recorder, recorded file playback, radio,
pictures and settings interfaces, a long-press of the MODE
Page 9
9
button will stop the current operation and return to the main
menu.
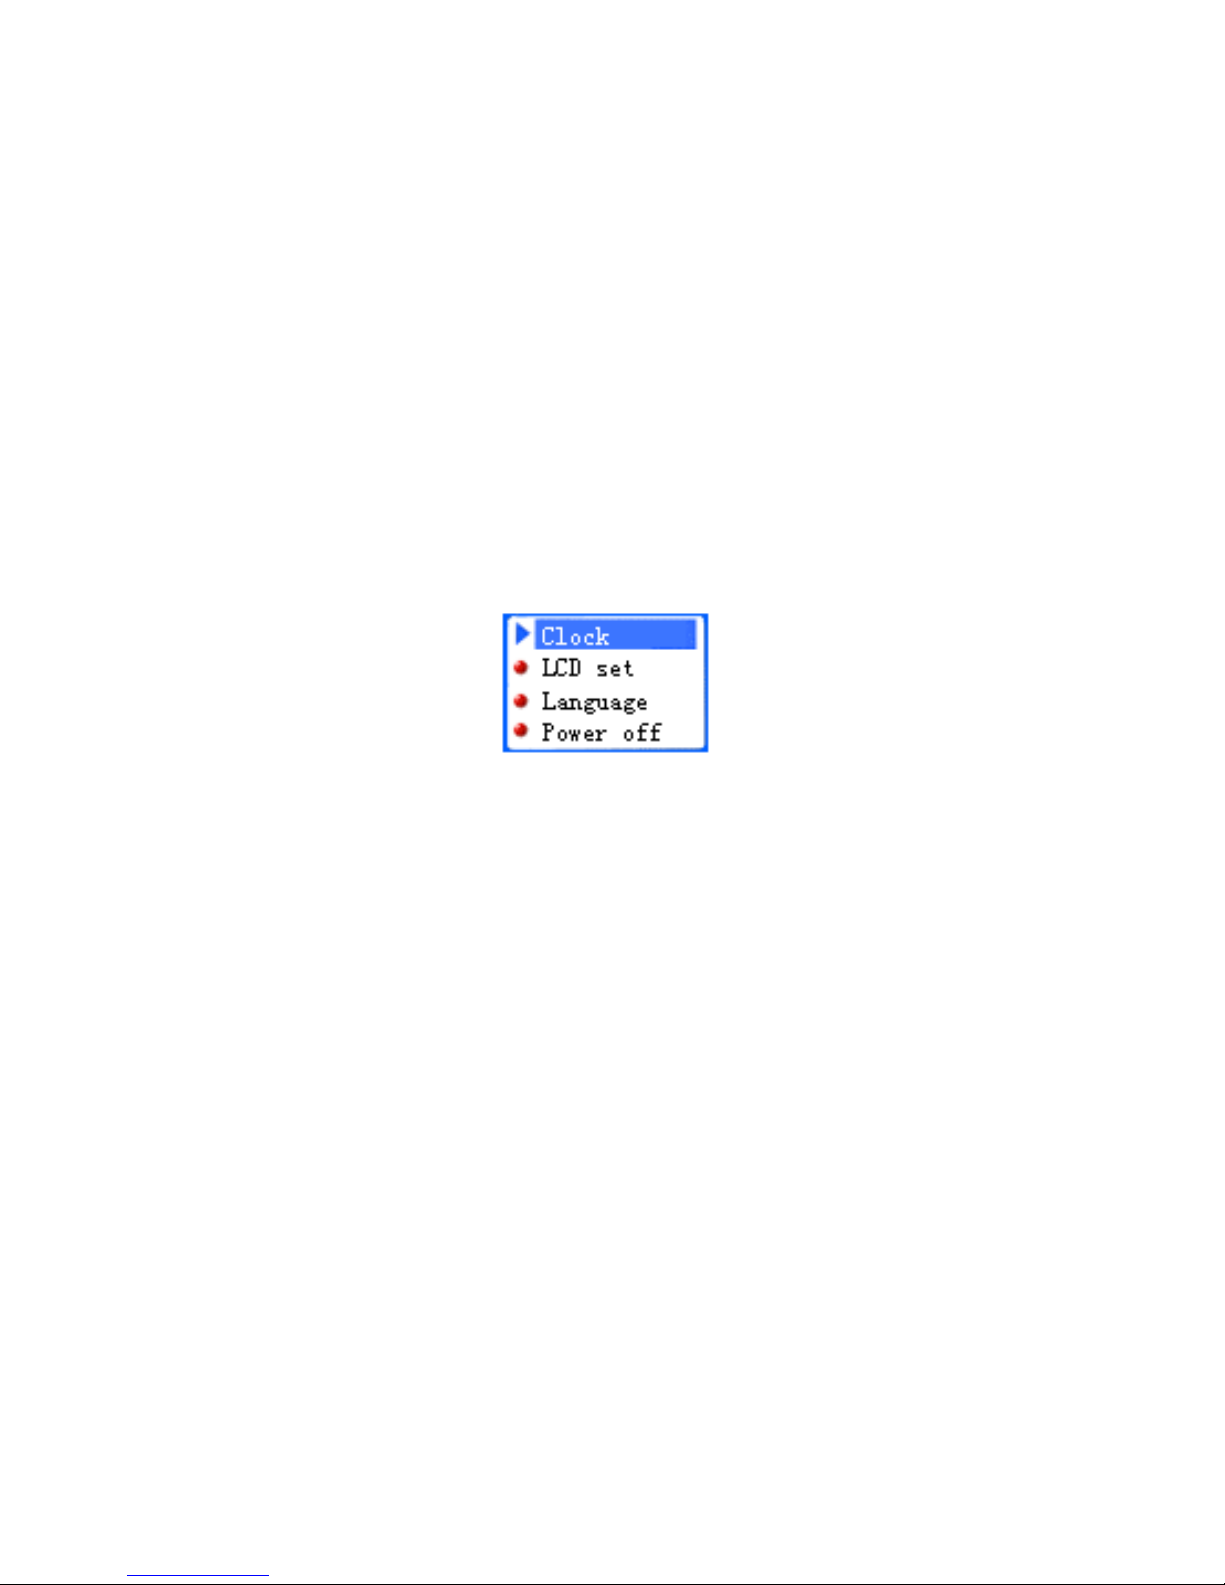
1.6 Standard Control Interface
Standard Menu
Note: For each functional module interface, the standard submenu will appear. Below is one of standard sub-menu for the
settings interface of the player.
The Settings menu
Able to display up to 4options in one screen.
The option with the blue background is the one currently
selected.
Press the Mode button to enter the main or sub-menu
Press either “Vol-”, “Vol+”, “Next” or “Last” for option
selection
A short-press of the PLAY button will exit out of the sub-
menu.
A short-press of A-B will enter the recording mode
interface and start recording.
A short-press of PLAY will exit the menu.
Page 10
10
Note: The player will auto exit to the main menu if player is
idling for more than 5 seconds.
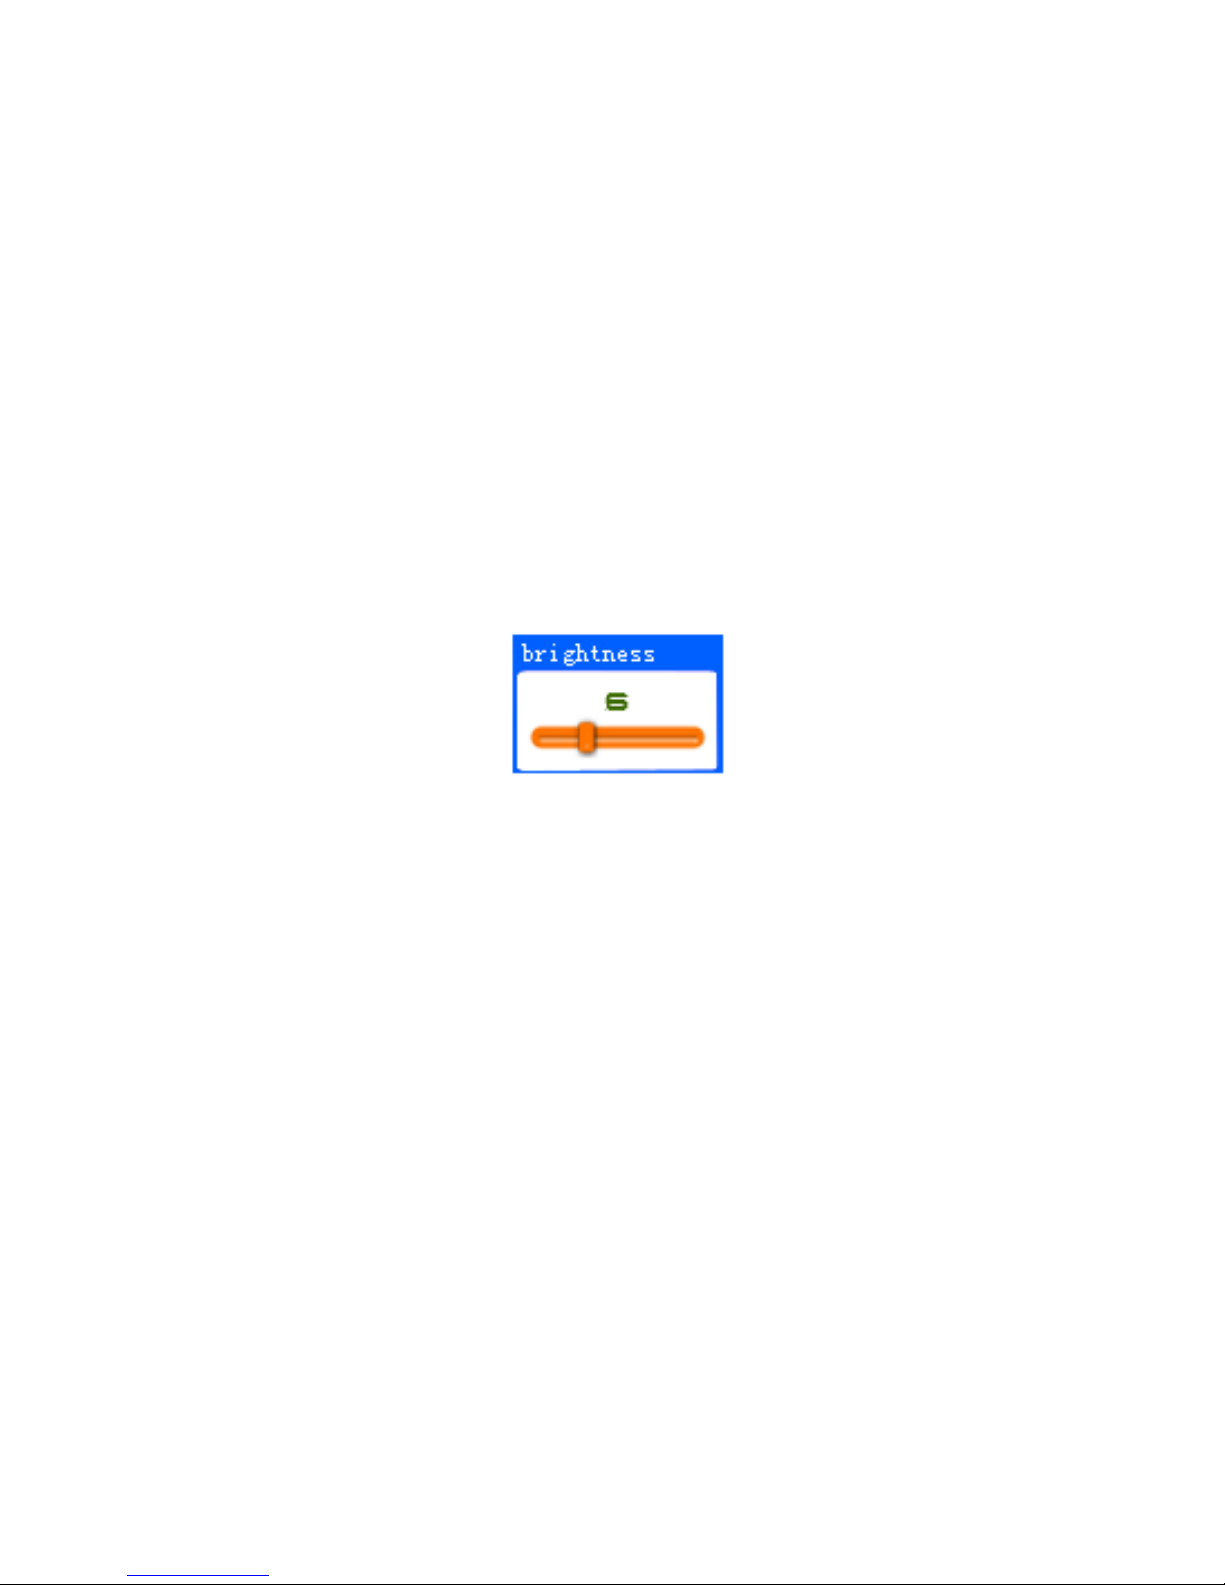
The Standard Slide Bar
Note: The standard slide bar offers a choice for adjustment of
the specific option either through increment or decrement of the
slide bar.
Below is a picture how the Standard Slide Bar looks like
Brightness Adjustment
The slide block can be moved to left or right.
The number on top of the slide bar indicates the position
of the slide block.
A short-press or long-press of NEXT will move the slide
block a step to right. The corresponding number will be
displayed step by step till the max number.
A short-press or long-press of LAST will move the slide
block a step to left. The corresponding number will be
displayed step by step till the min number.
A short-press of MODE will save the setting and exit to
the sub-menu.
Page 11
11
A short-press of A-B will enter the recording mode
interface and start recording.
1.7 Battery Level
There are all together 9 levels for measuring the battery
energy.
represents full battery. represents low battery.
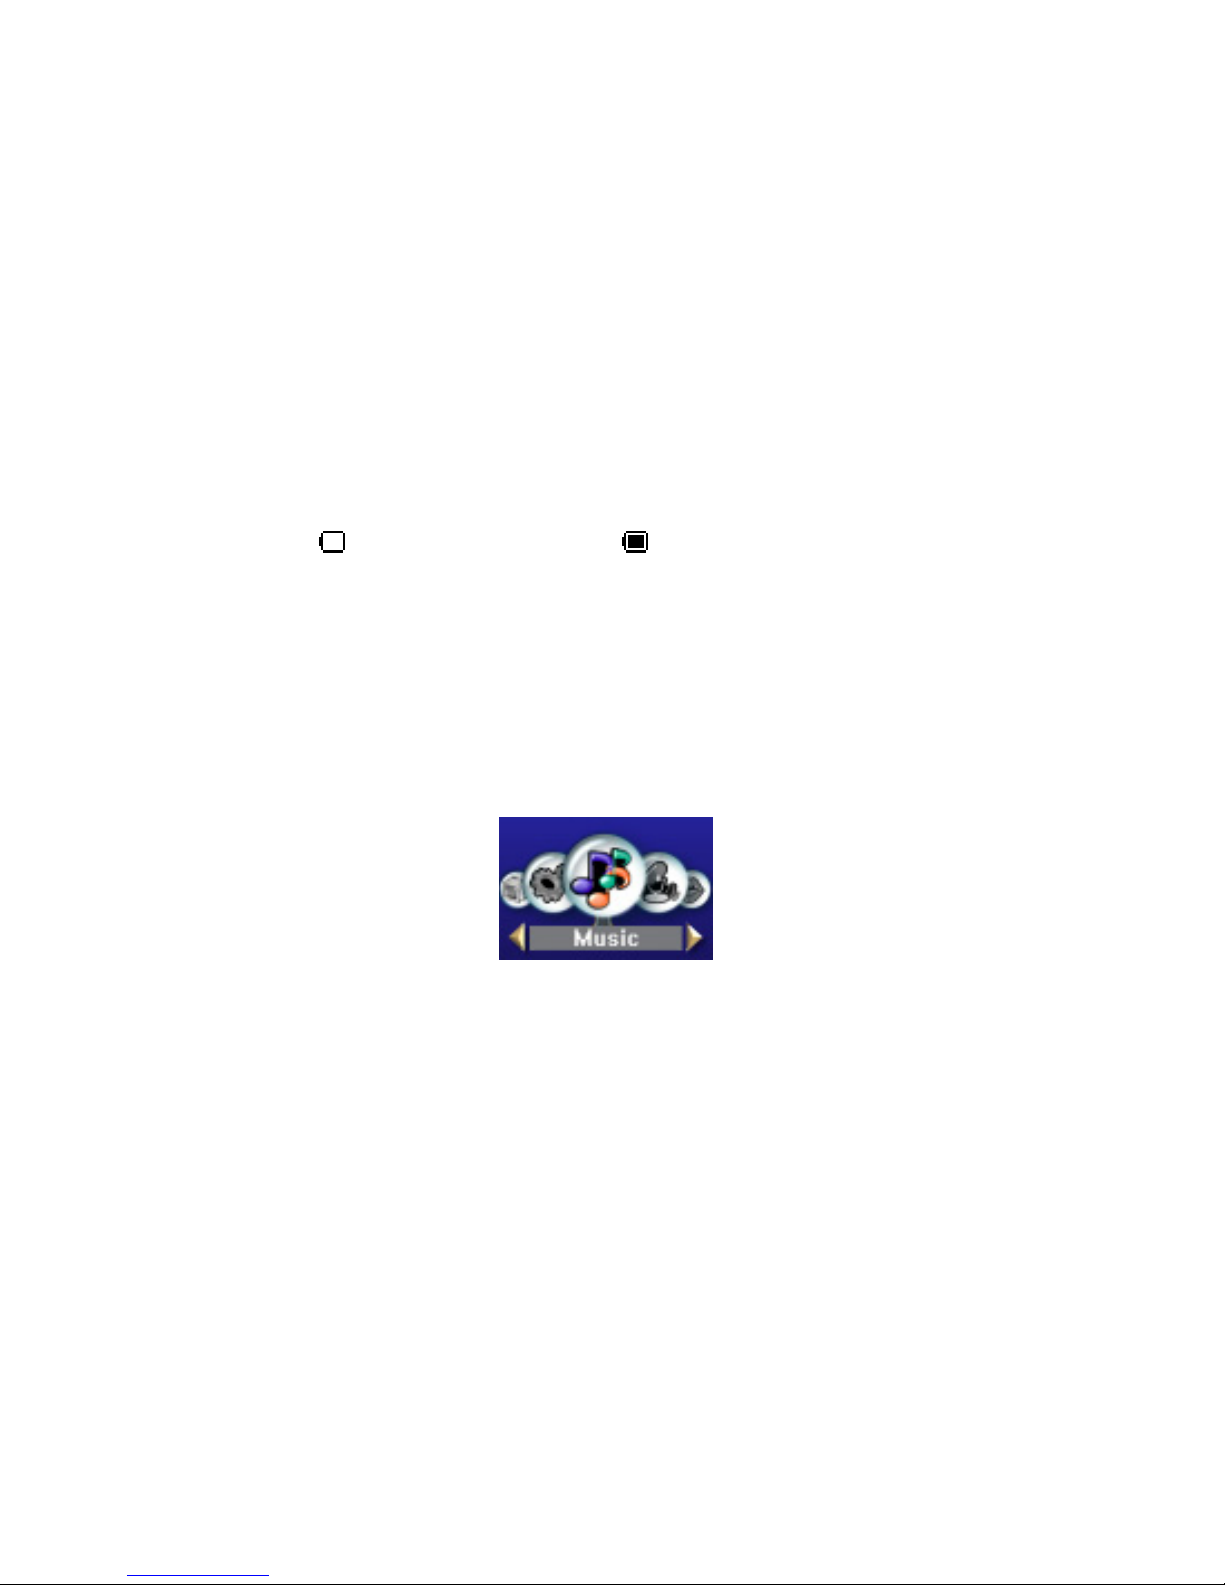
2 Main Menu
There are 6 functions available: music, recorder, voice, radio,
jpg and settings. Each round icon represents a function mode in
the main menu. The main menu interface is shown in the Fig
below.
The Musical File Playback
Button Function in the Main Interface
A short-press or long-press of NEXT will shift the
selection position to right.
A short-press or long-press of LAST will shift the
selection position to left.
Page 12

12
A short-press of MODE will enter the function module. A
Long-press will return to the main menu interface.
A short-press of A-B will enter the recording mode
function and start recording.
A long-press of PLAY will turn the player off.
3 Turn On/Off
3.1 Turn Off
A long-press of PLAY will turn off the player.
The player can be automatically turned off depending on the
user specification of power mode for the player, however this
function will be overridden if the USB port of the player is
connected to a PC.
3.2 Turn On
A long-press of PLAY will turn on the player.
3.3 Low Battery
If the battery is low, the player will automatically go into the
Stand-By mode.
4 Musical File Playback
The Musical File Playback function allows the playback of
musical files in MP3 and WMA formats along with additional
features like Lyrics Display, Tempo rate, Equalizer mode, etc.
Page 13
13
To play the MTV files, the file must be converted using a
special type of software.
4.1 The Stop Interface
In the Stop interface, the current music will stop at the current
playback position. If the user turns off the player, it will save
the setting of last previous state. When the player is turn on, the
player will restore back to last previous state of the player.
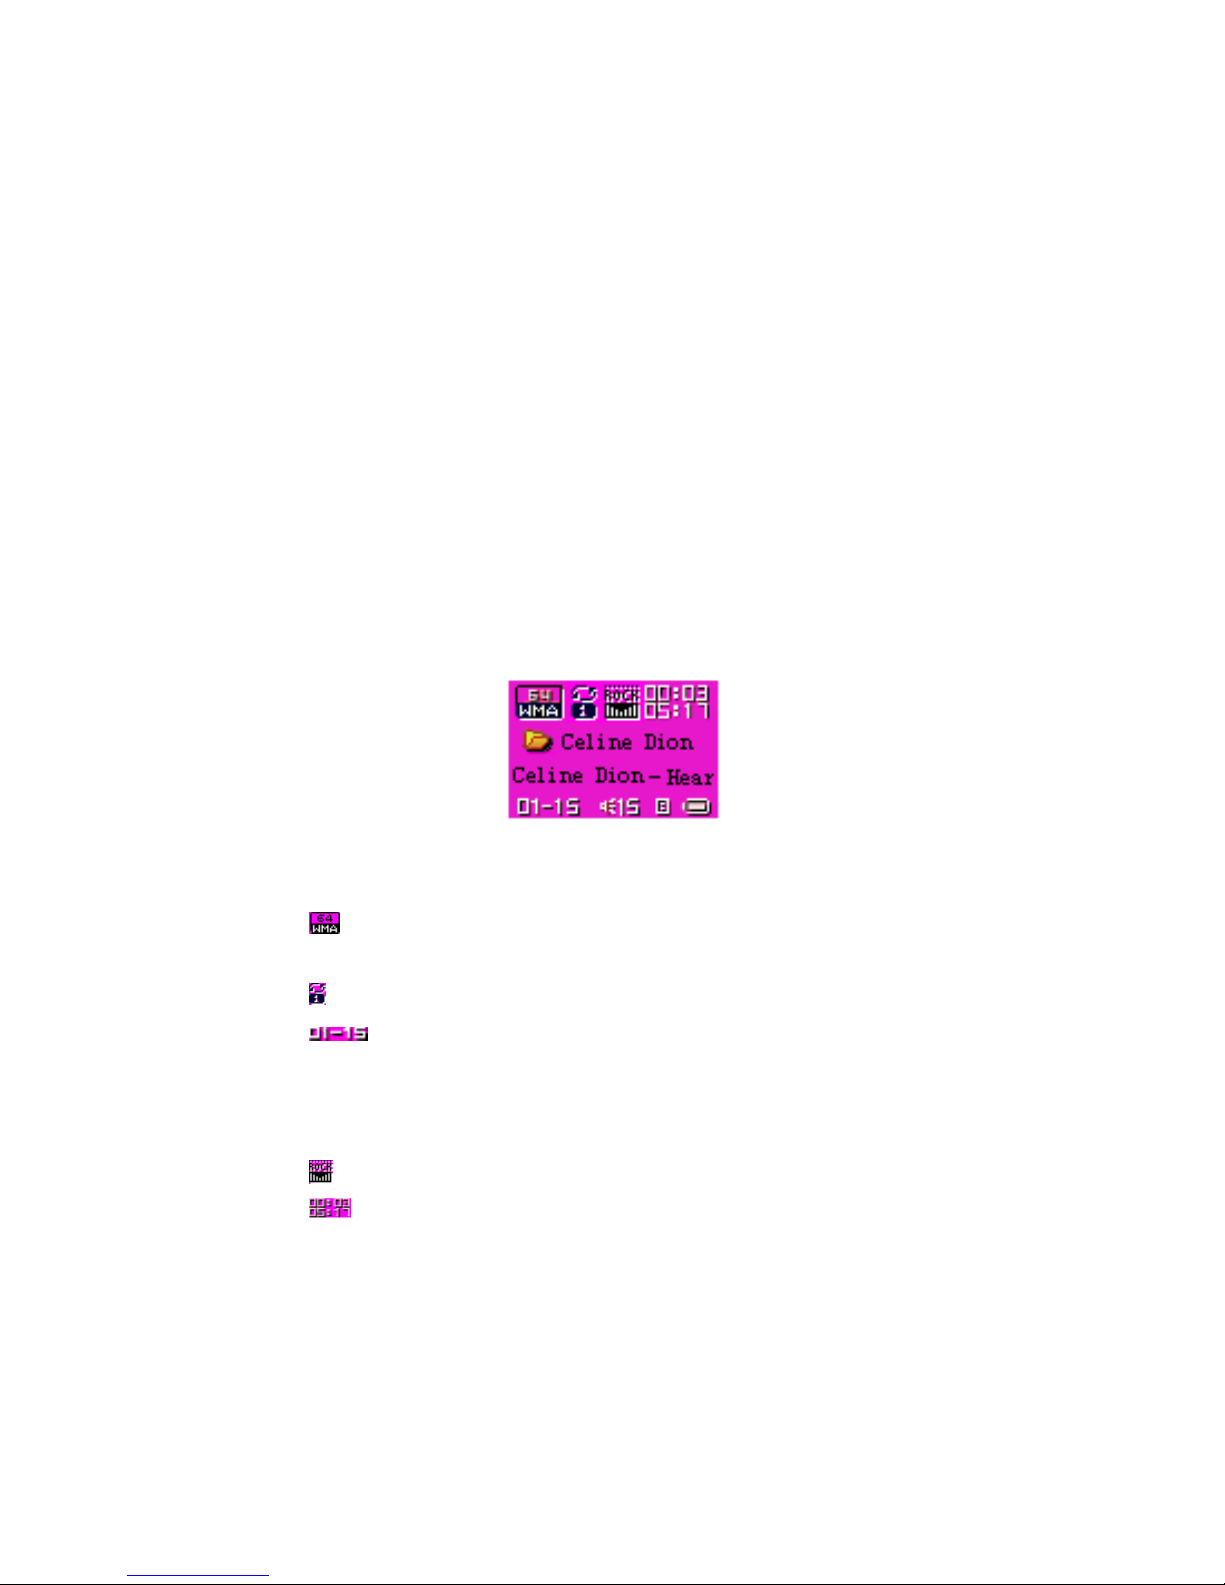
The music file interface is shown in the Fig below.
Musical File Playback
indicates that the current musical file is in the WMA
format with a bit rate of 64Kbit.
represents that the current play mode is Repeat 1.
indicates that the current musical file is the first
music file and the total number of the musical files is fifteen.
The total number refers to the number of musical files in the
current directory.
indicates that the current EQ is Rock.
shows that the current play back position is at 00:03
and the total length of the song is 05:17.
Page 14

14
represents that the current song has lyric display
function mode
The title and singer of the song will be displayed in the
screen.
Button Function in the Stop Interface
Long-Press of MODE: Enter into the main menu.
Short-Press of MODE: Enter into the sub-menu
Short-Press of PLAY: Play musical files.
Long-Press of PLAY: Turn the player off.
Hold-On of NEXT: Shift to the next song in the current
directory
Hold-On of LAST: Shift to the previous song in the
current directory
Short-Press of “Vol+” or ”Vol-”: Adjust the volume.
Short-Press of A-B: Switch to the recording mode
interface and start recording.
Short-Press of EQ: Selection of equalizer mode of the
musical file
4.1.1 The Stop Menu Interface
The stop menu interface is shown in the Fig below.
Page 15
15
The Stop Menu of the Musical File Playback Interface
The option with the blue background is the one currently
selected.
“Delete”: This is the name of the current selected option.
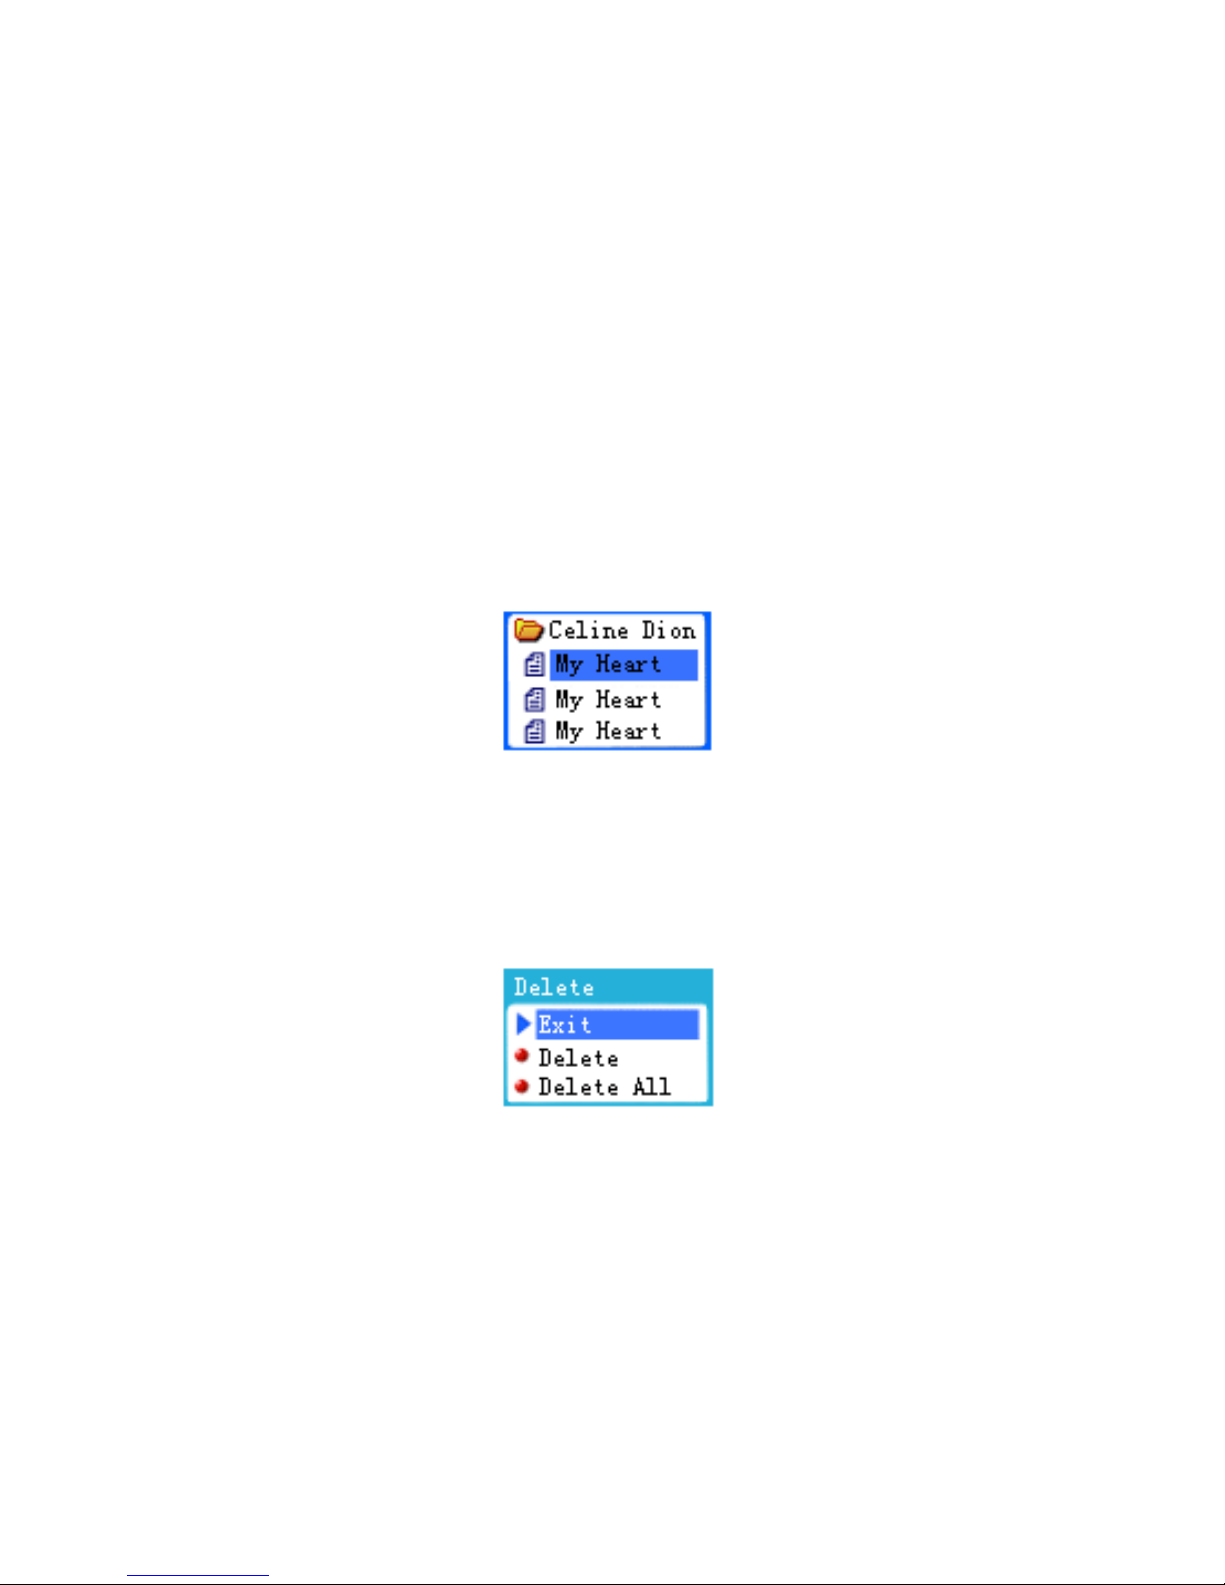
4.1.2 The Deleting Interface
Note: You can either delete a single file or all files in this
interface. The File Selection Interface is shown in the Fig
below.
The deleting selection of the Musical File Playback Interface
In this interface, press MODE to select the desire options of the
Deleting interface. See the Fig below.
The deleting ways of the Musical File Playback Interface
Button Function in the Deleting Interface
Long-Press of PLAY: Turn the player off.
Page 16

16
Short-Press of PLAY: Return to the Stop Interface.
Short-Press of A-B: Switch to the recording mode
interface and start recording
4.1.3 Directory Selection Interface
Beside the root directory, only valid directory that contains the
musical files is displayed. The directory selection interface is
shown in the Fig below.
The directory selection of the Musical File Playback Interface
Button Function in the Directory Selection Interface
• Short-Press or Long-Press of “Vol-”: The selection strip
switches to the next directory one by one. The selection
strip scrolls in a way of two lines.
• Short-Press or Long-Press of “Vol+”: The selection strip
switches to the last directory one by one. The selection
strip scrolls in a way of two lines.
•
A short-press of MODE will select the directory and
return to the Stop interface.
• A long-press of PLAY will turn the player off.
• A short-press of PLAY will return to the Stop Interface.
Page 17

17
• A short-press of A-B will enter into the recording mode
function and start recording.
4.2 Functions in the Playing Interface
The Playing interface is shown in the Fig below.
Musical File Playback
The text will scroll horizontally while the song is playing.
Button Function in the Playing interface
Short-Press of MODE: Enter into the Playing menu
interface.
Long-Press of MODE: If there is a corresponding lyric, it
will enter into the Lyrics interface. If there is no
corresponding lyric, then the song will stop playing and it
will enter the main menu.
Short-Press of PLAY: Enter into the Stop Interface.
Long-Press of NEXT: Function as fast forward till the
end of a song.
Long-Press of LAST: Function as fast backward till the
beginning of a song.
Page 18

18
Short-Press of NEXT: The current music fades out in 2
seconds. The player will jump to the next song and start
playing. The next song is selected based on the current
playing mode. If the current mode is Repeat One, then the
next song is selected based on Repeat All.
Short-Press of LAST: The current music fades out in 2
seconds. The player will jump to the previous song and
start playing.
Hold-On of “Vol+”: The volume will increase.
Hold-On of “Vol-”: The volume will decrease.
Short-Press of A-B: Enter into the Repeat interface and
confirm the A point. Another short-press of A-B will
confirm the B point and start repeating the segment
between A and B. The third short-press of A-B will
cancel the repeating.
Note: When the player encounters invalid files during auto or
manual selection of songs, the message “Format Error” will
display and return back to the Stop interface.
4.2.1 Playing mode interface
This interface provides the user with the following options:
① Repeat: To select the playing mode of the song.
② Equalizer: To select equalizer mode of the song
③ Tempo rate: To adjust the speed of song playing
④ Replay: To enter into the Repeat interface and start the
Repeat mode function.
Page 19

19
⑤ Replay Times: To set the number of times for repeating
for the song
⑥ Replay gap: To set the time interval between each
repeating songs.
⑦ Exit: Return to the Playing mode interface.
The interface is shown in the Fig below.
The Playing Menu of the Musical File Playback Interface
The selected position is displayed in blue background
It will auto exit after idling for more than 5 seconds.
4.2.2 Repeat Setting Interface
Note: You can only select Repeat Mode when the music is still
playing. The interface is shown in the Fig below.
The Playing Menu of the Musical File Playback Interface –
Repeat Mode
Page 20

20
List of Repeat Mode Options:
Normal: When the player finishes playing the songs in the
current directory, it will continue to play the songs in the next
directory.
Repeat One: Repeat playing the current song.
Folder: The player will stop once it finishes playing the songs
in the current directory.
Repeat folder: Repeat playing the songs in the directory.
Repeat All: Repeat playing the songs in all directories.
Random: Play the songs in the current directory in a random
way.
Intro: Play the beginning 10 seconds of all the songs in the
current directory in order.
4.2.3 Equalizer Setting Interface
Note: User can only select Equalizer mode when the music is
still playing.
List of Sound Effects Options:
Natural (Default)
Rock
Pop
Classic
Soft
Jazz
Page 21

21
DBB
4.2.4 Repeat Interface
Note: User can perform manual or auto repeat in this interface.
The interface is shown in the Fig below.
Musical File Playback Playing –AB Repeat
Manual Repeat Operation
When you enter Manual Repeat, the “A” in
will flash.
A short-press of NEXT or A-B will set the “A” point, and
then “B” will flash.
Subsequent short-press of NEXT or A-B will set the “B”
point. Then the segment between “A” and “B” will play
repeatedly.
After a short-press of LAST or A-B or the set repeating
times, the repeat function will be repeated.
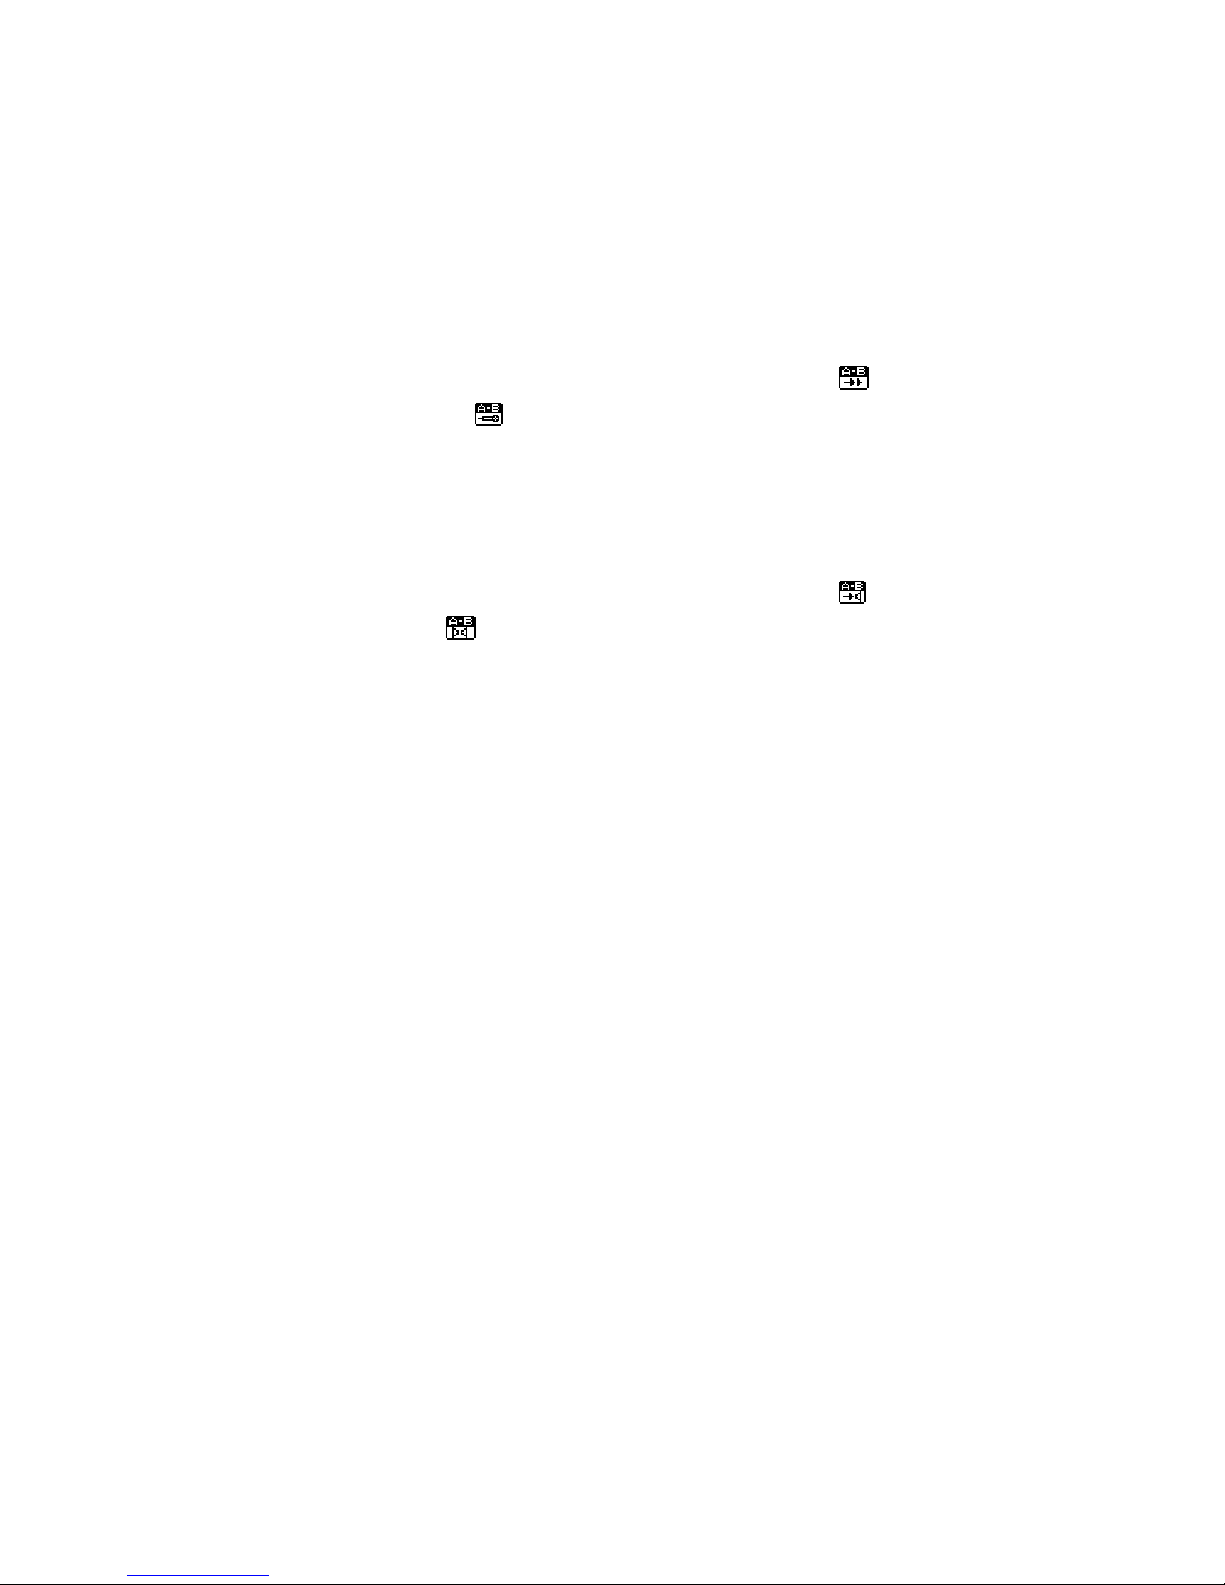
A short-press of NEXT will enter the cycle of
follow
by this icon->
after a few seconds. During this duration,
you will be able to record your own voice and the
recording duration is 10% longer than the repeat. The
minimum recording duration is 1 second.
A short-press of LAST will return to the Repeat function.
Page 22

22
A short-press of NEXT will enter the cycle of
follow by
this icon
(Compare). The Compare function plays the
sound recorded concurrently with the song play.
A short-press of LAST will return to Follow-Repeat.
A short-press of NEXT will begin the settings for the next
Repeat.
Note:
① In the steps above, hold-on of “Vol+” or “Vol-” will
change the current playing speed. (Except for the WMA
format)
② In all the steps above, a short-press of MODE will exit
the Repeat interface and return to the Playing interface.
③
In all the steps above, a short-press of PLAY will exit the
Repeat interface and the Playing interface, and return to the
Stop interface.
Auto Repeat Operation
When you enter Auto Repeat, the “A” in
will flash.
A short-press of NEXT/A-B will set the “A” point, and
then “B” will flash.
If the player finds a blank or after a short-press of
NEXT/A-B, the
Repeat will display, and the player will
start repeating the segment between A and B.
After the set repeat times, the “B” point will be
automatically set to the “A” point of the next segment, and
then back to the “B” point.
Page 23
23
A short-press of LAST will cycle the Setting->Repeat
function.
A short-press of NEXT will enter the cycle of
follow
by this icon ->
after a few seconds Follow. During this
duration, you will be able to record your own voice and
the recording duration is 10% longer than the repeat. The
minimum recording duration is 1 second.
A short-press of LAST will return to the Repeat function.
A short-press of NEXT will enter the cycle of
follow by
this icon ->
Compare. The Compare function plays the
sound recorded concurrently in with the song play.
A short-press of LAST will return to Follow-Repeat.
A short-press of NEXT will begin the settings for the next
Repeat.
Note:
① In the steps above, hold-on of “Vol+” or “Vol-” will
change the current playing speed.
②
In all the steps above, a short-press of MODE will exit
the function setting interface and return to the Playing
interface.
③
In all the steps above, a short-press of PLAY will exit the
Repeat interface and the Playing interface, and return to the
Stop interface.
4.2.5 Tempo rate Setting Interface
Note: User can only select Tempo rate when the music is still
playing. However, it will not have any affect for WMA file
Page 24

24
format. The range of playing speed: [60%, 200%], ±8 Levels,
(100% by default).
The interface is shown in the Fig below.
Musical File Playback – Tempo Rate
4.2.6 Replay Times
Note: User can only select Replay time when the music is still
playing .The repeat times range from 1 to 10.The interface is
shown in the Fig below.
Musical File Playback – Replay Times
4.2.7 Replay gap
Note: During repeating, the player will pause for this period of
time between each repeat. The interval can be range from 1 to
10 seconds. The interface is shown in the Fig below.
Page 25

25
Musical File Playback – Replay gap
4.3 Lyrics Show Interface
Note: Once you enter into the Lyrics Show interface, the current
song will continue to play and the corresponding lyrics will
display according to the playing progress of the song. When the
current song is over, the player will run the subsequent song
according to the Playing mode set. If the subsequent songs have
lyrics, the player will still work in the Lyrics Show interface. If
there is no lyric, the player will return to the Playing interface to
play the subsequent songs. The Lyrics Show Interface in shown
in the fig below.
Lyrics Synchronization Interface
The screen is split into two parts: an upper part and a lower part.
Generally, a line in the LRC corresponds to a part. If a line in
the LRC has more than 14 Chinese characters, the rest of the
characters in the line will be displayed in the lower part. For
each part, the sync time tag is calculated by averaging. As for
Page 26

26
English Songs, it is similar with the Chinese songs. However,
each part has 3 lines. Each line has 14 characters. When the
song is playing, its lyrics will be highlighted, and the next
sentence of the lyrics will wait in the lower part. The waiting
lyrics will be highlighted when the time comes.
Note: The time in LRC usually has some delays, the lyrics
can be showed 1 second ahead.
Button Function in the Lyrics Show Interface
Short-Press of Mode: To return to the Playing interface.
Short-Press of Play: To exit the Lyrics interface and enter
the Stop interface.
Long-Press of Next: Function as fast forward till the end
of a song. will be displayed.
Long-Press of LAST: Function as fast backward till the
beginning of a song. will be displayed.
Short-Press of NEXT: To switch to the next song.
If the file is not a valid musical file, then the total time will
be displayed as “00:00:00”.
Short-Press of LAST: To switch to the last song.
If the file is not a valid musical file, then the total time will
be displayed as “00:00:00”.
Short-Press of “Vol-”: Cycle to the next screen of the
lyrics.
Short-Press of “Vol+”: Cycle to the last screen of the
lyrics.
A-B button is disabled in this interface
Page 27

27
4.4 Auto Off
The player will be automatically turned off if the player idles for
more than 5 seconds in all the sub-menu of the Stop interface.
5 Record
Able to record sound files of MS-ADPCM WAV and AG8 ACT
format. It has the following interfaces: Stop, Recording, Pause
and Directory Selection.
5.1 The General Interface of the Recorder
The Recording Interface
00:00:03 indicates the progress of the recording.
05:05:17 indicates the space available for recording sound.
indicates the coding format of the current recorded file,
either AG8 and AD32.
01-15, the “01” indicate the current file. The “15”
represents the number of currently existing recorded files.
REC01
is the filename of the current recording file.
2004/10/29 08:56
is the date of the file
Page 28

28
5.2 The Stop Interface
Button Function in the Stop Interface
Long-Press of MODE: To return to the main menu.
Short-Press of MODE: To enter into the Stop Menu
interface.
Short-Press of A-B/PLAY: To enter the recording interface
and start recording.
Long-Press of PLAY: to turn the player off.
LAST and NEXT: Disabled.
“Vol+” and “Vol-”: Disabled.
5.2.1 The Stop Menu Interface
Note: User can select Local folder, REC Types and Exit in this
interface. The interface display is the same as that of the Stop
interface of Musical File Playback.
5.2.2 Directory Selection Interface
Note: User can select any directory as your current recording
directory. The interface display is the same as that of the
Directory Selection of Musical Files Playback.
5.2.3 REC Type Selection Interface
Note: User can choose either one of the REC types ranging from
Fine REC, Long REC, Fine VOR to Long VOR. The interface
display is the same as that of the EQ Selection interface.
Page 29

29
5.3 The Recording Interface
Note: Once you enter into the Recording interface, a new
recording file will be generated, and the recording will start
recording either in AG8 and AD32 format.
The prompt interface for saving file is shown in the Fig below:
Recording – Saving Prompt
Button Function in the Recording Interface
Short-Press of PLAY/A-B: To enter into the Pause
Interface
Long-Press of PLAY/A-B: To return to the Stop Interface
LAST, NEXT, Vol+ and Vol-: Disabled.
5.3.1VOR Function
When the player does not sense any valid voice, the system will
stay at Voice Waiting mode. When valid voice is sensed, the
player will resume recording.
5.3.2 Stop recording when the battery level is too low
If the battery level is too low, the recording file will be saved,
and the player will return to the Stop interface.
Page 30

30
5.4 The Pause Interface
Once you enter into the Pause interface, the time of pausing
recording time will flash at the rate of once per second.
Button Function in the Pause Interface
Short-Press of PLAY/A-B: To return to the Recording
interface to resume recording.
Long-Press of PLAY/A-B: To return to the Stop interface
and save the recording in the file system.
LAST, NEXT, Vol+ and Vol-: Disabled.
5.4.1 Stop recording when the battery level is too low
If the battery level is too low, the recording file will be saved,
and the player will return to the Stop interface.
5.4.2 Auto Off
If the idle time reaches the setting value in the system setup
management, the player will go into the Standby mode, and the
recorded sound in the Pause interface will be saved. This applies
to the Stop, Pause and its sub-interfaces.
Page 31

31
6 Voice
Support the playback of *.WAV and *.ACT files. It has the
following interfaces: Playing, Local folder Selection, Delete, as
well as function selection and settings interfaces.
6.1 Functions in the Stop Interface
Note: Once you enter into the Stop interface, the information
displayed the current recorded sound play. The interface is
shown in the Fig below.
Recorded File Playback
00:00:03 indicate the time progress of recorded sound.
01-15
represents the order of current recorded file and the
total number of recorded files in the current directory.
REC01 is the filename and 2004/3/15 10:23 is the date
and time when the file was created. (The text will not
scroll when the playing of the file stops.)
Page 32

32
Button Function in the Stop Interface
Long-Press of MODE: To enter into the main menu.
Short-Press of MODE: To enter into the Stop Menu
interface.
Short-Press of PLAY: To start playing the recorded sound.
If the current file is an invalid musical file, then the
message “Format Error” will appear and the player will
return to the Stop interface two seconds later
Long-Press of PLAY: To turn the player off.
Short-Press of LAST: To switch to the last recorded file in
the current directory.
Long-Press of LAST: To rewind to the last recorded files.
Short-Press of NEXT: To switch to the next recorded file
in the current directory.
Long-Press of NEXT: To fast forward to the next recorded
files.
Short-Press of A-B: To switch to the recording mode and
start recording.
6.2 The Stop Menu Interface
Note: User can select Local folder, Delete and Exit. The
interface is shown in the Fig below.
Page 33

33
The Stop Menu of the Recorded File Playback Interface
6.2.1 Folder Selection Interface
Note: User can select a folder as the current folder from the
valid directories (the directories that contain recorded files) to
store the recorded song or voice. Each time when you enter into
the Recorded File Playing mode, you will be located at the
current directory of the current disk. The interface is the same as
that of Musical Directory Selection interface.
Button Function in the Directory Selection Interface
Long-Press of “Vol-”: The selection strip switches to the
next directory one by one. The selection strip scrolls in a
way of two lines.
Long-Press of “Vol+”: The selection strip switches to the
last directory one by one. The selection strip scrolls in a
way of two lines.
Short-Press of MODE: To select the selection strip and
return to the Stop interface. When you switch to a new
directory, the resume playing memory will be cleared.
Short-Press of PLAY: To exit the Stop Interface.
Long-Press of PLAY: To turn the player off.
Short-Press of A-B: To enter the recording function and
start recording.
6.2.2 Delete Interface
Note: It is the same as the Musical File Deletion except that the
files are changed to recorded files.
Page 34

34
Button Functions in the Deleting Interface
Short-Press of MODE: To confirm the current selection
and return to the Stop interface.
Short-Press of PLAY: To cancel the current selection and
return to the Stop interface.
Long-Press of PLAY: Turn the player off.
Short-Press of A-B: Switch to the recording mode
interface and start recording.
6.3 Functions in the Playing Interface
Note: Once you enter into the Playing interface, the information
about the recorded song or voice will be displayed. Its interface
is similar with the Stop interface except that its time column is
counting.
Recorded File Playback
Button Function in the Playing interface
Short-Press of MODE: To enter into the Playing menu
interface.
Short-Press of PLAY: To enter into the Stop Interface.
Long-Press of PLAY: To turn the player off.
Page 35

35
Short-Press of NEXT: To jump to next file and start
playing from its beginning.
Short-Press of LAST: To jump to last file and start playing
from its beginning.
Long-Press of NEXT: Fast forward till the end of the
sound file.
Hold-On of NEXT: Fast backward until the beginning of
the sound file.
Hold-On of “Vol+”: To increase the volume.
Hold-On of “Vol-”: To decrease the volume.
Short-Press of A-B: To enter the Repeat interface and
confirm the “A” point.
Note: When the player encounters invalid files during auto or
manual selection of songs, the message “Format Error” will
display and return back to the Stop interface.
6.3.1 Playing Menu Interface
Note: User can select various options, including Repeat Mode,
Tempo rate, Replay and Exit, while the recorded file is still
playing. The interface is the same as the submenu of Musical
File Playback except that it does not have the EQ options.
6.3.2 Repeat Setting Interface
Note: User can select Repeat Mode for playing songs while the
song is playing. The interface is the same as the Repeat Setting
of Musical File Playback.
Page 36

36
List of Cycle Mode Options:
Normal
Repeat One
Folder
Repeat folder
Repeat All
Random,
intro
6.3.3 Repeat Interface
The interface is shown in the Fig below.
Recorded File Playback – Repeat Interface
Repeat Operation
When you enter the Repeat function, the “A” in
will
flash.
A short-press of NEXT will set the “A” point, and then
“B” will flash.
A short-press of NEXT will set the “B” point. Then the
segment between “A” and “B” will play repeatedly.
A short-press of NEXT/LAST will cycle the Repeat
function.
Page 37

37
Note:
①
In the steps above, hold-on of “Vol+” or “Vol-” will
change the current playing speed.
② In all the steps above, a short-press of MODE will exit
the Repeat interface and return to the Playing interface.
③
In all the steps above, a short-press of PLAY will exit the
Repeat interface and the Playing interface, and return to the
Stop interface.
6.3.5 Tempo Rate Setting Interface
Note: User can set the current playing speed of the record song
or voice in this interface. The range of playing speed: [60%,
200%], ±8 Levels, (100% by default). The interface is shown in
the Fig below.
Recorded File Playback – Tempo Rate
6.4 Disk Error
When playing recorded files, if a read error occurs, the player
will return to the Stop interface and prompt “Disk Error!”
Page 38
38
7 FM
Once User enter into this function, the user is in the playing
mode.
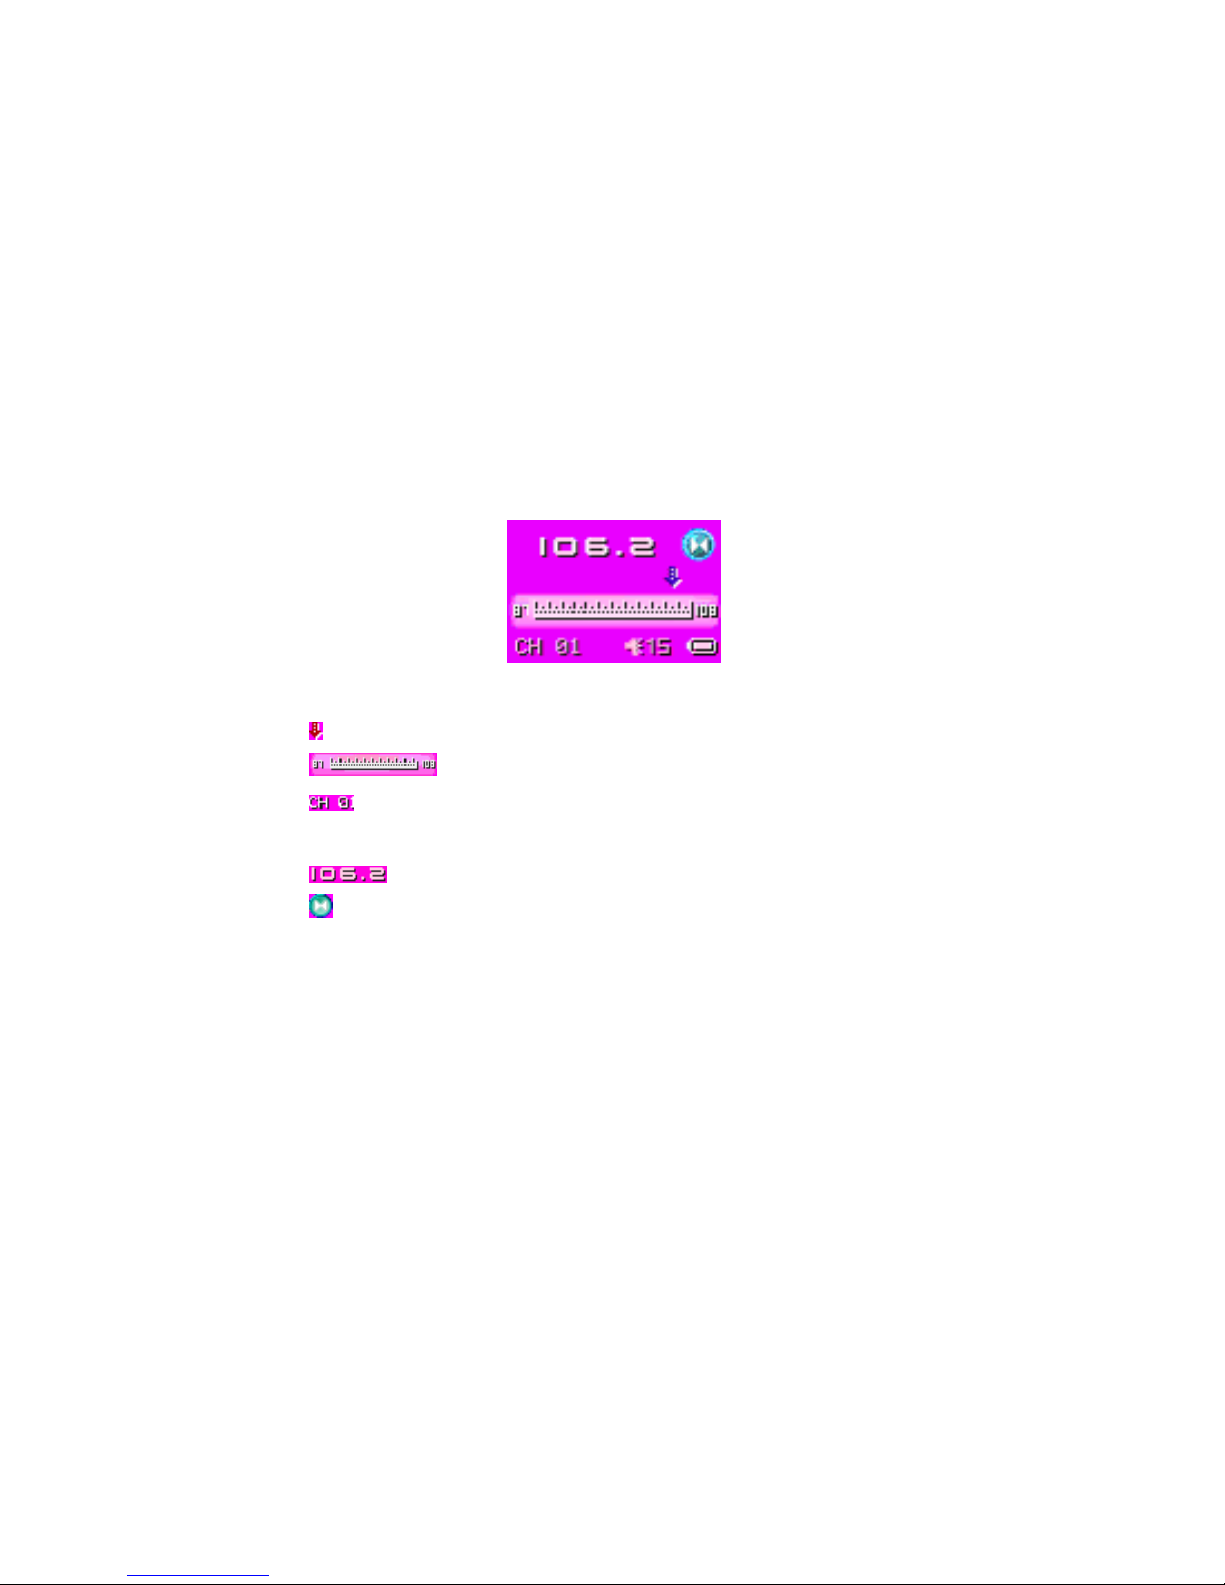
7.1 Interface
FM Radio
: The current frequency position
: Frequency Scale.
: The channel number of the preset radio station. Up to
20 radio stations can be preset.
: The current frequency.
:Stereo. If this icon does not appear, then the radio is
in mono mode.
7.2 Listen to the Radio
The interface is shown in Fig above. The current frequency
band is at 87MHz-108MHz (European and American Band).
Operation Instructions
A long-press of NEXT will search for a radio station
forward. If the frequency is the same as the one prestored,
Page 39

39
the channel number will display. A short-press of NEXT
will move the frequency forward at a step of 100KHz for
fine-tuning.
A long-press of LAST will search for a radio station
backward. If the frequency is the same as the one
prestored, the channel number will display. A short-press
of LAST will move the frequency backward at a step of
100KHz for fine-tuning.
Short-Press of “Vol+” or ”Vol-” will adjust the volume.
Long-Press of MODE: To enter into the main menu.
Short -Press of MODE: To enter into the FM submenu.
Long-Press of PLAY: To turn the player off.
A short-press of PLAY will jump to the next prestored
radio station. If there is no other prestored channel
numbers, the press will not be responded. When the last
prestored channel number is reached, the player will cycle
back to the first prestored channel number.
A short-press of A-B will enter the recording mode and
start recording.
7.3 FM Submenus
Save: Save the current radio station
Delete: Delete the current channel radio station.
Deleting All: To delete all the radio stations stored.
Normal Band: The American FM Radio Station Band (87-
108MHz). (China has the same band as America.)
Page 40

40
Japanese Band: The Japanese FM Radio Station Band (76-
90MHz).
REC: To start recording the radio program.
Exit: To exit the menu.
7.4 Saving Radio Station
Note: User can save the frequency to a new preset channel
number.
7.5 Deleting Radio Station
Note: User can delete the current saved radio station by pressing
MODE to enter the FM submenu to delete the current channel
7.6 Deleting All
Note: User can delete all the saved radio stations by pressing
MODE to enter the FM submenu to delete all the channels.
7.7 American Band
User can select the current band from 87MHz to108MHz.
7.8 Japanese Band
User can select the current band from 76MHZ to 90MHz.
Page 41

41
8 JPEG Viewer
Support viewing of JPEG pictures. Once user enter to Jpeg
function, user is at the file selection status. See the Fig below:
JPEG Interface – File Selection – Selecting Files
A short-press of Play will enter into the Picture Playing status.
Press ”Vol-” or “Vol+” to select the next/last file.
A short-press of Mode will enter the Stop submenu to
select either Local Folder, Play Set, Delete or Exit option
There are two playing modes options available for this
function. They are either Manual or Auto.
In the Auto Playing mode, the auto page turning interval
can be set to 1 - 8 seconds.
Other buttons are disabled.
Picture Playing Status
The Picture Playing status is shown the Fig below.
Page 42

42
A short–press of Next / Last will display the next/last
picture.
A short–press of Play will return to the File Selection
status.
A long-press of Mode will return to the main menu.
Other buttons are disabled.
9 Settings
Note: This is mainly used for the setting of system-related
parameter and status display. These settings include: Clock,
LCD Set, Language, Power off, Replay mode, Memory info,
Firmware Version, Firmware Upgrade and Exit Menu. The
interface is shown in the fig below.
Settings
Page 43

43
9.1 Clock Setting Interface
Setting the Clock
Button Function
A short-press “Vol+” will enter the procedure of setting
the recording time, beginning with the setting of year.
Follow by the order of “Month – Date – Hour – Minute”.
A long-press of PLAY will turn the player off.
A short-press of MODE will save the parameters and exit.
A short-press of A-B will enter the recording interface and
start recording.
The Setting Procedure
Hold-on of NEXT will increase the number step by step.
Hold-on of Last will decrease the number step by step.
A short-press of “Vol+” will confirm the current parameter
and switched to the next parameter.
Press Mode to save the setting after all the changes of the
parameters are confirmed, the system will be updated
Page 44

44
automatically.
9.2 LCD Set
Screen Settings
Button Function
◆ A short-press of “Vol-“ or “Vol+” will switch among
different options.
◆ A short-press of MODE will select and enter one of the
options.
◆ After you enter the option, a short-press of LAST or
NEXT will adjust the position of the slide bar.
◆ A short-press of PLAY will cancel the setting and exit.
9.3 Language
Language Selection
Button Function
Page 45

45
◆ A short-press of “Vol-“ or “Vol+” will switch among
different options.
◆ A short-press of MODE will confirm the options.
9.4 Power off
Power off
Button Function
A short-press of “Vol-“ or “Vol+” will switch between the
two modes.
A short-press of MODE will select either the Energy
Saving Mode or Sleeping Mode.
A short-press of PLAY will cancel the setting and exit.
Energy Saving Mode
Note: User can set the off time for the player to turn off if there
is no operation. The time ranges from 0 to 60.
Sleeping Mode
Note: User can set a time limit for the player to turn off if there
is no operation. It is mainly used for enjoying music before
sleeping. The time ranges from 0 to120.
Page 46

46
9.5 Battery Charge
Note: To charge the player, user need to turn on power switch of
the player and connect to the computer. The battery is fully
charged when manufactured. When the battery is charging, the
battery indicator will move from right to left. It will stay on
when fully charged.
9.6 Replay mode
Note: User can select either manual or auto for the playing
mode of the repeat function.
Button Function
A short-press of “Vol-“ or ”Vol+” will switch between the
two modes.
A short-press of MODE will save the setting and exit.
A short-press of PLAY will cancel the setting and exit.
9.7 Memory info
Allow user to view the size and the usage of the memory
information. Its interface is shown in the Fig below.
Page 47

47
Memory info
Button Function
A short-press of MODE/PLAY will exit.
A short-press of A-B will enter into the recording interface.
9.8 Firmware Version
Allow user to see the current firmware version. Its interface is
shown in the Fig below.
Firmware Version
Button Function
A short-press of MODE/PLAY will exit.
A short-press of A-B will enter into the recording interface.
10 UDISK
Support the standard USB DISK functions. Once the player is
inserted into the USB Port, the player will enter into the Udisk
function.
USB-connect Interface
There are three statuses: Ready, Download and Upload.
Ready means that the UDISK is ready to use.
Page 48

48
USB-download Interface
Download means that the UDisk is in downloading mode
USB-upload Interface
Upload means that the UDisk is in uploading mode
Button Function
In Busy status, the player will not respond to any button
operation.
In Ready mode, a short-press of MODE will switch to the
Page 49

49
MUSIC mode.
Short-Press of A-B: Switch to the recording function and
start recording.
11 Upgrade
Support the functions of upgrading, restoring and backup of the
firmware in the system. If the player firmware is corrupted or
damaged, the upgrade module can repair the player firmware.
Its interface is shown in the Fig below.
The Firmware Upgrading Interface
Firmware Upgrade Update in progress Interface
Page 50

50
Firmware Upgrade OK Interface
Firmware Upgrade Failure Interface
V3.0.39: represents the current firmware version of the
player or the firmware version of the player that is going
to upgrade.
Note: It takes about 15 seconds to finish the upgrade, the player
will auto restart to complete the upgrade after 1 seconds.
Page 51

51
12. Notice
①To extend the playing time of the player, please set the screen
to the Dim mode for the playing files other than MTV movies.
The Energy Saving Mode and Sleeping Mode can also prolong
the playing time of the player.
②You need to turn on the player and connect through USB port
of the PC or USB charger.
Page 52
52
LIMITATION OF LIABILITY AND DAMAGES.
IN NO EVENT WILL MANUFACTURER AND MANUFACTURER’S
RESELLERS (COLLECTIVELY REFERRED TO AS “THE SELLERS”) BE
LIABLE FOR DAMAGES OR LOSS, INCLUDING BUT NOT LIMITED TO
DIRECT, INDIRECT, SPECIAL WILLFUL, PUNITIVE, INCIDENTAL,
EXEMPLARY, OR CONSEQUENTIAL, DAMAGES, DAMAGES FOR LOSS OF
BUSINESS PROFITS, OR DAMAGES FOR LOSS OF BUSINESS OF ANY
CUSTOMER OR ANY THIRD PARTY ARISING OUT OF THE USE OR THE
INABILITY TO USE THE PRODUCT OR THE SOFTWARES, INCLUDING BUT
NOT LIMITED TO THOSE RESULTING FROM DEFECTS IN THE PRODUCT
OR SOFTWARE OR DOCUMENTATION, OR LOSS OR INACCURACY OF
DATA OF ANY KIND, WHETHER BASED ON CONTRACT, TORT OR ANY
OTHER LEGAL THEORY, EVEN IF THE PARTIES HAVE BEEN ADVISED OF
THE POSSIBILITY OF SUCH DAMAGES. BECAUSE SOME STATES DO NOT
ALLOW THE EXCLUSION OR LIMITATION OF LIABLITY FOR DAMAGES,
THE ABOVE LIMITATION MAY NOT APPLY TO THE PARTIES. IN NO
EVENT WILL THE SELLERS’ TOTAL CUMULATIVE LIABLIITY OF EACH
AND EVERY KIND IN RELATION TO THE PRODUCT OR ITS SOFTWRE
EXCEED THE AMOUNT PAID BY CUSTOMER FOR THE PRODUCT.
 Loading...