


Einstart®-C User Manual
Add: NO.1398 XIANGBIN RD. WENYAN XIAOSHAN, HANGZHOU, 311258, CHINA Website:www.shining3d.com
www.3dker.cn
Einstart
®
-C
USER MANUAL
HANGZHOU SHINING3D TECH CO., LTD.
STOCK CODE:830978

Einstart®-C User Manual
CATALOG
1 Summary ................................................................................................................................................. 1
1.1 How to use the User Manual ......................................................................................................... 1
1.2 Attention ........................................................................................................................................ 1
1.3 Product Model ............................................................................................................................... 1
2 Product Introduction ................................................................................................................................ 2
2.1 Product Appearance ..................................................................................................................... 2
2.2 Device parameters and accessories ............................................................................................. 2
2.3 Sound illustration .......................................................................................................................... 2
3 Preparation .............................................................................................................................................. 3
3.1 Hardware Installation .................................................................................................................... 3
3.2 Software Installation and Serial Number Registration ................................................................... 3
4 Using the Printer ..................................................................................................................................... 6
4.1 Slicing ........................................................................................................................................... 6
4.2 Print .............................................................................................................................................. 8
5 Software .................................................................................................................................................. 9
5.1 A detailed look at the software interface ........................................................................................ 9
5.2 Software functions ...................................................................................................................... 10
5.3 Advanced Parameters ................................................................................................................ 12
5.4 Introduction of LED Screen Button and Its Logic ........................................................................ 13
6 3Dker Platform(Website address:http://www.3dker.com/) .............................................................. 22
6.1 Model Downloading .................................................................................................................... 22
6.2 Software and Firmware Down loading. ....................................................................................... 22
7 Maintenance ......................................................................................................................................... 23
7.1 Printer Working Environment ...................................................................................................... 23
7.2 Clean Up the Printing Environment ............................................................................................. 23
7.3 Changing the Filament ................................................................................................................ 23
7.4 Loading Filament ........................................................................................................................ 23
7.5 STL File ....................................................................................................................................... 23

Einstart®-C User Manual
7.6 Set the Print Bed ......................................................................................................................... 23
7.7 Sliding Rail .................................................................................................................................. 23
7.8 Consumable Parts List ................................................................................................................ 23
8 FAQ ....................................................................................................................................................... 24
8.1. The filament is blocked .............................................................................................................. 24
8.2. Extruder height adjustment ........................................................................................................ 24
8.3. Model won’t stick to the platform. ............................................................................................... 24
8.4. Nozzle is surrounded by filament ............................................................................................... 24
8.5. 3dStar software cannot connect to the 3D printer. ..................................................................... 25
8.6. Cannot read files on USB drive .................................................................................................. 25
8.7. The extruder is blocked, forming thin strands during printing or the model is dislocated. .......... 25
8.8. Limit switch malfunction ............................................................................................................. 25
8.9 USB drive cannot be detected。 ................................................................................................. 25
Appendix: .............................................................................................................................................. 26

Einstart®-C User Manual
1
Einstart®-C User Manual
1 Summary
1.1 How to use the User Manual
This User Manual is set out to explain the following; Product Introduction, Preparation, How to Use the
Printer, Software Operation & Help, 3Dker Platform, Maintenance and FAQ. Please read the manual carefully
before use and follow instructions when using the Einstart-C.
1.2 Attention
Please consider the following information before using the printer.
1.2.1 Safety
The printer is only compatible with the power supply offered by Hangzhou Shining 3D Tech Co., Ltd.
Using an alternative power supply may lead to safety risks and/or damage to the printer
The print head reaches temperatures of over 200°C. To minimize potential risk, keep the printer door
closed during operation of the printer. It is also advisable to keep the printer door closed to reduce any outside
airflow, which can affect print quality.
DO NOT touch the model, print nozzle, print bed and any other part inside the printer until fully cooled to
room temperature. Care must be taken during the removal of 3D printed parts.
Although considered safe, the printer sends out small concentrations of vapor during printing therefore
good ventilation is recommended.
1.2.2 Protection
Keep the printer away from water as this may damage the printer.
DO NOT cut off power supply or unplug the USB cable during printing as it may cause print failure.
The printer operates at a room temperature of 5℃ to 30 ℃. Print quality may be affected if the
temperature is not in this range.
Shining 3D has no responsibility for any damage caused to the printer through using print material or a
power supply not offered by Shining 3D.
1.3 Product Model
Einstart®-C Wifi International
Einstart®-C2 Wifi Domestic
Within this Manual, the model is noted as the Einstart®-C when describing common functions. Any notes
applying to the Einstart®-C2 will be made apparent.

Einstart®-C User Manual
2
2 Product Introduction
The Einstart®-C 3D printer is easy to operate and maintain. Its basic principle is that, upon digital input,
plastic is heated, melted and deposited to form the desired 3D model. The design is built up layer upon layer
with each successful layer turning solid to give a finished printed model that is sturdy and durable.
2.1 Product Appearance
Einstart®-C
2.2 Device parameters and accessories
See Appendix.
2.3 Sound illustration
The printer uses sound effects to give the user an indication of processes that are occurring e.g. Printer
start-up, filament loading etc.

Einstart®-C User Manual
3
3 Preparation
3.1 Hardware Installation
3.1.1 Remove the package
Unpack the inner and outer packaging and remove the cushioning foam. Use this manual and technical
drawings above to learn about accessories and set-up.
3.1.2 Print bed installation
Remove the print bed, open the printer door and fit it to the platform holder. Allow the magnet and
positioning block to cooperate and align with one another.
3.1.3 Install the Bowden Tube
Locate the transparent Bowden tube inside the printer and feed it through the central hole at the back of
the printer. Then insert it in to the extruder through the blue quick connector. The Bowden tube is easily
removed by pressing down on the quick connector and pulling the tube out.
3.1.4 Power Supply Connection
Start by connecting the adaptor to the cable plug. Once completed, insert the cable plug in to the mains
socket and connect the adaptor to the jack in the back right of the printer.
3.1.5 Turn On the Printer
Once the power supply is connected, press the switch on the right side of the printer to turn on. The LCD
screen display will indicate that the printer is turned on.
3.1.6 Filament Load
Remove the filament packaging and cut the end of the filament at an angle with pliers or scissors to create
a pointed tip. Place the filament reel on the filament holder located inside the printer on the right hand side.
Then feed the filament through the hole inside the printer and into the Bowden tube until it reaches the extruder.
Please refer to charter 5.4(11, 24, 25) for detailed operation.
Note: For better adhesion of the 3D print to the bed, we recommend a layer of masking tape or glue
stick on the print bed prior to print.
3.2 Software Installation and Serial Number Registration
The slicing software, 3dStar, supports several OS including WIN7 32bit/64bit, WIN8, WIN10 and Mac OS x.
The slicing software, serial port driver, serial number and selected model data can be found on the USB drive
provided. Please read the “Read Me” file and software user manual carefully before installing the software.

Einstart®-C User Manual
4
3.2.1 Software Installation and Registration for Windows OS.
3.2.1.1 Steps:
Open the file folder in the USB drive or download the installation software from our website. Find the
Setup.exe and run it. Click “Next” to enter the below interface and click “I Agree” after reading and accepting
the 3DPRINT END USER LICENSE AGREEMENT.
Choose the installation path you want by clicking “Browse” and click “Install”.
Upon Agreeing the license clause, click “Install” in the popup window. Complete the installation process by
Clicking “Finish”.

Einstart®-C User Manual
5
Note: If you’ve installed “Microsoft Visual C++ 2013”, just click “Repair” as below picture shows.
Install the FTDI CDM Drivers. Click “Extract” and operate according to the guidance given until installation
is complete.

Einstart®-C User Manual
6
4 Using the Printer
To obtain model data, please refer to charter 5.1 . There are also some 3D files available on the USB
drive provided.
4.1 Slicing
4.1.1 For slicing, open the 3dStar software and choose corresponding device model in “setting”,
“Application”. For this printer, you should choose E-c.
4.1.2 Choose the corresponding machine type. For this printer, you should choose E-C.Click the folder
icon to open and load an .stl file as the below picture demonstrates.

Einstart®-C User Manual
7
4.1.3 The 3dStar software allows users to view, move, rotate and scale their 3D model according to
requirements. To zoom in and out, use the scroll wheel on the mouse. To rotate around your model, left-click
and drag. To pan across your model, right-click and drag.
4.1.4 Click the settings icon on the top right of the screen to make any necessary adjustments to your 3D
model. See charter 5.1, 5.2 and 5.3 for detailed information on software and print settings. Click the generator
icon to generate path in .gsd format once you have confirmed your settings.

Einstart®-C User Manual
8
4.1.5 The sliced file is stored in the same folder as the original STL file. Copy the GSD file on to USB flash
drive.
Note: When saving your file, the file name should avoid special characters and contain English
characters and numbers only.
4.2 Print
4.2.1 For set-up, refer to section 3.1.
4.2.2 Refer to the below steps for print operation. For further detail on the LCD touch screen, please refer
to section 5.4

Einstart®-C User Manual
9
5 Software
5.1 A detailed look at the software interface
Model saving path: After 3dStar loads the model, you can see the model stored location in this area.
Additionally, the sliced data path for printing will be stored in the same location.
Menu:The menu of 3dStar contains File, Edit, View, Print, Tools and Help.
Model preview area:Check the model in this area after loading successfully.
Model edit area:View, move, rotate and scale up/down the model.
Fast print setting:In 3dStar, users can conveniently load file, generate path (parameters will be the same
as your previous print) and print after generating (only when printer is online).
Print parameter information: Check and edit the slicing parameters in detail.
Model advanced edit switch:Allows the user to switch display once the model is loaded successfully. Click
to switch to the advanced edit interface.
Model/Path viewer switch: Click the arrow on the right to open and check model and path information.

Einstart®-C User Manual
10
5.2 Software functions
N
o.
Positio
n in
Software
Legend
Submenu
Description
1
Menu-
File
New
Clear current model
Open…
Open local STL file
Add…
Add new model to current
Recent Files
Link to recently opened files
Save
Save current model
Save As
Save current model as other
position
Exit
Exit 3dStar
2
Menu-
Edit
Select All
Select all models
Copy
Copy selected model
Paste
Paste copied model
Delete
Delete selected model
Layout
Optimal layout for current
model
View
View model from different
Move
Move model from X,Y, or Z
direction
Rotate
Rotate model around X,Y, or
Z axis
Scale
Up/Down
Scale up or down the model
3
Menu-
Print
Start/Stop
Print
Start/Stop print. Print cannot
resume if stop
Pause/Resu
me Print
Pause or resume printing

Einstart®-C User Manual
11
Building
Status
Check the status of current
print
Generate
Path
Slice current model and
generate path
4
Menu-
Tool
Select
Select online machine
Machine
Calibration
Calibrate the machine
Firmware
Detect firmware update
Manager for
STL File
Manage local STL file
Manager for
Machine
Manage machine
Manager for
Material
Manage material
Path Viewer
View the generated path
Setting
Settings for generator and
machine
Language
Select language
5
Menu-
Help
Version
Check current software
About
More information

Einstart®-C User Manual
12
5.3 Advanced Parameters
5.3.1 Path Generator
The use of “basic setting” is normally sufficient. We suggest you generate path with our default parameters
since improper changes could lead to print failure or extruder blockage.
5.3.1.1 Print Mode
Simple: 0.4mm layer thickness;
Fast: 0.3mm layer thickness;
Standard: 0.3mm layer thickness;
Quality: 0.15mm layer thickness;
Extreme: 0.1mm layer thickness;
5.3.1.2 Support
Null Support: No support when generating path.
Outer Support: “Outer Support” creates support where the support structure is printed directly on the raft
or platform (when printing without raft).

Einstart®-C User Manual
13
Full Support:Both outer and inner support when generating path. “Inner Support” means support is
created on the model surface.
Add Raft: When generating path, the software will generate a raft for your model, which can secure the
model effectively and compensate height variance.
Thin-wall: When generating path, the software will create a shell structure rather than infill. It will also close
the bottom of the model but not the top.
Peel off Factor: Users can adjust the distance between model and raft by changing this factor. It is a ratio
related to layer thickness. For example, if layer thickness is 0.2 mm and peel off factor is 2, the distance
between the model and raft is 0.4 mm.
Extruder Temperature: Temperature the nozzle will reach when printing. We suggest you set this value
based on the requirement of the material used.
Print once generated: Once the path is generated and the machine is ready, the printer will automatically
begin printing.
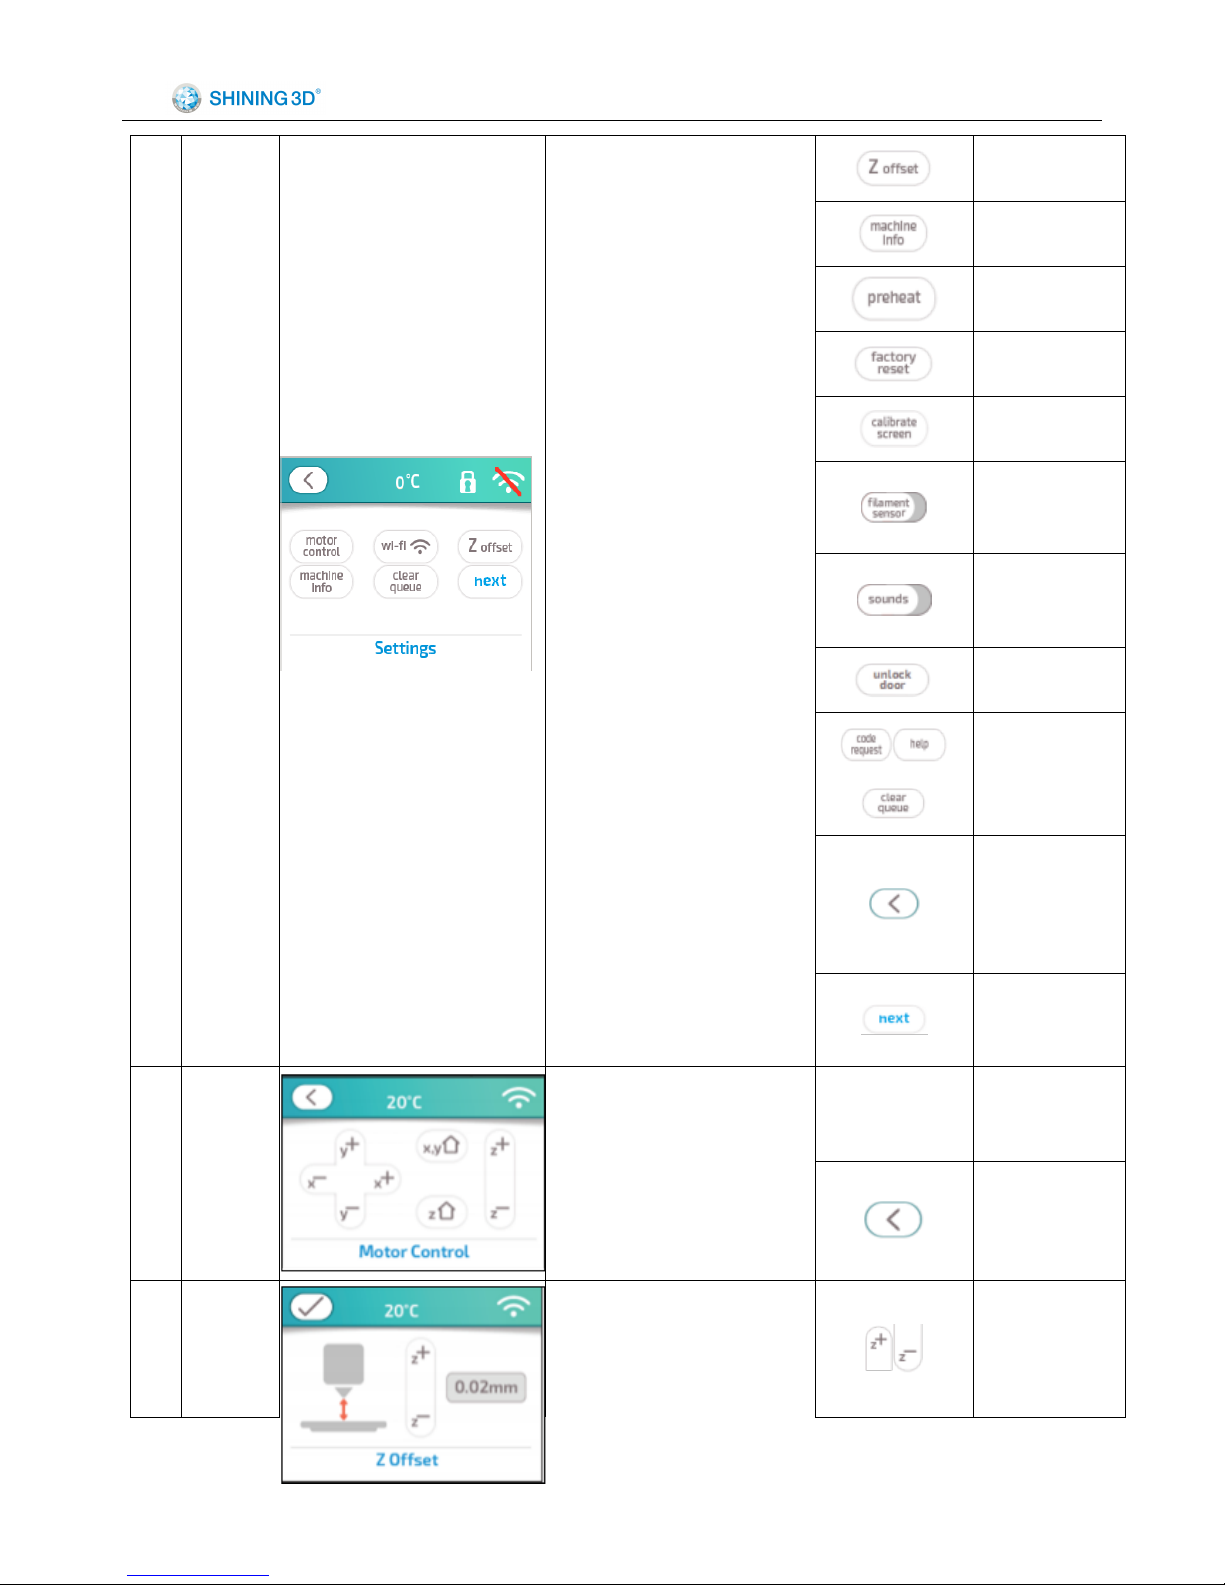
5.4 Introduction of LED Screen Button and Its Logic
No.
Interface
Pic.
Function
Button function
Logic
1
Choose
Language
language selection is
required during initial set up.
Language
Choosing
Skip to 2
2
WIFI
Connectio
n
Connect to WIFI or not.
Skip to 3
Skip to 11

Einstart®-C User Manual
14
3
WIFI
Checking
Searching for available
WIFI or trying to connect to the
WIFI used previously.
Skip
automatically
Skip to 4
4
WIFI List
A list of available WIFI is
generated. Scroll using the
arrows“
∧
” and “
∨
”.
Refresh the list
Skip to 11
5
Input WIFI
Password
Enter the password using
the keyboard.
Skip to 6 or 7
Skip to 4
6
WIFI
Connectio
n
succeeds
WIFI is connected
successfully.
Skip to 8
7
WIFI
Connectio
n fails
WIFI connection has
failed.
Skip to 5

Einstart®-C User Manual
15
8
Firmware
updates
The printer is checking
that the firmware is up to date.
Skip
automatically
Skip to 9
9
Updating
page
The printer updates
firmware automatically if it
detects updates are available.
DO NOT turn off the printer
during updating! restart will
occur automatically if updates
are successful.
Skip
automatically
Skip to 10
10
Welcome
Page
This is displayed once the
printer is prepared and ready
for use. Click any area on the
screen to skip to the home
page.
Any area
Skip to 11
11
HOME
Page
Home Page. You can
select any function button to
enter its interface.
Skip to 12
Skip to 24
Skip to 29
12
Printing
Selection
Select model source for
printing.
Skip to 13
Skip to 14 or 15

Einstart®-C User Manual
16
Local default
model
Skip to 11
13
Printing
Confirma--
tion
Select a model file for
printing.
Skip to 17 or 18
Skip to 24
Skip to 12
14
USB drive
file list
When the USB drive is
plugged in, this interface will
allow you to select a model
from the USB drive to print.
Select any model
in the list
Skip to 16
Skip to 12
15
USB
undetecte
d
If the USB drive is not
plugged in or cannot be
detected, this will be
displayed.
Skip to 12
16
Copying
File
Copying model file to the
device.
Finish copying
Skip to 13
Skip to 14
17
Leveling
print bed
After printing has begun,
this display can be seen
Skip
automatically
Skip to 18 or 19

Einstart®-C User Manual
17
during bed level checking.
Skip to 14
18
Printer
Heating
Up
Displayed during the print
head heating process.
Skip
automatically
Skip to 20
Skip to 14
19
Bed Error
If an error occurs during
bed auto leveling , this display
will be seen.
Skip to 17
22
Printing
Printing in process.
Pause current
printing
Skip to 23
Stop current
printing
Skip to 23
23
Stop current printing
confirmation.
Skip to 11
Skip to 22
24
Printing
Paused
Printing Paused display.
Various printing processes
can be managed at this stage.
Skip to 25
Skip to 12
Skip to 22

Einstart®-C User Manual
18
25
Filament
Managem
ent
Manage filament, you can
select to load or unload
filament here.
Skip to 26
Skip to 26
Skip to 11
26
Printer
Heating
Up
This display can be seen
during the print head heating
process.
Skip
automatically
Skip to 27 or 28
Skip to 25
27
Filament
loading
When the print head
reaches loading temperature,
this display indicates that you
can insert filament.
Skip to 25
28
Filament
Unloading
When the print head
reaches unloading
temperature, this display
indicates that the Printer is
reversing filament.
Skip
automatically
Skip to 29
29
Ready to
unload
Follow screen prompts for
loading of filament.
Skip to 25
30
Skip to 31
Skip to 14
Einstart®-C User Manual
19
Settings
Select Settings on the
HOME page to change
various parameters.
Skip to 32
Skip to 33
Skip to 34
Skip to 36
Skip to 37
Currently
Nonfictional
Mute or not
Unlock door
Currently
Nonfictional
Skip to last page
or 11
To next page
31
Motor
Control
Control the axial motor.
XYZ motor
control buttons
Control motor
Skip to 30
32
Print head
Offset
Change the print head
offset.
Increase or
decrease offset

Einstart®-C User Manual
20
Skip to 30
33
About
Printer
Firmware/software
version and total printing time.
Skip to 8
Skip to 30
34
Preheat A
Allows user to preheat.
Skip to 35
Skip to 30
35
Preheat B
Preheat temperature
setting.
Change target
temp
Save target
temp
Stop preheat
Skip to 34
36
Factory
Reset
Allows user to reset the
printer to default settings.
Reset to factory
setting
Skip to 30

Einstart®-C User Manual
21
37
Touch
screen
locate
Relocate touch screen
area.
Skip
automatically
Skip to 10
Einstart®-C User Manual
22
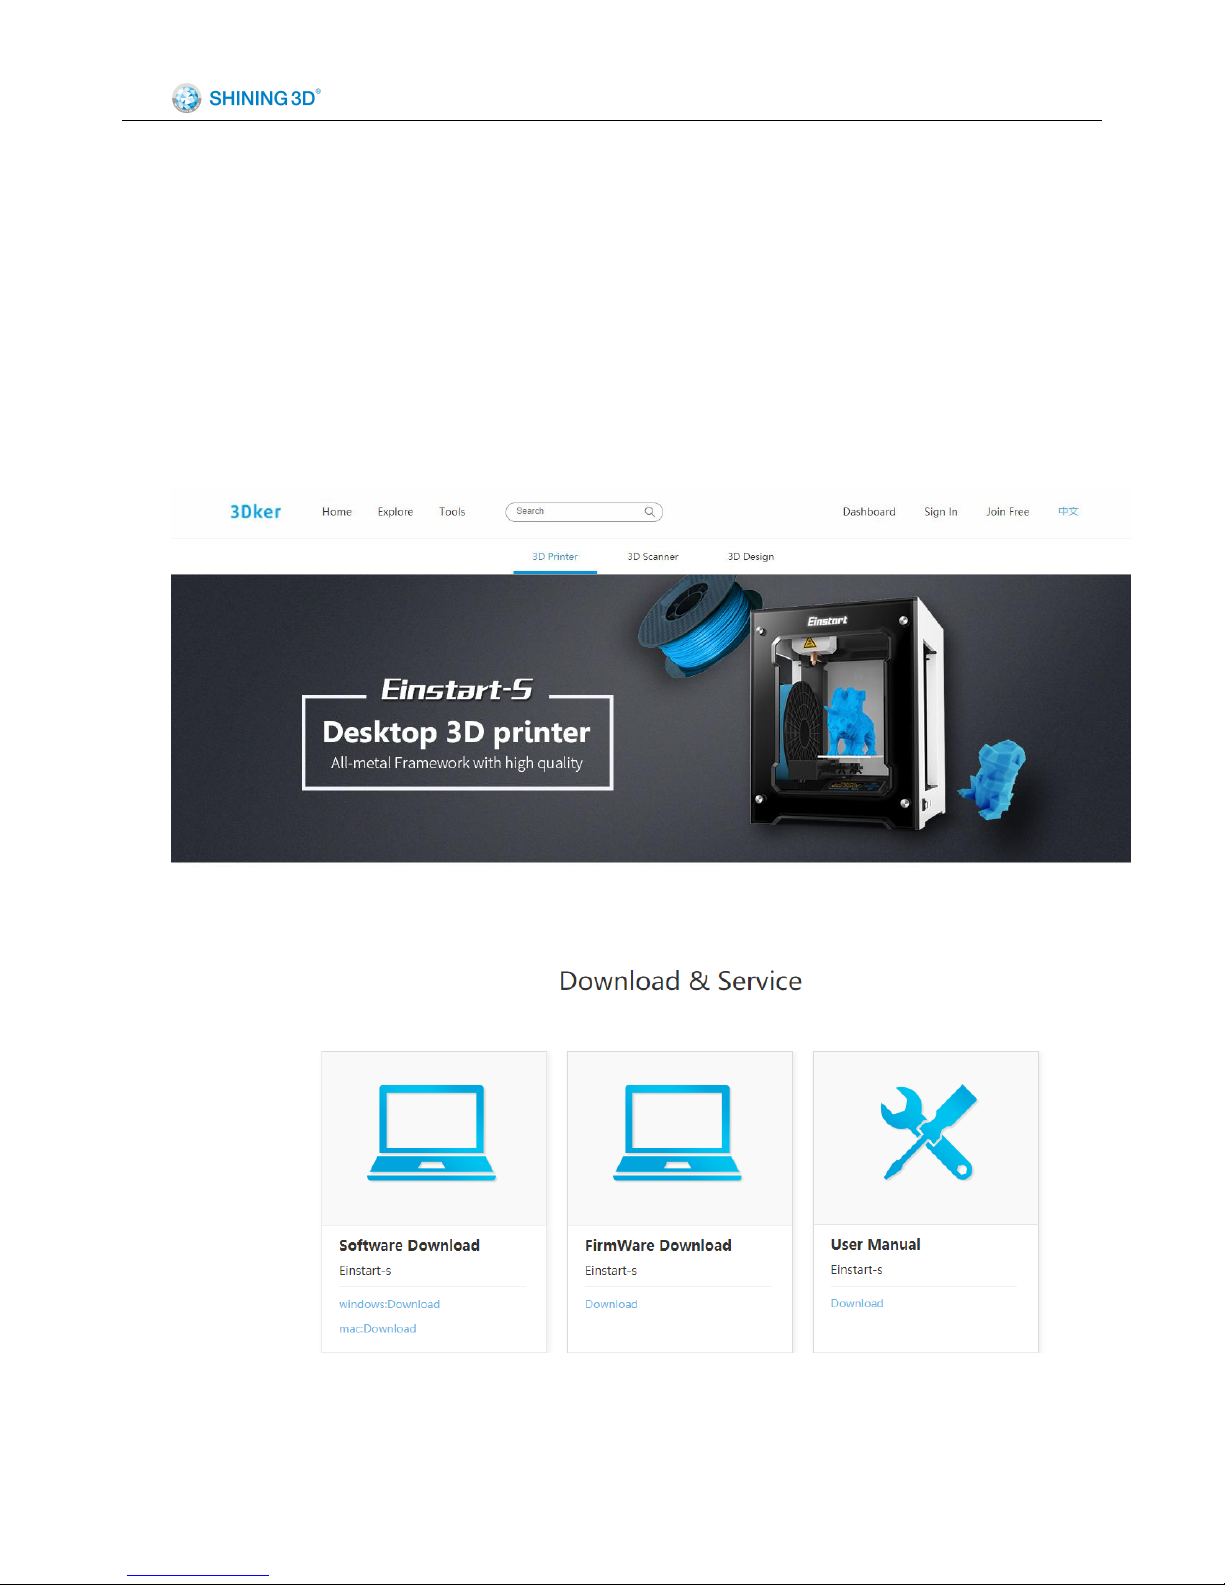
6 3Dker Platform(Website address:http://www.3dker.com/)
6.1 Model Downloading
Visit the 3Dker platform where you can find and download 3D model data designed by other users or
designers.
6.2 Software and Firmware Down loading.
Click “Tools” in the top menu to enter downloading page and select “3D printer”.
Scroll down the page and download the newest software, firmware and user manual on the below page.

Einstart®-C User Manual
23
7 Maintenance
7.1 Printer Working Environment
Make sure the printer is set on a stable flat surface. Do not interfere with moving parts during the printing
process.
Please hold the print bed securely when turning the printer off in the occurrence the bed drops with loss of
power.
7.2 Clean Up the Printing Environment
Dust may cause jamming on the sliding rail,which in turn may lead to poorer quality printing. We
recommend cleaning the Nozzle weekly. Follow instructions on our 3DKer website under “Maintenance”.
7.3 Changing the Filament
Filament should be changed when there is around 20 cm filament left or before using the unload
command.
7.4 Loading Filament
Make sure the print head reaches loading temperature before inserting filament. The tip of the filament
should be straight and sharp.
7.5 STL File
“3Dstar” slicing software supports STL format only.
7.6 Set the Print Bed
The print bed should be orientated and set correctly.
Make sure the print bed surface is flat and clean.
We recommend carrying out the auto levelling process regularly, particularly when printing often.
7.7 Sliding Rail
Lubricating grease should be add to the sliding rail annually.
7.8 Consumable Parts List
#
Parts photo
Parts name
Normal life cycle
1 Tube
3 months
2 Nozzle
3 months
3
Heat block
3 months

Einstart®-C User Manual
24
4 Heat rod
3 months
5 Thermistor
3 months
8 FAQ
8.1. The filament is blocked
Problem: A skipping sound is heard during printing or the loading of filament.
Solution: First, unload the filament and ensure the tip is even before reloading. If this does not solve the
problem, please take apart the extruder and clean.
8.2. Extruder height adjustment
Problem: During printing, either the first layer is not flat and wide but appears as a thin spiraled line or the
extruder touches the print bed.
Solution: If the distance between the print bed and head is more than 2mm, the extruder height needs to
be adjusted. (Refer to section 5.3.4).
8.3. Model won’t stick to the platform.
Problem: The edges of the model are warped or are becoming unstuck when printing.
Solution: Apply a thin layer of glue stick evenly on the platform. It is also worth considering a reduction in
strip rate or an increase in nozzle temperature (+-5~10℃).
Strip rate ranges from 1.8 to 2.6, a lower strip rate generally results in better adhesion.
Nozzle temperature ranges from 195℃ to 230℃ , a higher temperature generally results in better
adhesion.
8.4. Nozzle is surrounded by filament
Problem: The filament has gathered around the nozzle.
Solution: Remove the extruder cover and press the load button to heat the printer head. Remove the
cooling protective cover once the filament has softened. Finally, remove the filament using tweezers (Please

Einstart®-C User Manual
25
refer to the video or document instruction named “Clean nozzle”.).
Reason: The filament has failed to stick to the model or platform and as such has gathered round the
nozzle.
8.5. 3dStar software cannot connect to the 3D printer.
Problem: Error message indicating lack of connection to the printer or printer not registered.
Solution: Refer to section 6.1.2 and if the problem still exists, please contact support.
8.6. Cannot read files on USB drive
Problem: error message indicating no file in drive or no USB drive found.
Solution: The Einstart®-C is capable of reading .gsd files only,Make sure you have the right file format.
8.7. The extruder is blocked, forming thin strands during printing or the model is
dislocated.
Solution:
(1) Clean the filament and check whether the nozzle is blocked.
(2) Load filament again.
(3) Shut down the printer and check whether the X axis and Y axis move normally.
(4) Attempt to print the model again to determine if there are further problems.
Reason: (1) Poor quality filament may cause the extruder to become blocked.
(2)The nozzle is knocking in to the model causing dislocation
(3)The nozzle is blocked.
(4) The temperature sensor is broken.
(5)The cooling fan is not working.
8.8. Limit switch malfunction
Problem: A loud knocking noise may indicate the limit switch is broken.
Solution: Change limit switch (Refer to the video and document).
Reason: The limit switch may have been broken when cleaning residual filament or during transportation
of the printer
8.9 USB drive cannot be detected。
Problem: USB drive is not detected once plugged in to the printer
Solution: Restart the device or re-insert the USB drive. Make sure you are using a USB drive instead of
USB reader + SD card.

Einstart®-C User Manual
26
Appendix:
1. List of Product and Accessories
Einstart®-C
Einstart®-C 3d Printer
1 unit
Power Supply(Output 19V/4.95A)
1 PCS
USB cable
1 PCS
Bowden tube
1 PCS
3D printing Material
2 reels
Print bed
1 PCS
USB flash drive (4G)
1 PCS

Einstart®-C User Manual
27
Scraper
1 PCS
User manual
1 PCS
Handy tool
1 PCS

Einstart®-C User Manual
28
2. Parameter of the Printer

Einstart®-C User Manual
29
FCC Statement
This equipment has been tested and found to comply with the limits for a Class B digital device,
pursuant to part 15 of the FCC Rules. These limits are designed to provide reasonable protection
against harmful interference in a residential installation. This equipment generates, uses and can
radiate radio frequency energy and, if not installed and used in accordance with the instructions, may
cause harmful interference to radio communications. However, there is no guarantee that
interference will not occur in a particular installation. If this equipment does cause harmful
interference to radio or television reception, which can be determined by turning the equipment off
and on, the user is encouraged to try to correct the interference by one or more of the following
measures:
Reorient or relocate the receiving antenna.
Increase the separation between the equipment and receiver.
Connect the equipment into an outlet on a circuit different from that to which the receiver is
connected.
Consult the dealer or an experienced radio/TV technician for help.
This device complies with Part 15 of the FCC Rules. Operation is subject to the following two
conditions: (1) this device may not cause harmful interference, and (2) this device must accept any
interference received, including interference that may cause undesired operation.
Any changes or modifications not expressly approved by the party responsible for compliance could
void the user's authority to operate the equipment.
FCC Radiation Exposure Statement
This equipment complies with FCC RF radiation exposure limits set forth for an uncontrolled environment. This
equipment should be installed and operated with a minimum distance of 20 centimeters between the radiator
and your body.

Einstart®-C User Manual
30
More information please join our WeChat by scanning below QR code
Company Desktop 3D printer department 3Dker
Hangzhou Shining3D Tech Co., Ltd.
Add: NO.1398 XIANGBIN RD. WENYAN
XIAOSHAN, HANGZHOU , 311258, P.R. CHINA
Zip code: 311258
Working time:8:30-17:30
Tel:0571-83821911
Tax:0571-82999510
Technical support:
QQ:1984522360
Skype: shining_support
e-mail:aftersales@shining3d.com
Website:http://www.shining3d.com

Einstart®-C User Manual
31
Copyright
This document is copyrighted and contains proprietary information that is the property of Hangzhou
Shining 3D Tech Co., Ltd. The user does not have the right to copy, reproduce, or translate this document in
any way or to any media without the prior written consent of Hangzhou Shining 3D Tech Co., Ltd.
Disclaimer
This user manual is an instruction for installation, operation, and maintenance, but not product warranty.
All efforts have been made to ensure the accuracy and completeness of the information in this manual.
However, Shining 3D Tech Co., Ltd accepts no responsibility for any errors or omissions contained in the
documentation and reserves the right to explain and revise the publishing and fault of this manual. The
information in this manual is subject to change without notice.
 Loading...