

Shindy 17-657B User Manual
Parts
Quantity
○1 Radial Master Cylinder
1
○2 Reservoir Tank
1
○3 Hose
1
○4 Hose Clamp
2
○5 Reservoir bolt (M6)
1
Parts
Quantity
○6 Tank Fixing nut (M6)
1
○7 Reservoir Bracket
1
○8 Mirror Holder
1
○9 Half Clamp
1
○10 Mirror Hole Bolt (M10)
1
NISSIN RADIAL BRAKE MASTER CYLINDER KIT
PART # 17-656/B/G/K (19mm Piston diameter)
PART # 17-657B (17mm Piston diameter)
**All kits are inspected for quality before it ships by the manufacturer.
**Air-bleeding is a difficult process. Because each kit is thoroughly examined for anti-leaking,
each kit is assured that it is capable of bleeding air completely, if done correctly.
*Please read the directions carefully before installation. Make sure all components are included.
Components:
Information:
-Lever angle is adjustable to 6 positions
-While installing, make sure the motorcycle is in a stable position.
-Part #17-656/B/G/K will be compatible with 5/8" diameter piston on the
standard master cylinder. The feel of the brakes may slightly change.
-Part #17-657B is compatible with standard 14mm piston.
-Depending on the model, you may need to change the Brake Hose and Banjo bolts.
-This kit only fits on 7/8" handlebars only, and no other size.
-Use banjo bolt size M10 x P1.25.
-Use a new gasket when re-installing banjo bolt.
-Use DOT 4 polyglycol ether based fluid and Do NOT use DOT 5 brake fluid or silicone
based fluid
-Brake fluid will damage painted surfaces. If spills occur, immediately wipe off.
-Immediately rinse any fluid if in contact with eyes or skin.
-Make sure that all of the air is released and that air bleeding is also done in the rubber
hose between the reservoir and master cylinder. Any air left in the whole kit may result
in poor brake function and may cause an accident.
Instructions:
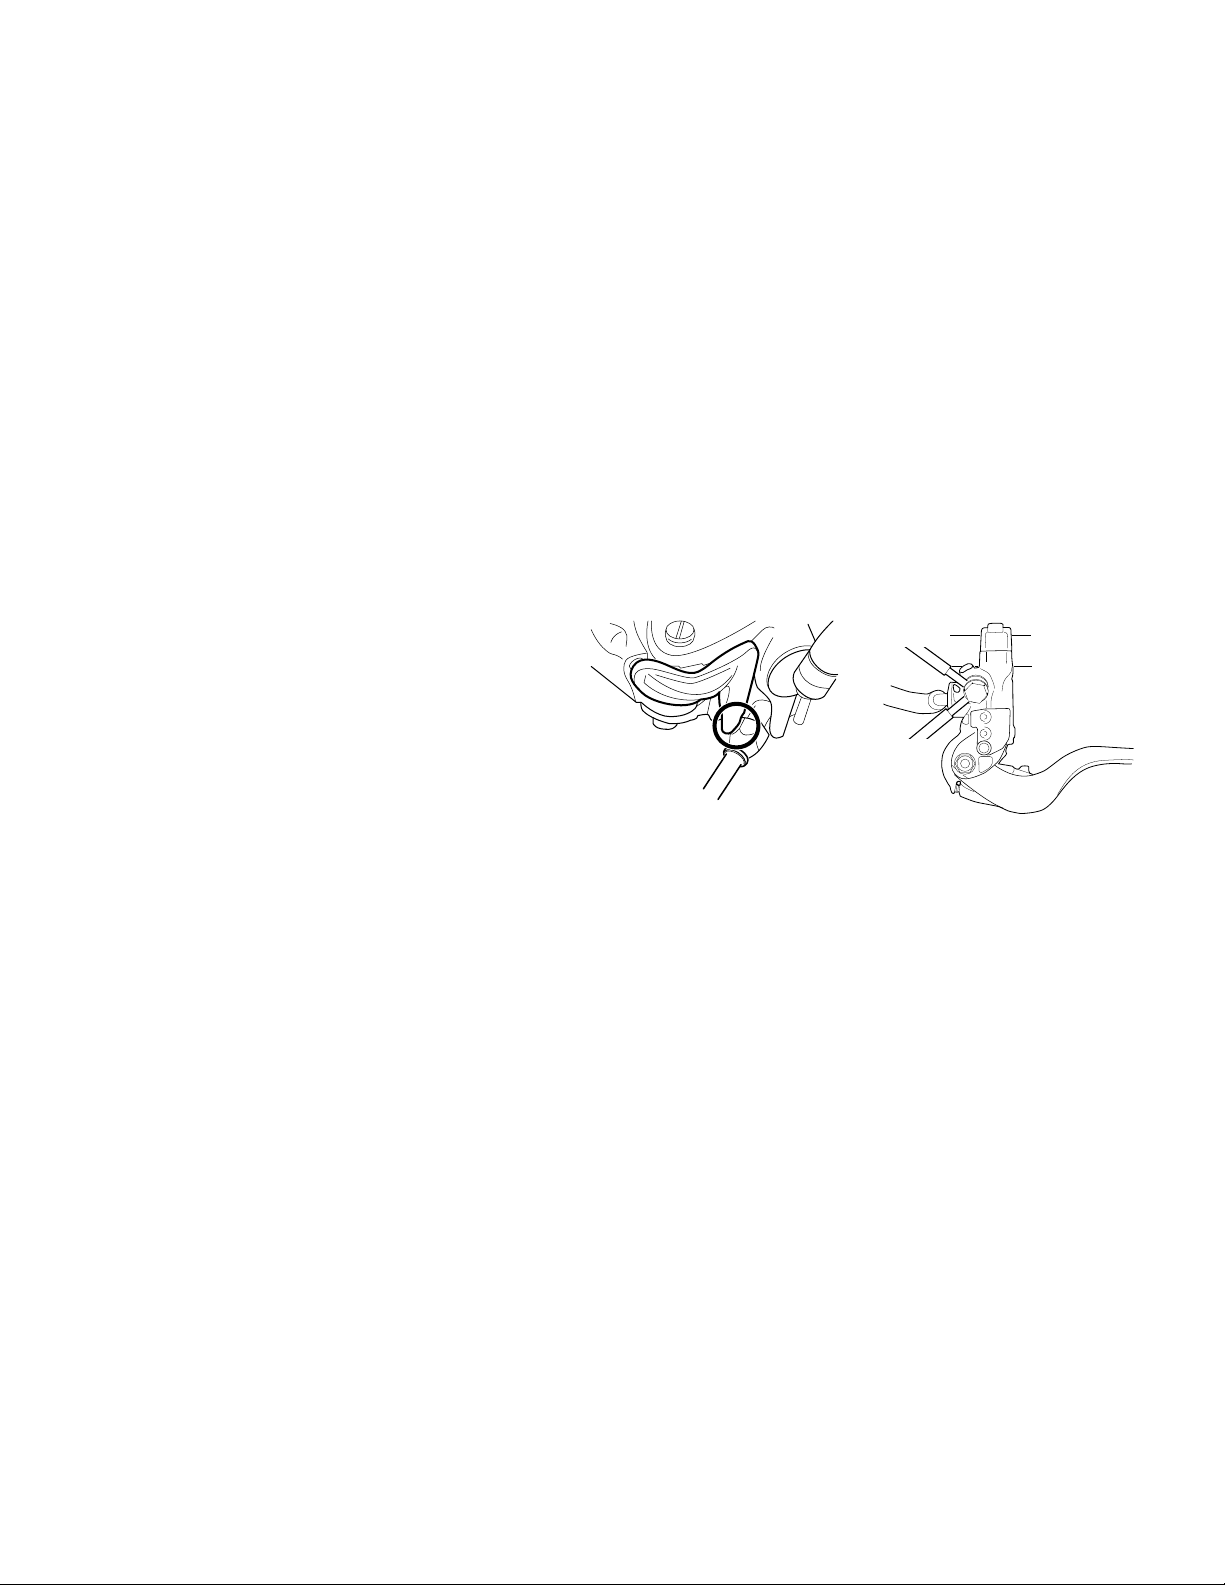
OK
NG
*Should be operated by and expert or under expert supervision to avoid damages or accidents.
1. Drain front brake fluid from Front Brake Caliper(s) completely.
2. Remove the brake switch coupler, banjo bolts and brake hose from the stock master
cylinder. Cover the stock master cylinder and brake hose with a rag to prevent spills.
3. Remove the stock master cylinder from the handle bar.
4. Mount ○1Radial master cylinder on the handle bar with ○9Half clamp (or ○8Mirror
holder) and allen cap screws. Connect the brake switch coupler.
5. Mount the ○2Reservoir tank on ○1Radial master cylinder with ○7Reservoir Bracket,
○5Reservoir bolt and ○6Tank fixing nut. Make sure the reservoir tank is not too slanted.
6. Connect brake hose(s) to ○1Radial master cylinder with M10 x P1.25 banjo bolt.
Fastening torque: 25-30Nm. New gasket must be used.
*The brake hose banjo(s) must be far
enough from the Brake Switch Pushing Arm
on the brake lever. Make sure the Pushing
Arm DOES NOT hit the banjo(s) when the
brake lever is fully stroked. Any returned
products with a bent pushing arm will not
be honored.
7. Take off the reservoir cap and pour brake fluid into the reservoir tank.
8. Let the air bleed through to the reservoir by squeezing the ○3Hose and stroking the
lever several times until you feel the pressure.
9. Connect the air bleeding hose to the air bleeder and stroke the lever. While holding
the lever down, loosen the air bleeder. When the air comes out, close it again. Repeat
until there is no more air to come out. Finally close the air bleeder with 4-7Nm torque.
10. Check the lever pressure by stroking the brake lever several times. Make sure the
brakes properly works before riding.
11. Hold the lever down stiffly to make sure the lever does not move. Check for any
brake fluid leakage. Check all bolts and nuts to make sure they are all tight.
IMPORTANT: Shindy Products, Inc. cannot be held liable for any damage to the product, motorcycle or
persons and property caused by failure to follow the mounting and maintenance instructions exactly.
SHINDY PRODUCTS, INC.
1566 CENTRE POINTE DR.
MILPITAS, CA 95035
 Loading...