

Page 1
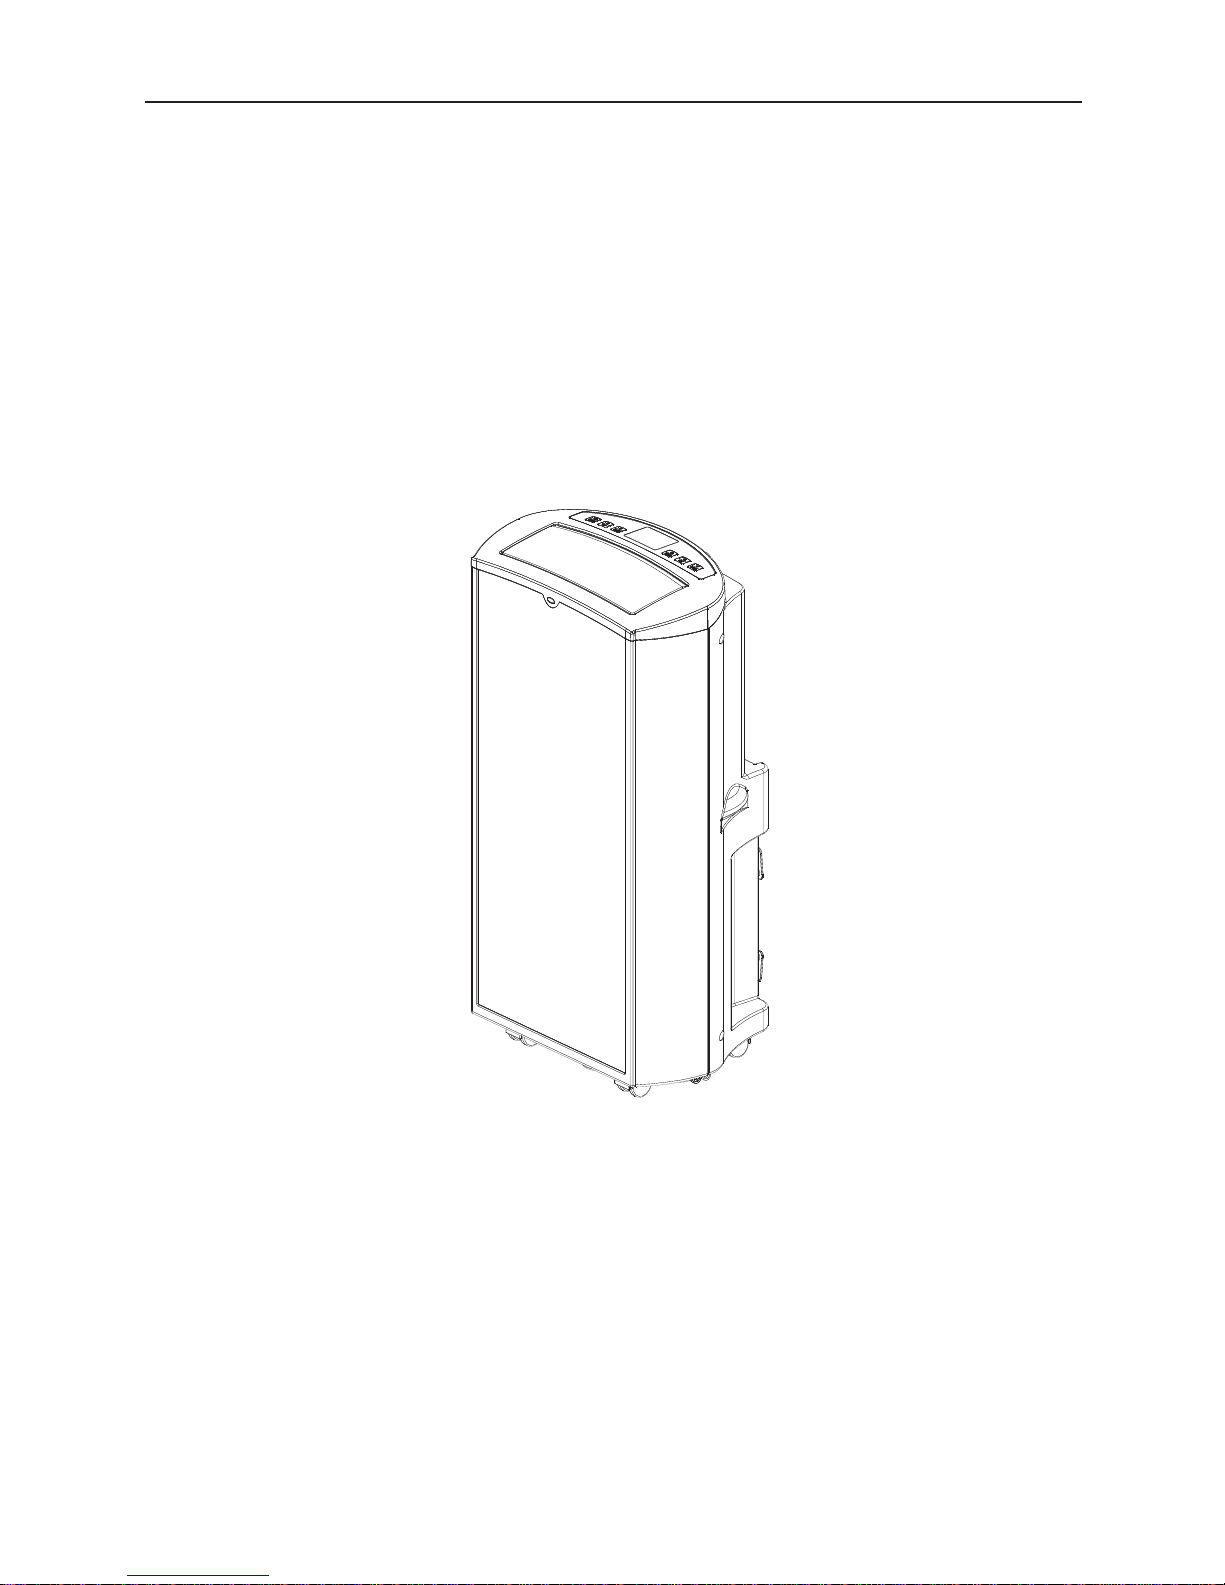
12,000/14,000 BTU Portable A/C with Heat
Owner’s Manual
Thank you for selecting our high-quality mobile air conditioner from Shinco. Before use,
please read this entire manual carefully for information regarding setting up your portable A/C,
operating it, and tips on regular maintenance. For any problems, please refer to the Quick
Troubleshooting as well as Limited Warranty documents included with this portable A/C.
Shinco – SPHN12W/ SPHN14W
Page 2

1
Table of Contents
Table of Contents-------------------------------------------------------------------1
Important Safety precautions--------------------------------------------------2-3
Features and Parts List----------------------------------------------------------3-4
Installation-------------------------------------------------------------------------5-6
Control and Setting----------------------------------------------------------------7-9
Water-Drainage
----------------------------------------------------------------------10
Maintenance
----------------------------------------------------------------------11-12
Trouble Shooting
--------------------------------------------------------------------13
Appendix
------------------------------------------------------------------------------14
Page 3

2
Important Safety Precautions
For your and your families’ health, please read the following safety precautions carefully before
use of this air conditioner:
Requirements
The appliance is for indoor use only.
Read all instructions, Rated Power Supply: Please connect the unit with Grounded Power
Sources: 110-120VAC, 60HZ.
Disconnect the power plug before dismantling, assembling or before cleaning.
Avoid touching mobile parts of the appliance.
Never insert fingers, pencils or any other objects though the guard whenever the power plug
is connected, especially while running.
The appliance is not intended for use by young children or infirm persons unless they have
been adequately supervised by a responsible person to ensure that they can use the unit safely.
Young children should be supervised to ensure that they do not play with the appliance.
Do not use the appliance for any other purposes than its intended use.
The appliance is must not be used if the guards are not fasten according to the instructions.
When the power cord is damaged, it must be replaced by the manufacturer or its service agent
or a similar qualified person in order to avoid hazard.
Do not use your appliance with an extension cord unless it has been checked and tested by a
qualified electrician or electrical supplier.
Return to authorized service agent.
The air conditioner unit must always be stored and transported upright, otherwise you
may cause irreparable damage to the compressor ; in case of doubt we suggest to wait for
at least 24 hours before you start air-conditioning unit.
Avoid restarting the air conditioning unit unless 3 minutes have passed since being turned off,
or the compressor may get damaged.
Never use the mains plug as a switch to start and turn off the air conditioning unit. Use the
provided ON/OFF switch located on the control panel.
Always place the portable air conditioner on a dry stable place.
The appliance shall not be installed in the laundry.
The appliance must be positioned so that
the plug is accessible. And it shall be installed in
accordance with national wiring regulations.
Energy Saving Tips
Do not cover or restrict the airflow from the Outlet or Inlet grills.
Page 4

3
The minimum distance from furniture and wall should be 19.6inch.
Keep the filters clean. Under normal conditions, the filters should be cleaned approximately
every 30 days. Since the filters remove airborne particles, more frequent cleaning maybe
necessary, depending on the indoor air quality.
Set the fan speed switch to high cool and the thermostat to the coolest position for the initial
start-up, then set the fan switch to Low cool and lower the thermostat to a comfortable
setting.
Suggestions:
If you want to get better effect, we suggest you not to use cooling function when ambient
environment is higher than 35℃(95℉) or heating function when the ambient environment is
lower than 7℃(44℉).
Features and Parts List
Features
Self-evaporative system, no water tank.
Oval and thin design, looks unique and luxury.
Wing outlet closes automatically after shut down the unit, prevent dirt into machine.
LCD display, indicating temperature and operation status.
Remote control and power plug can be put in the rear of the unit after use, exhaust hose could
be fixed with the machine after use.
New design handle, human oriented design
Universal socket on the rear of the unit, easy to fix power plug.
High position for pipe connection, easy to remove hot air.
On/off timer function,
Three -minutes -delay function for restarting, and some other protective function.
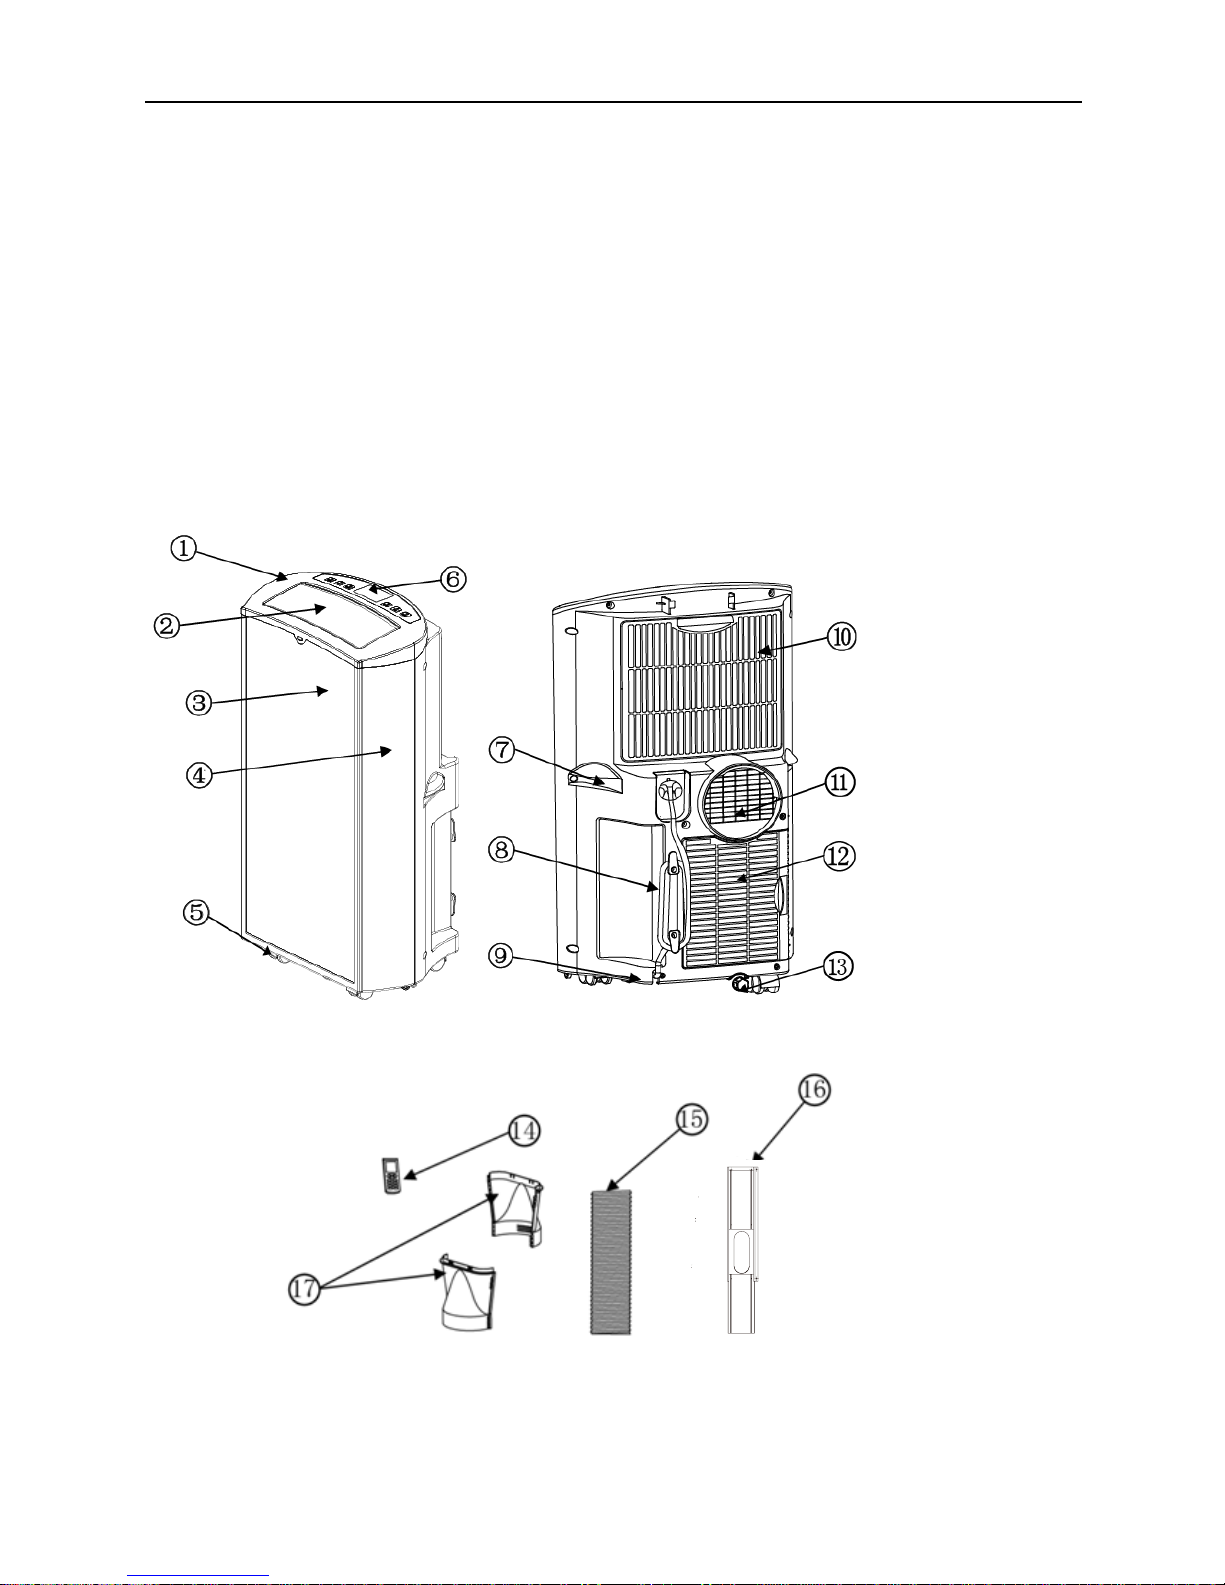
Parts list
1. Top cover
2. Air outlet grille
3. Brushed stainless steel
4. Front cover
5. Caster
6. Control panel
7. Handle
Page 5
4
8. Power cord
9. Drain port
10. Up filter frame
11. Protective net
12. Down filter frame
13. Water plug
14. Remote control
15. Exhaust hose
16. Window kits
17. Hose adaptor
IMA GE
e atte
Page 6

5
Installation
Installation
Warning:Before using this unit, please keep it upright at least 2 hours.
The unit can be moved easily among the rooms, but please note
the following:
1.1 Assemble hose adaptor(picture 1)
(picture 1)
1)Prepare male and female parts of hose adaptor, they are almost same on the structure
2)Each hand hold one part, you can connect them easily.
Remark: Don’t push too hard to prevent damage.
1.2 Assembly of the exhaust hose (picture 2)
(picture 2)
1) Lengthen one head of the hose, screw it into the unit anti-clockwise.
Remarks:screw it to its place, no less than three circles.
2) The same way to connect the hose to the assembled adaptor (At least three circles)
1.3 Installation of window kits. Partially open the window and then fix the window kits to the window
(picture 3, 4 below).
The window kits can be installed on most normal and vertical windows, and it is adjustable.
Page 7

6
(Picture3) (Picture 4)
1.4 Please make sure the unit is upright. The unit should be put on the flat floor and 19.6in to around
objects.
(Picture 5)
Fix the other end of the heat-exhausted hose to the air-outlet window kit(picture6, 7)
(Picture 6) (Picture 7)
Important safeguards
The length of the soft hose is from 11in to59in which bases on the unit model. Don’t use the
lengthened hose or other hoses instead, or it might cause faults. The air-exhaustion must be well
ventilated, if not, may cause the unit overheating.
Please note: Don’t turn the air-exhausted pipe in vase scale( >45°)
Page 8

7
Control and Setting
This portable air conditioner of cooling only model has three functions: cooling, dehumidifying and
fan. If the machine you purchased is cool and heat model, it has four functions cooling, heating,
dehumidifying and fan
Fan has three speeds: high speed, middle speed and low speed,
Setting temperature is 16--30 C/60 ~86℉, 24 hours timer, water-throwing function, sensor and
water-level protective function.
1、
Control instruction:
Control panel:
1.1 When plug in, follow the start music, the unit will enter standby status.
1.2 ON/OFF
button: When press this button, unit will play starting up music, model will
enter cooling mode (Setting temperature 22℃/72℉), low speed fan. Press again, unit will
shut off and play shut- off music, unit will in standby status.
1.3 Mode button
:
Press this key to choose Cooling, Heating (only for cool & heat model), Fan, Energy Saver,
or Dehumidifying Mode.
1.4 Fan button
:
a) Under cooling mode:
LOW FAN(F1)→MIDDLE FAN(F2)→HIGH FAN(F3)→LOW FAN (F1)
→…,goes like this.
b) Under fan model: same as cooling mode
c) Under heating model, hot air will come out after compressor working 2 minutes.
d) Under dehumidifying mode, fan is working in low speed
1.5 Timer button
:
Press Timer,
will flash, “88” areas indicates 24:00; you can set your time through
and buttons. The HOUR number will change from 1,2,3…24. Auto-shut-off
timer is only available when the unit on; auto-run timer is only available when the unit is
Up
Down
Mode
Fan
Speed
On/Off
Timer
Display
Area
Page 9

8
off. After timer setting accomplishes effectively , icon will keep on flashing until
setting time is due. If set again, history record will be cleared.
1.6 Up and Down button: can set temperature and timer .Under cooling or
heating mode, the sting temperature ranges from 16~30℃/60~86℉. If press Up
and Down button simultaneously, the unit will shift between ℃ to ℉.
2. Remote control
Drawing of Remote Control panel
Remote control for Cool only Remote control for Cool & Heat
Power :Press this key to turn on/off the button.
Mode :Press this key to choose cooling, heating, dehumidifying, , energy saver
and fan.
Up :Press this key to turn up temperature or adjust time.
Down :Press this key to turn down temperature or adjust time.
Fan :Press this key to set low/middle/high fan speed.
Timer
:Press this key to set time.
Page 10

9
Auto Swing:Press this key to control swing function.
Auto Clean: Press this key under cooling, dehumidify, and energy saver mode, after unit
has been turned off, it will work under low speed to blow condenser water, it will be dry
and clean finally.
Temperature :Press this key to choose Centigrade or Fahrenheit.
3、Multi protective function
3.1 Anti-freezing protecting control:
When the ambient temperature is very low under Cooling Mode, Dry mode and Energy saver
mode, the compressor and water motor will stop working if the copper coil temperature Temp
<0℃/32℉after the compressor continues working for 7 minutes; when copper coil temperature
will increase>7℃/44℉, the protection will be stopped automatically, and recover to previous
mode on the condition that compressor three-minutes delay protection satisfied.
3.2 Water-full protection:
When the water level in the bottom water plate is surpassing warning level, the unit will alert
automatically, “FL” and “Water Full” will flashes on LCD. Please discharge water in the
machine according to Chapter “Water Drainage”, the unit will recover previous working
status once the water has been discharged completely.
3.3 Auto defrosting
This machine has auto defrosting function, “Heat” on LCD will flash during defrosting.
3.4 Auto Thermal Protection
To protect whole unit, it has auto thermal protection under Heat mode, compressor and down
motor will stop work during protection, it will recover once the machine temperature comes
normal.
3.5 Compressor delay-protection
Except for the first power-on, the compressor can start at once. In other cases, the compressor
runs under 3 minutes delay protection.
4、Energy save function
Press any key on the control panel, background light will turn bright from dark for 10 seconds.
Under Energy Saver mode, the power consumption will be much lower.
Page 11

10
WATER-DRAINAGE
1. Manual drainage:
1.1 When water tank is full and unit stop working, please shut off the unit and unplug.
Please don’t move the model sharply, or the water will spilt out from water received plate.
1.2 Use a water container to take water under the water plug.
1.3 Screw off the water plug and unplug the water blocker, water will come out to the water
container.
1.4 Stuff up the water blocker and screw down the water plug.
2. Continue drainage:
2.1 Screw off the water plug and unplug the water blocker.
2.2 Use water pipe to connect the water outlet.
2.3 Lead the pipe to the outside or washroom.
Remark:
1. This method can be done only if there is no water in the water received plate.
2.This model have self-evaporative function, under cooling mode, please don’t use continue
drainage to get better cooling effect.
Page 12

11
Maintenance
Cleaning
Please shut off the unit and unplug the plug before cleaning or maintenance
1. Clean the surface
Clean the housing with a duster or a soft wet cloth. Do not use chemical solvent (such as benzene,
alcohol, gasoline). The surface may be damaged or even the whole case may be deformed.
2. Air filter cleaning
Clean the air filters every 2 weeks. If the air filter is blocked with dust, the ef f iciency will reduce.
2.1 Clean EVA filter grille
1) Pull out up and down EVA filter as below pictures
2) Wash the EVA filter by immersing it gently into warm (about 40℃/104℉) water with a neutral
detergent, rinse it and dry it thoroughly in a shaded place。
3) Install air filter grille carefully after cleaning the filters.
Please note: active carbon filter cloth (choose the accessories depending on your needs) can be put out
after putting out the filter frame and should be changed every 2-3 weeks based on the environment.
2.2 Clean CON filter grille
1). Outward and upward put out the air filter like below pictures
2). Wash the air filter by immersing it gently into warm (about 40℃/104℉) water with a neutral
detergent, rinse it and dry it thoroughly in a shaded place.
3). Put the air filter grille to its position in the unit.
Page 13

12
Please note: Don’t overexert to avoid buckle of CON filter grille.
After Season Maintenance:
1. Pull out the plug in drainage hole and empty the water-received plate, or drain out the water by leaning
the unit.
2. Turn on the unit to Fan mode, and press the button for 5 seconds till it to low fan speed. Keep this mode
for half day till the conduit is dried. Doing like this can keep the inner unit dried and not go moldy.
3. Turn off the unit and pull out the plug. Coil the wire and bind it together, then put it into the accessories
room.
4. Separate the air-exhausted pipe and safely keep it.
5. Put the unit into a plastic bag, then keep it in a dried place.
6. Take out the batteries of remote control and safely keep them.
* All accessories can be put in the accessories room on the back of the unit.
Page 14

13
Trouble Shooting
Don’t repair or disassemble the unit by yourself, unsuitable repair may make the quality-protected card in
vain, and even cause damage to the user or his/her possession.
Trouble Reason Solution
No power supply Power-on and turn on the unit.
FL and Water-full indicator
illuminate
Drain out the inner stored water
Timer function is active Cancel Timer function
The unit
doesn’t work
Room temperature too low or too
high?
Suggesting ambient temperature
between 7-35℃(44-95℉)
In direct sunlight Draw the curtains
Windows or doors open, many
people or a heat source in the
room
Close windows and turn on another air
conditioner
Filter is very dirty Clean or change the air filter
Air inlet or air outlet is blocked Clear out the stemming
The unit does
not seem to
perform
Room temperature is lower than
setting temperature
Change the setting temperature
The unit noise
is high
The unit is not put on flat place
Put the unit on flat and hard
place( reduce noise)
Compressor
doesn’t work
Heat-exceeded protection is
active
Re-start the unit 3 minutes later till the
temperature low down.
The distance is too far.
Control panel hasn’t received the
signal from remote control.
Let the remote control near the unit and
make sure it aims at the air-outlet
grille
Remote
control doesn’t
work
The batteries run out.
Change the batteries
CH 01 on
LCD
Room temperature is abnormal
check room temperature sensor or
relevant circuit
CH 02 on
LCD
Coil temperature is abnormal
check coil temperature sensor or
relevant circuit
If the solutions above don’t function for the troubles, please contact with special service agent for help.
Page 15

14
APPENDIX
Fuse Parameter
Type: FSD or 50F
Voltage: 250V
Current: 3.15A
The working principium diagram of the unit:
There is no further notice for the change of the parameters above, the exact parameters base on the
rating plate.
Meaning of crossed –out wheeled dustbin:
Do not dispose of electrical appliances as unsorted municipal waste, use separate collection facilities,
waste, use separate collection facilities.
Contact your local government for information regarding the collection systems available.
If electrical appliances are disposed of in landfills or dumps, hazardous substances can leak into the
groundwater and get into the food chain, damaging your health and well-being.
When replacing old appliances with new ones, the retailer is legally obligated to take back your old
appliance for disposals at least free of charge.
Condenser
Compressor Evaporator
Capillary tube
Page 16

15
Distributed by Avista USA
 Loading...