

Shinano Kenshi WNAS User Manual
Giga NAS Landisk
[ Wireless
Network Attached Storage (NAS)
From Plextor ]
V1.02
Includes
☆ Features Description
☆ Quick Install
☆ Detailed Setup Guide
☆ Tools Guide
1 of 47

Federal Communications Commission (FCC) Statement
This equipment has been tested and found to comply with the limits for a Class B
digital device, pursuant to part 15 of the FCC Rules. These limits are designed to
provide reasonable protection against harmful interference in a residential installation.
This equipment generates, uses and can radiate radio frequency energy and, if not
installed and used in accordance with the instructions, may cause harmful
interference to radio communications. However, there is no guarantee that
interference will not occur in a particular installation. If this equipment does cause
harmful interference to radio or television reception, which can be determined by
turning the equipment off and on, the user is encouraged to try to correct the
interference by one or more of the following measures:
x Reorient or relocate the receiving antenna.
x Increase the separation between the equipment and receiver.
x Connect the equipment into an outlet on a circuit different from that to which
the receiver is connected.
x Consult the dealer or an experienced radio/TV technician for help.
Properly shielded and grounded cables and connectors must be used to meet FCC
emission limits. Plextor is not responsible for any radio or television interference
caused by using other than recommended cables or connectors.
Unauthorized changes or modifications to the equipment could void the user’s
authority to operate the equipment.
FCC Radiation Exposure Statement
FCC Radiation Exposure Statement
This equipment complies with FCC radiation exposure set forth for an uncontrolled environment.
In order to avoid the possibility of exceeding the FCC radio frequency exposure limits, human
proximity to the antenna shall not be less than 20cm (8 inches) during normal operation.
The antenna(s) used for this transmitter must not be co-located or operating in conjunction
with any other antenna or transmitter.
These devices comply with part 15 of the FCC Rules. Operation is subject to the
following two conditions: (1) These devices may not cause harmful interference, and
(2) these devices must accept any interference received, including interference that
may cause undesired operation.
This FCC Statement applies to these NAS models:
PX-WNAS500L, PX-WNAS750L, PX-WNAS1000L and enclosed variants that
are materially similar to the tested NAS devices.
Pertinent testing documentation is available for verification.
2 of 47

Contents
What’s in the box 4
Introduction 4
Connectors, Buttons and indicators 5
Rear Connections 5
Buttons and Indicators 6
Quick Installation and set up and guide 7
Connecting your Plextor StorX to your Network 9
Copy the Plextor StorX Net-Tool software (supplied on CD) onto your PC 9
Connecting Plextor StorX to a DHCP Router, Hub/Switch 9
Connecting Plextor StorX to a Static IP Address Router, Hub/Switch 10
User Manual 12
Section 1: LAN Settings 13
Section 2: Setting up Wireless Connection 14
Section 3: System 18
Section 4: FTP Server 20
Section 5: USB 22
Section 6: Users 23
Section 7: Group 25
Section 8: Folder 27
Section 9: Media 31
Section 10: Backup 32
Section 11: BitTorrent 35
Tools 37
Scheduling 37
Restart 37
ADS (Active Directory Service) 38
Hard disk utility 43
Firmware Upgrade 44
Save Config 44
Factory Default 45
Login Settings 45
System Log 46
3 of 47

What’s in the box
Plextor StorX Unit (HDD installed)
Vertical stand
RJ-45 Cable
2x Antenna
Power Supply
Power Cable EU
Power Cable UK
Quick Start Guide
CD
Introduction
Congratulations on purchasing your Plextor StorX Network Attached Storage (NAS)
device. With your Plextor StorX you are able to:
1. Easily set up users, groups and folders
2. Set accessibility rights such as; No accessibility to other users, Read only to
other users, and Read/Write to other users.
3. Backup your data over the network
4. Backup USB device to NAS HDD with innovative One Touch Backup
5. Connect additional USB storage and printer via USB 2.0 connections
6. Backup and share files via FTP client
7. Play media files via UPnP client
All these features provide excellent data storage and sharing solution for your small
business, SOHO (Small Office or Home Office), or personal requirements.
☆ Supports CIFS/SMB for Microsoft
Network allowing remote users to
retrieve files easily using “My
Neighborhood”
☆ WEB-based User Interface (UI) for easy
configuration
☆ Supports 3.5” SATA HDD - up to 1TB
☆ Provides Password security for
management & HD Access
☆ Embedded FTP server for FTP clients to
transfer files
☆ Supports USB mass storage device
☆ One Touch Backup button for easy
backup of files (from USB Device)
☆ Supports 32 concurrently connected
users
☆ Supports user name & password for 50
users
☆ Built-in Samba server
☆ Supports access management for 300
folders
☆ Plextor StorX NET-Tool for user-friendly
setup
☆ Supports static IP & DHCP client
network environment.
☆ Supports Unicode for multiple-language
characters
☆ Supports group access management
☆ Compatible with Windows XP, Vista
& MAC OS X
4 of 47
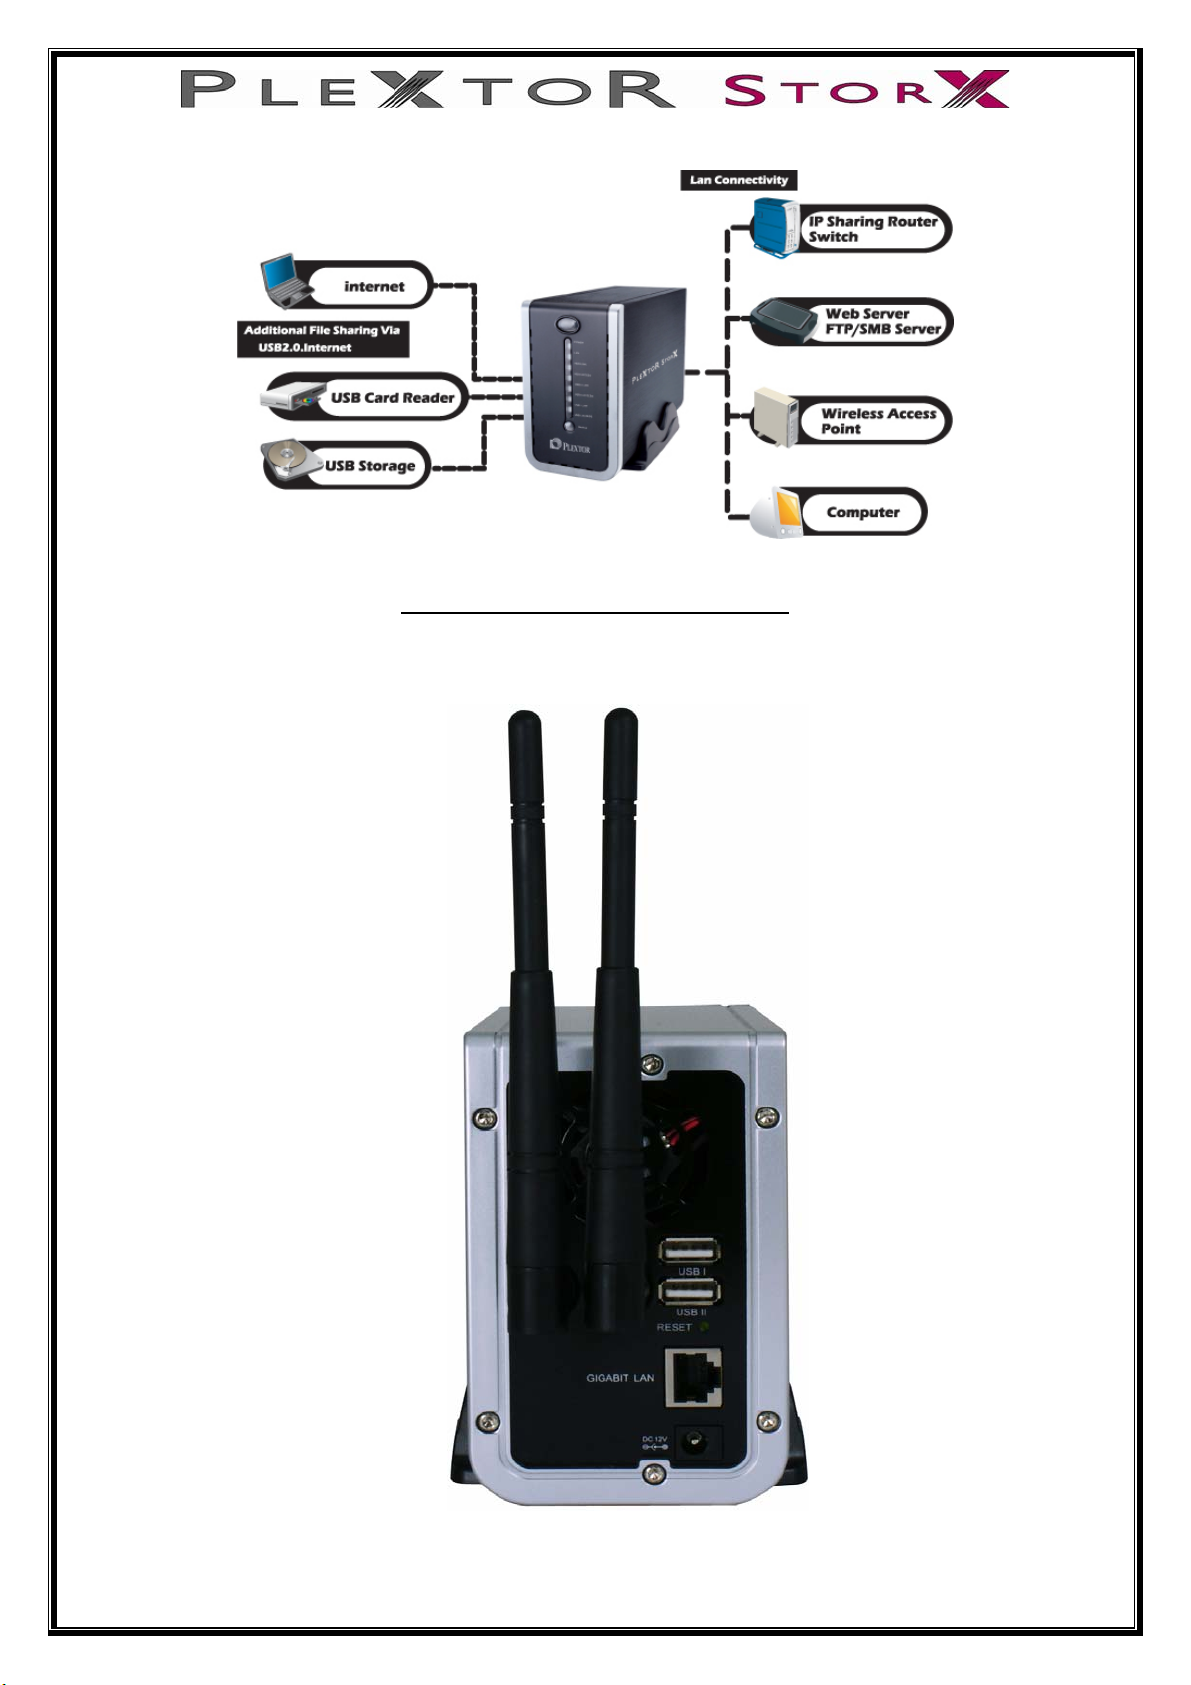
Rear Connections
Connectors, Buttons and indicators
5 of 47
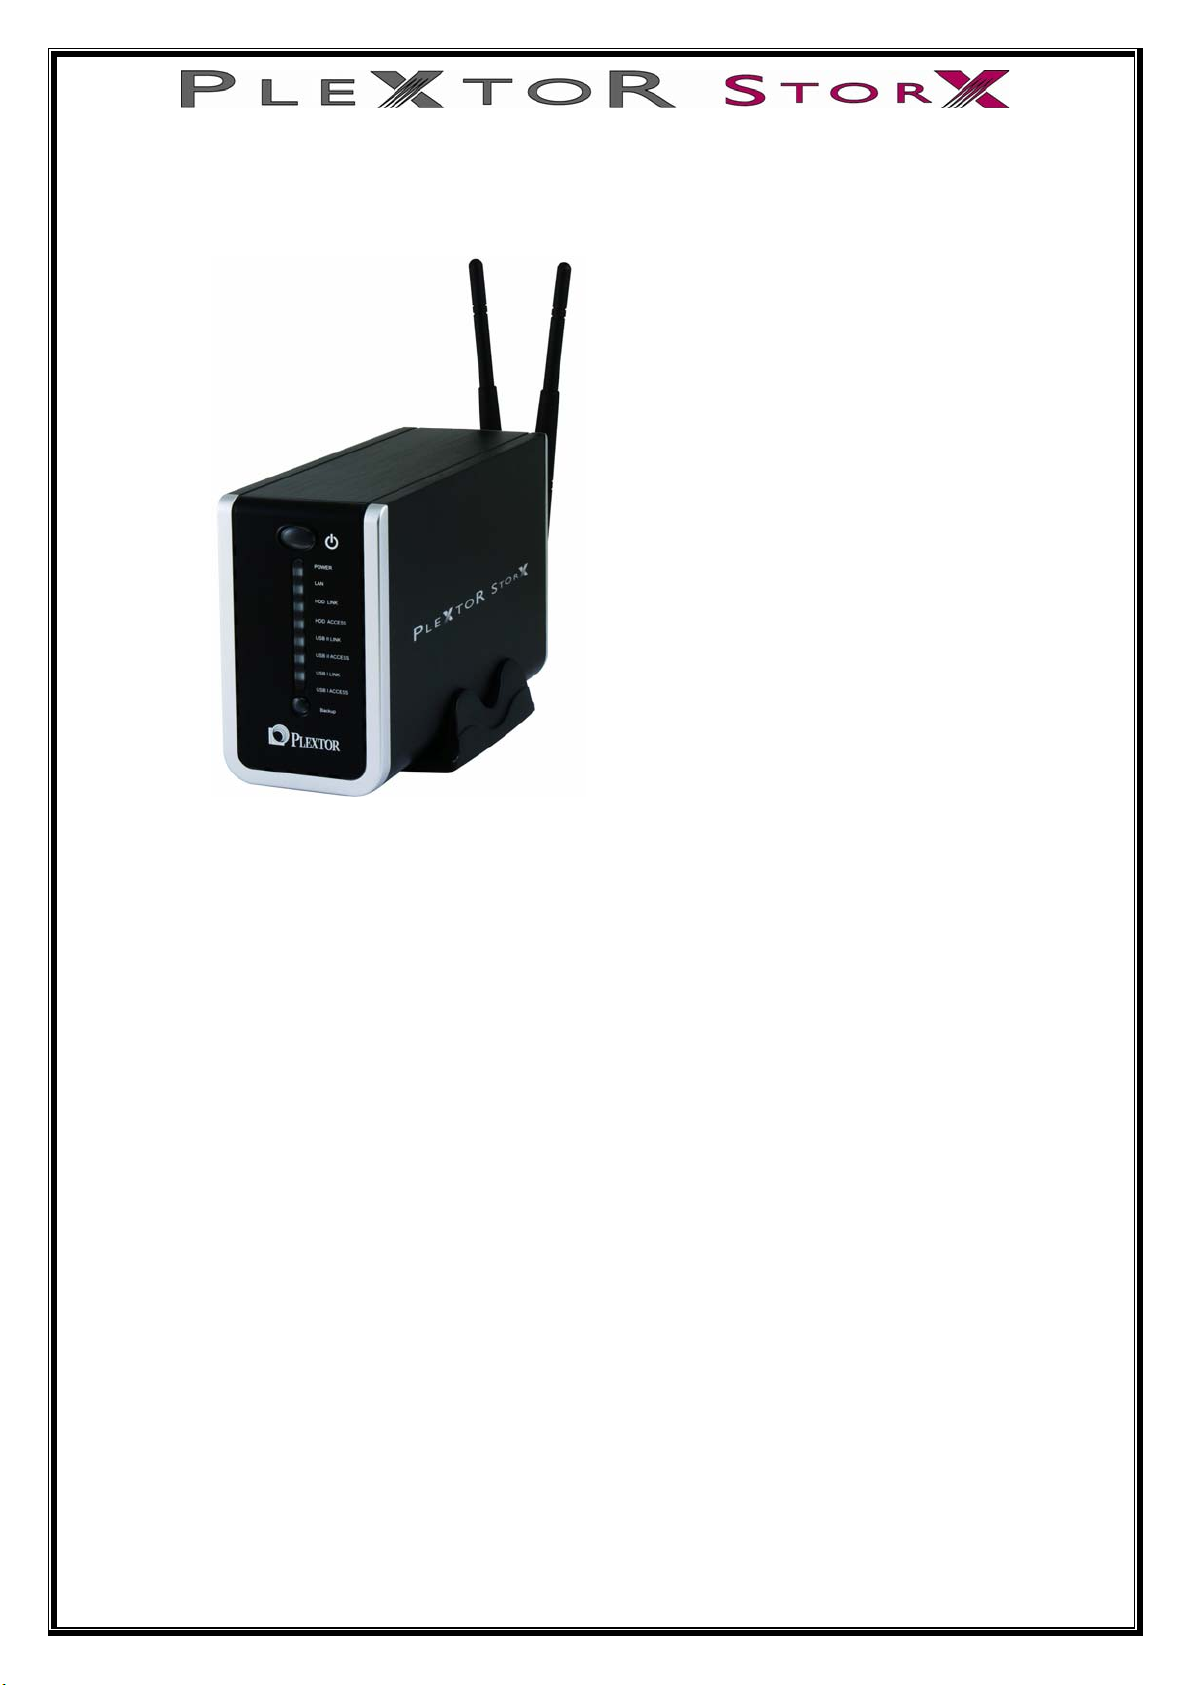
Buttons and Indicators
Power Button
Power
LAN
HDD LINK
HDD ACCESS
USB II LINK
USB II ACCESS
USB I LINK
USB I ACCESS
Backup Button
LED Indicators
Power LED Green – System ready
LAN LED Green – Valid Connection at 10/100/1000 Mbps
HDD LINK Green – HDD ready
HDD ACCESS Yellow – Data transmitting on HDD
USB I / II LINK Green – Valid connection on USB I / USB II port
USB I / II ACCESS Yellow – USB I / II PORT Active
6 of 47
Quick Installation and set up and guide
By following this simple Quick Setup Guide, you will soon be enjoying your new high
speed NAS.
This section shows you how to setup connections and format the hard drive of your
Plextor StorX.
To set-up users, folders and groups please read the User Manual section.
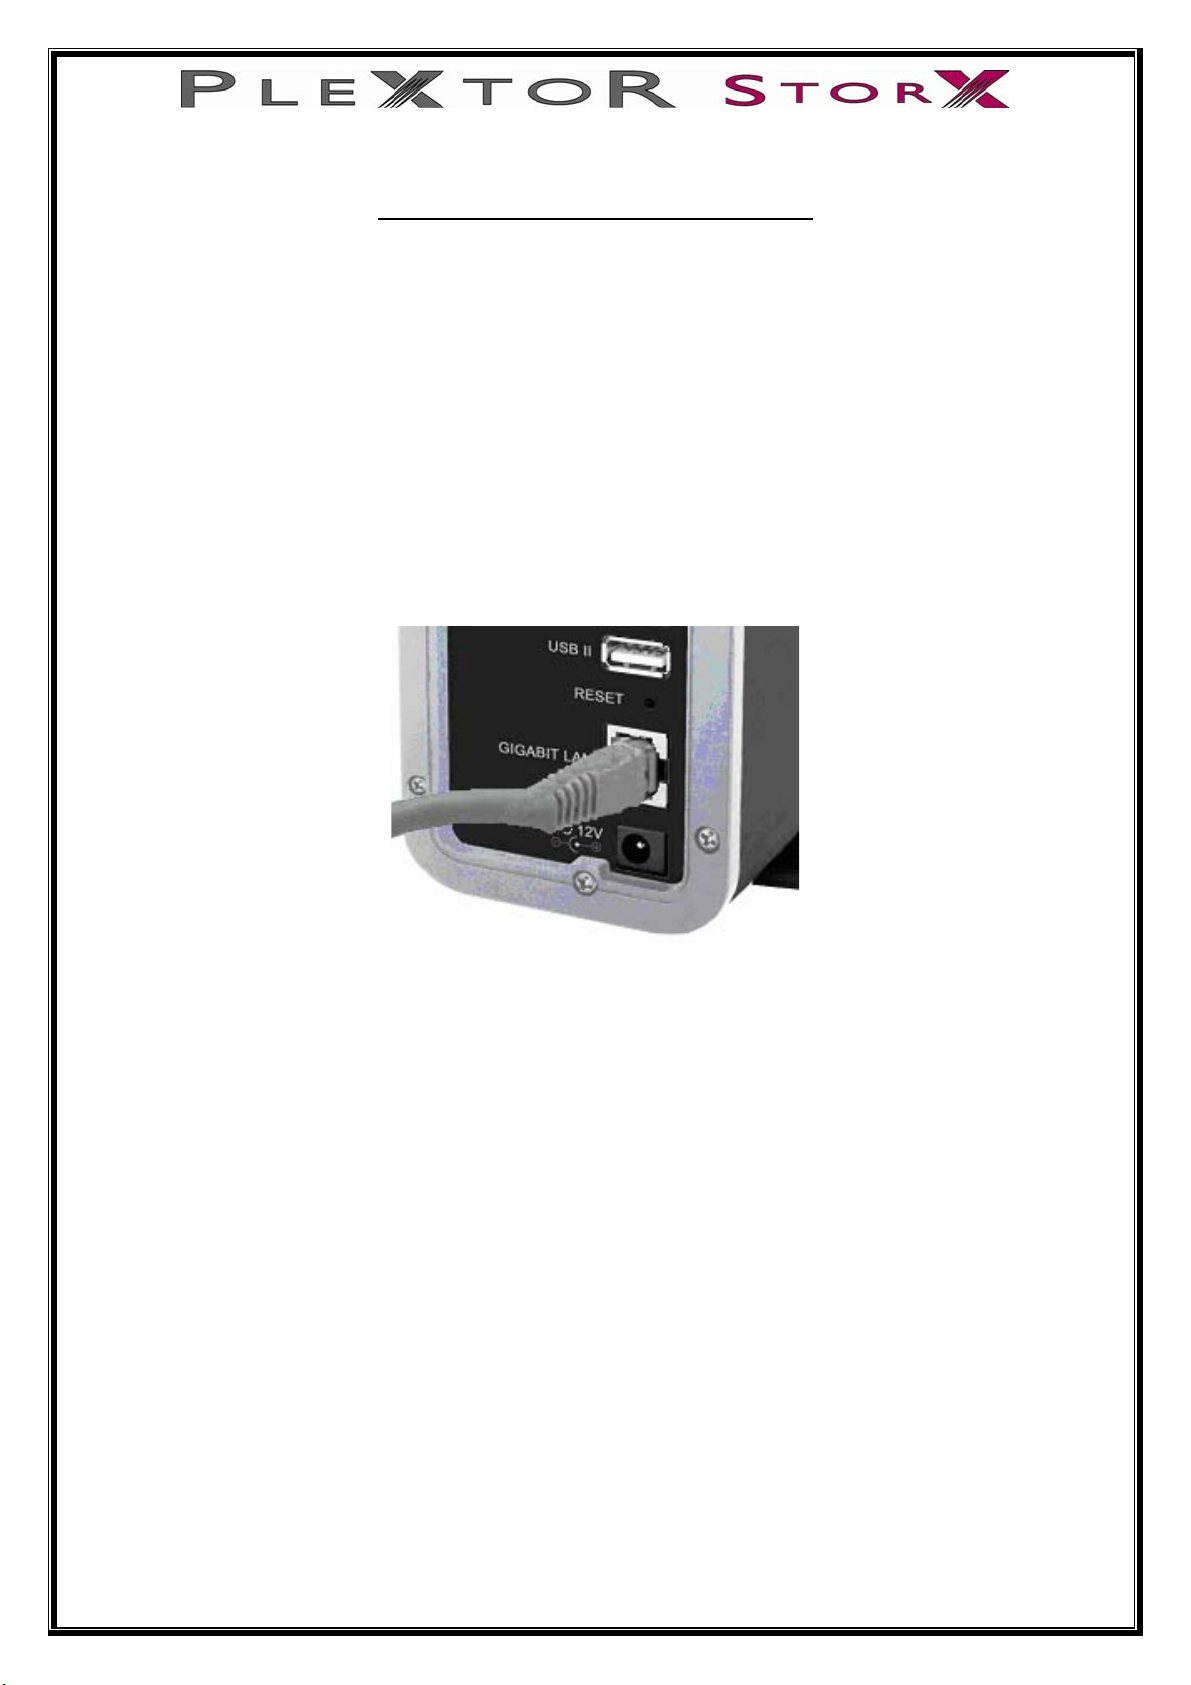
1. Connect one end of the RJ-45 cable (supplied) to the LAN port on your Plextor
StorX
7 of 47
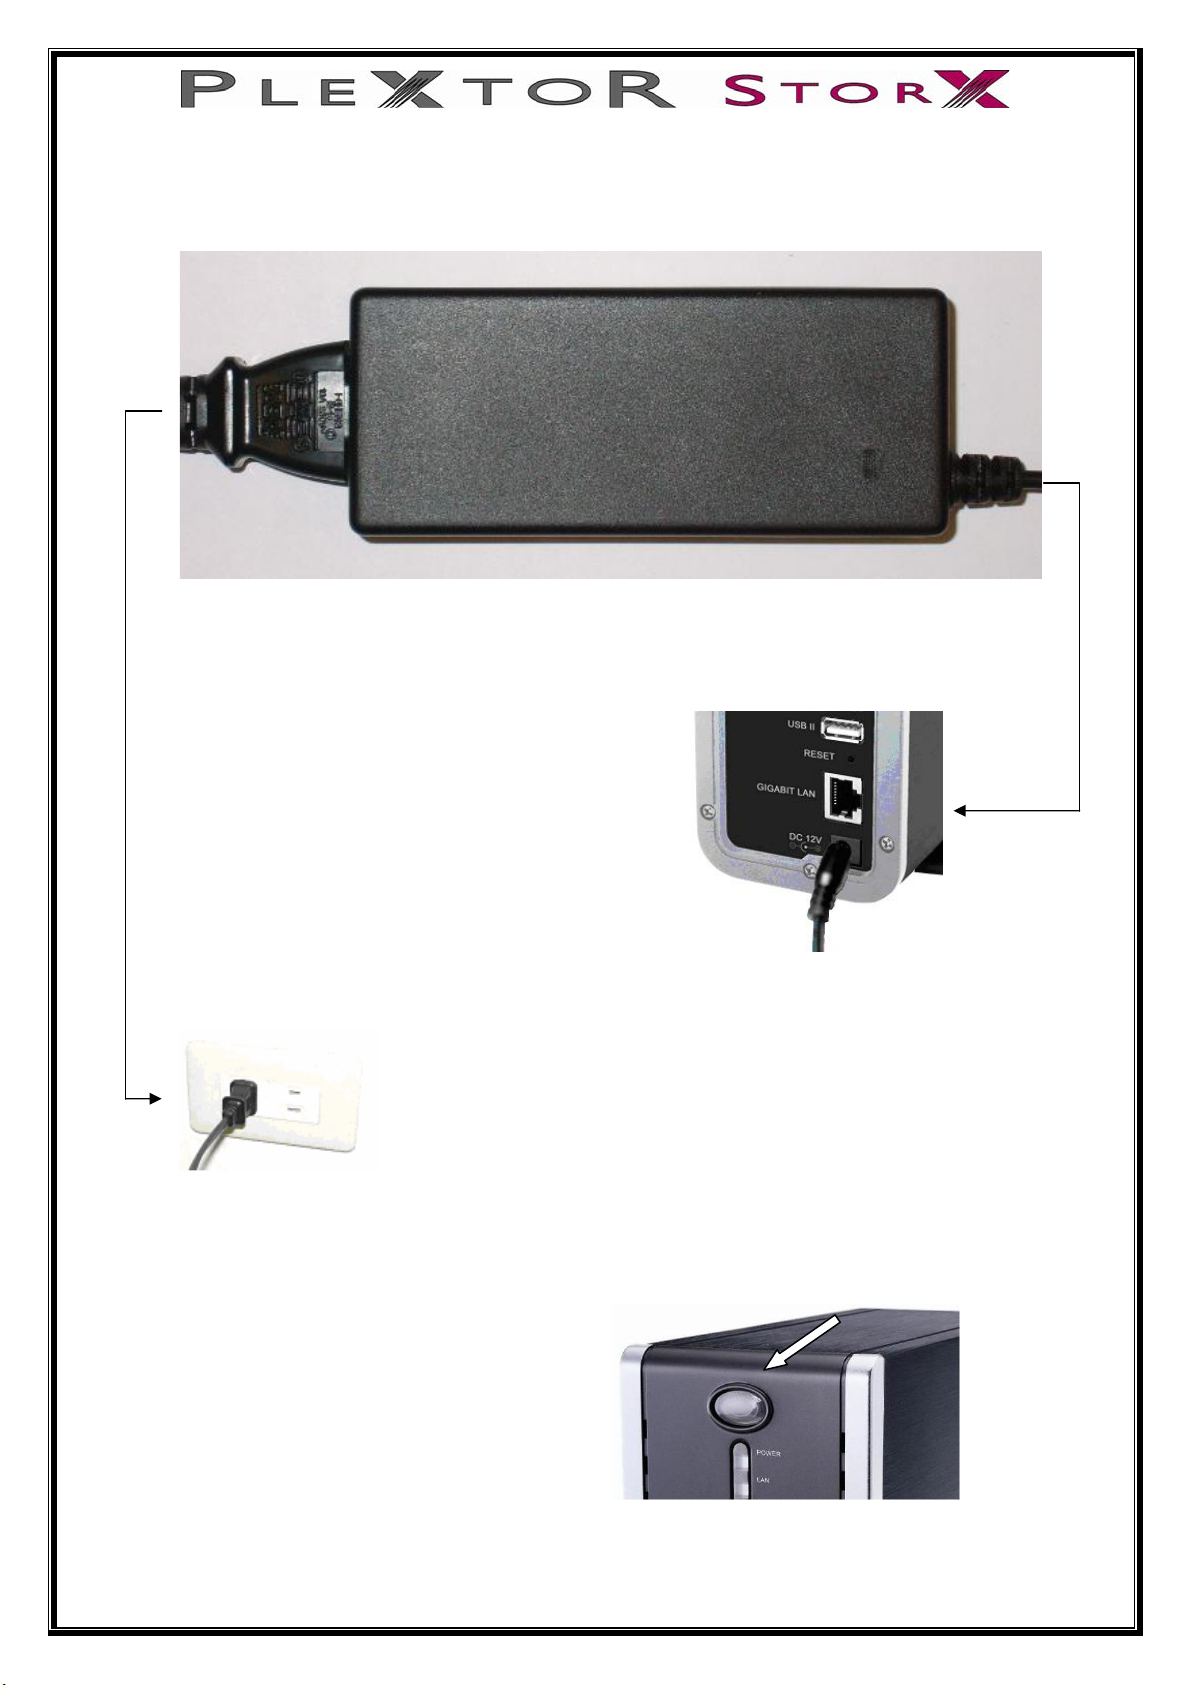
2. Connect the appropriate power cord (supplied) to the power adapter
3. Connect the power adapter end to device
4. Connect the power cord end to outlet socket
5. Push the power button to power on
8 of 47
Connecting your Plextor StorX to your Network
Copy the Plextor StorX Net-Tool software (supplied on CD) onto your PC
(select Plextor StorX Net-Tool, right click, copy, then paste to your PC)
Connecting Plextor StorX to a DHCP Router, Hub/Switch
When you connect your Plextor StorX to a Dynamic Host Configuration Protocol
(DHCP) device, the device assigns your Plextor StorX with a unique IP address.
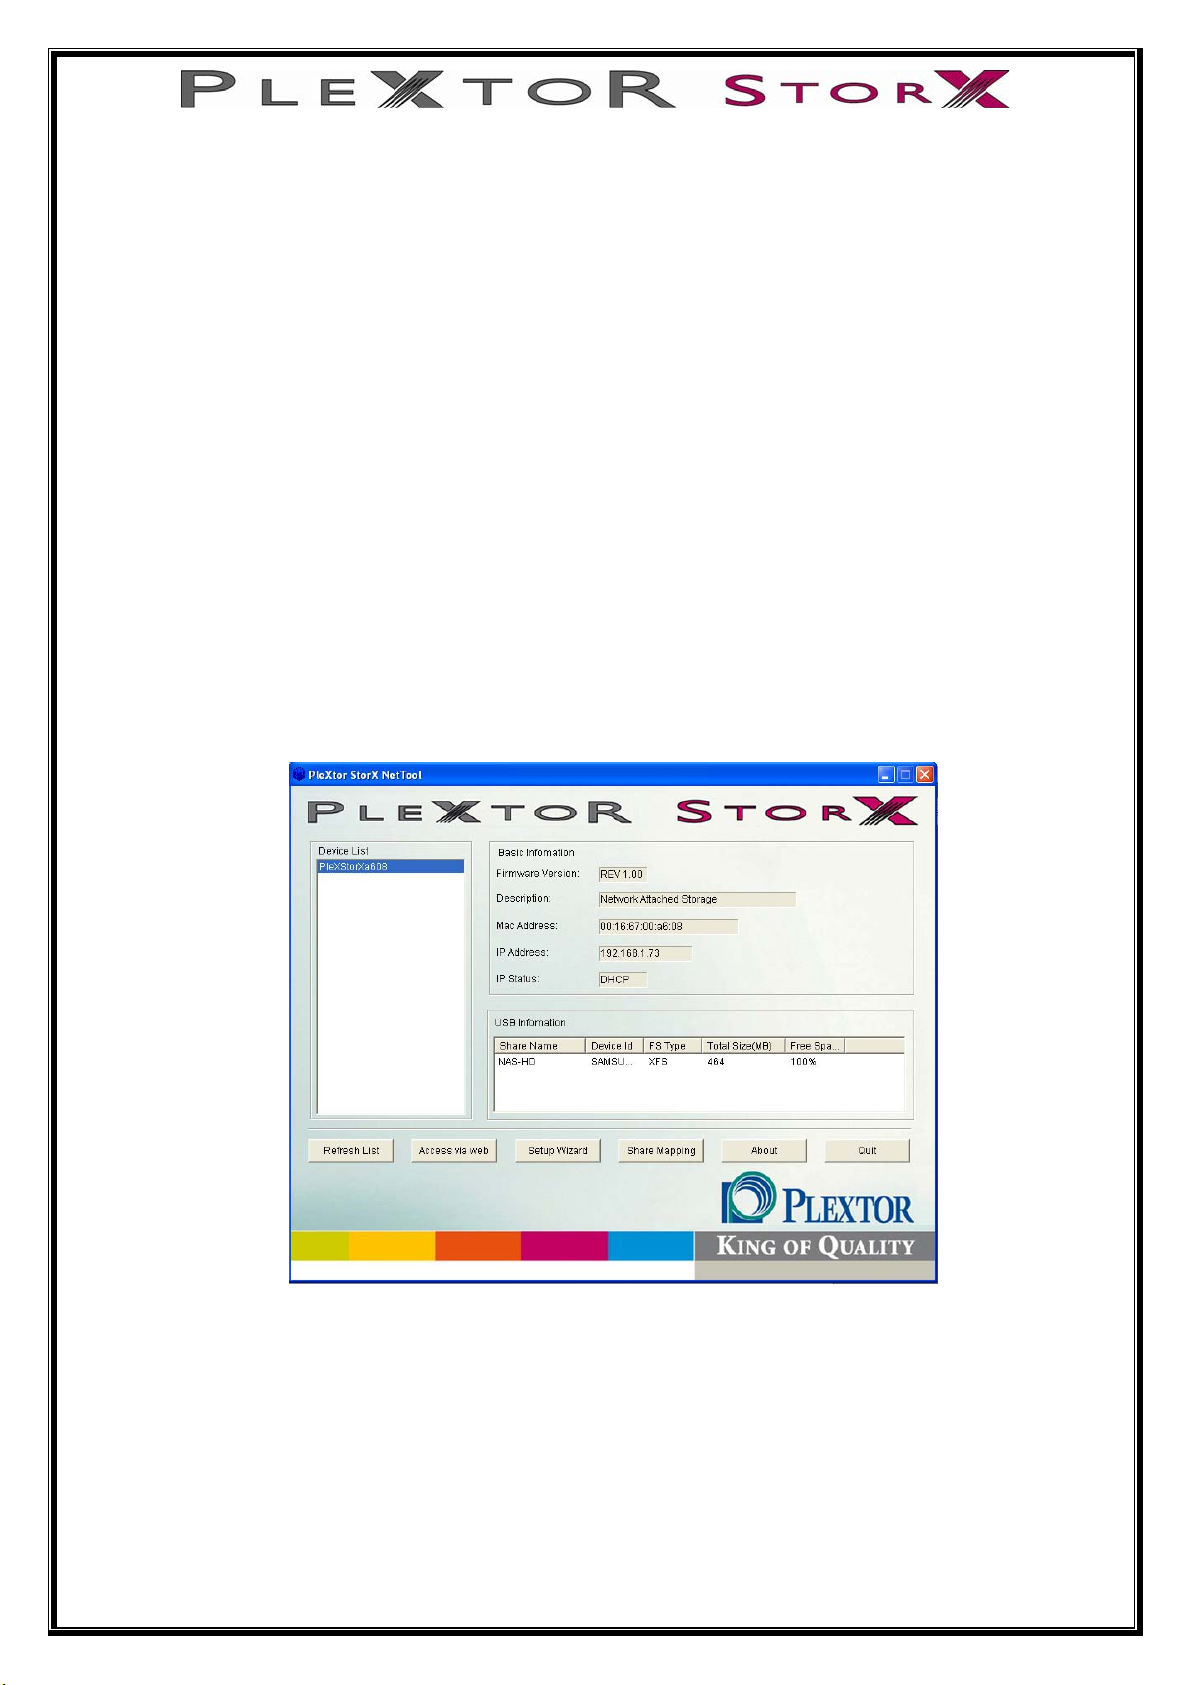
You can confirm network connection and view IP address via the Plextor StorX NETTool
• Open the Plextor StorX Net Tool
• If no device is shown click Refresh
• Click on PlexStorXxxxx
Your Plextor StorX details will be shown
Go to page 11 of this user manual
9 of 47
Connecting Plextor StorX to a Static IP Address Router, Hub/Switch
Plextor StorX has a default IP address of 192.168.16.1.In order to change this IP
address to one within the range of your static IP address router, hub/switch, you
must first connect the Plextor StorX to a PC via LAN connection
(please disable any wireless connection on your PC before you attach Plextor StorX.
Once finished setting up the static IP address you can re-enable the wireless
connection).
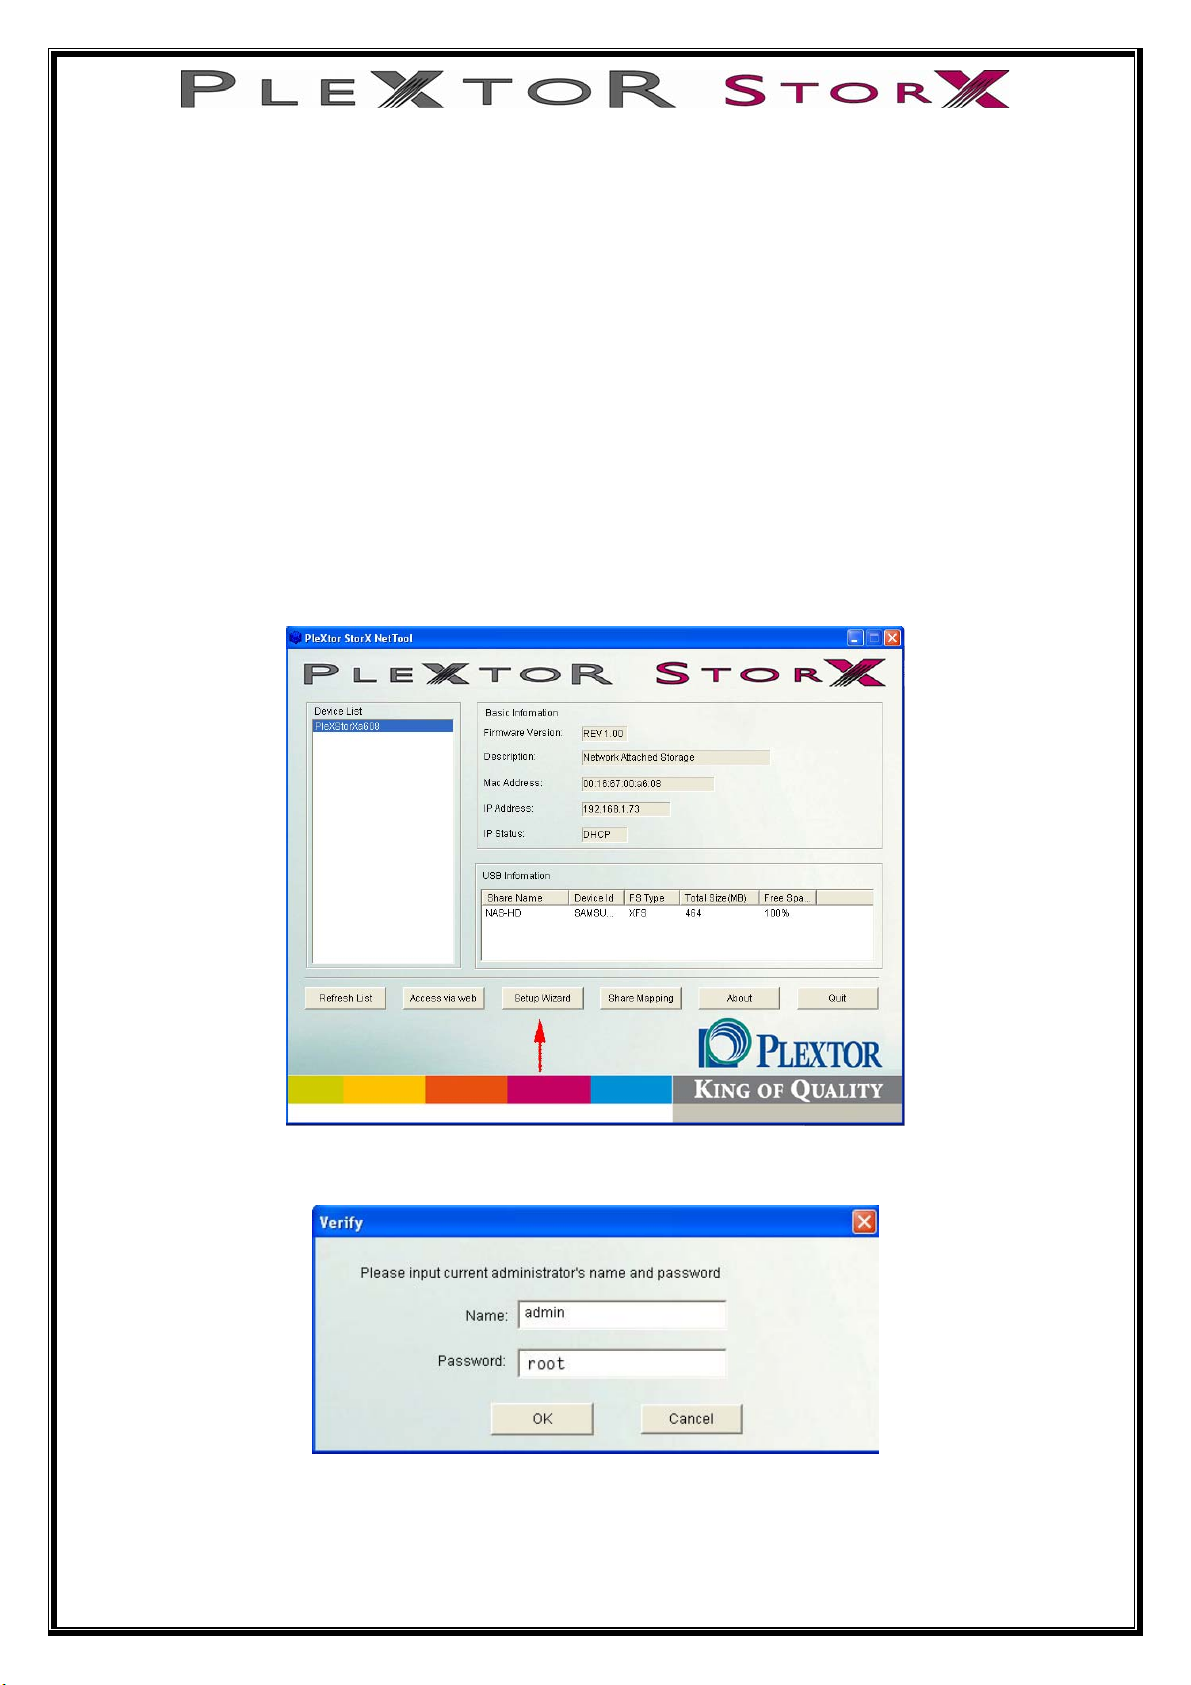
2: Open Plextor StorX NET-Tool on PC
3: Select device (PlexStorXxxxx)
4: Select Setup Wizard
1: Connect Plextor StorX directly to your PC via LAN cable
5: Enter default user name (admin) and password (root)
6: Click, OK
10 of 47
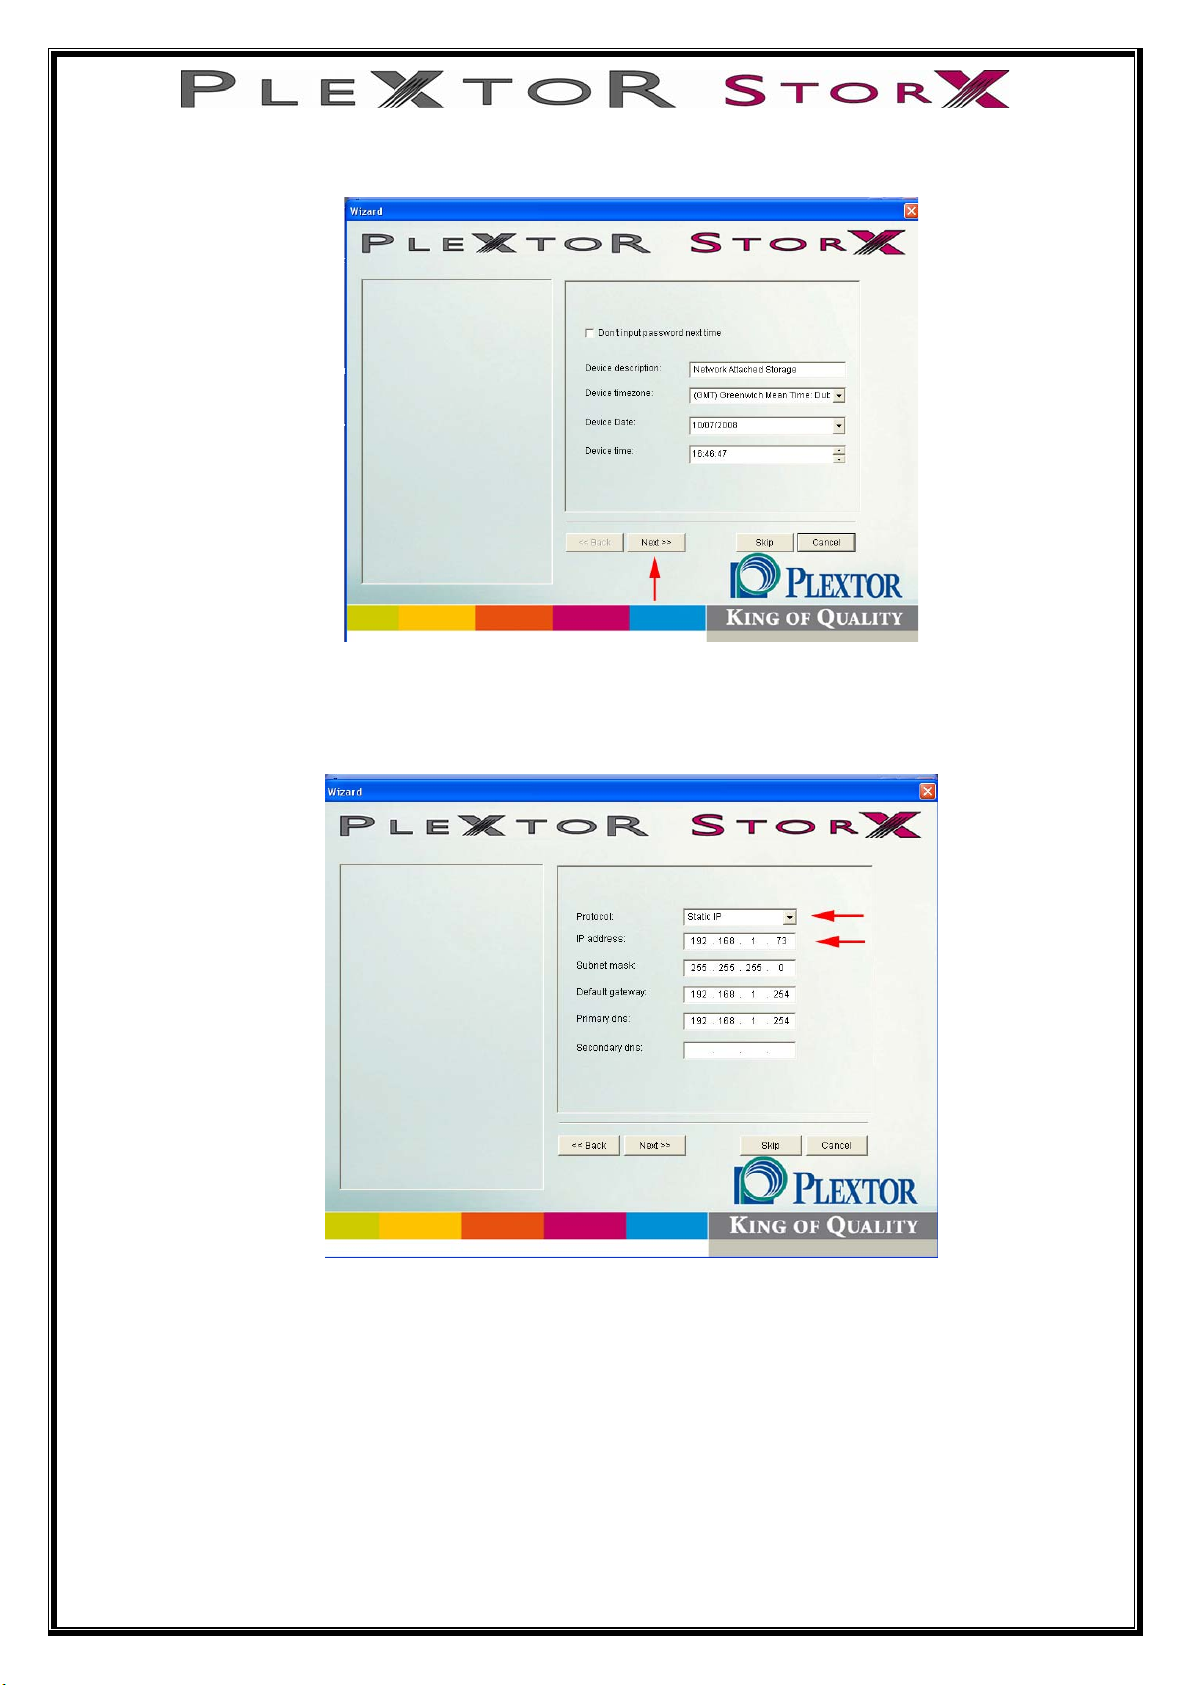
7: Click Next, to skip past date & time setup (you can set this up later)
8: Enter a static IP address within the range of your Router, Hub/Switch
(See the user manual supplied with your Router, Hub/Switch)
(Ensure no previously configured devices share your chosen IP address)
9: Click Next, then Finished to save your settings (you might lose connection
to your Plextor StorX as you have now changed Plextor StorX IP address to
be compatible with your router and not PC)
10: Disconnect the Plextor StorX from PC
11: Re-connect your PC to Router, Hub/Switch (re-enable wireless)
12: Connect your Plextor StorX to Router, Hub/Switch
11 of 47

User Manual
Administration
Section 1: LAN Settings (Dynamic Host Configuration Protocol (DHCP) or Static IP)
Section 2: Setting up Wireless Connection
Section 3: System (Set Date & time, Change name and description of device)
Section 4: FTP Server (Enable FTP server and guest settings)
Section 5: USB (Shows USB devices attached and USB printer)
Section 6: Users (Create users)
Section 7: Group (Create groups of users)
Section 8: Folder (Create folders and set user rights)
Section 9: Media (UPnP)
Section 10: Backup (Back up your files)
Section 11: BitTorrent (Down load a torrent file from internet)
Tools
Scheduling (Set a given time for device to restart)
Restart (restart device immediately)
ADS (Active Directory Service)
Hard Disk Utility (Format hard drive and Scandisc)
FW upgrade (Upgrade to new firmware)
Save Config (Save your preferred setting configuration)
Factory Default (Restores factory settings)
Login Settings (change Administration Username and Password)
System Log (shows recent activity)
12 of 47
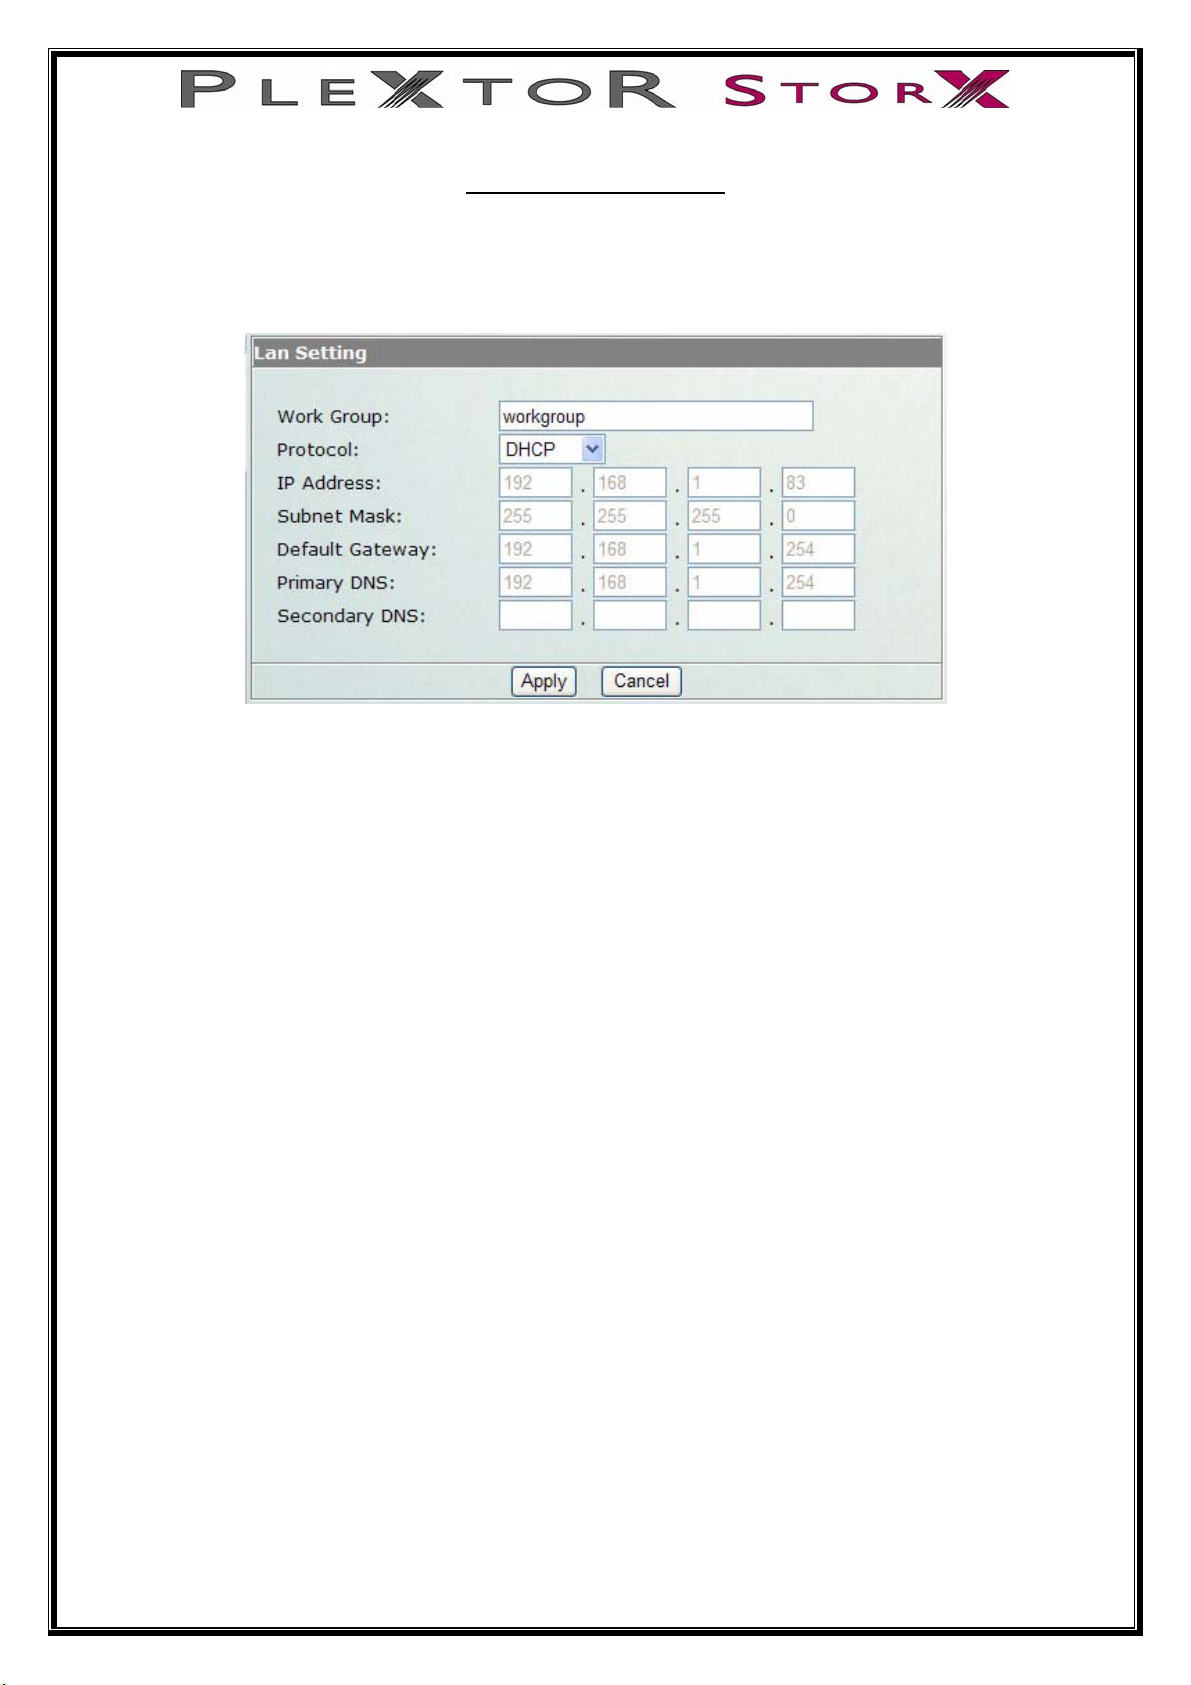
Section 1: LAN Settings
This section contains all LAN settings to configure your Plextor StorX to the network.
Depending on how the network is set up, changes to this page may or may not be
necessary. You can choose between DHCP and Static IP from the “Protocol”
DHCP
Selecting this option enables the Plextor StorX to request an IP and auto-configure
itself to the network when there is a DHCP Server present.
NOTE: If DHCP Client is enabled, but there is no DHCP server, the Plextor StorX
would fall back to the default IP address of 192.168.16.1.
Static IP
Select this option when there is no DHCP Server present on the network and
manually enter the network settings in the fields provided below this option.
IP Address – Enter the static IP address
Subnet Mask – Enter the Subnet Mask address
Default Gateway – Enter the Gateway IP address
DNS1 and DNS2 (both optional) – Enter the DNS IP addresses
NOTE: Contact the network provider/ administrator for additional
assistance in manually entering the above information.
13 of 47
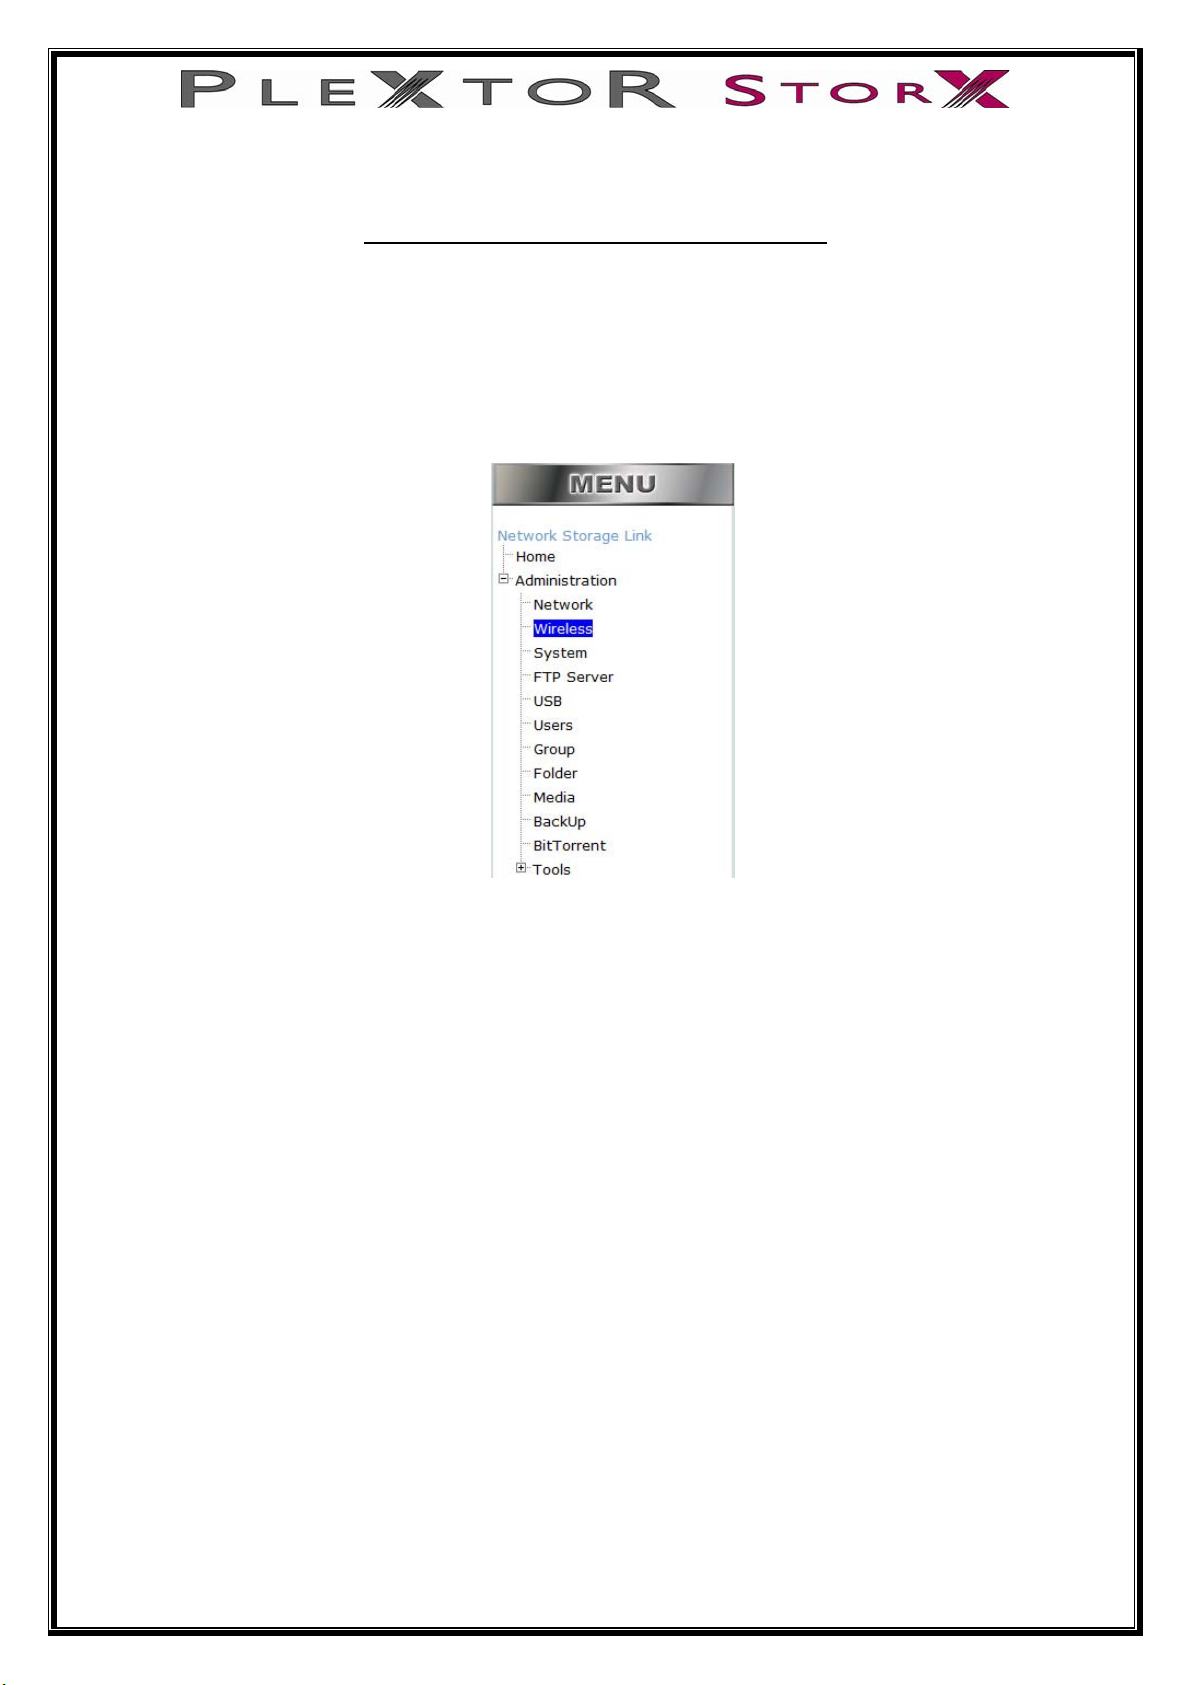
Section 2: Setting up Wireless Connection
1. Connect your Plextor StorX to your router with the RJ-45 LAN cable provided
2. On your PC (which is also connected to your router) open PleXtor NetTool
3. Select your PleXtor StorX. Enter Administration and select Wireless
14 of 47
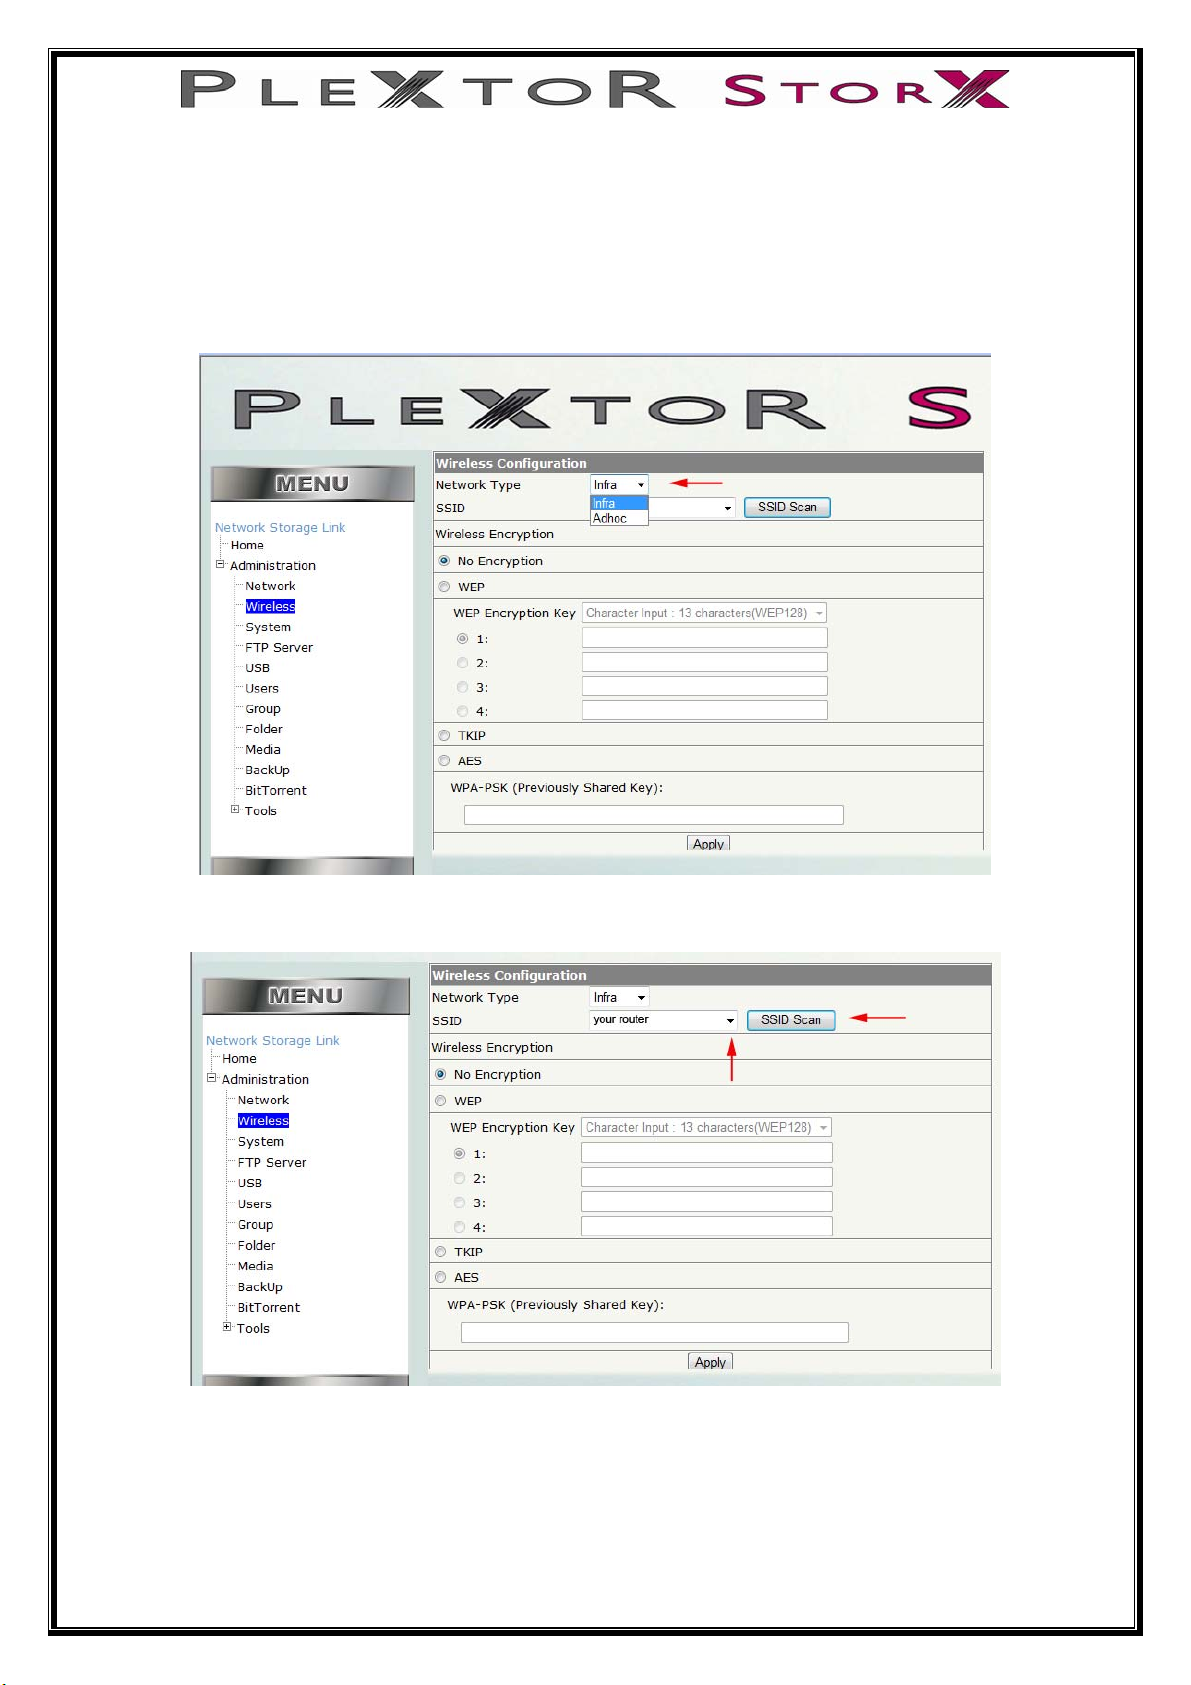
The following procedures are dependent on which security key (if any) your
router has been set up with.
If in doubt, please consult your routers user manual.
No Encryption
Select Infra (infrastructure) or Adhoc
Select, SSID Scan. Then from the drop down menu, select the name of your router.
If your router has no encryption select ‘No Encryption’ then Apply.
Remove LAN cable and restart NAS – NAS will now function in wireless mode.
15 of 47
 Loading...