Page 1

Mechanical Force Gauge
Series MF
Introduction
The MF mechanical force gauge is a
direct reading, dial type instrument
designed for measuring tension and
compression forces. All models are
housed in a rugged, aluminum,
ergonomically designed housing
which makes these instruments ideal
for material testing, manufacturing,
quality control and laboratory
environments.
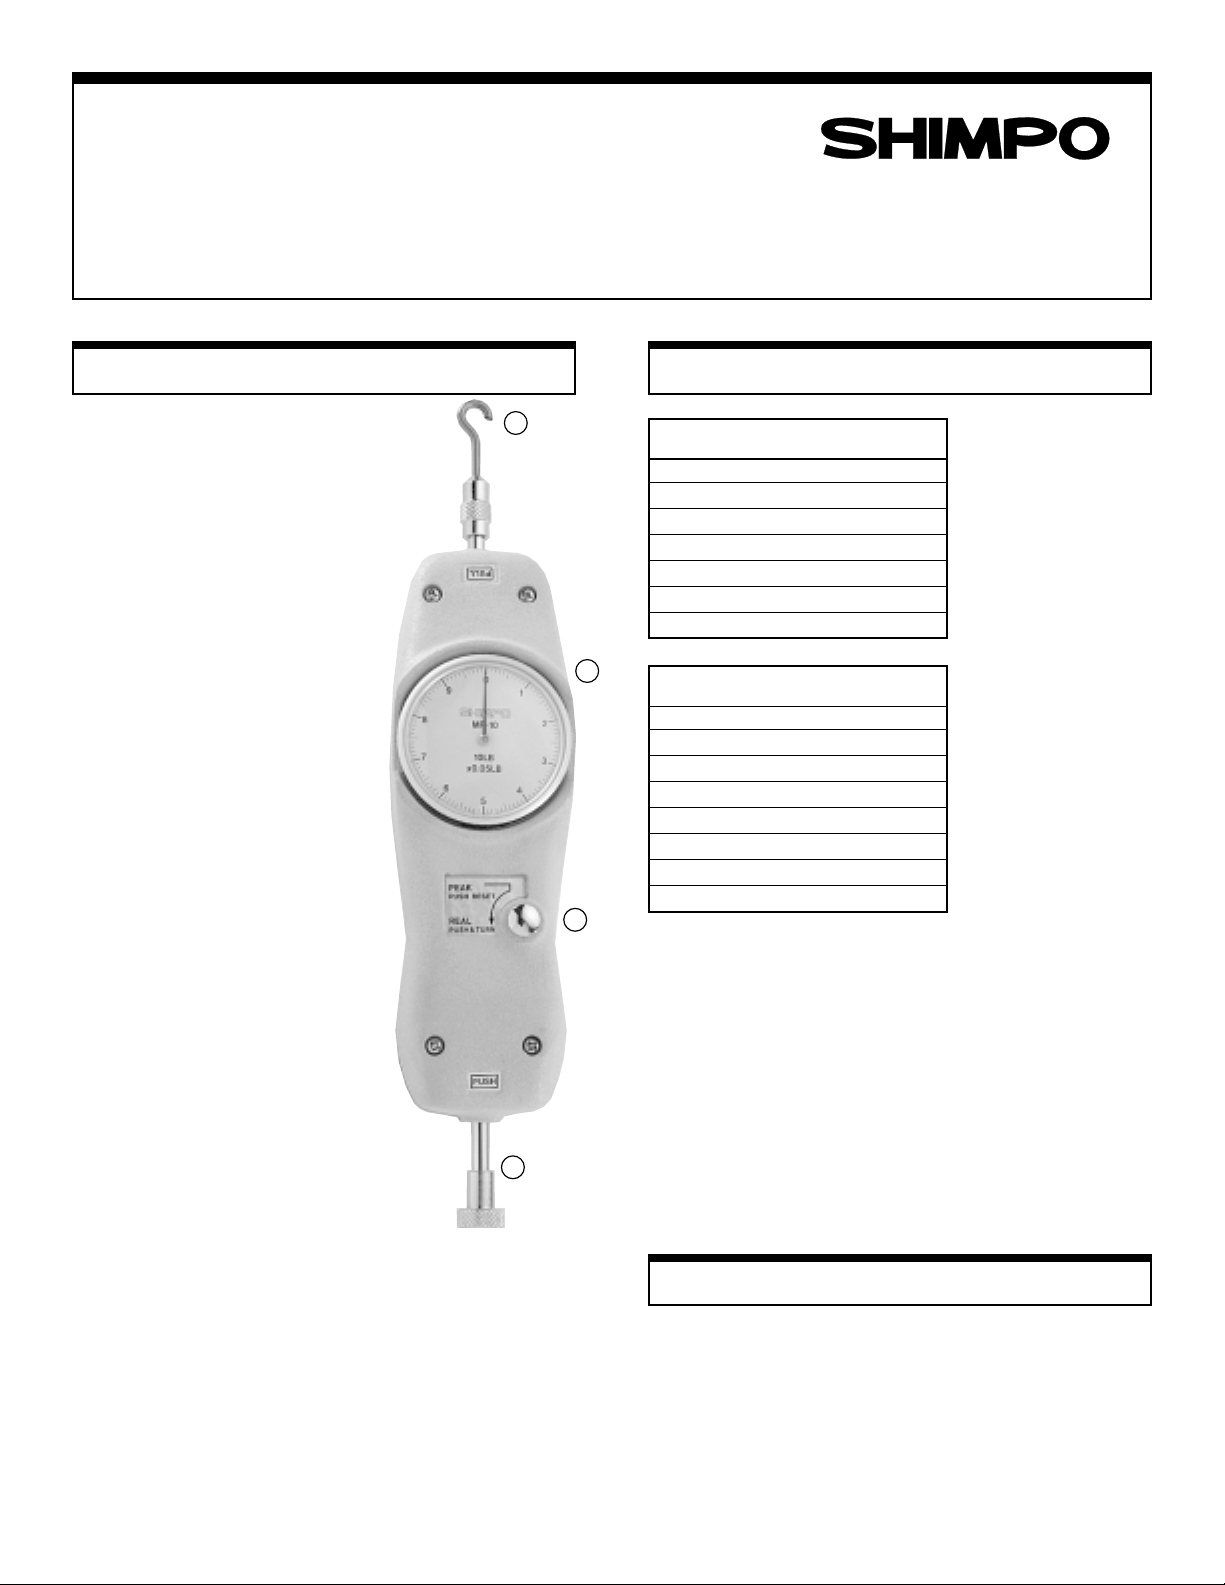
1. T ension Sensing Rod (M6P1)
Measure tensile forces using
the hook attachments.
2. Measure switch
Use this switch to select real
time or peak force.
3. T are Ring
Rotate tare ring to compensate
the attachment's weight.
4. Compression Sensing Rod
(M6P1)
Measure compressive forces
with following attachments: flat
head, conical head, chisel head
and notched head.
Instruction Manual
Specifications
1
3
2
4
MODELMODEL
MODEL
MODELMODEL
MF-2MF-2
MF-2 2 lb 0.01 lb
MF-2MF-2
MF-5MF-5
MF-5 5 lb 0.025 lb
MF-5MF-5
MF-10MF-10
MF-10 10 lb 0.05 lb
MF-10MF-10
MF-20MF-20
MF-20 20 lb 0.1 lb
MF-20MF-20
MF-30MF-30
MF-30 30 lb 0.2 lb
MF-30MF-30
MF-50MF-50
MF-50 50 lb 0.25 lb
MF-50MF-50
MF-100MF-100
MF-100 100 lb 0.5 lb
MF-100MF-100
MODELMODEL
MODEL
MODELMODEL
MF-1KGMF-1KG
MF-1KG 1 kg 0.005 kg
MF-1KGMF-1KG
MF-2KGMF-2KG
MF-2KG 2 kg 0.01 kg
MF-2KGMF-2KG
MF-3KGMF-3KG
MF-3KG 3 kg 0.02 kg
MF-3KGMF-3KG
MF-5KGMF-5KG
MF-5KG 5 kg 0.025 kg
MF-5KGMF-5KG
MF-10KGMF-10KG
MF-10KG 10 kg 0.05 kg
MF-10KGMF-10KG
MF-20KGMF-20KG
MF-20KG 20 kg 0.1 kg
MF-20KGMF-20KG
MF-30KGMF-30KG
MF-30KG 30 kg 0.2 kg
MF-30KGMF-30KG
MF-50KGMF-50KG
MF-50KG 50 kg 0.25 kg
MF-50KGMF-50KG
CAPCAP
CAP
CAPCAP
CAPCAP
CAP
CAPCAP
ACITYACITY
ACITY
ACITYACITY
ACITYACITY
ACITY
ACITYACITY
GRGR
GR
GRGR
GRGR
GR
GRGR
DIALDIAL
DIAL
DIALDIAL
ADUADU
ADU
ADUADU
DIALDIAL
DIAL
DIALDIAL
ADUADU
ADU
ADUADU
AA
A
AA
AA
A
AA
TIONTION
TION
TIONTION
TIONTION
TION
TIONTION
Overload capacity is 75kg for all models.
MF Models
Accuracy: ±0.2% full scale
Stroke: 10mm
Precautions
Do not exceed capacity of unit.
Accuracy may be affected if unit is exposed to high
humidity , dust or extreme shock.
Page 2

General Operation
Optional Accessories (cont'd)
1. Use "selector button" to select average (real time) or
peak mode.
2. Add proper attachment to push or pull measuring end.
3. Rotate tare ring to read"0". Adjustment should be
made under the same conditions as those used when
measuring actual load.
4. T o select average mode, push button down and turn
all the way counter clockwise.
5. T o select peak mode, turn button all the way clockwise. T o reset to zero, push button slightly.
Note: When in average mode you can still freeze the
indicator needle when desired measurement is reached
by turning selector all the way clockwise.
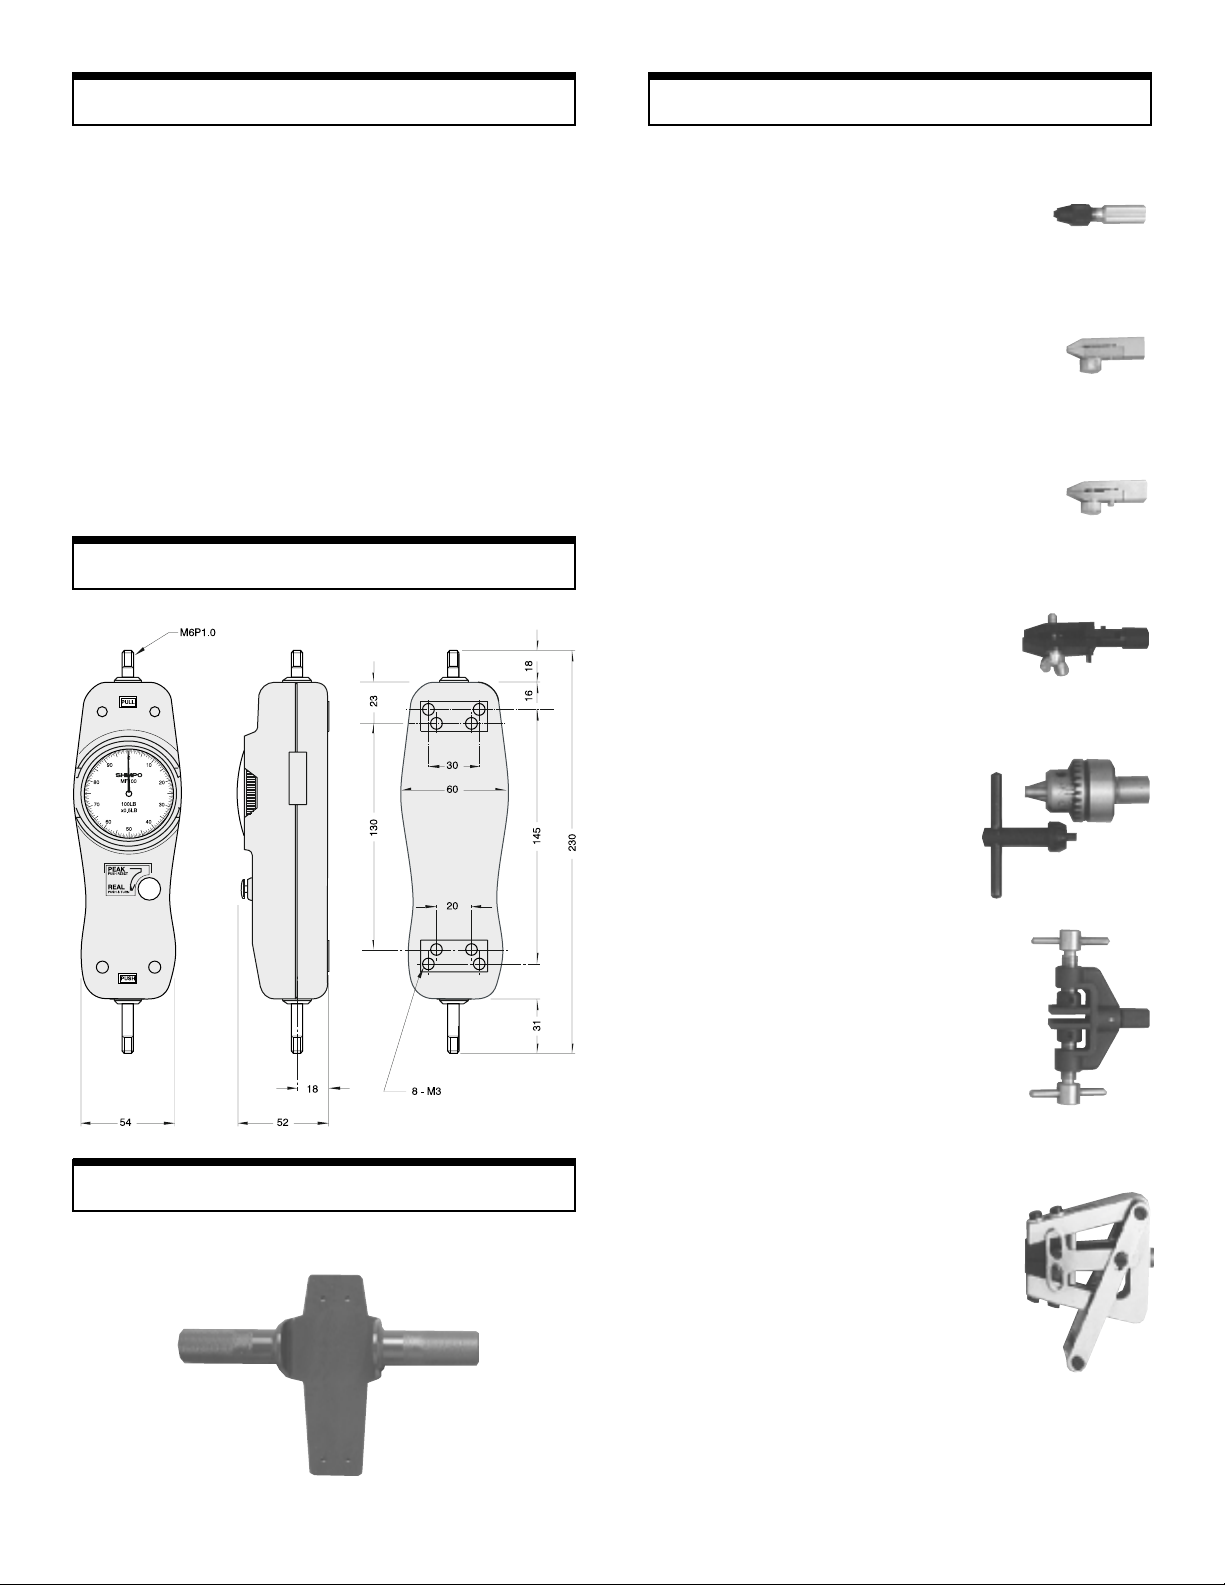
Dimensions
All dimensions in mm
Small Pin Grips
Theses special attachments are ideal
for gripping fine wires or filaments.
Choose between three ranges. Load
capacity is 22 pounds for each range.
0 - .5mm Diameter Pin Grip
.5 - 1mm Diameter Pin Grip
1 - 2mm Diameter Pin Grip
3mm Fine Point Grip
This narrow-faced grip is convenient
for testing fine and medium gauge
wire. It’s also handy for testing
electronic components in hard to
reach places. Load capacity is 30
pounds.
8mm Ribbon Grip
This grip is excellent for measuring
the tensile strength of ribbon, wire,
tape and paper. The load capacity is
60 pounds.
20mm Film Grip
Use this heavy duty, spring-loaded
film grip to check samples up to
10mm thick. The serrated jaw is
20mm wide.
Optional Accessories
Handle
Can be used with all models
Jacob’s Chuck Grip
Designed for testing low gauge wire
and rigid rods. Accepts diameters
from .5mm to 5mm. Load capacity is
110 pounds.
Flat Chuck Tensile Grip
Measure up to 110 pounds with this
heavy duty flat tensile grip. The
20mm square serrated faces can
accept materials to a maximum
thickness of 10mm.
Heavy Duty Wedge Grip
This self-clamping grip accepts
materials up to 10mm thick. The
retractable grooved jaw is 15mm
wide. Load capacity is 500 pounds.
SHIMPO INSTRUMENTS
 Loading...