Shimpo FGS-100L, FGS-100H, FGS-50S Instruction Manual

FGS-50S, FGS-100L & FGS-100H Manual Test Stands
Operation Manual
Take precaution to not drop the force gauge. Damage
to the sensor may occur.
Do not modify, disassemble or attempt to repair the
unit. Send to the factory for proper repair.
If upon delivery damage to the unit is detected, do not
operate the unit. Notify the shipping carrier immediately to obtain damage claim instructions.
Only measure forces that are in line with the measuring shaft. Do not attempt to take any measurements
(tension or compression) at any angle. Failure to keep
measurements in line will damage the instrument.
Ensure operation is performed on a level surface.
If applying large loads, secure test stand to a stable
wall or table.For details on the force gauge, refer to
the force gauge operation manual for each model.
Set-Up Summary for Lever or Wheel Test Stand
1. Remove the bracket from the test stand using the 5mm Allen
wrench included. See Force Gauge Mounting Procedure.
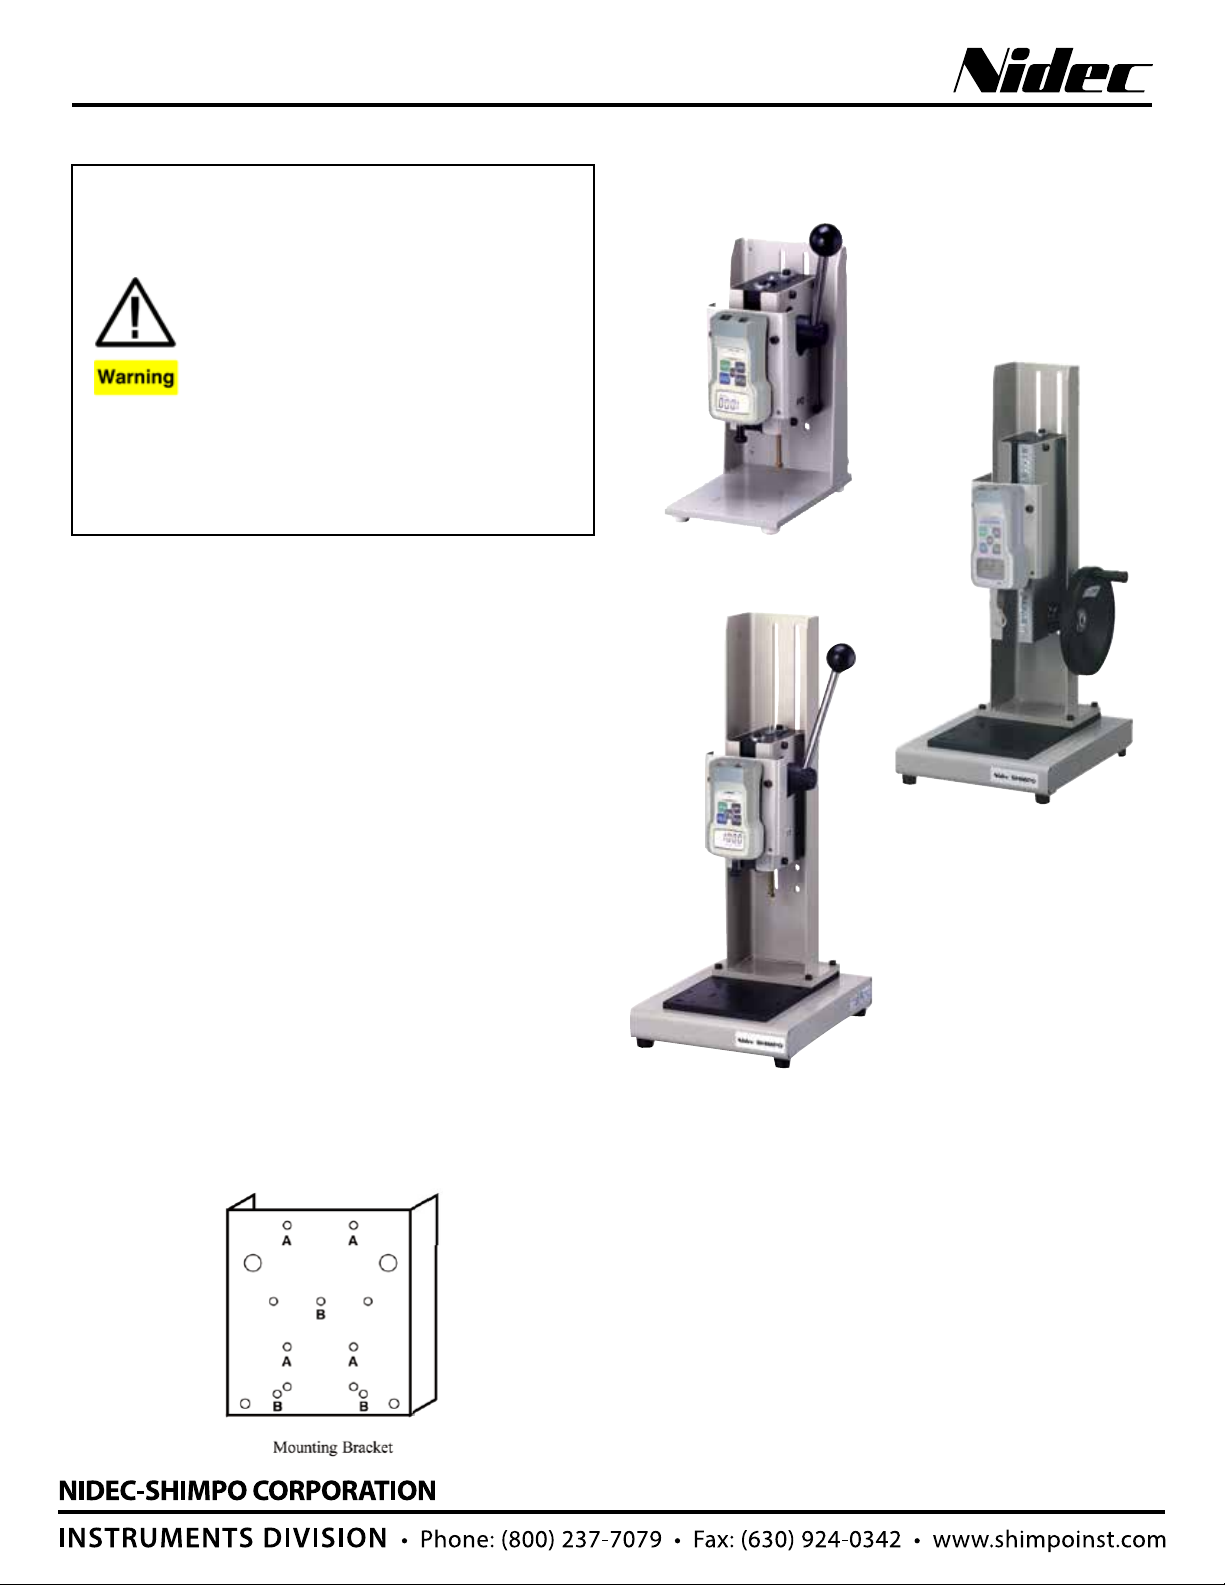
2. Use the mounting holes marked “A” shown on the Mounting
Bracket diagram for mounting an FG force gauge with the (4)
M4x8 Philips head screws included. See Force Gauge Mounting
Procedure.
3. Adjust the clearance span by removing the hex bolt from the
hole in the back of the stand. Loosen but do not remove the hex
bolts from the (3) slots. Adjust the span by sliding the drive unit
to the hole position desired and insert the hex bolt and tighten.
Tighten the (3) hex bolts in the slots as well. See Span Height
Adjustment Procedure.
4. Re-install the bracket with the force gauge to the test stand. See
Force Gauge Mounting Procedure.
5. Carefully check travel of the stand. If necessary, adjusting the
limit of the full travel of the gauge may be necessary. See Stopper
Adjustment Procedure
6. Testing may now begin with the force gauge and test stand.
See Measuring Procedure.
FGS-50S
FGS-100H
FGS-100L
SPECIFICATIONS
Capacity: FGS-50S: 22 kg (50 lbs.); FGS-100H/L: 200 lb (100 kg)
Travel: 1.97 in (50 mm) max.; FGS-100H: 0.12” (3 mm) / wheel
turn approx. 5.9” (150 mm) max.
Clearance: FGS-50S: 1.6, 2.75, 3.94 in. (40, 70, 100 mm);
FGS-100L: 3.31” – 11.57” (84 – 294 mm) 8 steps, 1.18”/step (30
mm/step); FGS-100H: 2” – 7.95” (52 – 202 mm) 6 steps, 1.18”/
step (30 mm/step)
Weight: FGS-50S: 22 lbs (10 kg); FGS-100L/H: 33 lb (15 kg)
Included Accessories: Mounting bracket (1 pc.),
Cable holder (1pc.), 5 mm Allen wrench (1pc.), Philips head screw
M4x8 (4pcs.)

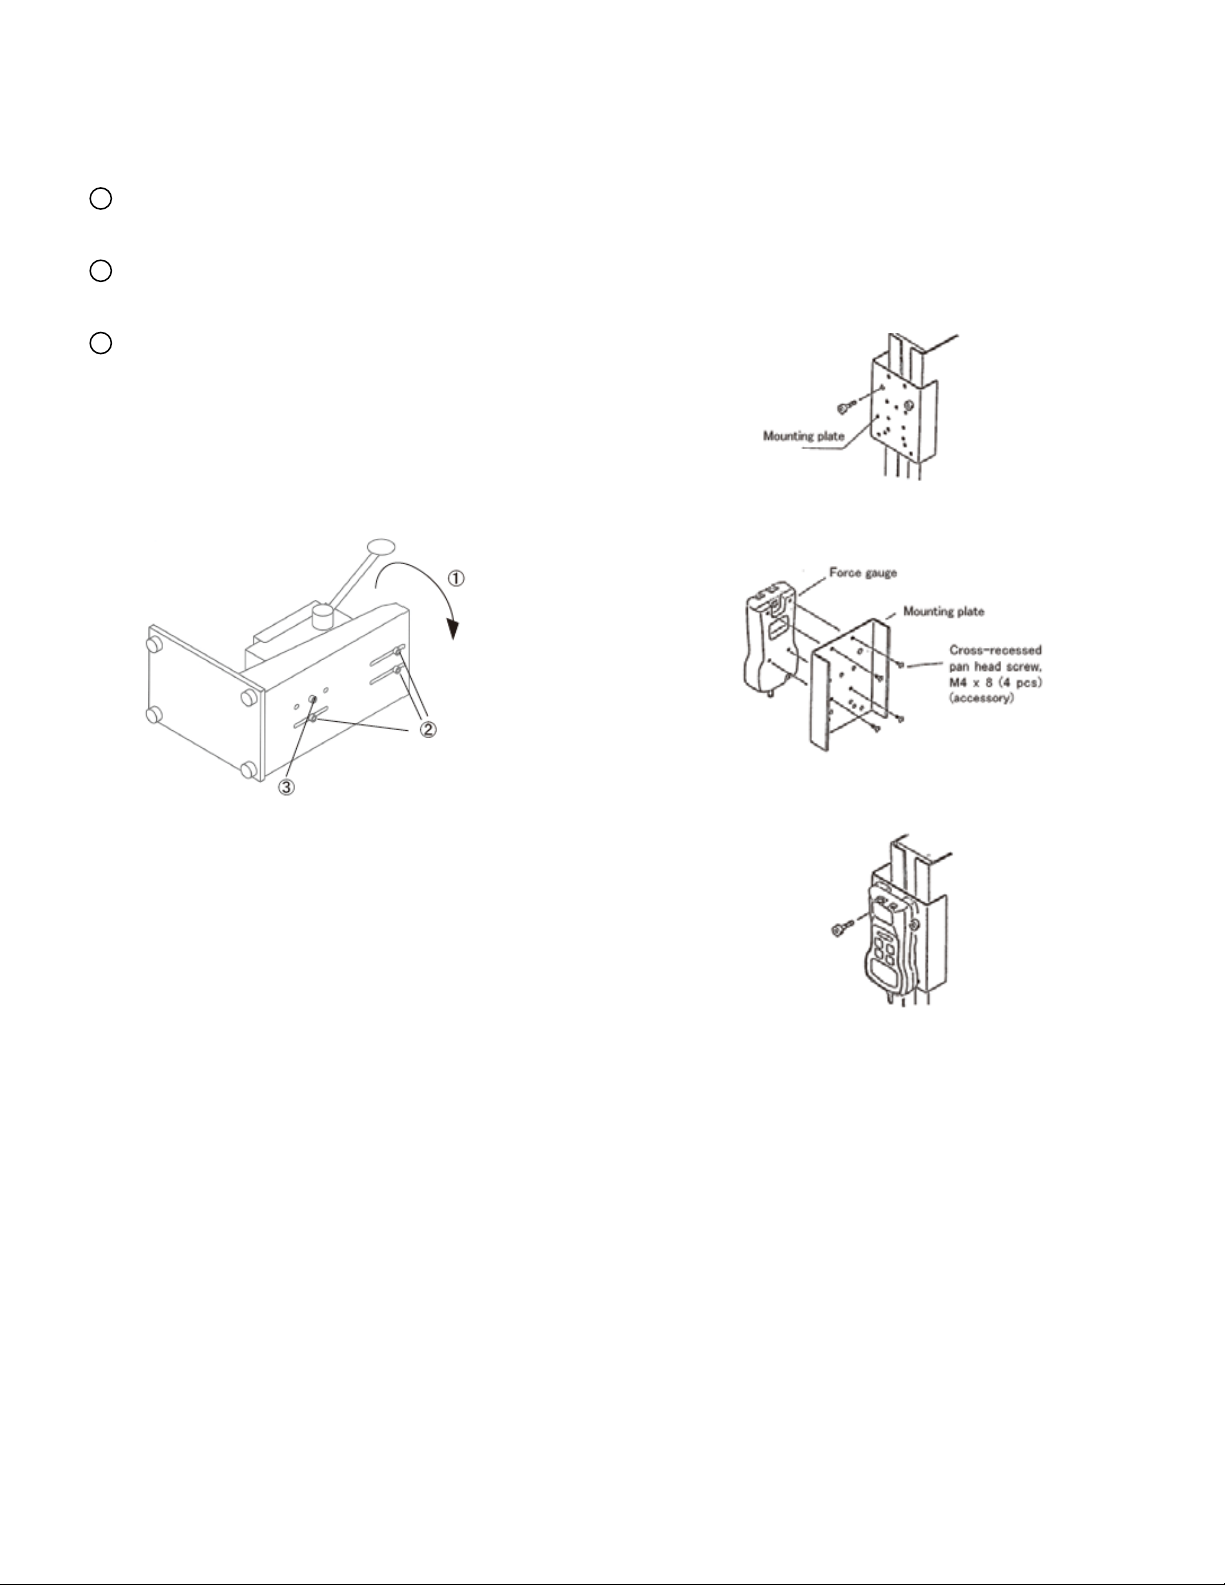
Span Height Adjustment Procedure
Step height adjustment is enabled by moving the slide assembly.
Available steps vary by model. Step adjustment distance is 1.18”
(30 mm).
1 Lay the stand body with the side facing up.
(Remove the cable grip beforehand.)
2 Loosen the height adjusting bolts in three slots out of four.
(Do not remove the bolts.)
3 While raising the slide assembly, remove the bolt from the
small hole, and hold the slide assembly at an appropriate position. Then, tighten the remaining three bolts. In this step, be
careful not to get your hand or finger caught between the slide
assembly and the stand body.
Force Gauge Mounting Procedure
1. Remove the mounting bolts by using the hexagon wrench (accessory), and remove the force gauge mounting plate.
2. Mount the force gauge to the force gauge mounting plate as
shown below.
3. Mount the force gauge to the stand body by using the removed
bolts.
 Loading...