

Shimano ST-7S20,BL-TY21,CJ-7S40 Service Instructions Manual
SERVICE INSTRUCTIONS
t
ST-7S20
Rapidfire Lever
SI-61S0C
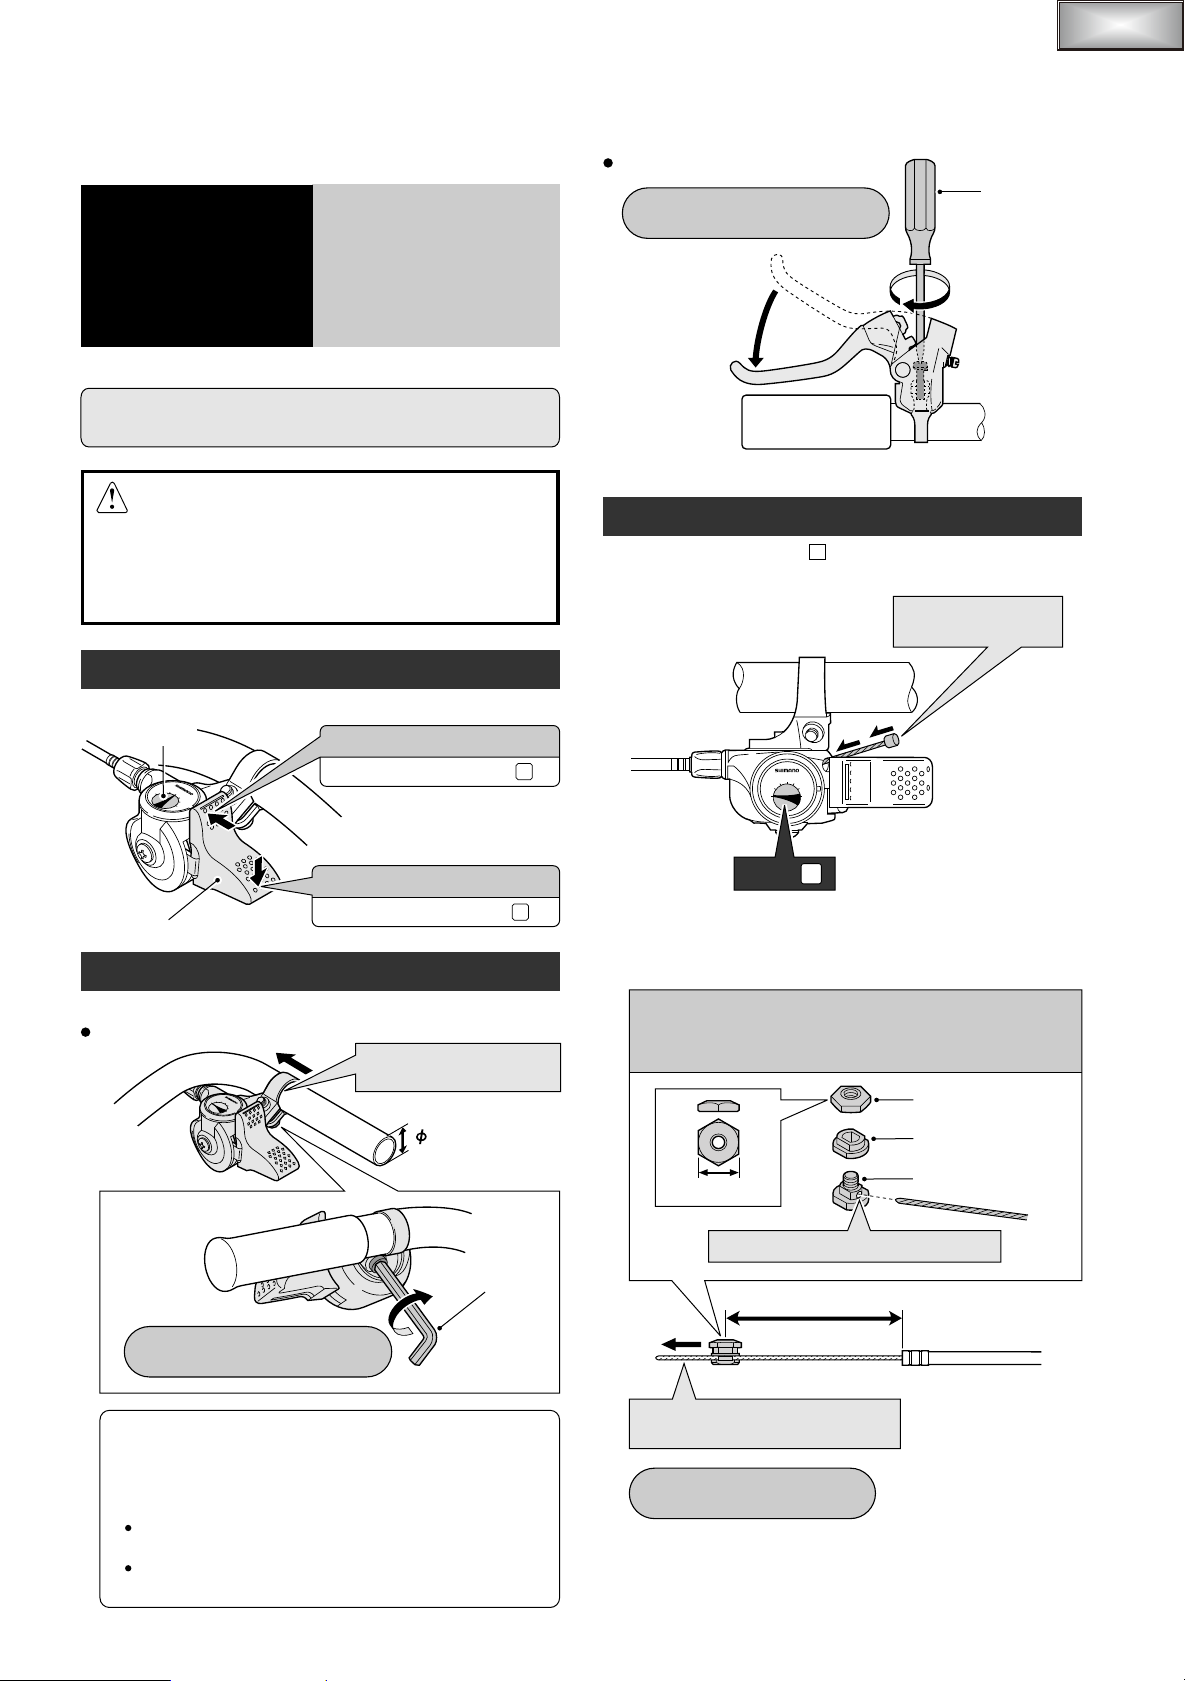
BL-TY21 Brake Lever
Tightening torque:
2.5 – 3 Nm {25 – 30 kgfcm}
Screwdriver
BL-TY21
CJ-7S40
Before use‚ read these instructions carefully‚ and follow them for correct use.
Brake Lever
Cassette Joint
Be sure to read these service instructions in conjunction
with the service instructions for the Inter-7 hub before use.
CAUTION
Be sure to shift the lever one gear at a time, and reduce the
force being applied to the pedals during shifting. If you try to
force operation of the shifting lever while the pedals are being
turned strongly, your feet may come off the pedals and the
bicycle may topple over, which could result in serious injury.
Rapidfire lever operation
Push the top or bottom of the lever body to shift the gears.
Indicator
1
3
2
4
5
6
7
Pedaling becomes lighter
Indicator moves toward
1
Depress
Installation of the shifting cable
Set the Rapidfire lever to .
1.
Next, pass the inner cable through the hole at the rear of the
Rapidfire lever.
1
Pass the inner cable
through the hole.
4
5
3
6
2
7
1
Pedaling becomes heavier
Lever body
Indicator moves toward
Installation of the lever
Install the lever as shown in the illustration.
ST-7S20 Rapidfire Lever
Attach to the straight
3
2
4
1
5
6
7
Tightening torque:
2.5 – 3 Nm {25 – 30 kgfcm}
The installation angle can be adjusted to one of two
positions to suit the shape of the handlebars. Angle
adjustment is carried out by loosening the lever body fixing
bolt.
Note:
The clearance between the cable adjusting bolt and the
handlebars should be 4 – 6 mm.
The end of the lever operation section should not hit the
grip.
section of the handlebars.
22.2 mm
7
5 mm Allen key
Set to
1
After checking that the end of the outer casing is sitting securely
2.
in the cable adjusting bolt of the Rapidfire lever, attach the inner
cable fixing bolt unit to the inner cable.
Inner cable fixing bolt unit
Note: Do not use this inner cable fixing bolt unit with
the CJ-4S30 cassette joint.
Inner cable fixing nut
Inner cable fixing washer
(Black)
10 mm
Pass the inner cable through the hole.
Inner cable fixing bolt
101 mm
Pull the inner cable while attaching
the inner cable fixing bolt unit.
Tightening torque:
4 – 6 Nm {40 – 60 kgfcm}
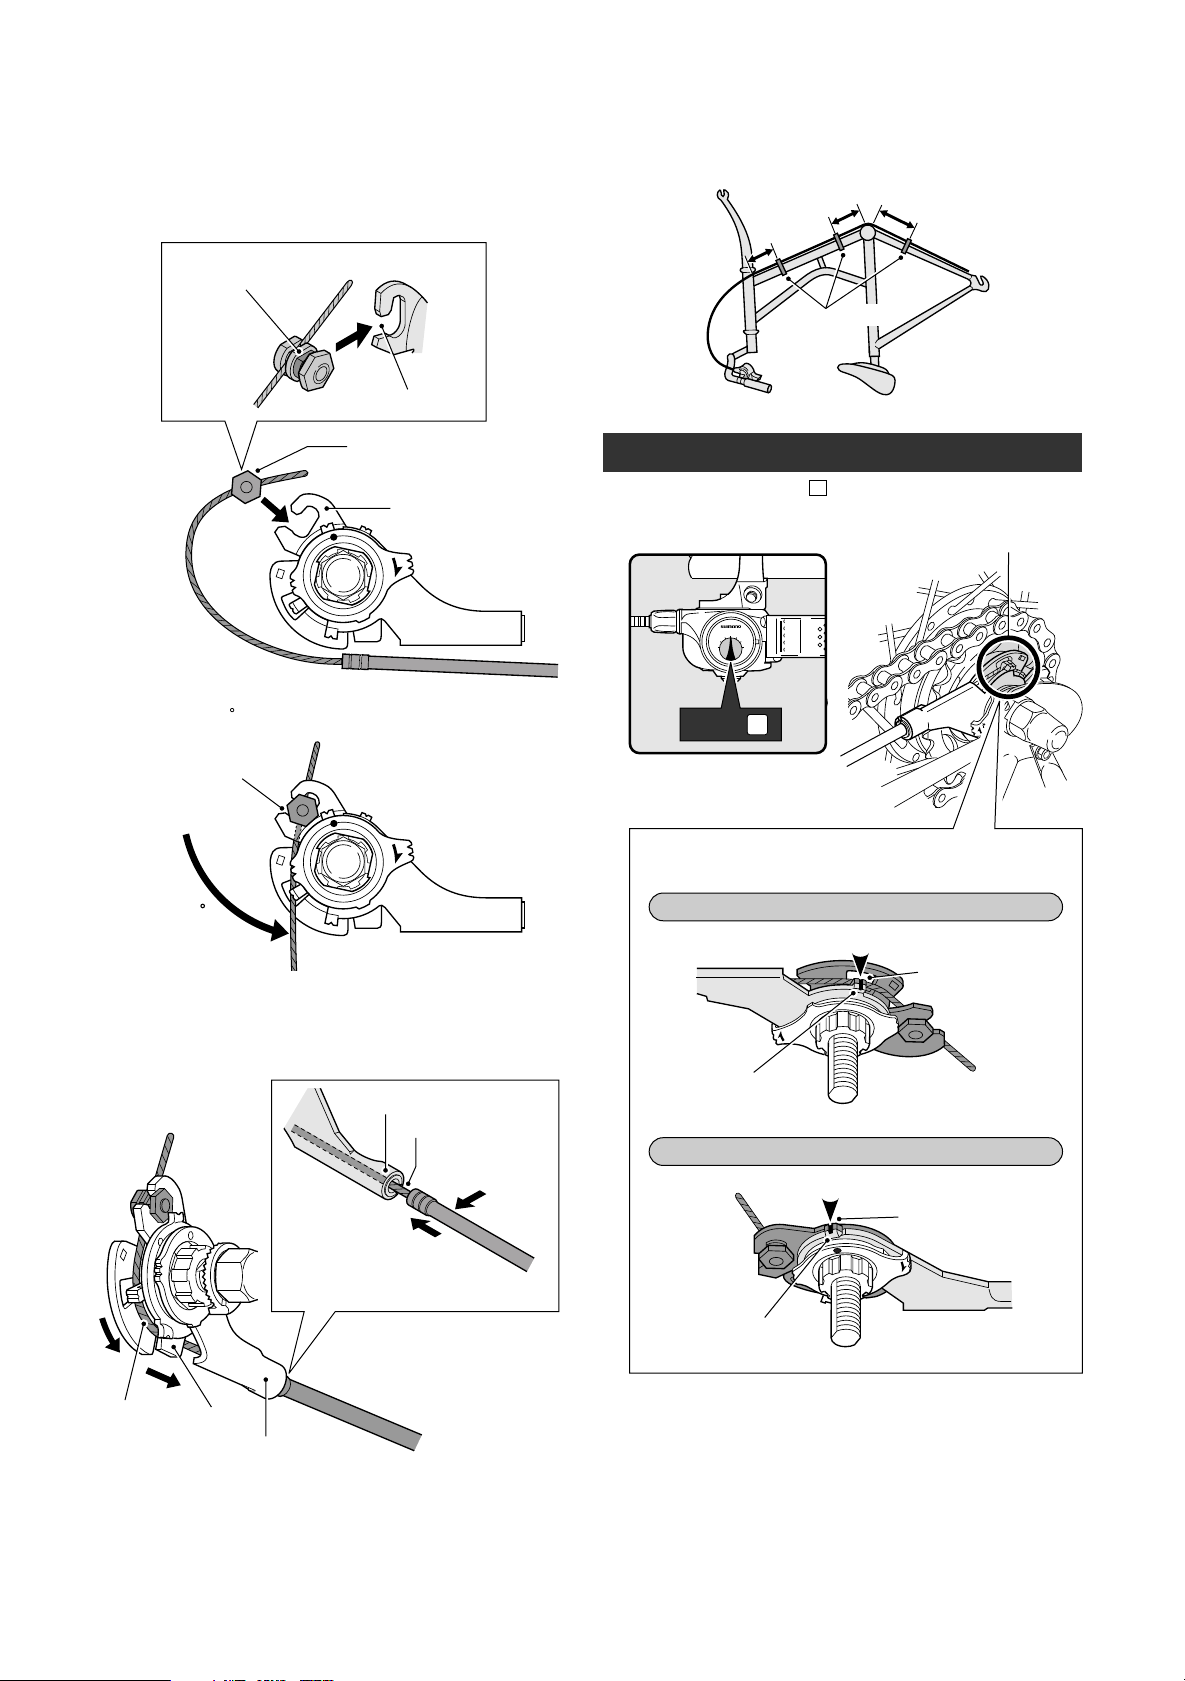
Bring the cable around to the cassette joint pulley, hold so that
3.
the inner cable fixing nut is facing to the outside (toward the fork
end), and then slide the flats part of the inner cable fixing washer
into the gap in the pulley.
Flats part of inner
cable fixing washer
Gap in pulley
Secure the outer casing to the frame with the outer casing bands.
6.
10 cm
10 cm
Outer casing bands
15 cm
Inner cable fixing nut
Cassette joint pulley
LOCK
Turn the cable 60 counterclockwise and attach it to the hook.
4.
Hook
LOCK
Turn the
cable 60
Attach the inner cable to the pulley as shown in the illustration,
5.
pass the inner cable through the slit in the cassette joint bracket,
and then insert the end of the outer casing securely into the
outer casing holder.
Outer casing holder
Slit
1
Pass through
the slit.
2
Insert into the outer
casing holder.
Adjusting the cassette joint
Set the Rapidfire lever to .
1.
Check to be sure that the red setting lines on the cassette joint
bracket and pulley are aligned at this time.
4
5
3
6
2
7
1
Set to
4
The red setting lines on the cassette joint are located in two
places. Use the one that is easiest to see.
When bicycle is upside down
Cassette joint bracket
When bicycle is standing up
4
Red setting lines
Should be straight
Cassette joint pulley
LOCK
Should be straight
Cassette joint pulley
LOCK
Inner cable
Cassette joint bracket
Pulley
Bracket
 Loading...