

Page 1

LED TV
USER MANUAL
MUAV4960Y-34580
Please r ea d this User Manua l carefully to ensu re use of this prod uc t and keep this
manual f or f uture referen ce
Page 2

Contents
Safety and warnings.................................................... ... ... ...2-3
Introduction.............................................. ... ... ....................... 4
Installation.............................................. ... ... .................... ..5-8
Remote Control.............................................. ... ... ... ..........9-10
Operation........................................... ... ... ....................... 11-14
Trouble Shooting............................... ... ... ..............................15
-1-
Page 3

IMPORTANT SAFETY INSTRUCTION
1) Read these instructio ns .
2) Keep these instructions .
3) Heed all warnings .
4) Follow all instructio ns .
5) Do not use this apparatus n ea r wa te r.
6) Clean only with dry clo th .
7) Do not block any ventilatio n op en in gs ,
install in accorda nc e wi th t he i ns tr uc ti on s.
8) Do not install near any h ea t so ur ce s su ch a s
radiations, heat regis te rs , st ov es , or o th er
apparatus (includi ng a mp li fi er s) t ha t pr od uc e
heat.
9) Do not defeat the safety purpos e of t he
polarized plug. If the p ro vi de d pl ug d oe s no t fi t
into your outlet, consult an ele ct ri ci an f or
replacement of the obs ol et e ou tl et .
10) Protected the power cord from be in g
walked on or pinched p ar ti cu la rl y at p lu gs ,
convenience rece pt ac le s, a nd t he p oi nt w he re
they exit from the apparatus .
11) Only use attachments/accessories
specified by the manufac tu re r.
12) Unplug this appa ra tu s du ri ng l ig ht in g
storms or when unuse d fo r lo ng p er io ds o f
time.
13) Refer all servic in g to q ua li fi ed s er vi ce
personnel. Servi ci ng i s re qu ir ed w he n th e
apparatus has been d am ag ed i n an y wa y, such
as power-supply co rd o r pl ug i s da ma ge d,
liquid has been spil le d or o bj ec ts h av e fa ll en
into the apparatus, the appa ra tu s ha s be en
exposed to rain or moistur e, d oe s no t op er at e
normally, or has been dropped.
14) Mains plug is used a s th e di sc on ne ct
device, the discon ne ct d ev ic e sh al l re ma in
readily operable .
15) The ventilation should not be impeded by
covering the ventila ti on o pe ni ng s wi th i te ms ,
such as newspapers , ta bl e- cl ot h, c ur ta in s, e tc .
16) No naked flame sou rc es , su ch a s li gh te d
candles, should be p la ce d on t he a pp ar at us .
17) Attention should be dra wn t o th e
environmental as pe ct s of b at te ry d is po sa l.
18) The use of apparatus in moderate climate.
19) The apparatus shall not be exposed to
dripping or splash in g an d th at n o ob je ct s fi ll ed
with liquids, such as vase s, s ha ll b e pl ac ed o n
the apparatus.
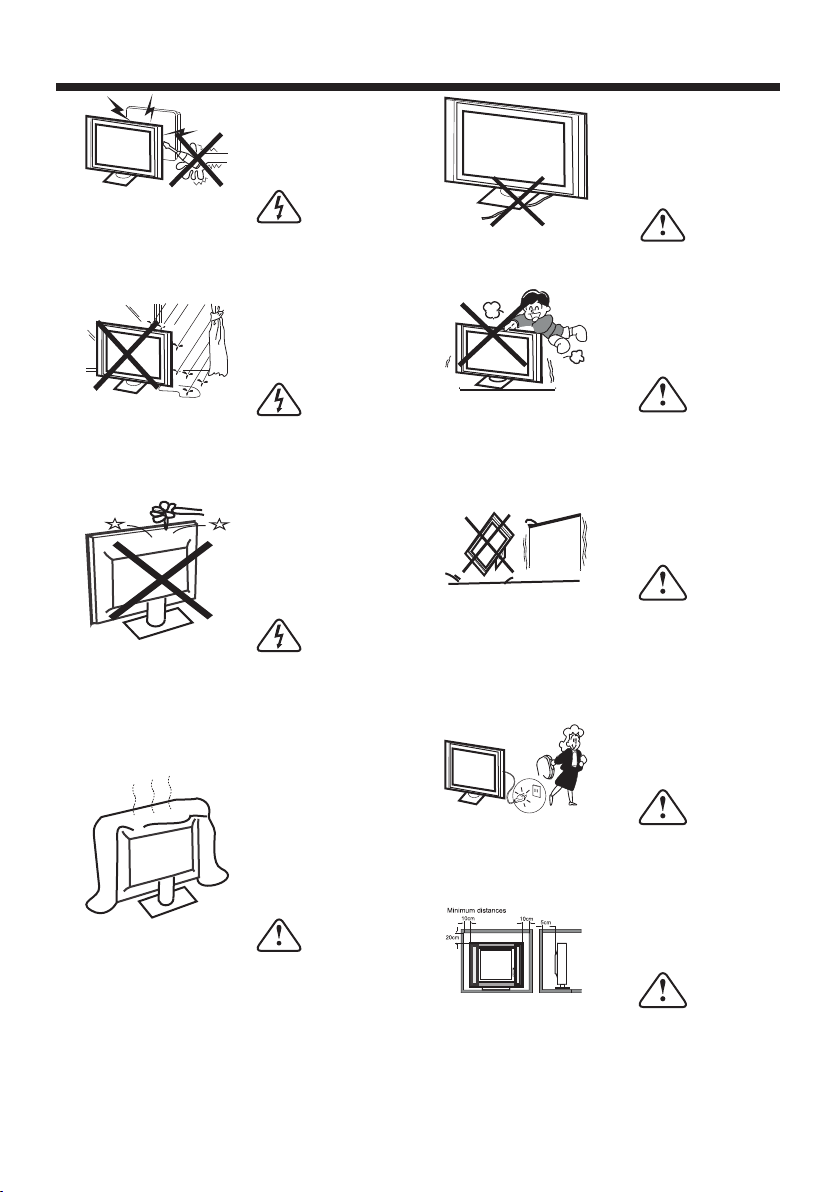
War ni ng : To avoid any i nj ur y ca us ed b y le an o f
the product, please alwa ys e ns ur e th e wh ol e
product was placed w it hi n th e ta bl e su rf ac e in
horizontal.
SA FET Y AND WA RNI NG S
WAR NI NG
Never place a t el ev is io n set in an unsta bl e
location. A tel ev is io n se t may fall, cau si ng s er ious
personal in ju ry o r de ath. Many inj ur ie s,
particula rl y to c hi ld ren, can be avo id ed b y ta king
simple
precautio ns s uc h as :
– Using cabin et s or s ta nds recomme nd ed b y th e
manufactu re r of t he t elevision s et .
– Only using fu rn it ur e that can safe ly s up po rt t he
televisio n se t.
– Ensuring th e te le vi si on set is not o ve rh an gi ng
the edge of the s up po rt ing furnitu re .
– Not placing t he t el ev ision set on ta ll f ur ni tu re
(for exampl e, c up bo ards or bookc as es ) wi th out
anchoring b ot h th e fu rniture and t he t el ev is ion set
to a suitable s up po rt .
– Not placing t he t el ev ision set on cl ot h or o th er
materials t ha t ma y be l ocated betw ee n th e
televisio n se t an d su pporting fu rn it ur e.
– Educating c hi ld re n ab out the dange rs o f
climbing on f ur ni tu re to reach the t el ev is io n set or
its control s.
If your exist in g te le vision set is b ei ng r et ai ned and
relocated , th e sa me c on sideratio ns a s ab ov e
should be app li ed .
CAU TION
RISK OF ELECTRIC SHOCK
DO NOT OPEN!
TO REDUCE THE RISK OF ELECTRIC SHOCK, DO
NOT REMOVE COVER (OR BACK).NO USER
SERVICEABLE PARTS INSIDE. REFER SERVICING
TO QUALIFIED SERVICE PERSONNEL.
The symbol indicates that dangerous
voltages constituting a risk of electric
shock are present within this unit.
The symbol indicates that there are
important operating and maintenance
instructions in the literaturaccompanying
this unit.
WARNI NG :
To reduc e th e ri sk of fire or ele ct ri c
shoc k, d o no t expose this app ar atus to
rain o r mo is ture.
WARNI NG :
The ba tt er ies shall not be ex po se d to
exce ss iv e heat such as su ns hi ne, fire or
the li ke .
CAUTION
-2-
Page 4

This symbol indicat es that this product
incorporates double insulation between
hazardous mains vol tage and user
accessible parts. When servicing use onl y
identical replace ment par ts.
This m ar ki ng indicates th at t hi s product
shou ld n ot b e disposed wi th o th er
hous eh ol d wastes thro ug ho ut the EU. To
prev en t po ssible harm t o th e en vironment
or hum an h ea lth from unco nt ro lled waste
disp os al , recycle it re sp on sibly to promot e
the su st ai nable reuse o f ma te rial
reso ur ce s. To re turn your use d de vi ce,
plea se u se t he return and c ol le ction
syst em s or c ontact the reta il er w here the
prod uc t wa s purchased . They can t ak e th is
prod uc t fo r environme nt al s afe recycling .
Step o ne : Us e the expansion
bolt s( 4* 36PWA) t o fi x th e wall mount
brac ke ts i nto the wall
Step Two: Fix the wall mount sc rews
(M6x8mm/4pcs) i nt o th e rear si de o f th e LC D
TV,us in g th e tongue
of 8kgf.cm.
* The TV appearance subject to m at er ia l
object.
SA FET Y AND WA RNI NG S
War ni ng: Changes o r mo di fi ca tions to this u ni t no t
expressly a pp ro ve d by t he party resp on si bl e for
complianc e
could voi d th e us er ’s a ut ho ri ty to operate
the equipme nt .
NOTE: Thi s eq ui pment has bee n te st ed a nd found to
comply with t he l im it s for a Class B dig it al d ev ic e,
pursuant to P ar t 15 o f th e FCC Rules.
The se l im it s ar e designed to p ro vi de
reasonabl e pr ot ec ti on against ha rm fu l in terferenc e in
a residenti al i ns ta llation.
Thi s eq ui pm en t generates , us es a nd c an
radiate rad io f re qu en cy energy and , if n ot i ns talled and
used in accor da nc e
with the in st ru ct io ns, may cause h ar mf ul
interfere nc e to r ad io communic at io ns .
However, the re i s no g ua ra ntee that int er fe re nce will
not occur in a pa rt ic ul ar installa ti on . If t hi s equipment
does cause ha rm fu l in terferenc e
to radio or tel ev is io n re ception, wh ic h ca n be
determine d by t ur ni ng the equipmen t of f and on, the
user is encou ra ge d to t ry to
correct the i nt er fe rence by one or m or e of t he
following m ea su re s:
o Reorient or r el oc at e the receivi ng a nt en na .
o Increase th e se pa ra tion betwee n th e eq ui pm ent and
receiver.
o Connect the e qu ip me nt into an outl et o n a ci rc ui t
diffe re nt f ro m that to which t he r ec ei ver is
connected .
Consult the d ea le r or a n ex perienced r ad io /T V
technicia n fo r he lp .
This device c om pl ie s wi th Part 15 of t he F CC R ul es .
Operation i s su bj ec t to the follow in g tw o co nd itions:
(1) this devi ce m ay n ot c ause harmfu l in te rf er ence,
and
(2) this devi ce m us t ac cept any inte rf er en ce r eceived,
including i nt er fe re nce that ma y ca us e un de sired
operation .
Step Th ree: Put the LCD TV with wall mount
screw s on to t he w al l mount brackets.
Warning: the a ng le b et we en t he TV and w al l
must not be bigger th an 3º.
Page 5
Warning
High voltages are used in the operation
of this television receiver. Do not remove
the cabinet back from your set. Refer
servicing to qualified service personnel.
WARNINGS AND CAUTIONS
Caution
Do not trap the power supply cord under
the television receiver.
Warning
To prevent fire or electrical shock
hazard, do not expose the television
receiver to rain or moisture.
Warning
Do not drop or push objects into the
television cabinet slots or openings.
Never spill any kind of liquid on the
television receiver.
Caution
Do not block the ventilation holes in the
back cover. Adequate ventilation is
essential to prevent failure of electrical
components.
Caution
Never stand on, lean on, or suddenly push
the television or its stand. You should pay
special attention to children. Serious injury
may result if it should fall.
Caution
Do not place your television on an unstable
cart, stand, shelf or table. Serious injury to
an individual , and damage to the
television, may result if it should fall.
Cautio n
When t he t el evision recei ve r is not
used f or a n ex tended peri od o f ti me, it
is adv is ab le to disconn ec t th e AC power
cord f ro m th e AC outlet.
Caution
Dim:515*320mm(不包 括底座)
If the television is to be built into a
compartment or similar enclosure, the
minimum distances must be maintained.
Heat build-up can reduce the service life of
your television, and can also be
-3-
dangerous.
Page 6
INTRODUCTION
Thank you very much for purchasing this
TV. To enjoy your product from the very
beginning, read this manual carefully and
keep it handy for easy reference.
CAUTION
Never tamper with any components inside
the TV, or any other adjustment controls
not mentioned in this manual. All LED-TVs
are high voltage instruments. When you
clean up dust or water drops on the LED
PANEL or CABINET, the power cord should
be pulled out from the receptacle, then
wipe the TV with a dry soft cloth. During
thunder and lighting, unplug the power cord
and antenna cord to prevent damage to
your TV. All repairs to this TV should only
be performed by qualified TV service
personnel.
Main features
① Used a s Televi si on , display termi na l,
PC dis pl ay;
② High l um in ance, wide vi ew in g
Angle;
INSTALLATION
*Locate the TV in the room where light
does not strike the screen directly.
*Total darkness or a reflection on the
picture screen can cause eyestrain. Soft
and indirect lighting is recommended for
comfortable viewing.
*Allow enough space between the TV and
the wall to permit ventilation.
*Avoid excessively warm locations to
prevent possible damage to the cabinet or
premature component failure.
*Do not cover the ventilation openings
when using theTV.
3 HDMI i nt er face and SCART
Interf ac e;
4 NICA M;
Main parameter
Panel
TV System
Video Signal System
Input Power Voltage
Power consumption
Audio Output Power (THD 7%)
Signal Input
Horizontal definition(TV line)
49
PAL-B/G、I 、D/K
SECAM- B/G、D/K、L、 LL
PAL/NTSC/SECAM
100-240V~50/60Hz
120
W
2x8W
Analog RGB(PC)x1
High-Definition Multimedia Interface(HDMI) x2
Video INput x1
Audio Input x2
USB Input x1
Y、Cb (Pb) Cr (PR)x1、
Mini SCART X1
Composite Video input >=350
Super Video Input >=400
Y Cb(Pb) Cr(Pr) >=400
-4-
Page 7

INSTALLATION
Front panel
KEYBOARD
The k eyboa rd i s locat ed a t the bot tom lef t ne ar the ri gh t
side of s ignal i nd icato r.
Remot e Butto ns
3
2
1
“ ” VOL - and mov e le ft
“ ” VOL + and mov e ri ght
“ ” CH- and m ove dow n
“ ” CH+ and m ove up
“ Cente r butto n ” po wer key a nd s ource k ey, hold i t for a
KEYBOARD
long ti me, the T V wil l po wer dow n.
1: Remo te cont ro l senso r.
2: Indi cator L ED : RED STANDBY.
3: Key bo ard
REAR Connections
Botto m
AC-I NPUT
100- 240V 50 /60Hz
OPTI CAL
All the terminals are (from left to right):
AC POWER SOURCE, OPTICAL, VIDEO, AUDIO INPUT.
SIDE Connections
MHL
HEA DPHON E
YPb Pr
HDM I3
HDM I1 HDM I2
All the terminals are (from left to right):
HDMI1, HDMI2, HDMI3/MHL, HEADPHONE, YPbPr, USB, RF.
-5-
USB
VIDE O
L R
RF
Page 8

ANTENNA
Note:
Aerial connecti on s: (female).
Input impendanc e: 7 5 un ba lanced.
F
INSTALLATION
PRESET MODE (HDMI)
1
2
3
4
5
6
7
8
RESOLUTION
800*600
1024*768
136 0*768
128 0*768
192 0*108 0
384 0*216 0
384 0*216 0
384 0*216 0
V.Freq.(Hz) H.Freq.(KHz)
60
60
60
60
60
30
50
60
-6-
37.88
48.36
47.7
47.3
67.5
67.5
112.5
135
Page 9

INSTALLATION
-7-
Page 10

INSTALLATION
AV EQUIPMENT
There are three HDMI ports located on the back of your TV. You can connect a Blu-ray player,
DVD player, or other video equipment through these ports.
The port is MHL enabled. You can connect MHL devices, such as the compatible
HDMI3
mobile phones and tablets.
NOTE: MHL cable is required to connect a mobile phone or tablet to the TV. Please
check the documentation of your device.
There is one component (Y, Pb, Pr) and video input located on your TV. You can connect a VCR,
cable box, or other video equipment to these jacks.
Please see the diagram below. You may also need to refer to the owner's manual of the device
that you are trying to connect.
HDM I1 HDM I2
Y
Yellow (video)
R
Red (audio R)
W
White(audio L)
R
Red(Pr or Cr)
B
Blue(Pb or Cb)
G
Green(Y)
HDM I3
MHL
HEA DPHON E
YPb Pr
USB
VIDEO EQUIPMENT with YPbPr
RF
AC-I NPUT
100- 240V 50 /60Hz
OPTI CAL
VIDE O
L R
The television' s in pu ts c an b e connected to the follow in g ty pe s of e quipment: VCR , mu lt i di sc player,
DVD, camcorder, video ga me o r st er eo s ystem, etc.....
YPbPr can support t he se v id eo f ormats:480i,576i, 48 0p ,5 76 p,720p,1080i, 1080p.
-8-
Page 11

REMOTE CONTROL
1OK2 3
4 5 6
7 8 9 0
+
CH
_
+
_
VOL
POWER MUTE
TV AUDIO
RECAL L/GOTO
TV MENU SOURC E
DVD MEN U
SOUND
EXIT
PIC
SLEEP ASPEC T
TEXT
TV/RA DIO
DVD SET UP
EPG FAV INF O
DISPL AY
DVD AUDI O
ANGLEPBCDVD/USB TITLE
SUBPAGE SIZE MIX
REVEA L
HOLD
LIST
INDEX
RETUR N
SUBTI TLE
FREEZ E
2
3
4
1
5
6
7
8
9
10
11
12
13
14
15
16
17
18
19
20
21
22
23
24
25
26
27
28
29
30
31
32
33
34
35
36
37
38
REMOTE CONTROL
-9-
Page 12

REMOTE CONTROL
TELETEXT
Teletext is an inf or mation system b ro ad cast by certa in c ha nnels which c an b e
cons ul te d like a newspa pe r. It a lso offe rs access to su bt it les for viewers w it h he aring
prob le ms o r who are not fam il ia r with the transm is sion language (c able networks ,
sate ll it e channels, etc .)
Press:
T
EXT
SELECTING A PAGE
You will obtain :
This is used to call or exit teletext modes. Th e su mm ar y ap pe ar s wi th
a list of items that can be accessed. Each item has a corresponding
3 digit page number. If the channel selected does not broadcast
teletext, theindication 100 will be displayed and the screen will
remain blank (in this case, exit teletext and select another channel).
Enter the number of the page required using the 0 to 9 up/down.
Example: page 120, enter 120. The n um be r is d is pl ay ed t op l ef t, t he
counter turns and then the page is displayed. Repeat this operation to
view another page. If the counter continues to search, this means
that the page is not transmitted. Select another number.
E
DIRECT ACCESS
TO THE ITEMS
INDEX
SUB PAGE
HOLD
REVEAL
LIST
Coloured are as are displayed at the bottom of the screen. Th e 4
coloured keys are used to access the items or corresponding pages.
The coloured areas flash when the item or the page is not yet
available.
This returns to the contents page (usually page 100).
Certain pages contain sub-pages which are automatically
displayed successively. Th is k ey i s us ed t o st op o r re su me s ub page acquisition. The i nd ic at io n ap pe ar s to p le ft .
To freeze the page.
To display or hide the concealed information (games solutions).
The user can set four favorite pages to be directly linked to the four
color keys. While list mode is activated, it is not possibility to use TOP
or FLOF navigation with the colorkeys. Th e fa vo ri te p ag e nu mb er s
should be stored and restored to/from nonvolatile memory for each
channel by the system software.
Insert Batteries Into the Remote Control
1. Remove the battery cover.
2. Inserting the 2 AAA 1.5V batteries
making sure the polarity (+ or -) of the
batteries matches the polarity marks
inside the unit.
3. Mount the battery cover. Replace with
new batteries when the TV set begins to
show the following symptoms: Operation is
unsteady or erratic. Sometimes the TV set
does not function with Remote Control
Unit.
Remark:
1) Alkaline Battery Recommended.
2) Remove batteries when they are
exhausted or if the remote control is not to
be used for Long time.
-10-
Page 13

OPERATION
Inst al la tion Guide
Ple ase selec t an OS D Langu age
Mag yar
Ned erlan ds
Nor sk
Pol skiEng lish
Por tugue s
Pyc ck
Ces ky
Dan sk
Deu tsch
~
Esp anol
E ka
Fra n ais
Hrv atski
Ita liano
OK
Cou ntry
Nor way
Rum ania
Pol and
Rus sian
Por tugal
Ser bia
This screen only appear w hen the TV first time
turn on or reset to factory s et.You can choose
language and country, auto turni ng programs .
And after turning the scr een will skip to the first
DTV program.
Swi tzerl and
Slo venia
Spa in
UK
New Zeala nd
Swe den
OK
Mor occo
Tuni s
Alg eria
1.CH AN NE L ME NU
The first item of the MENU is c hannel menu( for
TV or DTV source only).
Aut o Tuning
DTV M anual Tu ning
ATV Man ual Tun ing
Pro gramm e Edit
CHA NNEL
< >
You can search channel s and edit programs here.
1).Auto tuning:
Search all the channels a utomatically(you ca n
select ATV and DTV)
Tune Ty pe DTV+ ATV
Ger many
Gre ece
Hun gary
Pls press to select country at first , then
press OK button to start au to tuning .
Sig nal Inf ormat ion
CI In forma tion
Sof tware U pdate (OAD) Off
Sof tware U pdate (USB)
Ita ly
Lux embou rg
Net herla nds
MEN U
Nor way
Pol and
Por tugal
Chann el Tunin g
TV : 0 Pr ogram me(s)
DTV : 0 P rogra mme(s )
Rad io : 0 Prog ramme (s)
Dat e: 0 Prog ramme (s)
96% U HF CH 68 DT V
NOTE :
All the channels includ ing ATV, DTV and Radio
can be tuning by one time,i f the Tune Type i s
DTV+ATV .
All the store d ch an ne ls w ill be disapp ea r af te r
auto tuning .
After auto tuning , the channel will skip to
the first DTV channel.
2).DTV Manual tuning:
You can select a DTV chann el then find the
program in this channel .
Pls press to select the channel , then press
OK to search the programs .
NOTE:
Bad Normal Good means sig nal intensity.
DTV M an ual Tuni ng
_
VHF C H 5
Pre ss OK to se arch
Bad Nom al
3). ATV Manual tuning :
You can change the sound s ystem to search
the analog TV channels and fine tu ne the
channels , then storage t he channels you
selected.
ATV Ma nual Tun ing
_
Sto rage To 1
Sys tem BG
Cur rent CH 1
Sea rch
Fin e-Tune
Fre quenc y 255.2 5 MHz
Sav e MENU
+
Goo d
+
-11-
Page 14

NOTE :
Press teletext red butt on to storage to channels
after manual tuning .
4). Program edit:
You can Delete ,Rename , Move, Skip , FAV any
programs.
OPERATION
Pic ture Mo de Ener gy Savi ng
Col or Temper ature
Asp ect Rat io
PICT URE
< >
Noi se Redu ction
Scr een
Delete
Press teletext red butt on , the program in cursor
will delete.
Rename :
Only can rename ATV programs .
Move the cursor to the prog ram, press teletext
green button to rename th e program.
Press to choose the chara cter. Press to
move the cursor .
Press MENU button to exit e dit , Press EXIT to
exit the menu.
Note: ATV programs name o nly can be 5 character,
DTV programs name can be 25 c haracter.
Move the cursor to the prog ram , press teletext
yellow button , it will sho w yellow cursor , Press
to move the program.
Press to choose the progr am , press teletext
blue button to skip this pr ogram, The will
show on the right side of the p rogram .
Choose the skipped prog ram, press blue button
again , you can cancel the sk ip ,The will
disappear .
Favo ur it e
Press to choose the progr am , press FAV
button , it will show on the ri ght side of the
program.Choose the FAV program , pre ss
FAV button ag ain , you can cancel the FAV,
the will disappear .
Once your favorite grou p is created, you can
press the FAV key to quickly access your f avorite
channel.
5). CI i nf or mation: (option al )
This menu can display the C I card' s information.
2. PIC TU RE M ENU
The second item of the MENU i s PICTURE MENU.
You can adjust picture e ffect h ere, such as
contrast, brightnes s, etc.
Press OK to move, press OK to adjust.
Pic ture Mo de Ener gy Savi ng
Con trast 5 0
Bri ghtne ss 50
Col or 50
Sha rpnes s 50
Tint 5 0
Not e:
1) If y ou want t o adjus t contr ast, br ightn ess, co lor, and s harpn ess,
the p ictur e mode mu st be set t o perso nal.
2) Th is will i ncrea se or dec rease Wa rm (red ) and Coo l (blue ) color s to
sui t your pe rsona l prefe rence .
Sel ect Coo l to give t he whit e color s a blue ti nt, Nor mal to gi ve the
whi te colo rs a neut ral tin t, Warm to g ive th e whi te co lor s a red t int .
Ene rgy sav ing is th e defau lt sett ing, if y ou sele ct some o ther op tions ,
the p ower co nsump tion ma y chang e.
Thi s produ ct defa ult mod e (Ener gy savi ng) alr eady pa ss the En ergy
sta r test, I f TV set in o ther mo de, may i ncrea se ener gy cons umpti on
bey ond the l imits r equir ed for EN ERGY STA R qua lif ica tio n
3.SO UND MENU
The third item of the MENU is t he SOUND
MENU.
You can adjust the sound effect h ere such as
treble, bass, balance e tc.
Press to move, press OK to adjust.
Note:
Auto volume: only avail able when the input
signal volume is too larg e or distortion.
MEN U
SOU ND
< >
Col or Tempera ture Me dium
Red 4 0
Gre en 31
Blu e 50
MEN U
Sou nd Mode S tanda rd
Bal ance
Aut o Volume
4.TI ME MENU
The forth item of the menu is t he TIME M ENU
You can adjust the clock, power on/off time,
sleep time etc Press to mov e, press OK to
adjust
Clo ck -- -- -- - -
Off Ti me
On Tim e
TIME
< >
NOTE:
Within 15 minutes there i s no signal, the TV
will auto sleep , if Auto Sleep i s set ON. The
clock time can get from the DTV system auto.
Sle ep Timer
Aut o Sleep
Time Z one
-12-
Page 15

5.OP TION MENU
The fifth item of the MENU is t he OPTION
MENU. You can adjust the Menu lan guage,
Audio language,Subt itle language etc.
OPERATION
7. AP PL ICATIO NS M EN U
The sixth ite m of t he M EN U is the OPTION M EN U.
DMP
OSD L angua ge Engl ish
Aud io Lang uages D eutsc h
Sub title L angua ges Deu tsch
Cou ntry Ge rmany
OPTI ON
< >
In PVR File sys te m me nu y ou can set up USB
disk for PVR.
NOTE:
Restore fac to ry d ef ault will cle ar a ll t he p ro grams
and passwor d.
PVR F ile Sys tem
Res tore Fa ctory D efaul t
Selec t Disk C:
Check P VR File S ystem S tart
USB Dis k
For mat
Tim e Shi ft S ize
Speed
Fre e Record Li mit 6 Hr.
6.LO CK MENU
The sixth item of the menu is t he LOCK MENU
You can lock system, set password, block progra m
and set parental guidan ce Once you set the lock
system on you can not searc h the channels or
change any programs.
Loc k Syste m
Set P asswo rd
Blo ck Prog ram
LOC K
< >
NOTE:
The default pass word is 66 66.
Block program: Press to choose the
program ,press telete xt green button to block
the program. If you want un block the program,
pls enter the main menu , inp ut the password,
then press green button a gain.Parental
guidance: Press to choose 4~18 years.
Par ental G uidan ce Off
APP LICATI ONS
< >
Press OK butt on t o en te r the DMP men u.
USB 2 .0
PHOT O MUSIC M OVIE TE XT
Please make s ur e th at t he USB device h av e
plugged in th e sl ot .T here are four t yp e me di a
item can be sel ec te d, s uch as photo, m us ic ,
Movie, and te xt . Se le ct the type med ia i te m by
pressing , pr es s OK b ut ton to enter
the disk sele ct io n me nu.
1/1
Ret urn C
Press the to se le ct t he r ight disk and p re ss
OK to display m ed ia f il es and folder l is t or
choose Retu rn t o ba ck t o the media typ e
selection m en u.
1/1
Ret urn
Mov ies
Samp le1.t s
Sam ple1. ts Sam ple2. ts
Res oluti on: 688 x412
Aud ioTrac k: 1/2
Sub title : 1/3
Pro gram: 1 /5
Siz e: 51145 7 KByte s
Sam ple3. ts Sam ple4. ts
-13-
Page 16

Select the me di a fi le b y pressing or , t he n
the preview f ra me w il l po p up.Press th e bu tt on
to play the med ia f il e in f ull screen. Wh en t he
media file (p ho to ,m usic, Movie , or t ex t ty pe ) is
playing, pr es s th e OK o r Info button c an d is pl ay
the control b ar.
00: 00:33 /00:0 4:22
Inf o.
Pau se FF Pr ev. Nex tFB Sto p
Press to sele ct t he f un ction icon, p re ss O K
button to con fi rm t he f unction.
Press or EXIT b ut ton to exit the c on tr ol b ar.
NOTE:
You ca n ad just the audio tr ac k, s ub title, or
program in th e In fo m en u while Playi ng t he
video file. Ch oo se t he Info icon an d pr es s OK
can display t he I nf o ME NU.
Rep eat ALL
OPERATION
INFO
1.
Use to choose the program s , Press
INFO key, you can display the highli ght program's
information.
Schedule
2.
Press the teletext yellow key, It ca n list
all the reminder schedu le, press to choose
the list, press red key to delete the
schedule list, Press EP G to return to EPG menu.
Sch ed ule Lis t 04:55 2 8th Apr De lete
Time Da te
Pro gramm e Title
DELETE
Cha nnel Na me
Sample1.t s
Resolutio n: 7 20 x5 76
Aud i o T rac k : 1 / 2
Subtitle: 1 /3
Program: 1/ 6
Size: 30574 K By te s
Close
8.EP G Menu(El ectroni c Pr ogram
Guid e).
The EPG menu is used to look at w hat is being
broadcasted on DTV or Rad io channel in the day.
To access the EPG menu, press the E PG
botton,the followin g menu will be displayed:
PRO GRAMM E GUIDE T IME
28 Apr 0 4: 39
800 S ZTVM0 1
801 S ZTVM0 2
802 S ZTVM0 3
803 S ZTVM0 4
804 D ate
OK
No In forma tion
No In forma tion
No In forma tion
No In forma tion
No In forma tion
Sch eduleRec ord INFO
Rem ind
IND EX
3. Record
Press the red key ,It can set the program
to be recorded.
Remind
4.
Press the blue key to choos e one program
and set up one reminder tim e, the TV s creen will
skip to the choosed progr am in the reminder time
automatically.
Rem inder s ettin g
_
802 S ZTVM0 3
08 Mi nute
05 Ho ur
Apr M onth
28 Da te
Onc e Mode
OK
+
BAC K
-14-
Page 17

TR OU B LE S HOOTI NG
Tro uble phenomenon S ympto m
Picture Audio
Snow Noise
Ghost
Interferen ce
Normal Pic tu re
No picture Mute
No colour Normal audio C ol ou r control
Normal aud io
Noise
Mute
Inspection Check
antenna pos it io n, d irection
or connecti on
antenna pos it io n, d irection
or connecti on
electroni c eq ui pm en t,car/
motorcycl e, fl uo rescent lig ht
Volume(che ck i f mu te i s
activated o r if t he a ud io system
connectio ns a re n ot c orrect)
Power cord is n ot i ns er ted
Power switc h is n ot o pe ned
Contrast an d br ig ht ness/volu me
setup
Press stand by k ey o n th e remote
control for i ns pe ct ing
Pictur e
breaki ng u p
No colour
Normal aud io
or weak
Noise
retune chan ne l
TVs ys te m
The LED TV panel is built with very high precision technology giving you fine picture details
in vibrant color. Occasionally, a few non-active pixels may appear on the screen as a fixed
point of red, green, blue, black or white. Please note this does not affect the performance of
the product.
-15-
Page 18

LED TV
 Loading...