

Page 1
AMTC
LCD TV
MSAV3230Y-35531
(32" class/ 31.51 diagonal)
INSTRUCTIONS
CH LIST
EPGASPECT FAV
3
12
5
6
4
78
9
RECALL
0
YPbPr
CC MTS VGA
DTV
TV AV HDMI
STRENGTH
VOL
SLEEPUSB VOL
MENU
SOURCE
ENTER
TV
DISPLAY
EXIT
S.M
+CH+
VOL
P.M
REPEAT
ATTEN TION
If yo u pu rc ha se a u ni ve rs al r em ot e co ntrol f ro m yo ur l oc al r et ailer, please contact the remote manufacturer for the
required programming code.
Please read the important
notice for energy efficiency
on pa ge 5.
ENGLISH
AIR/ CAB LE MO DE SELE CTI ON
When shipped from the factory, the Signal Type option is set to the “Cable” (Cable Television) mode.
If no t us in g Ca bl e TV. se t th is m en u op ti on t o the “Air” p os it ion.
IF CO NTA CT W ITH CUSTO ME R SE RVICE I S RE QU IR ED
PLEAS E HAV E THE MODEL N UM BER READY P RI OR TO T HE C AL L
CUSTO ME R SE RVICE - 1 -8 00 -2 89 -0 98 4
FOR RECYCLING INFORMATION, PLEASE CONTACT CUSTOMER SERVICE.
CUSTOMER SERVICE -1-800-289-0984
Before operating the unit, please read this manual thoroughly.
Page 2
SAFETY AND WARNINGS
CAUTION:
ENGLISH
WARNING:
CAUTION:
WARNING:
CAUTION:
CAUTION
RISK OF ELECTRIC SHOCK
DO NOT OPEN!
TO REDUCE THE RISK OF ELECTRIC SHOCK, DO
NOT REMOVE COVER (OR BACK).NO USER
SERVICEABLE PARTS INSIDE. REFER SERVICING
TO QUALIFIED SERVICE PERSONNEL.
TO PREVENT FIRE OR SHOCK HAZARD, DO NOT EXPOSE THIS APPLINACE TO RAIN
OR MOISTURE.
TO PREVENT THE SPREAD OF FIRE, KEEP CANDLES OR OPEN FLAMES AWAY FROM
THIS PRODUCT AT TIMES.
TO PREVENT ELECTRIC SHOCK. DO NOT USE THIS POLARIZED PLUG WITH AN
EXTENSION CORD, RECEPTACLE OR OTHER OUTLET UNLESS THE BLADES CAN BE
PULLY INSERTED TO PREVENT BLADE EXPOSURE.
This equipment has been tested and found to comply with the limits for a Class B digital device,
pursuant to Part 15 of the FCC Rules. These limits are designed to provide reasonable protection
against harmful interference in a residential installation. This equipment generates, uses and can
radiate radio frequency energy and, if not installed and used in accordance with the instructions,
may cause harmful interference to radio communications.
However, there is no guarantee that interference will not occur in a particular installation. if this
equipment does cause harmful interference to radio or television reception, which can be determined
by turning the equipment off and on, the user is encouraged to try to correct the interference by one
or more of the following measures:
- Reorient or relocate the receiving antenna.
- Increase the separation between the equipment and receiver.
- Connect the equipment into an outlet on a circuit different from that to which the receiver is
connected.
- Consult the dealer or an experienced radio/TV technician for help.
Changes or modifications not expressly approved by the party responsible for compliance with the
FCC Rules could void the user’s authority to operate this equipment.
The lightning flash with arrowhead symbol,within an
equilateral triangle is intended to alert the user to the presence
of uninsulated dangerous voltage within the product’s
enclosure that may be of sufficient magnitude to constitute a
risk of electric shock.
The exclamation point within an equilateral triangle is
intended to alert the user to the presence of important
operating and maintenance (servicing) instructions in the
literatrue accompanying the appliance.
Important Note:
In the spaces below, enter the model and serial number
of your television (located at the rear of the television
cabinet). Staple your sales receipt or invoice to the inside
cover of this guide. Keep this user’s guide in a
convenient place for future reference. Keep the carton
and original packaging for future use.
Serial number:
Location of the required marking
The rating sheet and the safety caution are on the rear of
the unit.
BATTERY PRECAUTIONS:
Batteries should not be exposed to excessive heat such
as sunshine,fire or the like.
The remote control unit uses infrared beams to
transmit signals, so sunlight or fluorescent light on
the remote sensor may shorten operating distance.
Incorrect use of batteries may cause them to leak or
burst. Read the battery warnings and use the batteries
properly.
Do not mix old and new batteries.
Do not mix alkaline, standard (carbon-zinc), or
rechargeable, (Ni-Cd, Ni-MH, etc.) batteries.
Remove batteries if the remote control will not be
operated for an extended period of time.
Model number:
-1-
Page 3
IMPORTANT SAFETY INSTRUCTION
Important Safety Instructions
1) Read these instructions.
2) Keep th ese ins tr uctio ns .
3) Heed al l warni ng s.
4) Follo w all ins tr uctio ns .
5) Do not use this apparatus near water.
6) Clean o nly wit h dr y cloth .
7) Do not bl ock any v en tilat io n openi ngs, inst all in
accordance with the instructions.
8) Do not install near any heat sources such as
radiations, heat registers, stoves, or other
apparatus (including amplifiers) that produce heat.
9) Do not defeat the safety purpose of the polarized
plug. If the provided plug does not fit into your
outlet, consult an electrician for replacement of the
obsolete outlet.
10) Protected the power cord from being walked on
or pinched particularly at plugs, convenience
receptacles, and the point where they exit from the
apparatus.
11) Only use attachments/accessories specified by
the manufacturer.
12) Unplug this apparatus during lighting storms or
when unused for long periods of time.
13) Refer all servicing to qualified service
personnel. Servicing is required when the
appara tus has b ee n damag ed i n any way, suc h as
power-supply cord or plug is damaged, liquid has
been spilled or objects have fallen into the
apparatus, the apparatus has been exposed to rain
or moist ure, do es n ot oper at e norma lly, or h as been
dropped.
14) Mains plug is used as the disconnect device, the
disconnect device shall remain readily operable.
15) The ventilation should not be impeded by
covering the ventilation openings with items, such
as newspapers, table-cloth, curtains, etc.
16) No naked flame sources, such as lighted
candles, should be placed on the apparatus.
17) Attention should be drawn to the
enviro nment al a spect s of b atter y disposa l.
18) The use of a pparatu s in mode ra te clim at e.
19) The apparatus shall not be exposed to dripping
or splas hing an d th at no obj ec ts fill ed with liq uids,
such as va ses, sh al l be plac ed o n the app aratus.
20) Use on ly with a c ar t , stand , tr ipod, b racket, o r
table specified by the manufacturer, or sold with
the appa ratus . When a c art is used , use cau ti on
when moving the cart/apparatus combination to
avoid injury from tip-over.
SAFETY AND WARNINGS
The symbol indicates that dangerous
voltages constituting a risk of electric shock
are present within this unit.
The symbol indicates that there are
important operating and maintenance
instructions in the literature accompanying
this unit.
WARNING:
To reduce the risk of fire or electric shock, do
not expose this apparatus to rain or moisture.
WARNING:
The batteries shall not be exposed to excessive
heat suc h as suns hi ne, fir e or t he like .
WARNING:
The excessive sound pressure from earphones
and headphones can cause hearing loss.
This symbol indicates that this product
incorporates double insulation between
hazardous mains voltage and user accessible
parts. When servicing use only
identical replacement parts.
This marking indicates that this product should
not be disposed with other household wastes
throughout the EU. To prevent possible harm to
the envi ronme nt o r human h ea lth fro m
uncont rolle d wa ste dis po sal, re cycle it
responsibly to promote the sustainable reuse of
materi al reso ur ces. To ret urn you r used devi ce,
please u se the re tu rn and co ll ectio n systems o r
contact the retailer where the product was
purchased. They can take this product for
environmental safe recycling.
ENGLISH
-2-
Page 4
High voltages are used in the operation of this television
receiver. Do not remove the cabinet back from your set.
ENGLISH
Refer servicing to qualified service personnel.
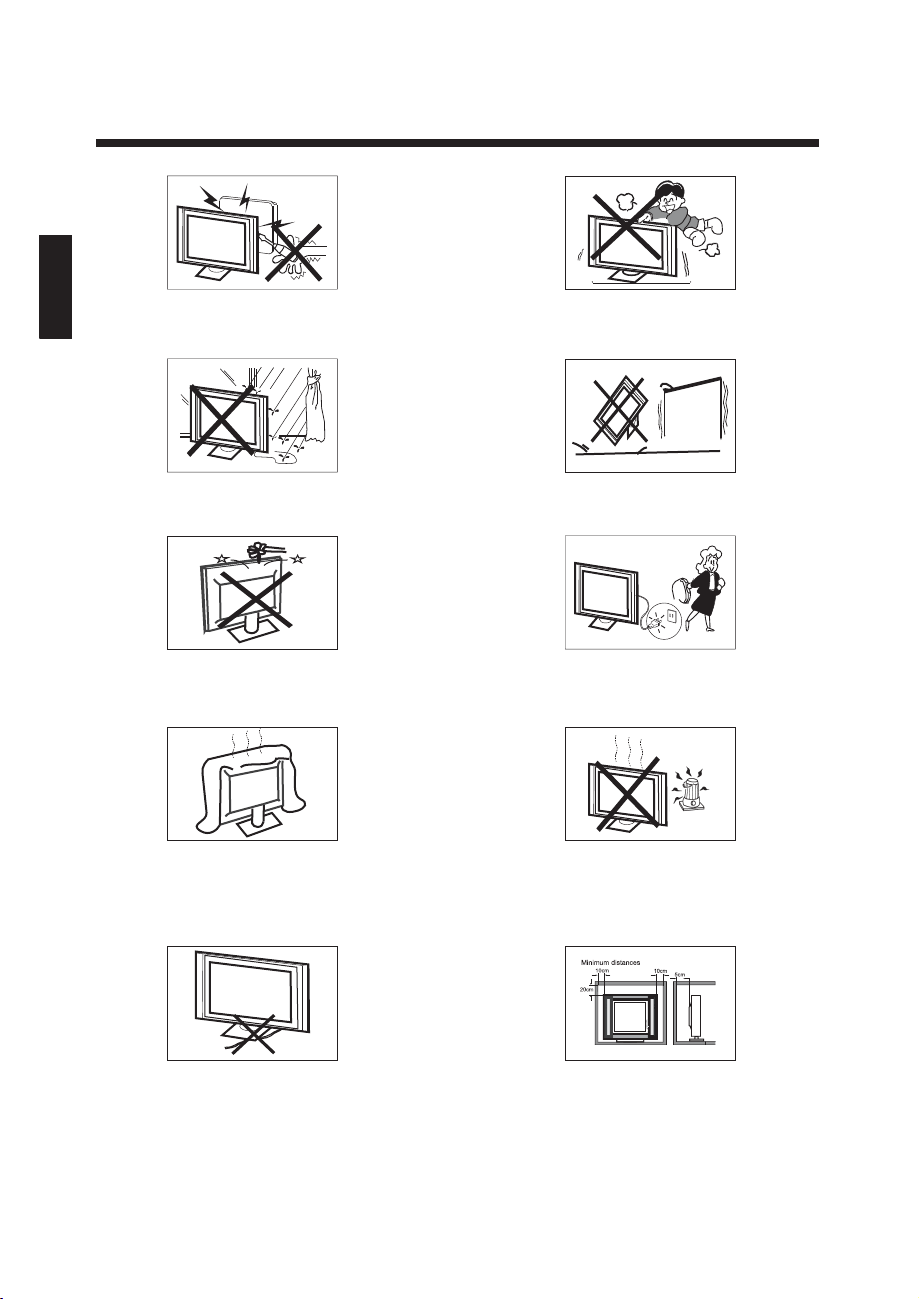
SAFETY AND WARNINGS
Never stand on, lean on, or suddenly push the television or
its stand. You should pay special attention to children.
Serious injury may result if it falls.
To prevent fire or electrical shock hazard, do not expose
the television receiver to rain or moisture.
Do not drop or push objects into the television cabinet
slots or openings. Never spill any kind of liquid on the
television receiver.
Do not block the ventilation holes in the back cover.
Adequate ventilation is essential to prevent failure of
electrical components.
Do not place your television on an unstable cart, stand,
shelf or table. Serious injury to an individual , and damage
to the television, may result if it falls.
When the television receiver is not used for an
extended period of time, it is advisable to disconne ct
the AC power cord from the AC outlet.
Avoid exposing the television receiver to direct sunlight
and other sources of heat. Do not stand the television
receiver directly on other products which give off heat,
e.g. video cassette players and audio amplifiers. Do not
place naked flame sources, such as lighted candles on
the television.
Do not trap the power supply cord under the television
receiver.
If the television is to be built into a compartment or similar
enclosure, the minimum distances must be maintained. Heat
build-up can reduce the service life of your television, and
can also be dangerous.
-3-
Dim:515*320mm(不包括底座)
Page 5

Contents
Safety and warnings...................................................................................... 1-3
Introduction................................................................................... ..............5
Installation...................................................................................................6-9
Wall Mount
.................................................................................................. 10
Remote Control............................................................................ ...............11-12
Operation.....................................................................................................13-16
Trouble Shooting..........................................................................................17
ENGLISH
-4-
Page 6
INTRODUCTION
Main features
32”wide screen for a complete home theater experience
Super slim LCD TV with LED backlight
1366 x 768 native resolution for HD performance
Integrated ATSC TV tuner for HDTV broadcast reception
Bea ut iful co lor dep th with a dynamic co ntras t ratio of 1200:1
Trip le H DMI inp uts for t rue digital connections
VGA port for connection to PC
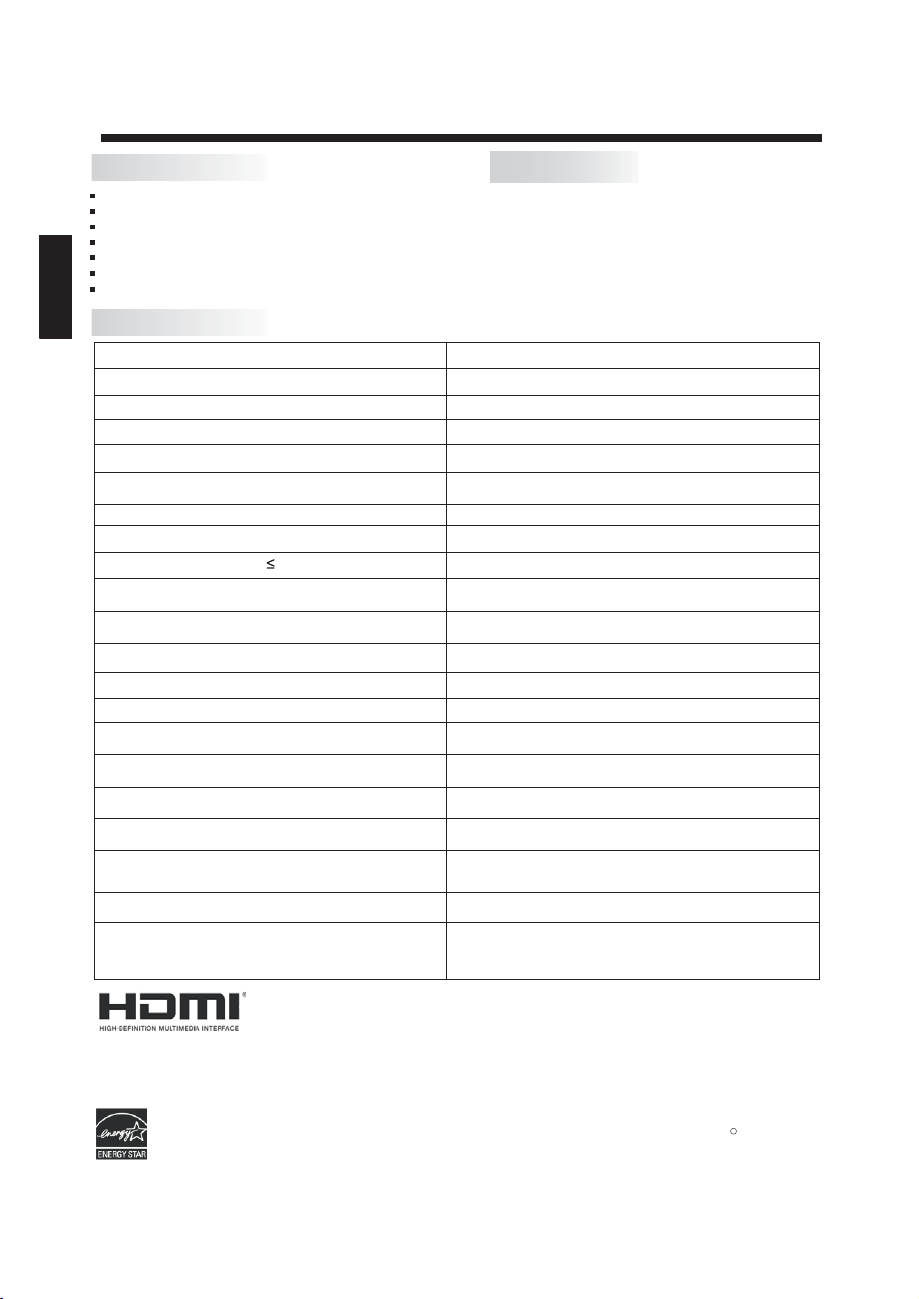
Specifications
ENGLISH
Viewing Picture Size(diagonal)
Resolution:
Aspect Ratio:
TV System:
Video Signal System:
Receiving Channel:
Maximum Power Consumption:
Input Power Voltage:
Audio Output Power(THD 7%):
High-Definition Multimedia Interface(HDMI) Input x 3
YCb(Pb)Cr(Pr) Input
Composite Video Input
Analog RGB(VGA) Input
Audio Input
®
Headphone Output
Optical Output
USB Input
AV O u t
Dimensions (approx)
with stand fitted(W.H.D)
Accessories
Power Cable..................................... 1
Infrared Remote Control...................
User’sM anual ................................
Battery(AAA)........................ . 2.........
Screws.................................. . .......... 4
Base stand........................................ 2
AV adapter cable............................... 1
31.51 inches
1366x768
16:9
ATSC Digital system and NTSC Analog system
NTSC/PAL
Cable :1-135/ Air: 2-69(ATV&DTV)
45W
AC 100-240V 50/60Hz
2 x 8W
x 1
x 1
x 1
x 1
x 1
x 1
x 1
x 1
732 x 200 x 472 mm
28.8 x 7.9 x 18.6 inch
Net weight 5.0kg (11 lbs) with STAND
Horizontal definition(TV line)
Composite Video Input >=350
Component (YPbPr) Video Input >=400
Others (HDMI1,HDMI2,VGA) >=400
1
1
The terms HDMI and HDMI High-Definition Multimedia Interface, and th e HD MI L og o ar e tr ad em ar ks o r
registered trademarks of HDMI Licensing LLC in the United States and other countries.
Manufactured under license from Dolby Laboratories. Dolby, Dolby Audio and the double-D symbol are
trademarks of Dolby Laboratories.
Enabling certain features and functionality in this TV(
may increase its energy consumption, possibly beyond the limits re qu ir ed f or E NE RG Y STAR q ua li fi cation.
Picture Mode "Personal/Vivid/Standard/Sports/Theater")
-5-
R
Page 7

INSTALLATION
VOL CH
YPbPr
CC MTS VGA
DTV
STRENGTH
TV AV HDMI
EPG
CH LIST
FAV
TV
DISPLAY
S.M
P.M
Front panel
1. Remote contro l sensor.
2. Indicator LED :
RED STAND BY.
3. Key board.
Panel keys
1 2 3 4 5
SOURCE MENU V- V+ CH- CH+ Standby
ENGLISH
1
2
3
1.SOURCE:
Display the input source menu.In
30 30
MENU mode,press“SOURCE”to
confirm the selected item.
2.MENU:
Display main MENU.
3.V+/V-
Adjust sound level.
In MENU mode, press“V+”or“
V-”to adjust the item that you selected.
4. CH+/CH-
In TV mode,press“CH+”or“CH-”
to change the channel up and down.
In MENU mode, press “CH+”or
“CH-”to select items.
5. STANDBY
Press this button to turn the unit ON from
STANDBY mode.
Press it again to turn the set back to
STANDBY.
REAR Connections
HEADPHONE
OPTICAL
All the terminals are (from left to right):
POWER SOCKET, , AUDIO INPUT,
HEADPHONE, OPTICAL
AV/YPbPr(COMPONENT)INPUT, HDMI3.
LRAUDIO IN
Y/VIDEO Pb
HDMI3
Pr
SIDE Connections
HDMI2(ARC)
All the terminals are (from left to right):
HDMI2(ARC), HDMI1, VGA, AV OUT, RF, .
Note: When HDMI has an input signal coming from a DVI source then the audio input signal must be
connected to the PC audio input.
HDMI1
VGA
USB
AV OUT
-6-
R F
USB
Page 8

Antenna
ENGLISH
Note:
Aerial connections:IEC(female).
Input impendance:75 unbalanced.
STEPS:
Be sure bo th the TV an d compu te r are set t o
Power off.
1.Connect VGA and audio cable.
2.Connect the power cord.
3.Powe r on the TV, swi tc h to PC mod e.
4.Powe r on the PC .
This sequence is very important.
INSTALLATION
PC
HDMI2(ARC)
HDMI1
VGA
HEADPHONE
OPTICAL
AV OUT
LRAUDIO IN
USB
R F
Y/VIDEO Pb
HDMI3
Pr
-7-
Page 9

INSTALLATION
Base Stand Assembly Instruction
the base stand
Prepar e to plac e th e TV wit h th e displ ay side dow n on a flat s ur face. D ue t o the siz e and weigh t of this
TV, the u se of 2 peopl e is recomm ended w he n movin g it . Ensur e the table or desk you use provides
a flat, totally clean surface, and use a soft cl oth betwe en the face o f the TV and t he tabl e to p rotec t the
TV's screen.
ENGLISH
1. Locat e the 2PC S of into the g ap in the b ot tom of th e TV , and che ck that it is
secure ly held i n pl ace as pe r a) b elow.
the base s tand
a)
2.Lock 4 PCS scr ew s in the de si gnate d locatio n as per b) b el ow and ch ec k each sc rew is firm ly
tightened
b)
4 x Scre ws
-8-
Page 10

AV Equipment
You can use the input terminals on TV set rear as follows.
INSTALLATION
ENGLISH
HDMI2(ARC)
Y
Yellow (video)
W
White(audio L)
R
Red(audio R or Pr)
B
Blue(Pb)
G
Green(Y)
HDMI1
VIDEO EQUIPMENT with YPbPr
W
R
VGA
GBR
HEADPHONE
Audio Receiver
AV OUT
W R
OPTICAL
R F
Y
W
LRAUDIO IN
W R
R
USB
VIDEO EQUIPMENT
G
Y/VIDEO Pb
Y
W R
B
Y
R
HDMI3
Pr
VIDEO EQUIPMENT
W R
TO AUDIO OUTPUTS
Y
TO VIDEO
OUTPUTS
It can be connected to the following appliances: VCR, multi disc player, DVD, camcorder, video game
or stereo system, etc.....
YPbPr can support these video formats:480i,576i,480p,576p,720p,1080i.
-9-
Page 11

Instruction for Wall Mount
A wall mount kit (purchased separately) would allow you to mount your JVC
TV on the wall. For detailed information on installing the wall mount, refer
to the instructions provided by the wall mount manufacturer. It is strongly
recommended to contact a technician for professional assistance for wall mount
installation. is not responsible for any damagJVC e to the product or injury to
yourself or others resulting from the wall-mounting.
Dimensions for Mounting Hole Pattern
68.3
200
Wall Mount
ENGLISH
- This TV is compatible with a 200mm x 100mm mounting hole pattern.JVC
- 4 pcs of type screws are required for installing the wall mount bracket to M4
your TV. Do not use screws that are longer than 10 mm. Screws that JVC
are too long may cause damage to the inside of the TV set.
- Do not fasten the screws too tight for this may damage the TV or cause the
TV to fall, resulting in personal injury. is not liable for these kinds of JVC
incidents.
- Do not mount your TV at more than a 15 degree tilt.JVC
- Always use two people to mount the TV to a wall.
- Do not install your Wall Mount Kit while your TV is turned on. It may result in
personal injury due to electric shock.
-10-
Page 12

2
3
4
ENGLISH
12
11
13
14
17
18
22
25
23
27
30
31
32
35
36
12
4
7
YPbPr
CC MTS VGA
DTV
TV AV HDMI
STRENGTH
SLEEPUSB
MENU
ENTER
EXIT
+
VOL
REMOTE CONTROL
1. POWER
To set t he TV st andby or on .
1
2. MUTING
Press to d isabl e or enable the sound output.
3. ASPECT
10
16
15
20
19
21
26
24
29
28
34
33
38
37
39
6
To cha nge pic tu re aspe ct .
5
4. FAV
Used to ac cess yo ur f avour it e chann els in digi tal
TV mo de .
5. CH LI ST
7
Used to di splay t he c hanne l li st.
6: EPG
Displa y all the i nf ormat io n of DTV programs.
7. NUMBER KEY
For dire ct acce ss t o progr am .
8. RECALL
8
To acc ess the p re vious ly viewed p rogra m.
9. VGA
9
Hot key directly go to VGA source.
10. MTS
Switch t he soun d st ereo.
11. CC
Enable or disable the CC function.
12. YPbPr
Hot key di rectl y go t o YPbP r so urce.
13. DTV STRENGTH
Used to di splay t he D TV signal s tr ength m en u.
14. TV
Hot key di rectl y go t o TV sou rc e.
15. AV
Hot key di rectl y go t o AV sour ce .
16. HDMI
Hot key di rectl y go t o HDMI so ur ce.
17. USB
Press to launch the USB multimedia mode
18. SLEEP
Press to d ispla y th e sleep t im er opti on.
19. VOL
Adjust v olume t o 50 .
20. VOL
Adjust v olume t o 75 .
21. SOURCE
Press to d ispla y th e Input S ou rce Lis t, to switc h
betwee n the differe nt inputs t o the tel ev ision .
22. MENU
Press to d ispla y th e TV mai n me nu.
23. EXIT
Used to ex it menu .
24. TV DISPLAY
Displays/removes the program Information.
25. CURSOR
To mov e withi n th e menu.
26.
ENTER
Confirms selection.
-11-
CH LIS T
EPGASPECT FAV
3
5
6
8
9
RECALL
0
VOL
VOL
SOURCE
TV
DISPLAY
S.M
+
CH
P.M
REPEAT
Page 13

12
13
14
17
18
22
25
REMOTE CONTROL
27. VOL+/-
2
3
CH LIS T
EPGASPECT FAV
4
12
4
7
YPbPr
11
DTV
STRENGTH
MENU
CC MTS VGA
TV AV HDMI
SLEEPUSB
ENTER
3
5
6
8
9
RECALL
0
VOL
VOL
SOURCE
1
To adjus t sound level.
28. CH+/CH-
To acc ess the n ex t or prev ious Prog ram.
6
29. S.M
5
To swi tch sou nd mode.
30. P.M
To switch picture mode.
31. REWIND
7
Reserved keys.
32. FAST FORWARD
Reserved keys.
33. SKIP BACKWARD
Press to s kip the p re vious f il e or Track i n US B Mode.
34. SKIP FORWARD
8
Press to s kip the n ex t file or t ra ck in USB M ode.
35. PLAY
9
Press th e Play Bu tt on in USB M ode to begi n or
contin ue Play ba ck.
10
36. PAUSE
16
Press th e Pause Button to pause play in USB Mode.
15
37. STOP
20
Press to S top pla y in U SB Mode .
38. REPEAT
19
Repeat p lay pho to .
21
39. COLO R KEYS
Reserv ed keys .
26
ENGLISH
23
27
30
32
35
36
31
EXIT
+
VOL
TV
DISPLAY
24
29
S.M
+
CH
P.M
28
34
REPEAT
33
38
37
39
-12-
Page 14

1. PICTURE MENU
< >
<
<
<
<
<
<
In this menu,you can adjust the picture effect here,
such as contrast, brightness, etc.
Press to select, press to adjust.ENTER
Only under TV source, menu will show ,
*
Under AV/Component/HDMI1/HDMI2/ /
VGA/USB, menu wi ll not sh ow .
HDMI3
OPERATION
Note:
1) Th er e ar e fi ve S ou nd M od es c an b e
selected:Standard,Music,Movie,Sports and Personal
2) Audio language is available in ATSC/TV
Programming only.
3) Aut o volume is available only when the input signal
volume is too large or there is distortion.
Pic ture Mo de Energy Saving
ENGLISH
Picture
Col or Temper ature
Asp ect Rat io
Noise Reduction
VGA Setting
Backlight 65
Note: The T V may not conform to the Energy S ta r
standard after Picture Mode is changed except
Energy Saving.
1.1 VGA Setting
When PC Mode is available.
ENTER
Press b ut to n to s el ec t PC a dv an ce d se tt in g
1) H-Pos: Adjust the horizontal position of the screen.
2) V-Pos: Adjust the vertical position of the screen.
3) Size: Fine tune the screen width.
4) Phase: Fine tune the phase of the screen. Usually
don't adjust this item.
5) Auto: Auto adjust to fit the screen.
VGA setting
Auto Adjust
Horizontal Pos.50
Vertical Pos.50
-
Siz e 50
Phase 7
MEN U
Note:
1) If you want to adjust contrast, brightness, col or, a nd
sharpness, the picture mode must return to personal
status.
2) Tint is avaliable in NTSC system only.
3) There are three color temperature modes can be
selected: Normal,Warm and Cool.
2.AUDIO MENU
In this menu, you can ajust the sound eff ec t he re .
Press to select, press to adjust.ENTER
Sou nd Mode St andard
Aut o Volume
Surround Sound
Digital Output
MTS S tereo
Audio Languages
Audio
3. TI ME MENU
In this menu, you can adjust the sleep timer, t im e zo ne ,
etc. Press to select,press to adjust.ENTER
Sle ep Timer Off
DST
Time F ormat
Time Z one
Time
Note:
1) Time zone, DST and the clock are available in ATSC
programming only, an d th e Cl oc k ca n' t be adjust.
4.OPTION
In this menu, you can adjust the Menu language, Close
Caption, Restore Default etc.
Press to select,press to adjust.
+
Option
4.1 Closed Caption
MEN U
Clock
MENU
ENTER
OSD Language English
Closed Caption
Setup Wizard
HDMI CEC
Restore Default
Software Update(USB)
CC Mo de CC Off
Basic Selection CC1
Advanced Selection Service1
Option
-13-
Page 15

OPERATION
<
<
1) CC Mode: Switching close caption mode.
2) Advanced selection: only ATSC program is
available.
3) Option: Used to edit CC font.
Note:
1) Restore Default: Restore Default will clear all the
programs and reset all the settings to default value.
5.LOCK MENU
In this menu, you can change the password and adjust
the V-chip setting.
Enter the password, it will go into the lock menu.
Factory default password is 0000.
Enter Password
Set P assword
US
Canada
Lock
RRT Setting
Res et RRT
5.1 Enter Password
When the System Lock switch is ON, the below
options listed below can be adjusted.
.
Set Password
5.2
1) Enter
old password: Input the old password.
2) Enter
new password: Input the new password.
3) Confirm password: Input the new password again.
5.3 US
ENTER
Press b ut to n th e sc re en w il l di sp la y as f ol lo w.
US
TV
MPAA
V
(Violence)
X
X
X
Description
Content
S
(Sexual
situation)
X
X
X
L
(Adult
language)
X
X
X
D
(Sexually
suggestive
dialog)
X
X
Parental
ENGLISH
Rat ing Con tent
TV-Y (All
children)
TV-Y7( Direc t to
order children)
Suggested
TV-G(General
age
audience)
TV-PG(Parental
Guidance
suggested)
TV-14(Parents
strongly
cautioned)
TV-MA(Mature
audience only)
And use the ENTER key to switch lock/ unlock
feature.
Control
2) MPAA: Switching the movie-rating control level;
N/A, G, PG, PG-13, R, NC-17, X.
Rating
G Gen eral au dienc es, All Age s admit ted
PG
PG-13
Age
R
NC-17
X
5.4 Canada
Press b ut to n, t he s cr ee n wi ll b e di sp la ye d as
ENTER
follow:
FV
(Fantasy
violence)
X
Par ental G uidan ce sugg ested . Some ma teria l may not b e
Suitable for children.
Par ents st rongl y cauti oned. S ome mat erial . may be
Inappropriate for children under 13.
Restrict. Under 17 requires accompanying parent or adult
guardian(age varies in some jurisdictions)
No o ne 17 and u nder ad mitte d.
X is an o rder ra ting th at is uni fied wi th NC-1 7 but may b e
enc oded in t he data o f order m ovies .
Canada
Canada Eng
Canada Fre
MEN U
1) TV: Press button, the screen will display as
follows:
ENTER
ENTER
TV RATING
ALL
TV-Y
ALL
TV-Y7
TV-G
TV-PG
TV-14
TV-MA
FV
ALL
ALL
ALL
ALL
BLOC K
V
S
L D
V
S
L
V
S
L
MEN U
1) Canada English: Switching the English rating control
level: C, C8+, G, PG, 14+, 18+.
D
ENTER
-14-
Page 16

OPERATION
<
<
Rating
C Chi ldren : Inten ded for y ounge r child ren und er the ag e of 8 year s.
Pay s caref ul atte ntion t o themes that could threaten their sense of
sec urity and wel l-being.
C8+ C hildr en over 8 y ears ol d: Cont ains no portrayal of violence as the
pre ferre d, acce ptabl e, or onl y way to re solve c onfli ct; nor encourage
chi ldren t o imita te dang erous a cts whi ch they m ay see on t he scre en .
G Gen eral: C onsid ered acceptable for all age groups, Appropriate
vie wing fo r the ent ire family, contains very little violence, physical,
ENGLISH
ver bal or em otion al.
PG Pa renta l Guida nce: In tended for a gen eral audience, but may not be
Age
sui table f or youn ger chi ldren ( under t he age of 8 ) because it could
contain controversial themes or issues.
14+ O ver 14 Years : Could c ontai n theme s where v iolen ce is one o f the
dom inant e lemen ts of the s toryline But it must be integral to the
dev el opme nt of plo t or char acter. Language usage could be profane
and nudity , p resen t withi n the con text of t heme.
18+ Ad ults: I ntend ed for vi ewers 1 8 years a nd olde r and mig ht contain
dep ictions of viol ence, w hich wh ile related to the development of
plo t, char acter o r themes, are intended for adult viewing. Could
contain graphic language and portrayals of secretary and nudity.
2) Canada French: Switching the French-rating control
level: G, 8ANS+, 13 ANS+, 16ANS+, 18ANS+.
Rating
G Gen eral :A ll ages a nd chil dren, contains minimal direct violence,
but m ay be int egrat ed into t he plot i n a humorous or unrealistic
man ner .
8an s+ Gene ral but i nadvi sable f or young children :May be viewed by a
wid e publi c audie nce, bu t could c ontain scenes disturbing to
Age
chi ldren u nder 8 wh o canno t disti nguish between imaginary and
rea l situa tions . Recom mende d for vie wing wi th pare n.
13a ns+ Ove r 13 year s: Coul d contain scenes of frequent violent scenes
and i n tense v iolen ce.
16a ns+ Ove r 16 year s: Coul d contain frequent violent scenes and violence.
18a ns+ Ove r 18 year s: Only f or adul t viewi ng. Could contain frequent
vio lent sc enes an d extre me viol ence.
5.5 RRT setting
It can be adjusted when the TV is i n ATSC digital
mode and the TV stream have RRT information.
5.6 Reset RRT
It can be adjusted when the TV is i n ATSC digital
mode and the TV stream have RRT information.
6. CHANNEL MENU
In this menu, you can adjust digital and analog TV
Channels.
Press to select,press t o ad ju st .ENTER
Description
Description
Air /Cabl e Cable
Aut o Scan
Favorite
Show/Hide
DTV S ignal
Channel
6.1 Air/Cable:
Select Air TV signal and cab le TV sig na l.
6.2 Auto Scan:
If it's the first time you use the TV, you should s ca n al l
the TV channels first,
Press button to confirm, you will see the menuENTER
Auto Scan
Scan all channels
Digital channel only
Analog channel only
MEN U
When you select "Scan all channels", you will watch
below indication which auto scan is in progress.
ENTER
Auto Scan DTV+ATV
0
0
0
Programme(S)
Programme(S)
Programme(S)
Found:
Analog:
Digital:
1%. .. RF CH 2 DT V+ATV
6.3 Favorite:
ENTER
Press button to choose/delete the favorite
channel.
6.4 Show/Hide
ENTER
Press b ut to n to d is pl ay o r hi de c ur re nt
channel.
6.5 DTV sig na l
Display DTV strength signal. It can't be selected and
adjusted.
-15-
Page 17

7. Dis pl aying J PE G files by using USB Port
You can display the JPEG fiels by using the
USB port that is located on the rear panel:
7.1
Connect the USB DEVICE that contains the
JPEG files.
7.2 Press to enter inputsource menu.SOURCE
7.3 In the inputsource menu,Press to
select USB, and then press ENTER.
OPERATION
7.5 Pr es s to s elect folder which
contains JPEG picture .
Return Up Folder date or name pict0001-1080.jpg
1/1C: Picture\1080\
ENGLISH
Input Source
HDMI3
7.4 to s el ec t Ph ot o, a nd t he n
Press
press enter
USB 2.0
PHOT O
pict0003-1080.jpg pict0004-1080. jpg pict0005 -1080.jpg pict0006 -1080.jpg
pict000
7-1080. jpg pict0008- 1080.jpg pict00011-1080. jpg pict0016- 1080.jpg
7.6 Press ENTER to dispay the picture in
the folder.
Return Up Folder date or name pict0001-1080.jpg
pict0003-1080.jpg pict000
pict000
7-1080. jpg pict0008- 1080.jpg pict00011-1080. jpg pict0016- 1080.jpg
4-1080. jpg pict0005- 1080.jpg pict0006-1080. jpg
pict0003-1080.jpg
1/1C: Picture\1080\
-16-
Page 18

TROUBLE SHOOTING
ENGLISH
Trouble phenomenon Symptom
Pict ure Audi o
Snow Noise
Ghost
Interference
Normal P ic tu re
No pictu re
No Color Normal a ud io Color control
Normal a ud io
Noise
No Sound
No Sound
Inspection Check
antenna position, direction
or connection
antenna position, direction
or connection
electronic equipment,car/
motorcycle,fluorescent light
Volume(check if muting function
is activated or if the audio system
connections are no t correct)
Power cord is not inserted
Power switch is not opened
Contrast and brightness/volume
setup
Press standby key on the remote
control for inspecting
Picture
breaki ng u p
No Color
Normal a ud io
or weak
Noise
retune channel
TVsystem
The LED TV panel is built with very high precision technology giving you fine picture details
in vibrant color. Occasionally, a few non-active pixels may appear on the screen as a fixed
point of red, green, blue, black or white. Please note this does not affect the performance of
the product.
-17-
Page 19

 Loading...