

Shenzhen High Power Tech C700 User Manual
Netac iMuz (C700)
User’s Manual
ShenZhen Netac Technology Co., Ltd.

Notice
This manual contains information protected by copyright law. All rights are reserved. No part of this document
may be used or reproduced in any form or by any means, or stored in a database/retrieval system without prior
written permission from Netac Technology Co., Ltd.
®
Netac
monopolization usage, permission usage, transfer, unfoldment for this trademark, etc. Other products and
company names mentioned herein all belongs to trademarks of their respective owners.
Netac provides the repair service during warranty period in promised support range. Netac iMuz is not
guaranteed for its compatibility with all kinds of computers and Operating System. Netac Technology Co., Ltd. is
not responsible for any loss arising out of using Netac iMuz. The governing laws for this product are laws of the
People’s Republic of China.
Netac reserves the rights to update user’s manual based on the application upgrade without prior notice. All
changes will be put into the new edition manual. Please visit website http://www.netac.com
user’s manual.
, OnlyDisk™ and is trademark of Netac Technology Co., Ltd. Netac has legal rights of
to download the latest
Remark
Preservation
Please avoid putting iMuz in the burning sun or dust.
Please avoid dropping or subjecting iMuz to any hard impact.
Please prevent liquid or eyewinker to enter into iMuz.
Cleanliness
Please avoid use volatile gasoline, diluent or any chemical to clean surface of iMuz.
Please do not use wet cloth to clean iMuz and accessories.
Please disconnect iMuz from computer before maintaining or cleaning iMuz.
Usage
Please do not use wet hand to plug/unplug or contact iMuz for preventing electric shock or damage.
Please do not unplug iMuz from computer when it is connecting with computer and transmitting data,
otherwise iMuz or the data may be damaged.
IMuz use FAT32 file format, please select FAT32 when formatting iMuz at Windows Operating System. If
you select NTFS format or others, the firmware would be damaged and iMuz would be not power on.
You can use iMuz as Removable Hard Disk. After iMuz was partitioned, iMuz can only identify the tracks
stored in first section that it is set as main section while playing.
Please do not copy the tracks into system folders, otherwise these tracks would not be identified while
playing.
Please do not unplug the LINE-IN Cable during LINE-IN recording, which would influence preservation
of the recording file.
Please sure there must be 200MB space at least in iMuz before recording, ot herwise recording can not
be progressed.

Others
Windows 98 mentioned in this user’s manual refers to the first and the second edition of Windows 98.
Files or data stored in iMuz cannot completely avoid being destroyed or lo st due to improper use or
other reasons. Please backup files and data when necessary.
iMuz is not guaranteed to work properly on all computers. Netac Technology Co., Ltd. is not responsible
for any loss arising out of using iMuz. The governing laws for this product are laws of the People’s
Republic of China.
1. iMuz Introduction ................................................................................................ 4
1.1 Package Checklist ............................................................................................................. 4
1.2 Features............................................................................................................................. 5
1.3 Name of Parts.................................................................................................................... 6
1.4 System Requirement .........................................................................................................6
1.5 Specifications..................................................................................................................... 6
2. Preparation .......................................................................................................... 7
2.1 Battery Charge................................................................................................................... 7
2.2 Connecting with Computer................................................................................................. 7
2.2.1 Driver Installation ........................................................................................................................... 7
2.2.2 Connecting.....................................................................................................................................9
2.2.3 Data Transfer..................................................................................................................................9
2.2.4 Disconnecting.................................................................................................................................9
3. Usage.................................................................................................................. 10
3.1 Basic Operation ............................................................................................................... 10
3.1.1 Power On/Off ...............................................................................................................................10
3.1.2 Hold Switch.................................................................................................................................. 10
3.1.3 Reset............................................................................................................................................ 10
3.2 Remote Control................................................................................................................ 10
3.2.1 Name of Parts..............................................................................................................................10
3.2.2 Connecting................................................................................................................................... 11
3.2.3 Usage........................................................................................................................................... 11
3.3 Switching Mode ................................................................................................................11
4. Mode Operation................................................................................................. 12
4.1 MUSIC Mode ................................................................................................................... 12
4.2 RECORD Mode ............................................................................................................... 13
4.2.1 MIC Record..................................................................................................................................13
4.2.2 LINE-IN Record............................................................................................................................14
4.3 LIST Mode....................................................................................................................... 14
4.4 RADIO Mode ................................................................................................................... 15
4.5 SEARCH Mode................................................................................................................ 16
4.6 SETUP Mode................................................................................................................... 17
4.6.1 Operation .....................................................................................................................................17
4.6.2 EQ................................................................................................................................................17

4.6.3 REPEAT.......................................................................................................................................19
4.6.4 FM SET........................................................................................................................................20
4.6.5 REC SET......................................................................................................................................20
4.6.6 LCD..............................................................................................................................................21
4.6.7 SYSTEM ......................................................................................................................................22
5. Others................................................................................................................. 23
5.1 Firmware Update .............................................................................................................24
5.2 FAQ.................................................................................................................................. 24
5.3 Contact Netac.................................................................................................................. 24
1. iMuz Introduction
Thanks for you purchasing Netac iMuz (model: C700). iMuz combine perfectly digital music playing function in
base of removable hard disk. iMuz can play MP3/WMA /OGG files, and support FM radio listening and
FM/MIC/LINE-IN recording.
1.1 Package Checklist
iMuz package includes the following items, please check it:
iMuz User’s Guide and Quick & Easy Use Guide
LINE-IN Cable Mini-USB Cable
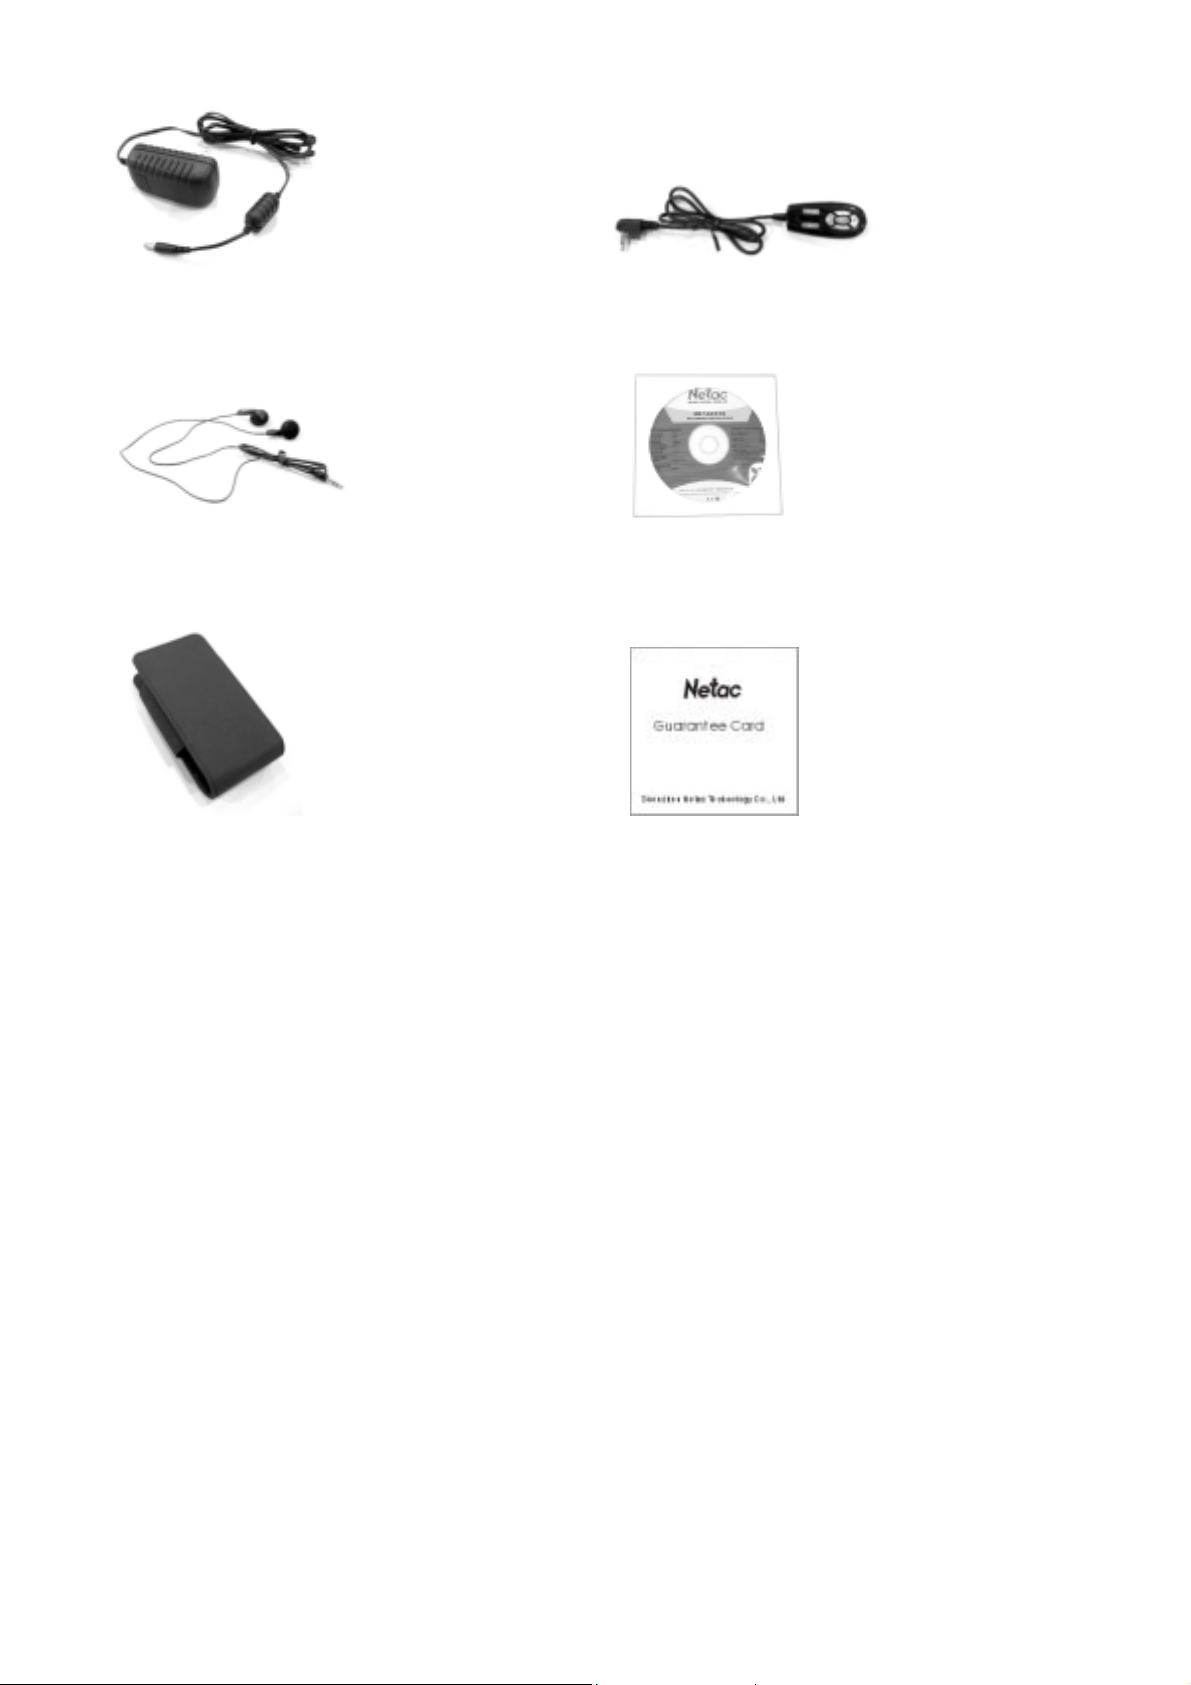
AC Power Adapter Remote Controller
Earphone Installation CD
Carrying Case Guarantee Card
1.2 Features
High definition array LCD with indigo blue backlight
Support Remote Controller function
Prevent effectively wrong operation with button lock
Stereo output
Support MP3, WMA and OGG music files
With multiple Play Mode & Sound Mode
Lyric shows while track is playing
Support auto play when power on
Support user-defined play-list
With track search
Support English, Traditional & Simplified Chinese Fonts
Build-in FM receiver, support automatic & manual search channel
Support MIC, FM, LINE-IN recording
Built-in Mini USB port, compatible USB Specifications 2.0/1.1/1.0
Build-in 1.8 inch Hard Disk, no driver installation required (except on Windows 98)
Update firmware through copying file to removable hard disk
Playing time is approximately 15 hours with an rechargeable lithium battery
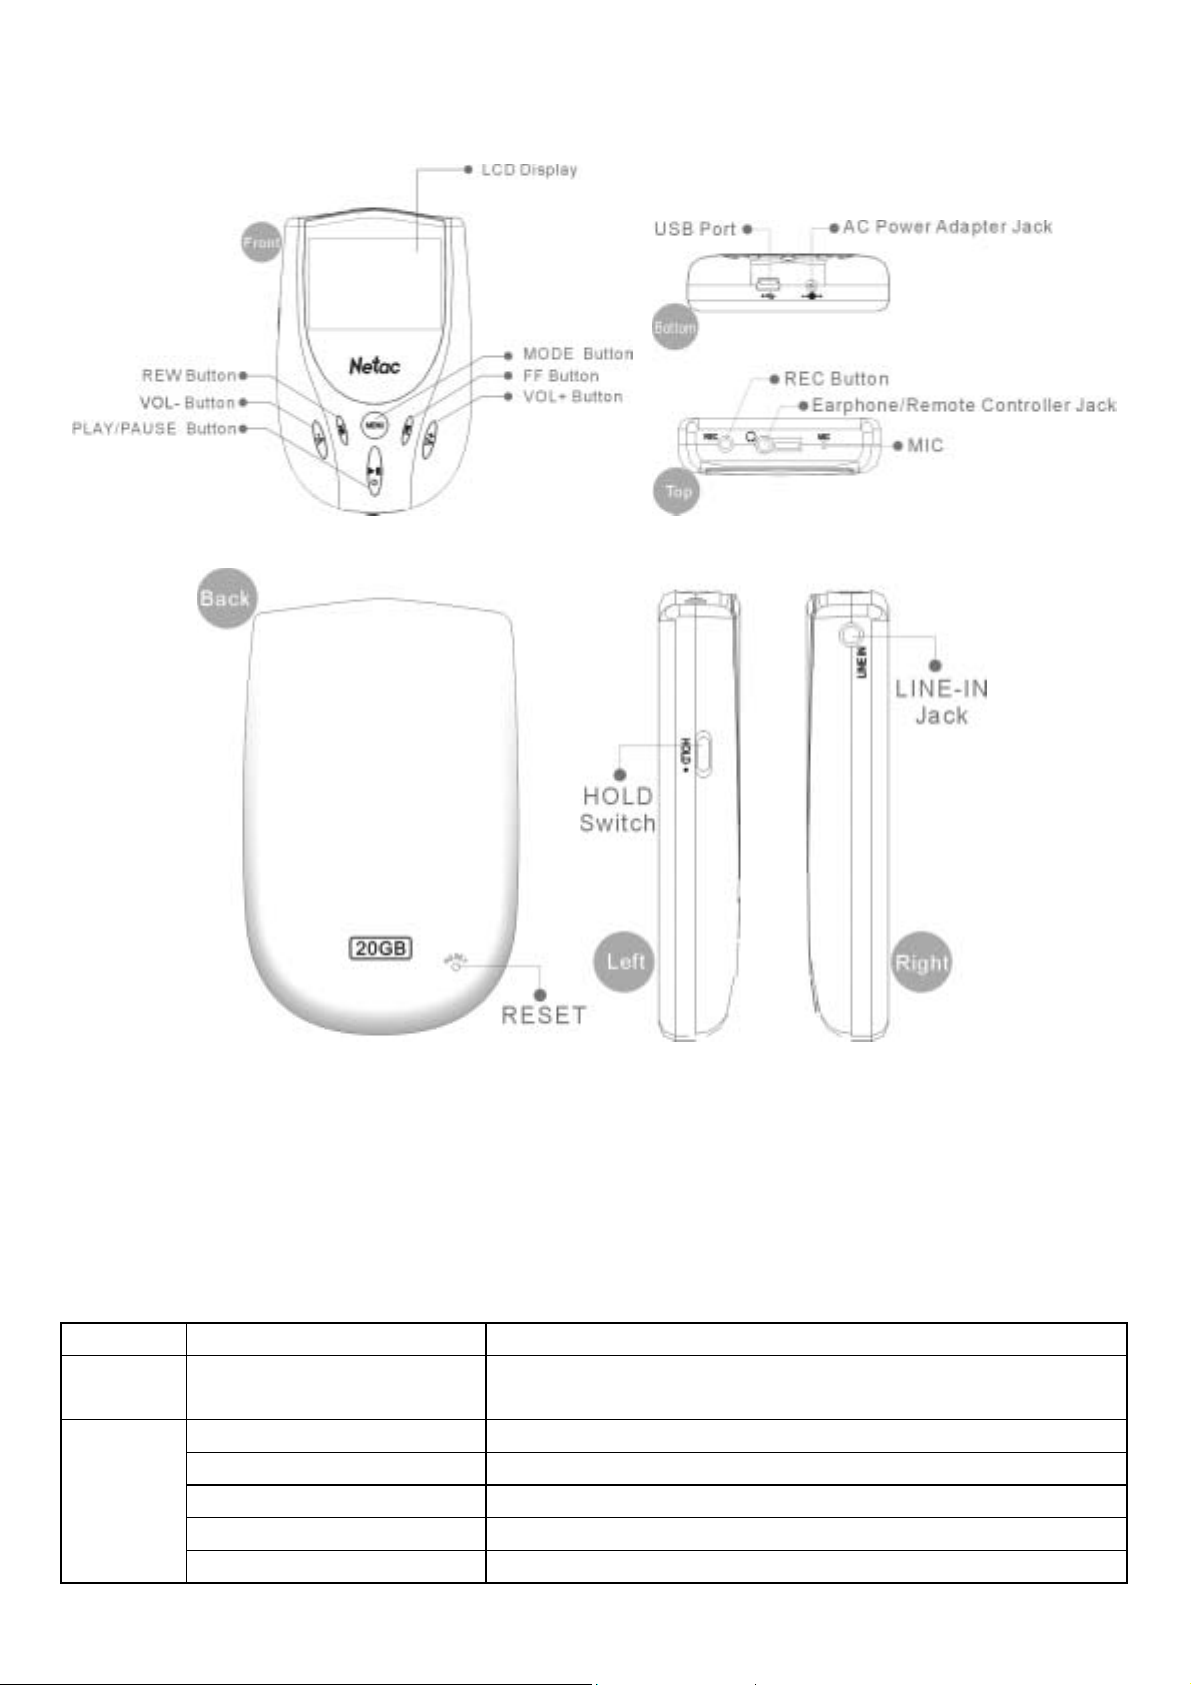
1.3 Name of Parts
1.4 System Requirement
IBM Compatible PC, Notebook with USB port
Windows 98/Me/2000/XP/Server 2003, Mac OS 9.x/X
USB Specifications 2.0/1.1/1.0
1.5 Specifications
Sorts Items Description
Display
Audio
Screen
Stereo Stereo
Earphone Output Frequency 50Hz ~ 15KHz
Earphone Output Power
SNR 90dB
Distortion Degree 0.03%
High definition array LCD with indigo blue backlight (160X105
lattice)
10mW + 10mW,28 Ohm

Music
Recording
F M
Power
Supply
Play Time
Others
Support ed File Types
ID3 Tag Ver1.0/1.1/2.0
EQ NORMAL, ROCK, CLASSIC, JAZZ, U-BASS, USER
Repeat ALL, SINGLE, DIR, SUB DIR, SHUFFLE
Music Management Play-list (M3U, BMK)
Recording Format
Recording Bit Rate MIC (32~128Kbps) LINE-IN / FM (64~320 Kbps)
Frequency Bound World(87.5 ~ 108 MHz), Japan (76 ~ 108MHz)
SNR 90dB
Receiving Mode Stereo, Mono
AC Adapter Input: AC 110 ~ 240V; Output: DC 5V, 2A
Battery Rechargeable Lithium Battery, 1400mAh, 3.7V
Charge Time Fast: 3 ~ 4 Hours; Normal: 8 Hours
MP3/WMA/OGG Above 15 Hours
Dimension 106.73mm X 67.48mm X 18.70mm
Weight 168g
Capacity 20GB
Memory 32MB
Working Temperature
MPEG1, 2, 2.5 Layer3 (8~320Kbps, VBR), WMA (8~192Kbps),
OGG (8~320Kbps)
MP3(32~320Kbps,44.1KHz)
0℃~60℃
2. Preparation
2.1 Battery Charge
Please connect AC power adapter with computer to charge for battery.
Normally, battery charge needs 8 hours, but 3~4 hours if you set “FAST CHARGE”. (Please refer to “4.6.7
SYSTEM” for details.)
If you want to check the charge status, please hold PLAY/PAUSE button to power on iMuz, and a battery icon
would appear on top left corner of LCD to indicate. The chargeable icon would twinkle ceaselessly while charging.
The battery level icon indicates how much battery life is left after charging.
Note: You can still use iMuz to progress operation like as playing track, listening to FM radio, recording or setting
during battery charging.
2.2 Connecting with Computer
2.2.1 Driver Installation
Please install driver on Windows 98 before using iMuz. The installation processes are as the following:
1) Boot your system to Windows 98.
2) Insert the installation CD into the CD-ROM driver.
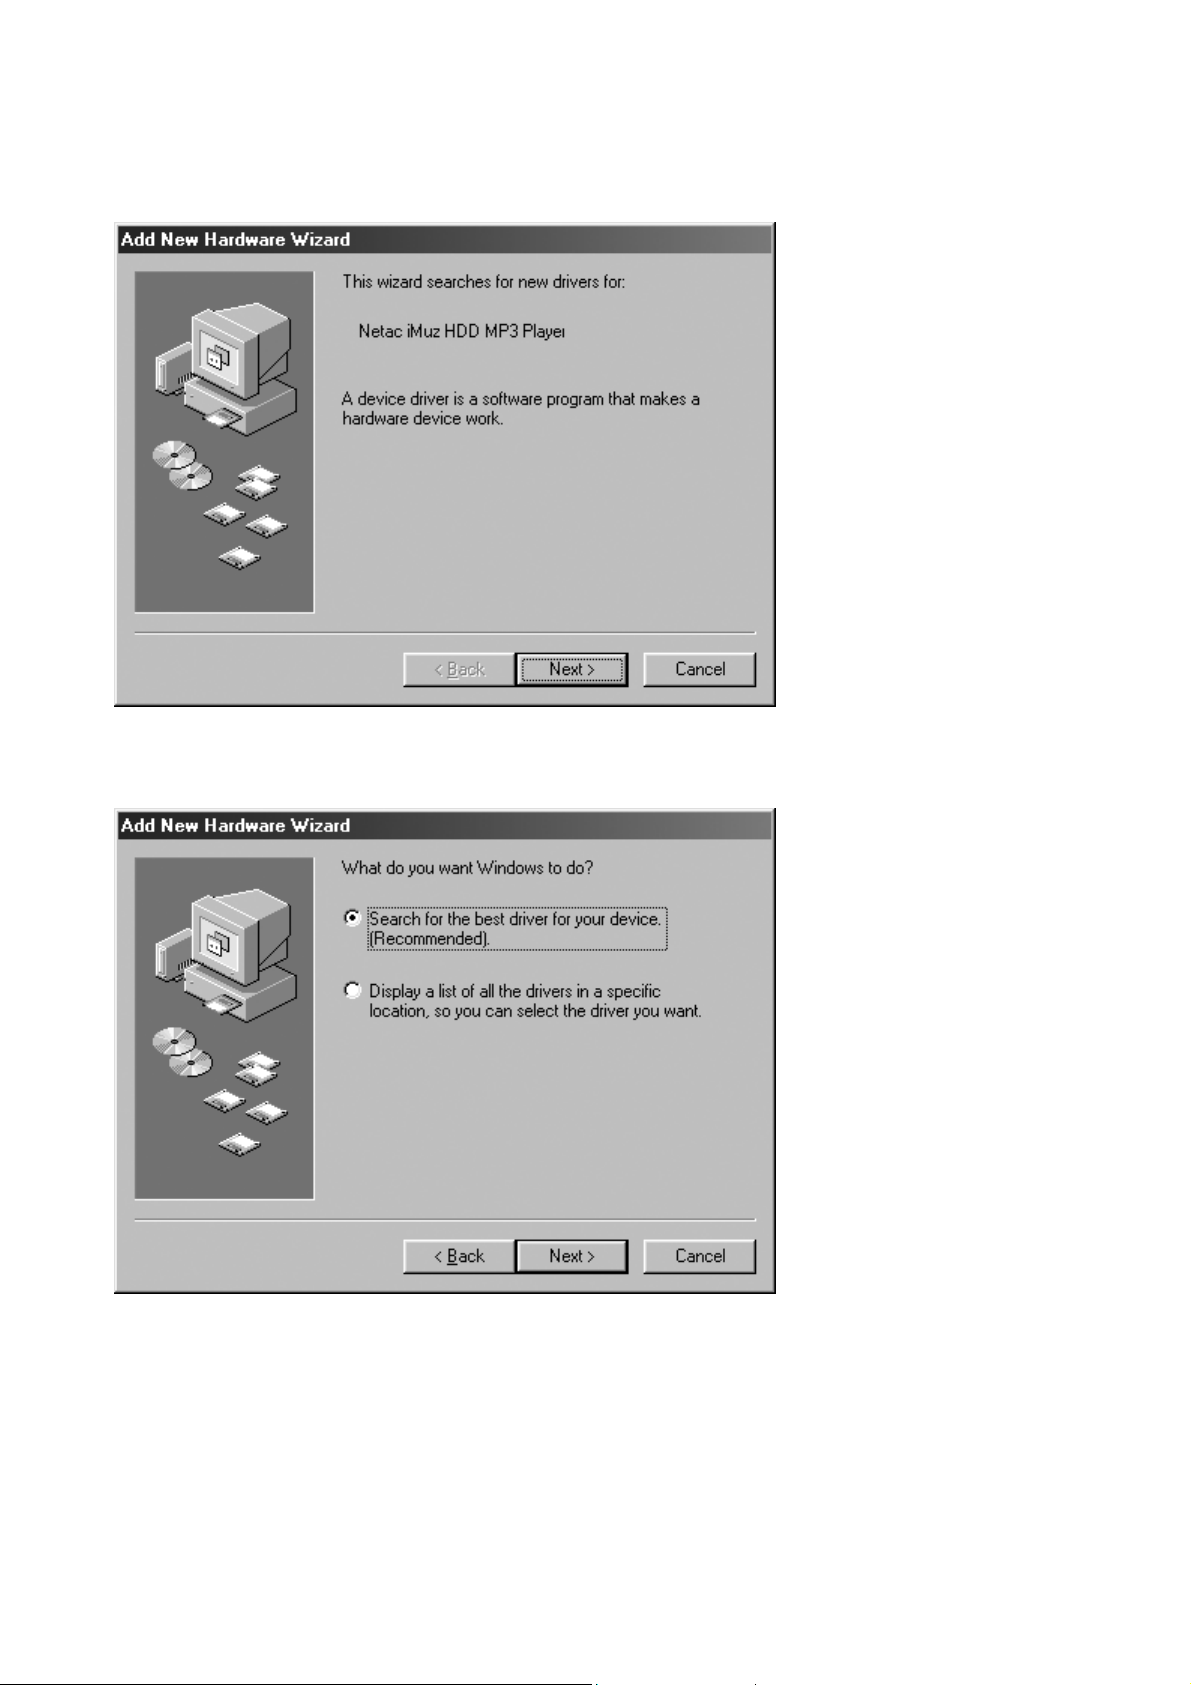
3) Connect iMuz with computer, the system would find an USB device automatically. “Add New Hardware
Wizard” dialog appears, click “Next” to continue.
4) Please select “Search for the best driver for your device. (Recommended)”, and click “Next” to continue.
5) Wizard shows where to locate iMuz driver. Only select “CD-ROM drive”, and click “Next” to continue.
 Loading...