

Page 1

LBM808Broadcast Monitor
User Manual
1 / 12
Page 2

2 / 12
Content
Chapter 1: Safety precautions -------------------------------------------3-3
Chapter 2: Item list--------------------------------------------------------------4-4
Chapter 3: Hardware connection
1. Rear view----------------------------------------------------------------------5-5
2. Port description --------------------------------------------------------------5-5
3. Connection diagram---------------------------------------------------------6-6
4. Specifications -----------------------------------------------------------------6-7
5. Dimension ---------------------------------------------------------------------7-7
6. RJ45-RS232 cable-----------------------------------------------------------8-8
Chapter 4: Front panel
1. Front view ----------------------------------------------------------------------8-8
Chapter 5: Basic operation introduction
1. Power switch -------------------------------------------------------------------8-8
2. Main source selection---------------------------------------------------------8-9
3. PIP source selection-----------------------------------------------------------9-9
4. Main settings--------------------------------------------------------------------9-11
Chapter 6: Control software-----------------------------------------11-12
Chapter 7: Copyright information---------------------------------12-12
Page 3

Chapter 1: Safety precautions
a) This device shall not encounter water sprinkle or splash, please do not
b) To prevent fire, keep this device far from any fire source.
c) If this device gives out any strange noise, smoke or smell, please
d) Signal cables are not hot swappable.
a) Please thoroughly read this manual before using this device, and keep
b) In the event of lighting or when you are not going to use the device for
c) Nobody other than professional technicians can operate the device,
d) To prevent equipment damage or electric shock, please don’t fill in
e) Do not place the device near any water source or anywhere damp.
f) Do not place the device near any radiator or anywhere under high
g) To prevent rupture or damage of power cords, please handle and
h) Please immediately unplug power cord and have the device repaired,
i. Liquid splashes to the device.
ii. The device is dropped down or cabinet is damaged.
iii. Obvious malpractice is found or performance degrades.
Danger!
There is high voltage in the processor, to prevent any unexpected
hazard, unless you are a maintenance personnel, please do not open the
cover of the device.
Warning!
place anything containing water on this device.
immediately unplug the power cord from receptacle, and contact local
dealer.
Caution!
it safe.
a long time, please pull the power plug out of receptacle.
unless they have been appropriately trained or under guidance of
technicians.
anything in the vent of the device.
temperature.
keep them properly.
when
3 / 12
Page 4
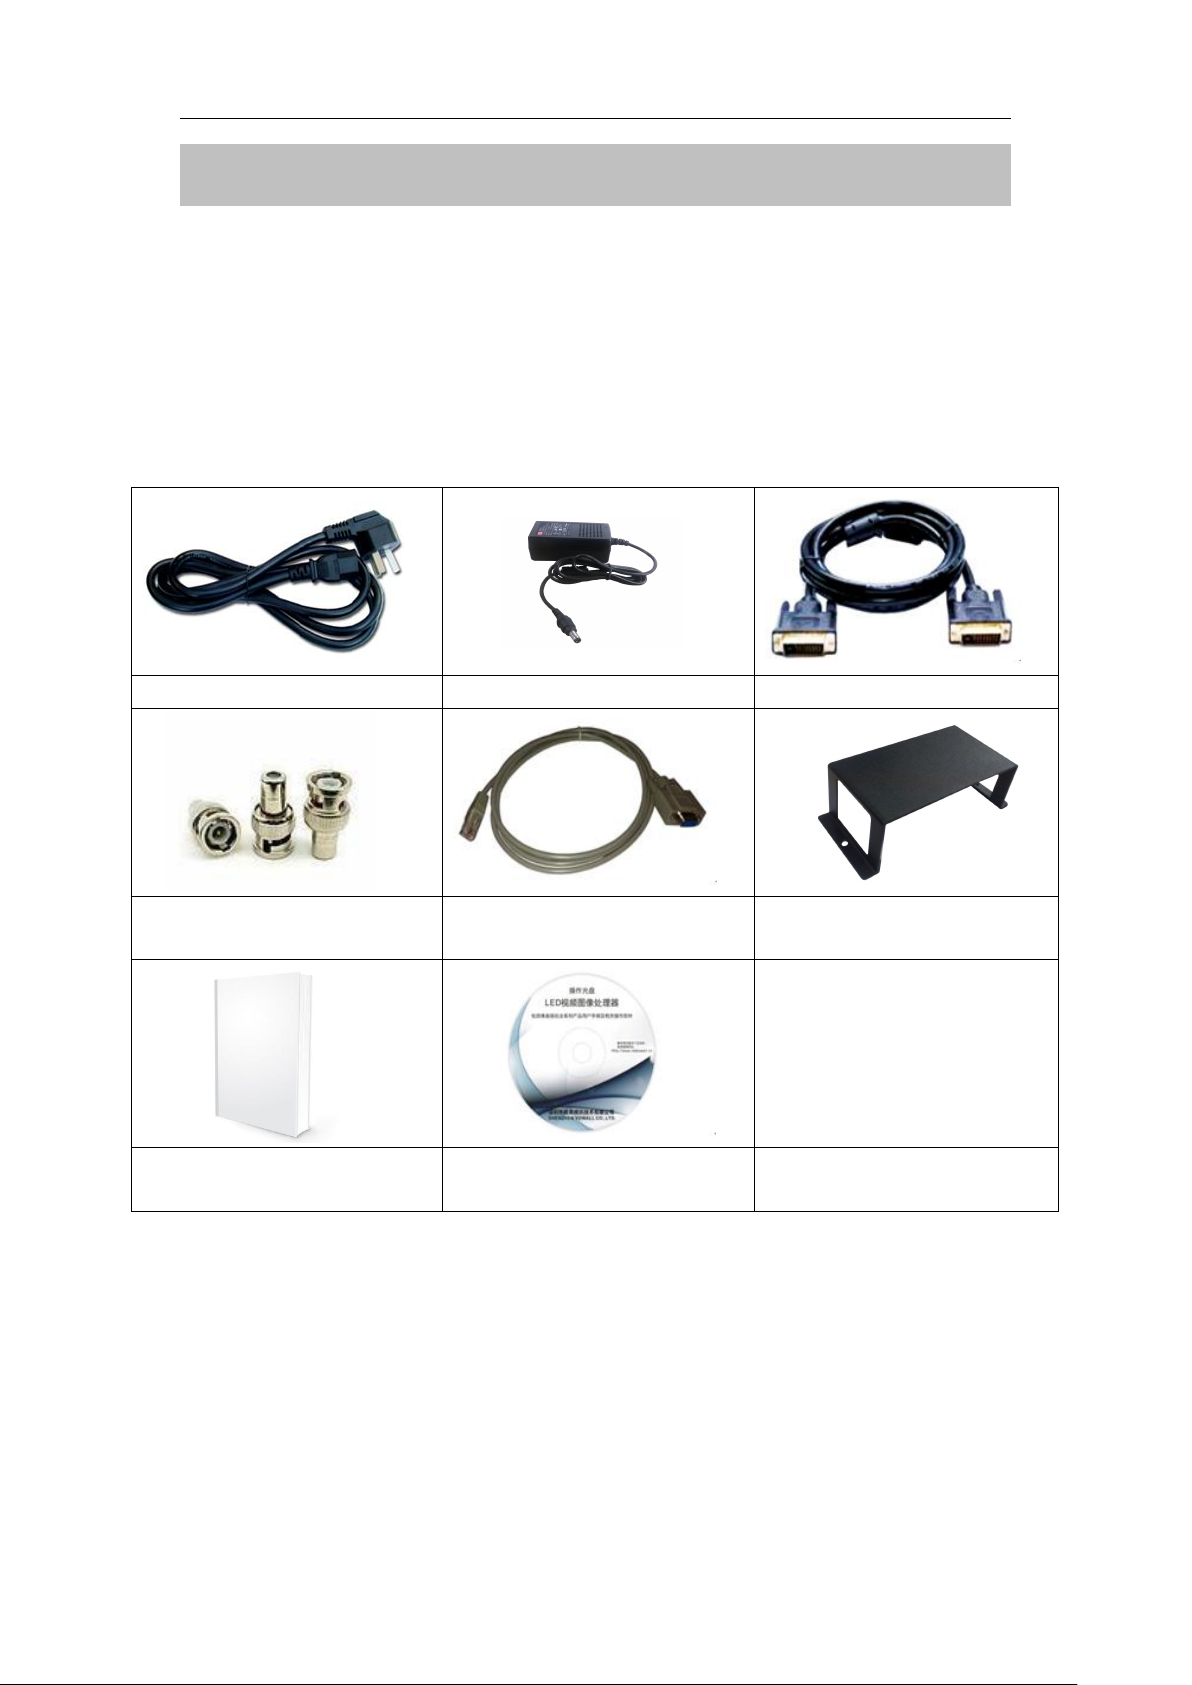
Chapter 2: Item list
1.5m Power cord X 1
Power adapter X 1
1.5m DVI cable X 2
BNC-RCA adapter X 2
1.5m RJ45-RS232
adapter cable X 2
Power supply
mounting bracket X 1
User Manual X 1
CD of control software
X 1
Please unpack the product with care, and then check whether all the following
items are included in the package. If anything is found missing, please contact
the dealer.
Standard accessories
The accessories supplied with this product may differ from the following
pictures, but they are applicable for the regions where you live.
4 / 12
Page 5

Chapter 3: Hardware connection
1. Rear view
2. Port description
1) Video input ports
Input ports include:
Port
Description
SDI
SDI/HD-SDI/3G-SDI digital signal input
VGA
PC analog signal input
DVI/HDMI
DVI/HDMI digital signal input (HDMI1.3)
Video
Composite video input (PAL/ NTSC)
2) Communication port
Port
Description
RS232
Serial communication port, RS232 level,
using RJ45-RS232 adapter cable
3) DC power input
LBM808 uses 12V DC power supply.
12345
6
1. SDI 2.VGA 3.DVI/HDMI 4.Video 5.RS232 6.Power
5 / 12
Page 6

3. Connection diagram
4. Specifications
Inputs
Number/Type
2×Video
2×VGA (RGBHV)
2×DVI/HDMI (VESA/CEA-861)
2×SDI (SDI/HD-SDI/3G-SDI)
Video Standard
PAL/NTSC
Composite Video
Amplitude/Impendence
1V (p_p)/ 75Ω
VGA Format
PC (VESA)
≤2304×1152_60Hz
6 / 12
Page 7

VGA
Amplitude/Impendence
R, G, B = 0.7 V(p_p)/ 75Ω
DVI Format
PC (VESA)
≤2304×1152_60Hz
HDMI-1.3 (CEA-861)
≤1920×1080_60Hz
SDI Format
SMPTE 259M
SMPTE 292M
480i_60Hz
576i_50Hz
720p,1080i,1080p
Input Connectors
Video: BNC
VGA: 15-pin D_Sub(Female)
DVI/HDMI: 24+1 DVI_D
SDI: BNC/ 75Ω
Output Display
LCD panel parameters
Size: 8”
Resolution: 1280×800_60Hz
Aspect ratio: full /4:3
Backlight brightness: 350cd/m2(adjustable)
Contrast: 900:1
Viewing angle: H/V 890/89
0
Others
Control port
RS232
Input Voltage
DC 12V
Maximum Power
Consumption
≤24W
Environment
Temperature
0-45 ℃
Environment Humidity
15-85%
Product Dimension
482.6mm(L) X 54.5mm(W) X 176mm (H)
Package Dimension
530mm(L) X 155mm(W) X 250mm (H)
Weight
G.W.: 4.0Kg, N.W.:2.8 Kg
5. Dimension
7 / 12
Page 8

8 / 12
6. RJ45-RS232 adapter cable
Page 9

Chapter 4: Front panel
1. Front view
1) Power: power on or off.
2) PIP: turn on or off PIP. PIP signal can be same as or different from
main signal.
3) Sources: signal source selection. When PIP is on, press this button
to select the PIP signal. When PIP is off, press this button to select
the main signal.
4) Menu: press this button to enter the setup menu.
5) Knob: rotate the knob to select a setting or adjust parameters.
6) OK: press this button to confirm the operation.
1. Power switch
Press “Power” to power on or off. For example, we can power off to
leave the device on standby.
2. Main source selection
Press “Sources” to enter main source selection menu. Rotate the
knob to select a source and then press “OK” to confirm.
3. PIP source selection
Press “PIP” to start the PIP mode and press “Sources” to enter PIP
source selection menu. Rotate the knob to select a source and press “OK”
Chapter 5: Basic operation introduction
9 / 12
Page 10

10 / 12
to confirm. The display is as follows:
4. Main settings
Press “Menu” to enter the main menu, rotate the knob to select a
setting and then press “OK” to enter the submenu. Rotate the knob
again to adjust the parameters and press “OK” to confirm. Press “Menu”
again to return to the main menu. The display is as follows:
1) Lang/
语言
:
OSD menu language setup and it supports Chinese and English.
2) Brightness:
Adjustment range of brightness of LCD is 0~100. The default is
Page 11

50.
3) Contrast:
Adjustment range of contrast of LCD is 0~100. The default is 50.
4) Saturation:
Adjustment range of saturation of LCD is 0~ 100. The default is
50.
5) Sharpness:
Sharpness of LCD can be set as normal or sharp.
6) Aspect ratio:
Aspect ratio of LCD can be set as full or 4:3.
7) VGA Auto:
When the current input signal is VGA and the signal works properly,
press “OK” to confirm automatic adjustment.
8) Backlight:
Adjustment range of backlight of LCD is 0~100. The default is 50.
9) PIP Mode:
Dual display mode includes Picture-in-Picture (PIP) and
Picture-by-Picture (PBP).
10) PIP Position:
PIP location can be set as top-left, top-right, bottom-left or bottom
right.
11) Factory Reset
:
This will reset the device to factory default settings.
Chapter 6: Control software
11 / 12
Page 12

1. Connect: device connection.
2. Source: select the main source.
3. PIP/PBP: turn on or off PIP or PBP.
4. Aspect ratio: full screen or 4:3.
5. PIP-Source: select the PIP source.
6. PIP-Position: select the PIP position.
7. Settings: set brightness, contrast, sharpness and etc. If the value set is
beyond adjustment range, users will be prompted for invalid operation.
Chapter 7: Copyright information
The copyright of this manual is owned by SHENZHEN VDWALL CO.,
LTD., unless with prior consent of VDWALL, nobody is permitted to
copy or use any part or all of the information contained herein.
This manual is provided for reference only, VDWALL reserves right
to change the product appearance, dimensions and specifications
from time to time without notice to users.
12 / 12
 Loading...