

Page 1
eonego
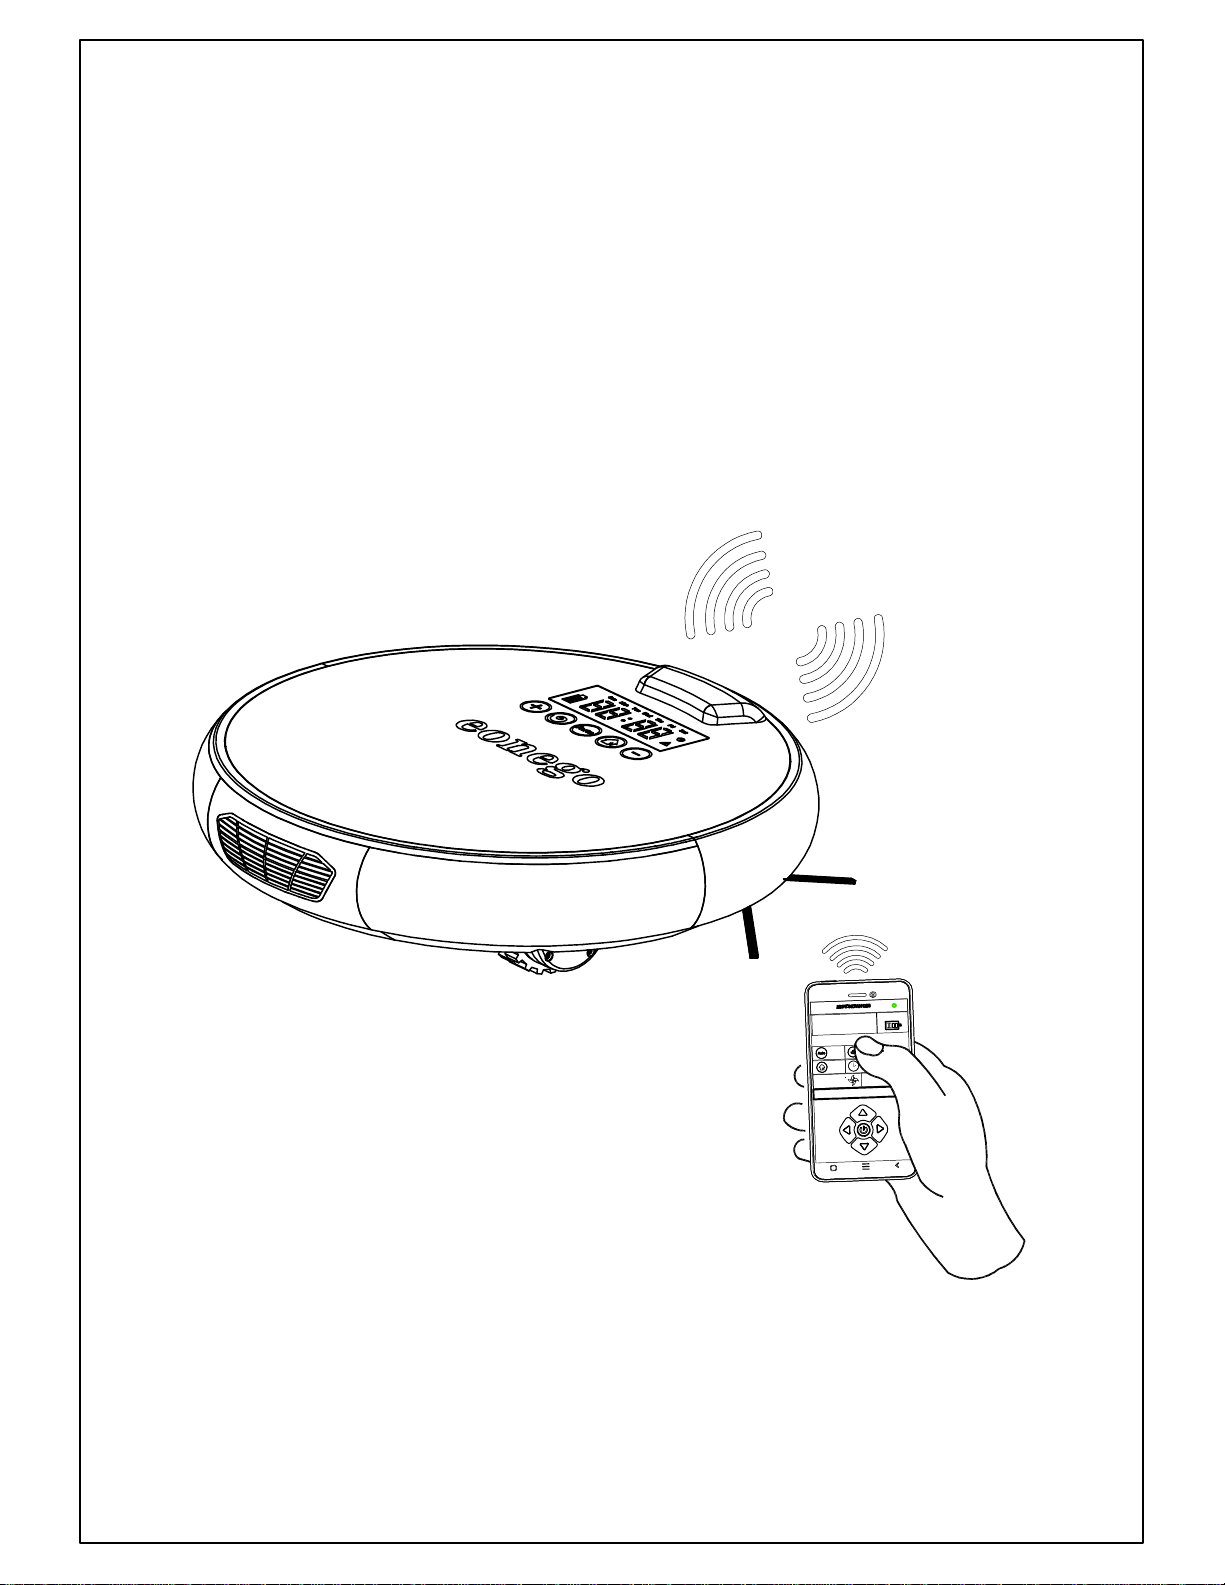
EWG-108 Intelligent Robot Sweeper
User Manual
返回
模式设置
风机开启
方向控制
当前状态
自动
清扫
自动
回充
电池电量
内网
Thanks for choosing eonego intelligent household
product, before using, please read this manual.
Page 2
Catalogue
1. Safety instruction
1-1.About the user manual
1-2.The power supply
1-3.Suitable usage environment
2. Attention before useage
2-1. Attention before useage
2-2. Safety standards
2-3. About Package
2-4. Deal with problem
3. Product introduction
3-1. Structure
3-2. Performance
3-3. (APP) Install 、Login in,(WIFI)Restore
4. Operation Instruction
4-1. Side brush assembly
4-2. Battery Recharge
4-3. Turn On/Off
4-4. Key Function
01
01
01
01、02
02
02
03
03
03
04
04
05
06-09
10
10
10
10
11
5. Charging base
6. Remote control
7. Maintenance
7-1. Dust box
7-2. Primary filter
7-3. HEPA filter
7-4. Mop
7-5.Middle Brush
8. Packing List
9. Product Specifications
10. Install、Replacing the remote control battery
11. Failure checking
11、12
13
14
14
15
15
15
16
17
17
18
19、20
12. Others Questions
21
Page 3
To Respected customers :
Thank you for choosing our intelligent robot cleaner ,this is really a meaningful
intelligent cleaner,It could easily help you sweep your room and offer a comfortable,
healthy enviroment even though you were not at home .
1. Safety instruction
1-1 About the user manual:
Before using the cleaner please follow the below basic safety precautions:
>>>Carefully read all the contents of this manual, using the machine according the man nul.
>>> Properly keep the instructions, if you will use this product transfer to the third party,
please send the instruction attached along with the product.
>>> Any wrong operateion against the user manual may result in personal injury or damage
the product,please take care when use it.
Attenion:
Please don't try to tear-down this cleaner by yourself.there's no part that user
can repair by themself<including the romote control>.And its only suitable
!
family environment to use .Both industrial or outdoor is not suitable.
more cannot be used on the surface of a liquid.
1-2. The power supply:
>>> A set of rechargeable batteries was used inside of the cleaner, charge with
specialized device.
>>> Please check and confirm the marked brand of the power supply voltage, ensure
the cleaner working in the suitable status .
>>> If the adapter's power cord or plug is damaged, please stop using it. Contact with our
company's after-sales service department or the authorized person to replace or repair.
>>> Don't use the power cord to drag or move the charging base, nor use the power cord
as a handle .
>>> Do not twist the power cord, and don't hold the power cord at the closing or place
heavy objects on the power cord.
>>> Don't let the power cord in contact with hot surfaces or sharp surfaces.
>>> Be sure to remove the water tank when you are charging, so as not to cause leakage .
>>> Don't drag out the power cord from the socket by the way of pull the code directly.
>>> Don't use wet hand contact power plug or cleaner.
>>> Long time not to use the charging base, please drag out the power plug from the socket.
>>> Use dry cloth to clean the dust on the plug oftently .
1-3. Suitable usage environment:
>>>The cleaner is only working in indoor environment suitably, including wood ﹑rubber
floor, ceramic tile, wool carpet shortly , etc., not suitable for the long-haired carpet.
>>>Cannot be used for cleaning below conditions:
--- Water ground (including flammable liquid), for example: wetland board,
bathroom, shower room and other moist environment.
--- The stairs.
--- Furnace with open fire.
>>> When the ground have the following material,The cleaner is prohibited to use :
Page 4
--- The objects may cause a fire ,such as c igarette ash that not put out, burning
cigarette butts, or a match.
--- Water or other liquid, especially detergent, kerosene, gasoline, paint, alcohol,
perfume,carpet cleaning, floor cleaning solution. Internal moisture
or water may cause short circuit machine.
--- The laser printer, copier toner, toner. These objects may cause fire or explosion.
>>> When use the cleaner,please don’t make it near the Hot source such as oven
or fireplace,since this may result in Deformation and aging .
.>>> Do not use machine in a potentially dangerous environment. For example, gas station,
oil depot, inflammable and explosive chemical plant.
>>> Don't use machine in outdoor. As,its will casuse the cleaner damage because of the
rain or mud, dust get into the internal space.
>>> Don't try to repair or change its performance by yourself.
>>> Don't fall, throw or extrusion the cleaner.
>>> Don't get body wet, otherwise a short-circuit that make a damage will occur.
>>> A daily maintenance is necessary.Please placing it in a clean place.
>>> Don't expose the cleaner to extremely high or low temperature environment.
It's not suitable for long-term in lower than 0 ℃ or higher than 40 ℃ environment
to use and preservation.
>>> Don't put it in liquid.
>>> Don't put it in lighted cigarettes or near open flame.
2. Attention before use:
2.1 Attention before use
>>> Please pay attention to its working space when the first time to use this cleaner,
To avoid it stop working ,please remove its barrier .
>>> For the foreseeable problems that may occur in the cleaning, should be ruled out as
soon as possible. Such as:
--- will easily upset aside the objects in a safe place.
--- whiskers on the edge of the carpet to turn over to a safe place.
--- vertical to the ground of the tablecloth, the curtain should try to make it not to
touch the ground.
--- objects to cut off the power supply with open flame.
---the power cord of the winding on the ground and the mobile obstacles.
Before cleaning,please make sure whether the brush,side brush has been
installed inside the product successfully or not .
>>>Ensure the dust container is empty, and installed in the suitable place.
>>>Before cleaning, need to check if the prosecutor sensors has been wiped clean.
>>>If you only need to clean a single room, please leave this room 's door close.
Attention:
If their is a reflective ground whose height of the steps drop more than 8
centimeters(e.g., glass), the cleaner have the potential to fall down the steps.
we are suggest that place with a layer of no reflection characteristics of cloth
!
or carpet in low order.and If your home is a complex Structure or with stairs,
To avoid accident occur,please pay attention to added a protective bar on
the edge of the stairs.
Page 5

2.2 safety standards
>>> This product can't be used by the people of the mentally disabled or lack of
common sense, unless there is the one responsible for their safety in their
supervision or guidance when using this product.
>>> Properly keep the product, in children and people can reach the outside without
judgment, products work, especially need to be careful.
>>> This product is in working status, so as to prevent down others, please let
everyone in the room know this product is working.
>>> Please do not use this product as a toy to play, when children or pet near here,
please pay close attention to.
>>> If you want to change the rechargeable battery inside the host, please contact
the service department. If you use the wrong type of battery replacement, likely
to cause explosion.
>>> If you use the my company make the host of original battery and charge, there
may be a potential danger, therefore cause damage to the host is not in the warranty.
>>> Reasonable processing this product, please old batteries, batteries contain
dangerous environment of harmful substances, please do not arbitrarily discarded,
please follow the local environmental protection regulations, throw it to the
prescribed recovery site.
2.3. About the package
>>> Do not use this product packaging materials as household garbage discarded.
Please send packing material to a proper collection points in order to use these
resources again.
>>> This product packaging bags and plastic bags have led to the danger of suffocation,
should avoid to children to play, do not where children can touch.
2.4. Deal with problem
>>>If the power adapter, host and other accessories fails, please do not repair or
disassemble machines. Otherwise may cause personal injury. Please contact
me or my company after-sales service department of professional maintenance
organization is designated,By professional maintenance staff to provide after-sales
service and maintenance.
Page 6
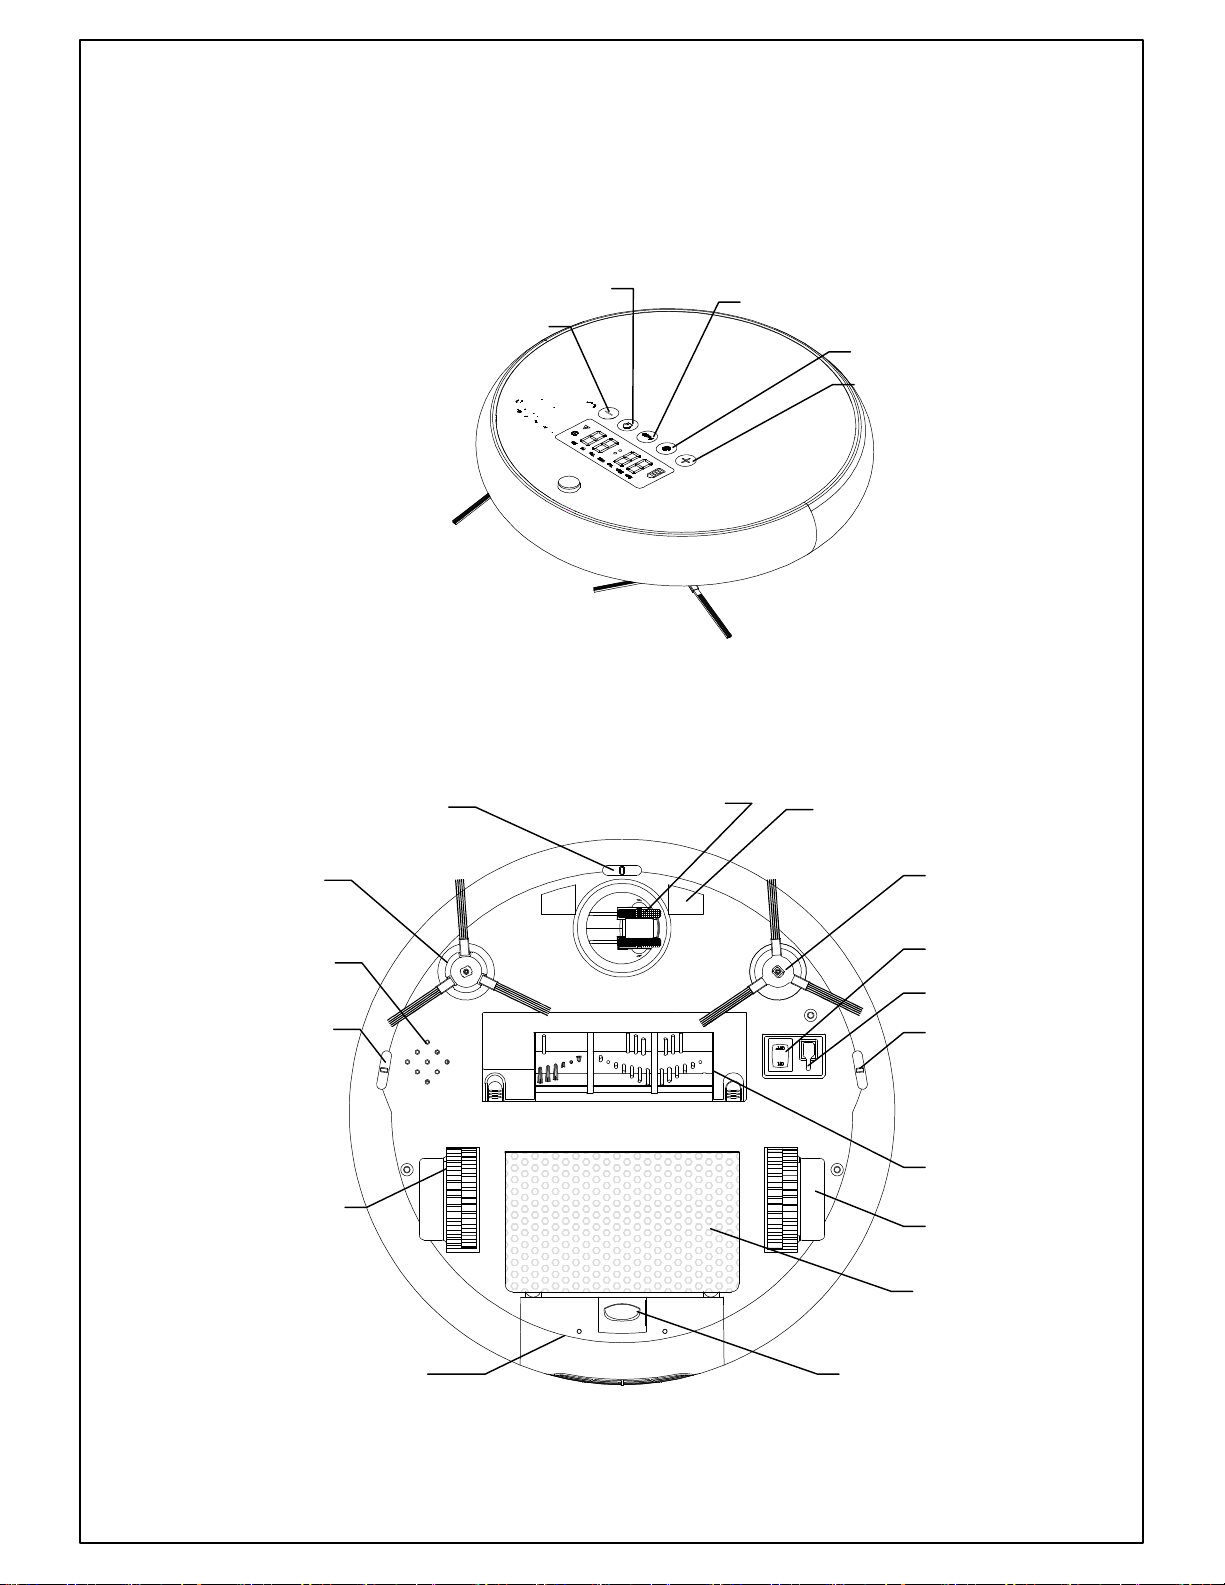
3. Product introduction
Charging socket
3-1. Structure:
3-1.1 Control Buttons as the figure(1) shown .
Auto recharge
Auto cleaning
Setup button2
3-1.2 Bottom structure as shown in figure (2).
Cliff sensor
Universal wheel
Spot cleaning
Setup button1
Figure(1)
Charging contact sheet
Right side brush
Speaker
Cliff sensor
Right wheel
Dust-container
Left side brush
Power switch
Cliff sensor
Middle brush
Left wheel
Mop
Buckle
Figure(2)
Page 7
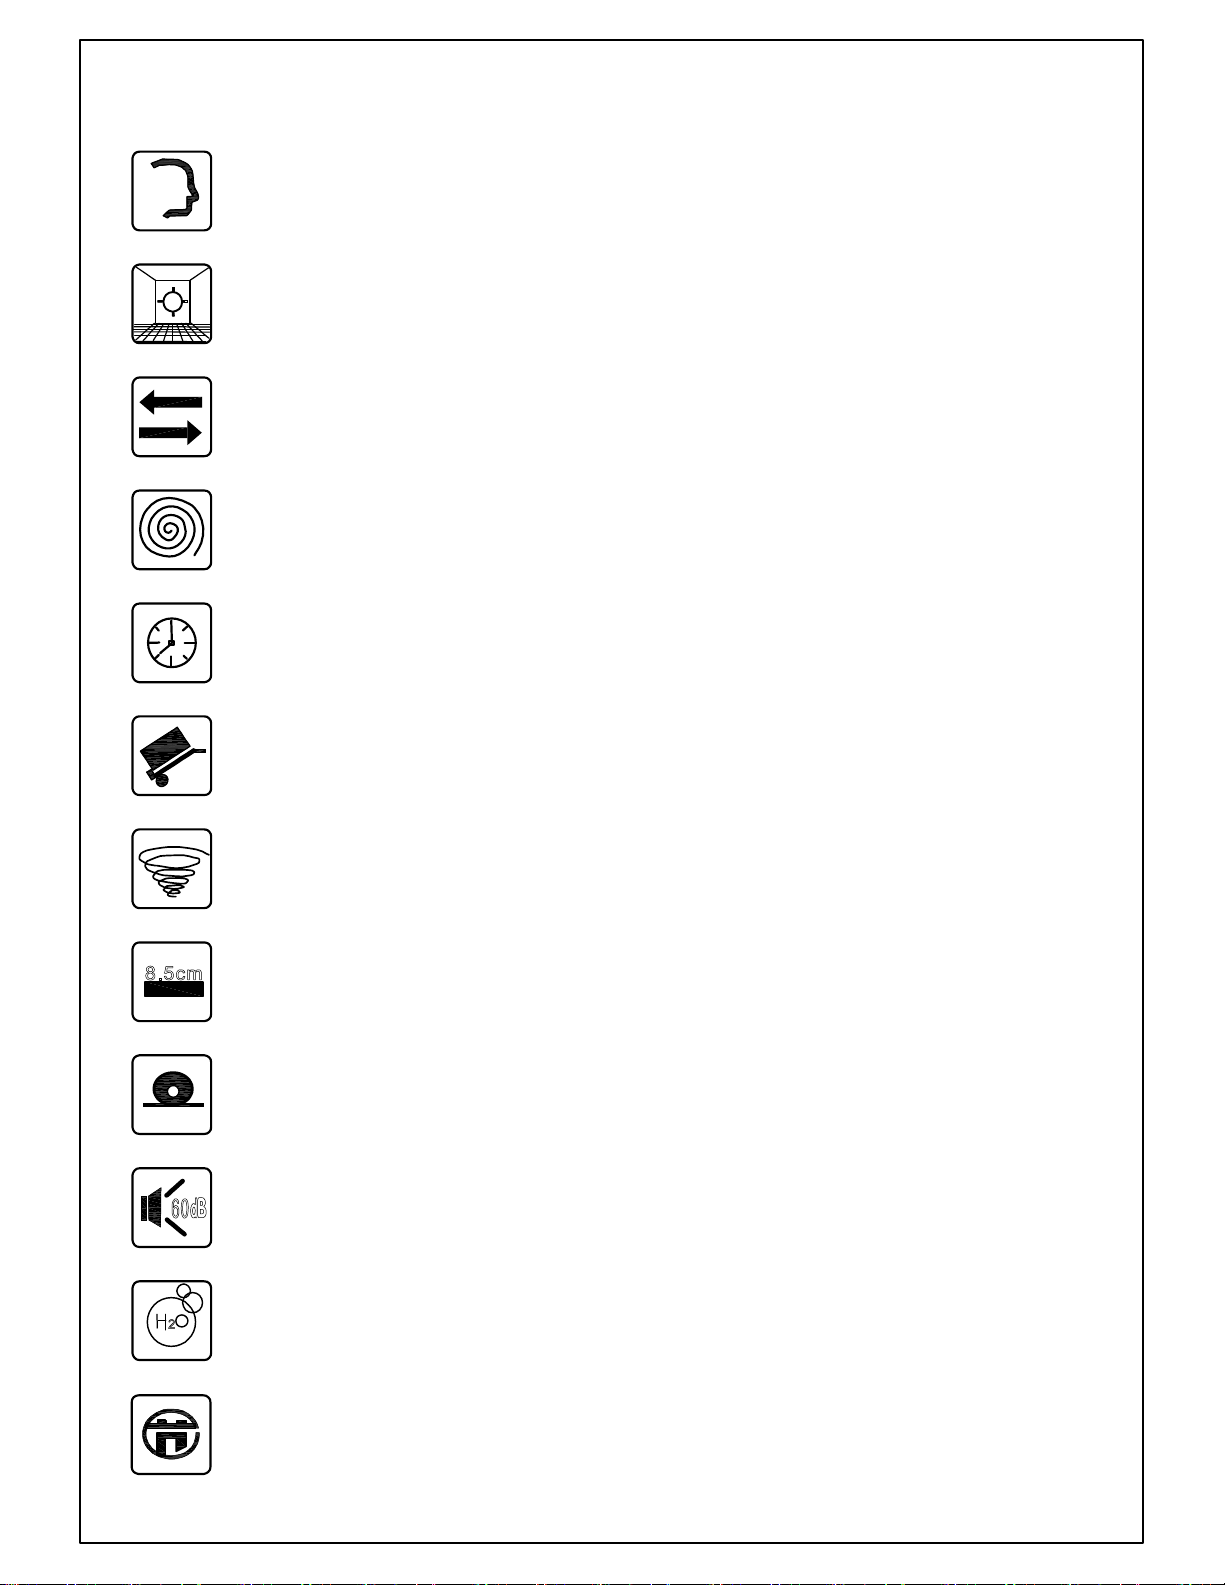
3-2 Performance
The Intelligence Function
Cleaning the room just need click one button, without need monitoring.
Navigation function
Automatic route planning, sweep every place of the room .
Automatic charging (can also choose to manually)
The cleaner can automatically search for the charging base when it is low power .
Note: use this function must be equipped with the charging base.
Spot cleaning
After set this functin, cleaner will sweep the garbage areas with strong power.
Make an appointment to clean (optional)
According to your appointment time to start work.
Note: use this function must be equipped with the charging base.
Fall prevention function
Can prevent the cleaner from the table or tumbled down to the stairs.
A whirlwind brush
cleaning efficiency is high because of this structure.
Thinly body
can be easily cleaned into the bottom of the bed or sofa.
Softly tire design
Wheels with software materials, will not scratch the floor or carpet.
Low noise design
far below the ordinary vacuum cleaner
Environmental protection function
The built-in Primary filter、HEPA filter, effectively filter dust, purify the air.
Safety and energy saving
24 w ultra-low power.
Page 8
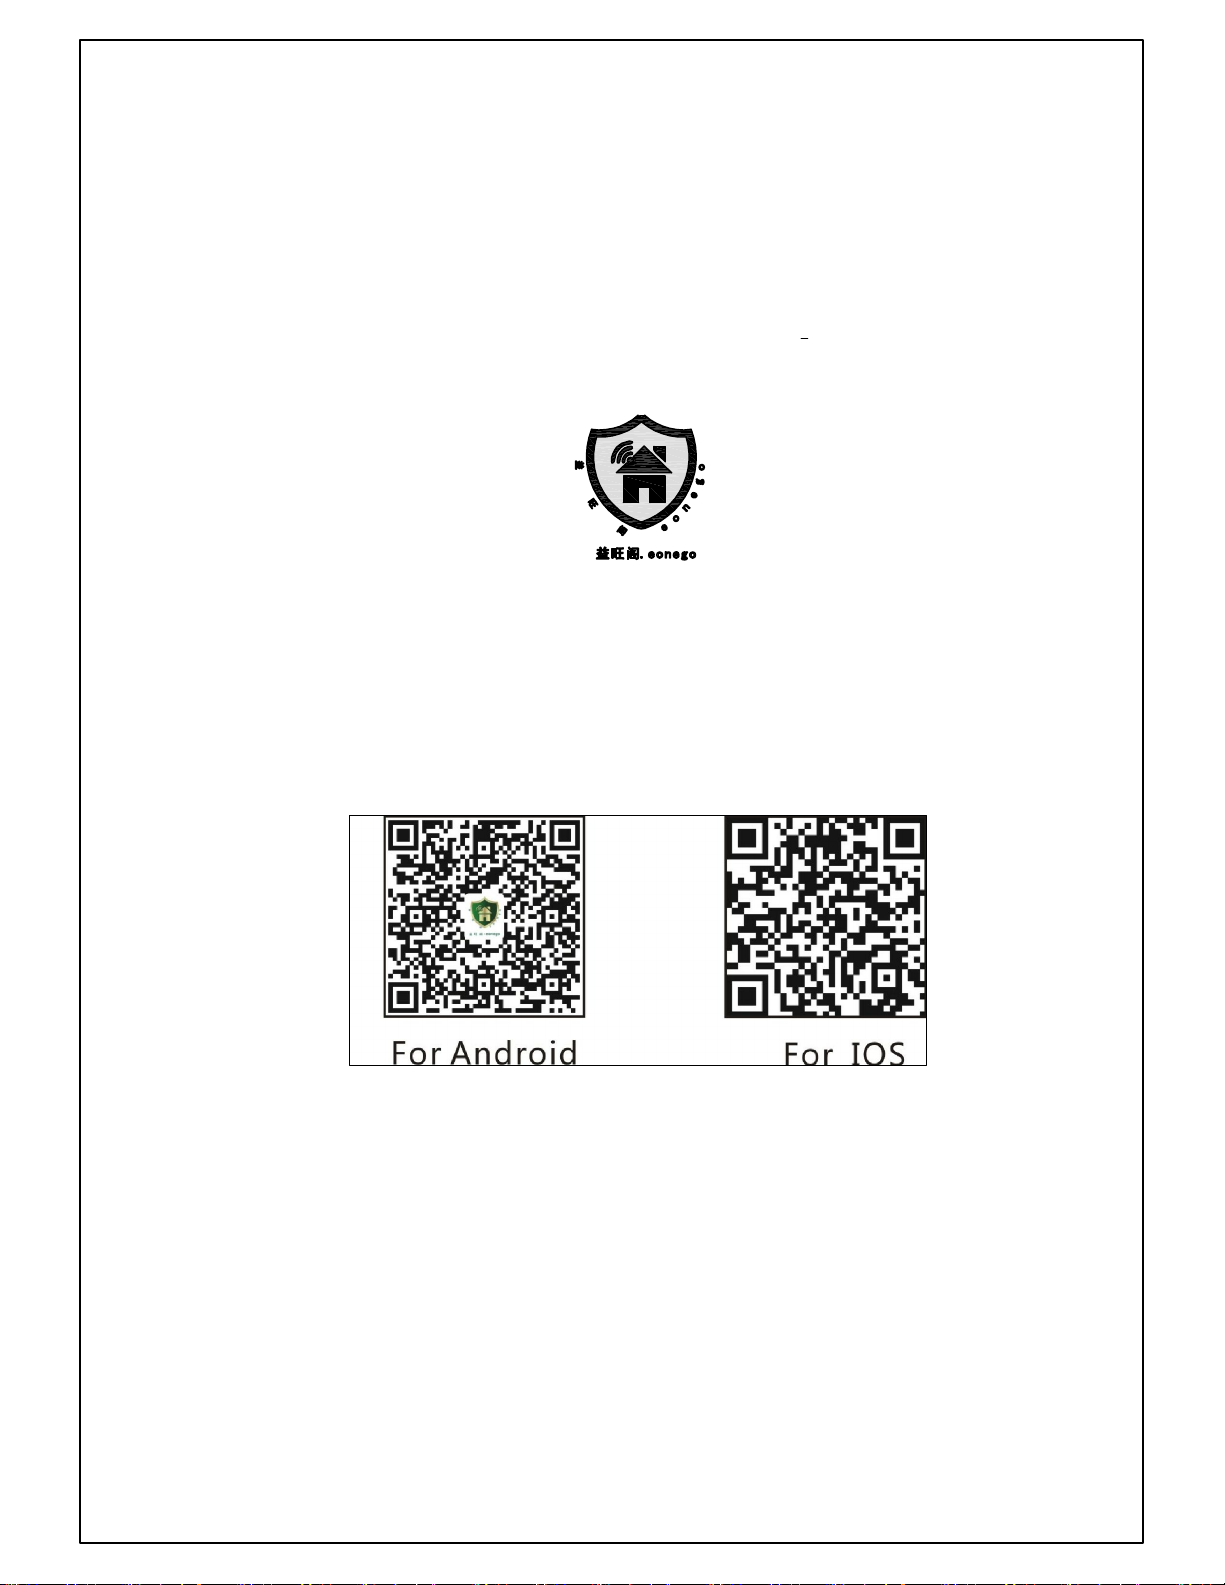
3-3. (APP) Install 、Login in,(WIFI)Restore
3-3.1 (APP) Install
>>>Support remote operation by mobilephone with"APP"
<First: ensure your phone is connect with your home WIFI network>
<Second: ensure the cleaner is power-on,and entered the standby mode>
>>> The "APP" symbol as shown in figure (3).
Figure (3)
For Android Mobile-phone:
1. Unicom a WIFI network with your mobilephone.
2. Scan the QR code as shown in figure (4).
3. Install the "APP"
Figure (4)
IOS Mobile-phone:
1. Unicom a WIFI network with your mobilephone.
2. Scan the QR code shown in figure (4).
3. Install the "APP"
Another way to Install the "APP":
Search "EONEGO Micro Home" in APP store,and
then click install.
Page 9

3-3.2 <APP>Login in
点击
All equipments
Service Name
Step1:Click""EONEGO
Micro Home"APP
Return
SSID:XXXXXX<Service Name>
Password: YYYYYY
Authmode:
ConfigureWIFI
Show Password:
Start
Step2: click"Configure WIFI"
Click
WIFI Password
Scan local device
Configure WIFI
Help-Customer service
Return
SSID:XXXXXX
Password: YYYYYY
Authmode:
Configure WIFI
Show Password:
Start
Click
Click
Step3:SSID will connect to your
service,Enter your Password,and
then click“Start”.
Start Configure
Successful
I have know
Step4: Start Configure(A little time you
should be waiting ralate to your network
speed).When it's finish,Click"I have
know",and then,click"Returrn".
Page 10

All equipments
Note:Device number will be
subject to actual display.
Click
Click
All equipments
Equipment:3C:33:00:0B:77:EE(0)
Click
Click
Scan local device
Configure WIFI
Help-Customer service
Scan local device
Configure WIFI
Help-Customer service
Step5: click"Scan Local Device" Step6 : Click "Equipment"Code
Return
Please input password
Password:
Next step
Offline
Return
Status Bar
Mode Set
Auto
cleaning
Auto
recharge
Fan control
Direction control
Battery capacity
Spot
cleaning
Time
setting
Follow the Wall
Intranet
Timing
cleaning
Speaker
control
Step7:Please enter the password
<The default password:8888>,and
then click"Next step".
Step 8:Entry "APP" User Operation
Interface
Page 11

3-3.3 <WIFI>Restore the factory Settings ( as shown in figure (5). )
( Warm prompt: After the success configuration, It's will save the current information.When the
router replacement or in the home wireless SSID is changed, you need to reset the WIFI
module to restore factory Settings .)
Flashing area
(1)、Press the "setup key 1" and "spot cleaning
" key at the same time. you will hear three"di 、di 、di"
sounds at about three seconds later.then,fingers left,"week"
symbols will continue to flashing.
(2)、About 10 seconds later when you hear two sounds,
Cleaner enter into standby mode, WIFI module will be restore
to factory Settings.
(3)、Enter the APP UI, click "configuration WIFI" .
Figure (5)
3-3.4 "APP" UI
Spot cleaning
Setup key1
Return
Working Status
Mode Set
Fan Control
Direction control
Forward
Turn left
Return
Status Bar
Mode Set
Auto
cleaning
Auto
recharge
Fan control
Direction control
Battery capacity
Spot
cleaning
Time
setting
Follow the Wall
Intranet
Timing
cleaning
Speaker
control
Turn Right
Fall back
Step 8:Entry "APP" operation interface
Figure (6)
Page 12

4. The usage of product:
4-1 The installation of sweeping brush:
Get the side brush from the package,push in deep force directly to the side
brush Mounting holey, as shown in figure (7).
Pushing Down
Pushing Down
Figure (7)
4-2 Battery Charging
Before using the product, please recharge machine 4 hours, confirm the battery in a
saturated state, as shown in figure (8).
The charging machine has two ways: can use charge back any seat, also can charge
directly. Insert as picture(2) the machine charging hole soft gel gently poke, and then
connect the power adapter charging hole for charging machine.
High Voltage Danger
Note:
Figure (8)
1. Do not use this machine for a long time, please do good to save the machine
and its accessories (machine power switch "O" word press).
2. Often do not use the machine, timing charging is necessary (intervals of no
more than 15 days is the best).
4-3. Power On/off
Open the power switch to "I" word press at one end (press the "O" words said
shutdown), as shown in figure (9).
Power switch
Figure (9)
Page 13

4-4 Control Panel
4-4.1 . Set time: in the case of standby press the "+" key (" + "key lights), enter the
time setting, in set mode according to the local clearing key or recharge key, switch
around four Numbers and the week, press the" + "key or" - "button to adjust number
or a week, Press the "auto" button to confirm the current Settings and make sure
after the completion of the machine into standby mode, the button lights on.
4-4.2 . According to the local clearing, machine start cleaning within a certain scope.
4-4.3 . According to the automatic
cleaning, automatic cleaning the key
Auto cleaning
Setup button1
Setup button2
Auto recharge
Spot cleaning
Figure (10)
under the light machine start,
according to the actual terrain as intelligent switch cleaning mode, such as
bow type cleaning, spiral, along the wall cleaning, around the pillar.
4-4.4. The automatic recharge: when press the "recharge" back to the key under
the light, machine into looking for automatically recharge mode, find
back filling machine entered the stage of charging, increasing power indicator
light cycle, said in charge. After a full charge into standby mode automatically.
4-4.5. Set the reservation methods: under the condition of standby press
"-" button to enter setup time mode, press "local" cleaning or "recharge" key
switch around four Numbers (press the "+" or "-" key to change the time
or weeks), adjust good reservation time and after one week According to "
automatic" confirm Settings, and then the machine into standby mode, key
light full on. To make an appointment time to, machine immediately activate
automatic cleaning function. (such as: set up the appointments until ten o 'clock,
selected week 1 and press automatic cleaning, then choose 2 weeks according
to the automatic cleaning, then automatic cleaning out and save the reservation
mode, every week 1, week 2 of the 10 o 'clock sweeping machine automatic cleaning
the room.) Note: this working mode must be equipped with recharge, just can use.
4-4.6. Border cleaning: standby, please press " " and" - "key at the same time, the
machine into border cleaning mode. If you need to other models,
please press the other relevant key and exit border cleaning mode.
5. Charging base
5-1. The structure, as shown in figure (11).
Charging contact sheet
Indicator Light
Adapter socket
Figure (11)
Page 14

5-2. How to use the Charging Base
Attention:
● Automatically search for Charging Base when the battery is about
to run out,and the power indicator on the panel will be go out.
● To seat the Charging Base in the room of a open place, Don't place
obstacles that affect the movement of the Robot within 3-5 meters
!
radius.
● If room area is too big, can't find Charging Base, you can put
the machine on the base about 1.5 metres before, or with
the remote control command machine near the recharge seat
(remote controlMethod of use, please reference manual on page 9.)
● Often use dry cloth to wipe the shell of charging contact and
contact patches on the Charging Base, to prevent dust and
lead to poor contact.
● The Robot must use the random matching chargers,the use
of other charger and battery, will cause the damage of the machine.
● For the first time use or reoccupy after long time need not,
8-9 hours charge is necessary before use, must charge battery
only after 2-3 times full charge discharge cycles, can achieve
the best performance.
High Voltage Danger
Figure (12)
Page 15

6. Remote control <as shown in figure (13) >
6-1. Performance introduce
Press the button : Turn Left ;
Press the button : Turn Right ;
Press the button : Forward ;
Press the button : Fall back .
On/Off : Turn on/off <Turn off by default>
Recharge : automatic looking for recharge.
Spot : sweep the garbage areas with strong power.
Auto : automatic cleaning with the planning route.
6-2. How to use the remote control to set time and week :
Press" set "button to enter the time setting mode,
and the first number will be flashing, said into the
figures to be set at the time (in 24 hours).
By "∨ ∧ "button to time to set the current position
and the" > "button to switch to the next one to set
the digital bits (according to the < button to switch to a digital bits). Repeat the
" > "button to set the position to the week. Set time press automatic charge back
after confirmation, then automatic cleaning button to ente r standby mode.
Spot
On/Off
Recharge
Auto
Set
Figure (13)
!
Attention:
Using remote control distance as far as possible within 5
meters, otherwise,It's may lead to failure or not sensitive.
Page 16

7. Maintenance
7-1. Dust box
7-1.1 Pull the buckle of the dust on the bottom of the clenar.As shown in figure (14)
7-1.2 The Dust container will bounce off.As shown in figure (15)
7-1.3 Take out the container.As shown in figure (16) .
buckle
Slowly pull
7-1.4 Press the buckle on the side of the container box,open it with outward force.
As shown in figure(17)
buckle
Figure (17)
Open
7-1.5 Open the lid,sweeper the container with the brush.As shown in figure(17) .
then,taking out the trash,As shown in figure(18) .
Figure (14) Figure (15) Figure (16)
plastic rib
Outward set,Convenient to take out.
figure (17)
Figure (18)
Page 17

7.2. Primary filter
Take out the Primary-filter from the container box,and clean it w ith a
Hairdryer or cleaning usually.As shown in figure(19)
Figure (19)
7-3. HEPA filter
Take out the HEPA-filter from the container box,and clean it w ith a Hairdryer or
cleaning usually. (oftenly ,It's need to be replaced three months later).
As shown in figure(20).
Figure (20)
Attention:
Don't forget to put the Primary-filter 、HEPA-filter into the container
!
Tip: The garbage will not be able to enter the dust box if not installe dust container or
nor intall at the right position.
7-4. Mop (optional)
7-4.1 Two kinds of mops <dry、wet >is contained by the cleaner. Not only can
clean the stuff on the floor, more can effectively clean the hair and dirt from the rug.
box again after you clean up all of them.otherwise,build in motor's
failure will occur to the container box.
Dry Mop
Figure(21)
7-4.2 The wet mop , with a capacity of 180 ml of water tank, ooze water through three
holes on the bttom.It can timely supply water, keep the mop wetly, Deeply
clean the ground .
Wet Mop
>>Do not use on the carpet!
>>It's easily to be jams when mopping the
floor,Clean up the mop in time is necessary.
>>Please remove the water tank when you
need to add water.
>>After cleaning, please clean UP the mop timely
>>Aviod leakage to the floor,don't forget to
pour out thewater in the tank.
Attention
Figure(22)
Page 18

7-5 Middle Brush
7-5.1 Both hands push back the buttons on each side of the frame at the same time as shown in
figure (20).
Figure(20)
7-5.2 And then pull up the frame as shown in figure(21) 。
Figure(21)
7-5.3 Taken out the middle brush as shown in figure(22)
Figure(22)
7-5.4 Middle Brush Module.
Figure(23)
7-5.5 Clean the rubbish with clean brush .At the same time, please use dry cloth
to clean up middle brush is placed in the groove of bottom case. as shown in
figure (24)
图(24)
Page 19

8. Packing List
Side BrushCharging BaseRobot Cleaner
Cleaning Brush
On/Off
Recharge
Spot
Auto
Set
HEPA Filter
<A Primary filterBuilt-in>
Romote Control
9. Product Specification:
>>>Power: 24 w
>>>Noise: < 60 db
>>>Battery type: lithium-ion battery
>>>Battery capacity: 2600 mah
>>>Battery life: 800 times
>>>Voltage: 14.8 V DC
>>>Charging time for the first time: 4 H
>>>Normal charging time: 2 -3H
>>>Battery work time: 90 - 120 Minutes
>>>Dust box capacity: 600 ml
>>>Net weight: 3.3 kg
>>>Dimension:34 cm diameter:
>>>Thickness: 8.5 cm
Adaptor Water Tank
<With a Wet Mop>
eonego
warranty card
eonego
EWG-108 Intellig ent Robot Sweeper
Thanks for choosing eonego intelligent household
product, before using, please read this manual.
warranty card User ManualDry Mop
Power Adapter Specification:
Input voltage: AC 100 ‐ 240 v
Input current 0.8 A
Input frequency: 50/60 hz
Output voltage: DC 19 v
Output current rating: 1.0 A
Note:
The best distance tou use Remote Control
is less than 5 meters.
User Manual
Page 20

10. Install、Replacing the Remote Control Battery
10.1. get the remote control out of the box, as picture (18)
10.2. Open the remote control battery door, as picture (19)
10.3. Put 2 batteries (battery model: AAA1.5 V) into the remote control, pay attention
to the battery is negative direction, as shown in figure (20)
Note:
Processing of waste battery, please follow the local environmental protection regulations, throw
it to the prescribed recovery site.
Please don't put the old and new, mixed type of different batteries. Long-term need not when,
please take out the battery, in order to prevent battery leakage damage the remote controller
When installing the battery, be sure to pay attention to the battery is negative direction.
That the battery is not enough, please replace the battery in time.
For a long time not to use the remote control, please remove the battery, prevent the battery
electrolyte leakage, lead to the remote control fault occurs.
Do not place the remote control in high temperature or humid place.
Do not use any foreign matter falling within the remote control, especially when replace the
battery.
Please reasonable processing the product of old batteries. Batteries contain dangerous
environment of harmful substances, please do not arbitrarily discarded.
1. Abandoned the Robot, must be taken out the battery.
2. When remove the Battery-cell, must turn off the switch.
3. Battery can not be stored in more than 45 degrees of high temperature environment or in the water.
4. Do not allow the exert force on the battery or falling from height.
5. Battery recycling must be conducted.It is forbidden to throw away 、throwa person of the
fire and explosion in case.
6. If the battery leakage, be careful not to let the fluid sticks to the skin or clothing, shall be
immediately after wipe with dry cloth To the recycle bin or specify pits, do not arbitrarily discarded.
7. Rechargeable batteries is forbidden to use.
Page 21

11.Failure Checking
11.1. The machine starts there is continuous back or turn left, turn right.
The solution: shut off the power switch of the machine. Check on the machine to check the
sensor for dust or dirt make its produce error signals, please use dry cloth clean cotton detection
sensor.
11.2. The machine in trouble
Solution: machine in cleaning the room, may be in trouble, this case, it will try to use various
methods to get rid of trouble, once can't get rid of, please hand help machine out of the woods,
and obstacles. Trouble may is as follows:
Wire winding machine is scattered on the ground;
Machines are drooping curtain cloth or the temples of carpet edge winding;
The front too many obstacles.
11.3. The machine can't perceive the stairs
Solution: the machine can sense height difference is greater than 8 cm of the vast number of
stairs, but for part of the ground of the have head or smooth reflective strong ground, will
reduce the performance of detecting head, at this point, the proposal at a lower level with a layer
of no reflection characteristics of cloth or carpet, and pay attention. If not this case, can check
whether too much dust on the machine to check the sensor, and wipe it clean.
11.4. The machine cleaning the dust absorption capacity reduction
The solution: shut off the power switch of the machine. Remove dust box, and according to the
following steps:
Check whether have accumulated on the dust box filter cotton dust can not remove too much,
see if need to change.
Check to make sure that no dirt in brush suction of blockage, remove the sweeping brush and
clean up. Ensure no hair, filament winding on both ends of the side brush, after clean up the side
brush back into the host.
Check the drive wheels place for winding dirt or object doesn't work.
11.5. The machine is working, the noise is very large
The solution: shut off the power switch of the machine. Remove dust box and clean up garbage,
will be at the bottom of the machine up.
Observe the host whether suction mouth were choked up with rubbish.
Check and clean up the brush. (including side brush) on both ends.
Put 2 batteries (battery model: AAA1.5 V) into the remote control, pay
attention to the battery is negative direction, as shown in figure (20)
Page 22

11-6.Failure Code Display and How to solve
Failure Code
Er01
Er02
Er03
Failed parts How to solve
Cliff Sensors
Failure Cause
At the edge of the cliff
for the Robot,and can't
cast off by itself.
Cliff sensors is dirt.
Entangled by others
Move the Robot to the flat
Place.
Power OFF ! Clean the sensors
on the bottom of the Robot.
Power OFF ! Clean the rubbish
such as hair、thread wrapped
on the brush.
Middle
Brush
Low Battery
Middle Brush were
installed in the wrong
position
The Leakage because of
long time no use of this
Robot.
Far away from the
Charging base,and
can't find it .
Power OFF ! Reinstall.
Manually use the Charging base
or the power adapter to charge
the Robot.
Manually use the Charging base
or the power adapter to charge
the Robot.
Er04
Er05
Wheel electric
current beyond
standard
Wheel float off
The wheel is stucked
by rubbish。
Robot has encountered
big obstacles or steep
slope、pit.
Power OFF ! Clean the
rubbish.
Move the Robot to the flat
Place.
If according the above steps to clean up and then the fault still exists, please
contact our company after-sales service department.
Page 23

12.Other Questions
1. The normal full of electric power, the machine can work how long?
Answer: according to the condition of different ground, normal wooden floor, ceramic tile
and leveling the ground about 90 minutes, undercoat carpet about 60 minutes (associated
with the cleaning mode of setting).
2. The machine can work in the case of unattended?
A: yes, but before use, please the prophet will be my people know machine at work, prevent
somebody to fall.
3. What built into the machine device, is used to help machines to cope with obstacles?
A: the machine built-in photosensitive element, can feel higher than 8 cm stairs, prevent
machines down or run into obstacles will work back around.
4. The machine can clean the bottom of the home?
A: the machine is flat type design, in the normal cleaning the ground, can travel to the leg,
the foot of the bed is higher than 10 centimeters lower part of the household cleaning, such
as bed, cabinet, sofa, tea table, etc.
5. Rechargeable batteries can use how long?
A: the machine under normal use the built-in rechargeable battery can be recycled, at least
800 times.
6. Why not according to set good cleaning machine model work?
A: machine remaining battery is low, will automatically be transferred to "return to charge"
mode, this mode
Need to have a recharge (optional).
7. How blunt once electricity can clean area (automatic mode)?
A: in general, a charge to clean about 100 ‐ 120 m squared room, according to the room
The complexity and garbage.
8. The machine run into obstacles?
A: under normal circumstances, after the machine run into obstacles will automatically
return or find other walk path.
9. Why machine while working out the garbage?
Answer: (1). Please check whether the machine dust case waste too much, (if the amount of
garbage dust accumulated on the ground is too much, the machine after a brief job even
waste a lot of dust box, also won't alarm prompt) should be timely cleaning dust box.
(2). Please check whether the brush for a long time didn't clean, wrapped the above the
accumulation of excess hair and dirt.
10. Why can't machine according to the appointment of time automatically start cleaning
work?
A: to make an appointment clean set function is not enabled.
11. Why the remote control doesn't work?
Answer: (1). The effective control of the remote control range is 5 meters. Long distance
remote control will not very sensitive.
(2). Please check whether the battery in the remote control is not enough, please replace
the battery in time and make sure the battery installed.
(3). Make sure the machine power switch is open, if it is found that the power battery is low, please
recharge machine first.
(4). With a clean cloth to wipe the remote infrared emitter and red on the machine
Perimeter receiver.
(5). The host machine with recharge too close, or there is other near infrared signal at this time
Equipment to make the remote control signal interference
Page 24

FCC Warning Statement
Changes or modifications not expressly approved by the party responsible for
compliance could void the user’s authority to operate the equipment. This
equipment has been tested and found to comply with the limits for a Class B digital
device, pursuant to Part 15 of the FCC Rules. These limits are designed to provide
reasonable protection against harmful interference in a residential installation. This
equipment generates uses and can radiate radio frequency energy and, if not
installed and used in accordance with the instructions, may cause harmful
interference to radio communications. However, there is no guarantee that
interference will not occur in a particular installation. If this equipment does cause
harmful interference to radio or television reception, which can be determined by
turning the equipment off and on, the user is encouraged to try to correct the
interference by one or more of the following measures:
‐‐ Reorient or relocate the receiving antenna.
‐‐ Increase the separation between the equipment and receiver.
‐‐ Connect the equipment into an outlet on a circuit different from that to which
the receiver is connected.
‐‐ Consult the dealer or an experienced radio/TV technician for help.
FCC Radiation Exposure Statement
The antennas used for this transmitter must be installed to provide a separation
distance of at least 20 cm from all persons and must not be co‐located for
operating in conjunction with any other antenna or transmitter.
Manufacture: ShenZhen EONEGO Intelligent Technology
Co., LTD. DongGuan Branch
Address: Block S, DongXing Industrial Zone, KangLe
RD, HengLi Town, DongGuan City
GuangDong Province, China.
Service hotline: (+86)0769-88086016
 Loading...