

Page 1

LED Mini Board
User Manual
Model:B1248U
Version: 5.03
Page 2

1. General Information
1.1 Parts
LED Mini Board
1) LED Name Badge
2) CHARGER
3) USB CORD. USED WITH THE CHARGER TO CHARGE THE BADGE,
AND USED WITH YOUR COMPUTER TO PROGRAM THE BADGE
4) CD-ROM WITH SOFTWARE AND MANUALS
Badge Panel Features:
1) 12x48 pixels.
2) 6 Text Messages, each of them up to 125 characters
3) 2 Images Message (max.12x384 pixels.) Two color images, with black text
on a white background, in BMP image format work best.
4) 9 animations
5) It’s easy to select run sequence of 8 messages and adjust to the brightness
(25%, 50%, 75%, 100%) using buttons on the the back of the badge.
1.3 LED Badge Details
Page 3
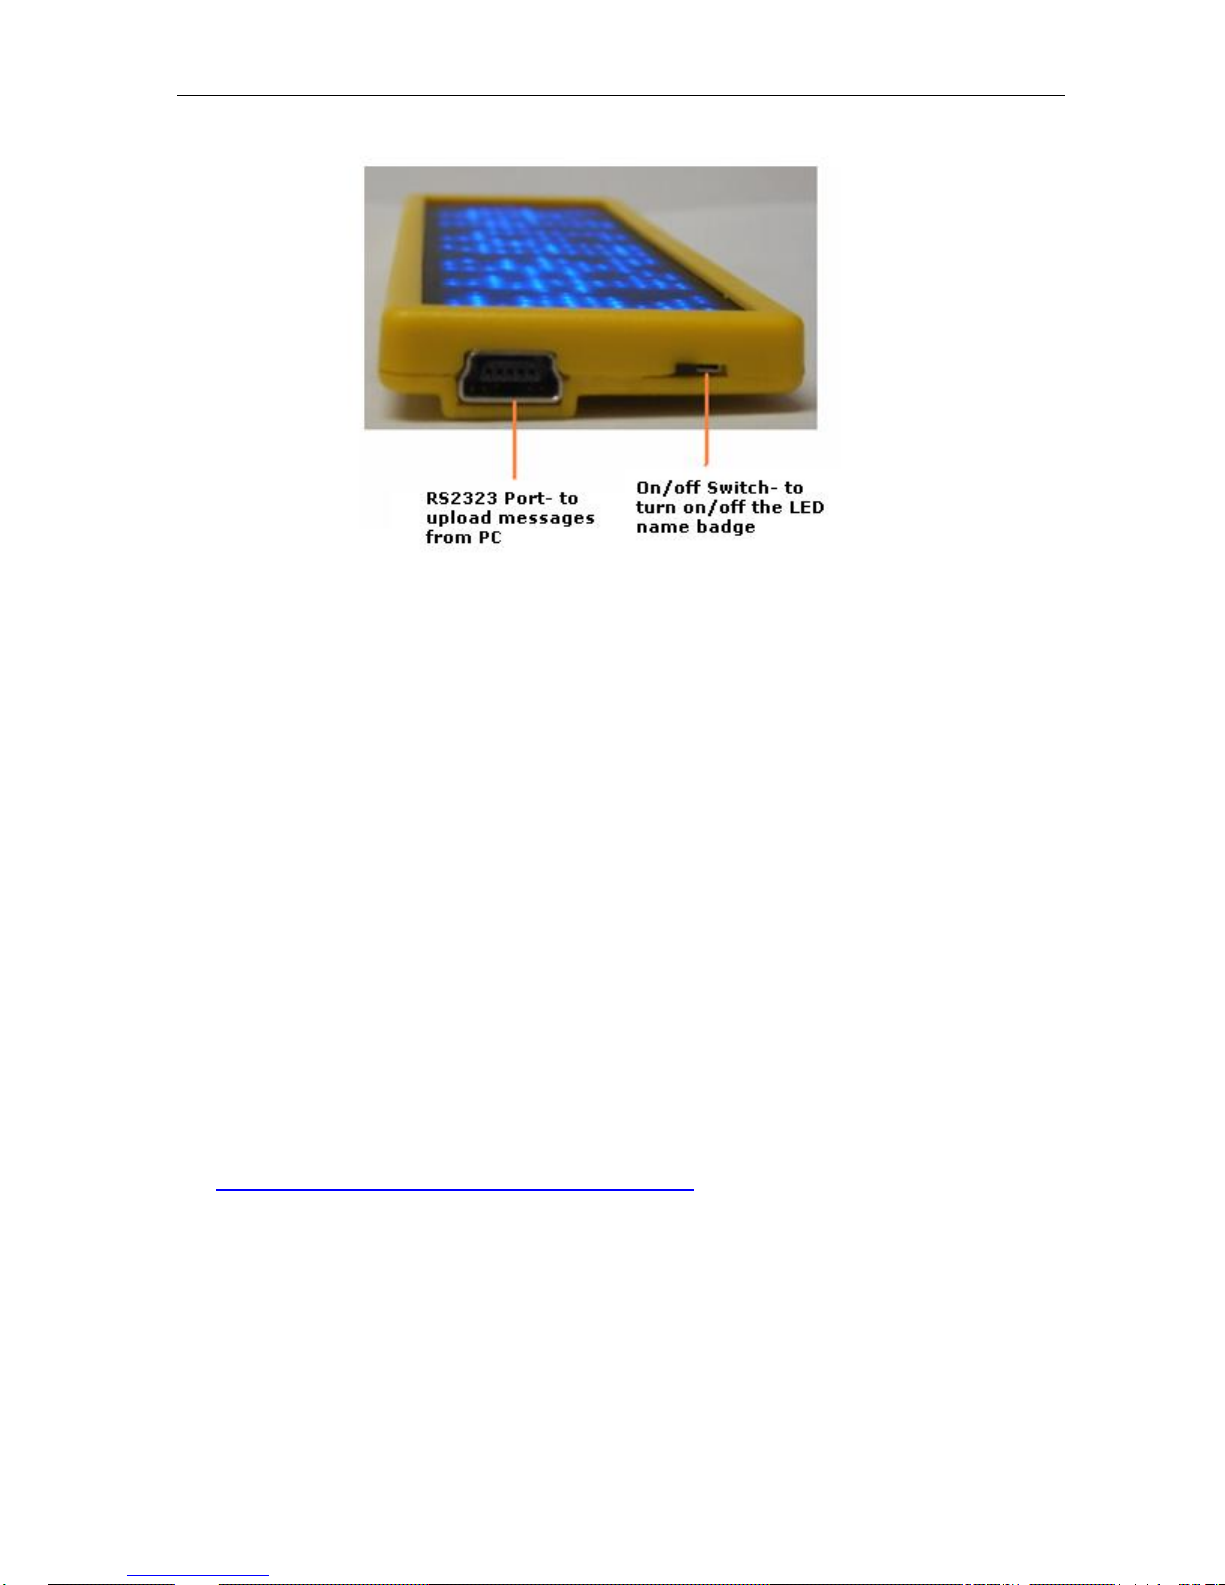
LED Mini Board
Buttons
There are two buttons on the LED Name Badge. One is use to choose which
message to display, the other is adjust the brightness.
1.3.1 On/Off Switch
First, make sure the battery is charged before using. Turn on the switch, and
the pre-stored message will run automatically.
1.3.2 How to use your LED Name Badge
There is one set of magnetic plates at the back of the badge in order to stick it
strongly on the surface of jacket, T-shirt and so on. No screws are
required.Simply push the front magnetic plate upward (see Fig below) to
remove it from the badge. Move the removable
magnetic plate under your jacket and adjust to the suitable position, the LED
will be hung up tightly on articles.
2. Guide in installing software
You can install software directly from our website. See the support page here:
http://brightledsigns.com/info/support/badges
The support page has downloads that are not on the CD-ROM, and we
recommend you use the software from the website.
There is also CD-ROM in the package that you can use if desired, but the
software and documentation aren’t as updated as what is on the website.
Page 4

LED Mini Board
2.2.2 Running the Software
1) There will be a program called “LED Mini Board” in your windows start menu.
2) On the desktop , there should also be an icon as called “LED Mini Board.”
3) Double-click the icon and the program will start::
When pull down the arrow in right corner, you can to choose the language you
want, as shown below:
Page 5

LED Mini Board
2.3 Software operation
2.3.1 Input a test message: Type content directly into the entry boxes labeled 1, 2, 4,
5, or 6. To the right of where you typed in the message, you can set the
speed, action (scrolling, falling snow, etc), font number and whether it is sent
and so on.
Icons: There are 10 animated icons in the upper toolbar, like a heart ,
telephone etc. You can click on these to insert an icon into a
message.
Speed: There are 5 speeds to choose from.
Action: There are Scroll, Twinkle, Snow and Stop actions.
Font Number: Selects which font to use
Sending chosen: If checked, send the message to the badge.
2.3.2 How to insert an image?
The LED Mini Board can display up to 2 image type messages, one in slot 7,
Page 6

LED Mini Board
and one in slot 8. Please use the “Logo”buttons at the end of image message
edit boxes to select an image. Black pixels on a white background, in the
BMP format, work best.
2.3.3 How to edit an image
There is a bundled Image Editor in the software package. Click the button of
the Image Editor on the interface to launch the program. When you finish an
image file, please save it to disk. Then use the “Logo” buttons to load the
image you edited.
2.3.4 About the running sequence:
The messages will be run based on the order shown in the “Run Sequence”
entry. You can input a different order like “87654321” or “6327” if you want
something other than the default.
2.3.5 About communication:
Insert the USB of LED Mini Board to PC directly, and the software will run. After
editing, then press Send button, the message will upload to LED Mini Board.
Note: If you are having trouble communicating with the badge, please see
our support page here:
http://brightledsigns.com/info/support/badges
Specifically, see the plclean.exe utility which will re-install the USB
to Serial drivers for Windows.
3. About charging
3.1 You can use the USB cord to charge the LED Mini Board in your PC as you turn
on the switch button. The the screen will show a twinkling icon which shows the
percentage of charging completed.
Page 7

LED Mini Board
 Loading...