

Page 1
255mm50mm130mm
HEAT THERAPY WRAP
User Guide
Thank you for purchasing a Sharper Image Heat Therapy Wrap.
Please take a moment to read this guide and store it for future reference.
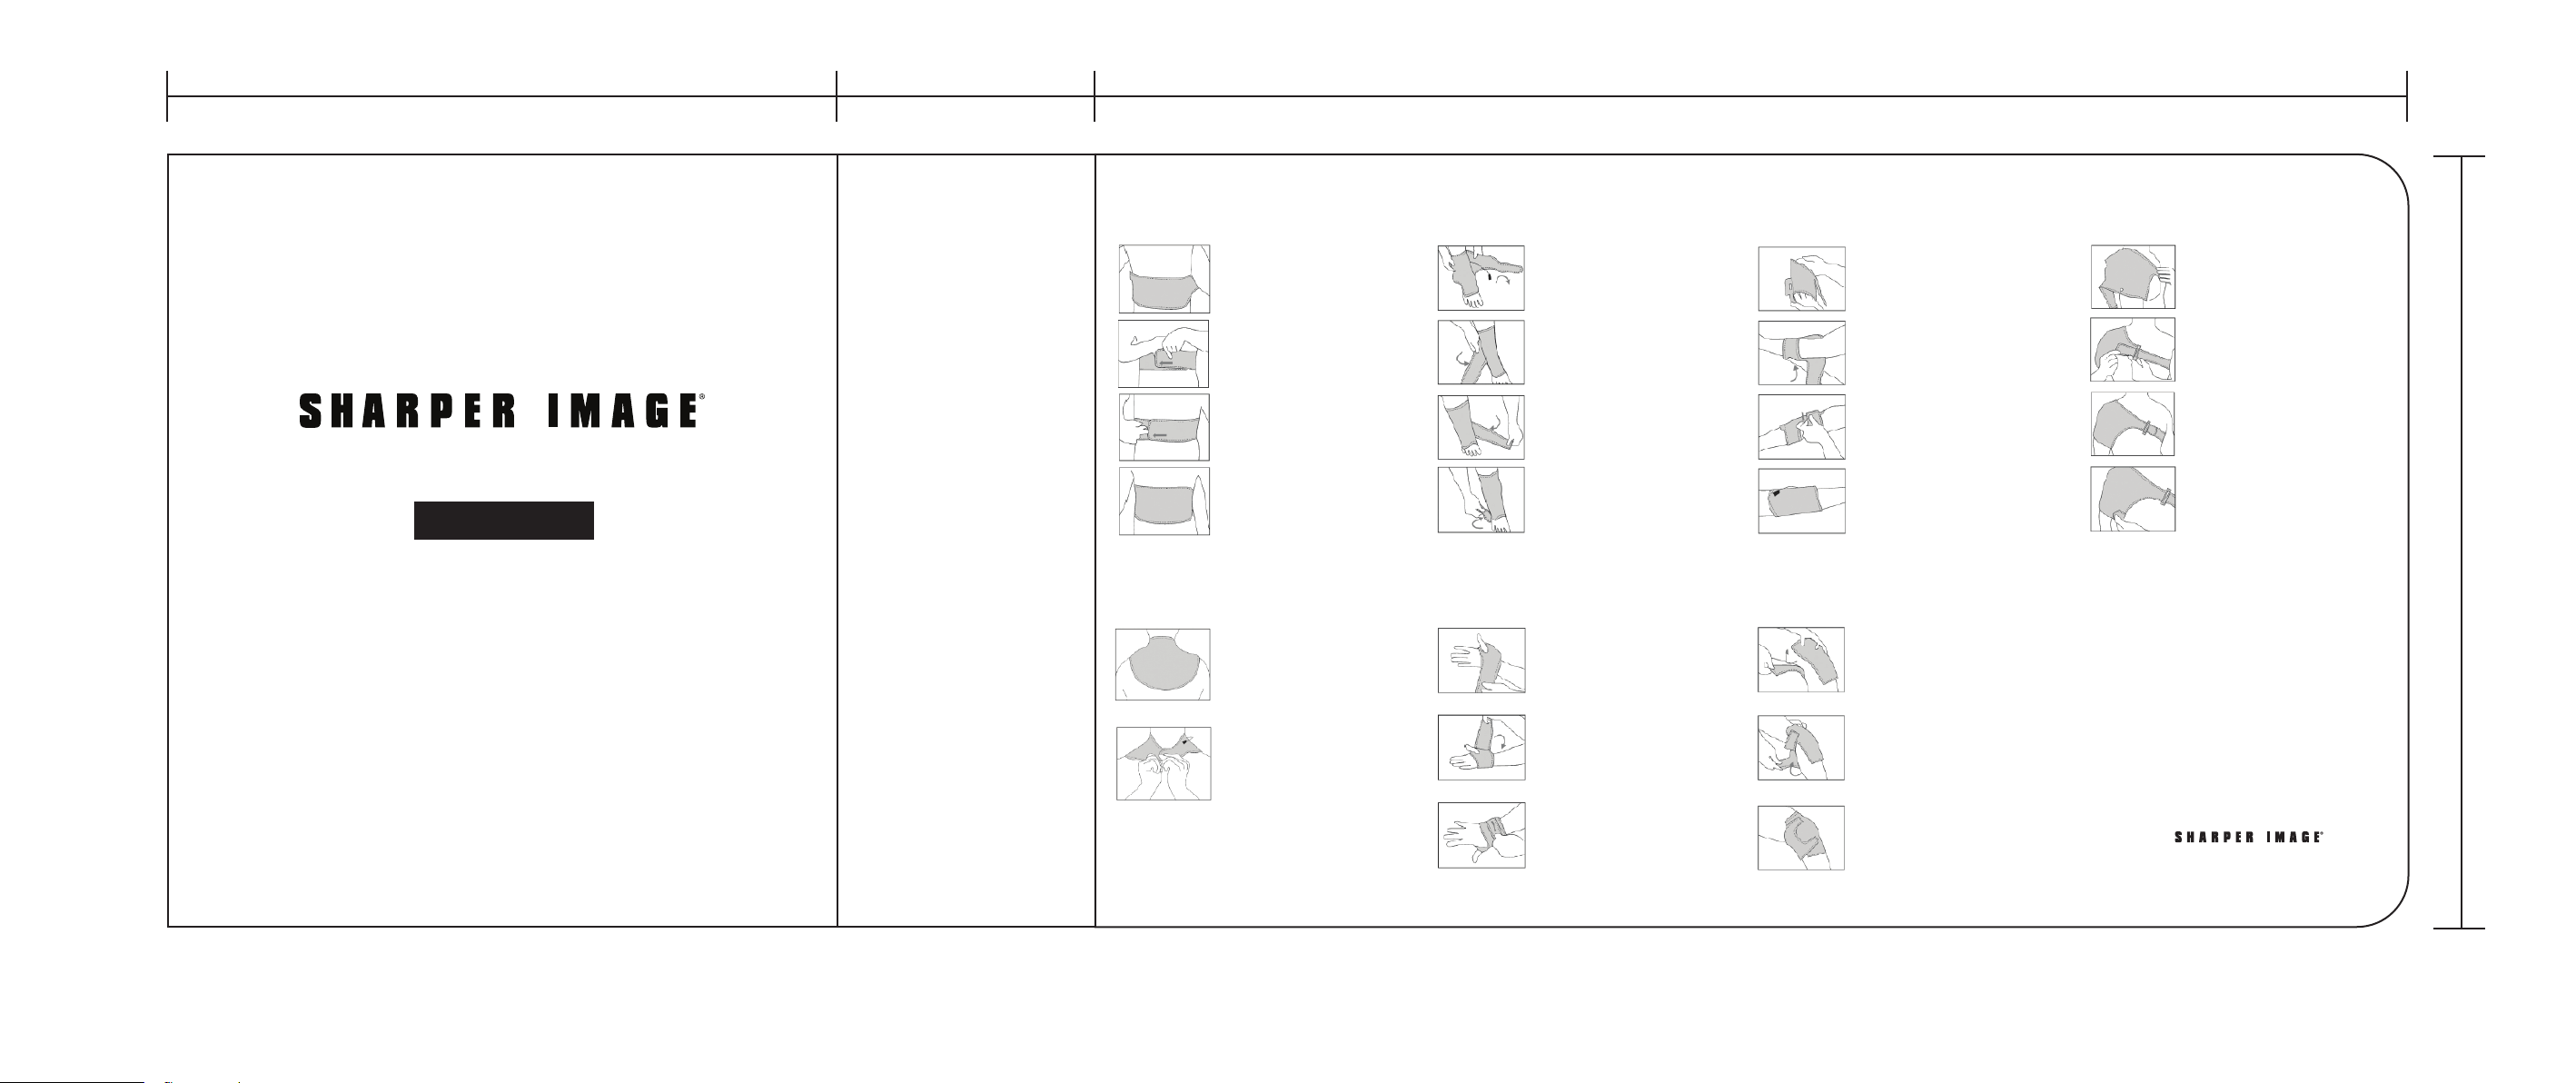
BACK WRAP
Place heating area over your
back with logo facing out.
Bring the straps around
your sides.
Lay the strap with the logo
over the other end to close it
with the velcro.
Our Back Wrap may also be used
in the front to relieve pain from
menstrual cramps.
ANKLE WRAP ELBOW WRAP SHOULDER WRAP
NECK WRAP WRIST WRAP
Place wrap over back of neck.
Place straps around the neck
and over one another to secure
the velcro.
Place the wrap, logo side facing
away from skin, around the front
of your shin / ankle as shown to
the left.
Bring the velcro strap around the
back of your leg, just underneath
the calf.
Next, at an angle, bring the strap
over the front of your leg to the
side of your foot.
Run strap beneath and around the
side of your foot, then secure the
velcro over the top.
Place thumb through the slit,
with the wrap’s logo side facing
out.
Wrap the strap around your wrist,
making sure to support any area
with slight compression.
KNEE WRAP
Connect the lower strap to the wrap
as shown.
Put your arm through the loop
you’ve just made, making sure the
strap you’ve connected is closer to
your foream.
Secure the second strap
(closer to the bicep).
Readjust the first velcro strap to
achieve the desired fit.
Place wrap over knee, making sure
the cupping of the wrap goes over
the knee cap. Wrap the upper strap
around your thigh and close the
velcro over the wrap.
Wrap the lower strap around your
upper calf and secure the velcro
over the top of the wrap.
Place the wrap, logo facing out,
so that the cupping of the wrap
fits over your shoulder.
Bring the longer strap around your
back and under the opposite arm
to the front of your chest. Put the
longer strap through the loop.
Tighten the strap and bring the
velcro back over the strap so the
logo is now facing out.
Bring the smaller velcro strap
beneath your arm and place it
over the wrap as shown. It should
fit securely over your bicep.
WARRANTY/CUSTOMER SERVICE
Sharper Image branded items purchased
from SharperImage.com include a 1-year
limited replacement warranty. If you have
any questions not covered in this guide,
please call our Customer Service department
at 1 (877) 210-3449. Customer Service agents
are available Monday through Friday,
9:00 a.m. to 6:00 p.m. ET.
150mm
Lock the strap in place with the
velcro at the end of the strap by
placing it over the wrap surface.
You may use the wrap over either
knee. To do so repeat the same
directions on your other knee.
The SHARPER IMAGE® name and logo are registered trademarks.
©Sharper Image. All Rights Reserved.
Page 2
255mm50mm130mm
HEAT THERAPY WRAP
Battery Guide
Thank you for purchasing a Sharper Image Heat Therapy Wrap.
Please take a moment to read this battery guide and store
it for future reference.
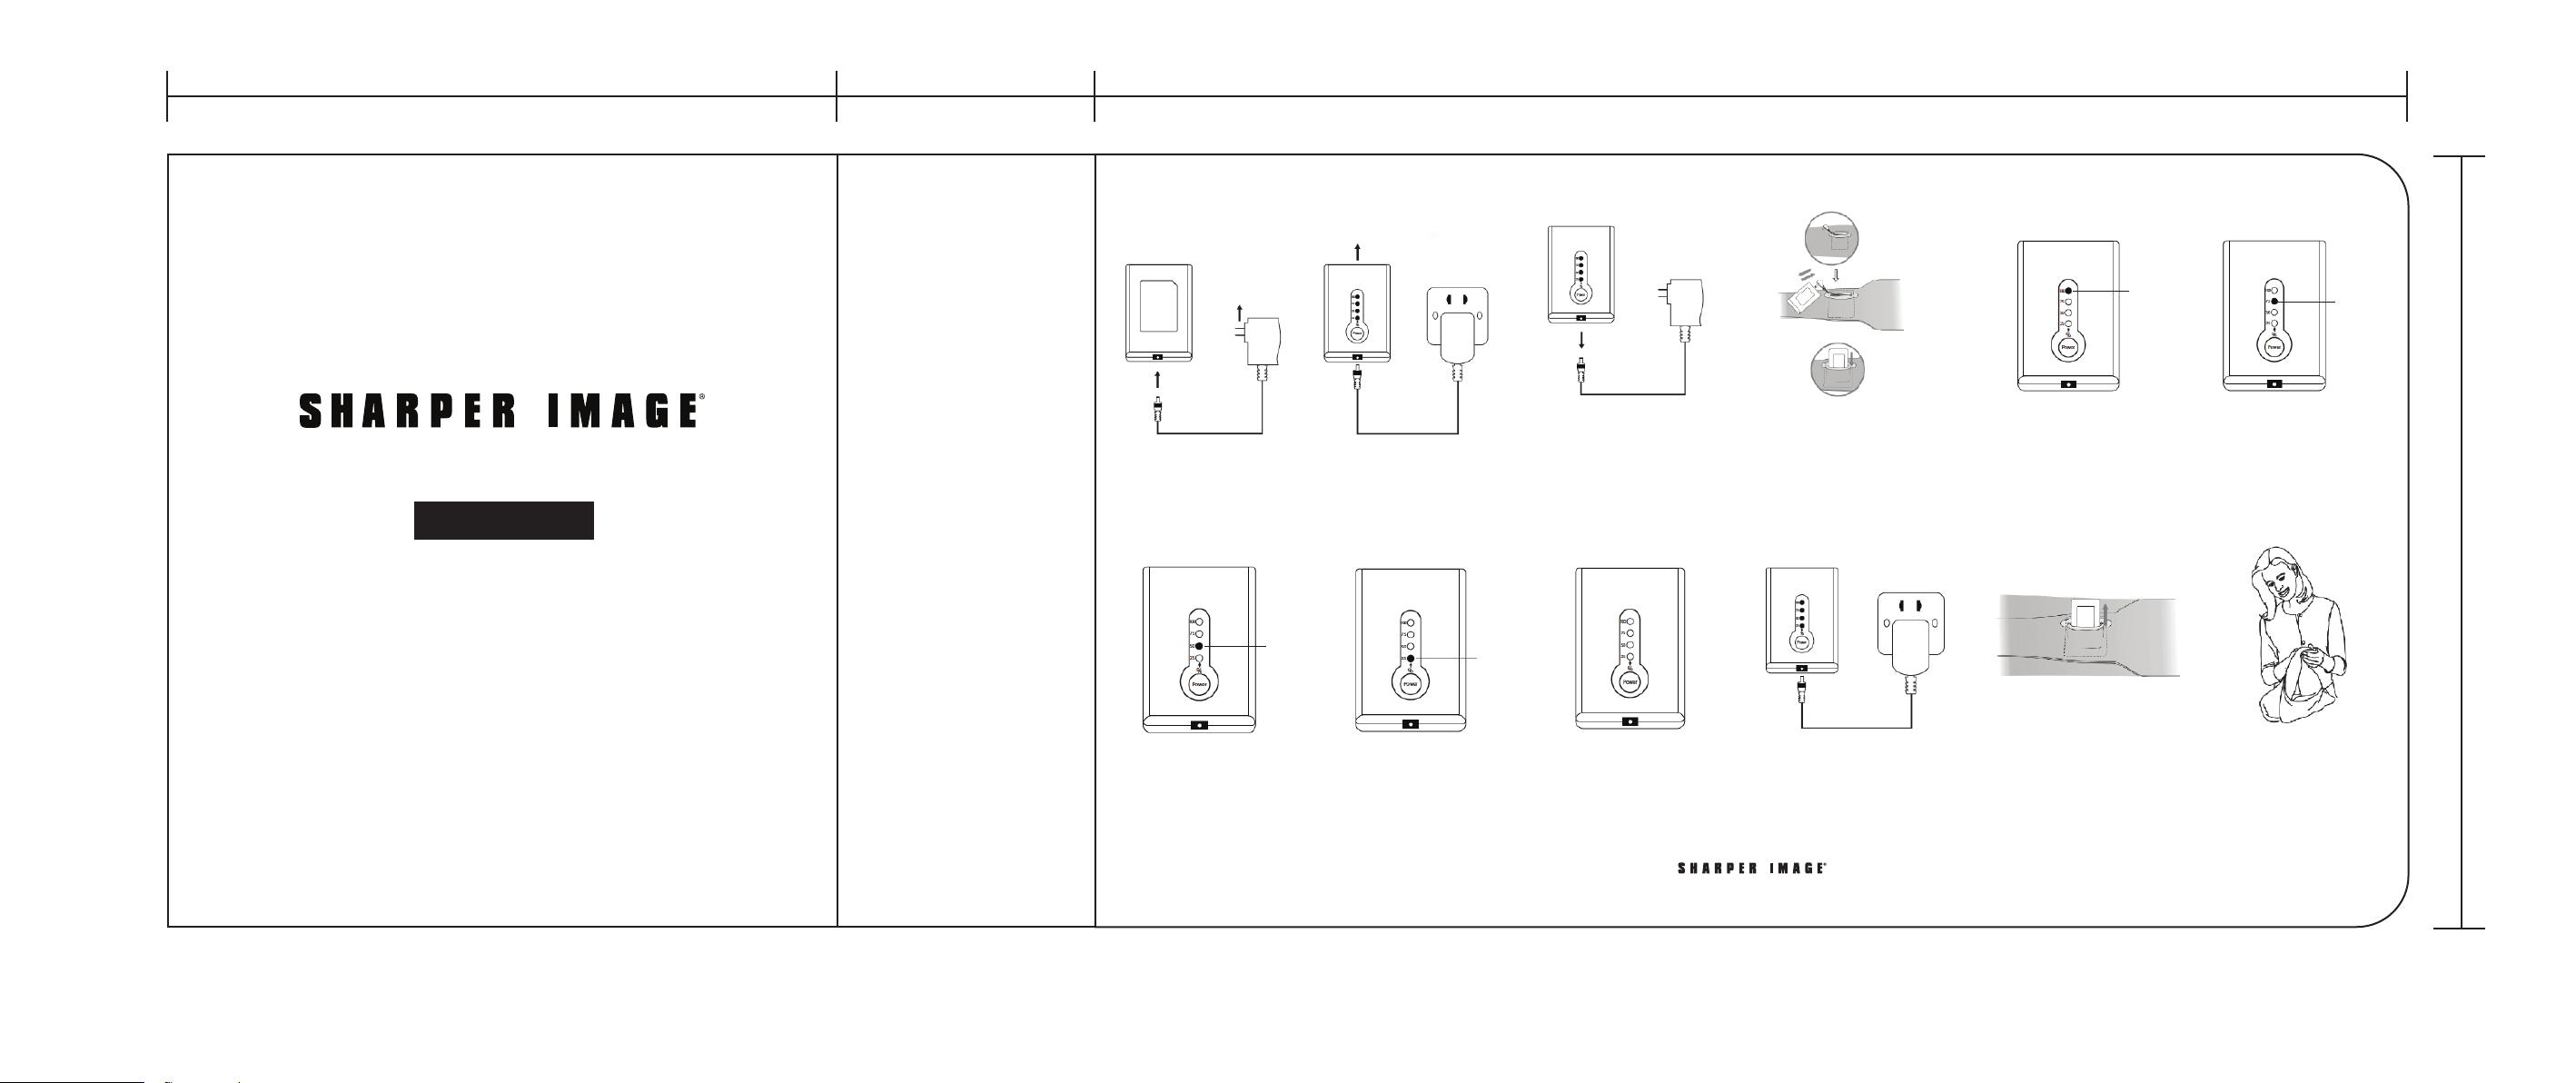
CONNECT THE CHARGER FULLY CHARGE THE BATTERY
Connect to
Power
SELECT MED
TEMPERATURE SETTING
Four Blue lights = Full Charge
SELECT LOW
TEMPERATURE SETTING
50%=Med
25%=Low
REMOVE BATTERY CHARGER PLUG/
CHECK THE BATTERY
Click “ Power ”:
Four lights = 100% battery
Three lights = 75% battery
Two lights = 50% battery
One light = 25% battery
One light (blinking) = Less than 25% battery
POWER OFF
INSTALL POWER PACK
Locate the connector. Plug Power Pack
into the connector. Put Power Pack into
pocket.
FULLY CHARGE THE BATTERY
BEFORE STORING
POWER ON &
MAX TEMP SETTING
100%=Max
To Turn Power On:
Press and hold ‘’ Power ‘’
for 2 seconds until the controller
light shows BLUE (100%).
ATTENTION
*Do not turn the power on when
brace/glove is folded.
WARNING!
SELECT HIGH TEMP
SETTING
High Temperature Setting:
Click ” Power ” until the light
changes to 75%.
WASH & CARE
75%=High
150mm
Med Temperature Setting:
Click ” Power ” until the light
changes to 50%.
WARRANTY/CUSTOMER SERVICE
Sharper Image branded items purchased from SharperImage.com include a 1-year limited replacement
warranty. If you have any questions not covered in this guide, please call our Customer Service department at
1 (877) 210-3449. Customer Service agents are available Monday through Friday, 9:00 a.m. to 6:00 p.m. ET.
Low Temperature Setting:
Click ” Power ” until the light
changes to 25%.
To Turn Power Off:
Press and hold “ Power ” for
2 seconds until all lights are OFF.
ATTENTION
*Battery must be fully charged before use.
*Battery must be fully charged before it's
stored, and at least once every 6 months
of storage thereafter.
The SHARPER IMAGE® name and logo are registered trademarks.
©Sharper Image. All Rights Reserved.
Power Pack MUST be removed from
brace/gloves prior to washing.
SPOT CLEAN RECOMMENDED
*Hang dry.
*Do not iron.
*Do not use bleach or
cleaning solvents.
*Do not twist or wring.
 Loading...