

Page 1
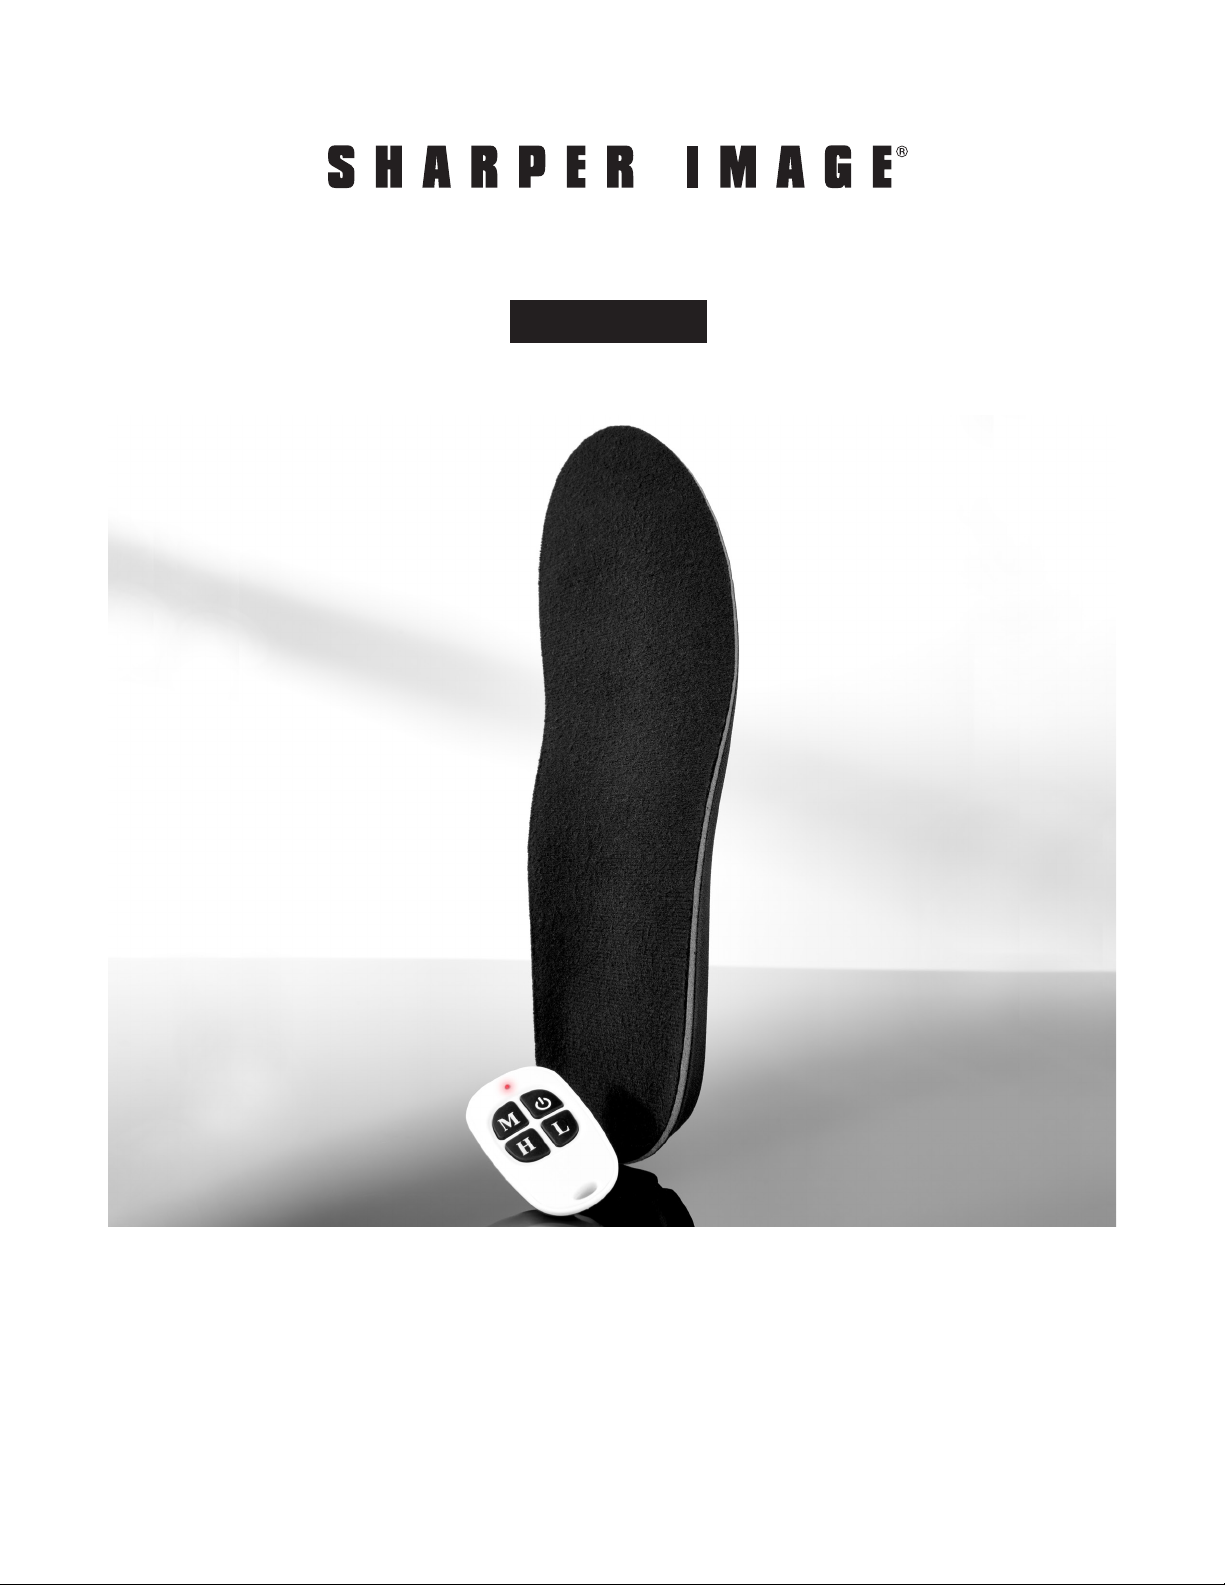
HEATED INSOLES
Item No. 206940
User Guide
Thank you for purchasing the Sharper Image Heated Insoles. Please take a moment to read
this guide and store it for future reference.
-1-
Page 2
FEATURES
• Wireless adjustable temperature control (High, Medium and Low)
Operates on rechargeable li-polymer batteries (1500mAh battery built into each insole)
•
Includes a magnetic USB charge wire and a wireless remote control
•
HOW TO USE
Plug the USB charger(Not included) into an outlet and connect with the charge wire.
•
• Connect both insoles to the charge wire plugs until it is fully charged. The back of the insoles
will illuminate a blue light when fully charged and a red light while charging.
Note: Do not force the plug into the battery. The magnetic port can be easily damaged. Please
make sure it’s connected, and the red light is on when charging.
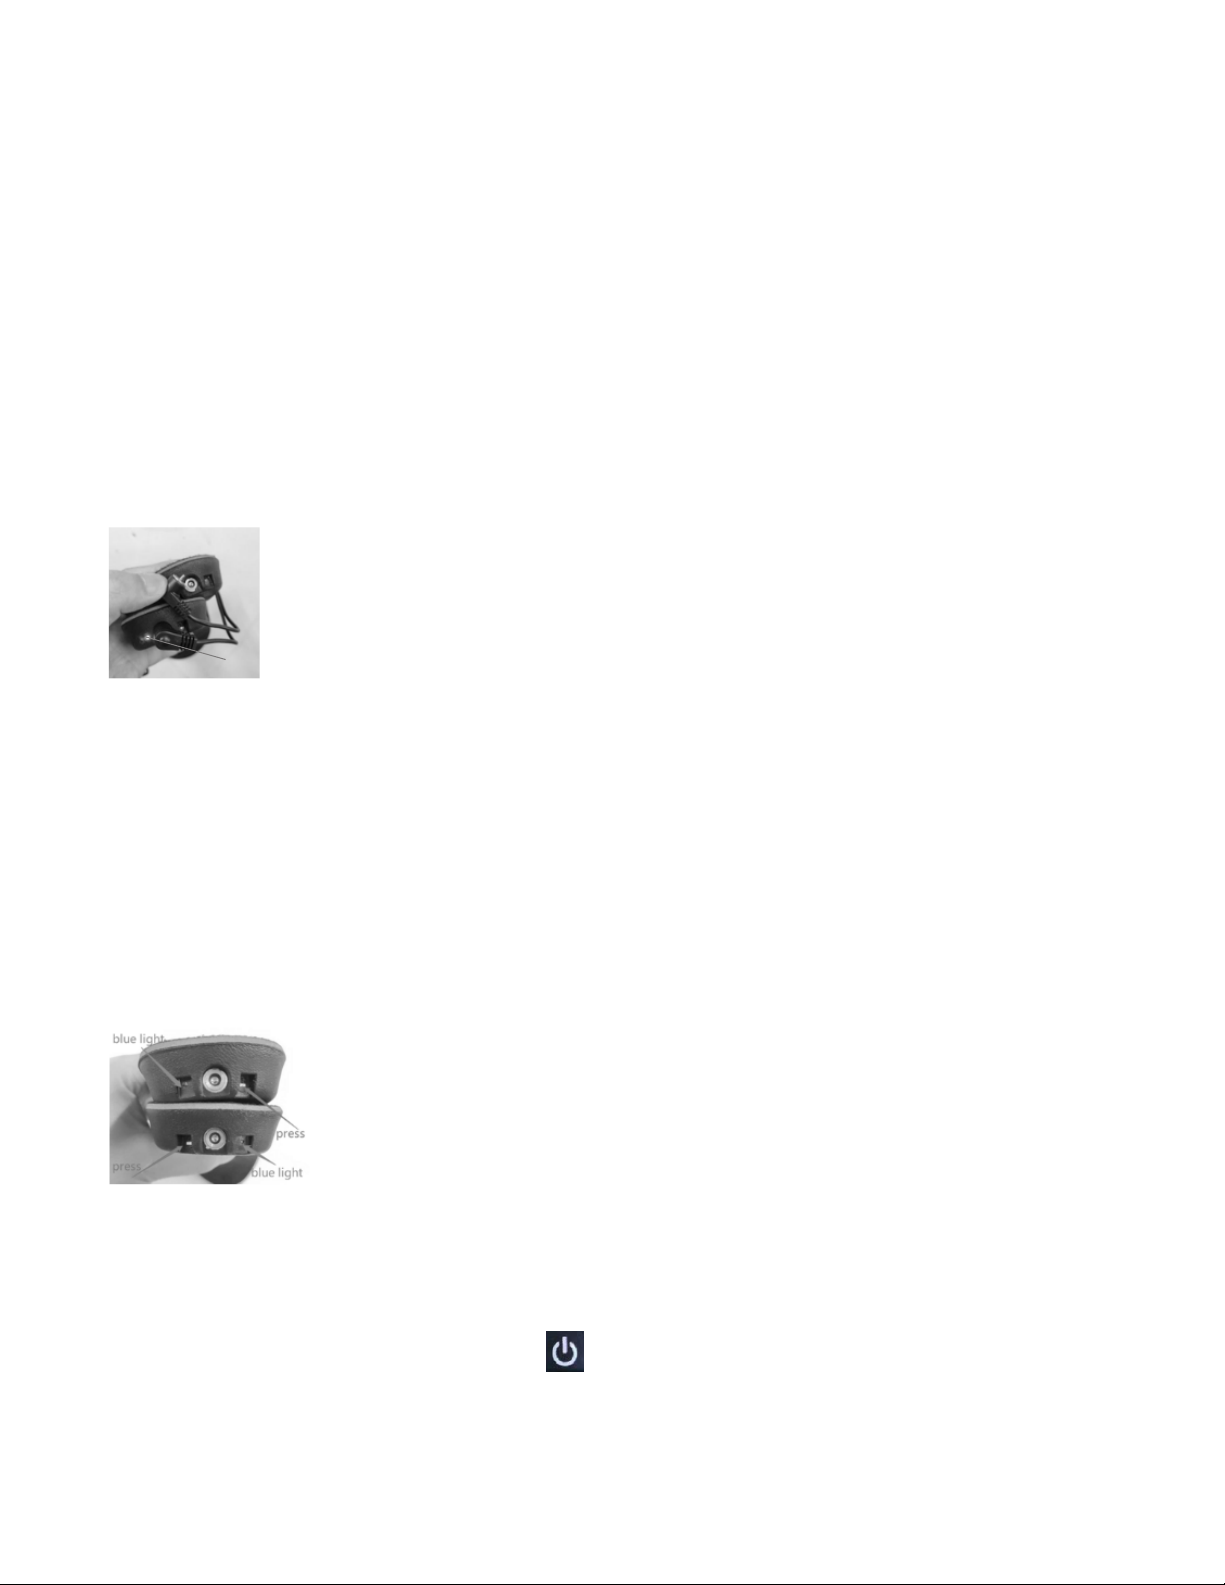
Red Light
• When the blue light illuminates on the insoles, the battery is fully charged.
Note: Fully charge the Heated Insoles battery before using for the first time. Failure to fully
charge the battery prior to the first use may reduce battery life.
When fully charged, disconnect the insoles from the USB charge wire.
•
• Before using, check the back of the insole to see if the wireless control is on.
• See image below: Press where the red arrow is pointing to for 3 seconds or until the blue
light on the other side lights up for around 1 second.
• To turn off the wireless function, press where the red arrow is pointing to for 5 seconds or
until the blue light blinks once.
•
To turn the heat on press the heat button. Adjusting heat: “H” is high heat (solid blue light).
“M” is medium heat (quick blinking blue light) and “L” is low heat (slow blinking blue light).
Note: The wireless remote control only works within 9.8 ft. from the insoles.
To turn the insoles off, press the on/off button.
•
-2-
Page 3

• Turn the wireless function off when the insole is not in use or when storing.
Note:
The Heated Insoles should only be used with the included charging cable.
TEMPERATURE SETTINGS
• High heat: 131º F with approximate run time of 3 hours
• Medium heat: 113º F with approximate run time of 4.5 hours
• Low heat: 95º F with approximate run time of 8 hours
Note: Above results are tested under an average room temperature of 82.4 Fº.
CLEANING AND MAINTENANCE
Spot clean with a damp cloth, do not wash.
•
• Line dry only.
• Do not twist the insole as this may result in damage.
• Do not wear while playing sports.
• Do not disassemble the heated insoles.
BATTERY USE AND CARE
• Do not use the battery if you notice a change of shape (lumps), overheating when charging,
rust or corrosion on the battery connectors.
• Charge the battery regularly (recommended a minimum of once every 3 months).
• Charge between each use.
• Keep the battery away from cold to minimize the impact.
• For best performance, it is recommended not to fully charge the batteries if the product is
not being used for a longer period of time. Charge for 30 minutes only and after 3 months
charge the batteries again for about 30 minutes. Charge the batteries completely before
using product again.
• When battery is not in use, keep it away from other metal objects like paper clips, coins,
nails, screws or other small metal objects that can make a connection from one terminal to
another. Shorting the battery terminals together may cause burns or a fire.
• Under abusive conditions, liquid may be ejected from the battery, avoid contact. If contact
accidently occurs, flush with water. If liquid contacts eyes, seek medical help. Liquid ejected
from the battery may cause irritation or burns.
-3-
Page 4

SAFETY WARNINGS
• Do not expose product to rain. Water will increase the risk of electrical shock.
• Never use the cord for carrying, pulling or unplugging the heated product. Keep the cord
clear from heat, oil, sharp edges or moving parts.
• Do not use on open wounds, sensitive skin areas or in the presence of poor circulation. Check
skin frequently during use to ensure rashes or burns are not developing. The FDA and CPSC
recommend the following precautions be taken to avoid hazards associated with the use of
heated clothing.
ALWAYS
• Inspect heating unit before each use to assure it is in proper working order.
• Discard if it looks worn or cracked, or if the electrical cord is frayed.
• Read and follow all instructions prior to use.
NEVER
• Use on an infant.
• Use on a person who is paralyzed or has skin that is not sensitive to temperature changes.
• Use on a sleeping or unconscious person.
• Use in an oxygen enriched environment or near equipment that stores or emits oxygen.
• Sit on this device.
• Crush this device.
• Unplug this device by pulling its connecting cord.
• Use pins or other metallic fasteners to hold this device in place.
• Do not submerge product or battery into water while in use.
Do not puncture or tear into the lining of the product. To fit different sizes of shoes, cut the
•
forefeet line with size marked only. Do not cut over the lines.
• Do not allow the battery to come into contact with water or other liquids. If water or liquids
enter the battery interior, immediately disconnect the product from the battery. Allow the
battery to dry completely before use.
• Do not penetrate, strike, short-circuit or disassemble battery.
• Keep all electronic components of your product away from fire and excessive heat.
• Do not leave product unattended while connected to the battery.
• Only use the charger and battery included with this product.
• If you experience any discomfort while using this product, remove it immediately and consult
your physician before resuming use.
• Check with your physician if you are pregnant, have a pacemaker, diabetes, circulatory
problems, sensitivity to heat, or are under the age of 13.
-4-
Page 5

GENERAL PRODUCT SAFETY WARNINGS
Read all safety warnings and instructions. Failure to follow warnings and instructions may result
in electrical shock and/or serious injury. Save all warnings and instructions for future reference.
WARRANTY / CUSTOMER SERVICE
Sharper Image branded items purchased from SharperImage.com include a 1-year limited
replacement warranty. If you have any questions not covered in this guide, please call our
Customer Service department at 1 (877) 210-3449. Customer Service agents are available
Monday through Friday, 9:00 a.m. to 6:00 p.m. ET.
The SHARPER IMAGE® name and logo are registered trademarks.
©Sharper Image. All Rights Reserved.
-5-
 Loading...