

Page 1
Thank you for purchasing the Sharper Image Automatic Shoe Cover Dispenser.
Please read these instructions prior to using this device for the first time.
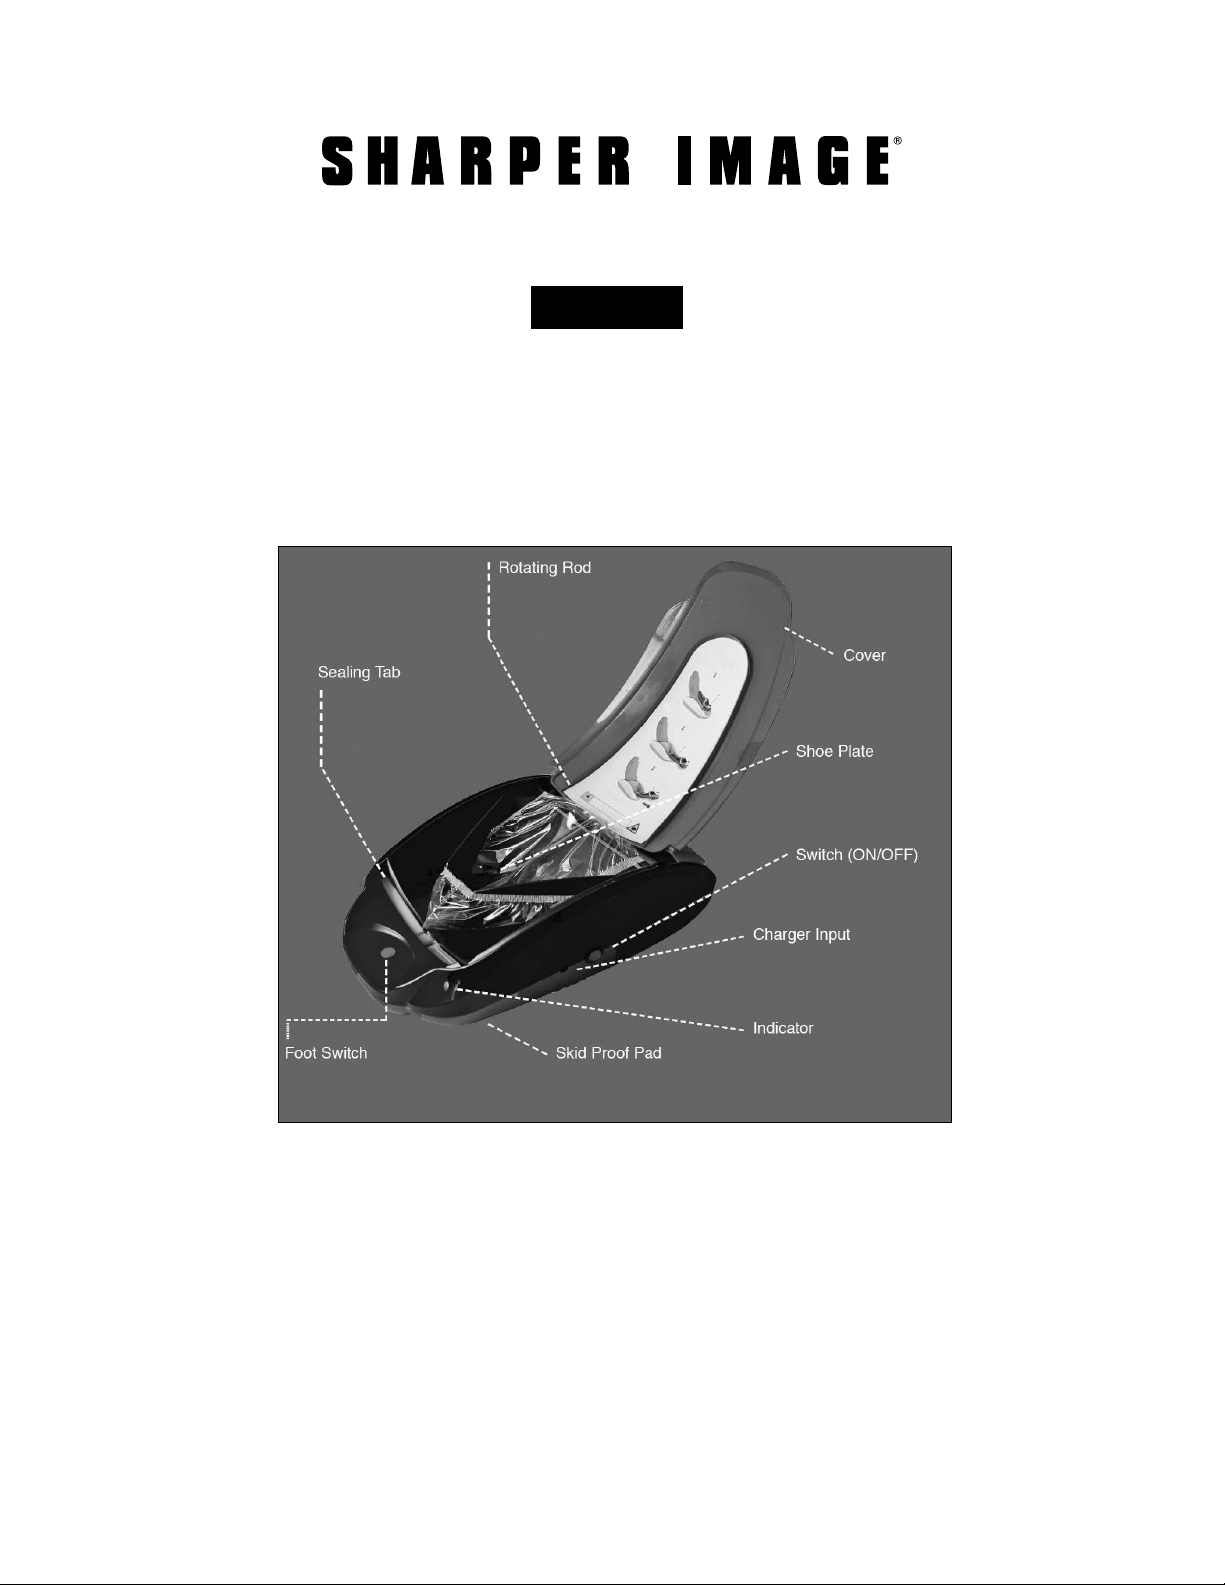
PRODUCT STRUCTURE
AUTOMATIC SHOE COVER DISPENSER
Item No: 206133
Owner’s Manual
HOW TO USE
1. Place the Automatic Shoe Cover Dispenser on the floor. Press the unit firmly on the floor to
ensure the skid proof pads stay in place. Note: If the unit is easy to move when using, wipe both
the floor and skid proof pads with a wet towel.
2. When the unit is turned on the indicator light will illuminate. Press the foot switch for 1 second
to activate. Note: The indicator light will go off automatically after 1 minute and enter power
saving mode.
- 1 -
Page 2
HOW TO USE IN 3 STEPS
1. Ensure the film is curled upwards before placing your heel between the shoe plates.
2. Slowly slide your foot down the unit. Press the tip of your toe on the foot switch for 3 seconds.
Hold for a few seconds to seal. After the seal plates open back up remove your foot. Note: For
best results, keep shoe in place for three seconds after the heating element completes its cycle
to enhance the wrapping quality and tightness.
3. The unit will automatically clip the film and seal it. If the film did not completely cut after the
sealing clip opened, pull the film lightly to remove the excess. Note: Before stepping into the foot
switch, raise your heel more so that the shoe will fit more precisely.
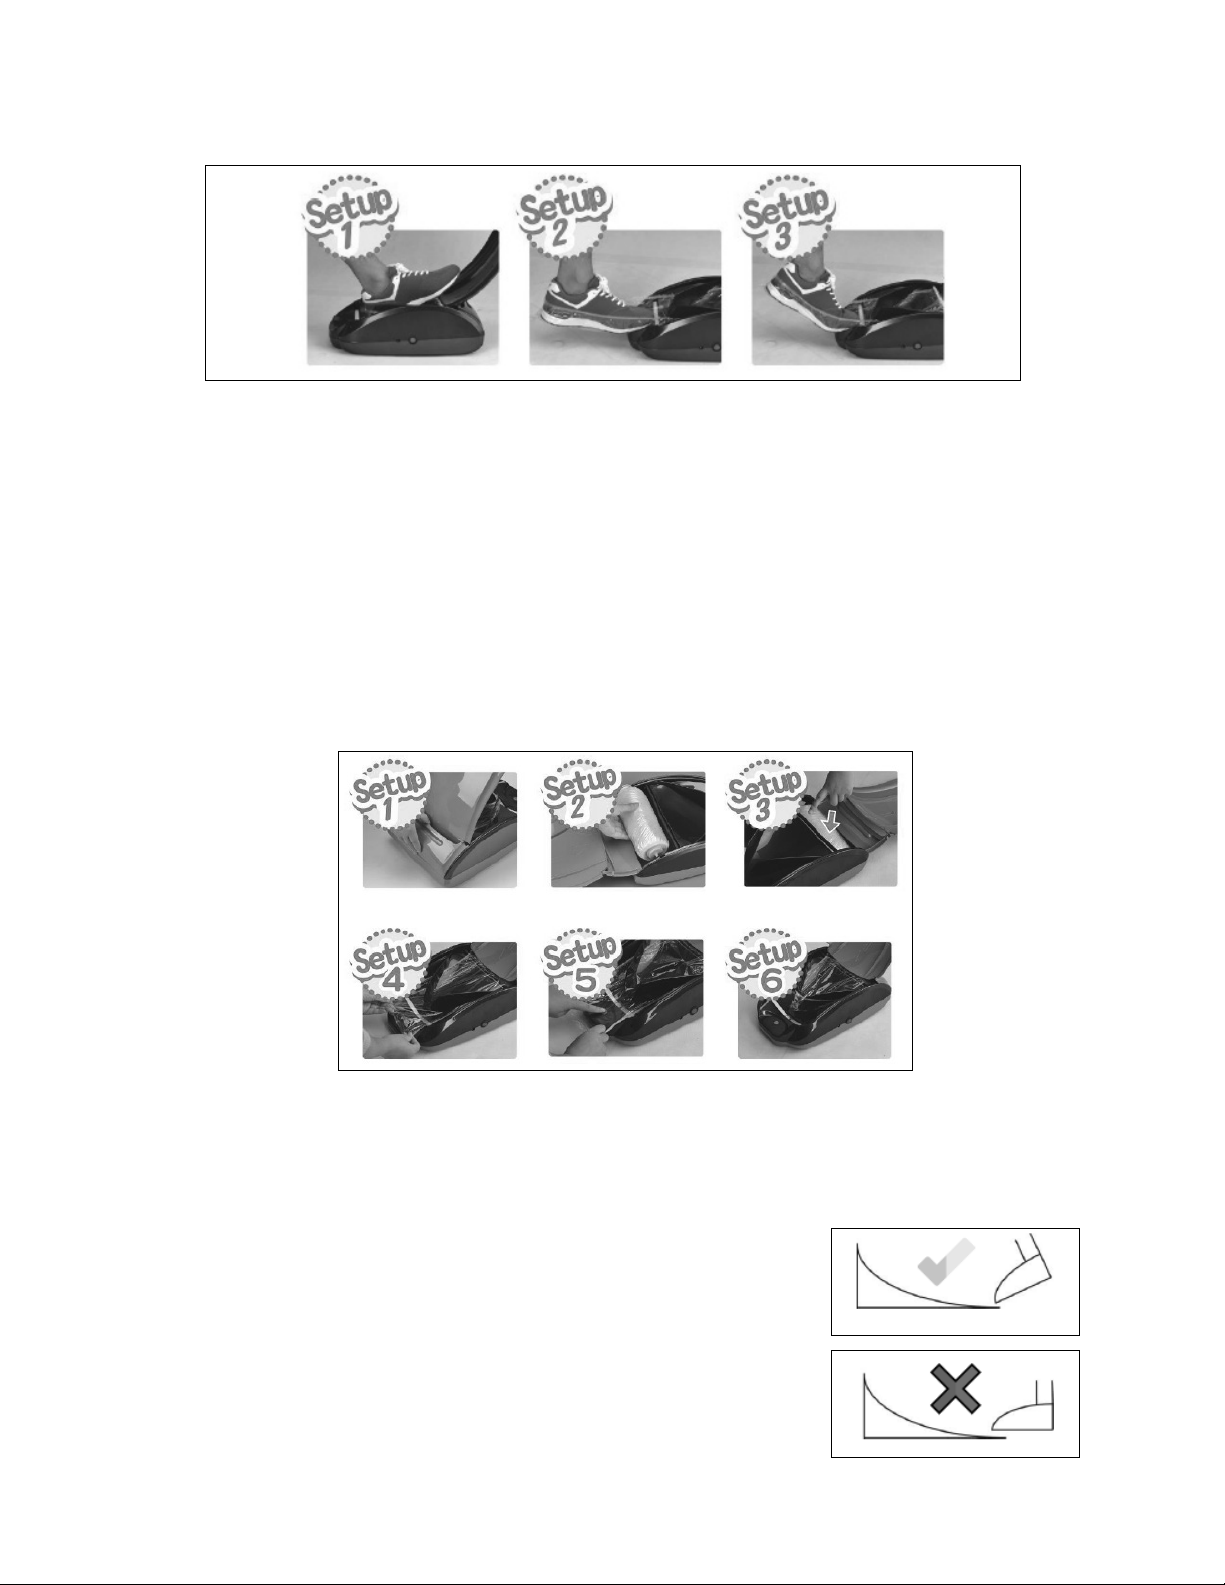
HOW TO INSTALL FILM ROLL
1. Pull the top cover open.
2. Place the roll of film into the dedicated compartment. Using the ends on the roll,
align to the track until you hear a click. Note: Make sure the film rolls over when rolling
out (not under). Do not throw away black knobs, they are
not included with replacement rolls.
3. Insert the roll of film over the spool.
Make sure the roll is securely placed on each side.
4. Pull the film through the shoe plates.
5. Press the foot switch to cut off excess film. Hold for 3 seconds.
6. Check to make sure the film seal is facing up.
7. See video online at SharperImage.com for detailed instructions.
- 2 -
Page 3

HOW TO CHARGE
1. Plug the charger into an AC power outlet.
2. Plug the charging cable into the charging jack of the unit.
NOTE
• Ensure the unit is switched on when charging.
• Unplug the charger after charging is finished.
• The indicator light will illuminate red while charging and turn green when charging has finished.
• Flashing red light will alert you when the unit needs to be charged.
• Flashing green light will turn red when the unit is in use.
MAINTENANCE
• Turn the until off before cleaning it.
• Wash the unit with water or detergent.
• Clean the skid proof pads on the bottom of the unit to make sure the unit stays in place
while in use.
• If the unit won’t be in use for an extended amount of time, pack it away and place
it in a dry place.
TROUBLESHOOTING
- 3 -
Page 4

SPECIFICATIONS
Temperature 140 °F
Battery type Lithium Battery
Charging time Approximatively 2 hours
Voltage 13.6 V
Power 20 W
WARNINGS
European directive 2012/19/UE on Waste Electrical and Electronic Equipment (WEEE), requires that
old house hold electrical appliances are not thrown into the normal flow of municipal waste. Old
appliances must be collected separately to optimize the recovery and recycling of materials they
contain and reduce the impact on human health and the environment.
• To ensure battery safety when charging, please check the AC power supply voltage.
• Don’t touch the charger or a live socket.
• Unplug the charger after it’s fully charged.
• Unplug the charger immediately and contact our service center if it emits smoke or burns
when charging.
• Do not disassemble the unit or change the battery.
• Please dispose of used batteries properly.
• DO NOT put your fingers into the range of the sealing clip when the unit is in use.
• Keep away from children. This unit is not a toy.
• Keep unit away from water.
WARRANTY / CUSTOMER SERVICE
Sharper Image branded items purchased from SharperImage.com include a 1-year limited
replacement warranty. For Customer Service, please call 1 (877) 210-3449.
The SHARPER IMAGE® name and logo are registered trademarks.
©Sharper Image. All Rights Reserved.
- 4 -
 Loading...