

Page 1
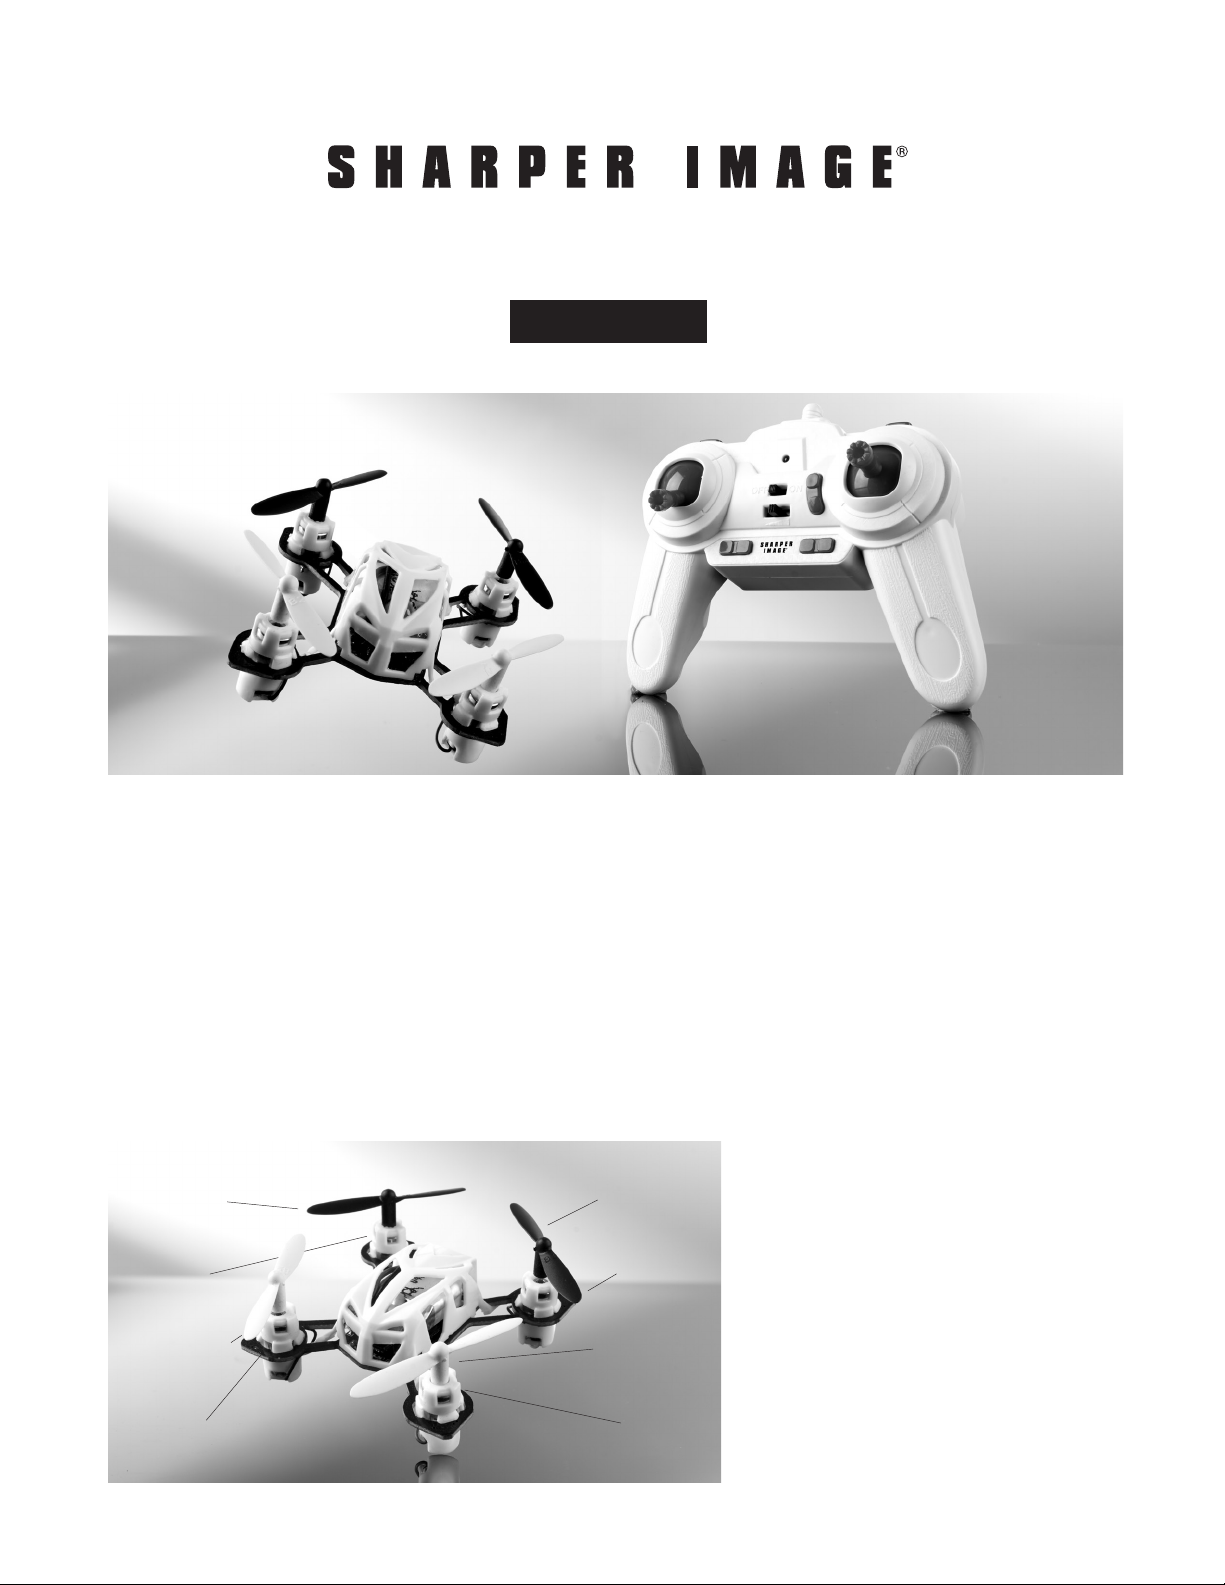
MOSQUITO DRONE WITH LED LIGHTS
Item No. 206614
User Guide
Thank you for choosing the Sharper Image Mosquito Drone with LED Lights.
Please take a moment to read this guide and store it for future reference.
FEATURES
1. Four motors with stability software to ensure smooth flying experience!
2. Simple and efficient design to ensure easy installation and repairs.
3. Equipped with 6 AXIS GYRO to allow the user a smooth flight.
IDENTIFICATION OF PARTS
Rear Blade Rear Blade
Blue LED Blue LED
Front Blade Front Blade
Red LED Red LED
- 1 -
Page 2
REMOTE CONTROLLER
Headless function Power light
Throttle lever
(up/down, L/R)
Speed selector
(low, med., high)
Power switch
Rotary
trimmer
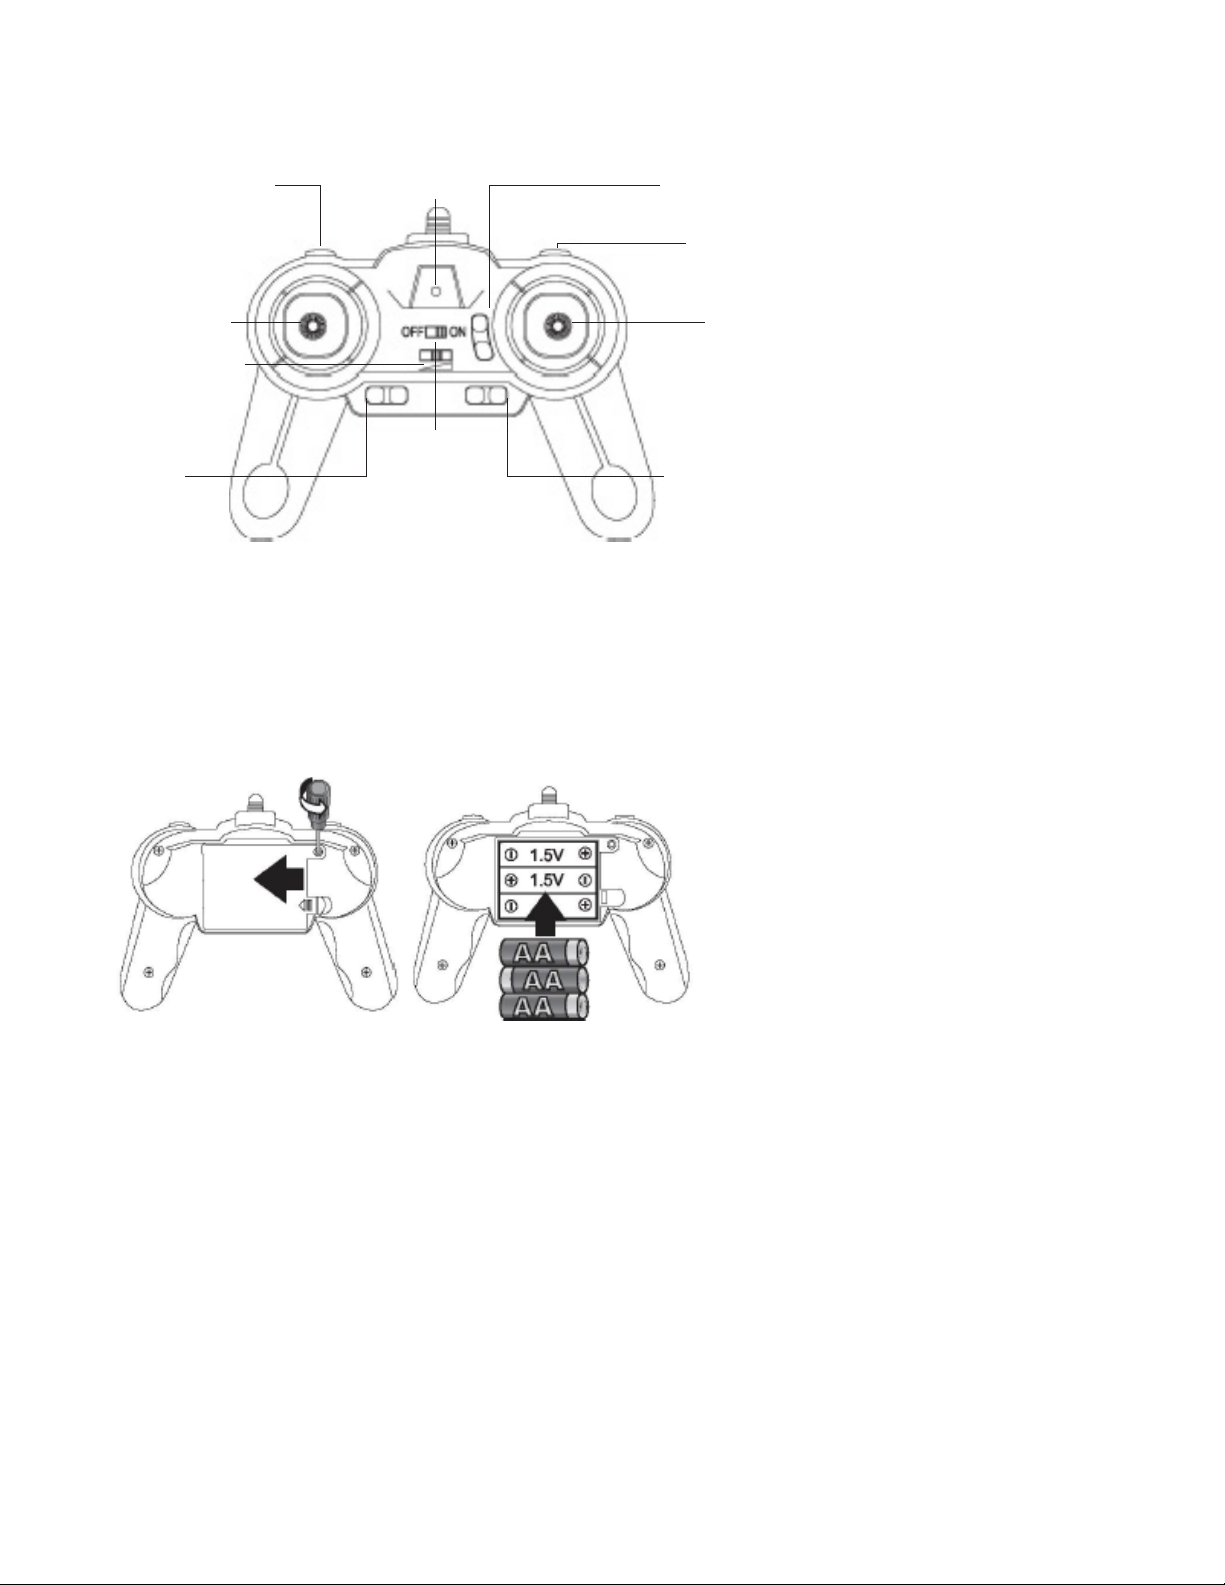
HOW TO INSTALL BATTERIES IN THE
REMOTE CONTROLLER
3 x AAA batteries are required (not
included). Open the battery cover and
install batteries with correct polarity as
shown.
Forward/back
fine tuning
Instant flip
Steering
(forward/back,
left/right
Left and right
fine tuning
NOTE:
• Make sure batteries are installed with the
correct polarity.
• Do not mix old batteries with new ones.
• Please do not use other sized batteries.
WARNINGS
• This product is a precision piece of
equipment with high levels of technology in
order to keep it airborne. In order to prevent
accidents, it is highly recommended that
the operator assemble the unit properly.
Safety must be of the highest concern
when operating the quadcopter. Serious
accidents to one’s self or others may
result if due care is not shown. We are not
responsible for any damages or injuries
caused by this quadcopter.
• The recommended operating age is 8 and
older and those with previous hobby flying
experience.
• Please check with your local authorities if
any licenses are required to operate this
quadcopter.
- 2 -
Page 3

SAFETY INSTRUCTIONS
• Please operate this away from obstacles
and crowds. This quadcopter is capable
or high speeds which may be dangerous.
It is highly recommended to operate
said quadcopter away from crowds, high
buildings, high voltage wires, etc. Do not
operate this quadcopter under less than
ideal environmental conditions such as
high winds, rain or thunder.
• Due to the high-quality parts and
equipment, stay away from hot objects
and do not operate under the blazing sun.
If the equipment overheats then let the
quadcopter rest in a cool shaded area but
do not put it in a fridge or freezer.
• Avoid water as this may damage vital
components.
• Minimum operating space is 26 X 26 X
16.4 feet.
• Ensure both aircraft and remote control
have adequate power in the batteries prior
to using.
• Ensure speed mode set to Low when first
playing then you may gradually increase
speed as confidence and skill increases.
• When turning on or off, always turn on
the quadcopter first and then the remote
control.
• Always ensure all connections are secure
prior to using the quadcopter.
• lt is recommended that the space area
must have over 26 X 26 X 16.4 feet.
• Be sure the controller and the receiver
battery are working with full electricity.
• Be sure the throttle lever of the remote
control is at the lowest position before you
play
• Please be sure to follow the correct order
of switching power on the quadcopter
first then controller. While turning off the
power, turn the quadcopter off first then
the controller. Please note, not following
the instructions may cause damage.
• Be sure the connection wire between
the battery and motor is secure. The
constant rocking during flight will cause
the quadcopter to lose control or make the
plug loose.
HOW TO USE
• Make sure the quadcopter starts on a
leveled horizontal area.
• Once the unit and remote control are on
the lights will flash three times.
HOW TO RECHARGE: Use the USB port to
charge the unit with the included USB cable.
Only use the cable included to charge the
device. When charging, the unit’s LEDs
should illuminate bright red.
SPEED MODES: On the remote control there
are three speed modes. Low is for beginners,
medium is for novice users (will beep twice
when selected) and high is for expert users
(will beep 3 times when selected.
AERIAL SOMERSAULT: When operating the
quadcopter, you can press the “instant flip”
button to person an aerial somersault. The
remote-control indicator will turn from red to
green when the button is pressed. Once the
roll is complete then normal operations will
resume.
NOTE: This action is recommended only in
large areas otherwise it will be dangerous.
- 3 -
Page 4

ADDITIONAL INSTRUCTIONS
• Propellers must rotate clockwise in the
front and counterclockwise in the rear.
• If the unit begins to wander you can fine
tune it with the remote control.
FLYING CONTROL:
• Turning the right joy stick left and right will
make it fly left and right respectively.
• Turning the left joy stick up and down will
make it fly up and down respectively.
• Turning the left joy stick left and right will
make it fly forward while leading left and
right respectively.
• Turning the right joy stick up and down
will make it fly forward and backwards
respectively.
• Using the fine tune directional buttons
will make the unit gently head left or right
when pressed left or right respectively.
• Using the fine tune directional buttons
will make the unit gently head forward or
backwards when pressed front or back
respectively.
SPEED MODE: The quadcopter has a 3-speed
mode by switching the speed selector on the
remote control, Left position is low speed,
suitable for beginner. Middle position is
medium speed, suitable for advanced players.
Right position is high speed, suitable for very
skillful players.
AERIAL SOMERSAULT: While the quadcopter is
flying in the air press the “instant flip” button
on the remote control Handset. You will hear
“beep” this means the somersault rolling
mode is engaged. Push the direction control
lever to either direction, the quadcopter will
do a 360-degrees somersault and rolling
mode will be off automatically.
NOTE: This action should operate in a big
space, otherwise it will be dangerous.
HEADLESS FLIGHT MODE: Press the
“headless function” button, “beep-beep”
means engaged, press again “beep” means
disengaged.
QUADCOPTER BATTERY CHARGING INSTRUCTIONS
• Plug in the USB charging cable supplied to the
charging socket on the quadcopter.
• The red light will illuminate when it is fully charged.
ADDITIONAL INSTRUCTION BEFORE FLYING
1. The red LED lights is the front of the
quadcopter, blue LED is the rear.
2. Check the propeller rotating direction after
the quadcopter is on. The left front and right
rear propellers spin clockwise, right front &
left rear propellers spin counterclockwise.
3. If in flight quadcopter flies to one side,
adjust fine-tuning with the included remote.
The SHARPER IMAGE® name and logo are registered trademarks.
©Sharper Image. All Rights Reserved.
WARRANTY / CUSTOMER SERVICE
Sharper Image branded items purchased from
SharperImage.com include a 1-year limited
replacement warranty. For Customer Service,
please call +1 (877) 210-3449.
NOTE: Use the included USB cable
to charge the quadcopter only.
 Loading...