

Page 1
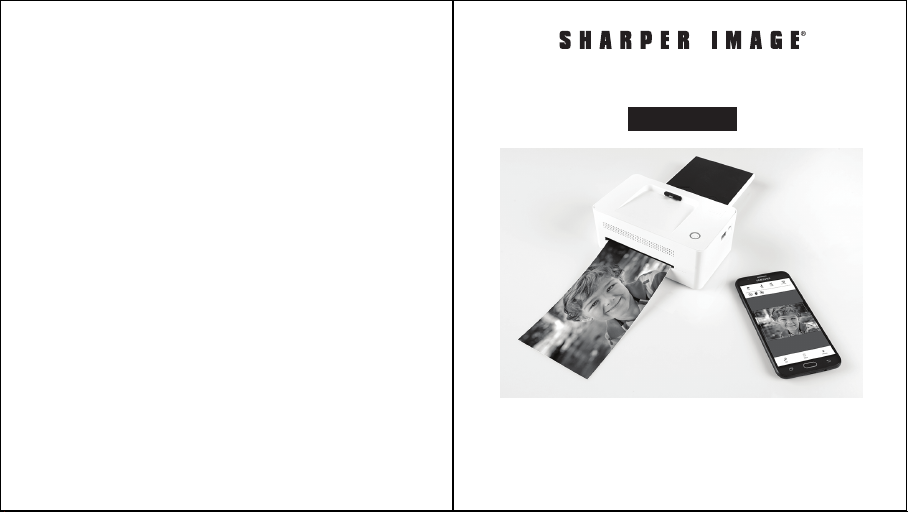
SMARTPHONE PHOTO PRINTER
Item No. . 206589
User Guide
Thank you for purchasing the Sharper Image Smartphone Photo
Printer. Please take a moment to read this guide and store it for
future reference.
- 1 -
Page 2

SAFETY PRECAUTIONS
• Use only recommended power sources.
• Do not attempt to disassemble, alter, or apply heat to the product.
• Avoid dropping or subjecting the product to severe impacts.
• Do not touch the interior of the product if it has been dropped or
otherwise damaged.
• Do not use, place, or store the product in the following: Places with
direct sunlight, places with a temperature higher than 40 º C (104ºF),
places with high humidity or dust, and places with strong vibrations.
• Stop using the product immediately if it emits smoke, a strange smell,
or otherwise behaves abnormally.
• Do not use organic solvents such as alcohol, benzene, or thinner to
clean the product.
• Do not let the product come into contact with water or other liquids.
• Do not allow liquids or foreign objects to enter the product.
• Do not handle the power cord with wet hands.
• Keep out of reach of children.
• Keep the printer in a safe area to avoid people tripping over the power
cord.
• Please stay at least 7.9 inches away from the printer when in use.
• Unplug the power cord when the product is not in use.
• Unplug the power cord periodically, and using a dry cloth, wipe away
any dust or dirt that has collected on the plug, the exterior of the
power outlet, and the surrounding area.
• Do not stick your hand or objects into the printer interior.
• Do not place heavy objects on top of the product.
- 2 - - 3 -
• Do not touch the paper while it is printing.
• Do not pull out the paper while it is printing.
• Do not place anything on top of the printer while it is in use.
• Use the latest app for optimal results. You may download the latest
app through Google Play or Apple App Store.
• Never reuse paper. Reusing paper may cause paper jams or cause the
ink sheet to adhere to the paper causing printer damage.
• Do not reuse ink cartridges.
• Do not unplug the printer while it is printing.
Page 3
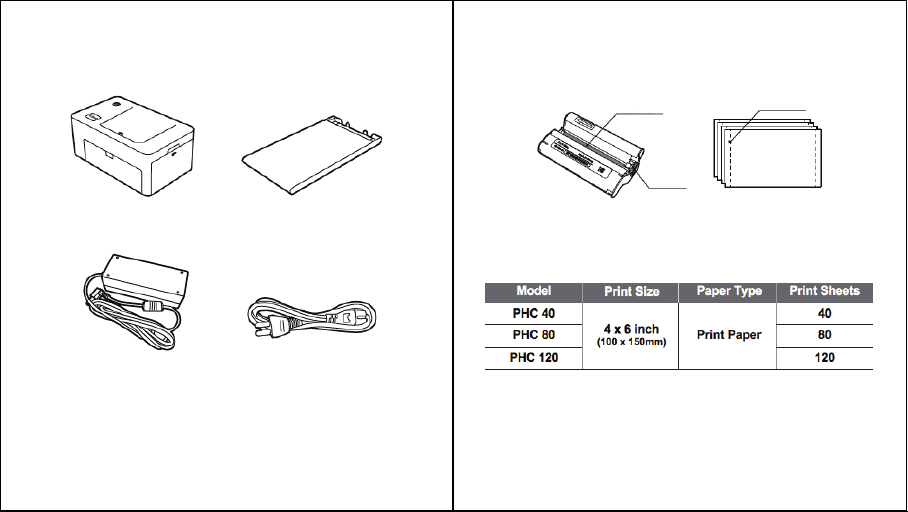
PACKAGE CONTENTS
Before use, make sure the following items are included in the package:
CONSUMABLE (SEPARATE PURCHASE
Before printing, purchase an Ink Cartridge/Paper Set
)
Photo Printer Dock
(PD-450/480)
Power Adapter
* Specifications or design may change without notice for product
optimization.
Paper Cassette
Power Cord
- 4 - - 5 -
Ink Sheets
Lever
Ink Cartridge
CONSUMABLE SET
*Ink cartridge and paper are sold as a set.
Cut line
Photo Paper
Page 4
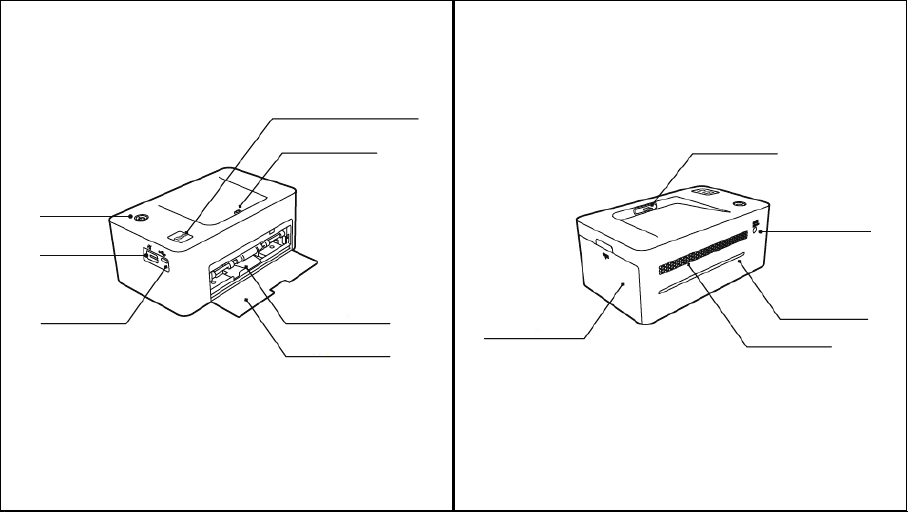
IDENTIFICATION OF PARTS
1 Touch App & Print Button
Dock Connector
Dock Connector
Power button
USB Port
*Micro 5 Pin
* Do not attempt to use the Micro 5 Pin port. This port is designed
use.
for factory
- 6 - - 7 -
Paper Tray Slot
Paper Exit Door
Cartridge Cover
DC power slot
Paper path slot
Ventilation hole
Page 5

INSTALLING PHOTO PRINTER DECK
MINIMUM 5CM
(
)
2 IN.
MINIMUM 20CM
(
)
8 IN.
MINIMUM 5CM
(
)
2 IN.
INSERTING CARTRIDGE
MINIMUM 5CM
(
)
2 IN.
Choose the right place to put the Smartphone Photo Printer Dock. Place the
printer on a table or other flat, stable surface. Do not place the printer on an
unstable or tilted surface.
• Leave a minimum of 5 cm (2 in.) of open space around the printer.
• Leave a minimum of 20 cm (8 in) in front of the printer.
• Make sure the power cord is not interfering with the area where the
paper comes in and out.
• Avoid using the printer in dusty areas. It may damage the printer or
cause a malfunction.
- 8 -
1. Open the cartridge cover.
3. Press down and pull out the lever
to replace used cartridges.
2. Insert the cartridge using the arrow
specified until you hear a clicking
sound.
• When inserting the
cartridge, do not touch
the ink sheet with your
hands.
• Do not reuse used
cartridges. this could
result in a product
malfunction.
- 9 -
Page 6

INSERTING PAPER CASSETTE
1. iPhone, iPad and iPod
1. Open the cassette cover.
3. Open the printer’s cassette cover.
- Visit the App Store via your device.
2. Insert paper facing shiny side up. You
can insert up to 20 sheets. Inserting over
21 sheets may cause a malfunction. Avoid
touching the coated paper with your hands
as it may affect the photo quality.
- Search for “SI Smartphone Printer.”
- Install the application.
2. Android Phones and Tablets
4. Insert the cassette until it clicks
into place.
- 10 - - 11 -
- Go to the Play Store via your device.
- Search for “SI Smartphone Printer.”
- Install the application.
Page 7

CONNECTING TO THE PRINTER AND PRINTING
Printing photos using the dock:
Printing photos using a USB cable:
1. Turn on the printer by pressing the
power button on the top left corner.
Connect the smart phone to the dock
after turning the printer on.
3. Choose a photo
2. Push the 1Touch button on the left
bottom corner of the printer. App will run
automatically. In case of Android phone,
App can be launched when it is docked.
4. To start printing, push the 1Touch
button or the print button in the App.
- 12 - - 13 -
1. Turn on the printer by pressing the
power button on the top left corner.
Connect the smart phone to the dock.
3. Choose a photo.
2. Push the 1Touch button on the left
bottom corner of the printer. App will run
automatically. In case of Android phone,
App can be launched when it is docked.
4. To start printing, push the 1Touch
button or the print button in the App.
Page 8

PRINTING PHOTOS USING WIFI
(
*PD-450W/480W MODEL ONLY)
USB FLASH DRIVE/DIGITAL CAMERA
Printing with USB Flash Drive
1. Turn on the printer.
2. Connect your device to the printer.
3. Insert your flash drive into the USB port.
4. Select the USB menu from the printer app.
5. Select your image and print.
1. Turn on the printer by pressing the
power button on the top left corner.
Turn WiFi on in your smartphone.
3. App launch.
* You can find your printer Model No. on the label at the bottom of printer.
2. Go to WiFi setting in your smart
phone and find “Direct-SI-XXXX”.
Printer name (XXXX) is variable (4
characters). Password is “12345678.”
4. Choose a photo. To start printing, push
the print button in the App.
- 14 - - 15 -
Printing with USB Flash Drive
If a “PictBridge” compatible camera is connected, you can print photos directly
from your digital camera.
1. Turn on the printer.
2. Remove any memory card or USB flash drive.
3. Connect your camera to the printer using a USB cable.
4. Turn on the camera and go to the album. (Certain cameras will show
(insert icon) icon)
5. Select your image from the camera and print.
Page 9

CHARGE YOUR DEVICE
1. Using the dock
Docking to the printer will charge your device.
2. Using a USB cable
Connecting a USB cable to the USB port will charge your device.
- 16 - - 17 -
POWER AND LED STATUS INDICATORS
LED Status
Page 10

TROUBLESHOOTING PRODUCT SPECIFICATION
- 18 - - 19 -
Page 11

FCC REQUIREMENTS PART 15
Caution: Any changes or modifications in construction of this device which are
not expressly approved by the responsible for compliance could void the user’s
authority to operate the
NOTE: This device complies with Part 15 of the FCC Rules. Operation is subject
to the following two conditions;
1. This device may not cause harmful interface, and
2. This device must accept any interference received, including
interference that may cause undesired operation.
This equipment has been tested and found to comply with the limits for a
Class B Digital Device, pursuant to Part 15 of the FCC Rules. These limits are
designed to this equipment generates, uses, and can radiate radio frequency
energy and, if not installed and used in accordance with the instructions, may
cause harmful interference to radio communications.
However, there is no guarantee that interference will not occur in a particular
installation. If this equipment does cause harmful interference to radio or
television reception, which can be determined by turning the radio or television
off and on, the user is encouraged to try to correct interference by one or more
of the following measures.
1. Reorient or relocate the receiving antenna.
2. Increase the separation between the equipment and receiver.
3. Connect the equipment into an outlet on another circuit.
4. Consult the dealer or an experienced radio/TV technician for help.
- 20 - - 21 -
WARRANTY / CUSTOMER SERVICE
Sharper Image branded items purchased from SharperImage.com include a
1-year limited replacement warranty. If you have any questions not covered
in this guide, please call our Customer Service department at 1 (877) 210-
3449. Customer Service agents are available Monday through Friday, 9:00
a.m. to 6:00 p.m. ET.
The SHARPER IMAGE® name and logo are registered trademarks.
©Sharper Image. All Rights Reserved.
 Loading...