

Page 1

VIDEO CAMERA DRONE WITH LED LIGHTS
Item No. 205981
User’s Guide
Thank you for purchasing the Sharper Image Video Camera Drone with LED Lights.
Please read these instructions prior to using this device for the first time.
- 1 -
Page 2
FEATURES
• HD video camera
• NEW durable plastic body
• Auto Hover mode
• Headless mode
• 3 speeds
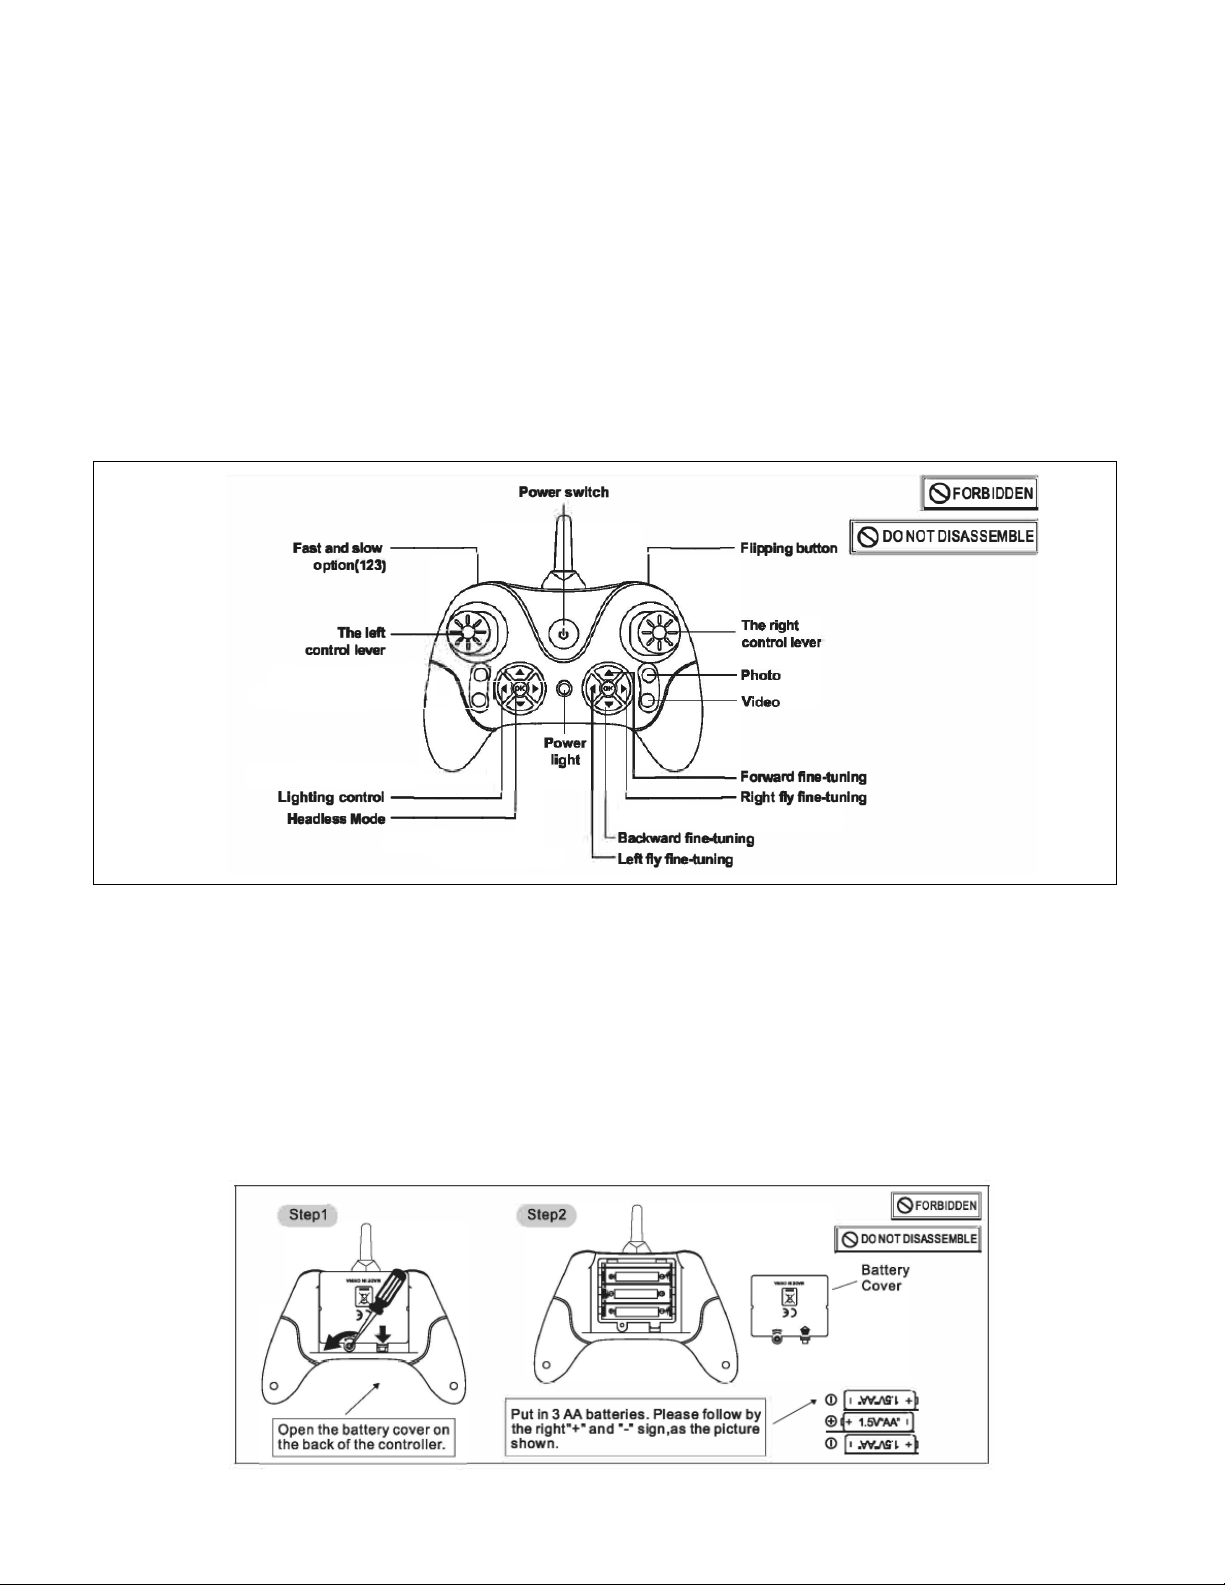
IDENTIFICATION OF PARTS
BATTERY INSTALLATION (TRANSMITTER
• Open the battery cover and insert 3 AA batteries.
• Follow polarity diagrams inside the battery
compartment.
• Replace the battery cover.
)
- 2 -
Page 3
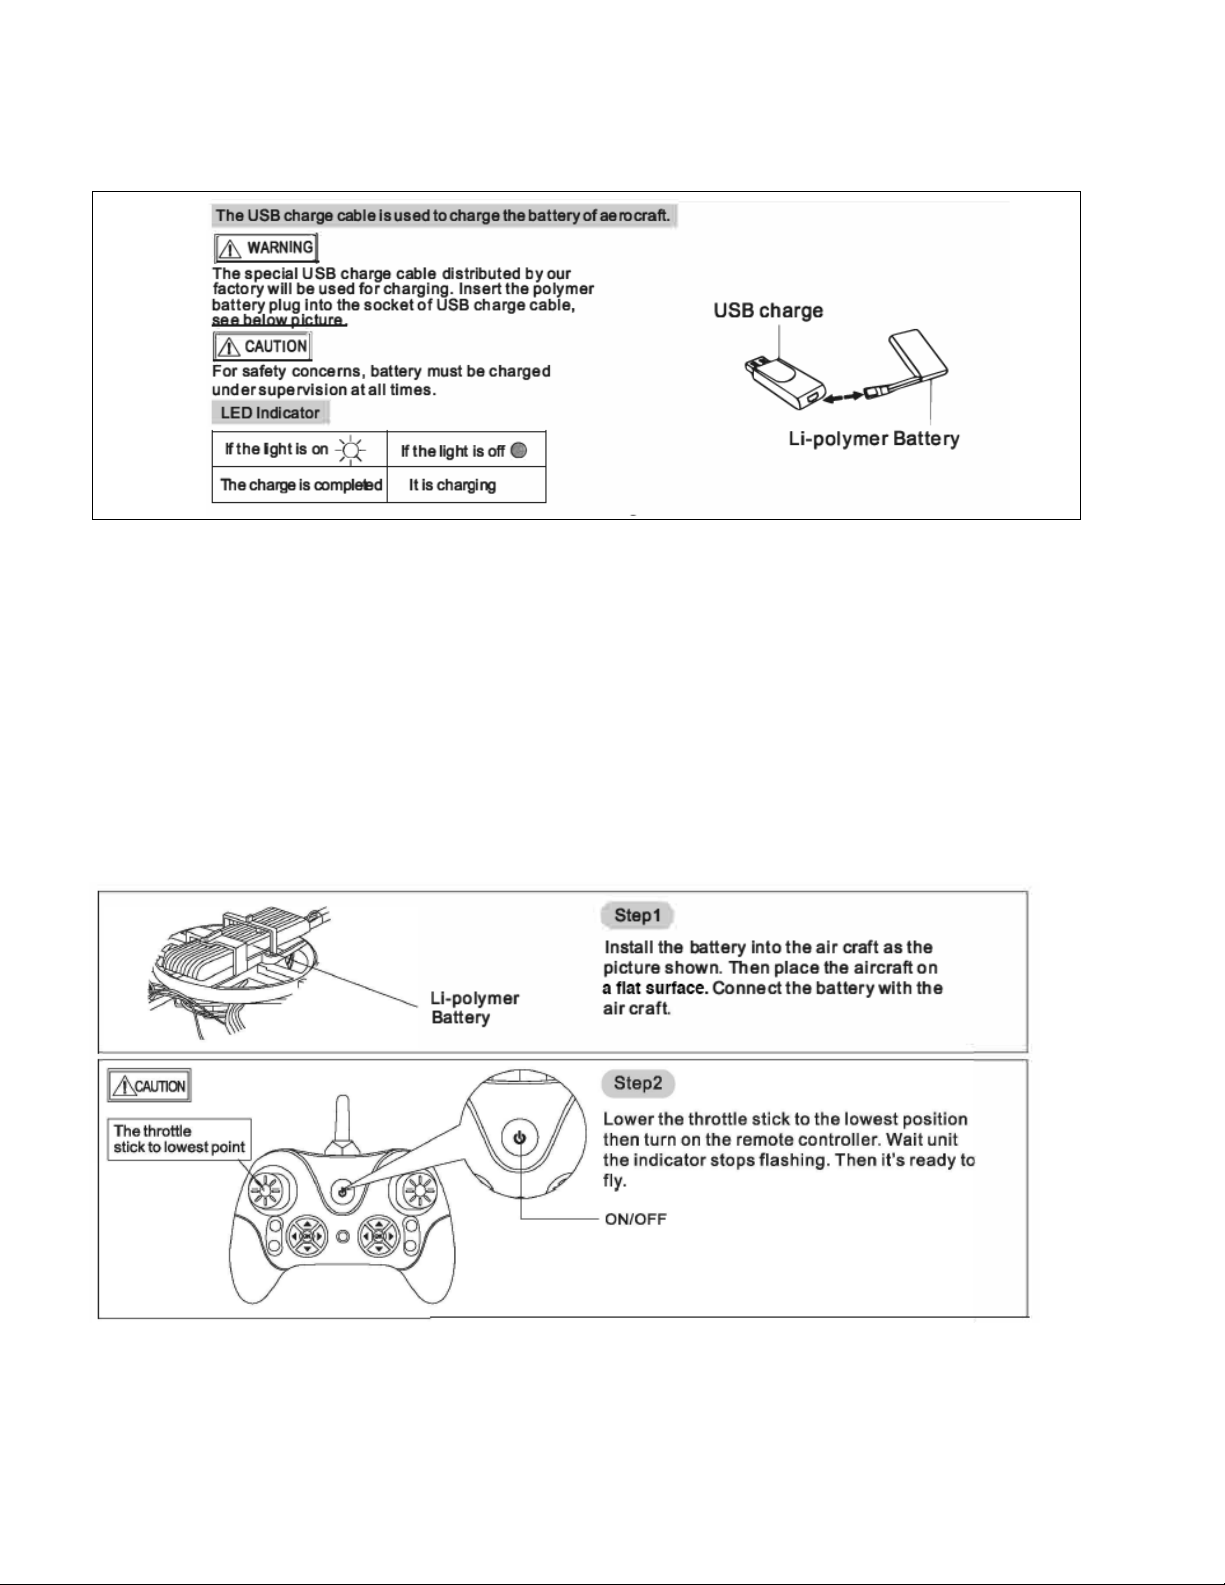
CHARGING THE DRONE
• Please use the charger that came with this package. Do not use any other charger.
• Connect the charger and battery as shown.
• A light will be off during charging.
• A light will illuminate when the battery is fully charged.
• The charge time is approximately 1.5 hours.
• A full charge provides approximately 6-7 minutes of flight time.
WARNING: Do not overcharge. Do not leave a charging battery unattended.
PAIRING THE DRONE AND TRANSMITTER
- 3 -
Page 4
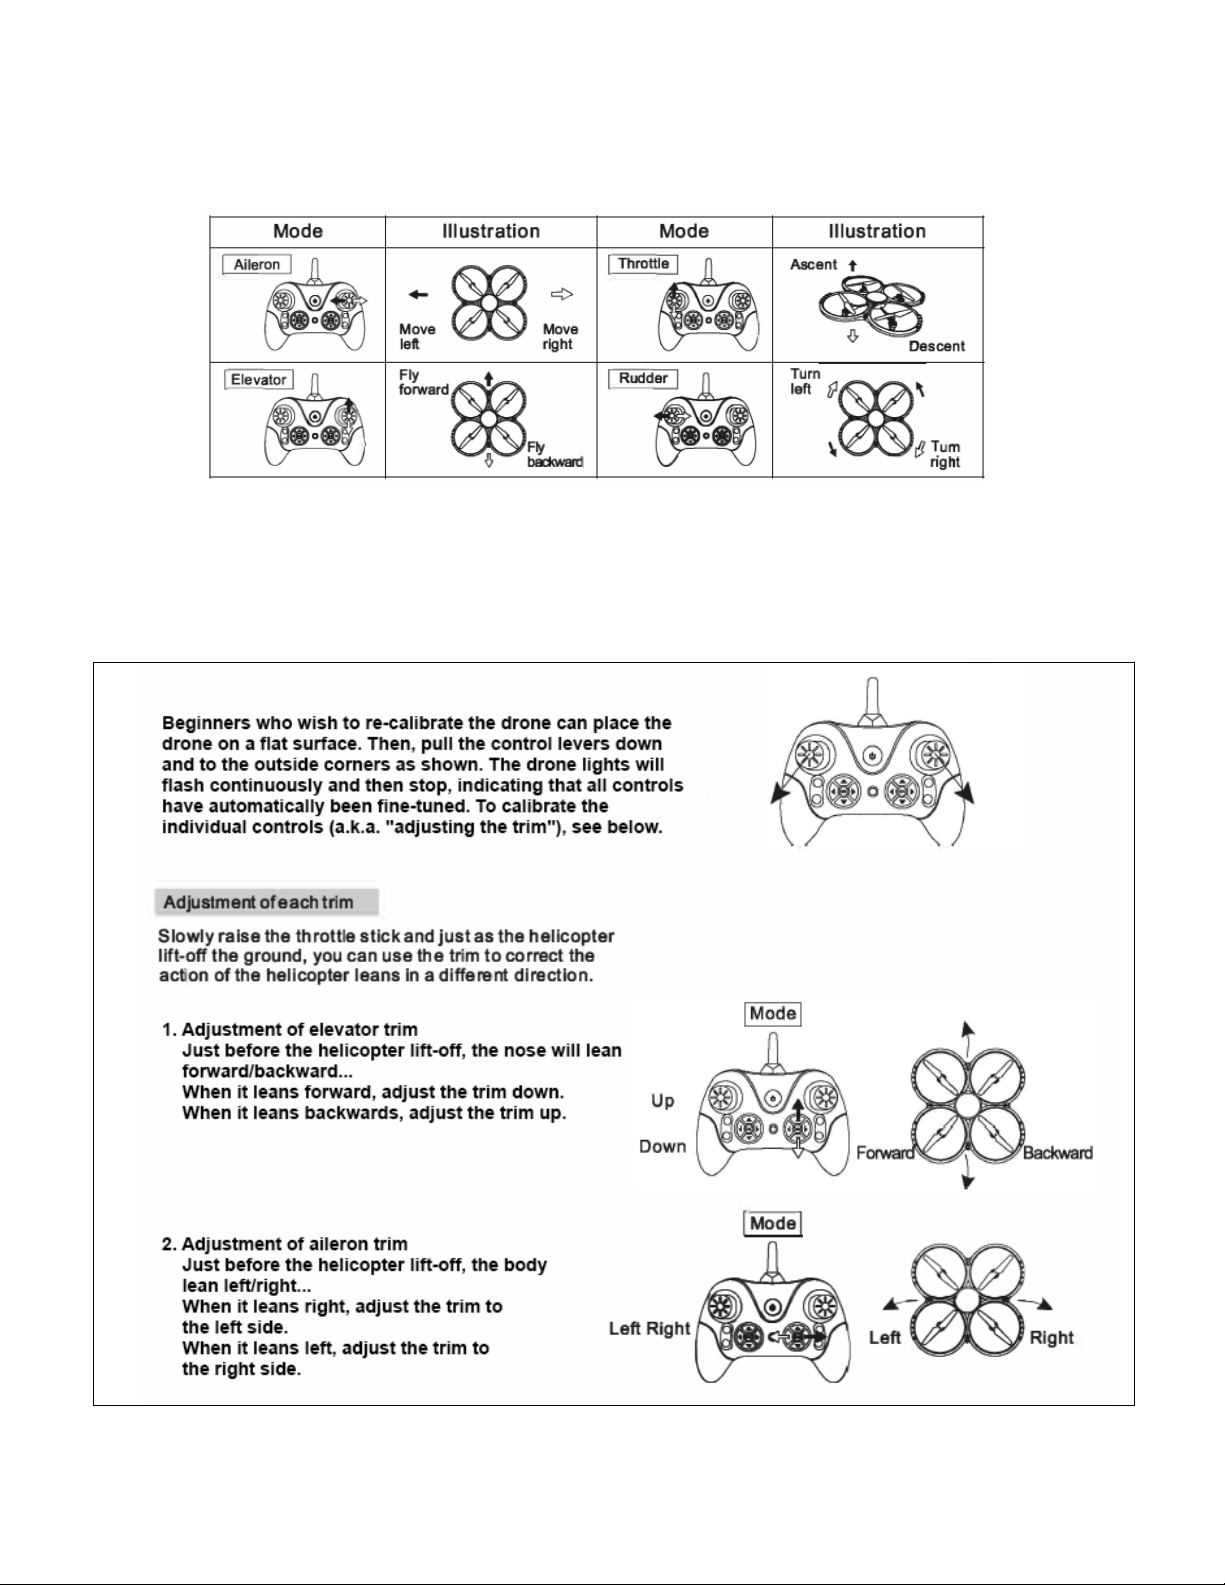
CONTROLLING THE DRONE
NOTE: The range is approximately 90 ft.
TRIM CONTROLS (CALIBRATION
If the vehicle drifts or rotates on its own, you can correct this by adjusting the trim controls.
)
- 4 -
Page 5
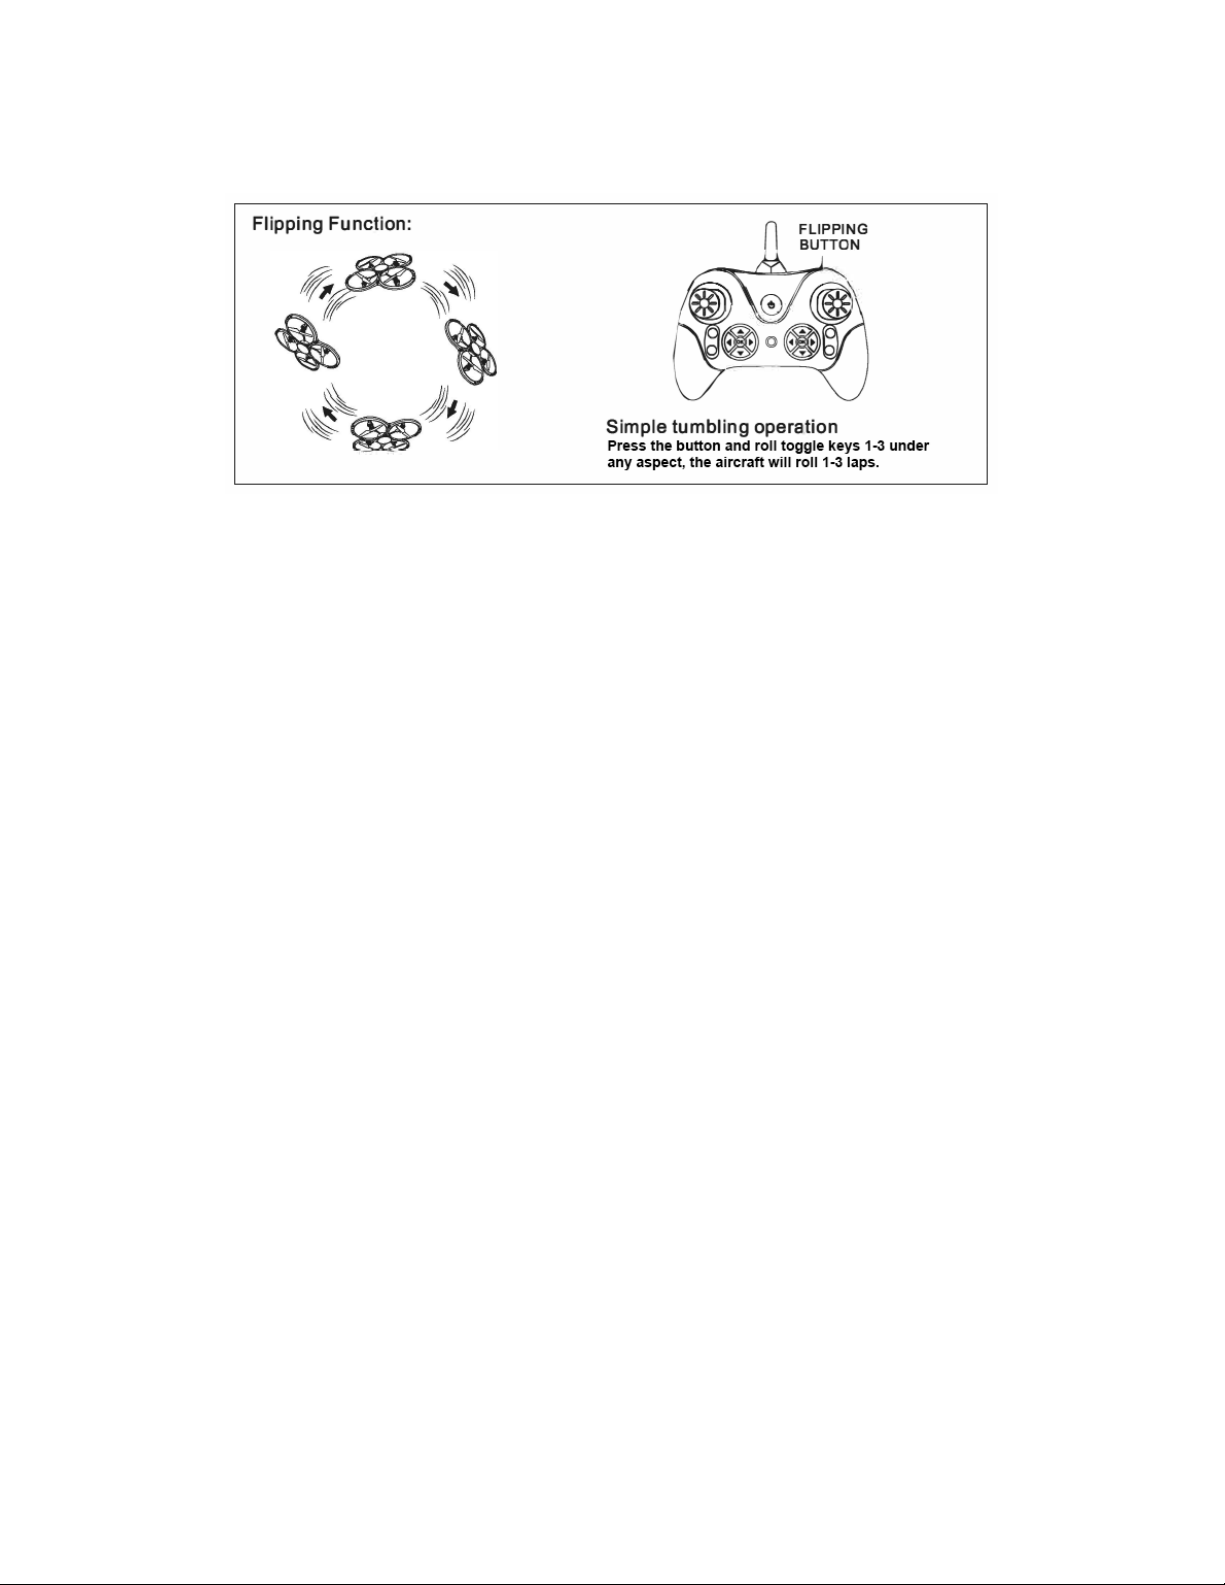
STUNT FLIP OPERATION
SPEED CONTROL
The Video Camera Drone with LED Lights has three speeds to suit your skills and flying environment.
Press the Fast/Slow button to change speeds.
• SLOW (left position): For beginners and indoor flying.
• MEDIUM (middle position): For beginners/intermediates and outdoor flying.
• FAST (right position): For intermediates/experts and outdoor flying.
HEADLESS MODE
Headless mode makes this drone easier for beginners to fly, because there is no specified “front end”
or “rear end.” In Headless Mode, when you bank left, the drone banks left. When you bank right,
the drone banks right, regardless of what direction the quad is facing.
To turn on Headless Mode
1. Start with the drone on a flat, level surface, with the video camera pointing away from you.
2. Press the Headless Mode On/Off button.
AUTO HOVER MODE
When you reach your desired altitude, release the throttle lever to maintain the altitude in
auto hover mode.
AERIAL VIDEO AND PHOTOS
• Insert SD card (not included) into the slot until it clicks into place. This camera supports
cards up to 32GB.
• While the drone is powered on, press Video to record video. The white LEDs will flash continuously
while video recording is under way. Press again to stop recording.
- 5-
Page 6

AERIAL VIDEO AND PHOTOS (CONT.)
• While the drone is powered on, press Photo to shoot a single still photo. The white LEDs will
blink once, indicating that you have shot 1 photo.
• To view videos and photos, power off the drone, remove the SD card and insert it into your
computer or USB card reader.
WARNING
• Do not use a battery that appears damaged or leaky.
• Do not open or modify the battery or the drone.
• Do not allow children to touch or play with the battery.
• Do not expose battery or drone to excessive heat.
• Do not discard the battery with the ordinary household trash. It should be recycled in accordance
with local laws.
CAUTION
• Do not expose to water or extreme heat.
• Remove batteries when not in use for extended periods.
• Do not allow vehicle to crash.
• Be sure all batteries are fresh/fully charged before operating this vehicle.
• Store this vehicle in the box when not in use.
FCC STATEMENT
This device complies with Part 15 of the FCC Rules. Operation is subject to the following two conditions:
(1) This device may not cause harmful interference
(2) this device must accept any interference received, including interference that may cause undesired
operation.
Note: This equipment has been tested and found to comply with the limits for a Class B digital device,
pursuant to part 15 of the FCC Rules. These limits are designed to provide reasonable protection
against harmful interference in a residential installation. This equipment generates, uses and can
radiate radio frequency energy and, if not installed and used in accordance with the instructions,
may cause harmful interference to radio communications. However, there is no guarantee that
interference will not occur in a particular installation. If this equipment does cause harmful interference
to radio or television reception, which can be determined by turning the equipment off and on, the user
is encouraged to try to correct the interference by one or more of the following measures:
-6 -
Page 7

FCC STATEMENT (CONT.
)
- Reorient or relocate the receiving antenna.
- Increase the separation between the equipment and receiver.
- Connect the equipment into an outlet on a circuit different from that to which the receiver
is connected.
- Consult the dealer or an experienced radio/TV technician for help.
WARRANTY / CUSTOMER SERVICE
Sharper Image branded drones purchased from SharperImage.com include a 60-day limited
replacement warranty. For Customer Service, please call 1 (877) 210-3449.
The Sharper Image® name and logo are registered trademarks.
Manufactured and marketed by Camelot SI, LLC under license.
©Sharper Image All Rights Reserved.
-7 -
 Loading...