

Sharper Image 205980 Owner's Manual
HEATED INDOOR/OUTDOOR SLIPPERS
Item No. 205980
Owner’s Guide
Thank you for purchasing the Sharper Image Heated Indoor/Outdoor Slippers.
Please read this guide and store it for future reference.
FEATURES
• Heated slippers for indoor and outdoor use
• Adjustable temperature control – Low, Medium, and High
• Rechargeable lithium-ion batteries (charger included)
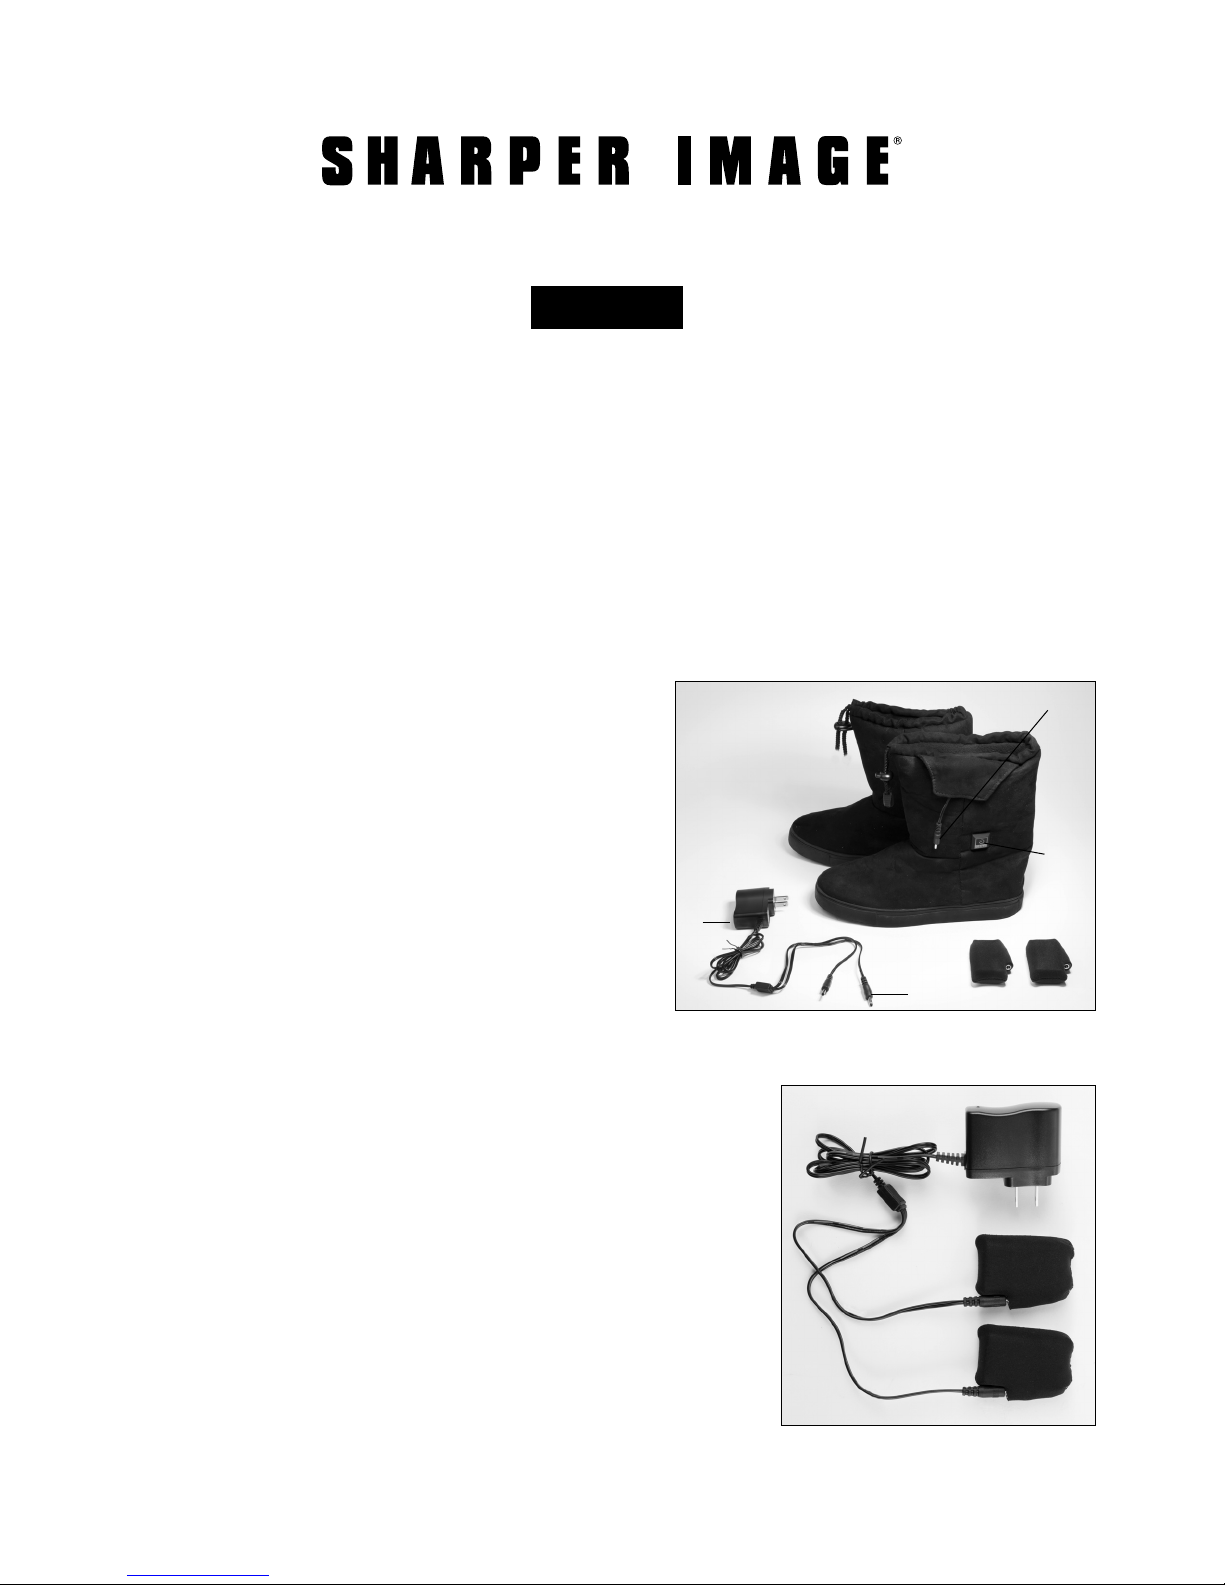
IDENTIFICATION OF PARTS
A. Slipper input plugs
B. Control button
C. Battery charger input plugs
D. LED light
A
B
D
OPERATION
1. Remove batteries from box.
2. Plug the battery charger into an outlet.
3. Connect the lithium-ion batteries to the input plugs of
the battery charger. Do not force the plug into the battery.
4. The LED light on the charger will light up in red, indicating
that it is being charged.
5. When the LED light on the charger is green, the battery is
fully charged (may take up to 8 hours).
NOTE: Before using your Heated Indoor/Outdoor Slippers,
the batteries should be fully charged. Failure to fully charge
the batteries prior to their first use may reduce battery life.
(
CONTINUED ON NEXT PAGE
)
C
- 1 -
(
OPERATION
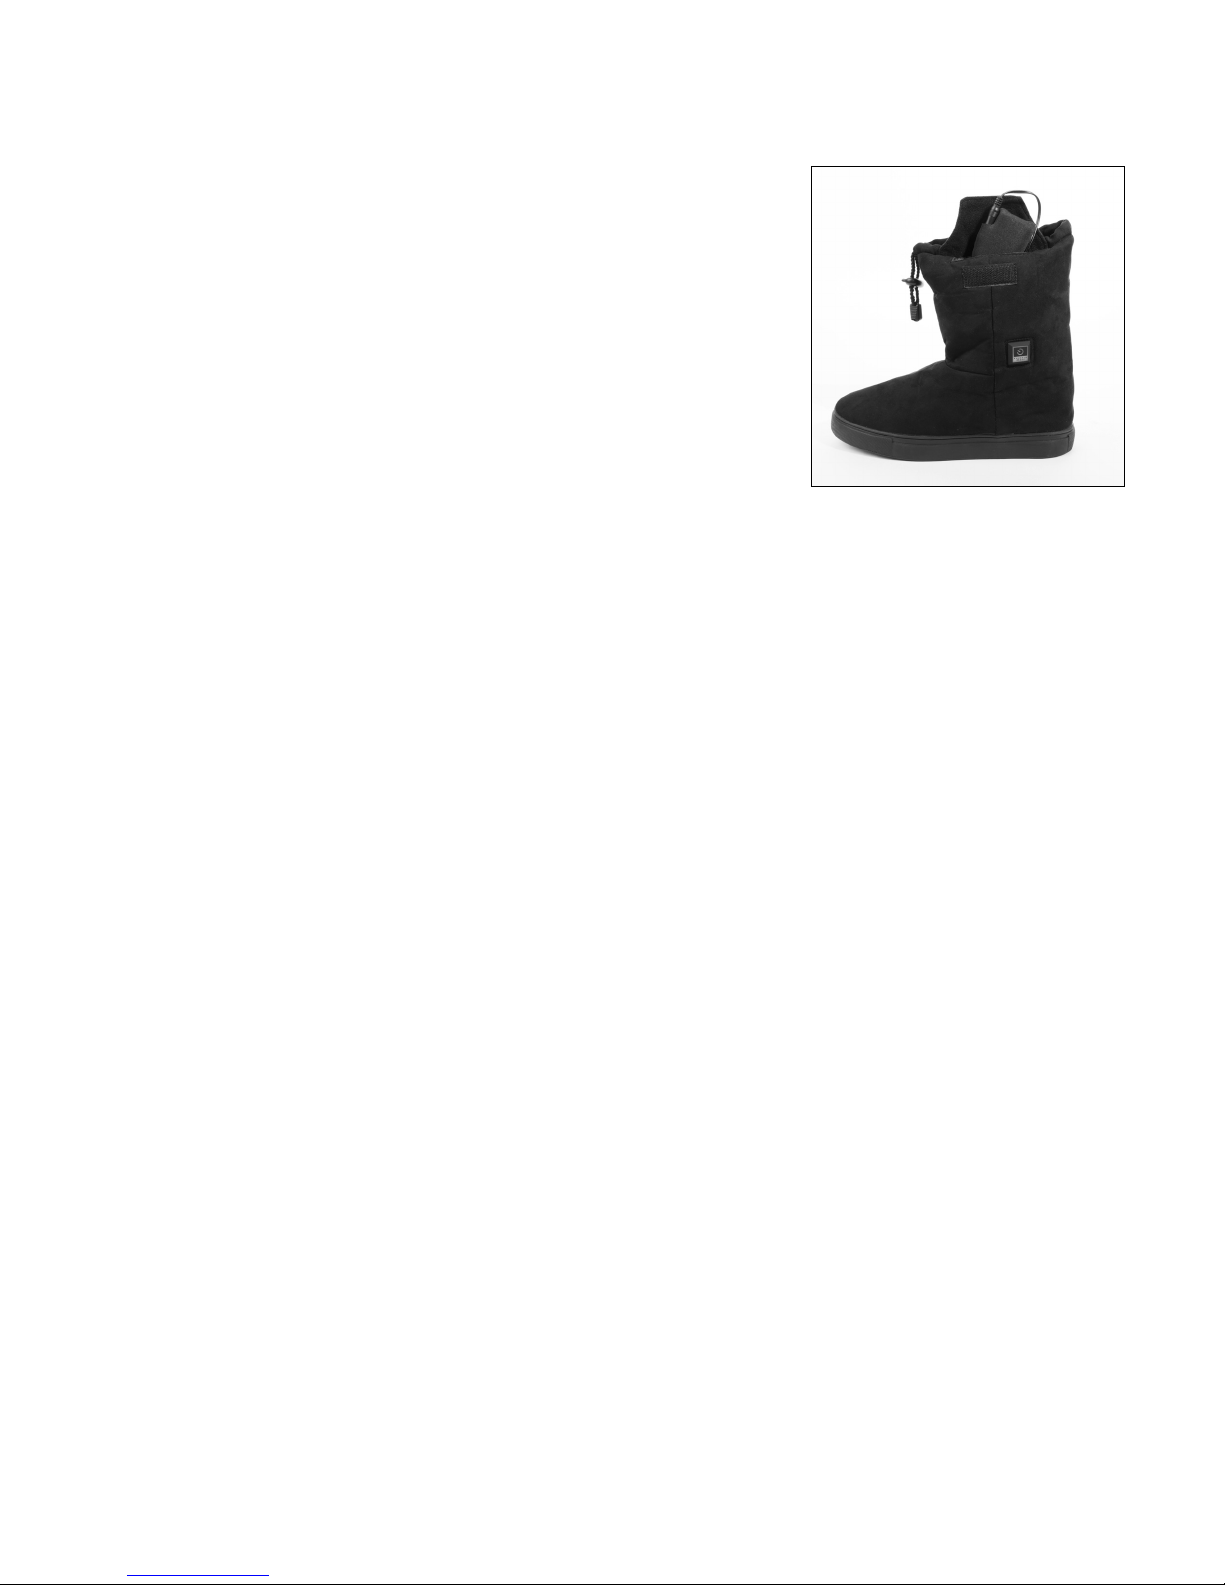
6. When fully charged, disconnect the batteries from the charger.
7. Locate the input plugs inside the small pouch on the outside
of each slipper and connect the charged batteries. Place the
batteries into the pouch once connected.
8. Press and hold the control button on the side of each slipper
for three to five seconds, or until the LED light flashes red,
then green, then blue.
9. The LED light on the control button of the slippers will then only
flash red, indicating that the shoes are in pre-heat mode.
10. After approximately five minutes, the light will change to solid
red, indicating the slippers are no longer in pre-heat mode. The temperature can be adjusted
by pressing the control button.
¬ Blue: Low heat – 104 °F with approximate run time of 4-5 hours
¬ Green: Medium heat – 113 °F with approximate run time of 2.5-4 hours
¬ Red: High heat – 122 °F with approximate run time of 2-3 hours
CONT’D
)
NOTE: Recommended to wear socks inside of the slippers.
11. To turn off the slippers, press and hold the control button for three to five seconds,
or until the LED light turns off.
12. Unplug the batteries when the slippers are not in use. Store batteries inside the pouch
of the slippers.
NOTE: The Heated Indoor/Outdoor Slippers should only be used with the included batteries
and charging cable. Never use the batteries or cable with any other device, regardless of how
similar the plugs may look, feel, or appear to fit or work together.
CLEANING AND MAINTENANCE
• Always remove batteries from the slippers before cleaning
• Spot clean with a damp cloth or hand wash in cold water with mild detergent
• Hang dry
• Do not twist the garment to prevent damaging the cable
• Do not dry clean or bleach
BATTERY WARNINGS
• Do not use batteries if you notice a change of shape (lumps), overheating when charging,
or if rust or corrosion on the battery connectors is found.
• Charge the batteries regularly (recommended a minimum of once every 3 months).
(
• Charge between each use.
CONTINUED ON NEXT PAGE
)
- 2 -
 Loading...