

Sharper Image 205405 Owner's Manual
Item No. 205405
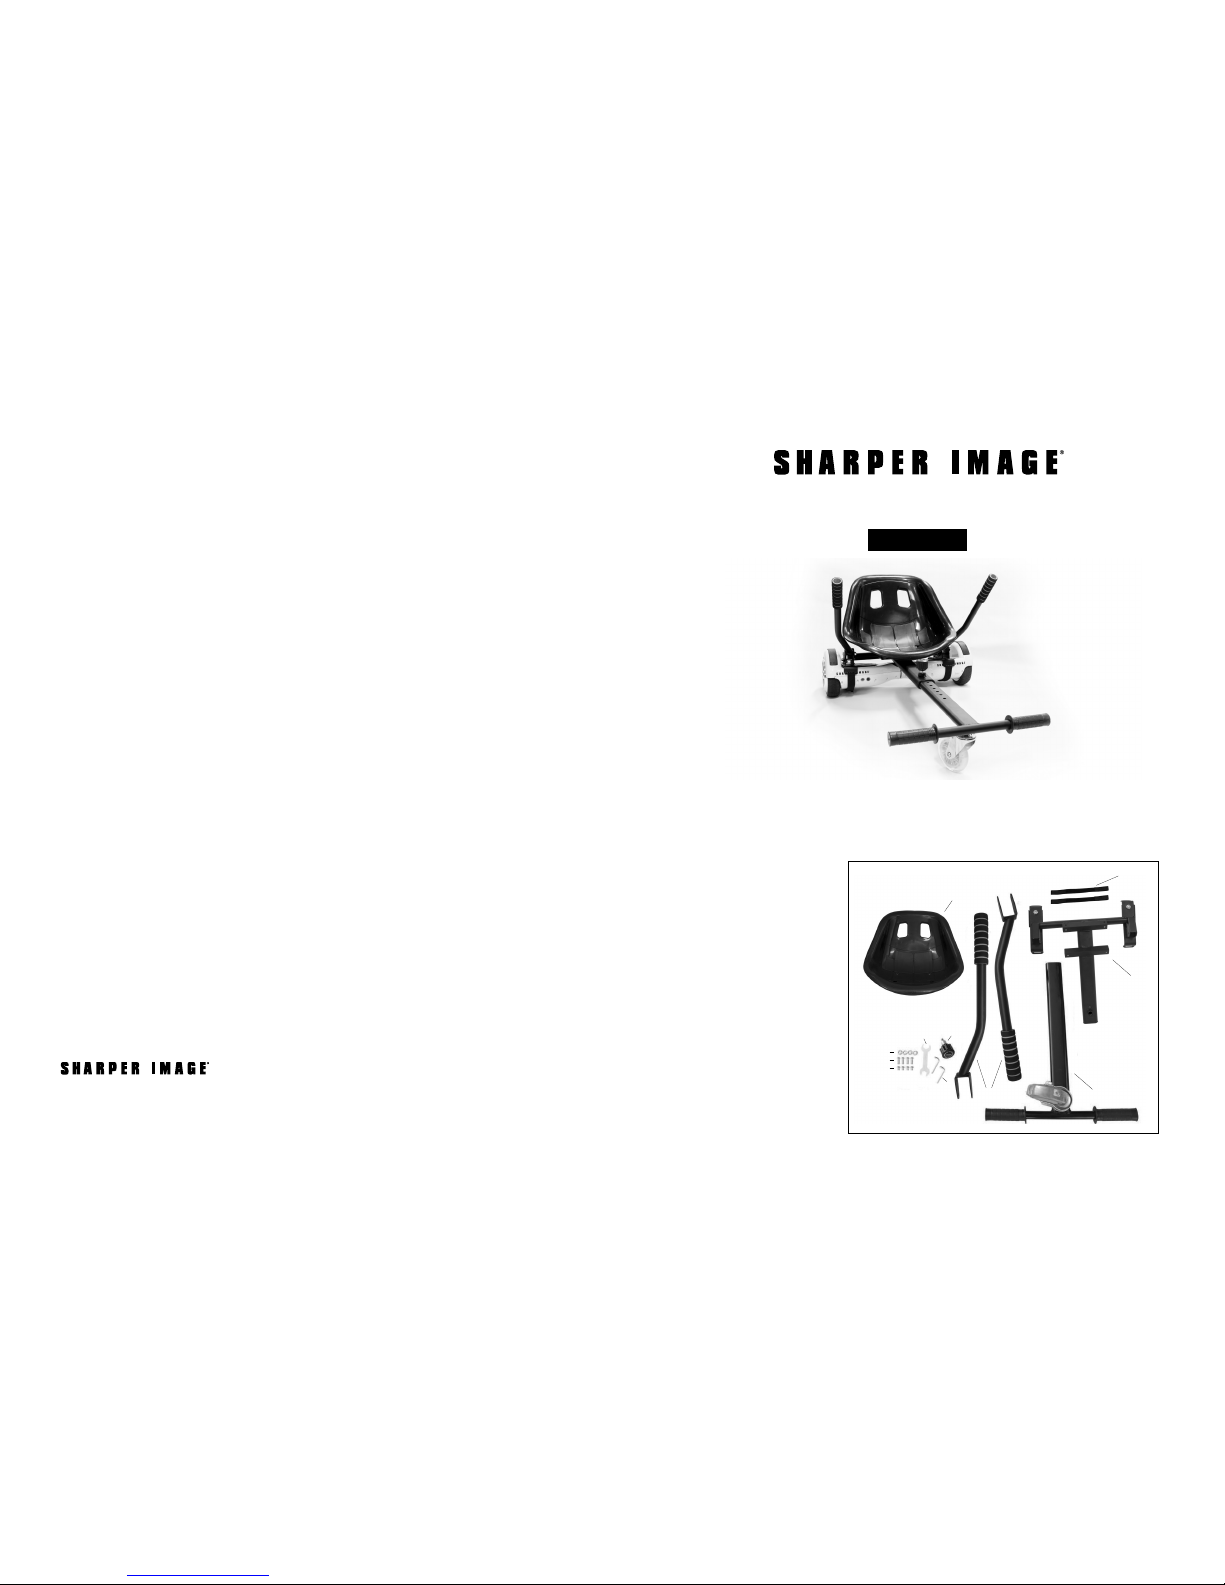
HOVERKART
Owner’s Guide
Thank you for purchasing the Sharper Image HoverKart. Please read these directions and
store them for future reference.
1. Allen wrenches (2 pcs.)
2. Hex wrench
3. Adjustment knob
4. Short screws (4 pcs.)
5. Long screws (4 pcs.)
6. Lock nuts (4 pcs.)
7. Handles (2 pcs.)
8. Main body
9. Foot bar
10. Seat
11. Velcro straps (2 pcs.)
To avoid injury, you must read this Owner’s Manual carefully and follow these safety warnings:
• Operator must take all reasonable safety precautions such as wearing a helmet, knee pads,
elbow pads and other protective gear.
• The HoverKart is for personal entertainment only. It is not for commercial or medical use.
• Do not operate the HoverKart on streets or highways.
• Do not operate the HoverKart in the dark.
• Avoid driving on steep slopes.
• Do not operate the HoverKart on slippery surfaces such as snow, ice and slippery floors.
• Do not operate the HoverKart if you are pregnant.
• Do not operate the HoverKart if you are impaired or under the influence of alcohol or
other drugs.
• Do not use headphones or talk on the phone while operating the HoverKart.
• Do not allow young children to operate the HoverKart.
• Do not carry items when operating the HoverKart.
• The HoverKart can be operated by one person at a time. It cannot be used by two or
more riders simultaneously.
• The operator and his or her belongings should not exceed the maximum load of 220 lbs.
• To avoid collisions, maintain a safe distance from other HoverKart operators, bicyclists
and pedestrians.
• Do not modify the HoverKart.
• Operator must abide by all local, state and federal laws when operating the HoverKart.
• Failing to obey the HoverKart Owner’s Manual may cause injury or death. Sharper Image is
not responsible for the misuse of the HoverKart or using it for any purpose other than
personal transportation.
Sharper Image branded items purchased from SharperImage.com include a 1-year limited
replacement warranty. For Customer Service, please call 1 (877) 210-3449.
INSIDE THE BOX
SAFETY WARNINGS
WARRANTY / CUSTOMER SERVICE
1
2
3
10
7
11
8
9
5
4
6
The SHARPER IMAGE® name and logo are registered trademarks.
©Sharper Image. All Rights Reserved.
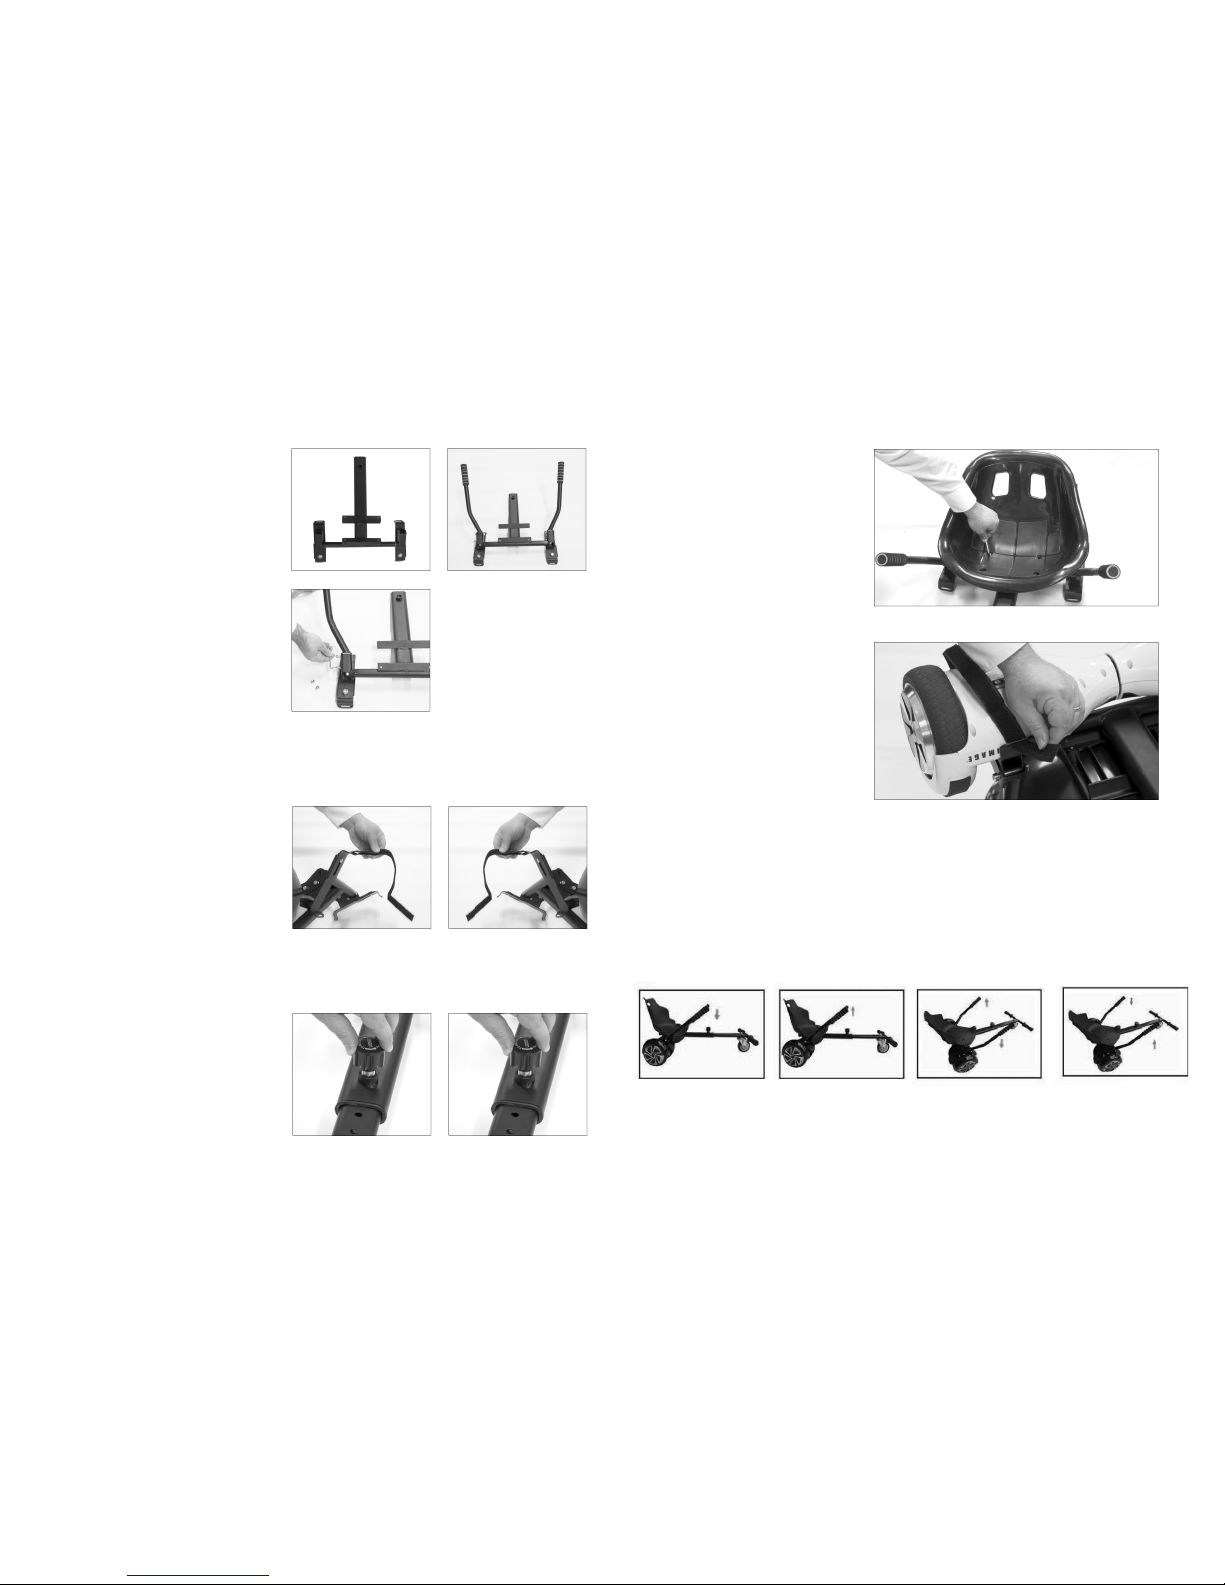
Step 2. Attach the Velcro straps to
the main body.
• Thread one end of the Velcro strap
(about 3”) through the rear eyelet
of the main body.
• Fold the Velcro strap onto itself
to secure it in place. (Leave the
other side alone for now. We will
use it later to attach the Hover
Board.)
• Repeat this step for the
other side.
Step 3. Attach the foot bar to the
main body.
• Slide the foot bar into the main
body. Make sure the holes are
pointed up.
• Use the adjustment knob to
secure the foot bar in place.
Step 1. Connecting the handles to the
main body.
• Place the main body on the fl oor.
• Fit the handles onto the main body.
The bracket of the handles should fi t
over the corresponding pieces on
the main body. Note: When the
handles are properly attached,
they will angle slightly away from
the main body.
• Secure the handles with the long
screws and lock nuts. Insert the
screws so that the head of the screws
are on the outside (i.e., closest to the
Hover Board tire).
• Tighten the screws with the
included Allen wrench. (Use the
included hex wrench to hold the nut
while you tighten the screws. Do not
overtighten.)
Step 4. Attach the seat to the main
body.
• Place the seat onto the main body.
• Align the 4 holes on the seat with
the 4 holes in the main body
• Secure the seat using the 4 short
screws. Tighten the screws by
hand with the included Allen wrench.
The HoverKart is now assembled.
You are ready to attach the Hover Board.
Step 5. Attaching the Hover Board.
• Make sure your Hover Board is fully
charged and powered OFF.
• Place the main body of the HoverKart
on top of the Hover Board.
• Run the Velcro strap UNDER the Hover
Board, and thread the end into the front
eyelet of the main body. Note: The fuzzy
side of the strap will be facing the fl oor.
• Fold the Velcro strap onto itself tightly to
secure the main body to the Hover Board.
• Repeat the above steps on the other side
of the Hover Board.
BEFORE YOU RIDE
• Always wear a helmet and protective
clothing.
• Adjust the foot plate to accommodate
each user’s own height.
• Sit on the HoverKart BEFORE turning
on the Hover Board.
• Control the HoverKart with the
instructions below.
• Always turn the Hover Board OFF before
getting off of the HoverKart.
• Be sure to read and follow all Safety
Warnings on the next page.
ASSEMBLING THE HOVERKART ASSEMBLING THE HOVERKART
HOW TO RIDE
PUSH DOWN TO GO
FORWARD.
TO TURN LEFT, PULL THE
LEFT HANDLE UP AND
PUSH THE RIGHT
HANDLE DOWN.
PULL UP TO BRAKE
OR GO BACKWARD.
TO TURN RIGHT, PULL THE
RIGHT HANDLEUP AND
PUSH THE LEFT
HANDLE DOWN.
 Loading...