

Sharper Image 204990 Quick Start Manual

PROFESSIONAL VIDEO DRONE
Item No. 204990
Quick Start Guide
NOTE: The Professional Video Drone is a sophisticated piece of equipment. it is recommended for
those users who have prior experience flying RC drones and quadcopters. This Quick Start Guide
will give you an idea of what is involved to get started with your drone. If you are new to this model,
we strongly recommend you start by reading the full User’s Guide included in this package. Your
safety and satisfaction is our prime concern.
STEP 1: CHARGE AND INSTALL THE DRONE BATTERY.
• Connect the battery to the balance charger
and the wall charger. The two LED lights will
turn RED when charging and GREEN when
fully charged. The charging time is about
180 minutes.
• Place the battery into the battery
compartment and connect the battery
plug with the correct polarity. When the
drone is powered on, the blue LEDs will
blink in a rotating pattern.
- 1 -
STEP 2: PREPARE THE CAMERA.
• Insert a Micro SD card (not included) into the camera. This camera supports Class 4
to Class 6 cards, from 4GB to 32GB capacity.
• Insert the rechargeable battery into the camera.
• Charge the camera by connecting the charging cable and plugging it into a USB port.
• Attach the camera onto the gimbal. Power on the camera. You can press the buttons on
the camera to shoot pictures and videos. Users can also use the transmitter to to control
the camera and play back videos.
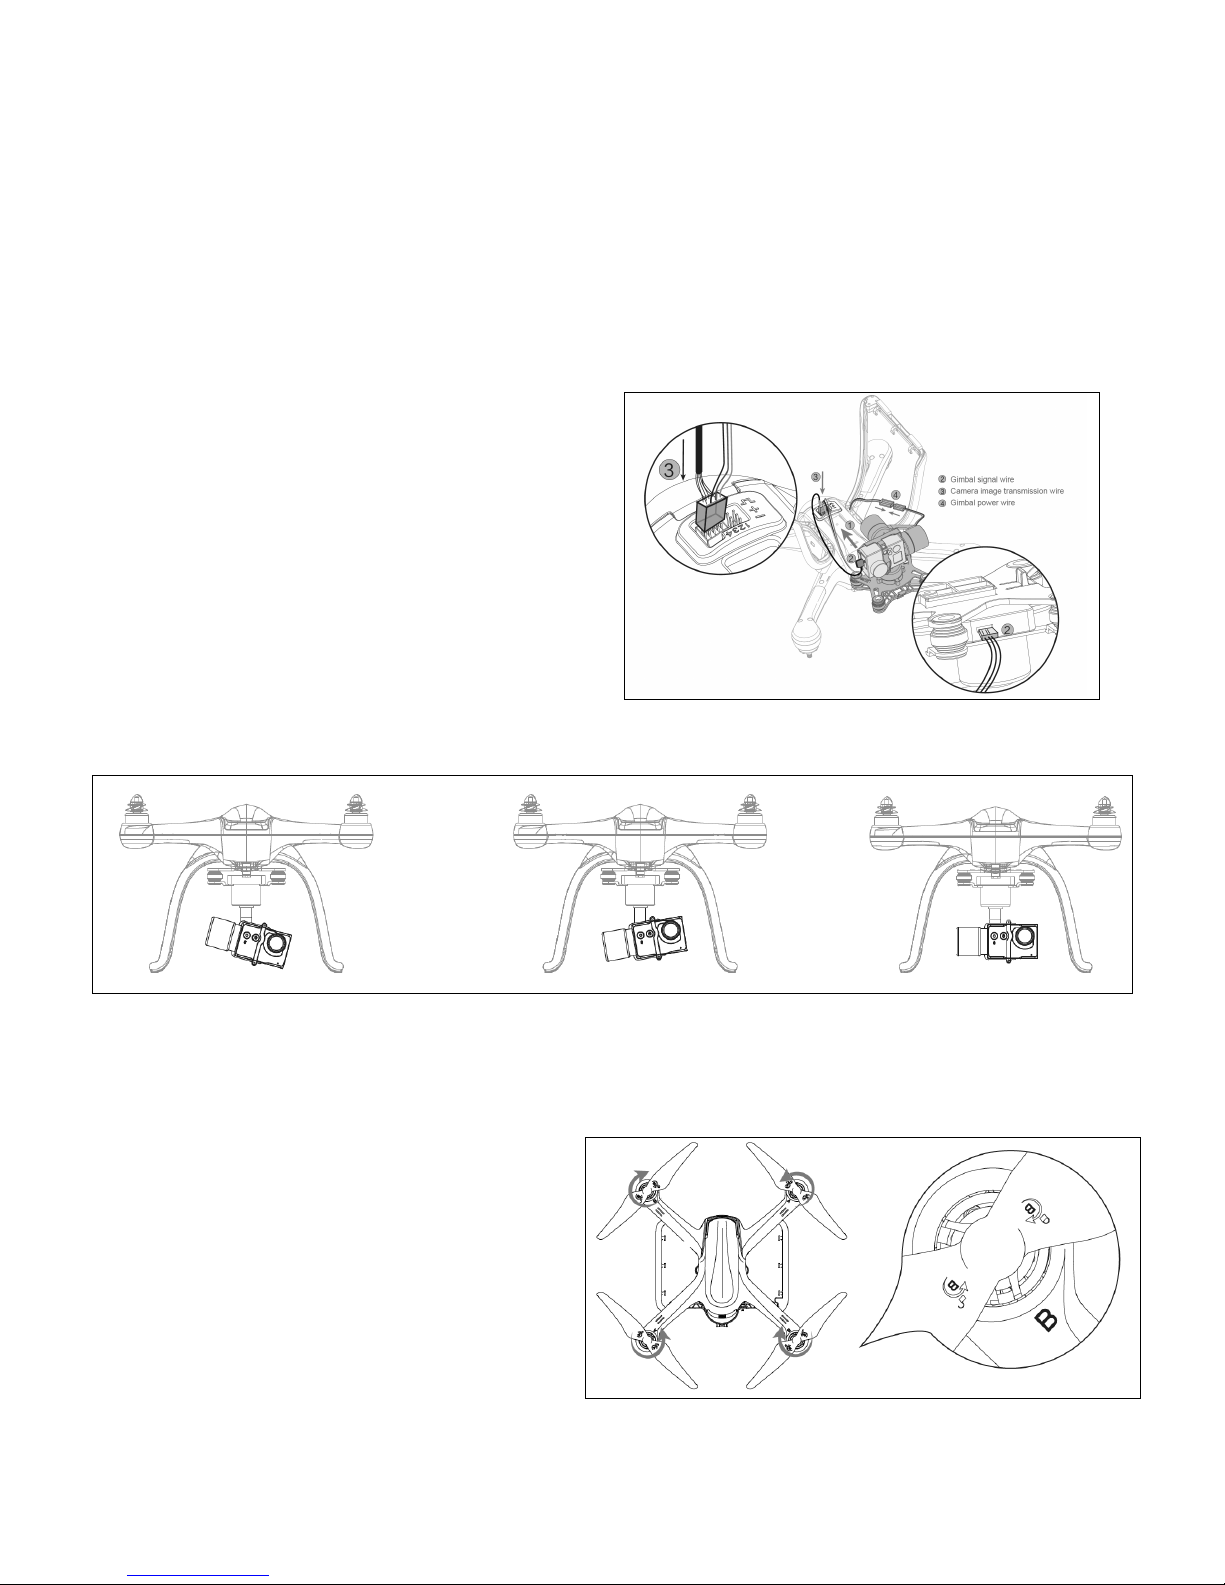
STEP 3: ATTACH THE GIMBAL TO THE DRONE.
• Carefully position the gimbal at the bottom
slot with shock resistance equipment slot
and slip it into the bottom of the frame.
• Insert the gimbal signal wire into the
slot on the gimbal.
• Insert the camera image transmission
wire into the left slot.
• Connect the power plug.
STEP 4. CALIBRATE THE GIMBAL.
• Keep the drone on a level surface and do not move it.
• The gimbal will enter calibration mode automatically and finish calibrating in 60 seconds.
STEP 5. INSTALL THE PROPELLERS.
• Take out the four propellers and install
them on the corresponding motor shafts.
• There are 2 types of propellers, “A” and “B.”
Be sure each propeller is on the
correct shaft.
• Lock rotors in place by twisting them
gently in a clockwise direction.
NOTE: These propellers are sharp. Please
wear gloves to perform this step.
- 2 -
 Loading...