

Page 1
PORTABLE VIDEO RECORDER AND CONVERTER
Item No. 203963
Quick Start Guide
- 1 -
Page 2

1. Prior to first use, please charge this device
for 5 hours with the included USB cable and
charger. (You may charge this device with AC
power or USB.)
A. Via the power supply
B. Via the computer’s USB port
2. Insert the included memory card into
the slot.
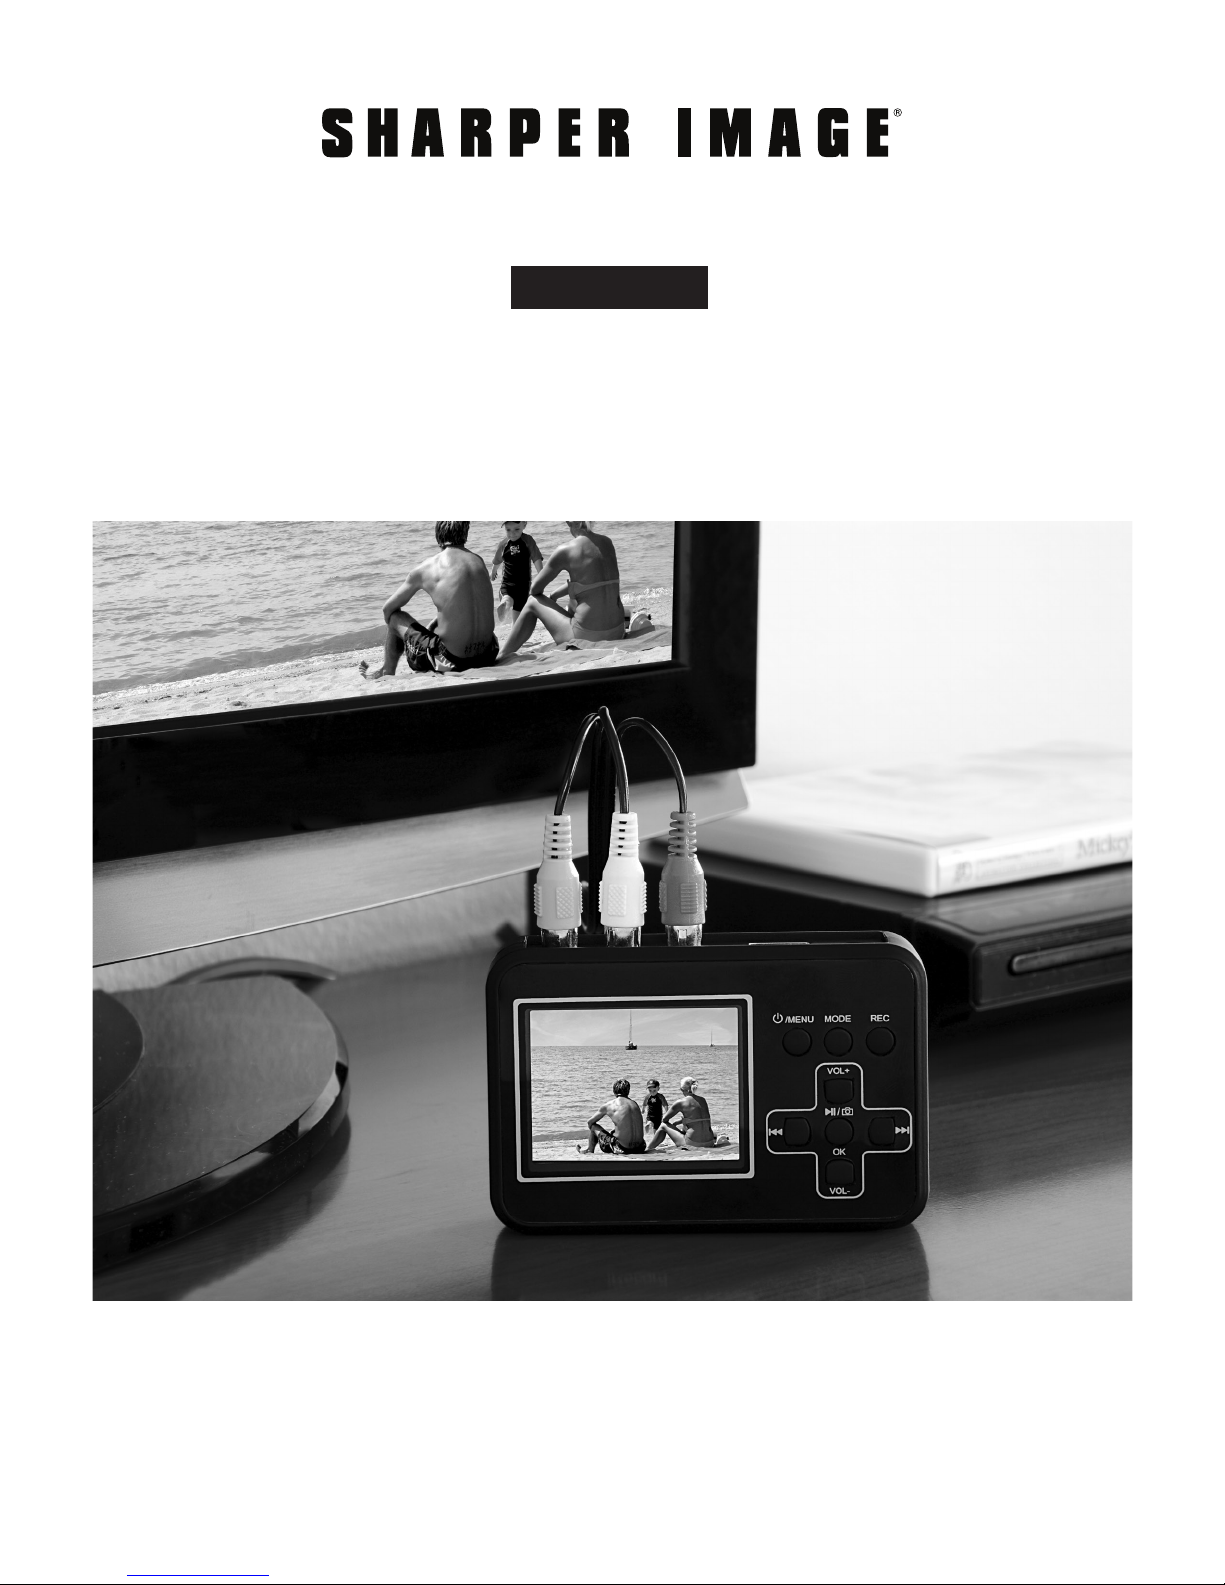
5. Turn ON the Portable Video Recorder and
Converter by pressing and holding the On/Off/
Menu button for approximately 3 seconds.
(The default mode is Video Recording mode.)
On/Off
menu
Select
mode
Start/stop
recording
The buttons
within the
cross perform
different
functions
depending
on the mode
selected
6. Press REC on the Portable Video Recorder and
Converter to begin recording. The counter in the
upper right hand corner will turn red.
7. Press PLAY on your video source. The video will
be visible on the Portable Video Recorder screen.
8. When you are finished converting, press the
REC button to stop and save your recording.
You now have a digital copy of your video saved
on the memory card. Note: The included 4GB
card holds approximately 25 minutes of video.
3. Connect your video source (VCR, DVD player,
camcorder, etc.) using the included cables.
Source
4. Turn ON your video source.
9. To watch your video on the built-in screen,
press the MODE button to select Play mode.
Press OK to play the video. (If you have multiple
files, press the uu| or |tt buttons to scroll
through the various files.)
Once your videos are converted to digital, you may
watch them on a TV, or transfer them to a computer
for editing and storage. Consult your owner’s
manual for details. With a little bit of practice, you
will become proficient at recording and digitizing
your home videos. Please be sure to read the full
owner’s manual to learn about the many advanced
features of this device, including time stamp,
volume settings and more. Happy Converting!
The SHARPER IMAGE® name and logo are registered trademarks.
©Sharper Image. All Rights Reserved.
- 2 -
 Loading...